GRASSHOPPER
FOR AN ARCHICAD USER
_INTRO
This tutorial is here to show you that Grasshopper can make your facades way easier to do than any other architectural platform. I was trying to do the same thing in my ArchiCAD. First of all – it took for ages and second – it wasn‘t as cool to change anything. Scaling each component was a nightmare.
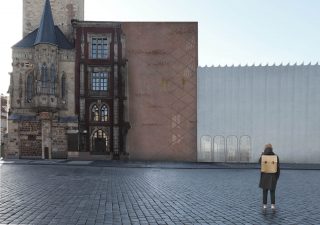
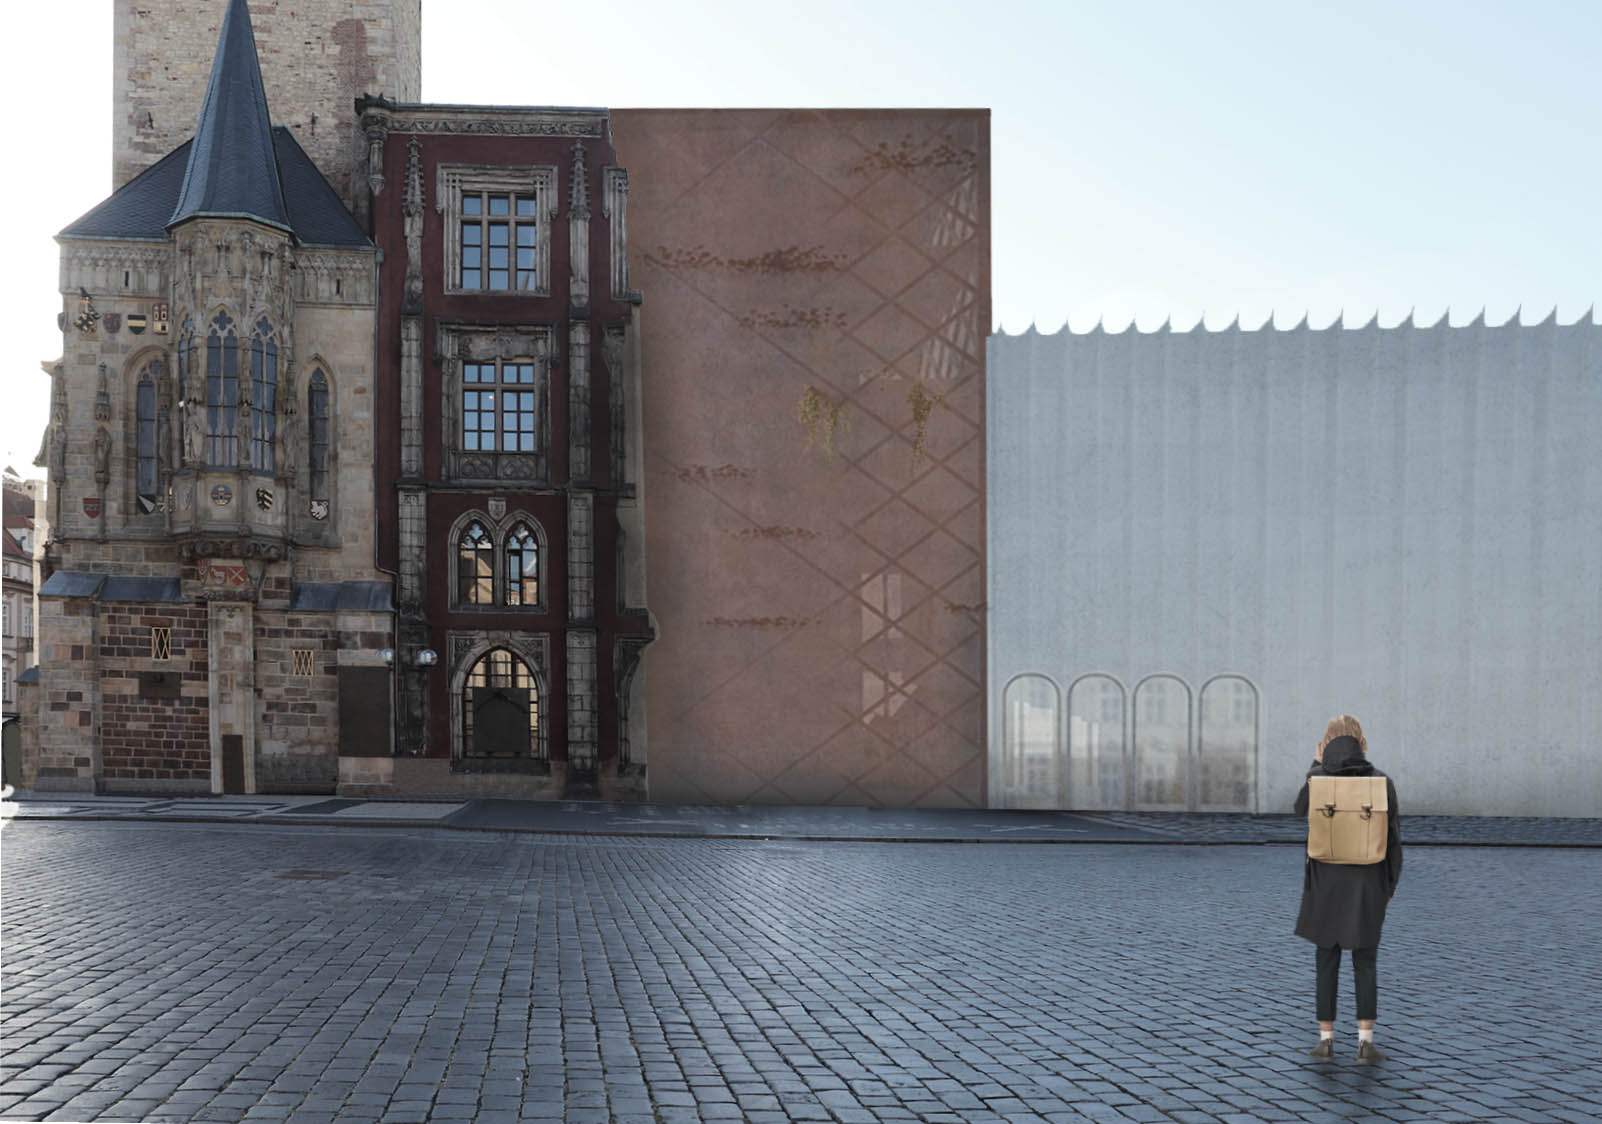
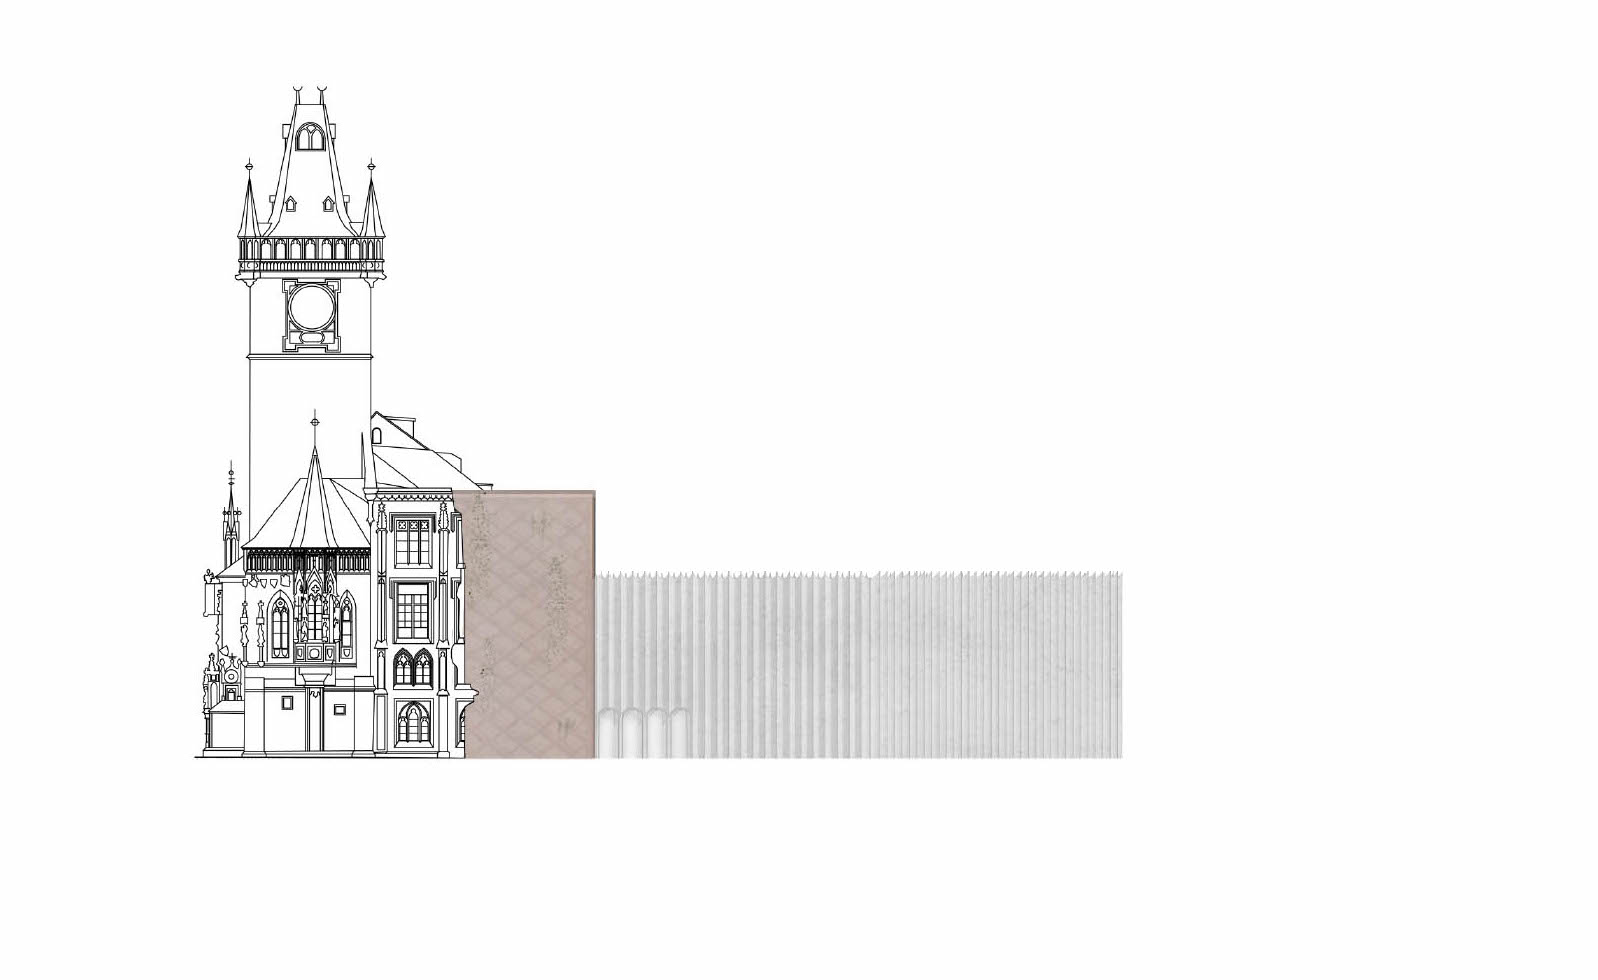
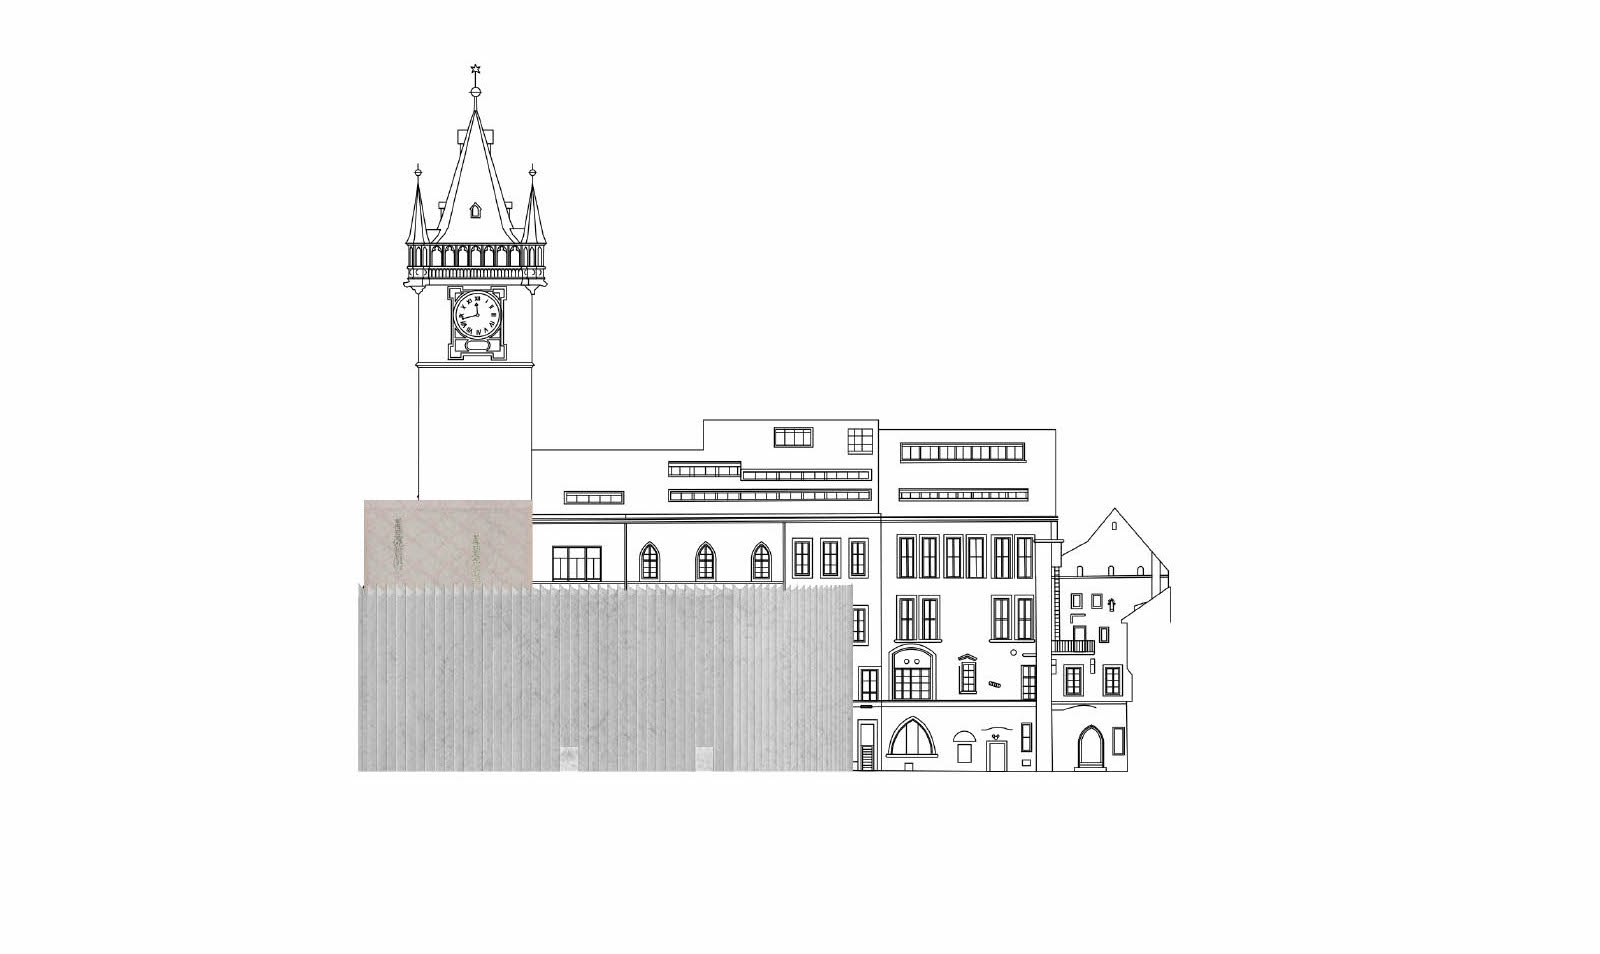
I am going to be doing a facade of an Aula Magna for Charles UNI. The concept if based on the logo of Charles UNI and I am using parts of that logo on facade.
_THE 1ST PART
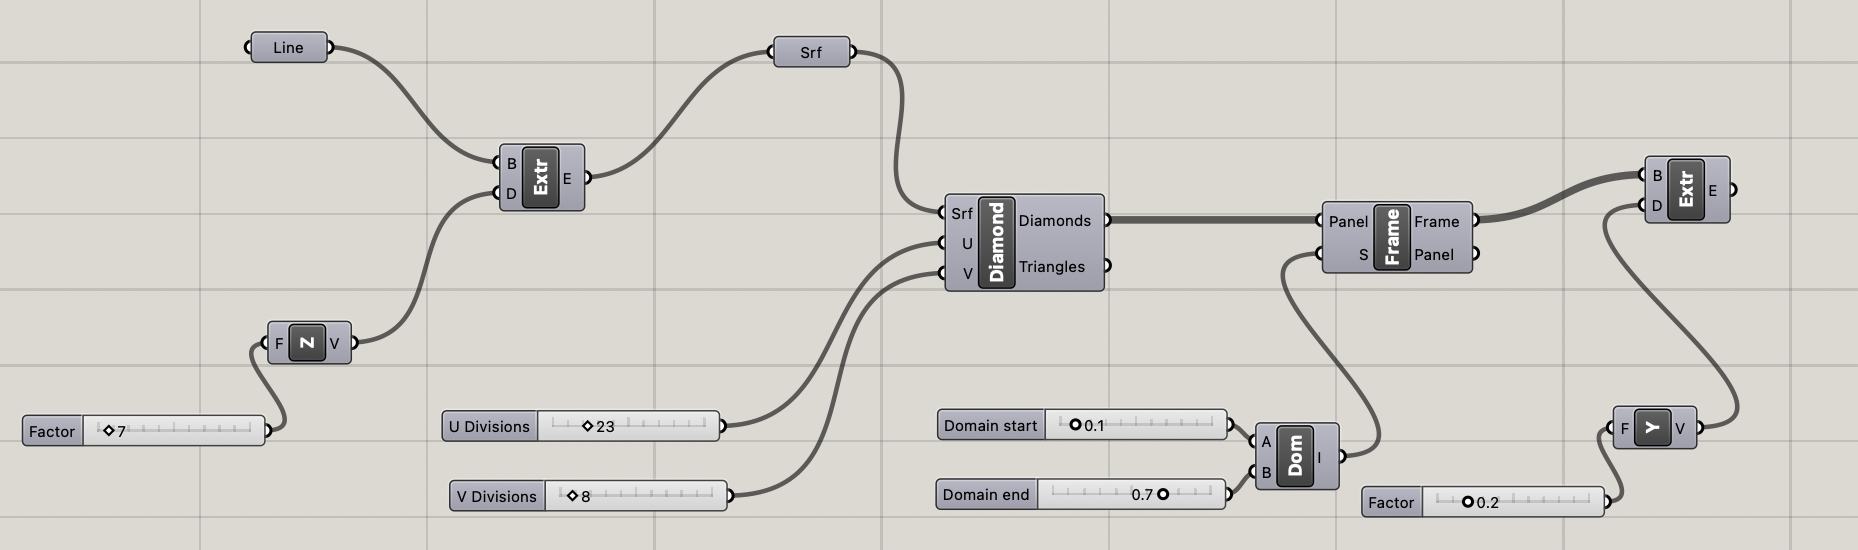
1) The first step is an extremely easy one. Go to your Rhino and make a simple line.
2) Open your Grasshopper that is automatically in your Rhino. With a double click add a /line/.
3) Click on the line to view a quick menu and select /set one lite/.
4) Step 3 gets you back to Rhino for a sec. Click on that one line that you want.
5) Welcome back to Grasshopper. This time it is going to be a bit longer than the last time here. Add /extrude/ to your line. That helps you line to become a vertical plane. Plug it into _base.
6) To the _direction of /extrude/ plug /Z/ with a /number slider/ based on how high you want your plane to become.
7) Another double click. Add /surface/ because you don‘t want your plane to stay in the vector mode. PLug it into _extrusion of the /extrude/ that already exists.
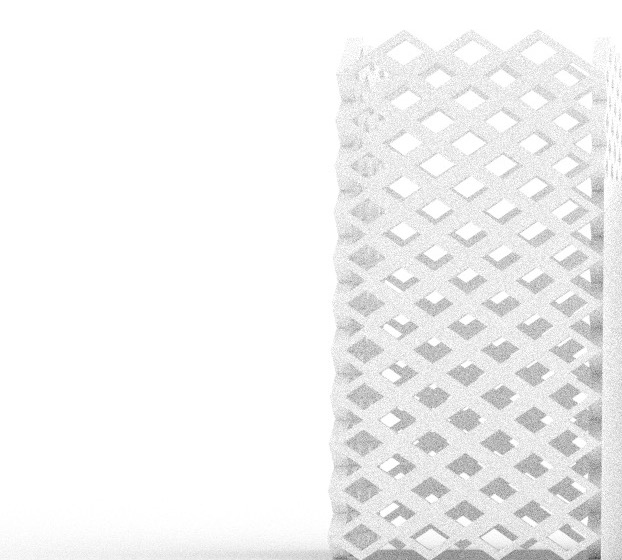
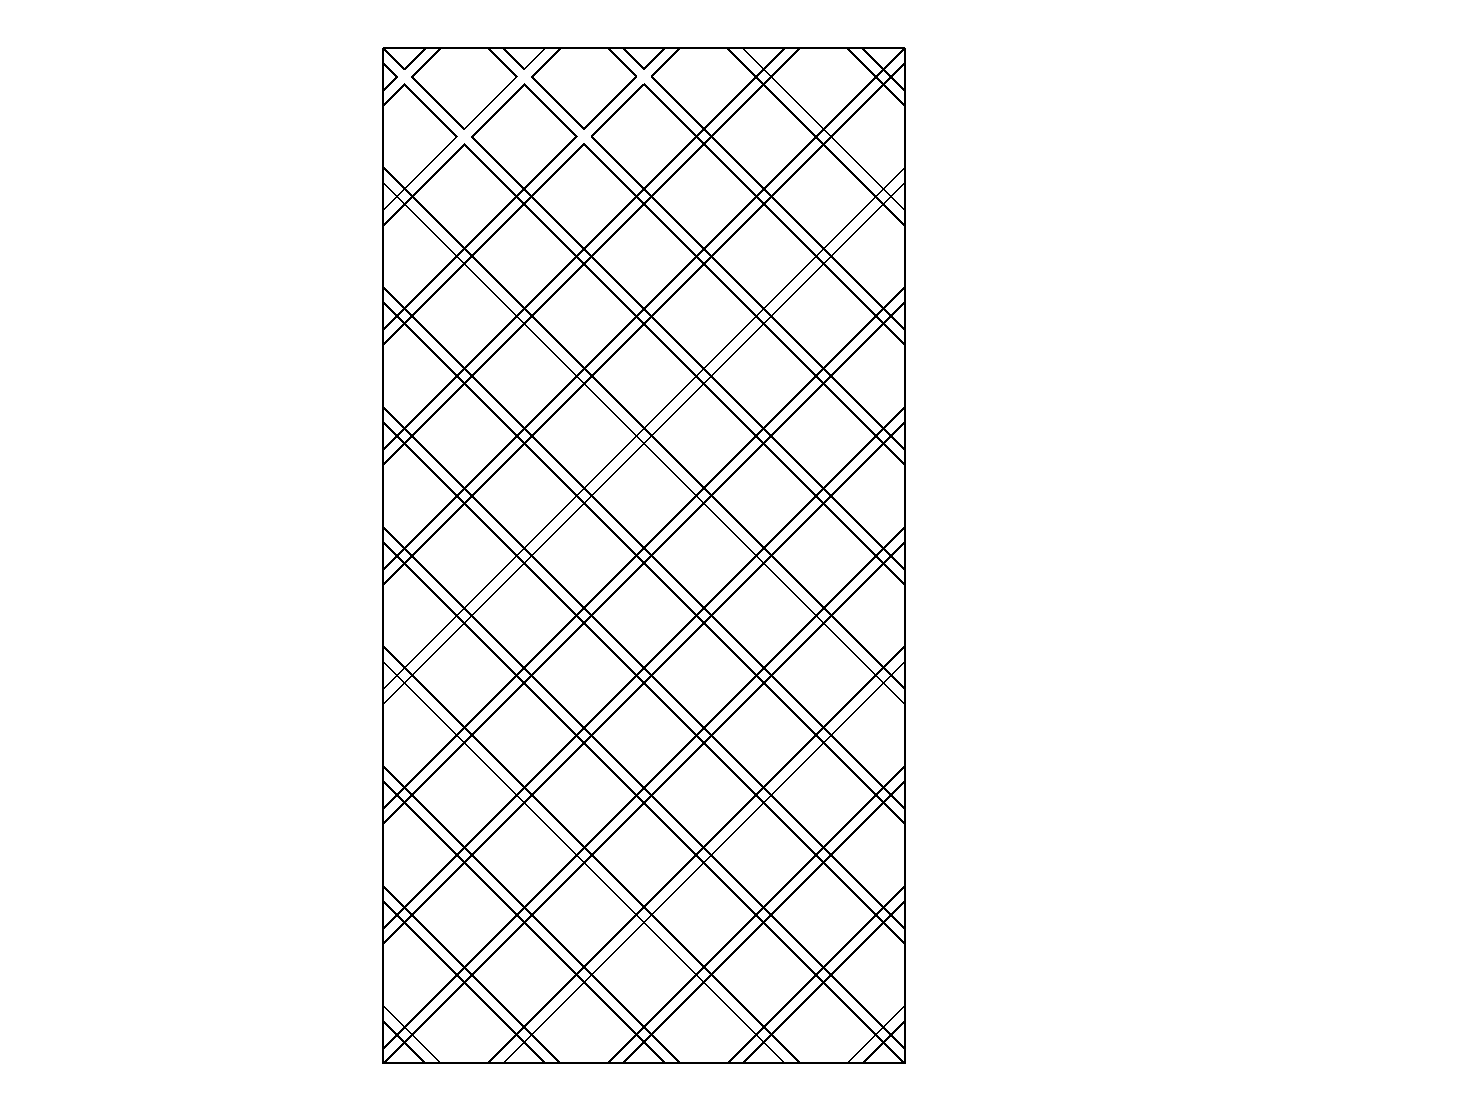
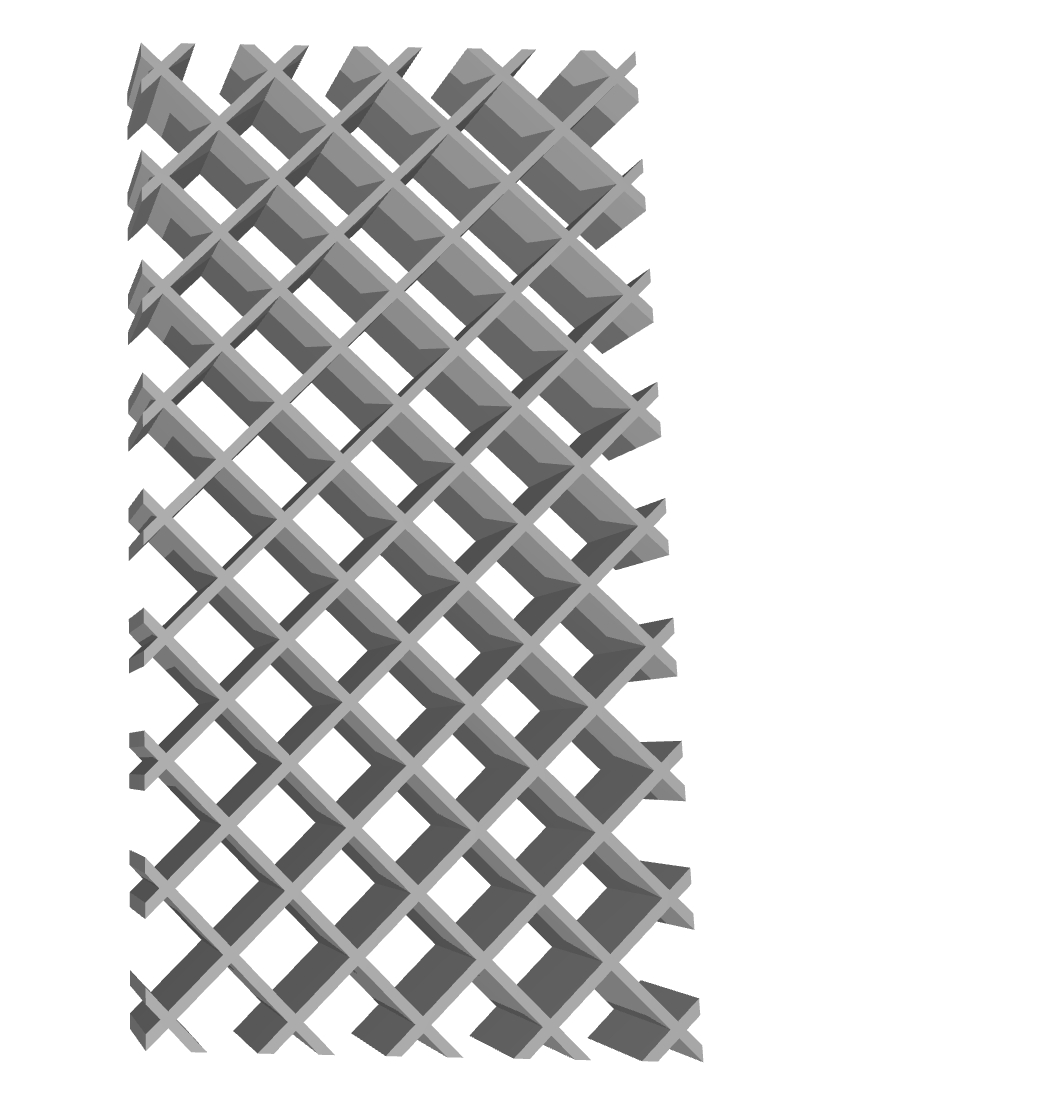
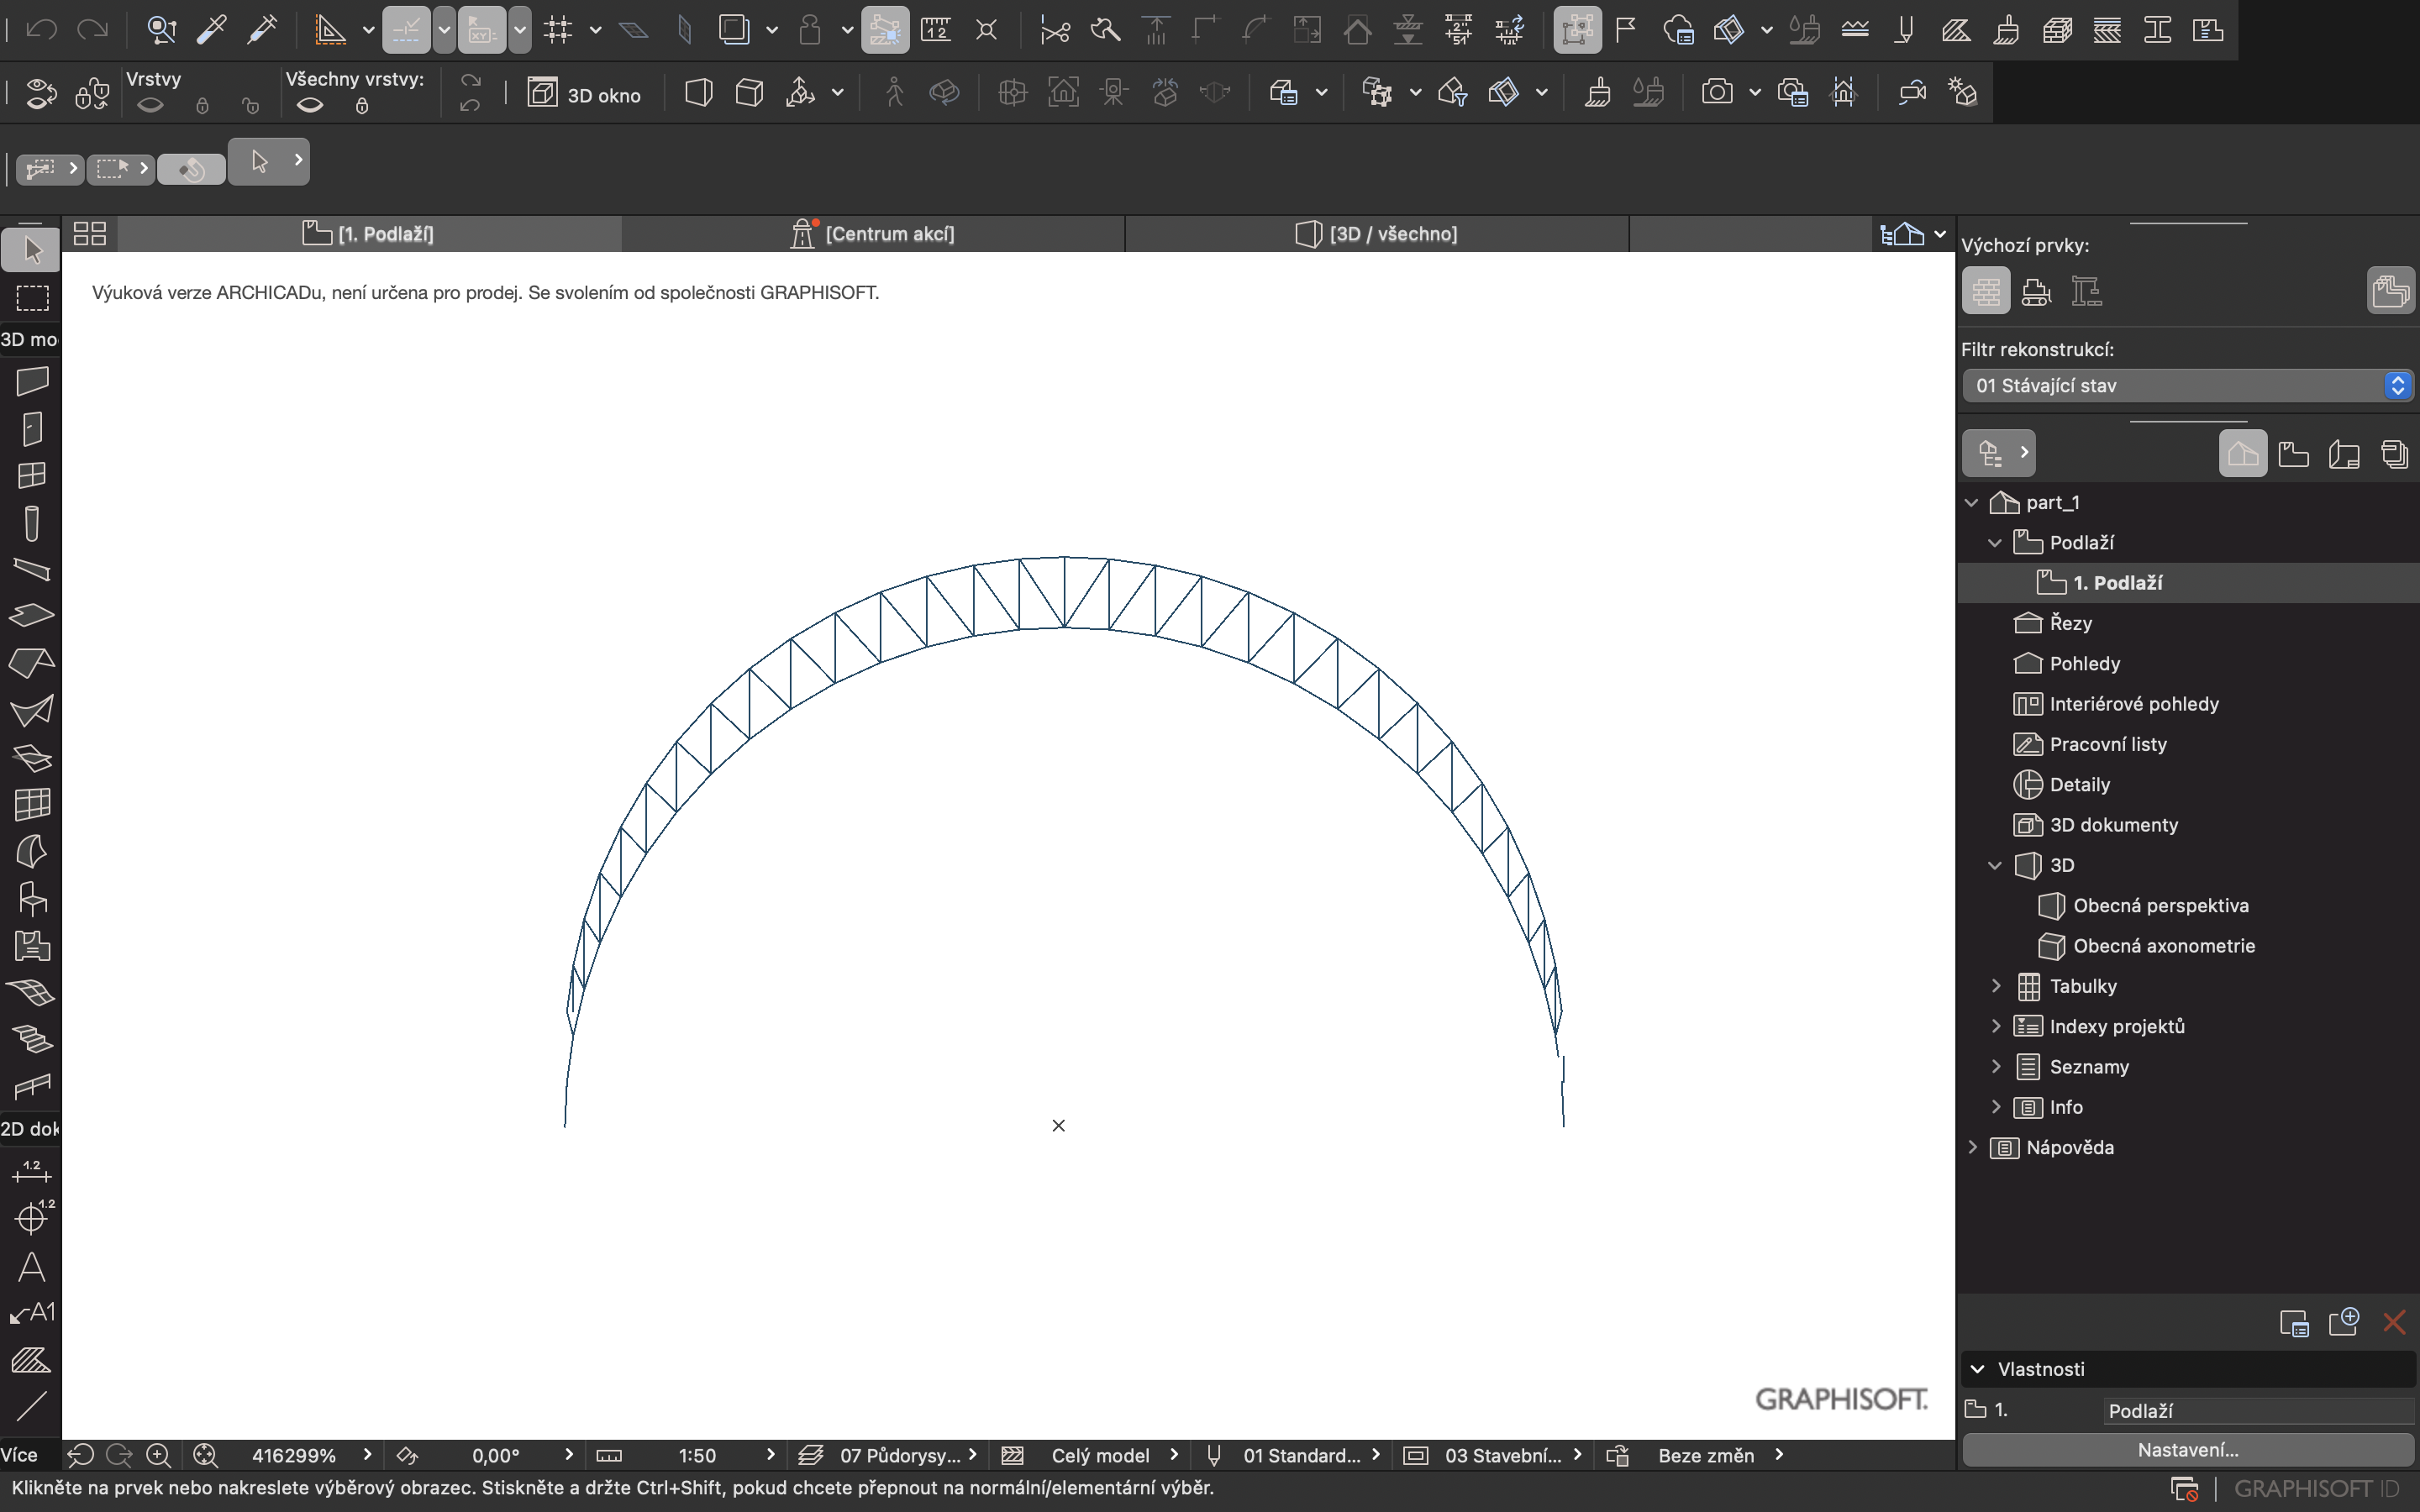
8) Now the most important thing – add /diamond pannels/ to /surface/. It makes your life way easier when you want any diagonal shapes. Add /number slider/ to each of your _division (U and V) based on how many sectionts you want to make in your plane.
9) You want diamonds, not triangles. So use /panel frame/ that you plug into _diamonds. To _scale factor of your /panel frame/ plug / a number. _A and _B are start and end of it so put numbers in there.
1O) To _frame panel of your /frame panel/ plug an another /extrude/ on _base. To /directiion/ of it add a /unit Y/ and choose /factor/ with a /number slider/.
11) Bake it by clicking on it.
12) You have it in your Rhino by now.
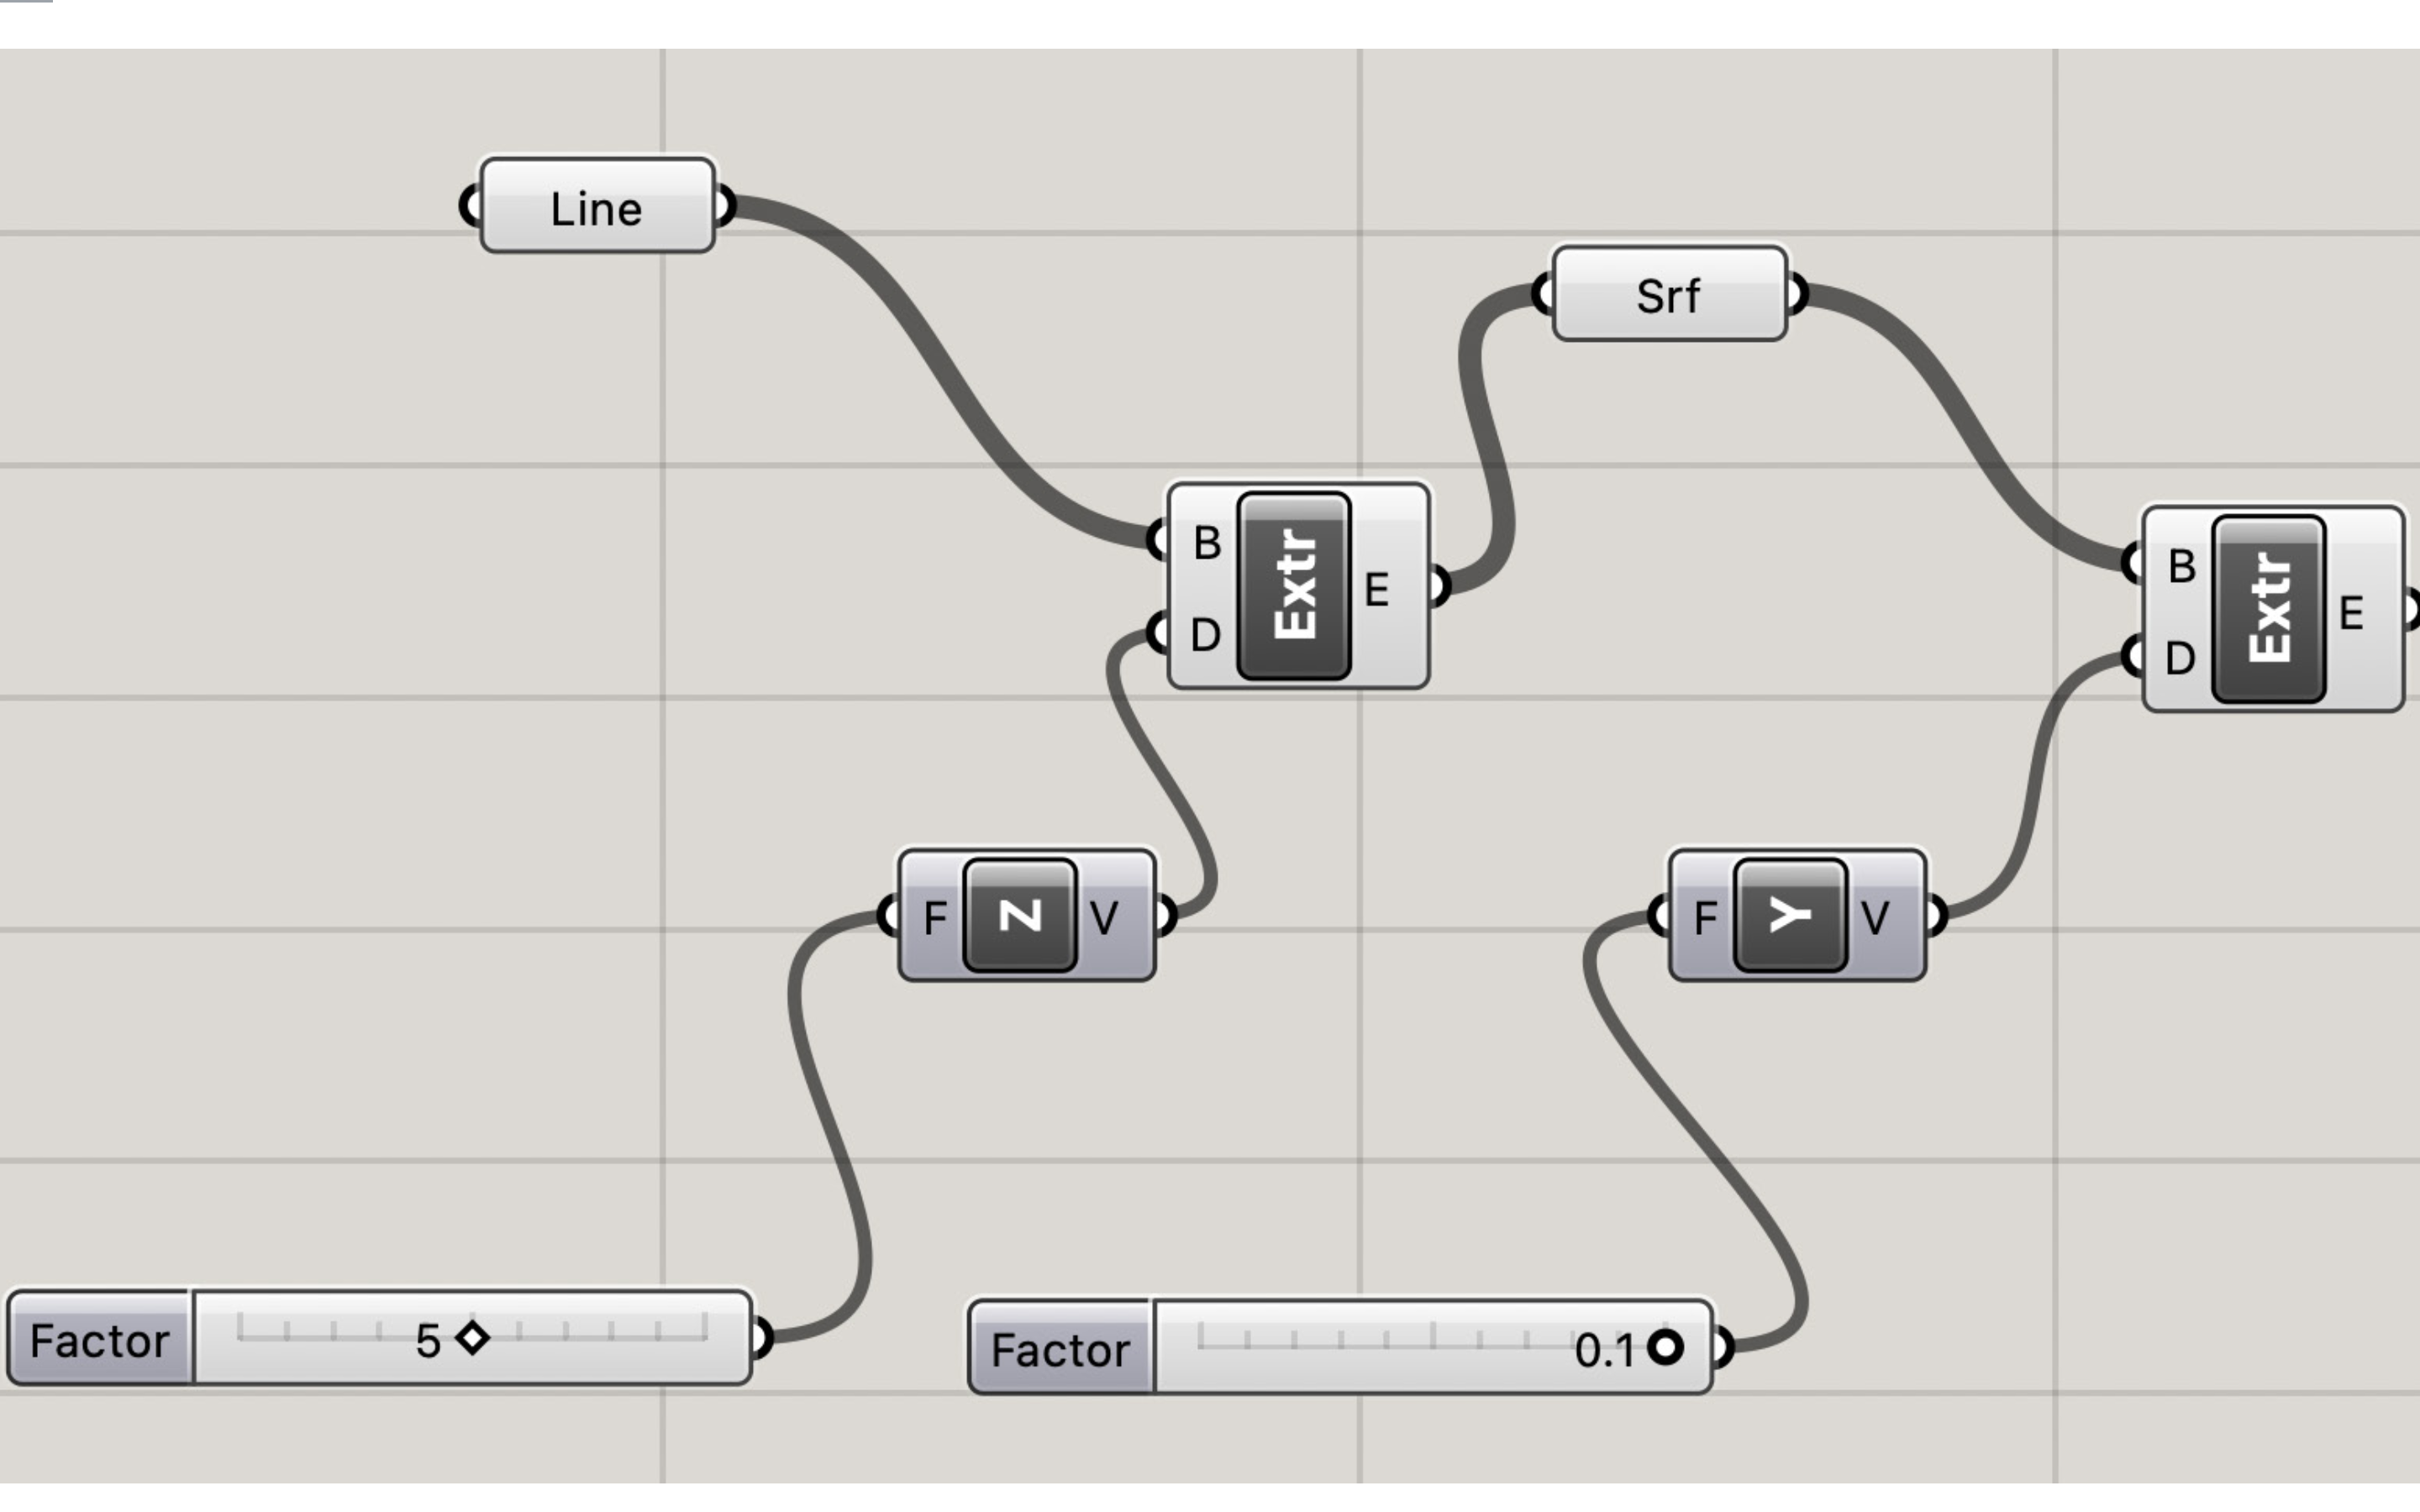
_THE 2ND PART
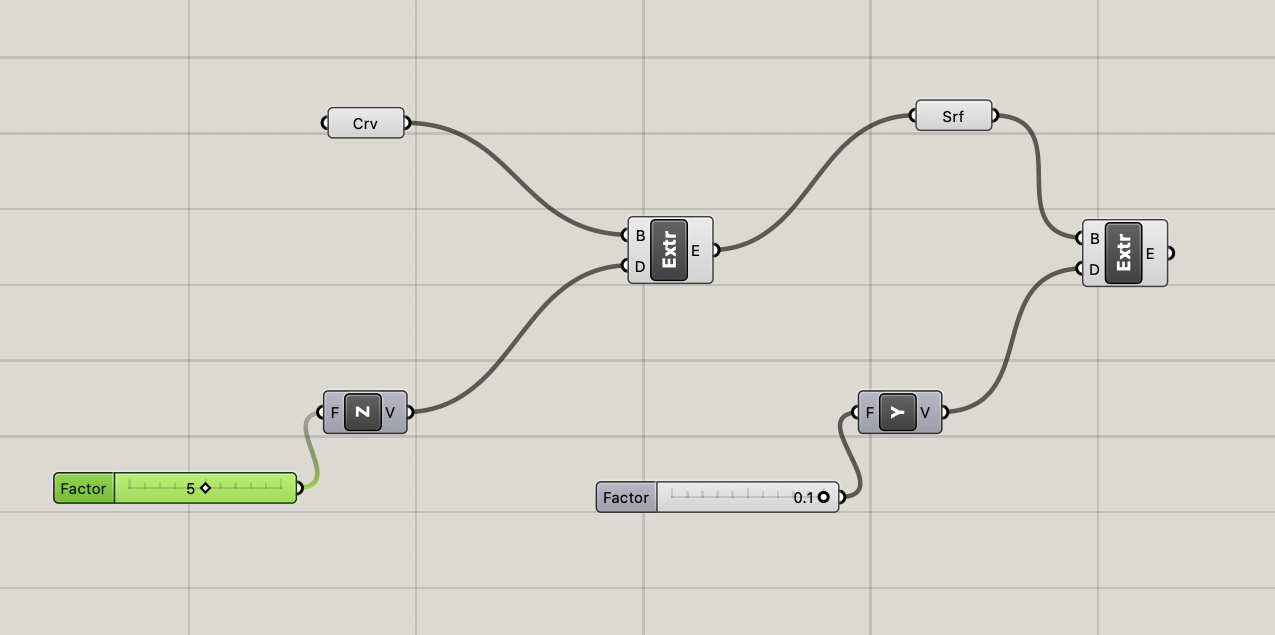
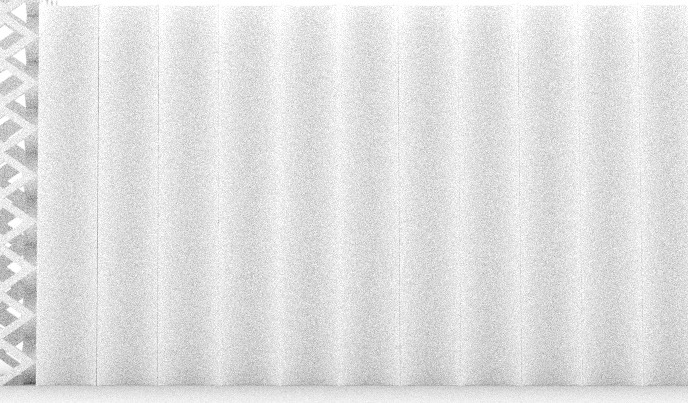
1) Go back to Rhino and make a curve.
2) Go to your Grasshopper and add a /curve/. Click set that one curve you have already made in your Rhino. It gets you to your Grasshopper once again.
3) Connect that one curve into _base of /extrude/. To direction add /Z/ and a /number slider/ based on how big you want it to be. I like to have my number sliders down below all the other things so its is easier for me to change any scale and keeps the script also a way more organised.
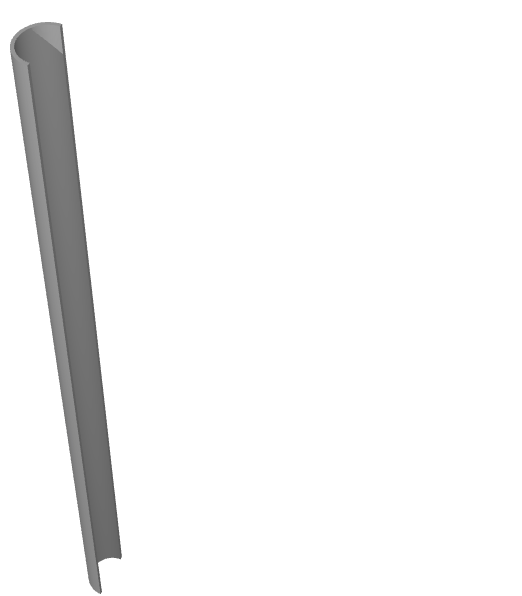
4) To _extrusion of your /extrude/ add a /surface/ which you plug into an another extruder. To _direction add /Y/ and choose the thickness of it by a /number slider/.
5) Bake it once again.
6) You‘re finished. Go to the last part.
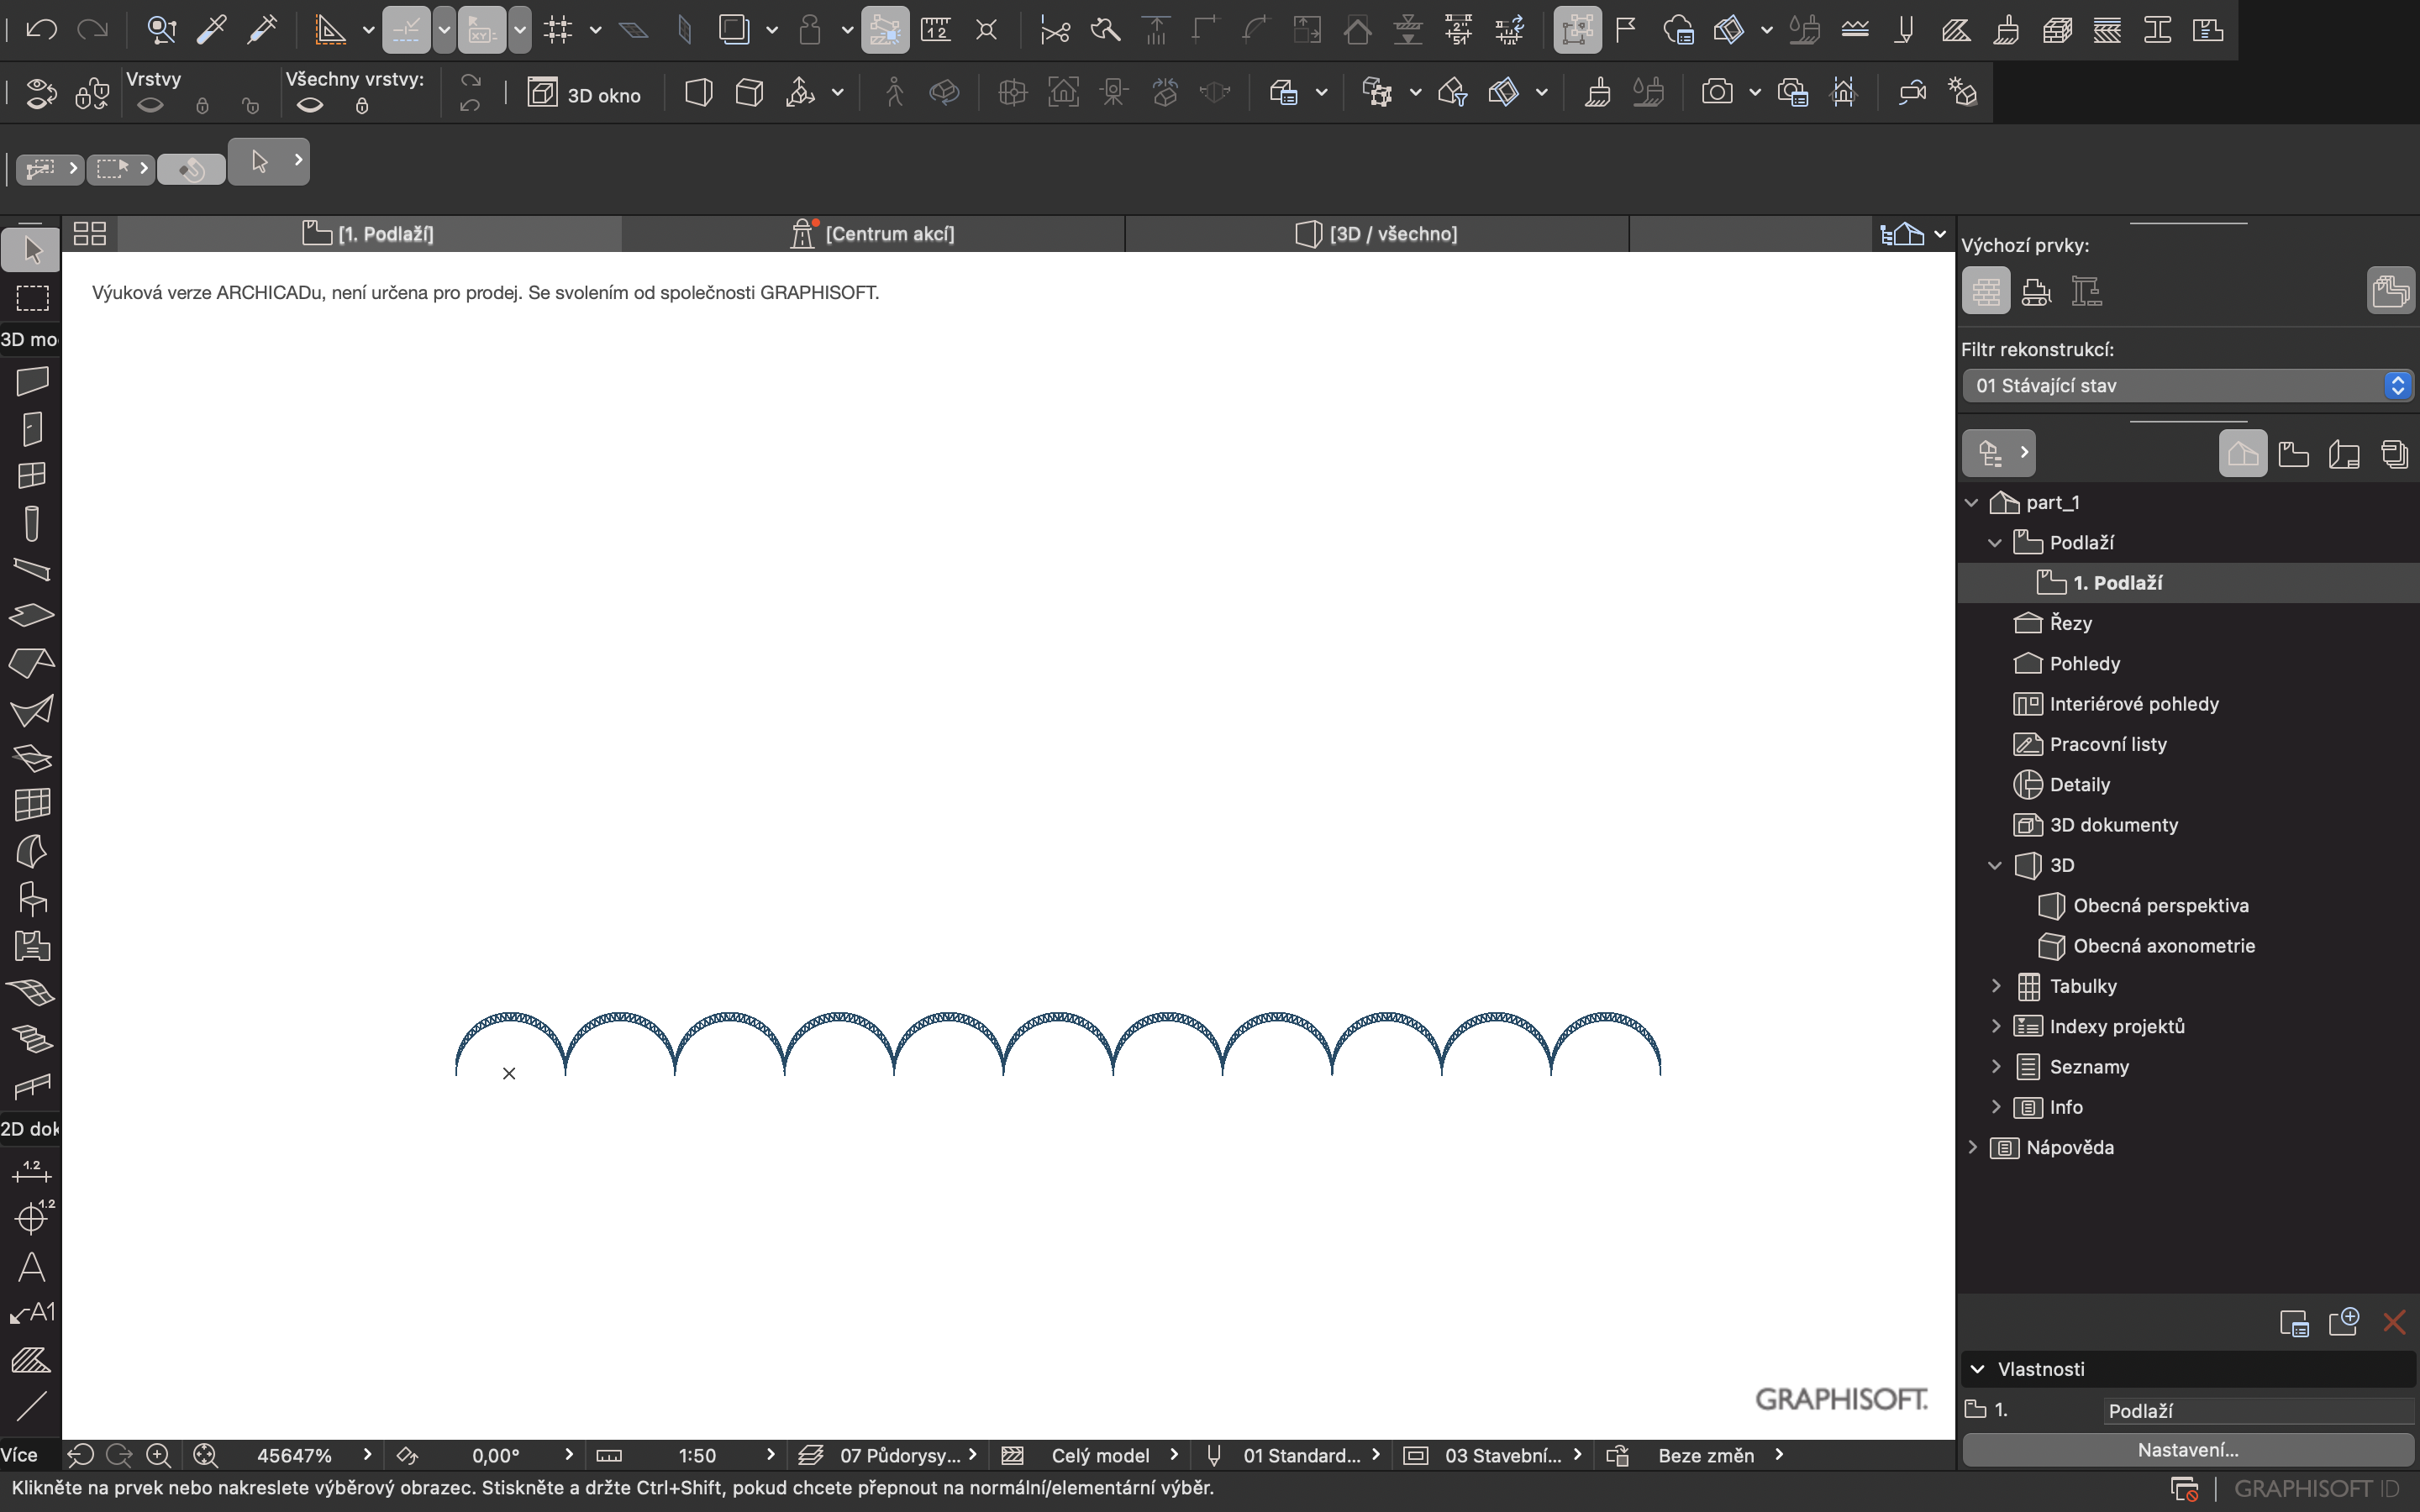
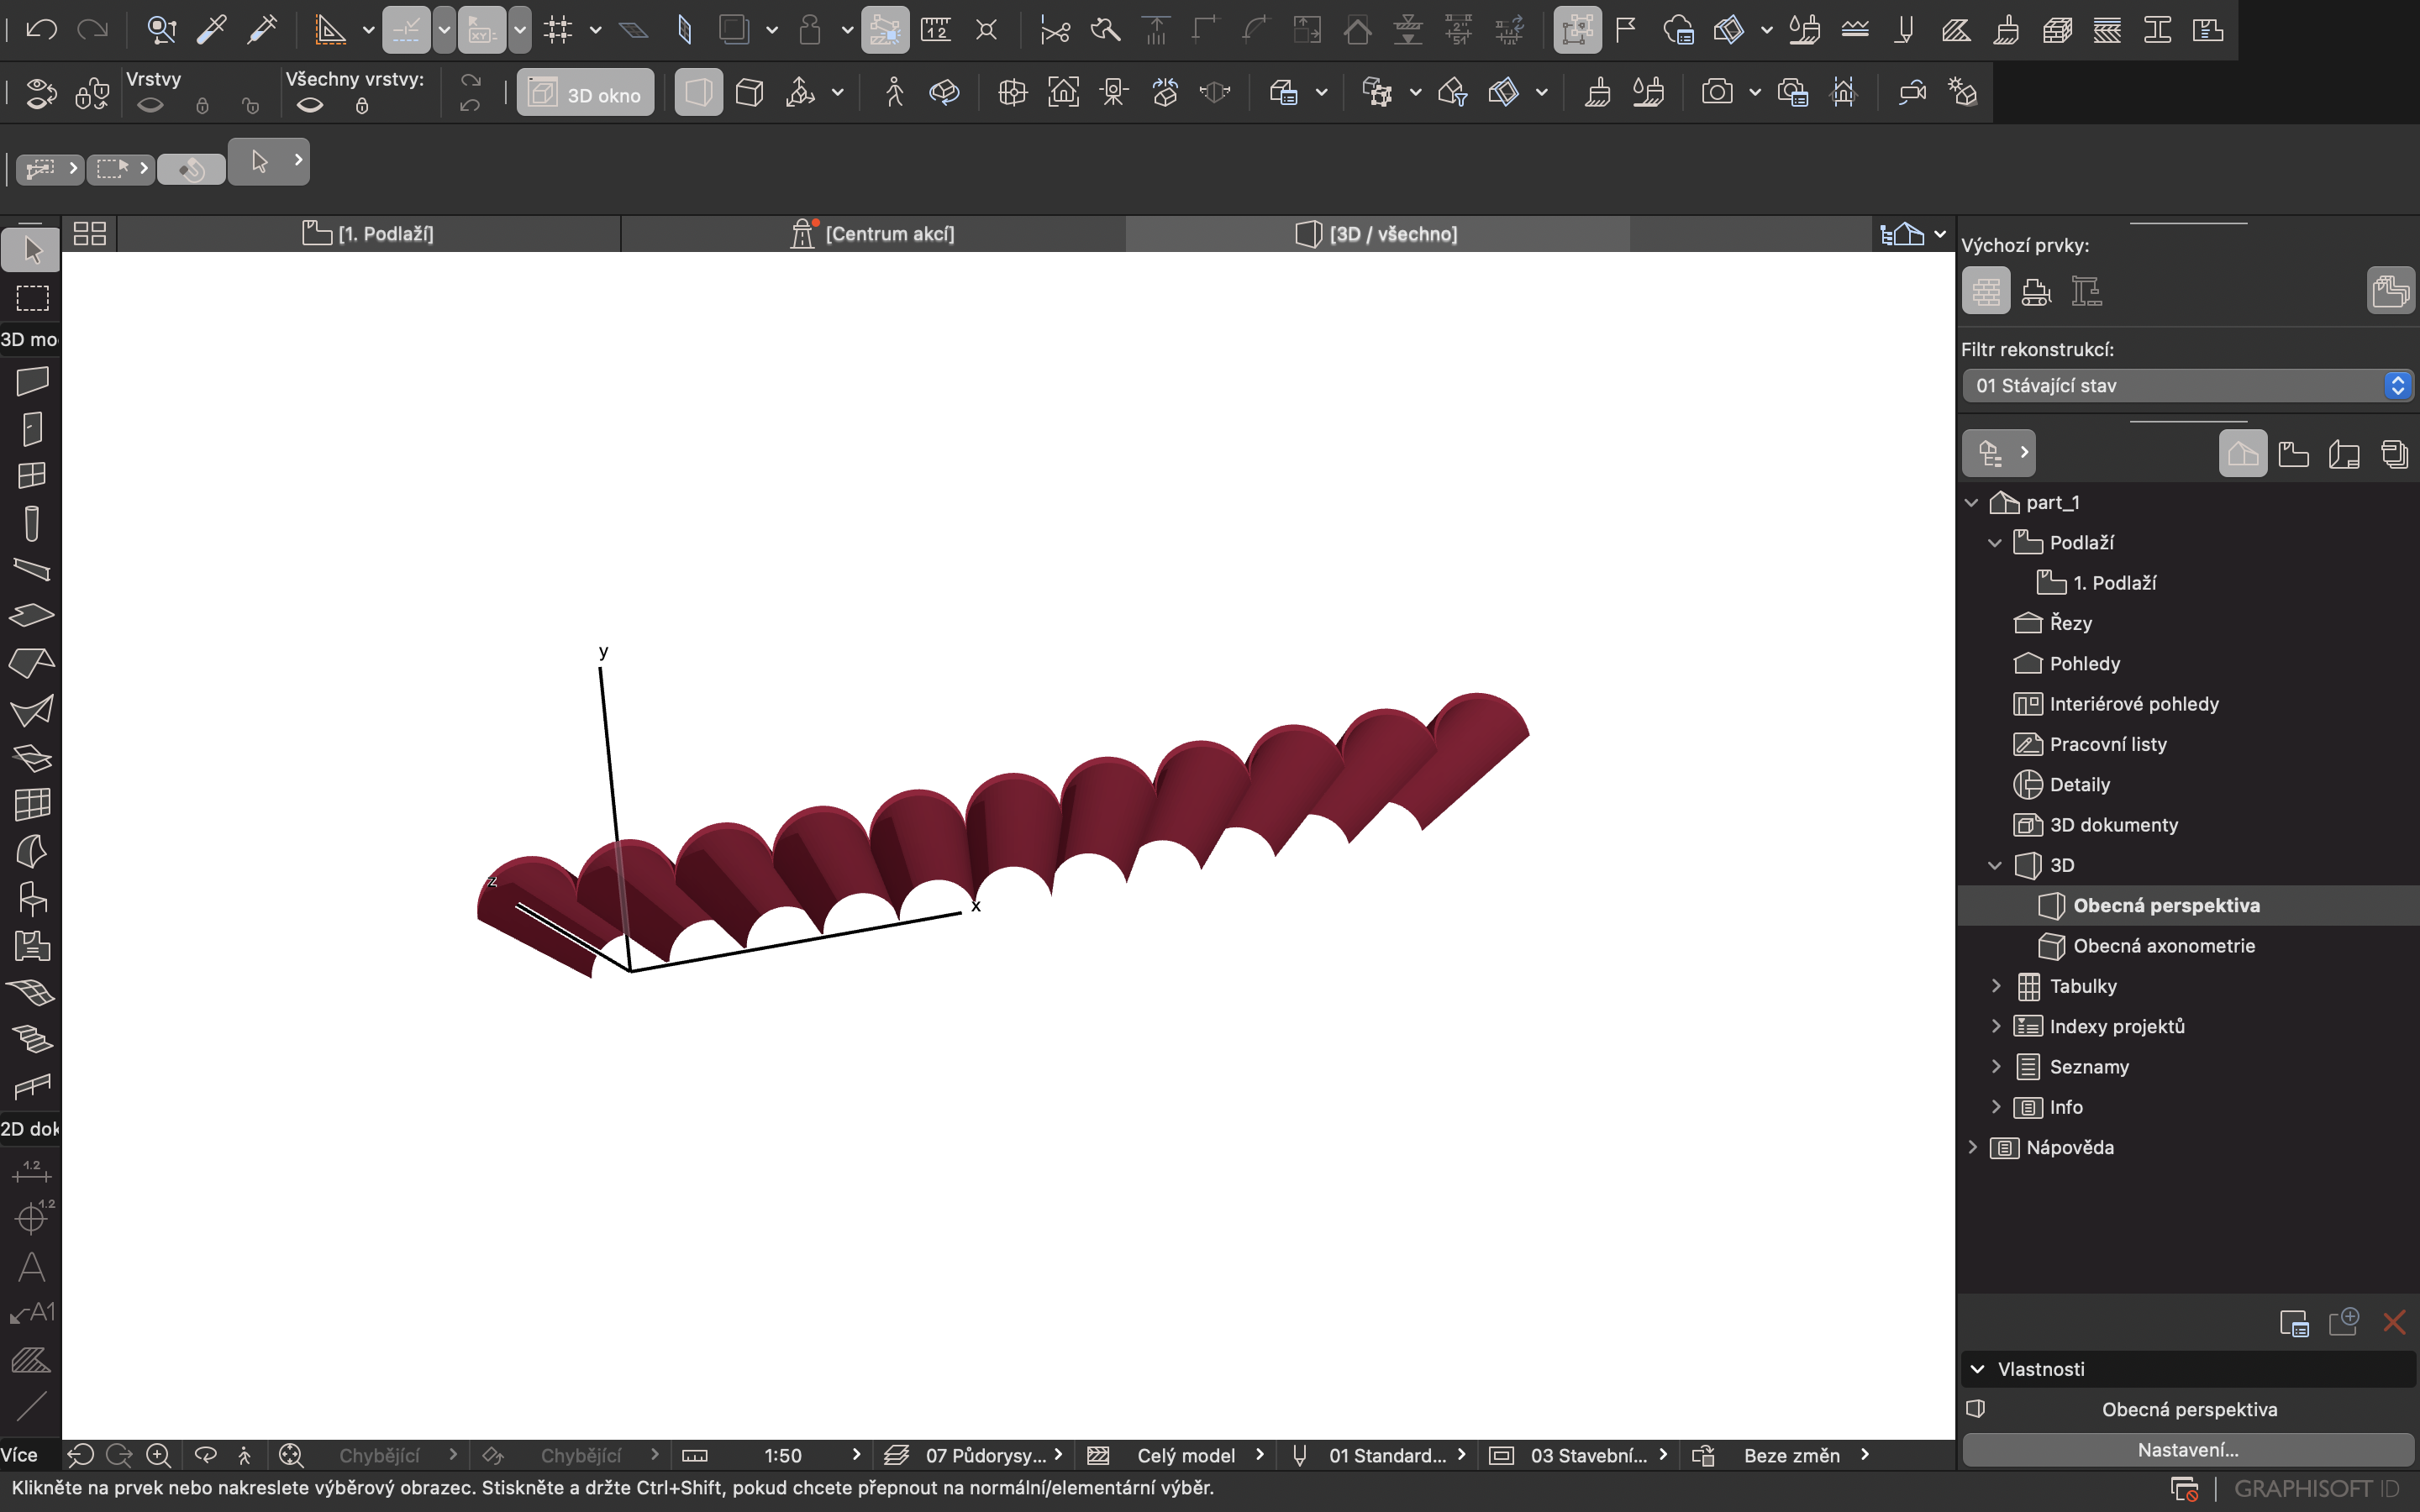
you can start from any shape you want,
here are some polylines just to show you
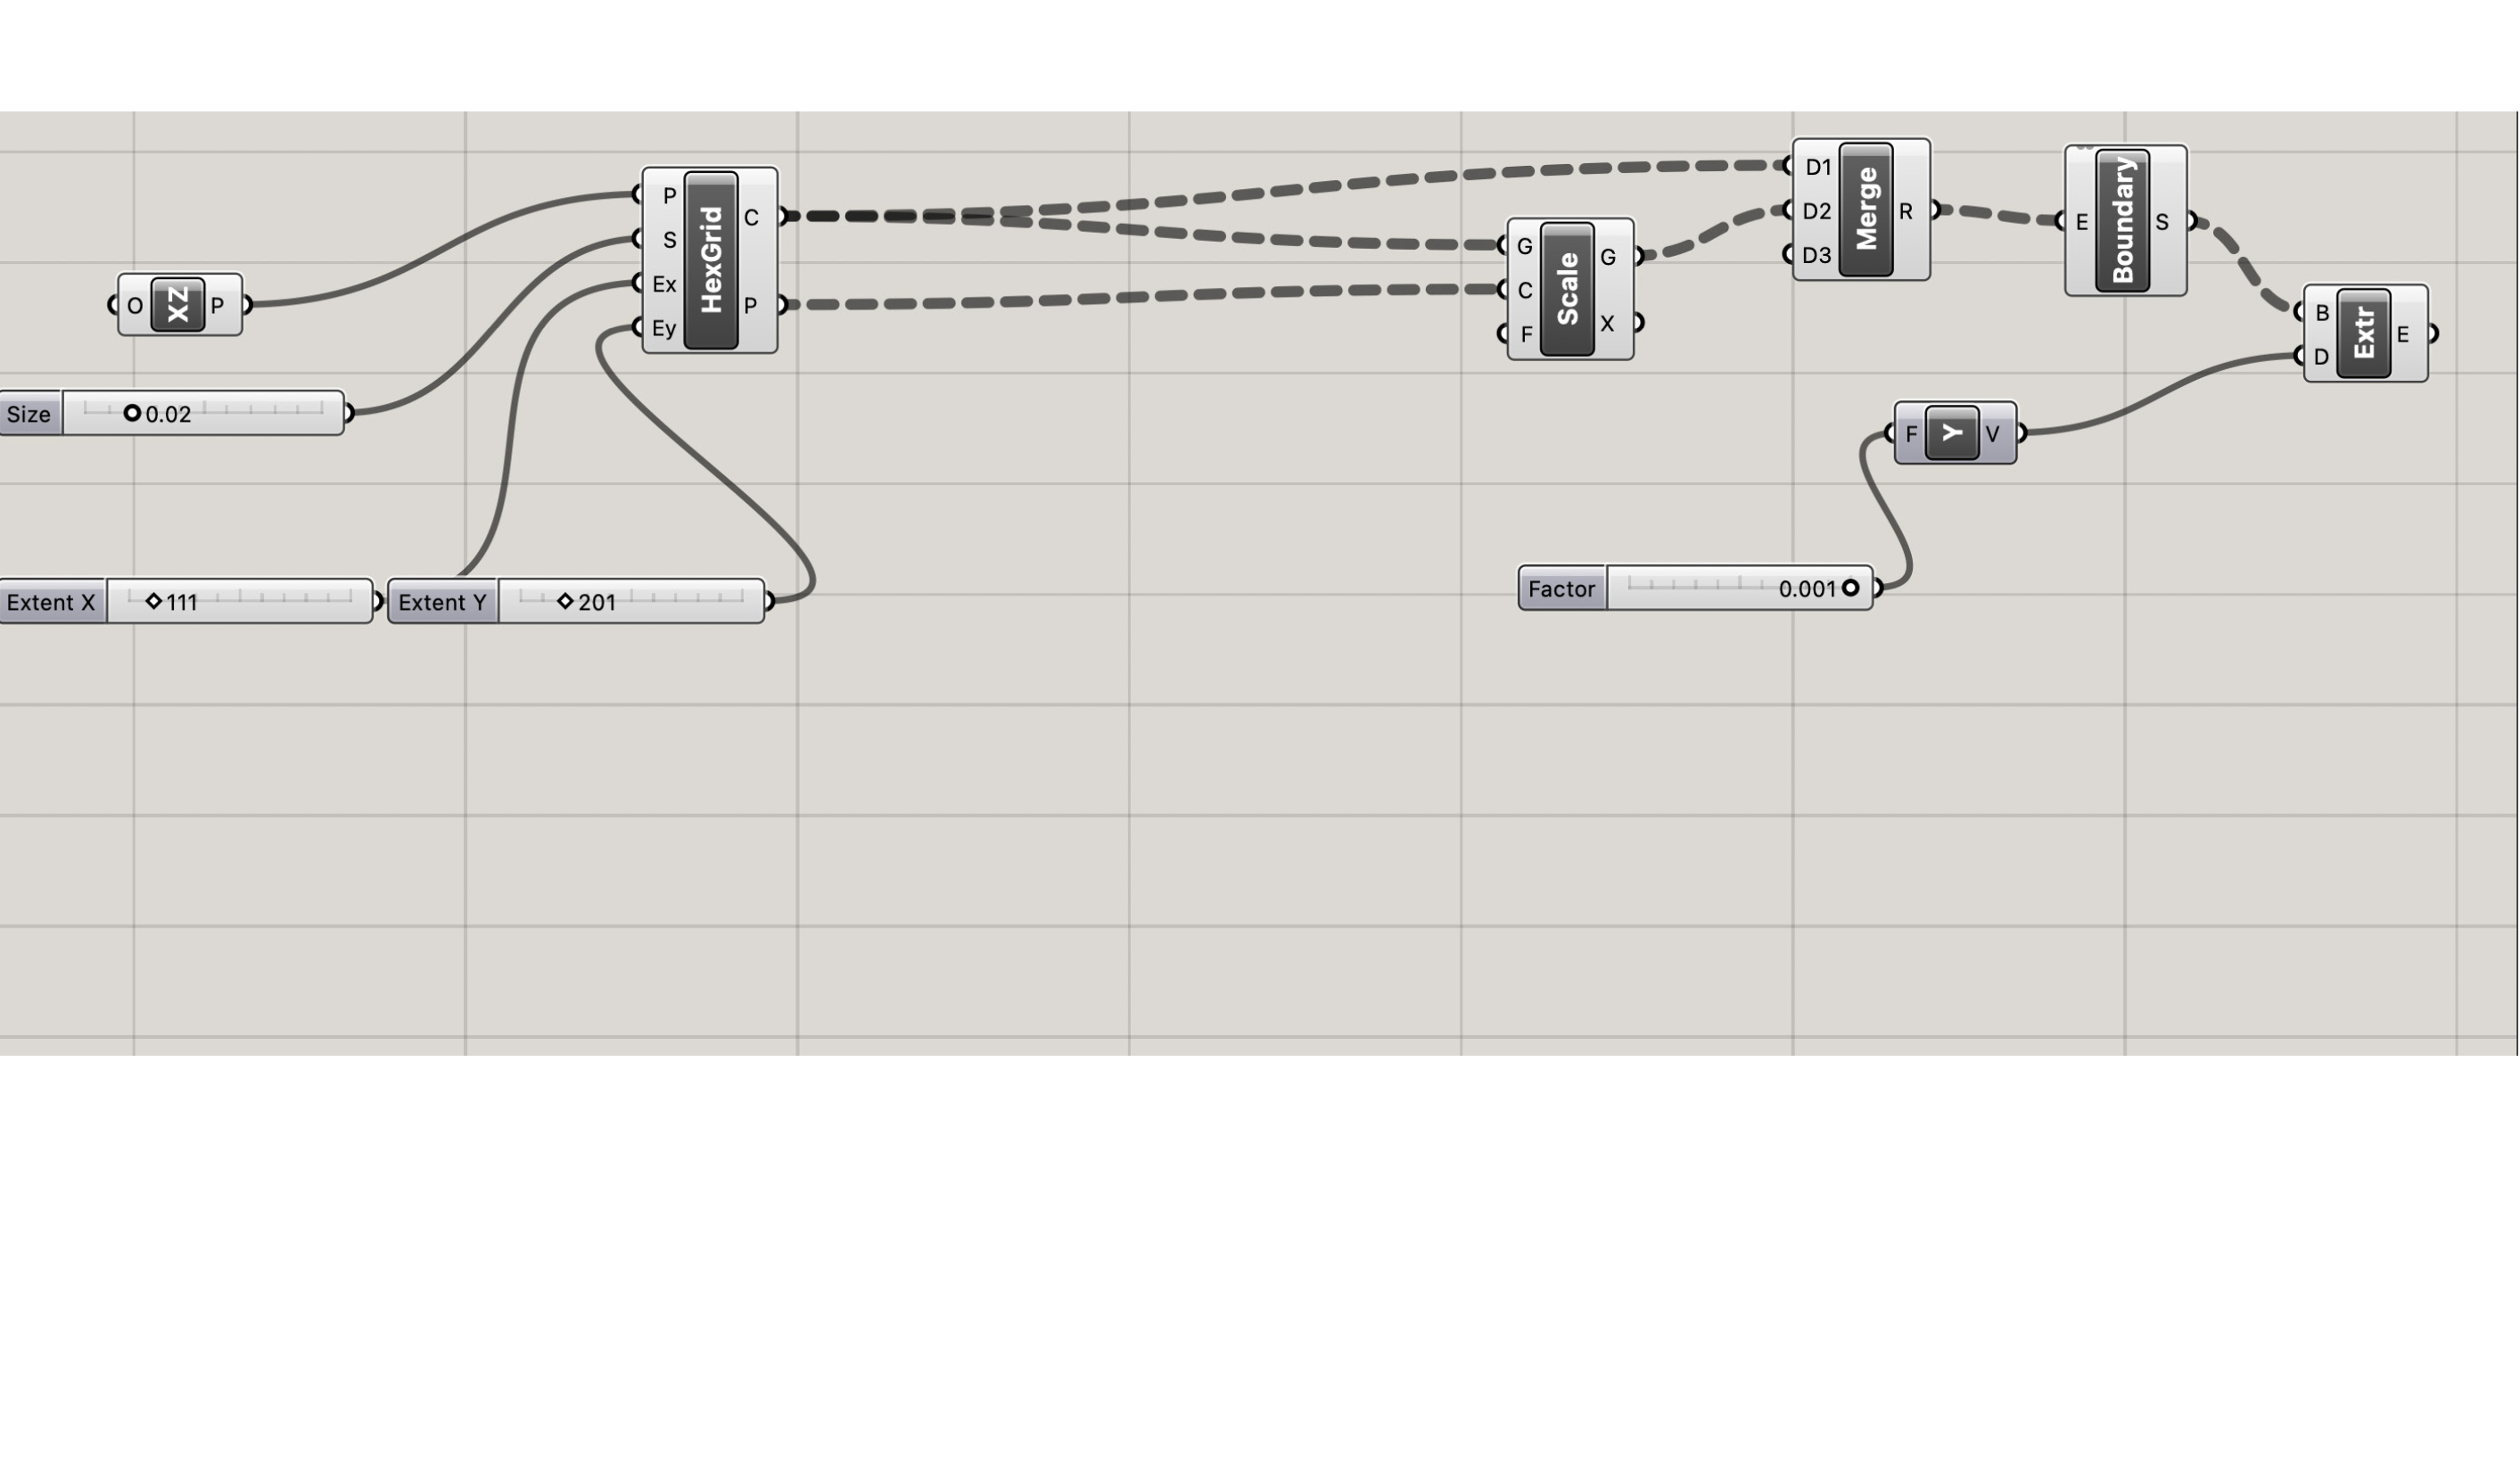
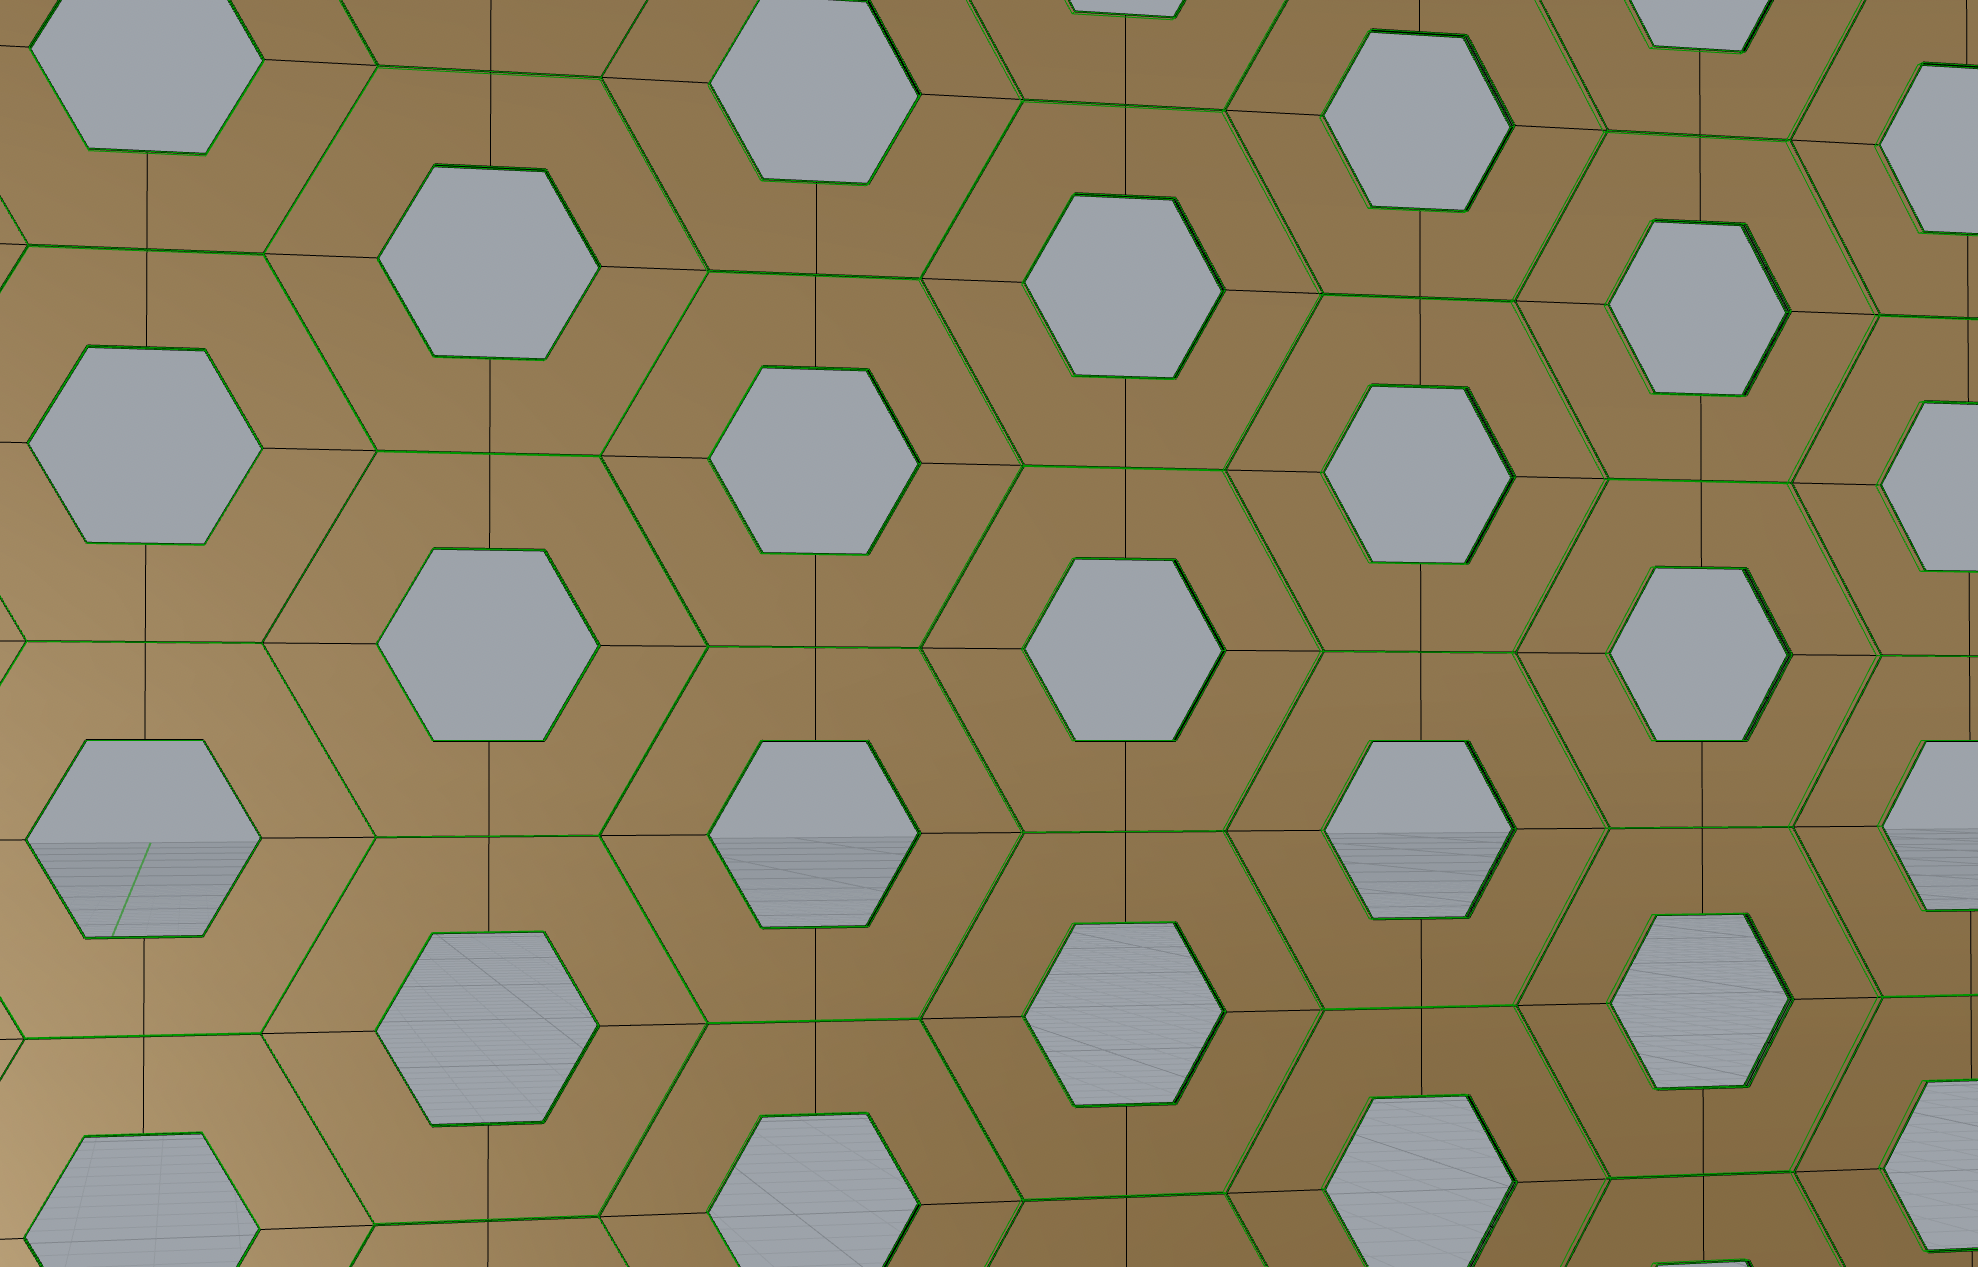
_THE 3RD PART
Another one that is pretty hard to model in ArchiCAD but gets easier while modeling in Grasshopper. Perforated facade pannels that I‘m using in front of the columns. Due the hexagon holes you can grow flowers on it and you can find it at JaJa‘s parking house in Copenhagen.
1) Make a plane of hexagons, use /hexgrid/. Choose as much of them as you want. They are connected to each other.
2) Scale it, extrude it.
3) Life hack – don‘t try to make as many hexagons as I did in case you want your laptop to live. My one had some seriour problems. But if you can export your perforated facade as quick as you can, there is a huge chance you can open it in Archicad later on and works ok.
_USING ARCHICAD WHILE GRASSHOPPER
If you want, you can use ArchiCAD to model those, but it takes so much time compared to script it in Grasshopper. If you want to model the diamond facade, you can do it by using columns, you have to rotate each of them into direction you want. The easiest way to model it in ArchiCAD is making a polylines which you will fill up with walls or any other 3D structure. After that making another one and offset it.
Making the rest of the facade in ArchiCAD is a bit easier, but changing the proportions takes some time.
When you do each of these facade parts in Grasshopper, you can open it in ArchiCAD because exporting from Rhino into almost every other 3D program is compatible. And Grasshopper is better for editing.
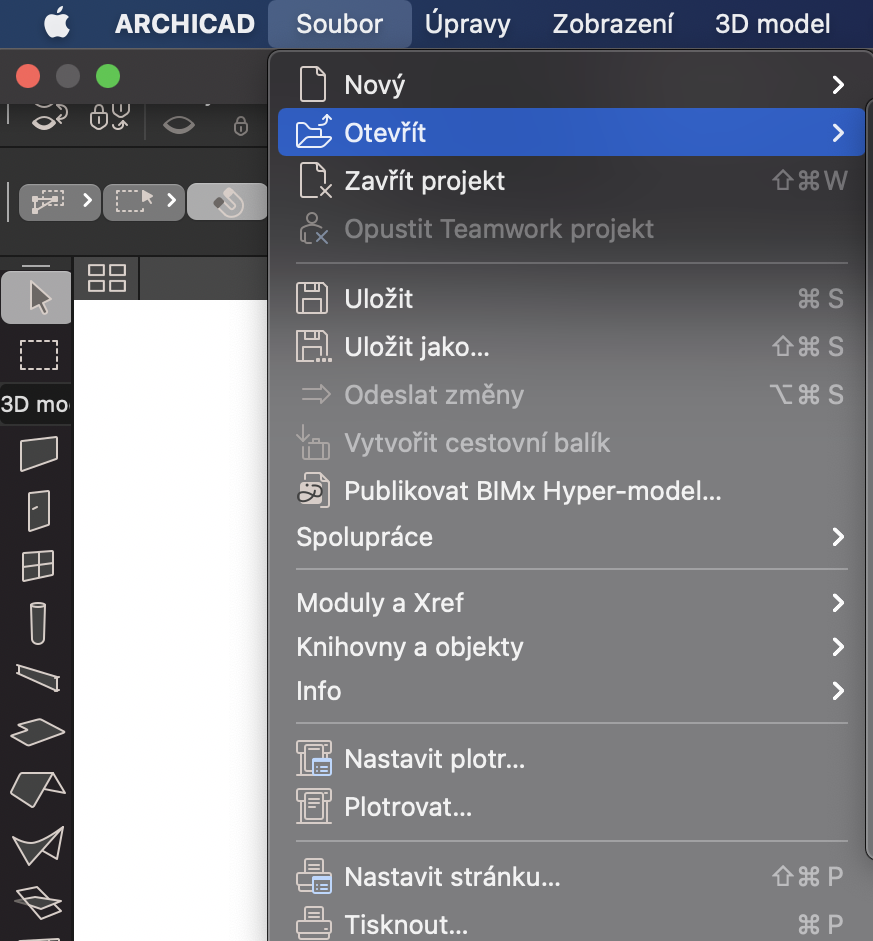
When you are done with the scripting part, the next step is going to show you how to import your object into ArchiCAD from Rhino. To export an object from Rhino, you have to click on ‘file’ and then choosing ‘export’.
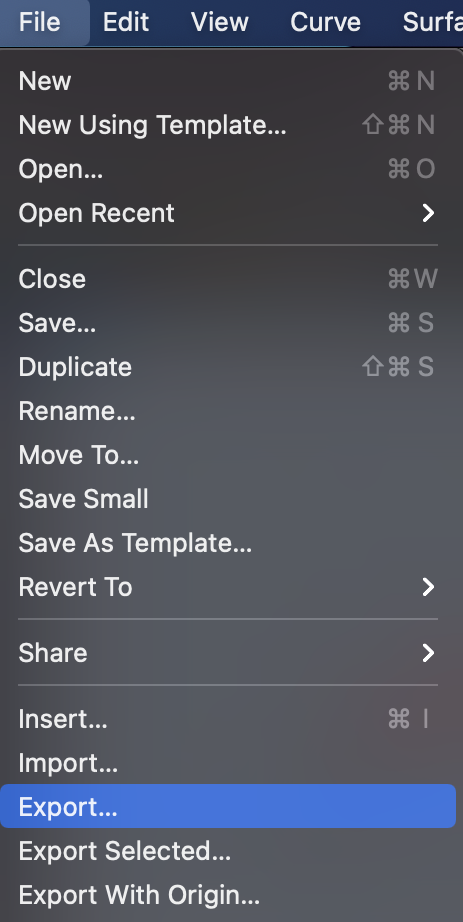
From Rhino you can’t export the object as ‘pln’ which is usually used for ArchiCAD files. The best way is exporting the object as ‘Collada’. Collada is mostly used for Blender but you can open it in ArchiCAD as well and it works for your ArchiCAD edits.
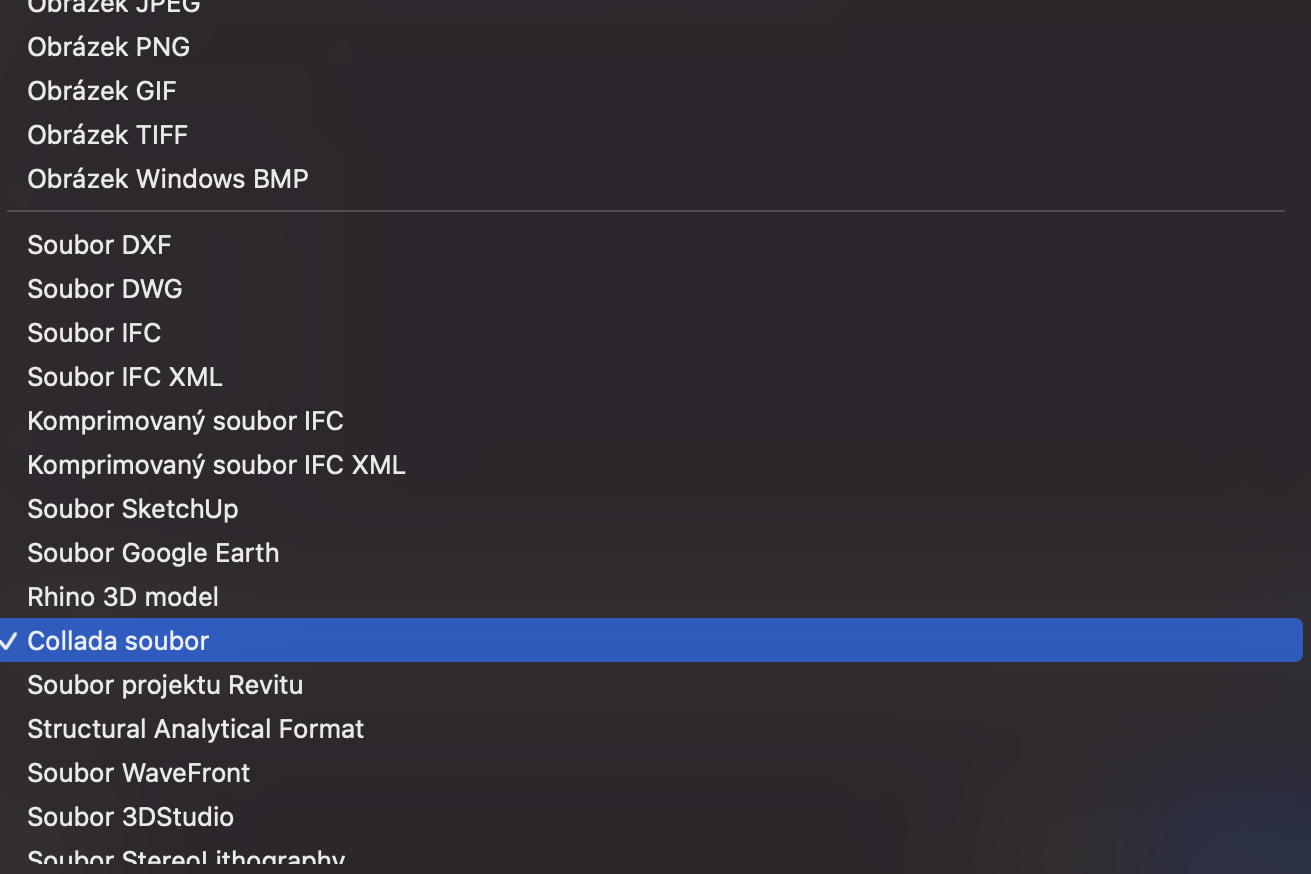
Collada file is easily recognisable because it ends with ‘.dae’.
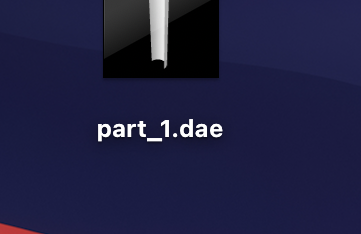
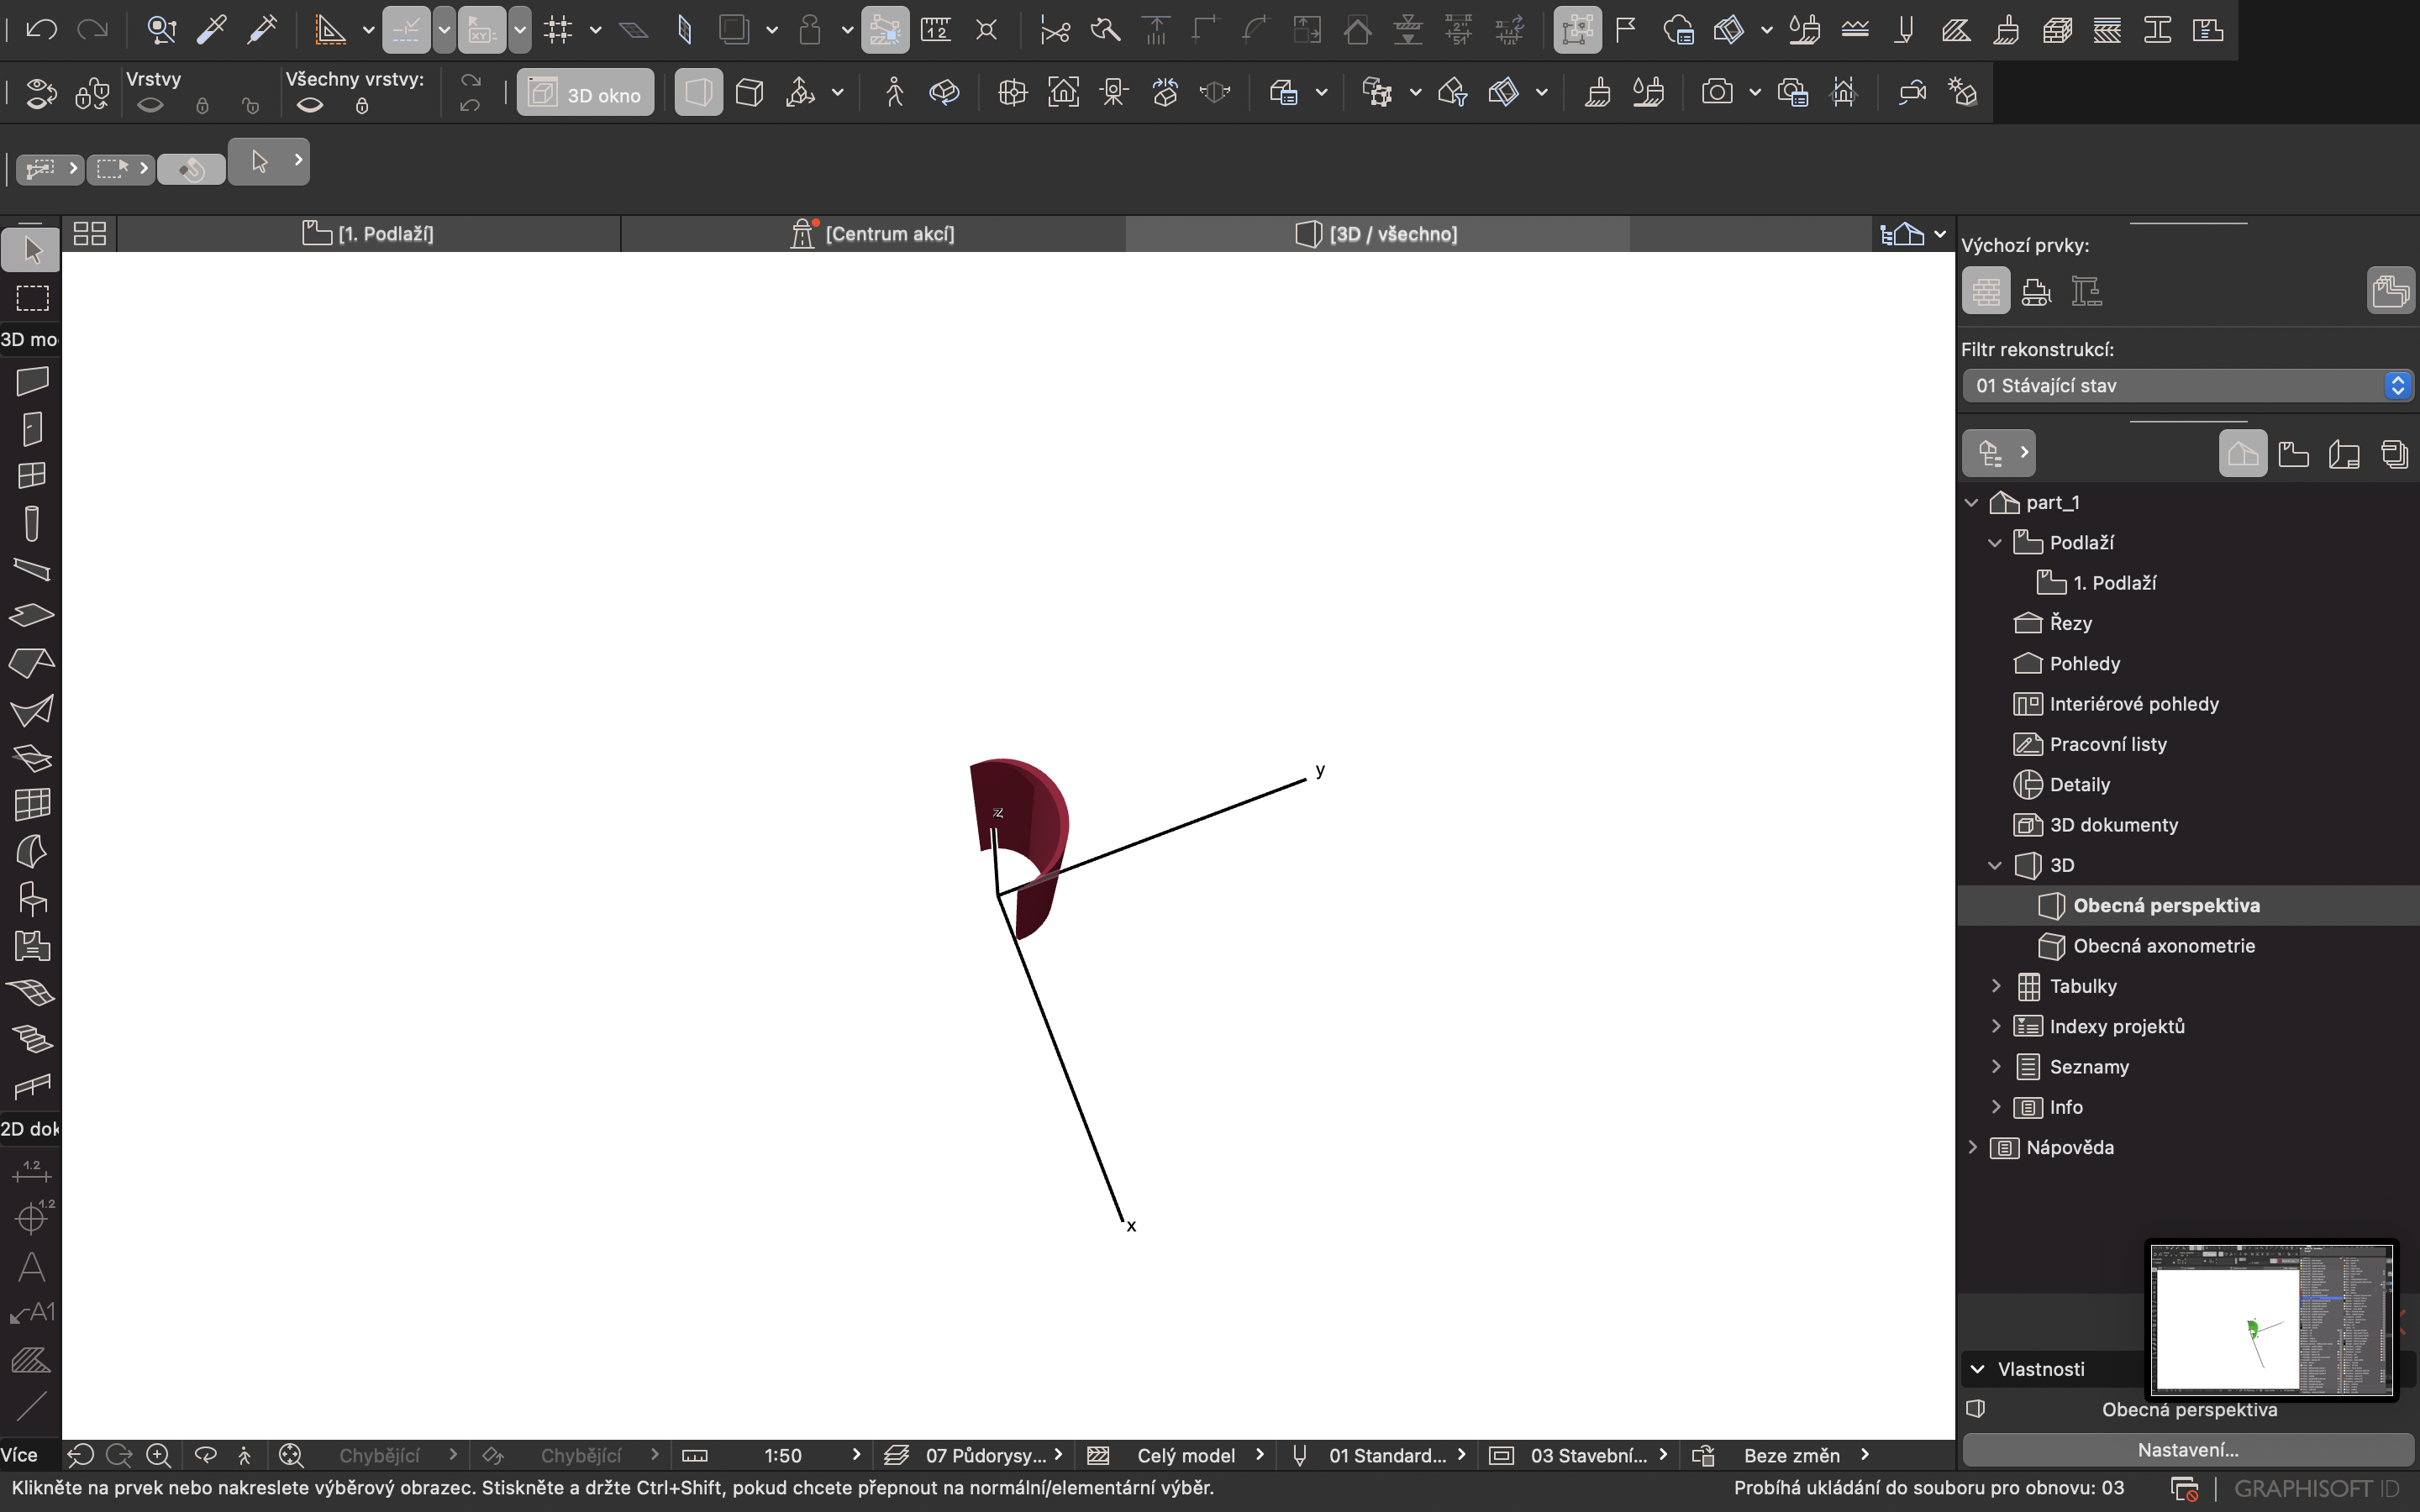
You can close both Rhino and Grasshopper at the moment and open Archicad. Import the Collada file into it by clicking on ‘file’ and choose ‘open’ from the menu plus choose the Collada file from your documents.
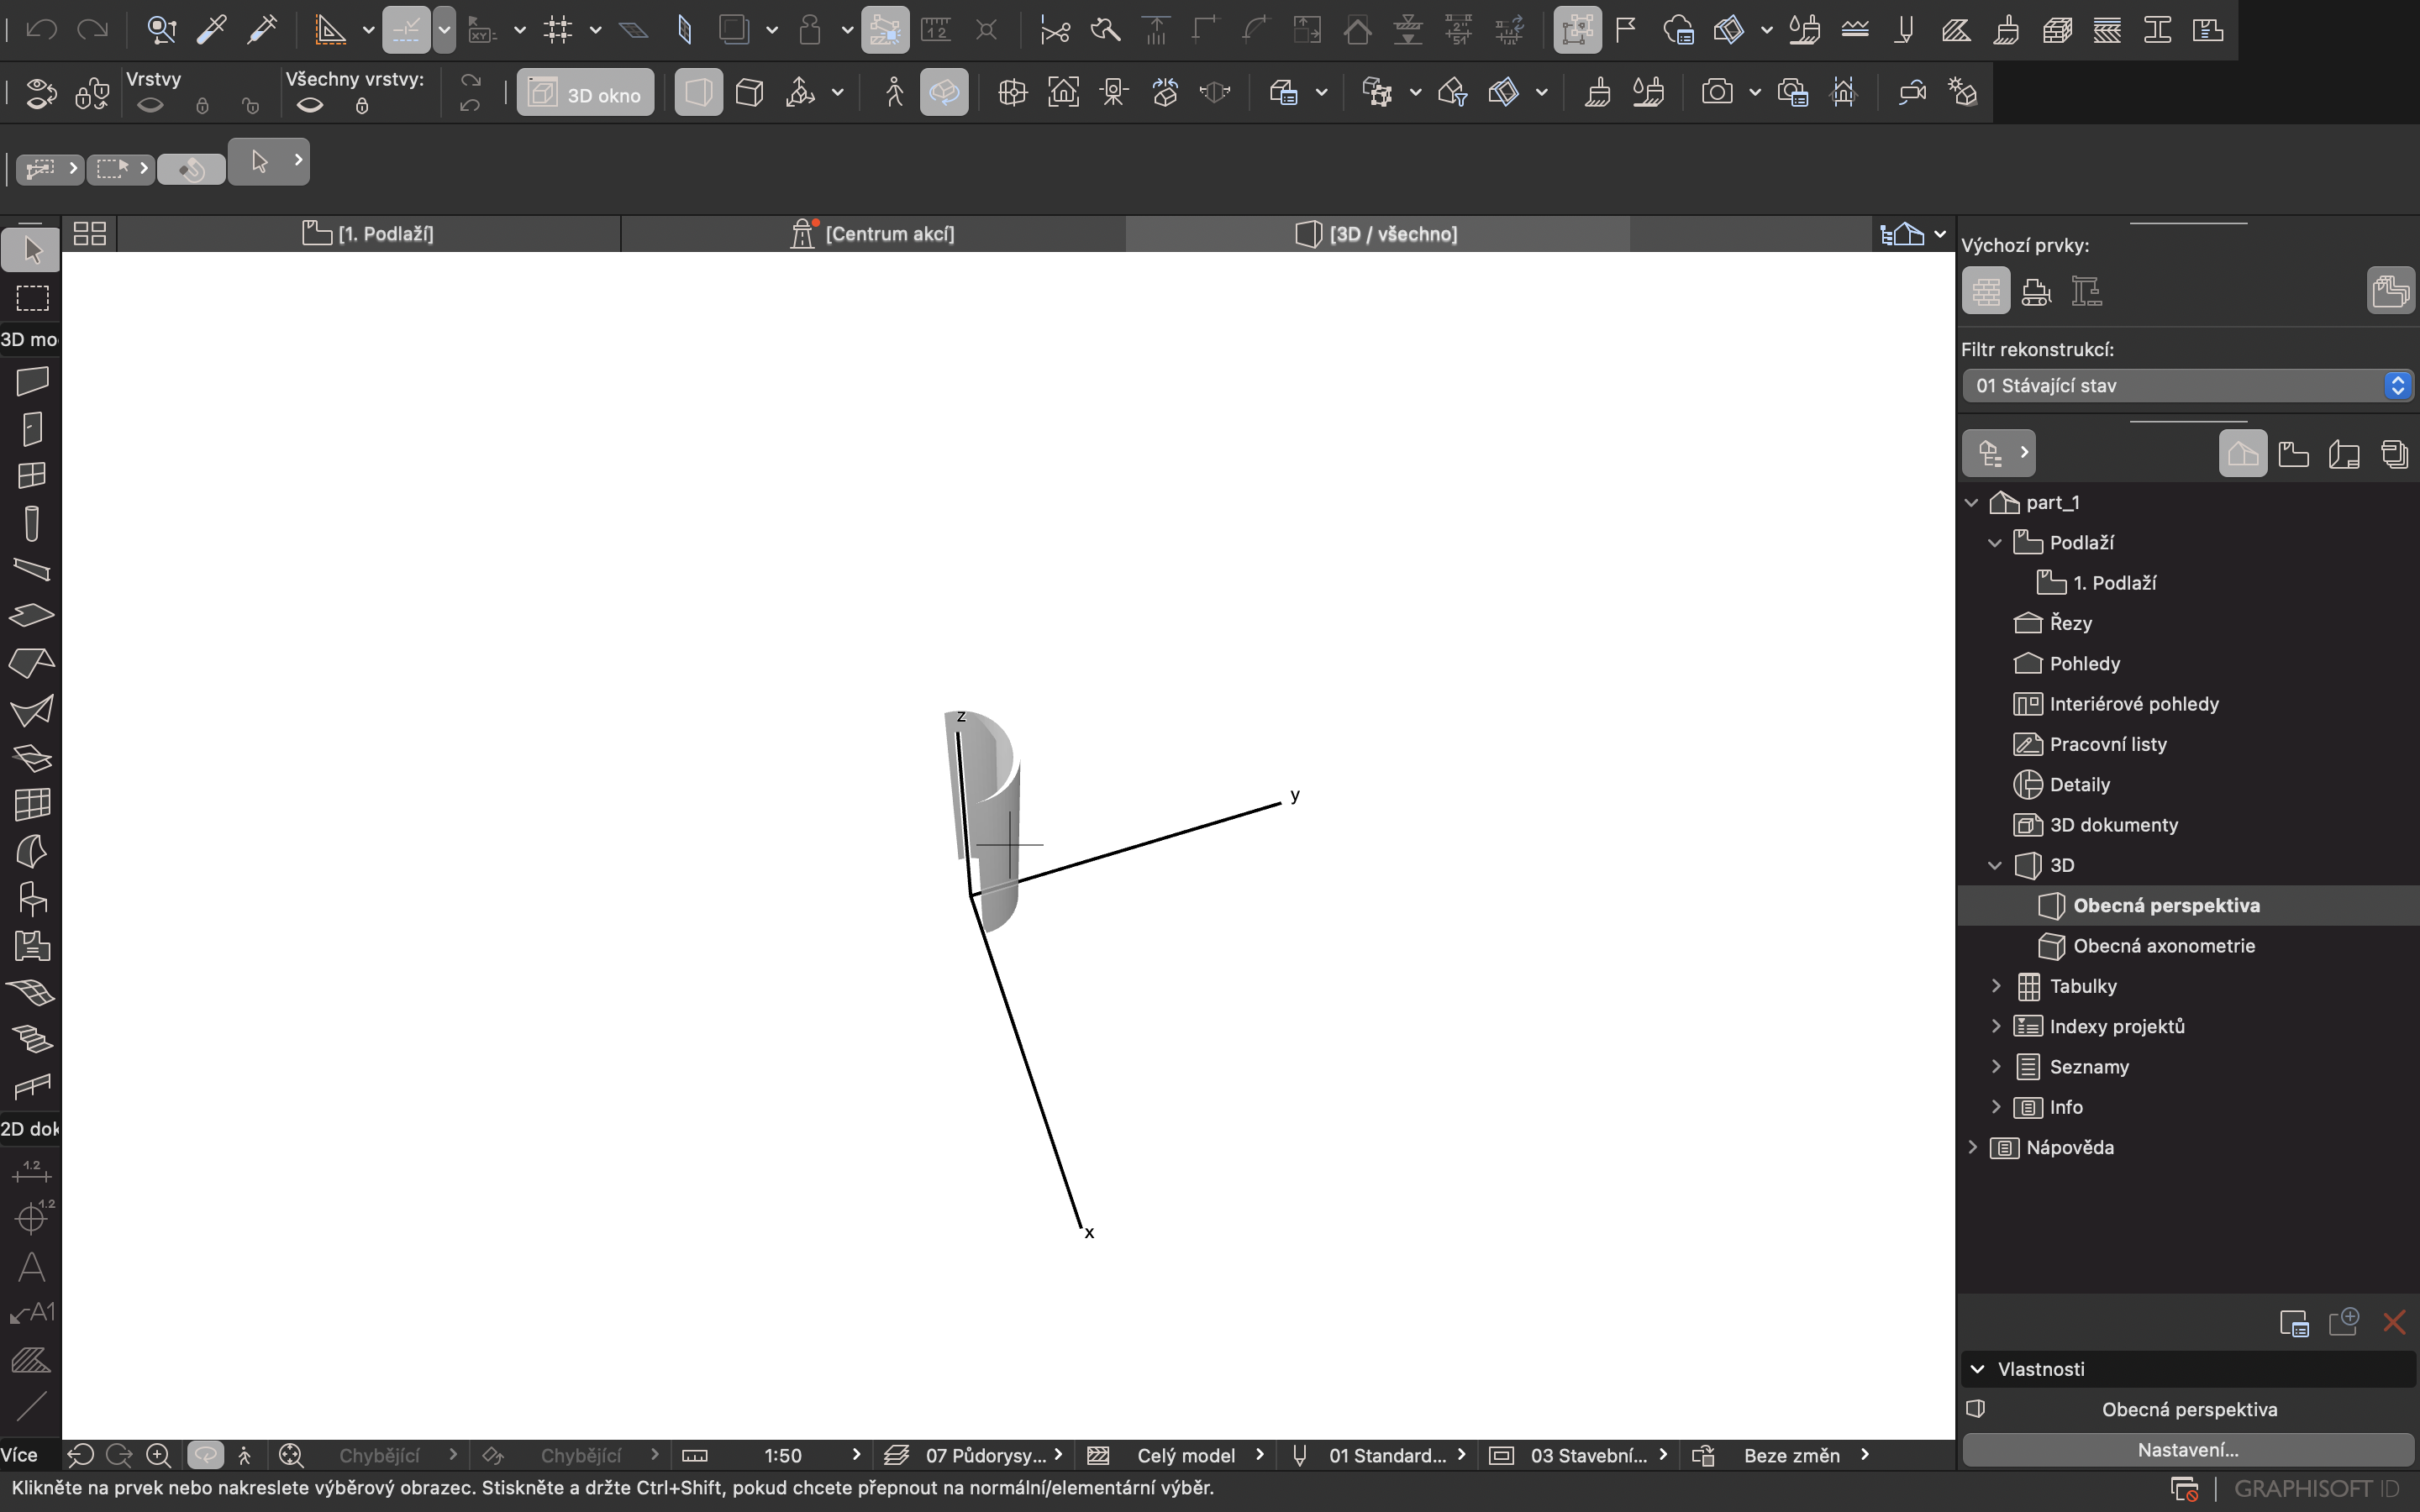
The file is imported into Archicad. You can change its scale or texture and it works as a usual object from your ArchiCAD library.
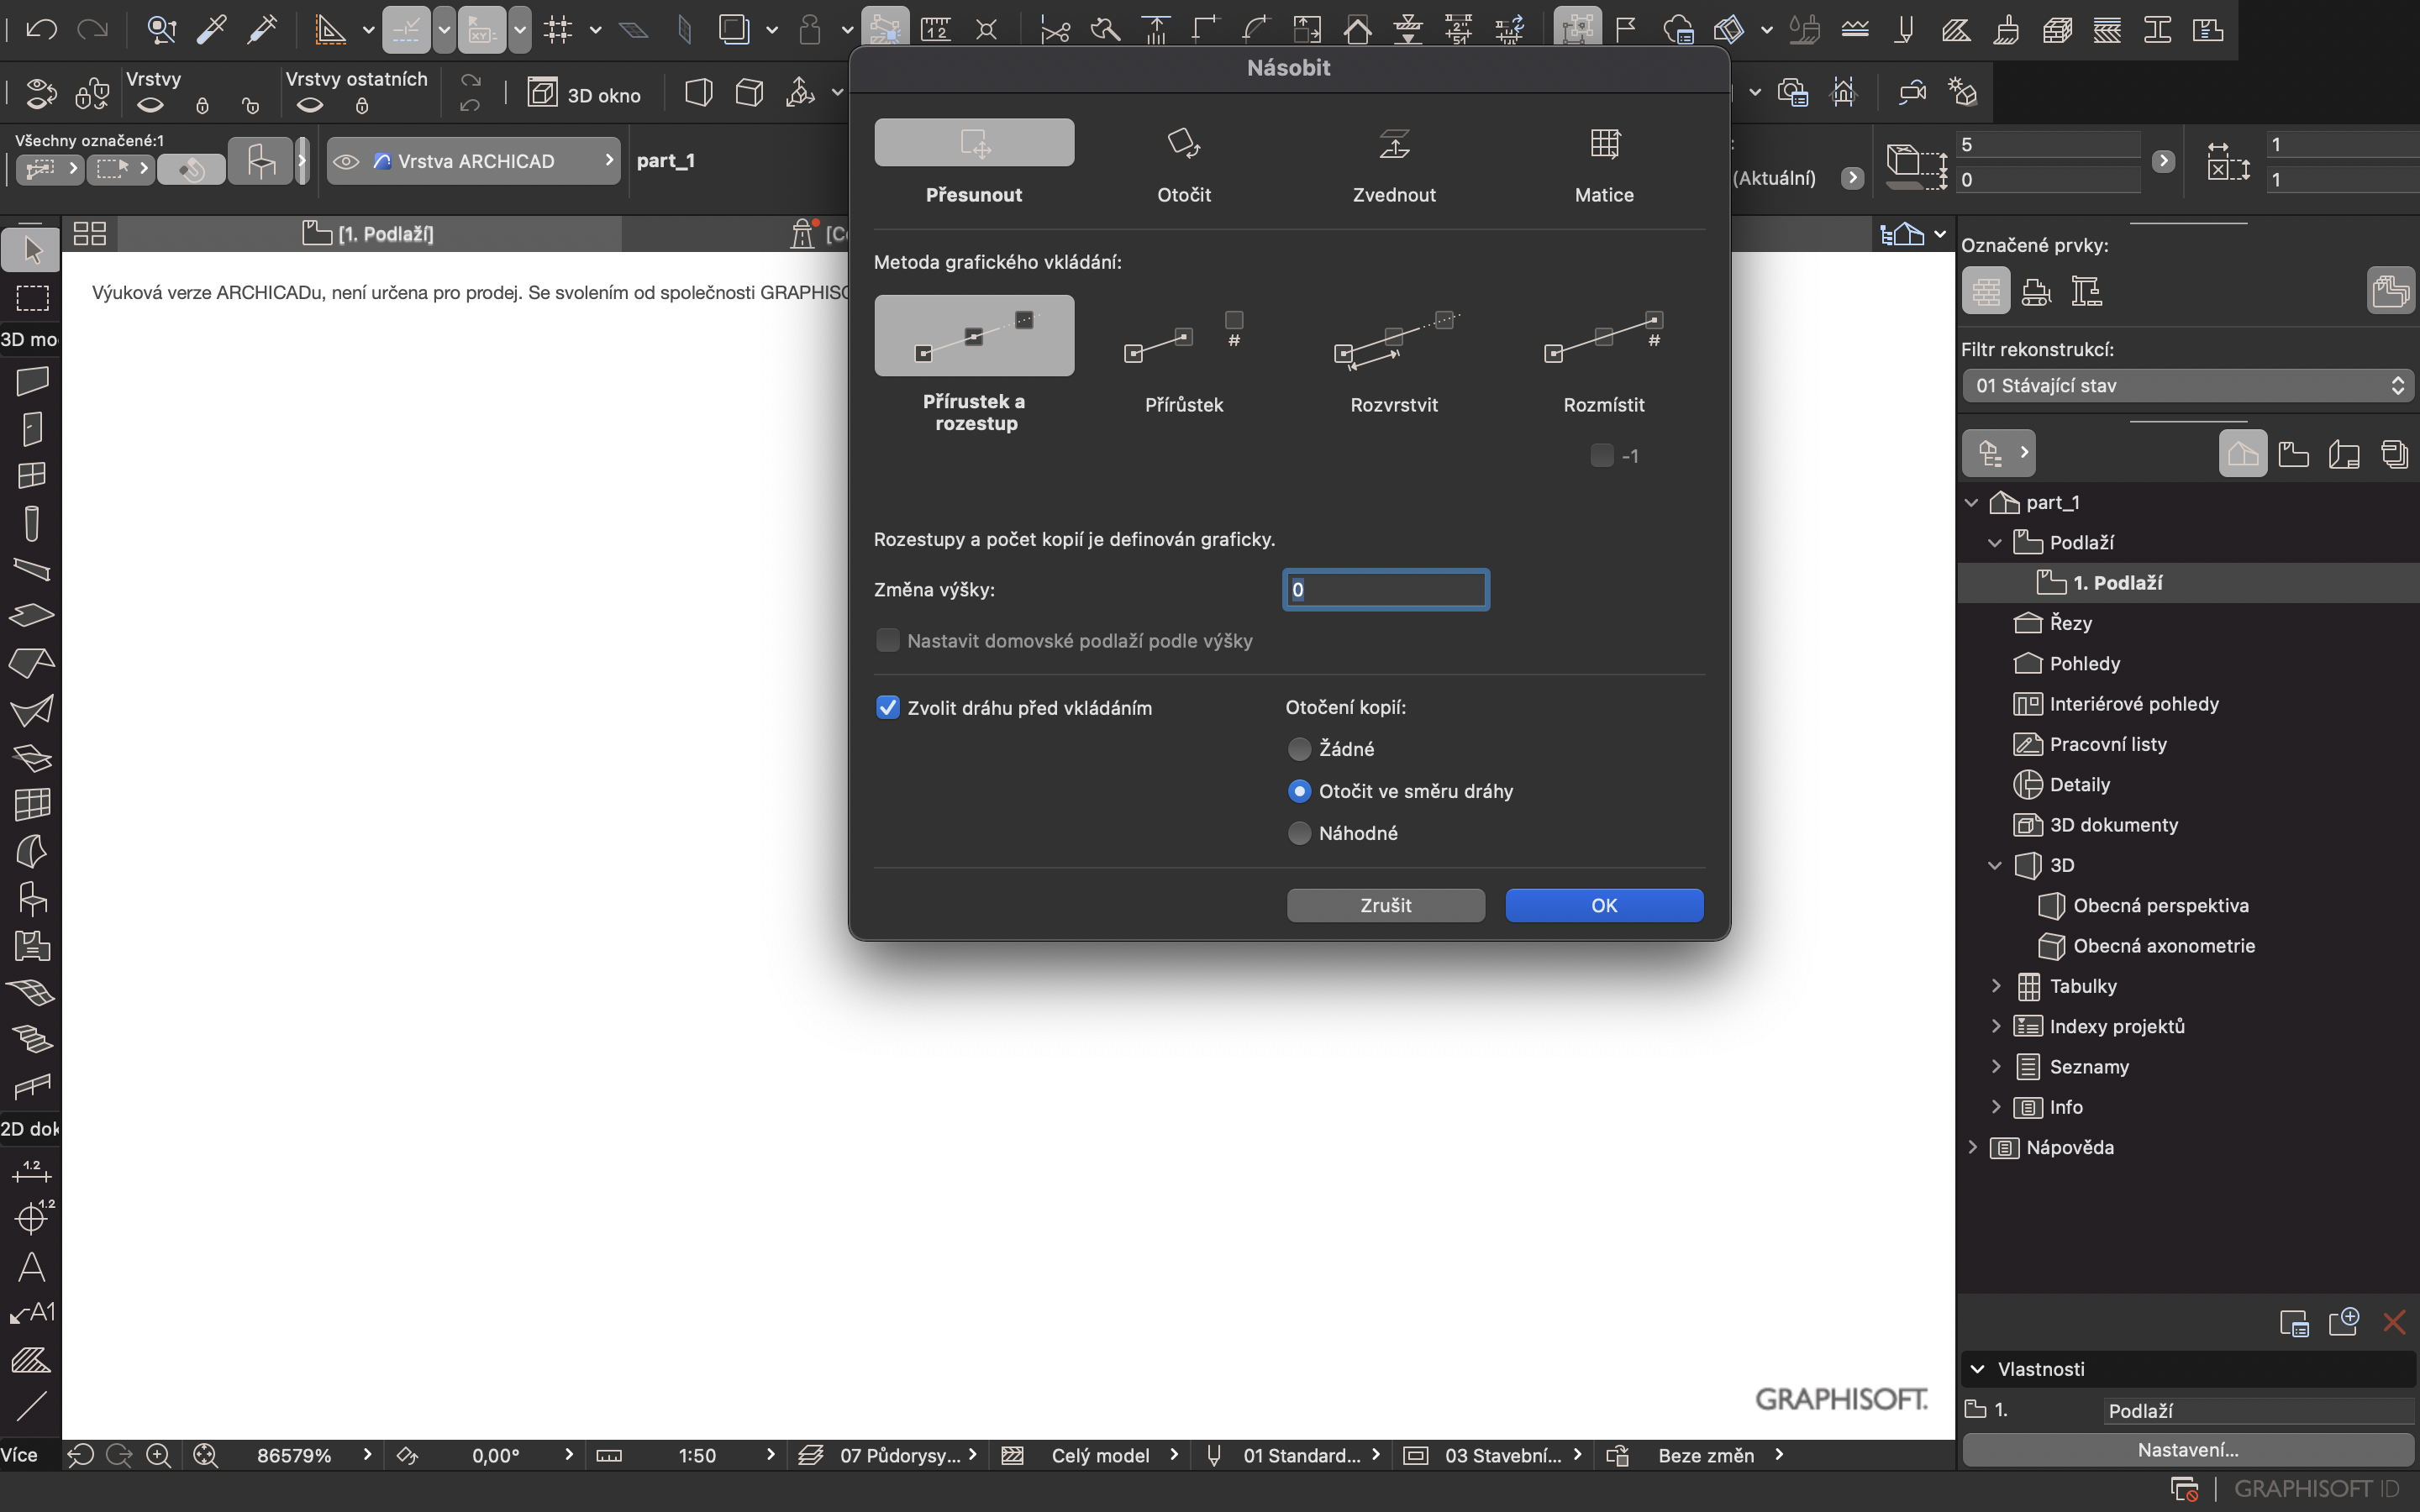
If you can change the scale, use ctrl+K and for multi duplication, use ctrl+u.
_OUTRO
Open your Archicad. Scale it into the right scales. Add into your project anything you need that is easier for you to only choose from a library. Whenever you have something that is hard to model, go back to Grasshopper real quick.
Hope this was useful
That is it for the tutorial
Good luck