
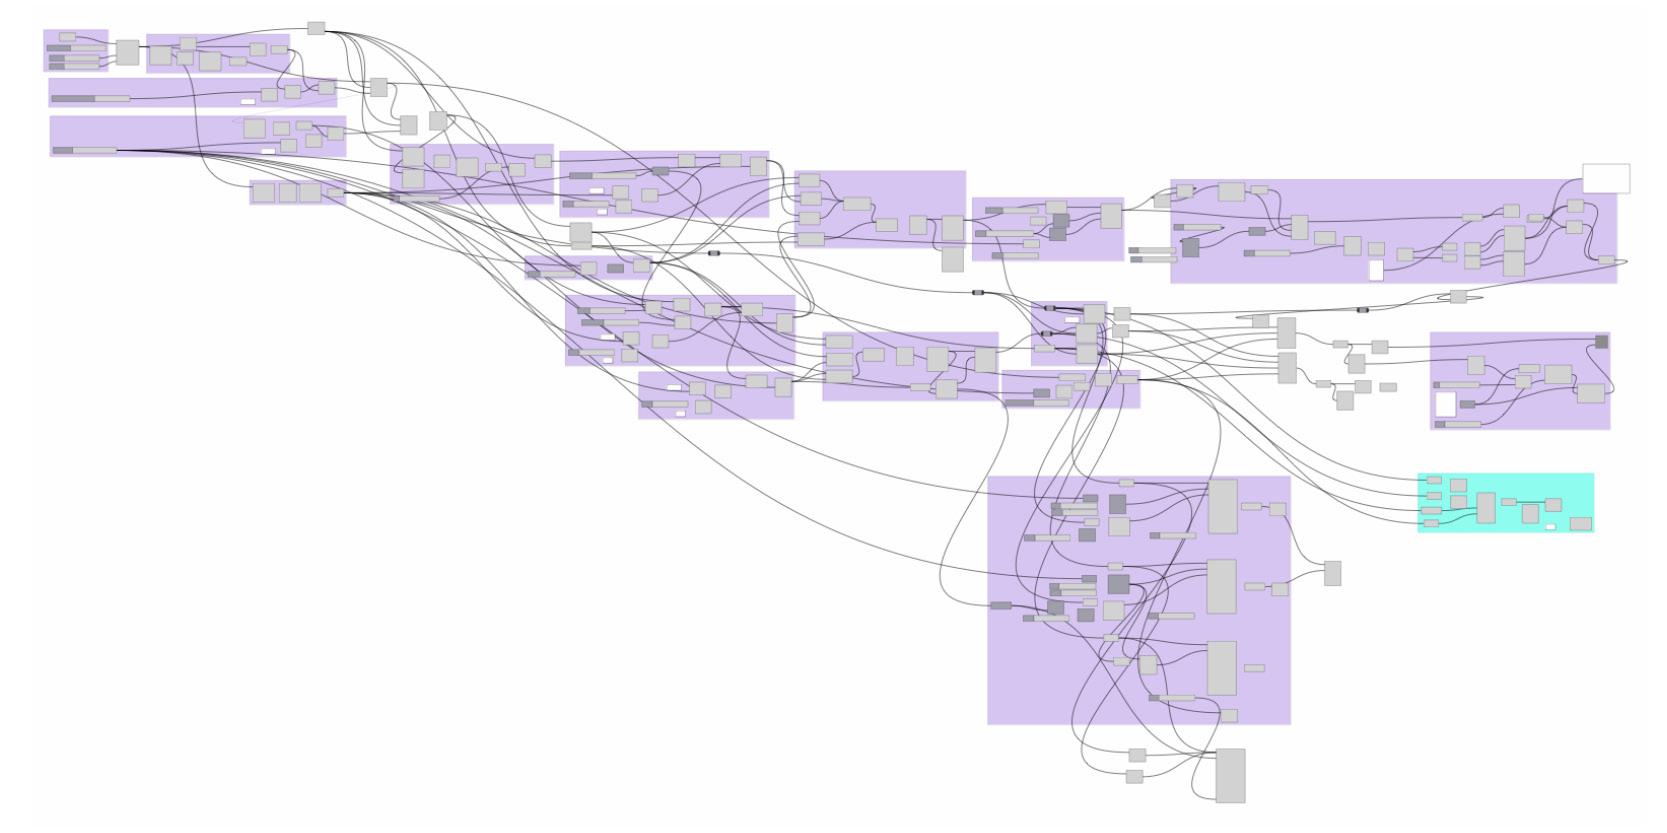
Approach
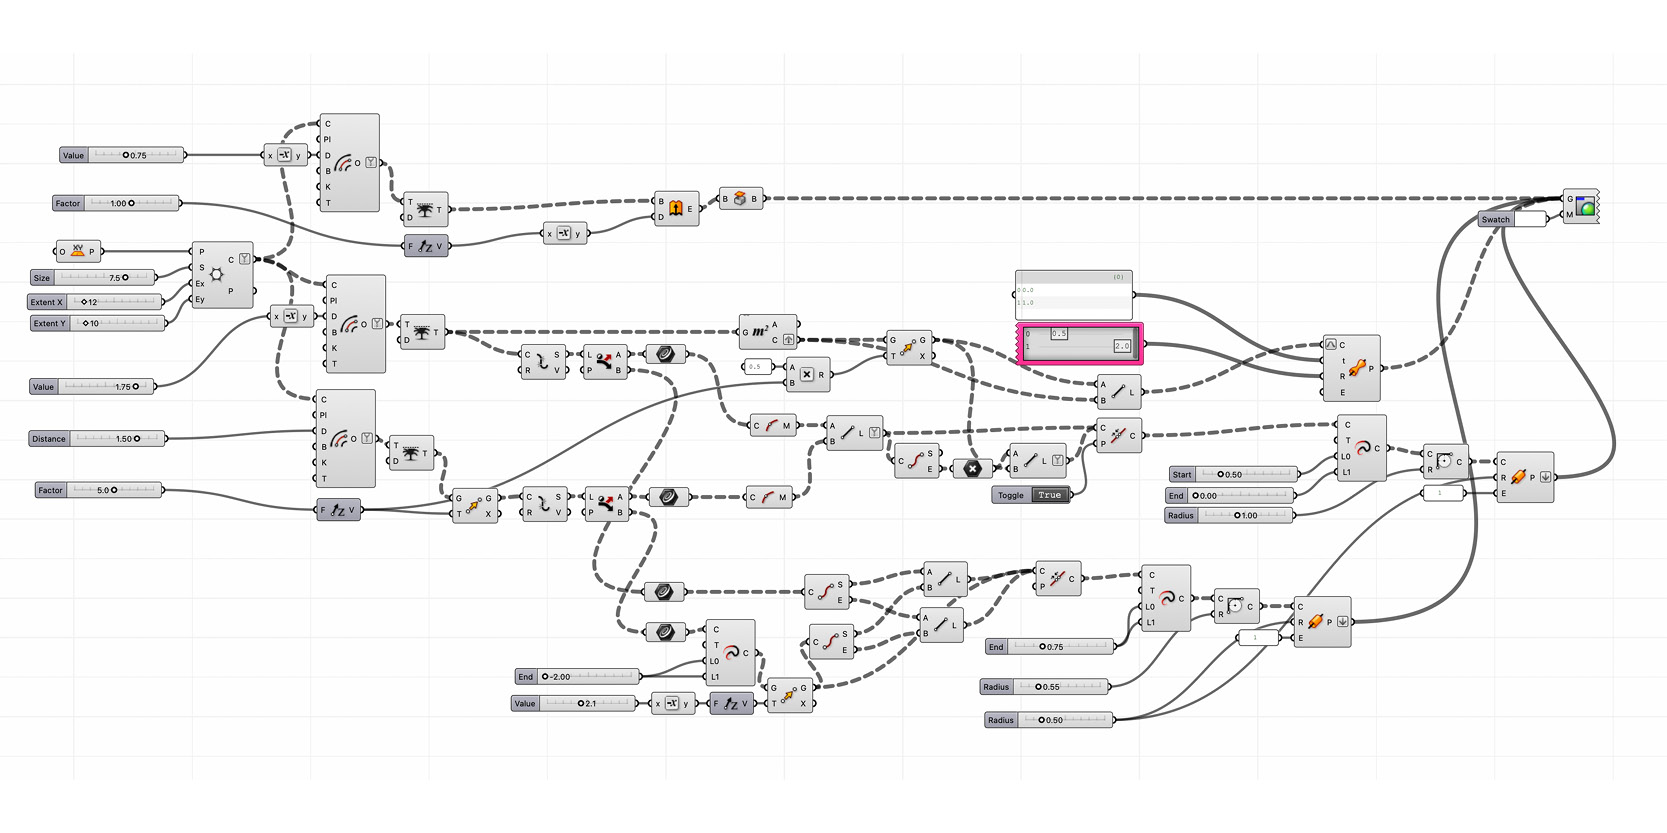
Chainmill
Creating a parametrically designed 3d printable fabric with the chainmill method from different shapes using Grasshopper.
Comparison
Displaying different approaches and solutions how to design the fabric.
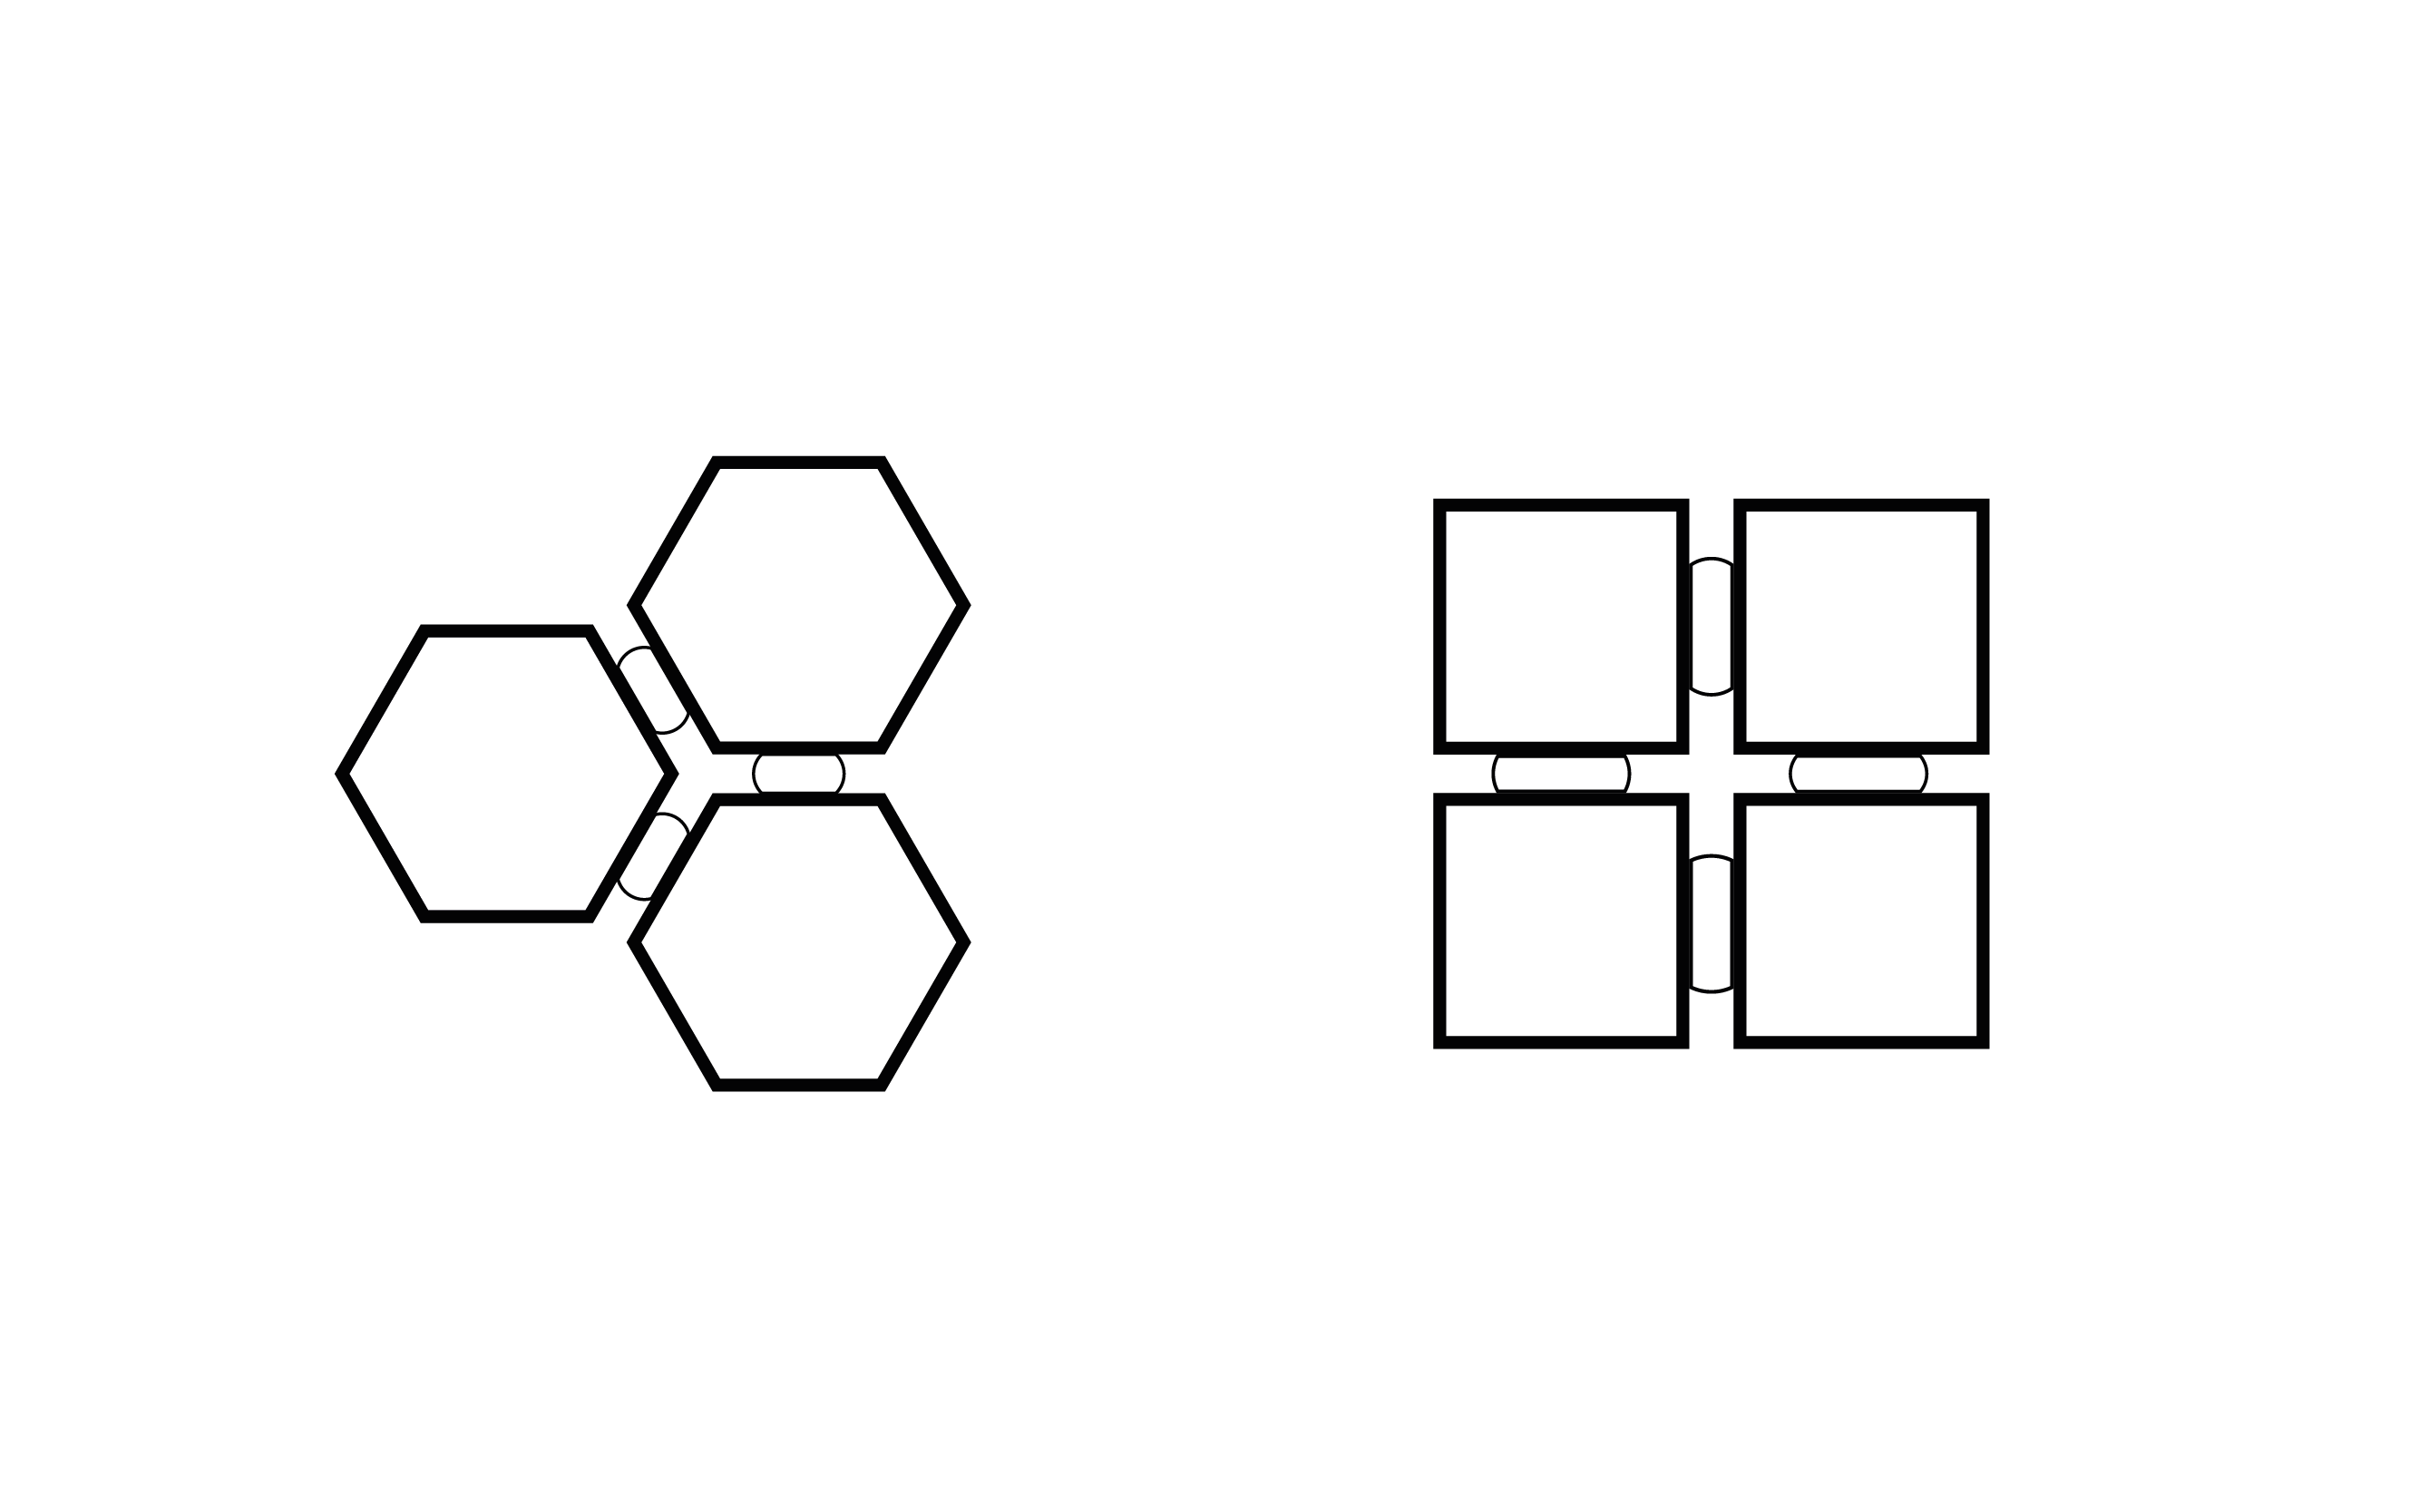
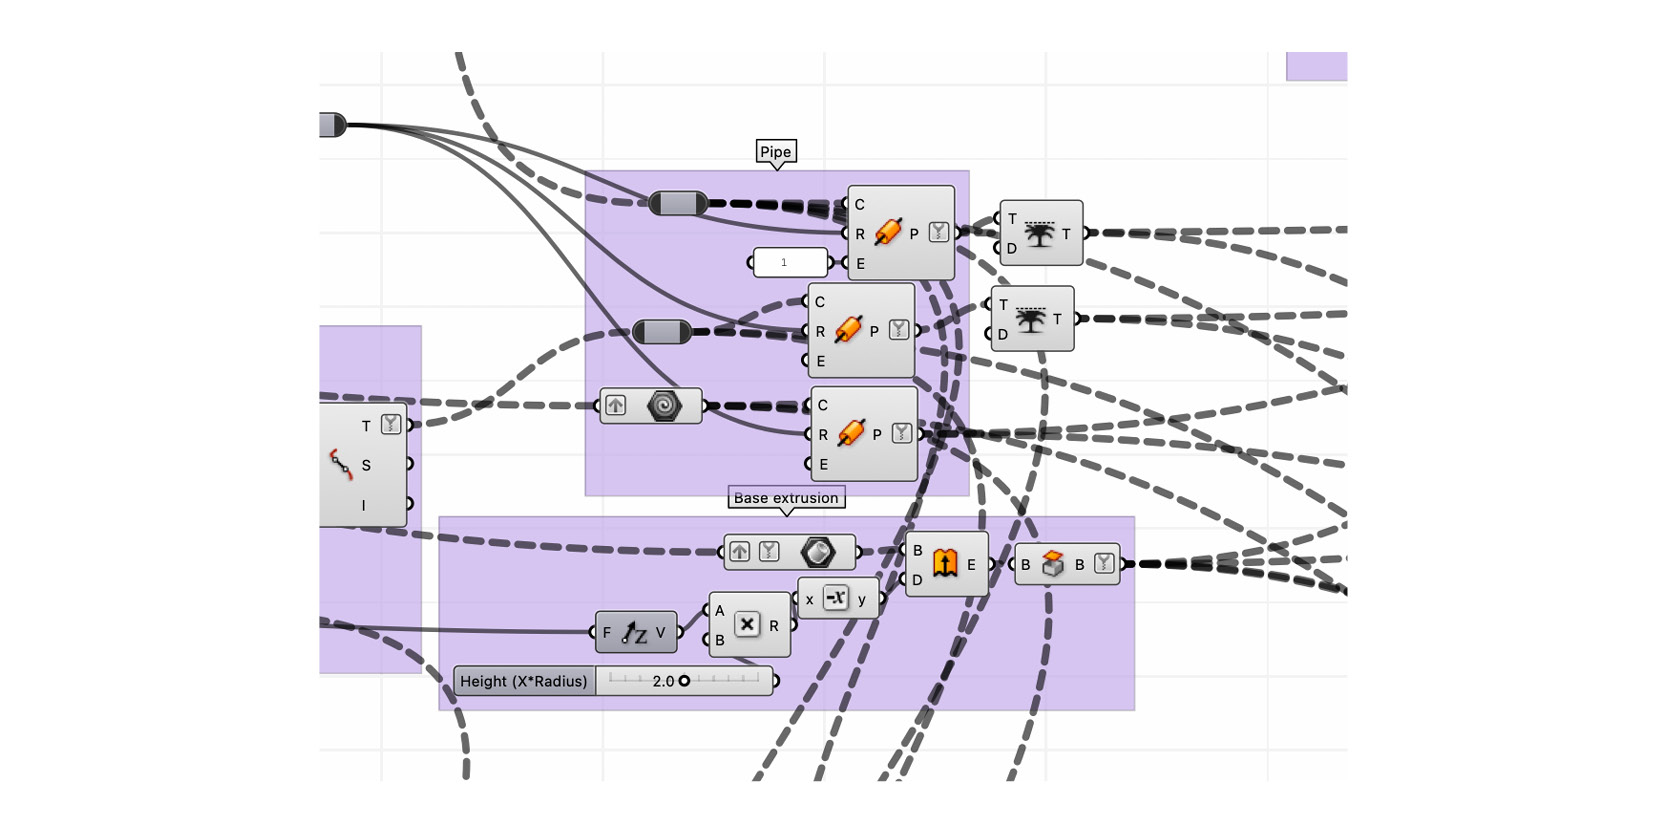
One – bracket connection
Overview
Bracket connection
starting with a hexagonal grid. offsetting it and dispatch the segments
creating the bracket and the clamp by moving the segments and connecting the end points
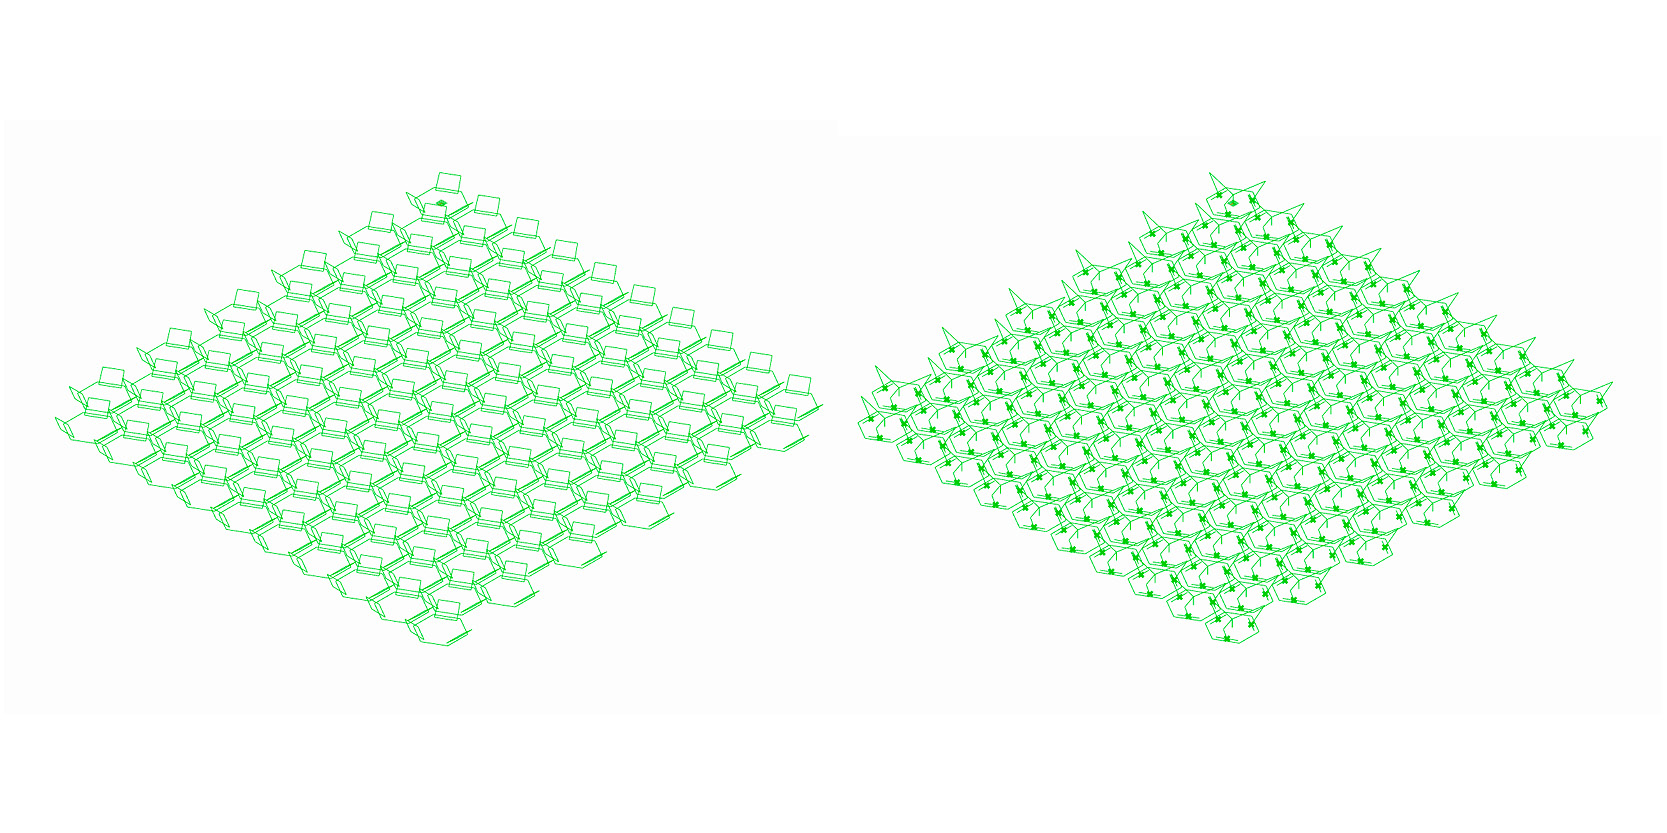
extruding the base and use pipe-component for the segmented lines
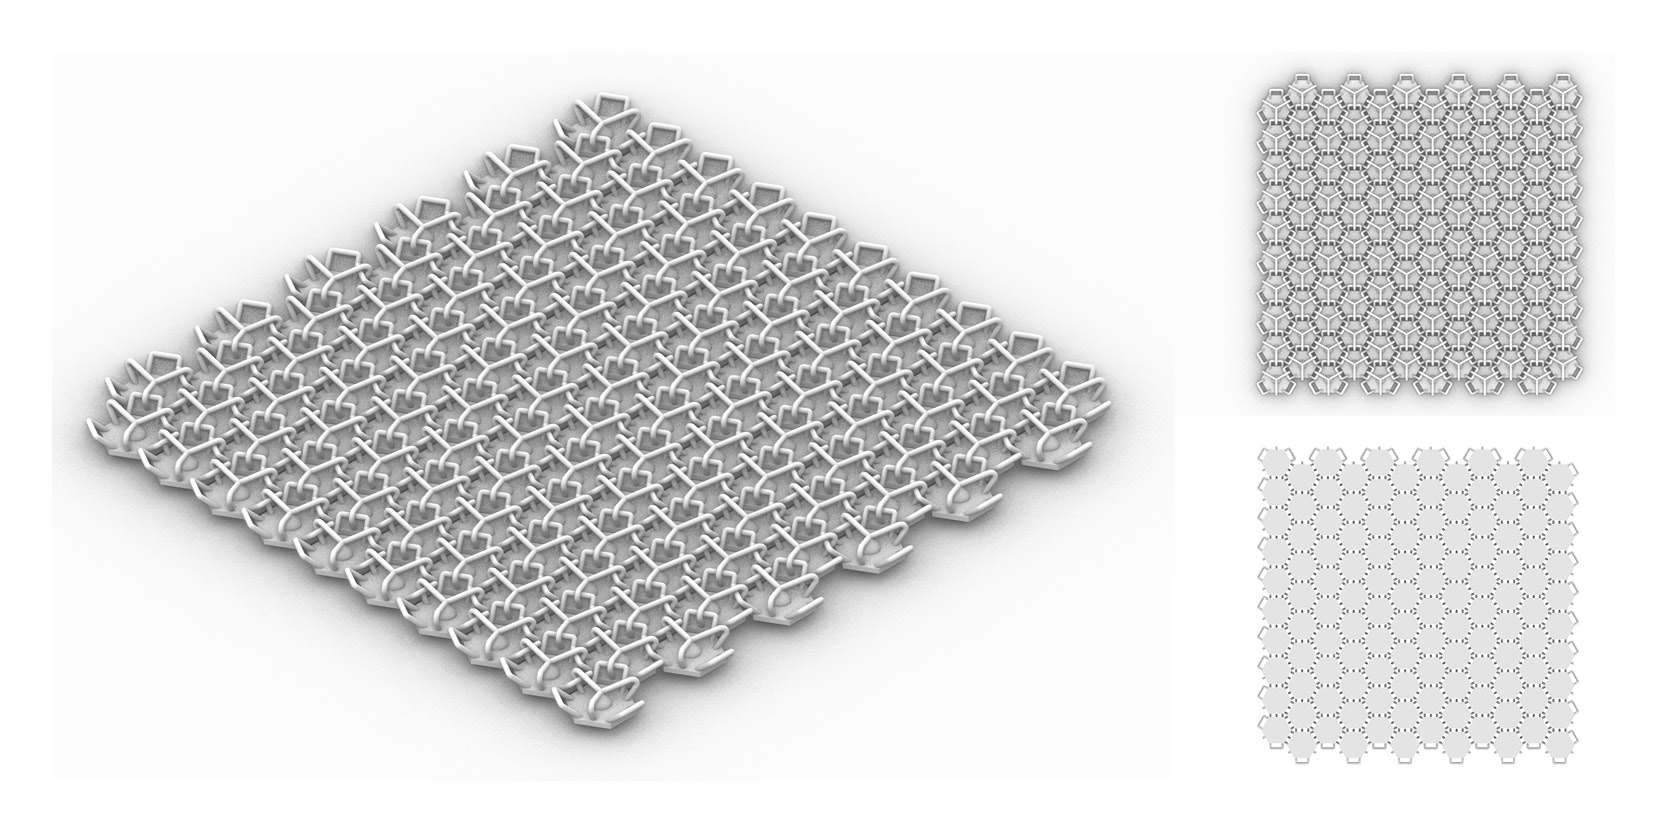
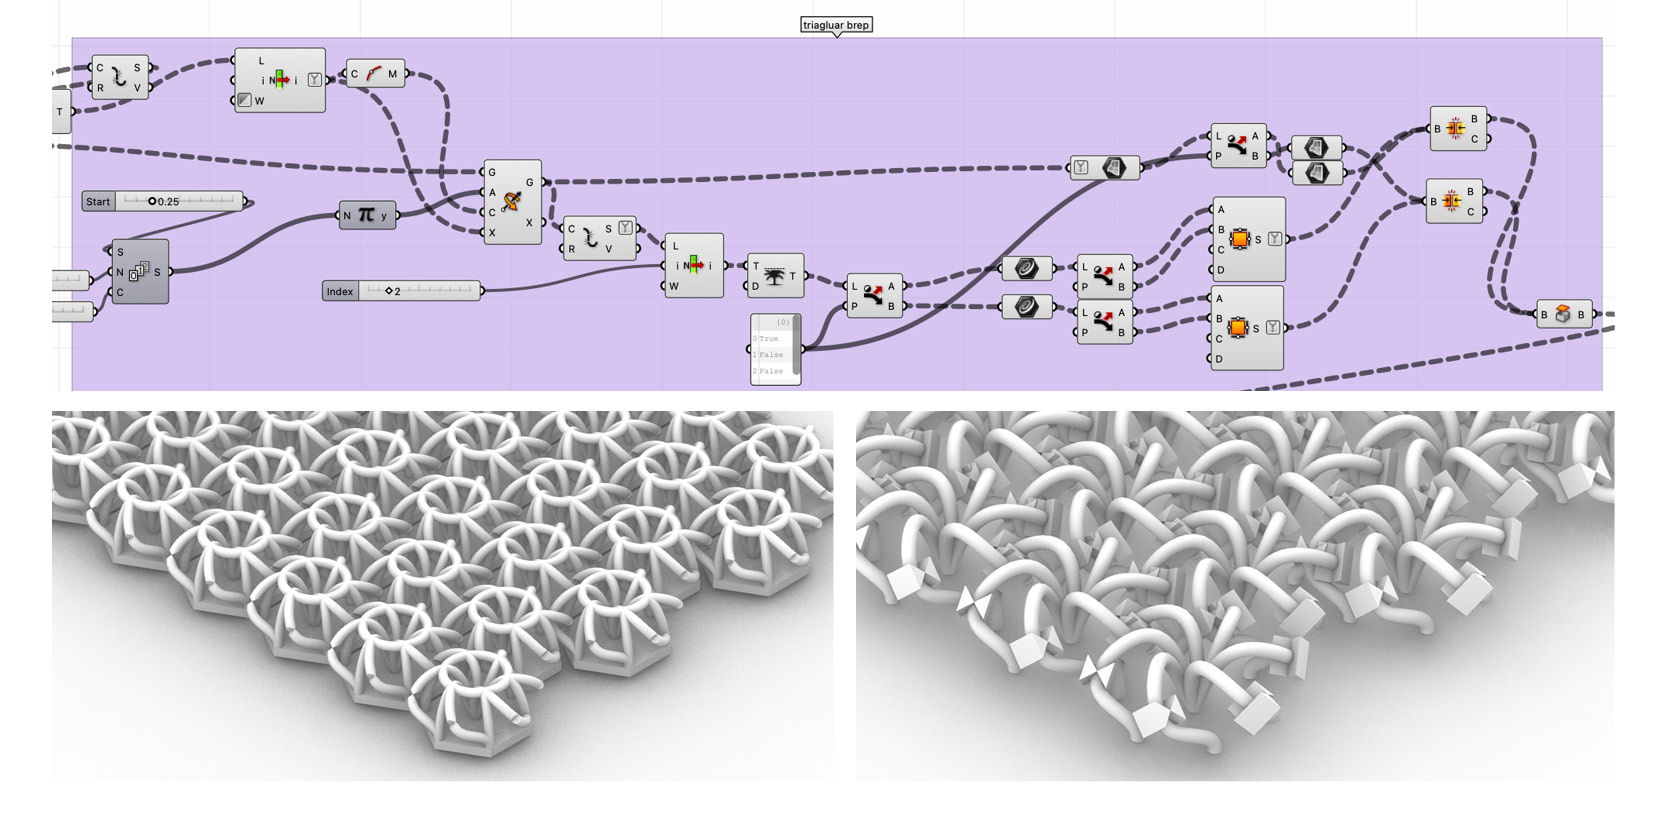
Two – hexagonal structure
Overview
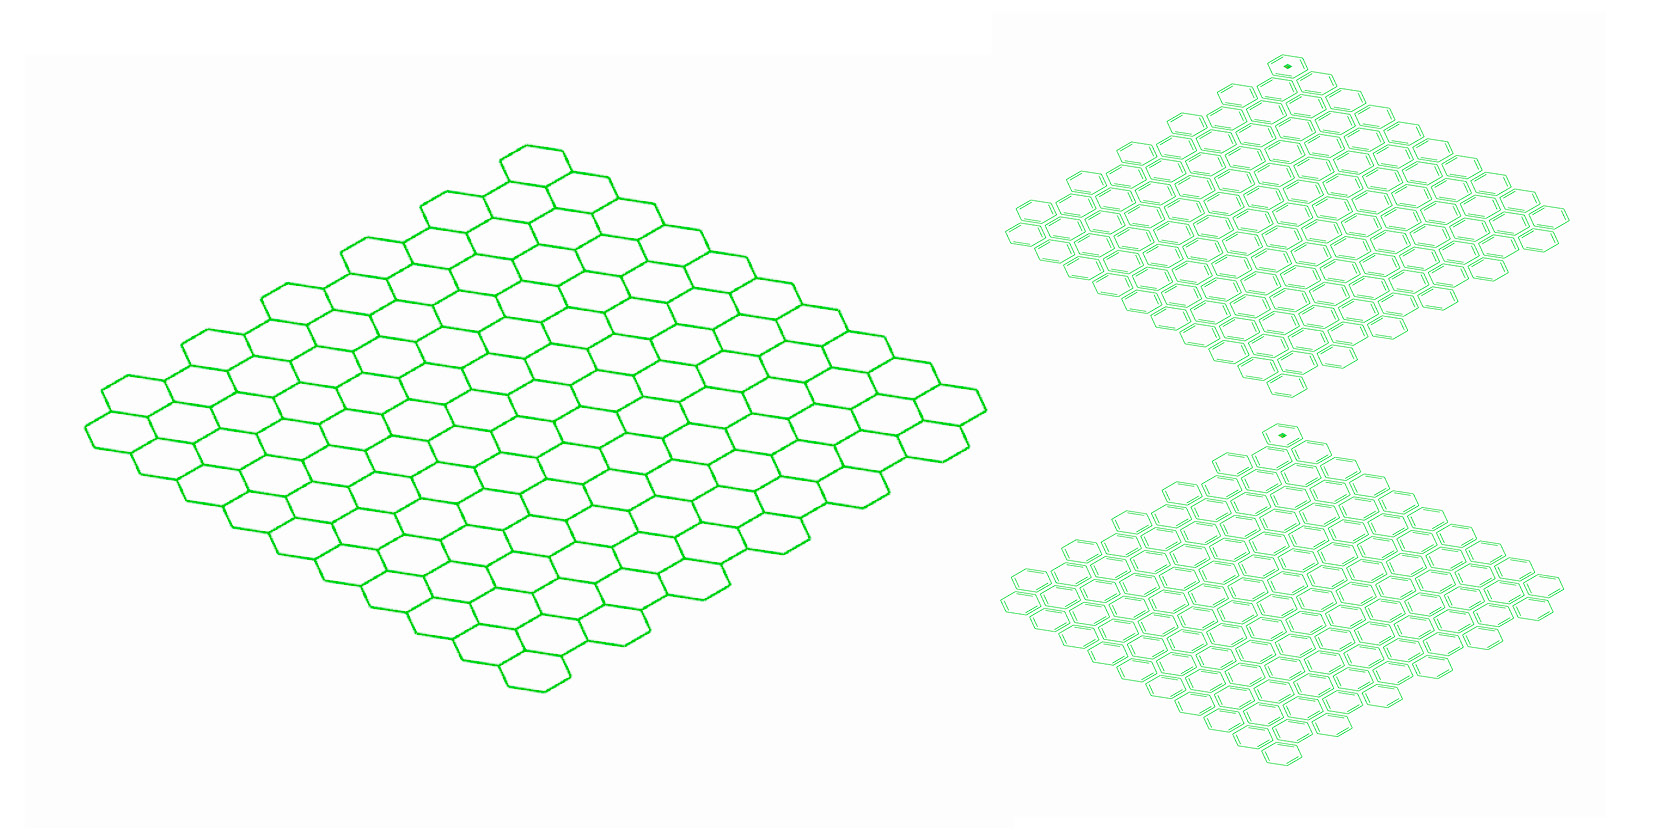
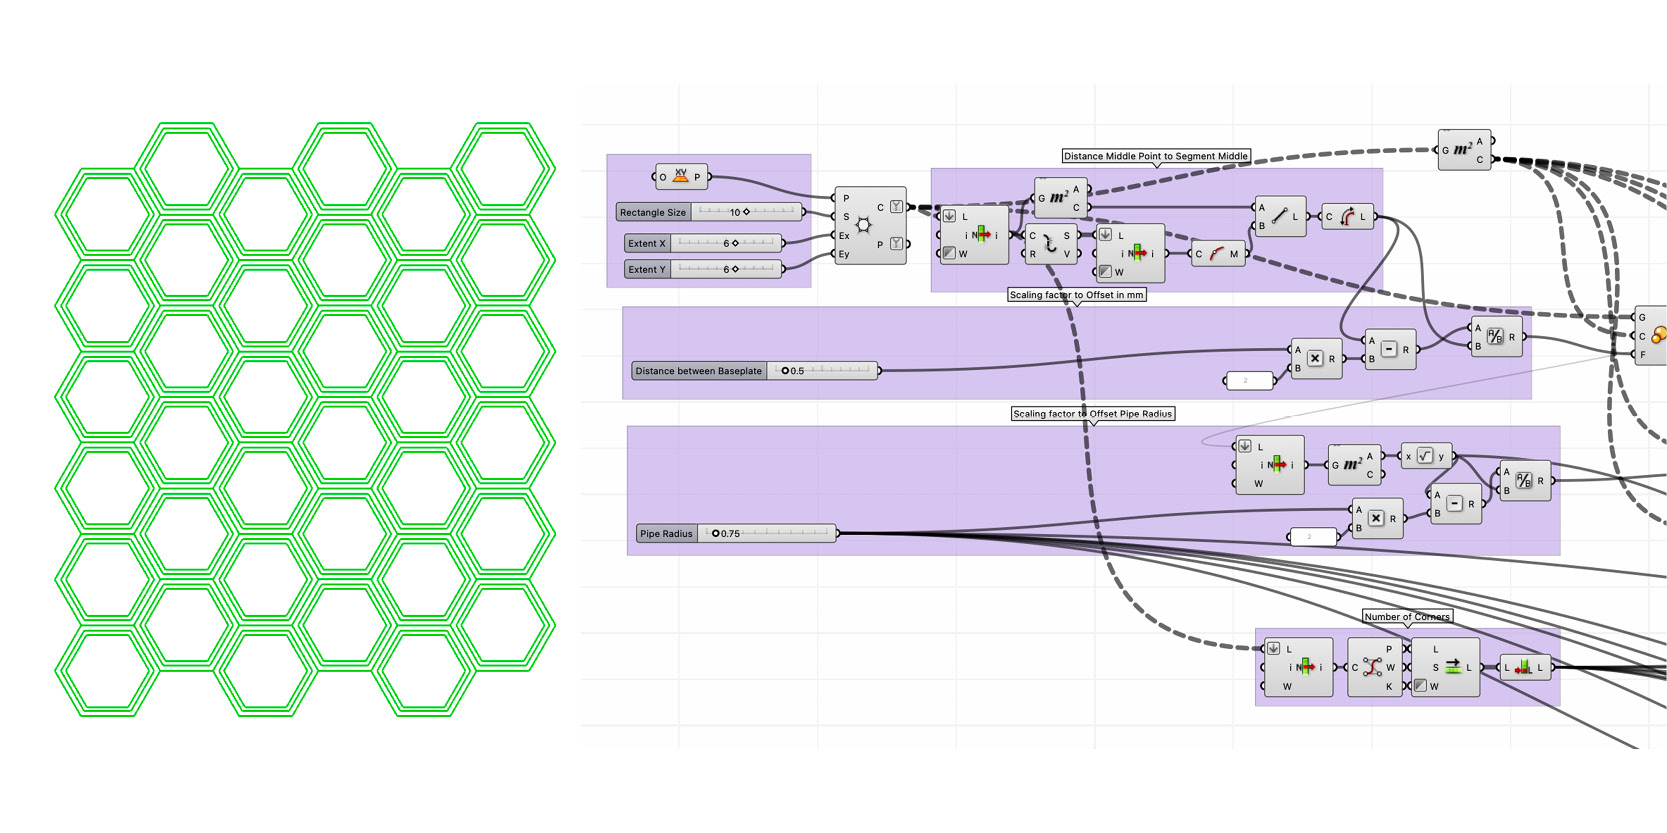
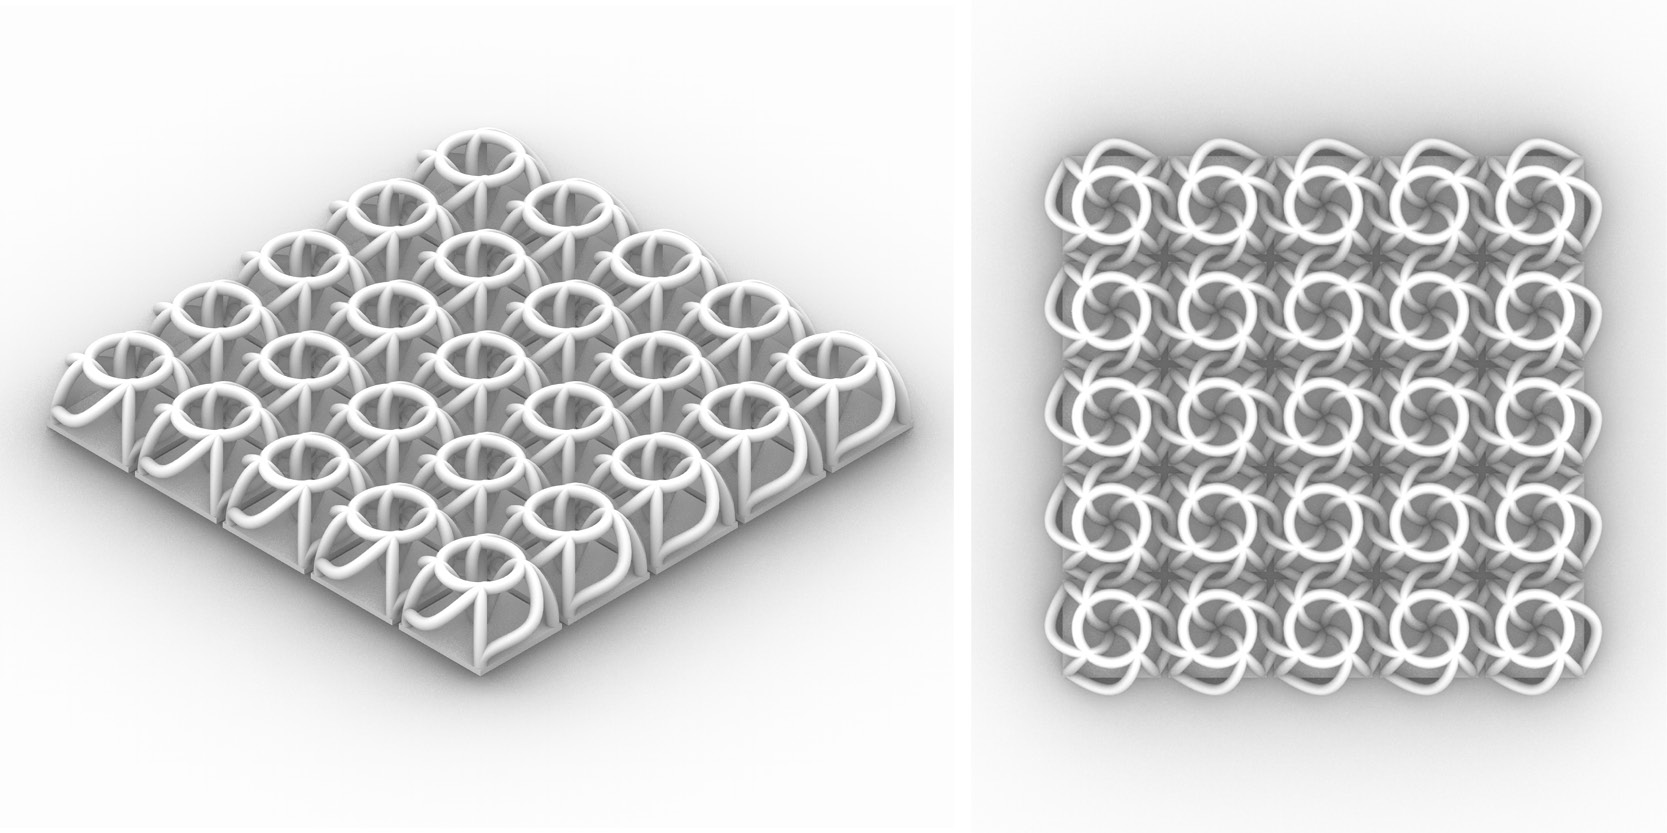
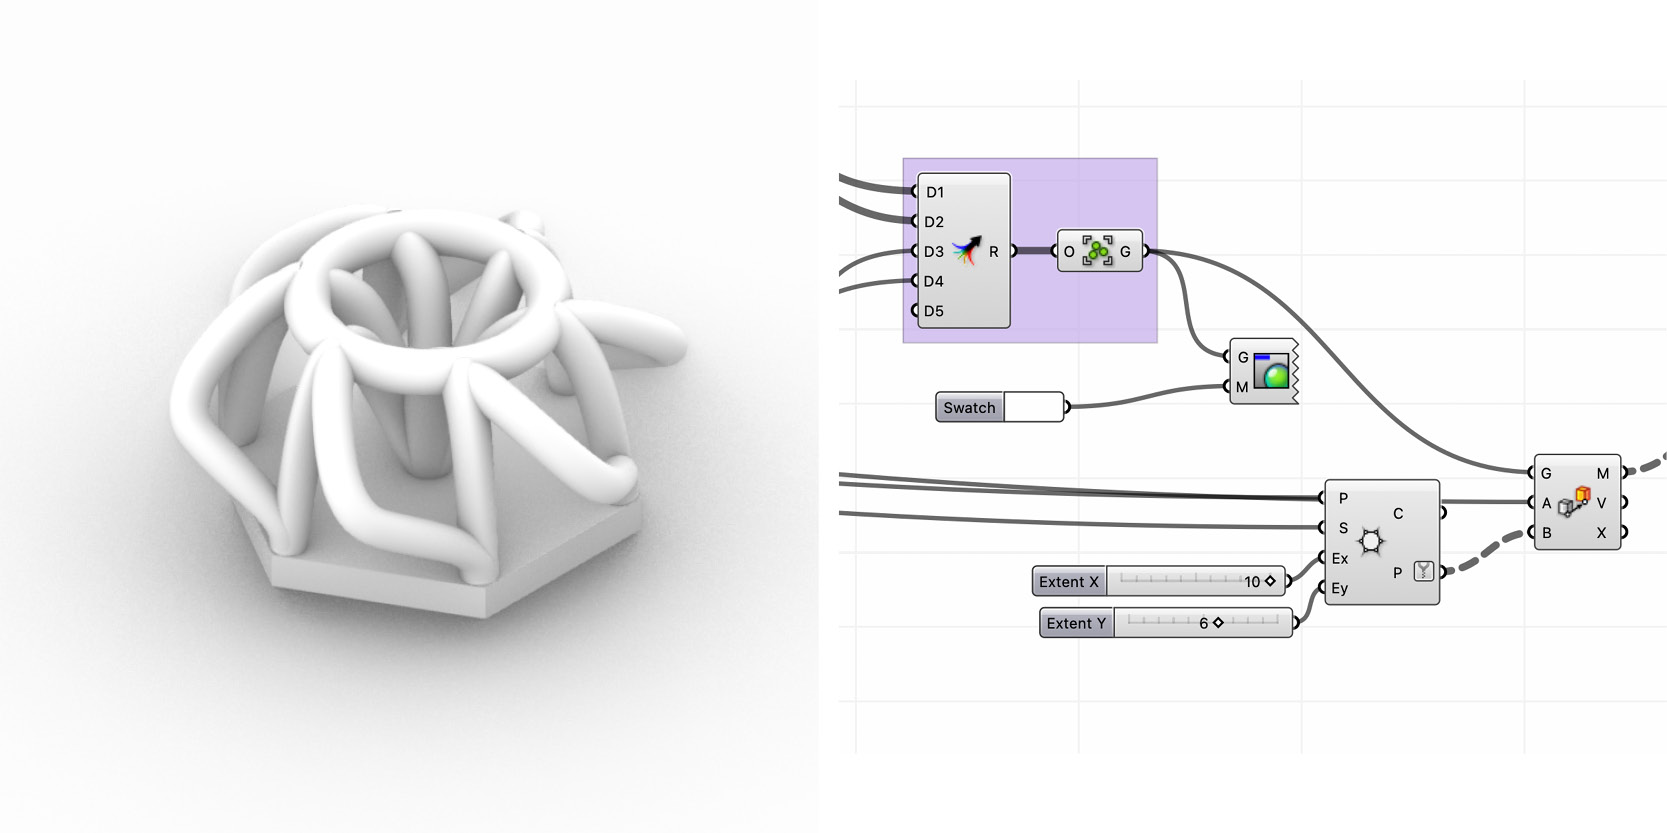
Hexagonal interlocking structure
starting with a grid again and offsetting it multiple times
creating intersecting circles and move them upwards create multiple circles
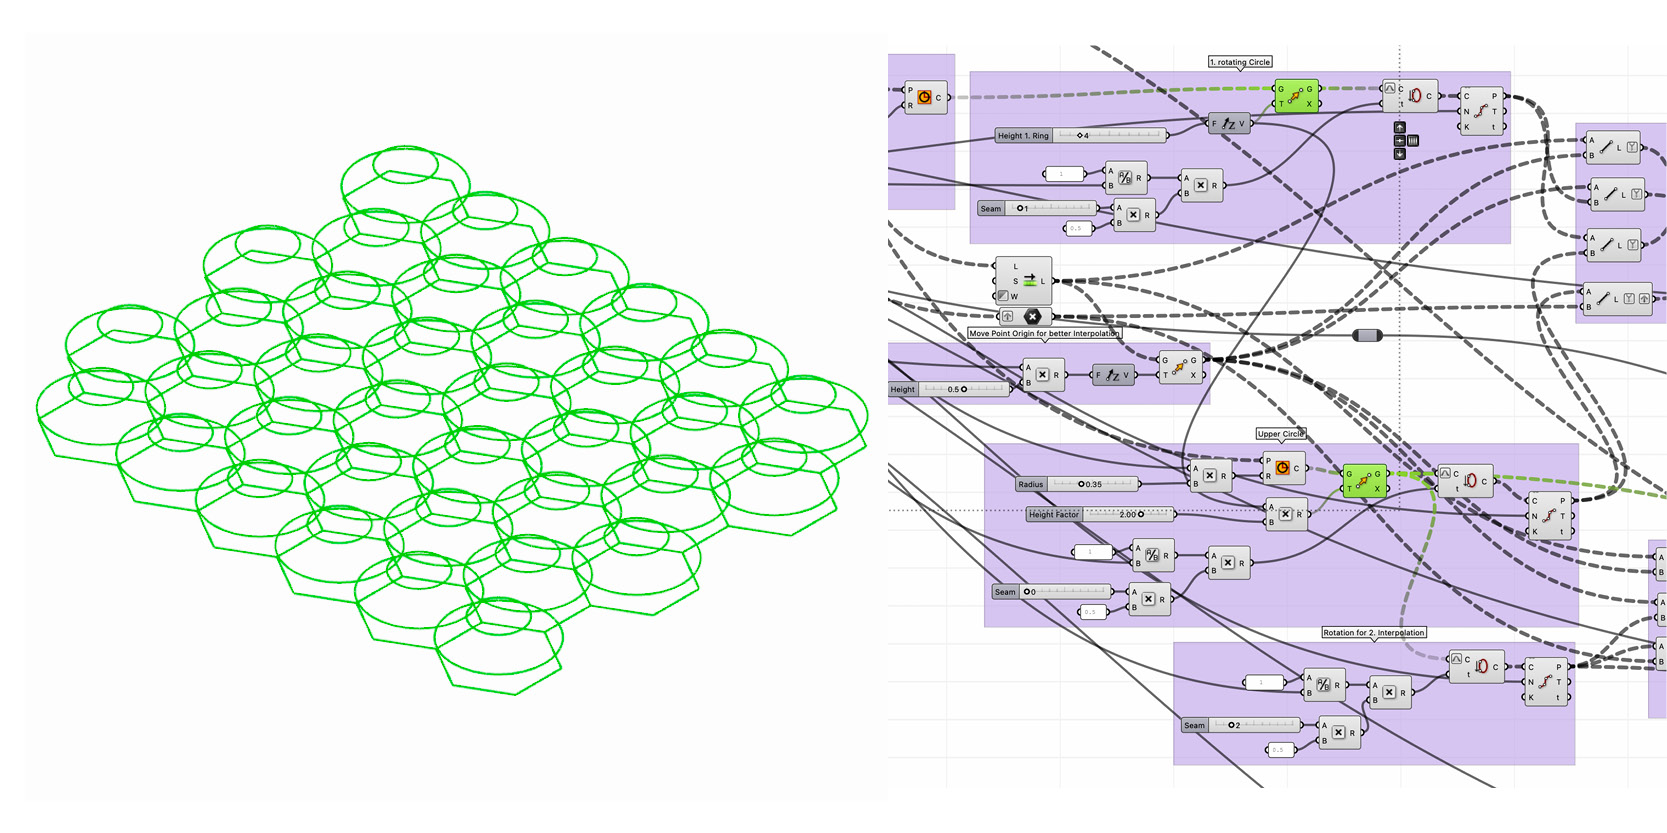
divide and rotate curves (circle and hexagonal) and connecting the lines for the circular structure
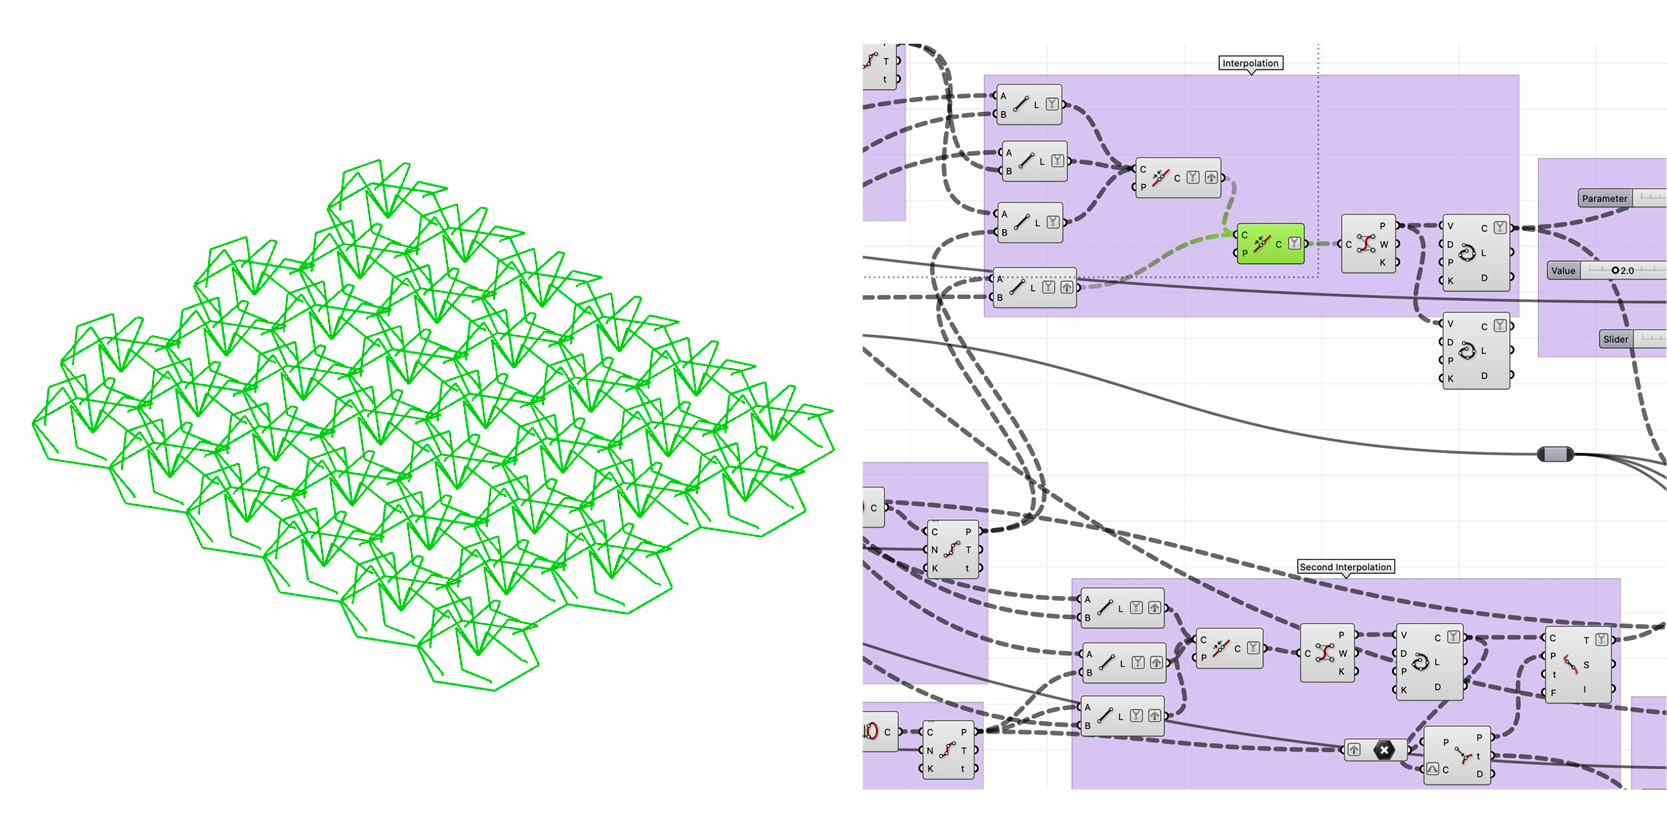
divide curves again (no rotation) and connecting the lines for the supporting structure
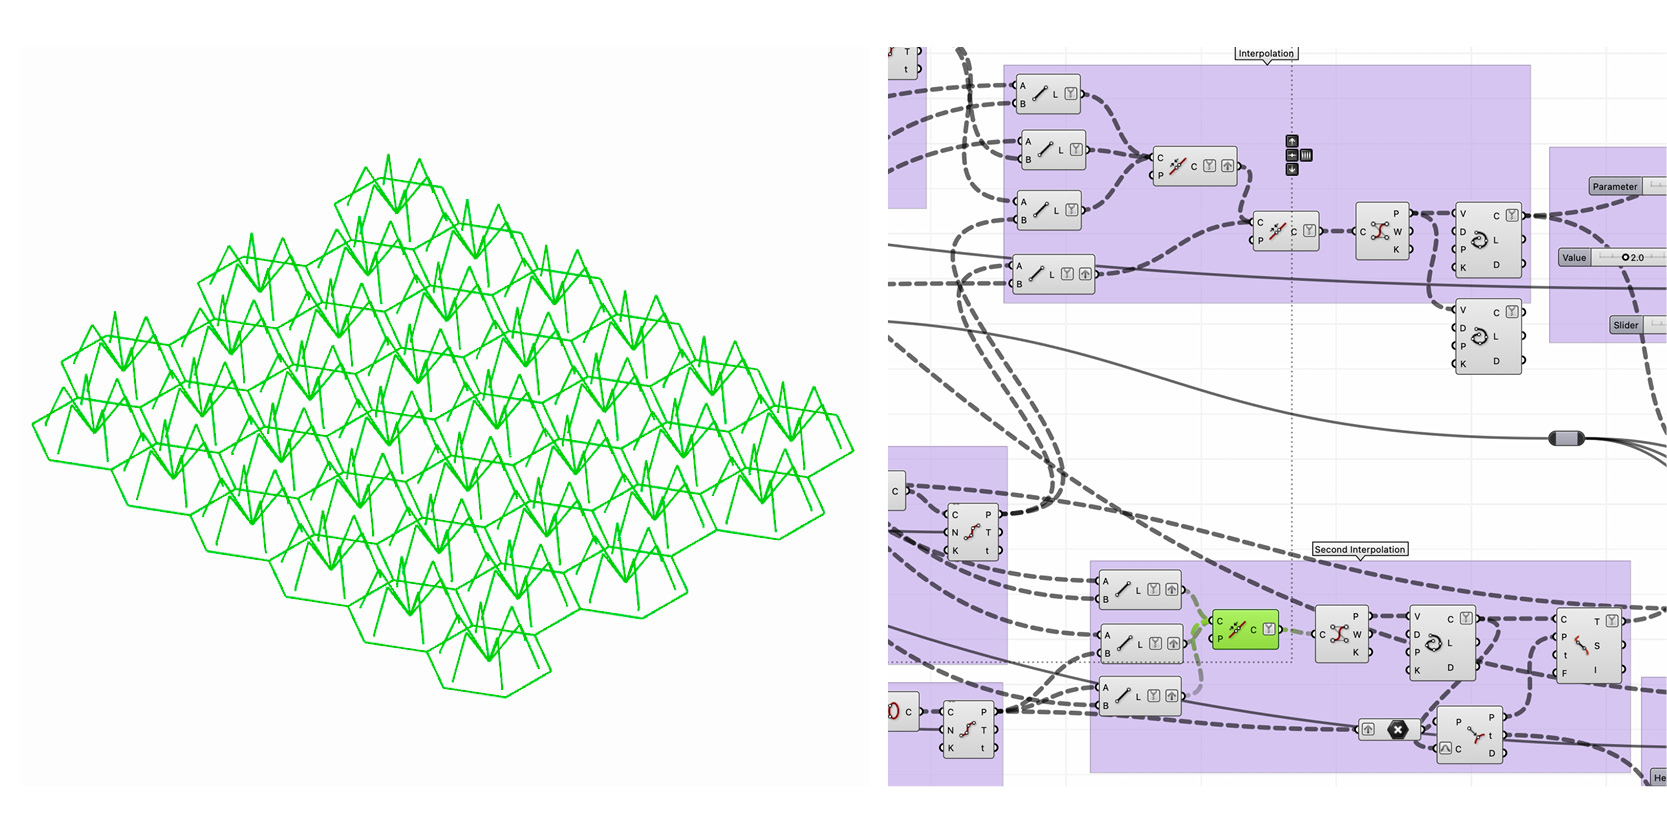
using control point component and interpolate for smooth curves

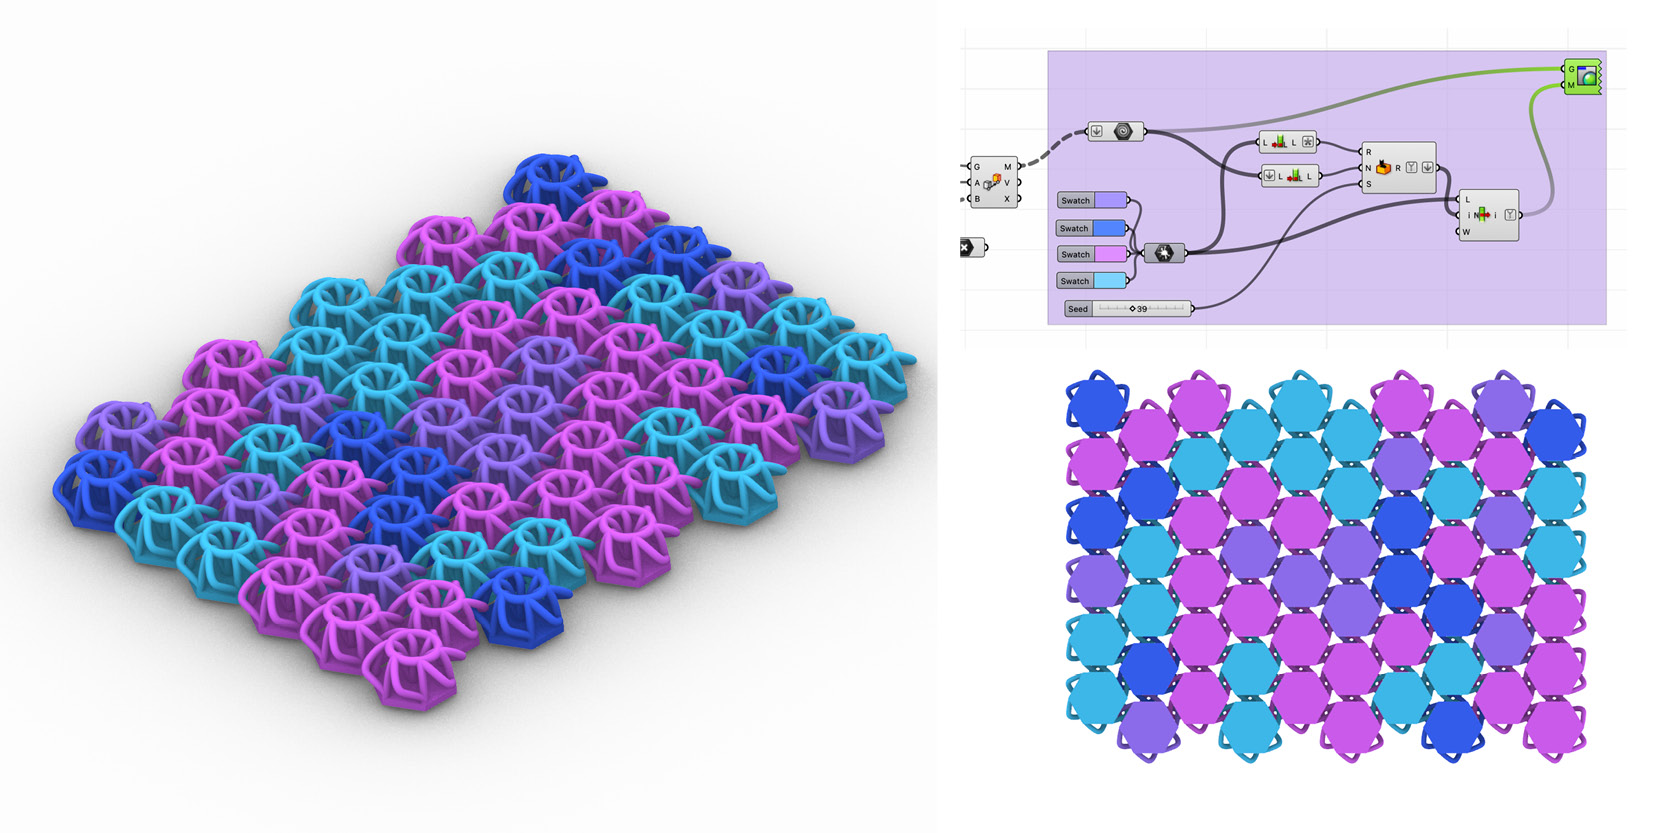
using pipe component to extrude the curves and colorize it
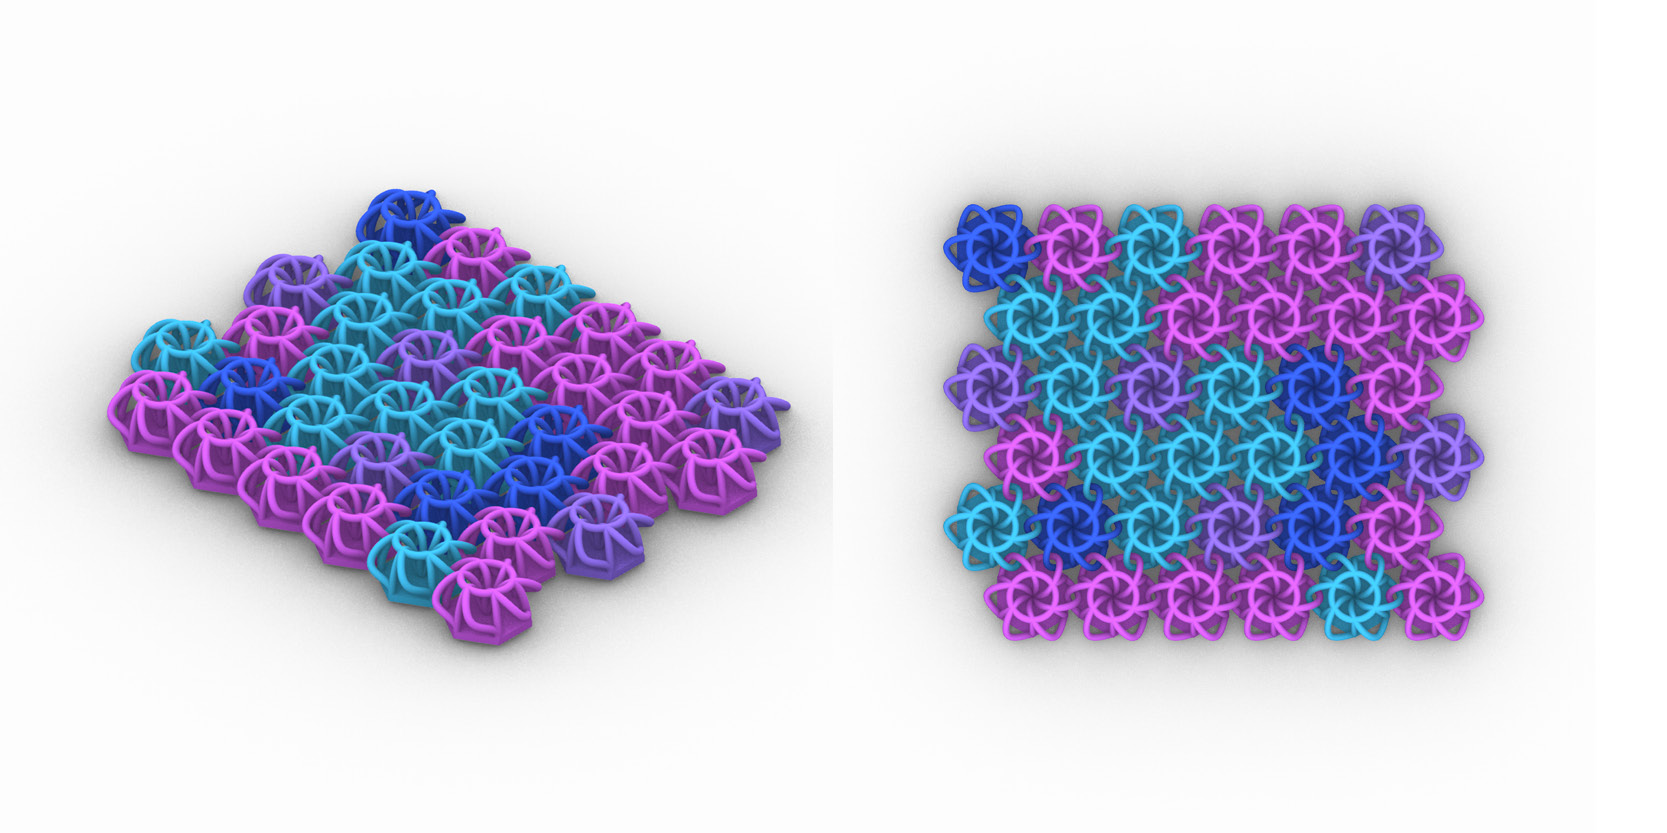
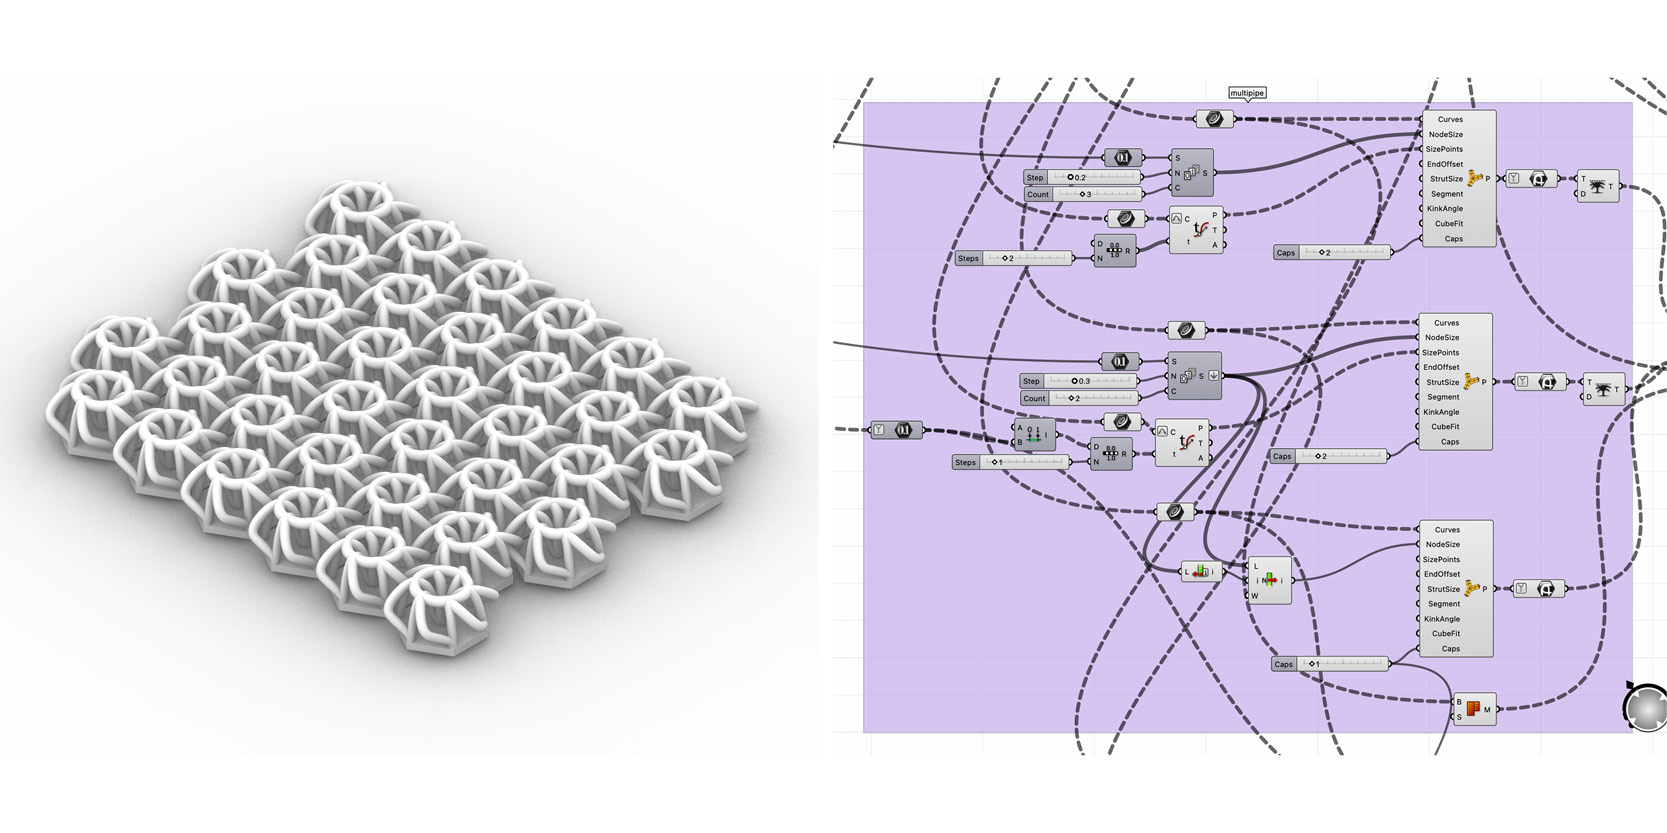
Connections – for seamless additions
creating rotating rectangles and solidify them. finally perform boolean operation
Mesh Pipes
script also works with mesh / multipipes
Three – rectangular structure
Overview
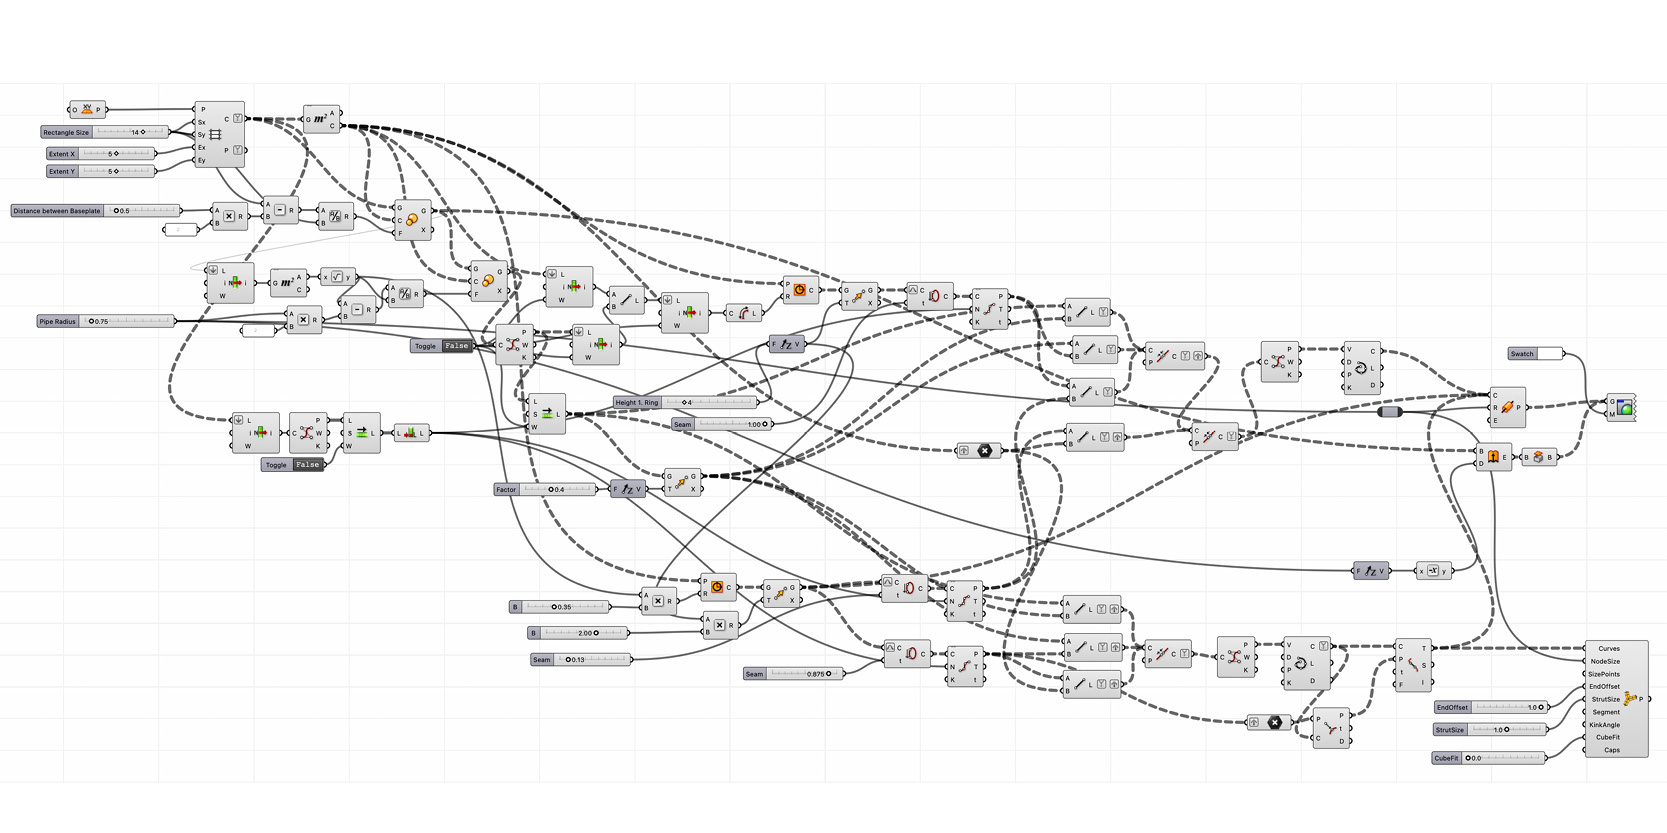
also works with rectangles
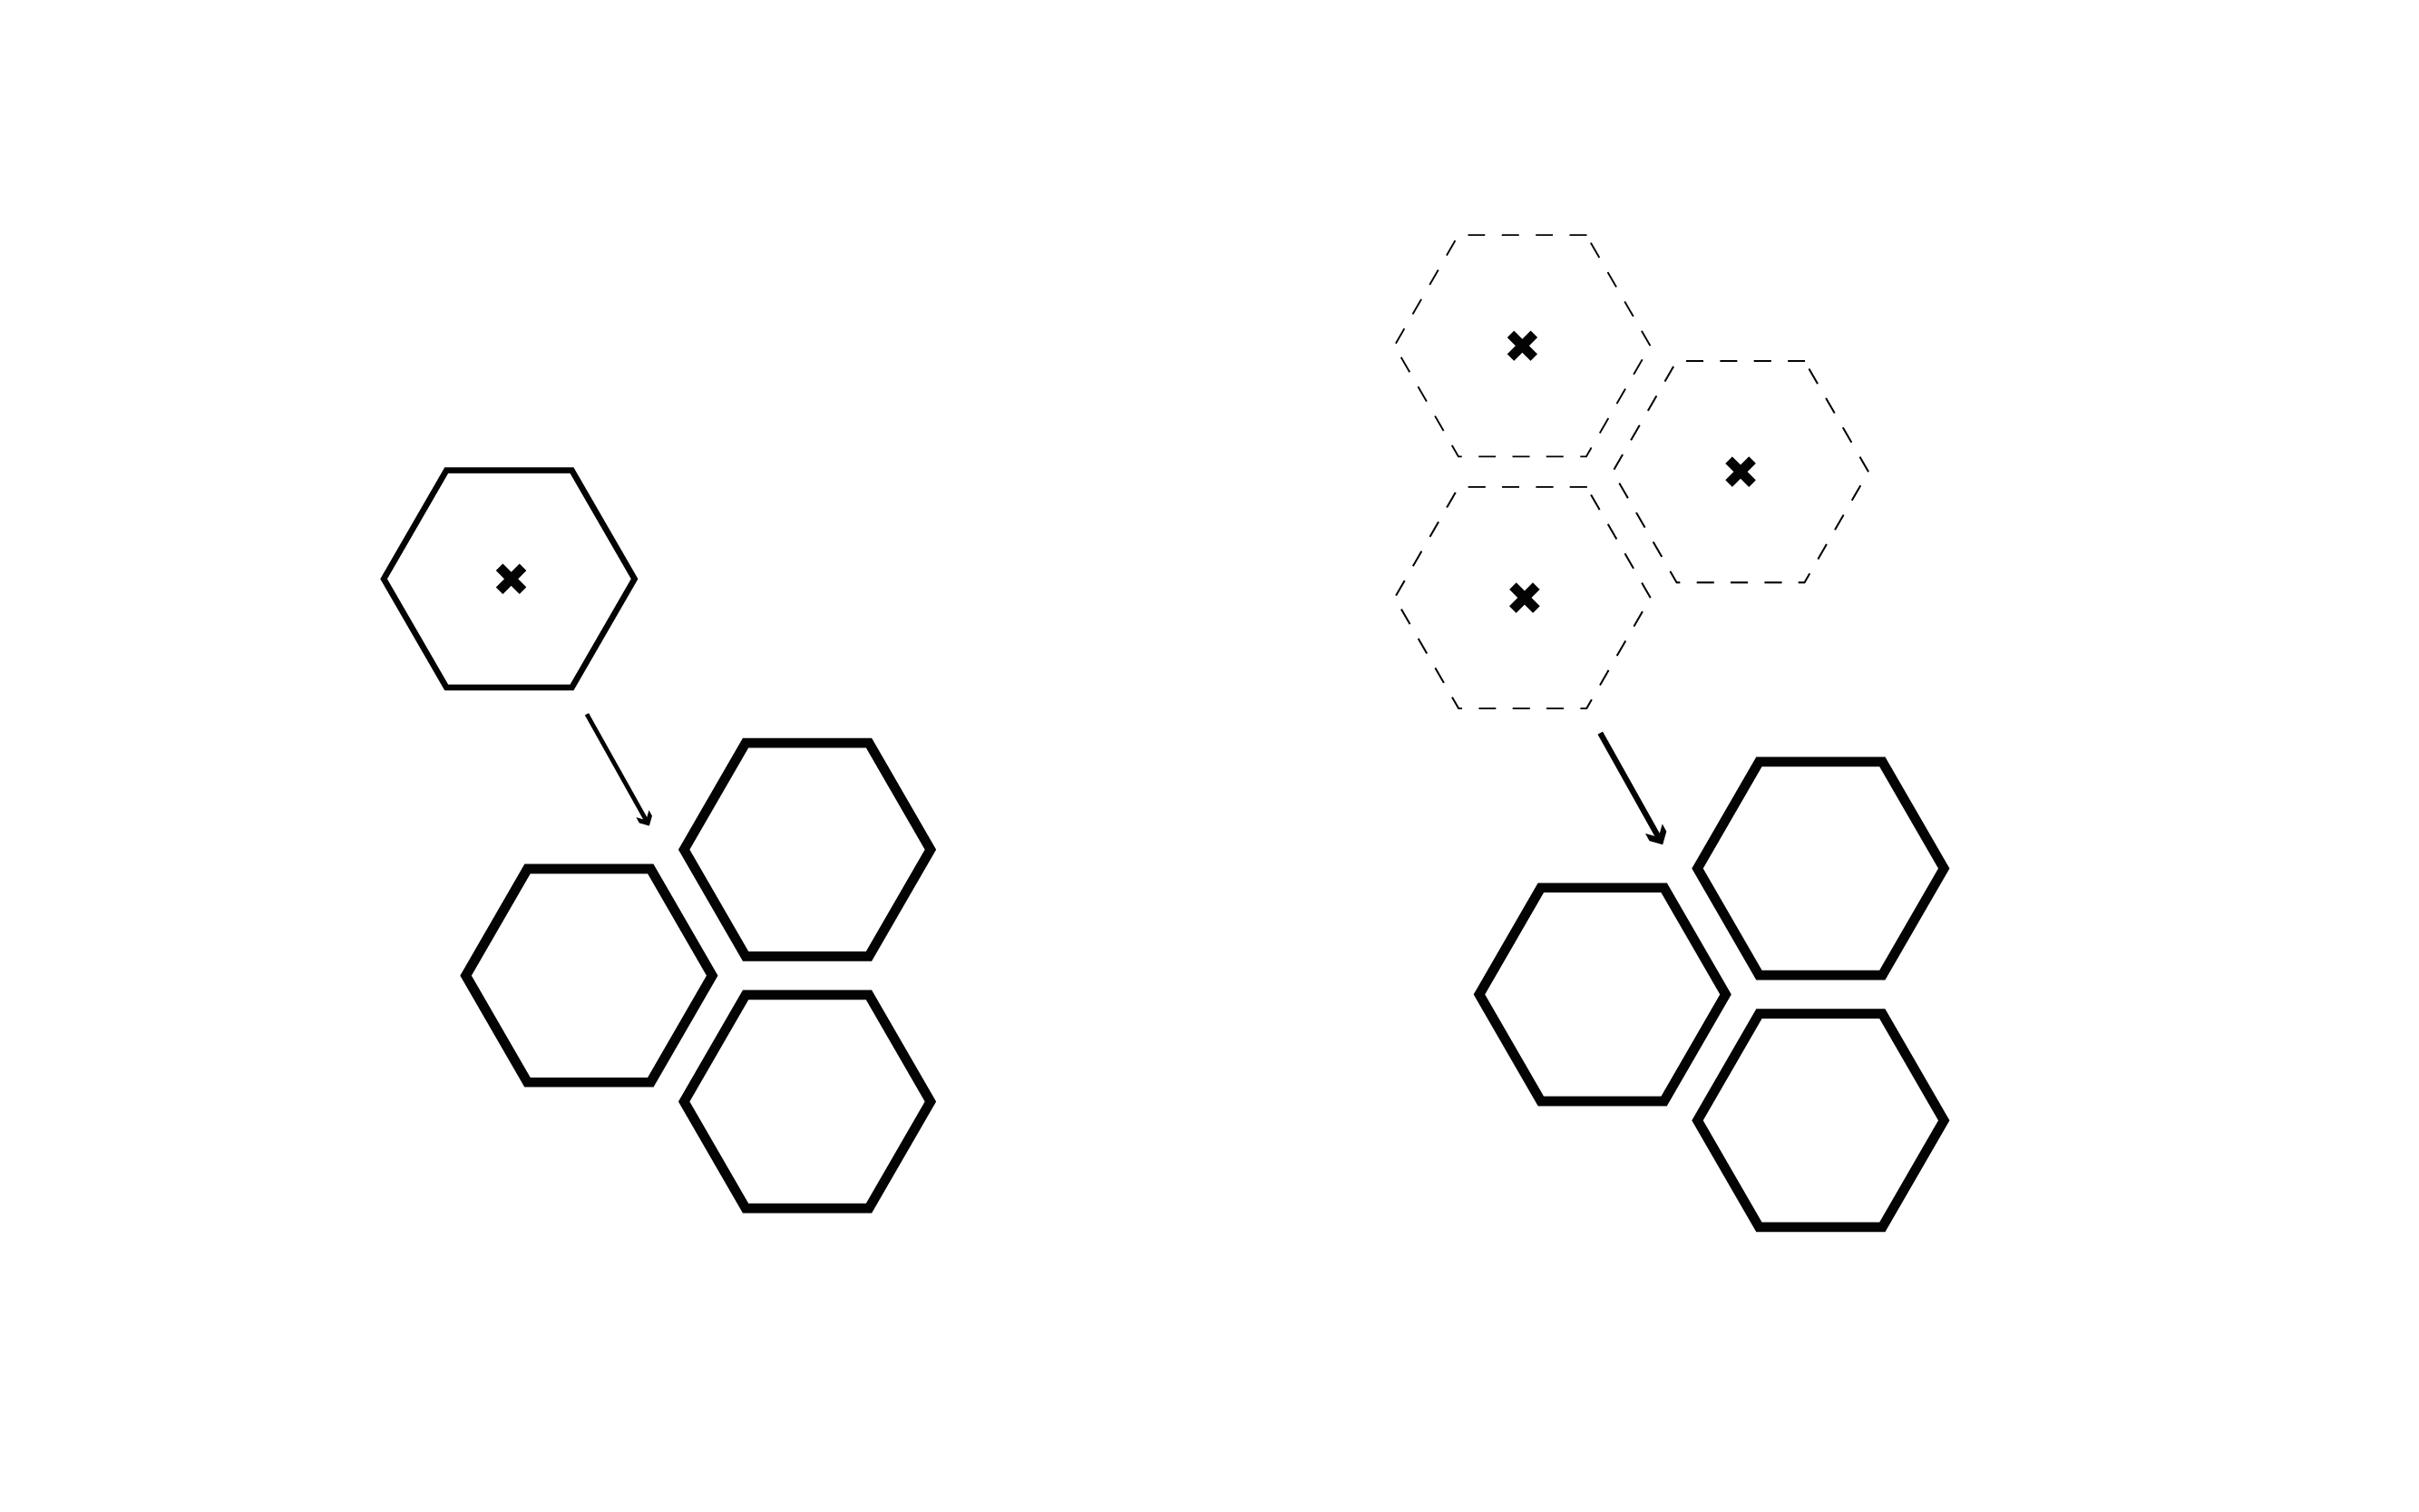
Four – the other way round
creating just one cell
… & move it to several points
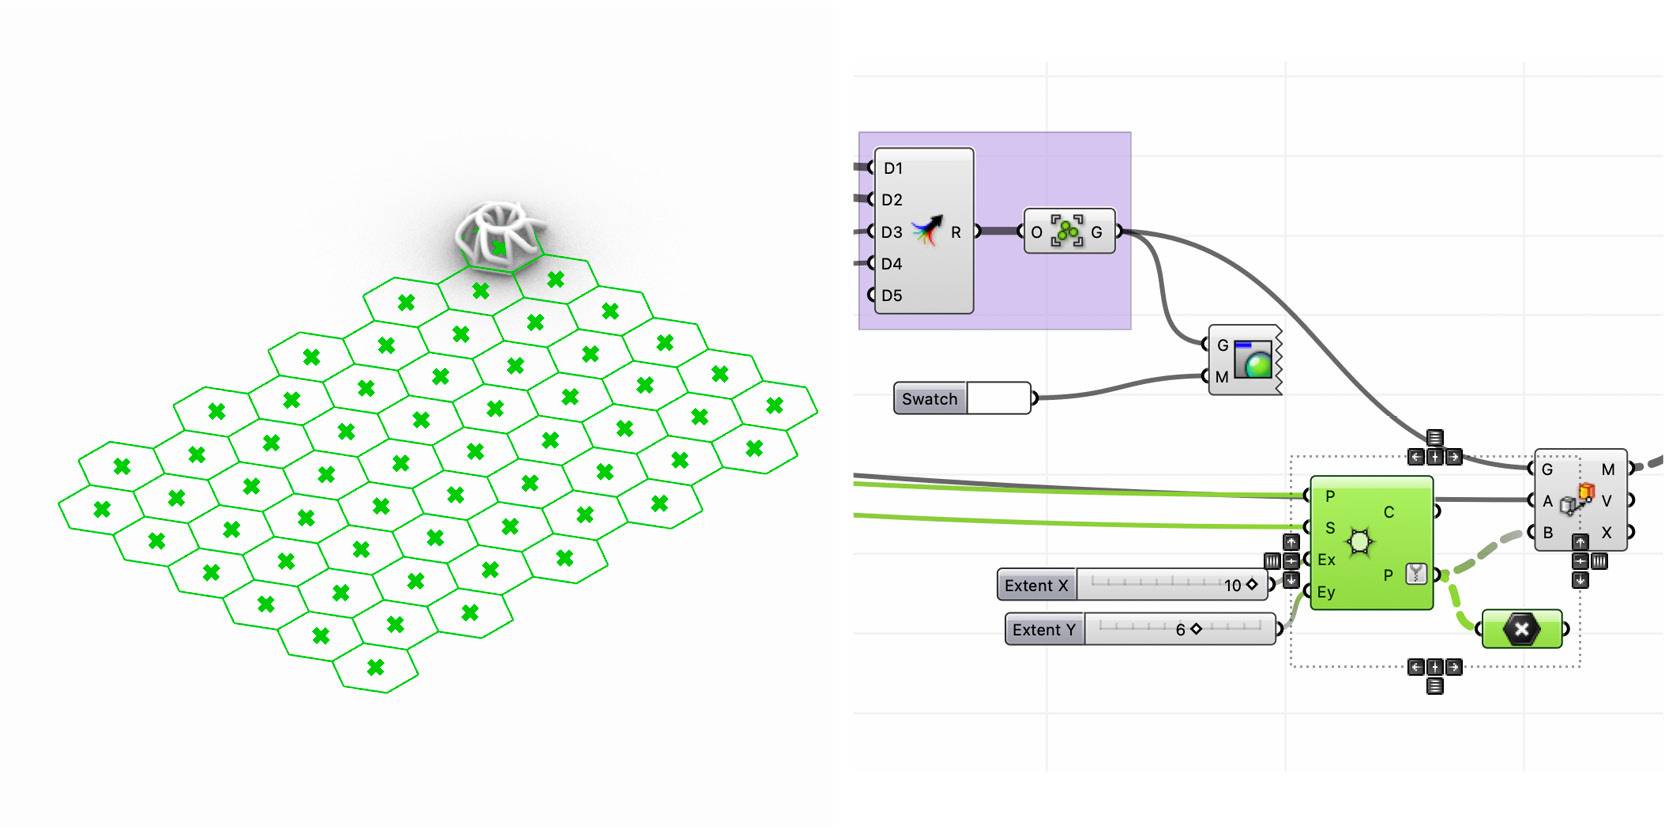
faster editing and easier managable
Five – model photos

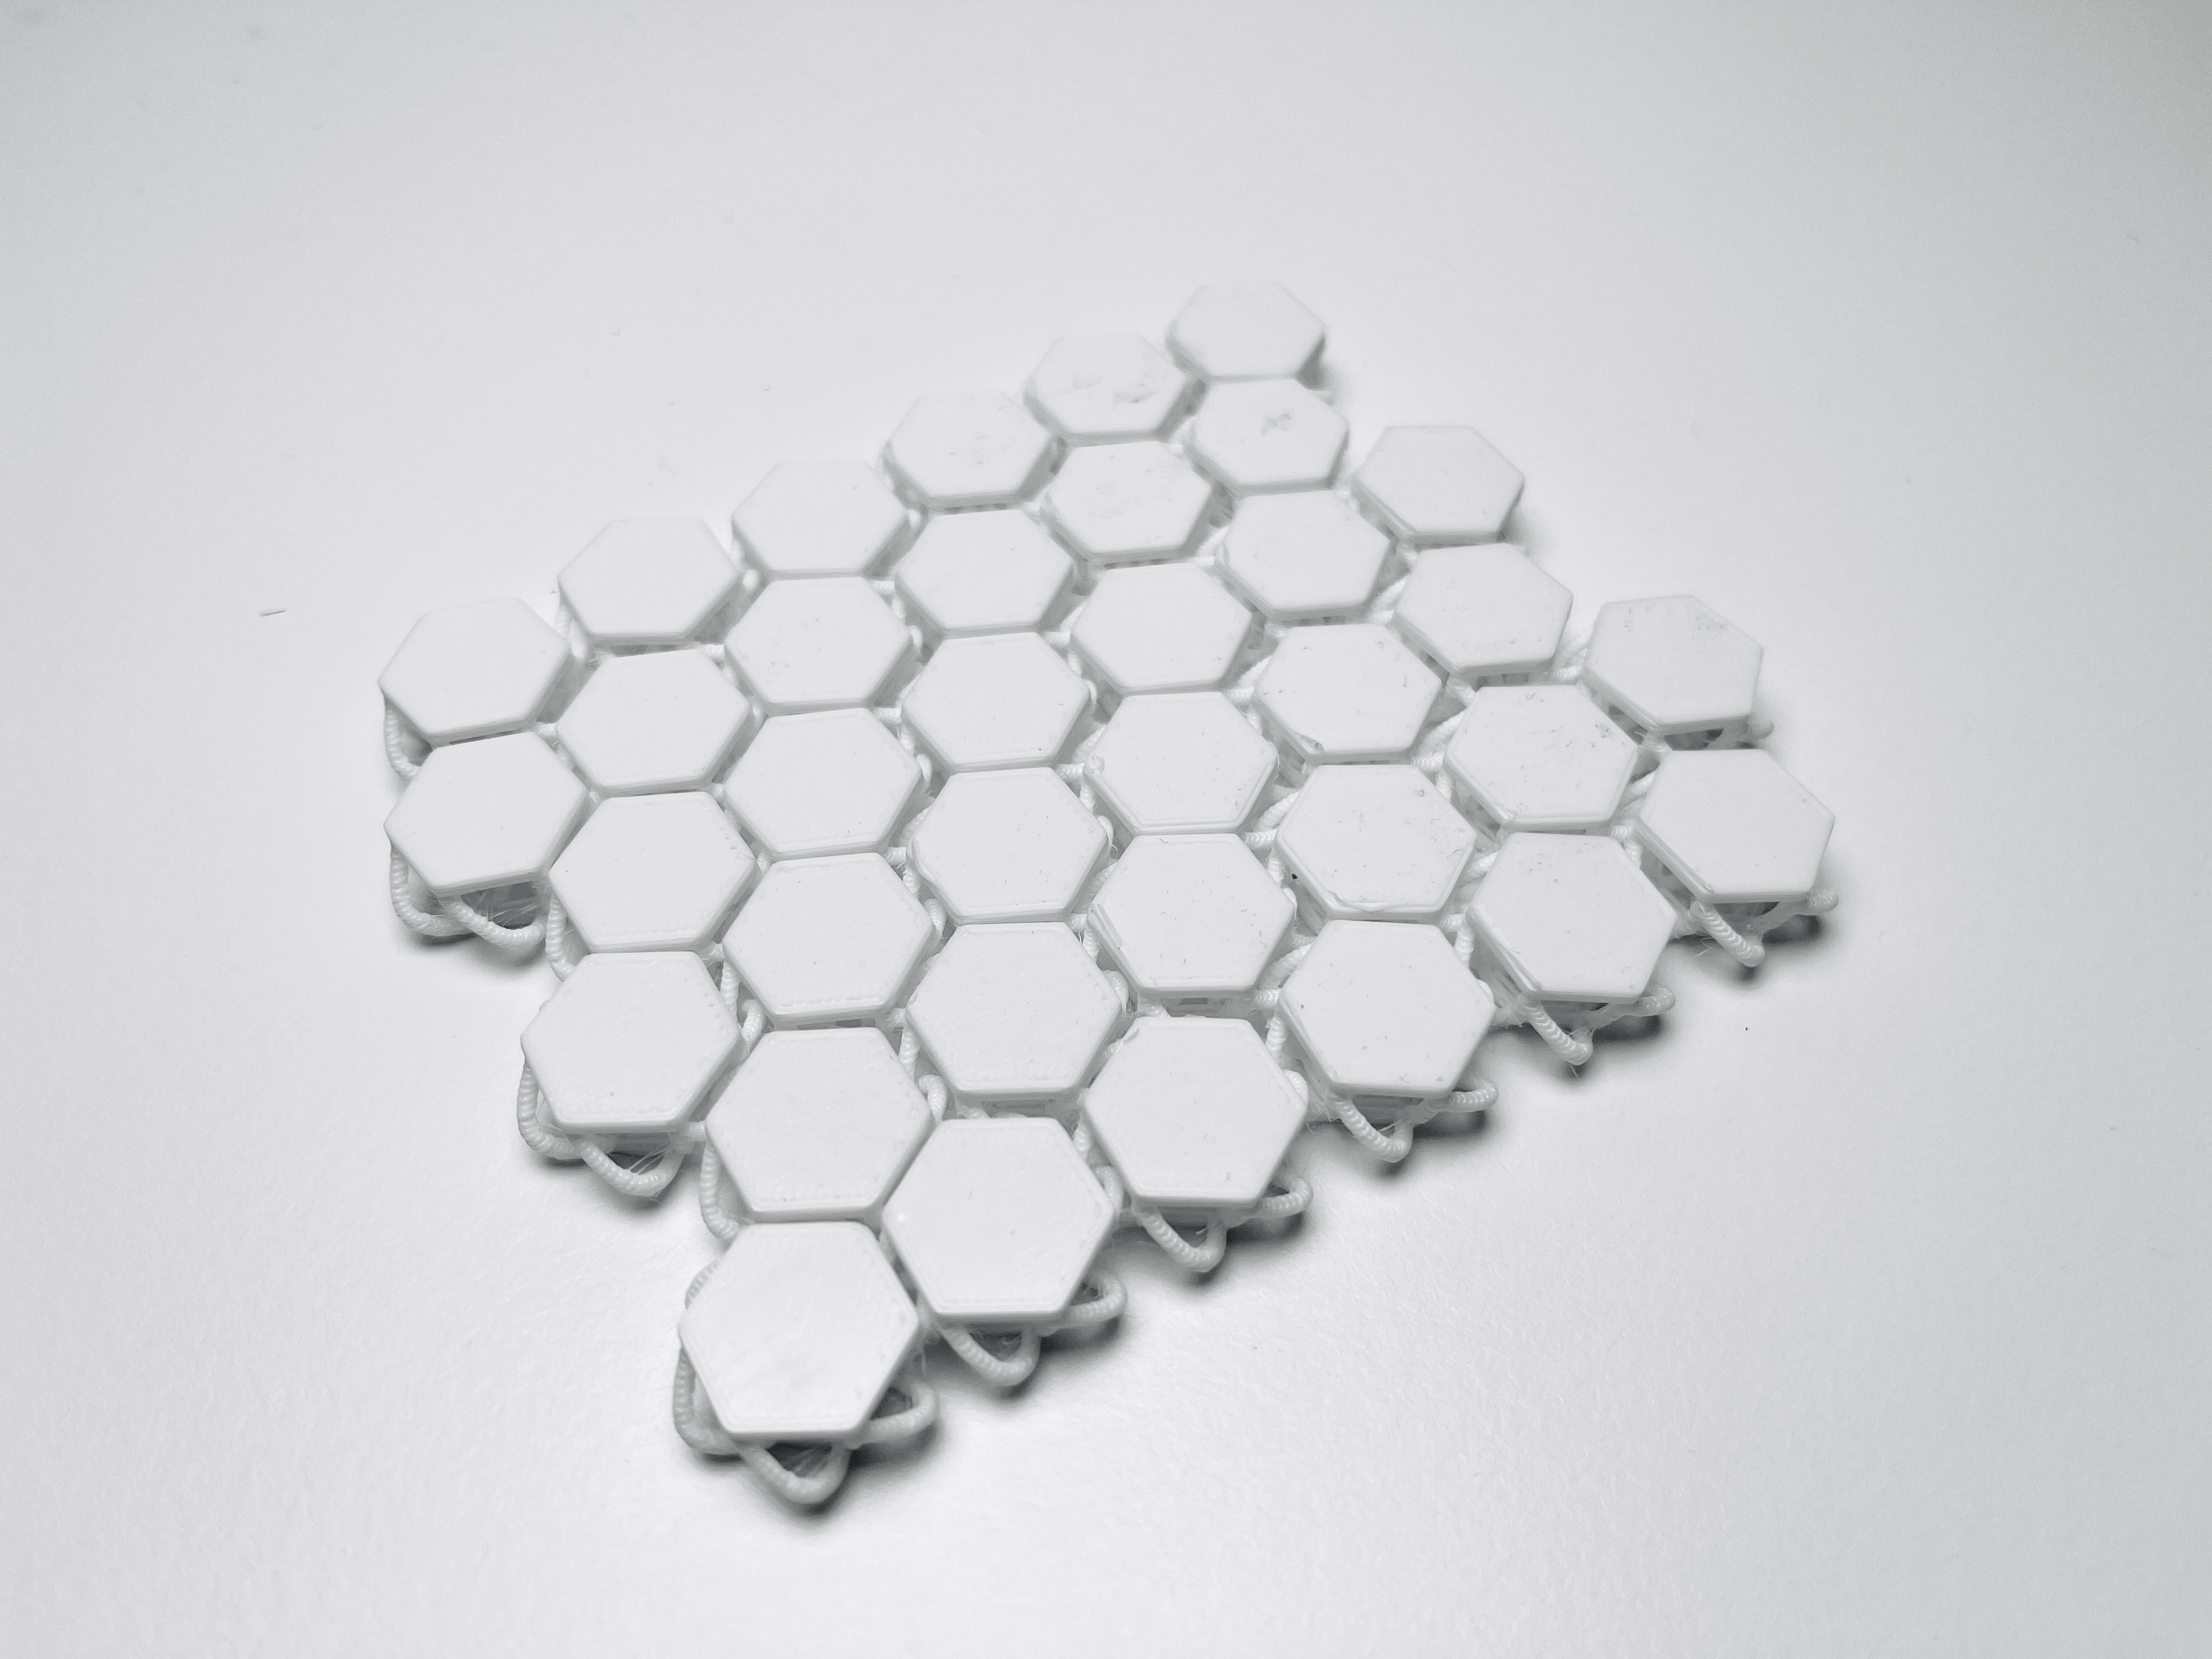
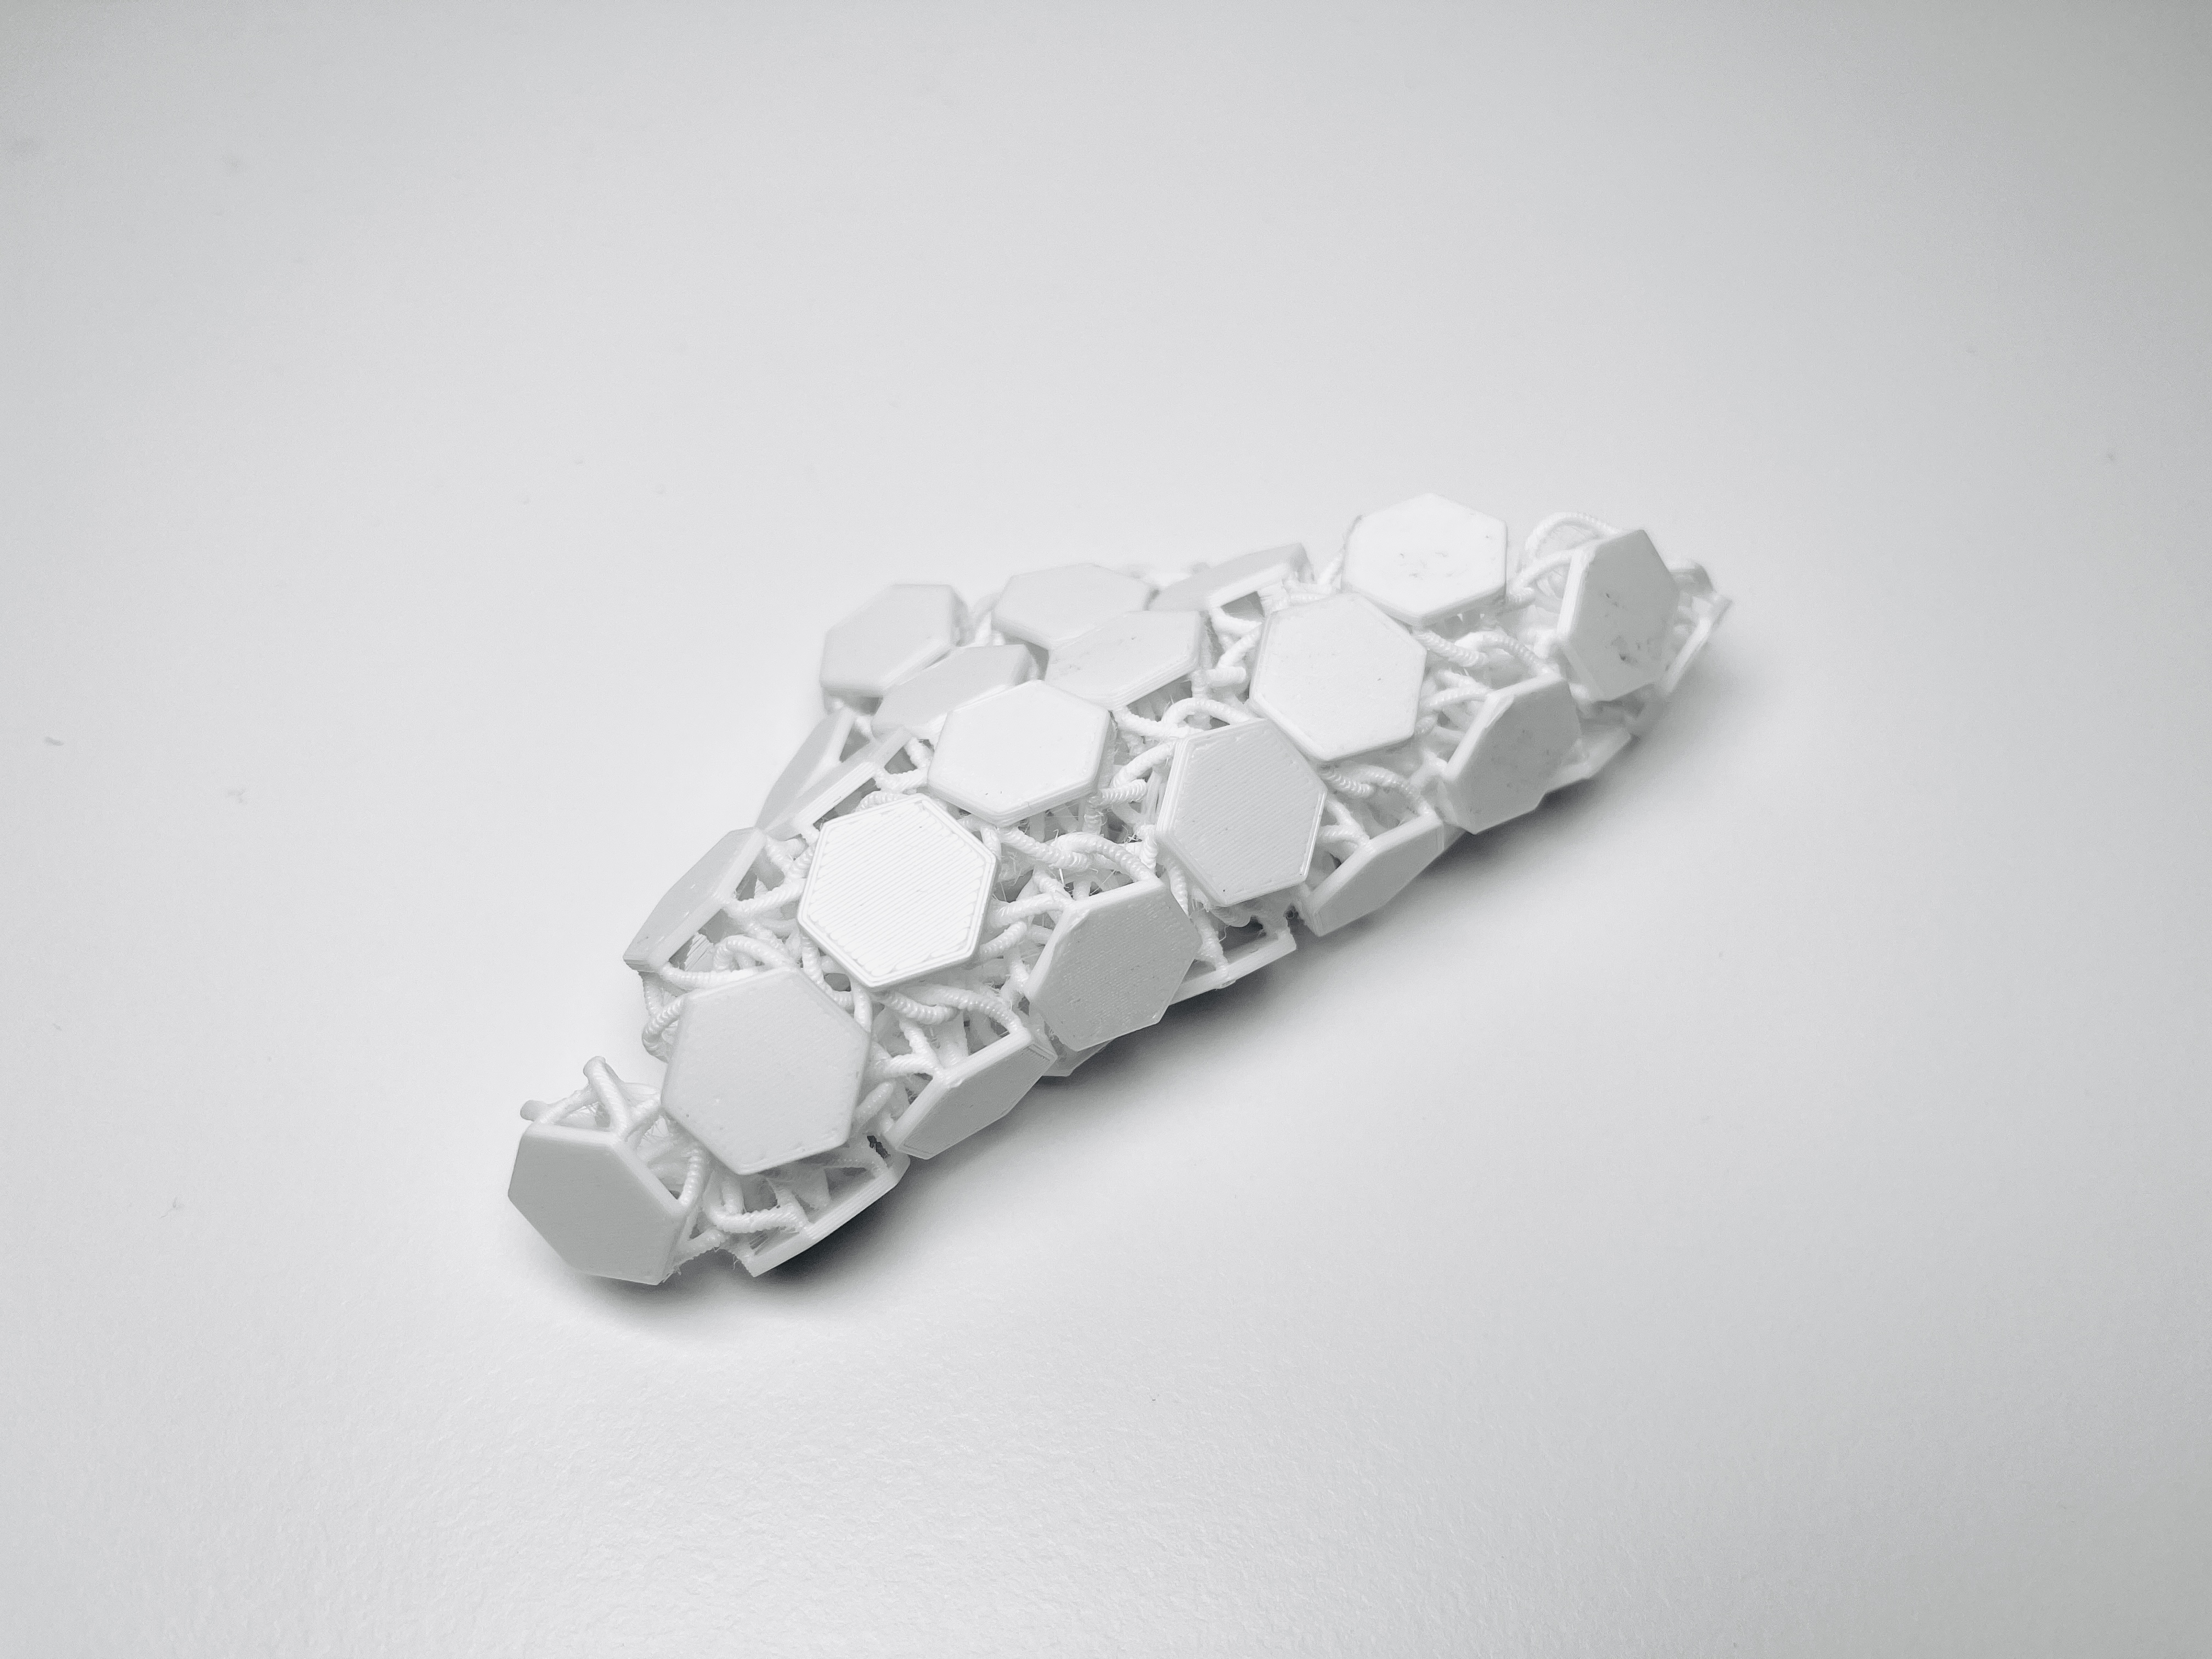

Files and Links
Grasshopper File 3d fabric hex
Add-On Pufferfish by ekimroyrp