INTRODUCTION:
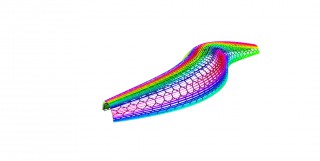
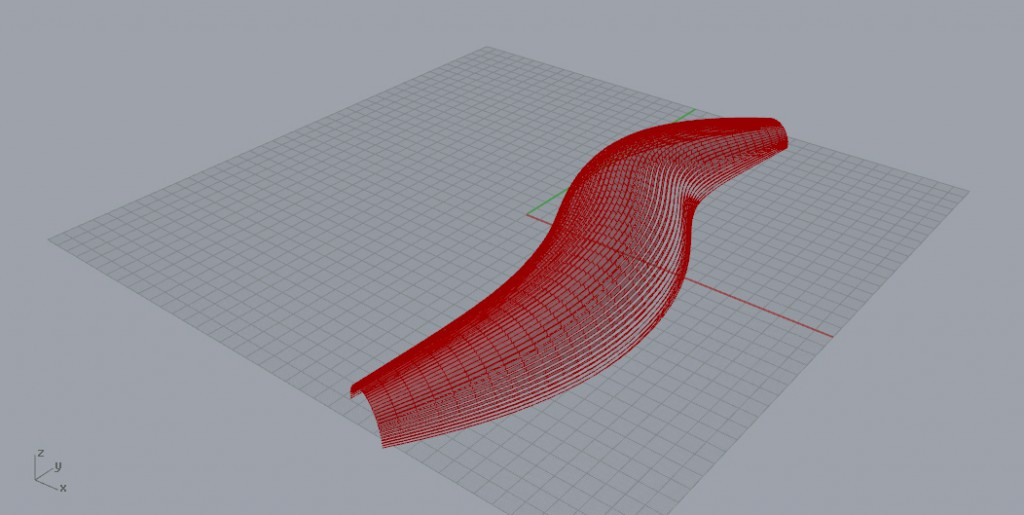
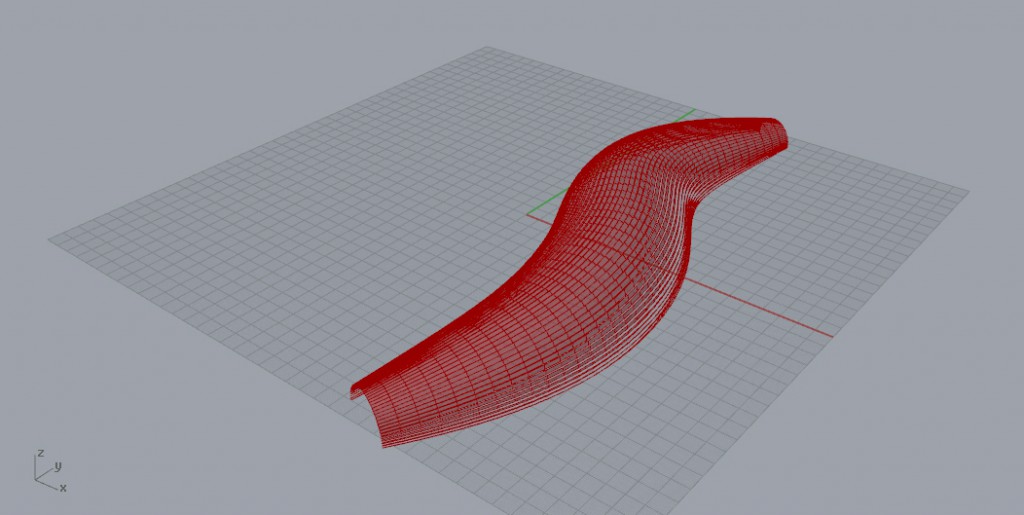
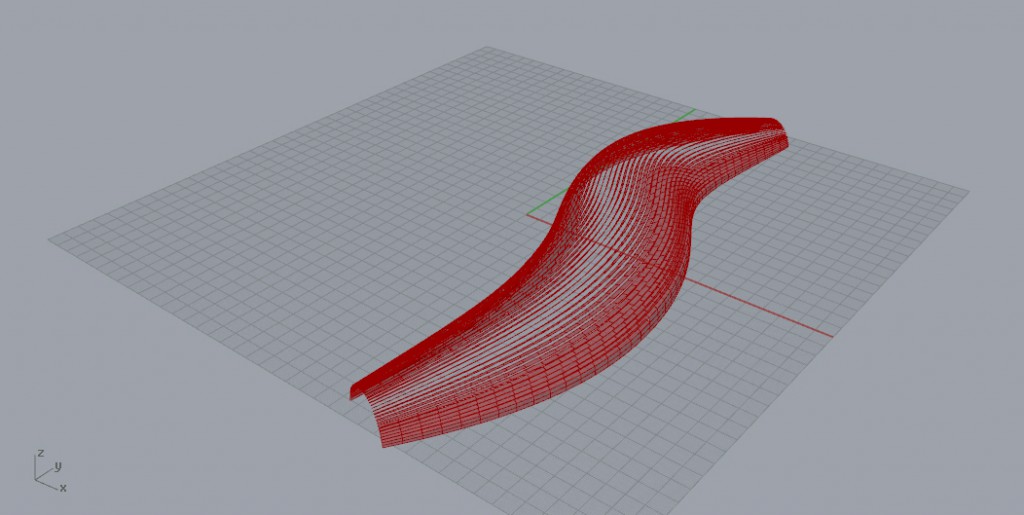
The main aim of this project is to realize a covered space where people can meet with frineds and spent some time outside; it could be used even if it’s not sunny, since it’s composed by two surfaces: the inner one is realized with an hexagonal structure of windows, that let the sun enters, the second one is composed by plates that move according to sun position and shade the space from too strong light.

To obtain the final project, I proceeded with the following steps:
- CREATION OF THE BASE SHAPE
- INNER SURFACE CONSTRUCTION: HEXAGONAL STRUCTURE
- OUTER SURFACE CONSTRUCTION: PLATES BASE CONSTRUCTION
- SUN CREATION
- SEVERAL OPTIONS IN PLATES MOVEMENT
Let’s have a look at the tutorial.
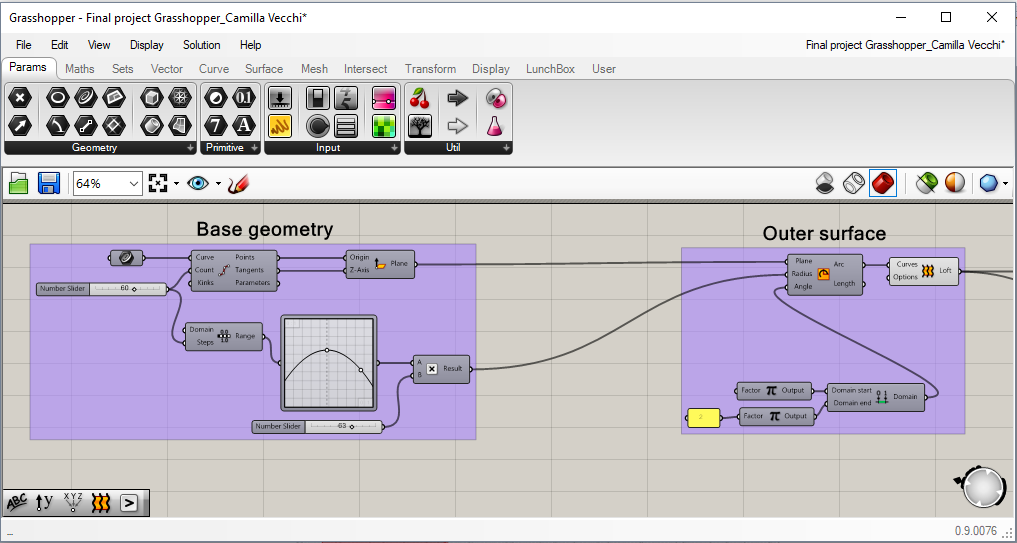
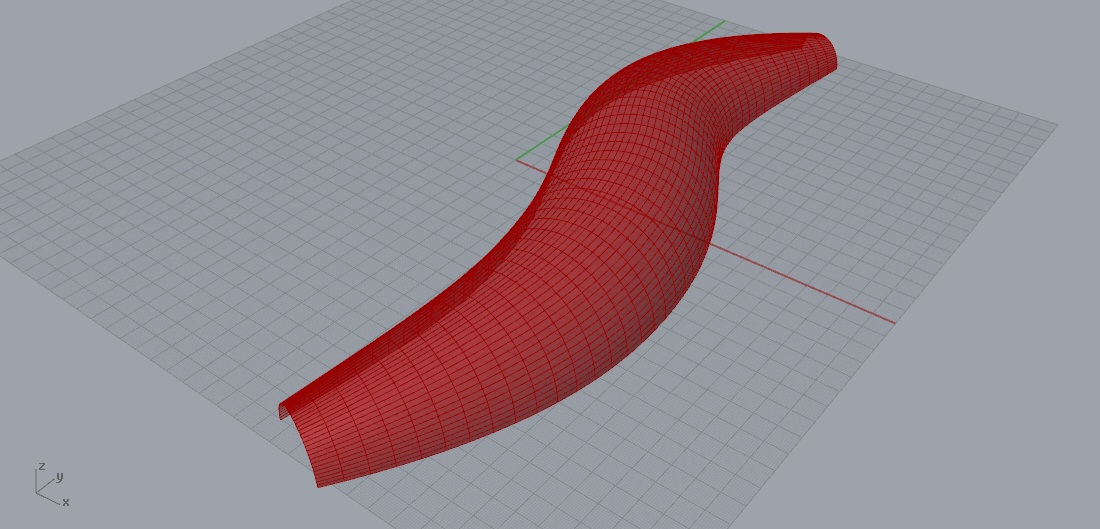
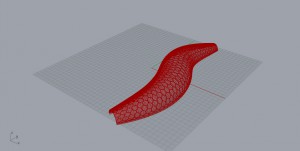
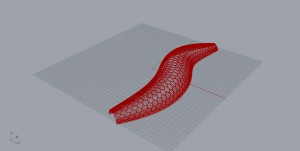
- CREATION OF THE BASE SHAPE
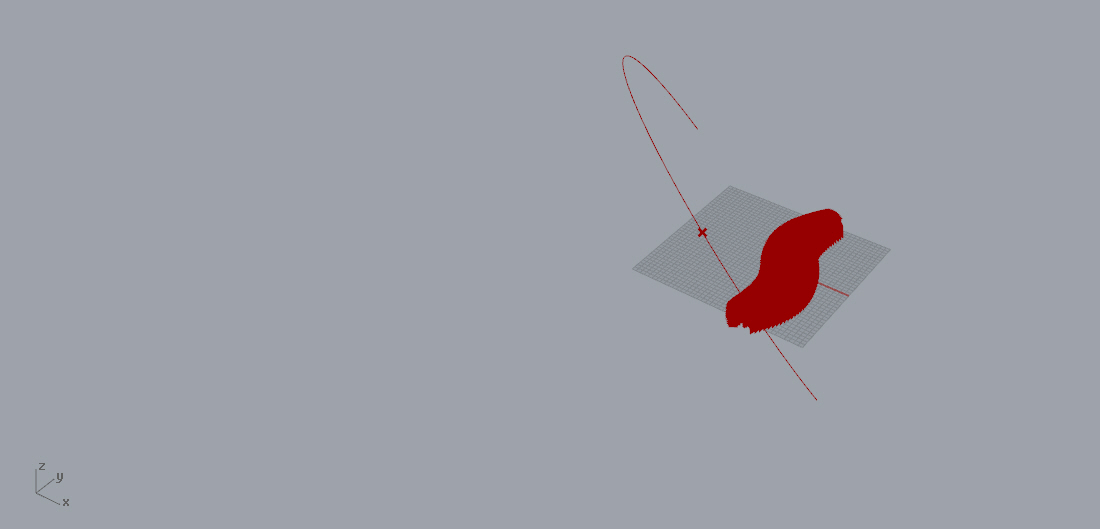
First, I opened Rhino and I drew the curve which will be the base shape that my project will follow; letting it selected, I opened Grasshopper > Params > curve component placed in the working space > right click on it > set one curve. In this way, the curve I have drawn is parameterized in the software.

To create the base structure, I should create some arcs following the curve so, first, I used Divide curve to have several points on it; then, for each of them I used Plane normal to set the plane on which create the arcs. With the tool Arc, I created the shapes with a feature in Radius: I wanted something more narrow at the two ends and larger in the middle, so I used Range, with the same Slider as before fo the Steps > in Range, I putted a Graph Mapper with parabolic shape. To turn them in the right direction, I used Create Domain, with Start π and End 2π, and I used it in Angle.
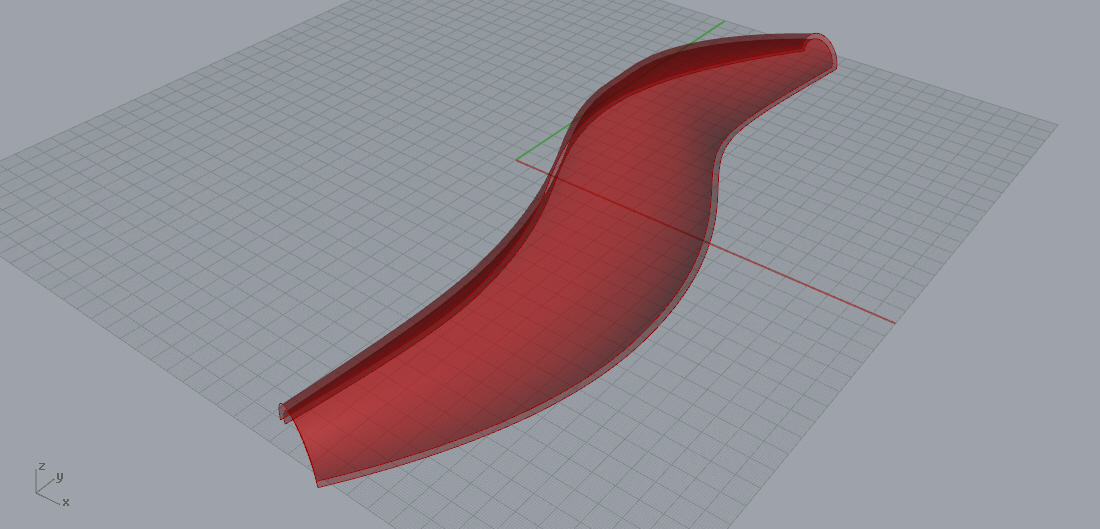
I used Loft to have the final base surface.

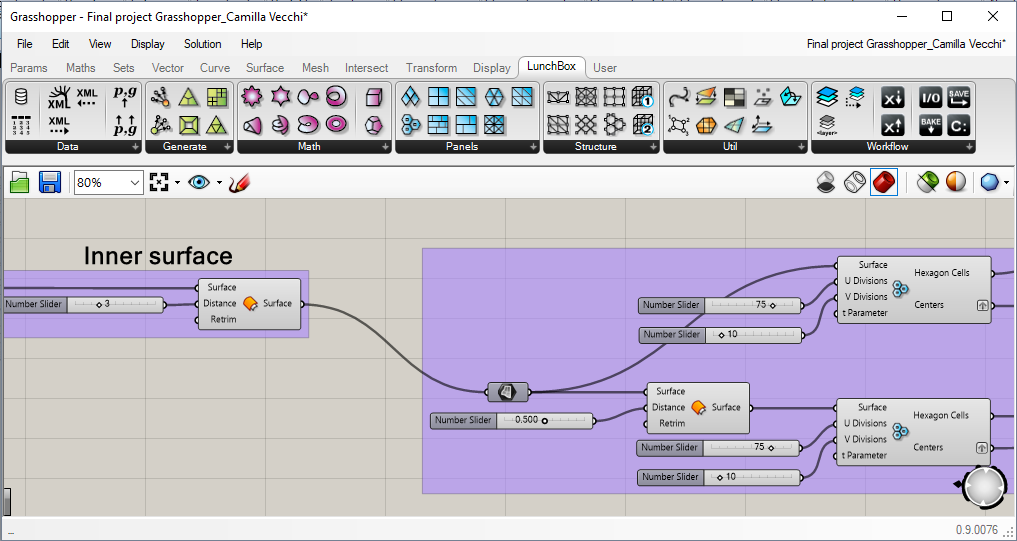
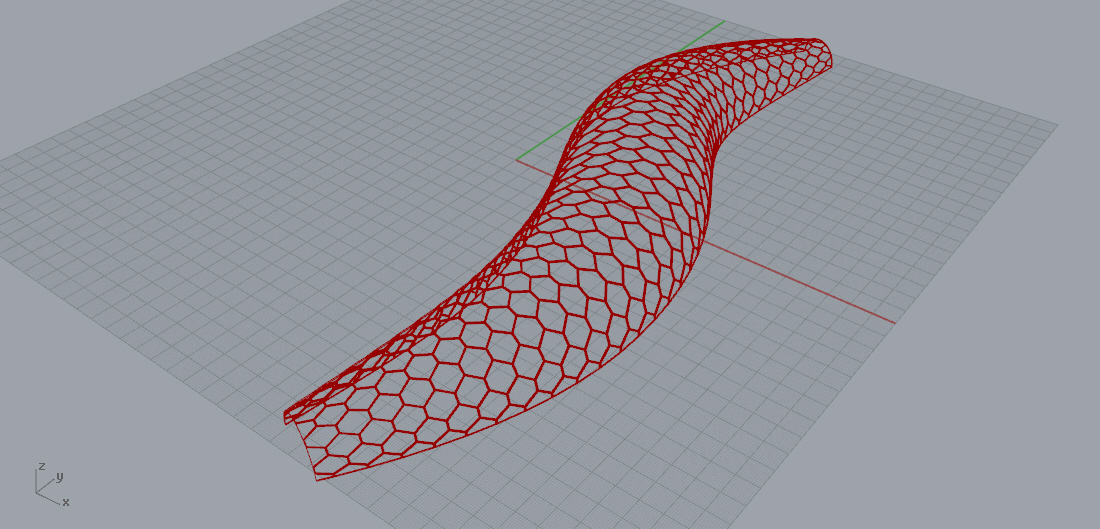
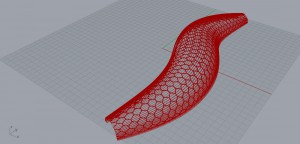
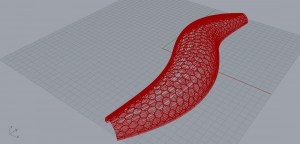
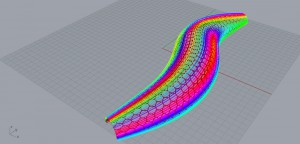
2. INNER SURFACE CONSTRUCTION: HEXAGONAL STRUCTURE
First, let’s create an Offset to generate the base inner surface.
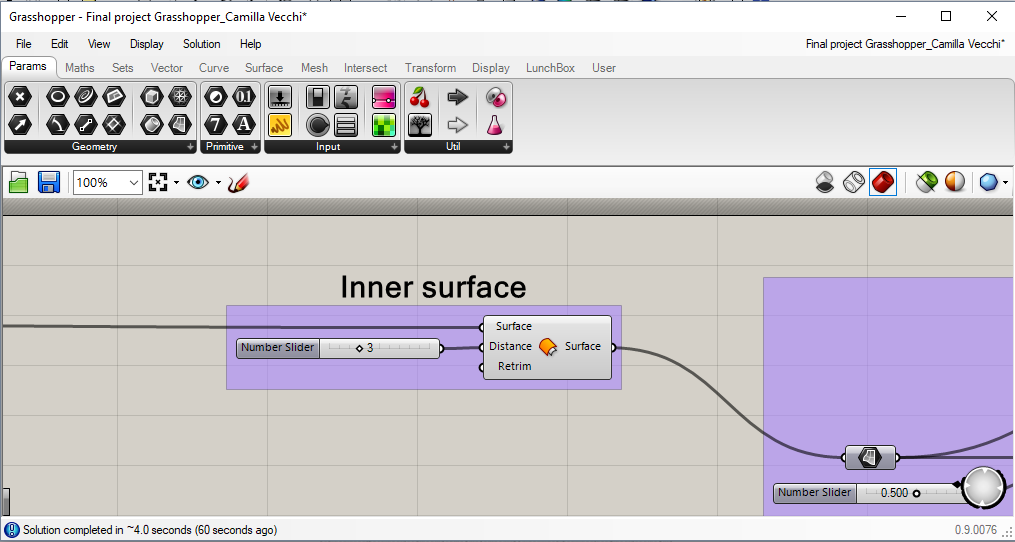
After that, I used a Surface component to easily switch off and on it in the following steps of the tutorial.
Now, I will explain how to realize the hexagonal structure. First of all, I realized anothe Offset, in order to create the base for the construction of the frames; then, after downloading the plug-in LunchBox, I went in his section > Panels > Hexagon Cells and I divided the two surfaces with that pattern.
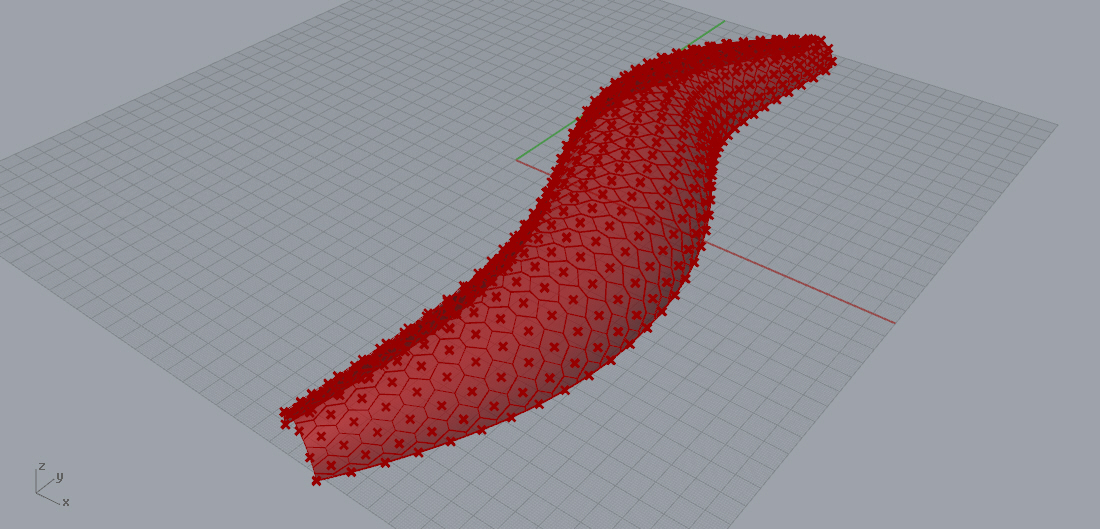
Afterwards, I used the tool Discontinuity, on both surfaces, to select the hexagons vertices and Polyline to make them individual geometries; with Boolean Toggle se on True, I made them a close geometry.

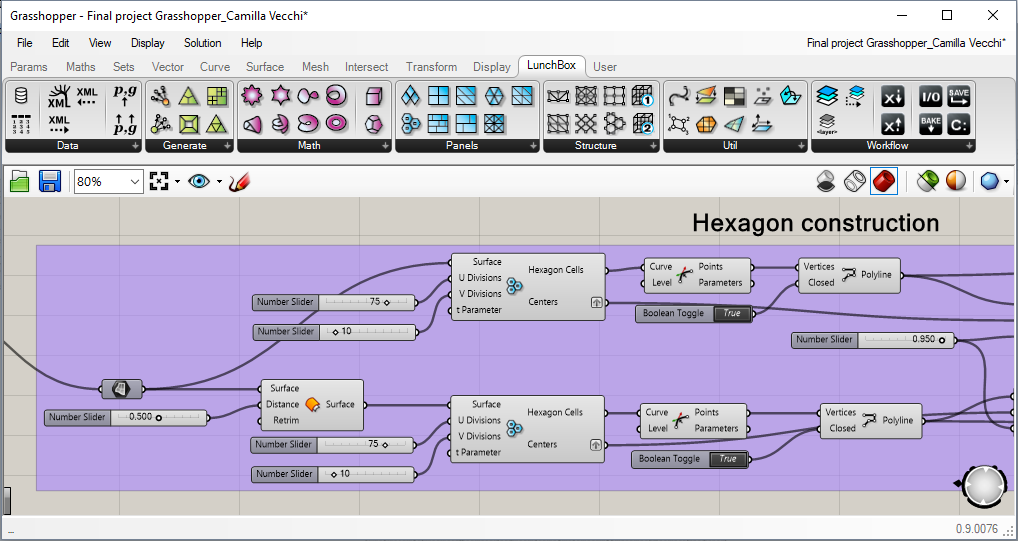
In order to make frames, I used the tool Scale, on both surfaces, and Merge to join bunch of data streams. With Loft, I created surfaces through a set of section curves; with Brep Join, I joined them to have the final structure.
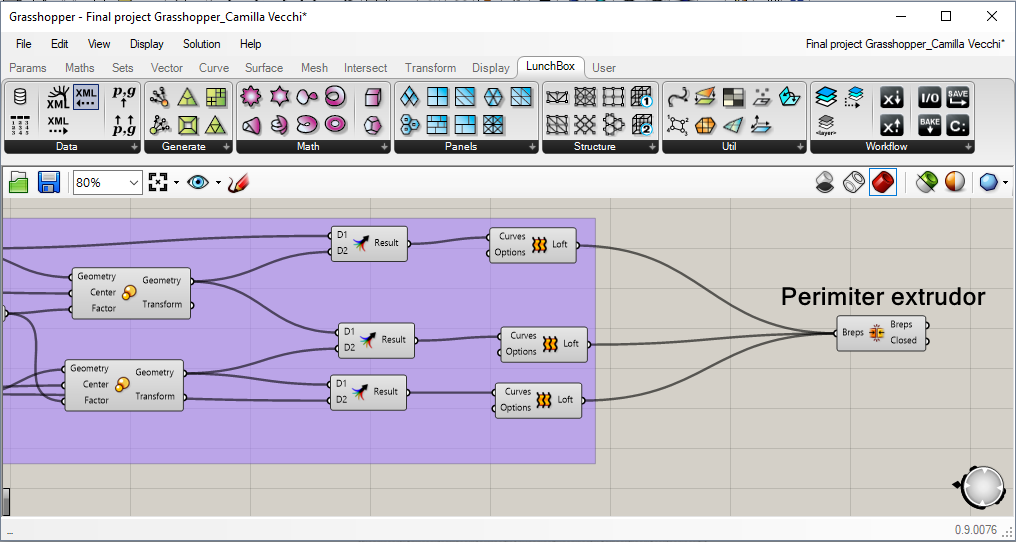
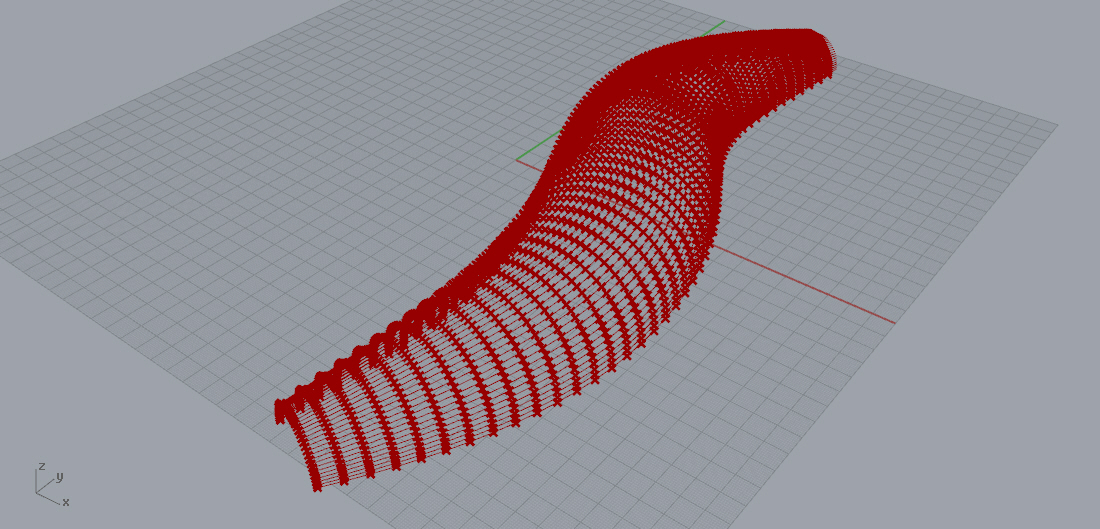
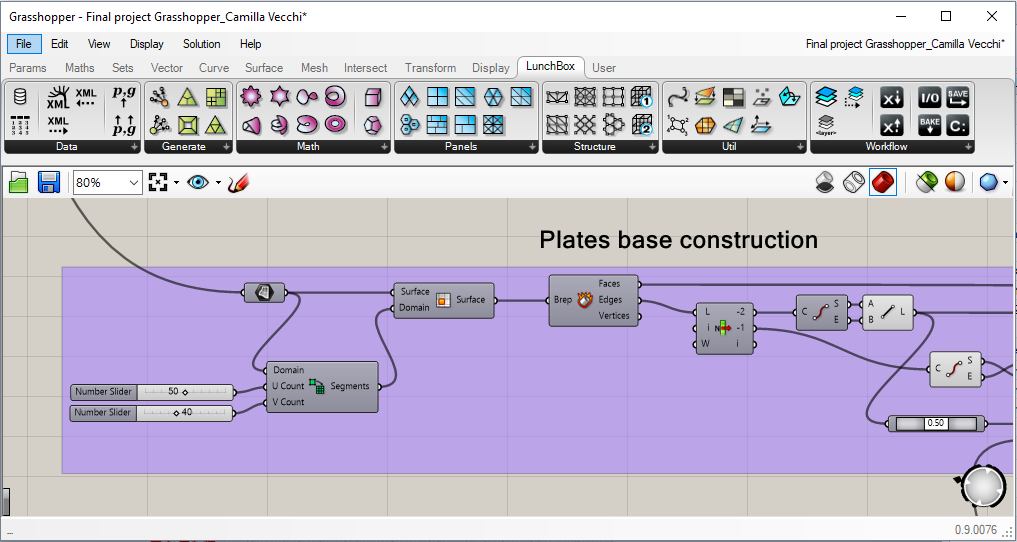
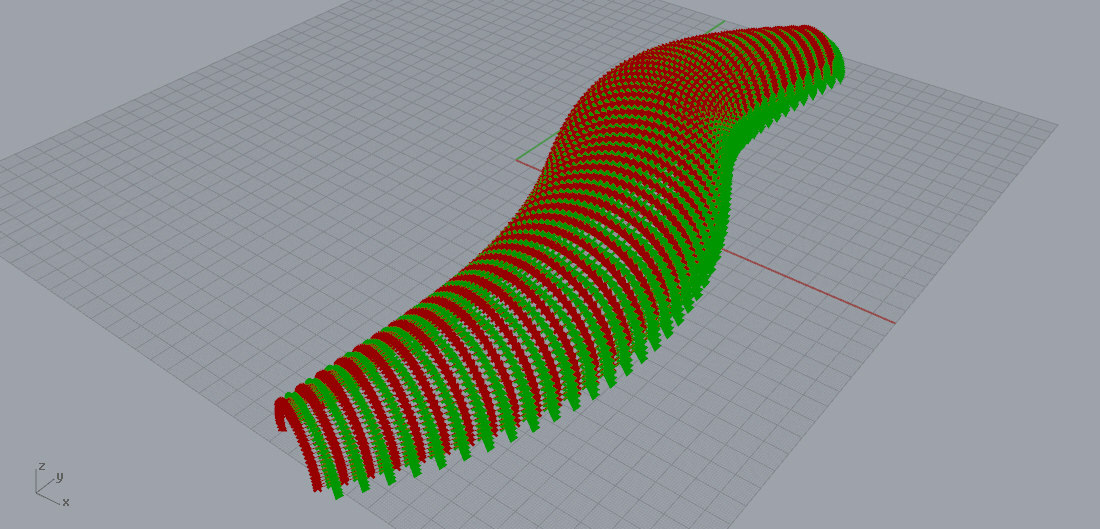
3. OUTER SURFACE CONSTRUCTION: PLATES BASE CONSTRUCTION
In order to work better on the second part, I switched off the final output of the previous paragraph: right click on Perimeter extrudor > click on the head next to Preview.
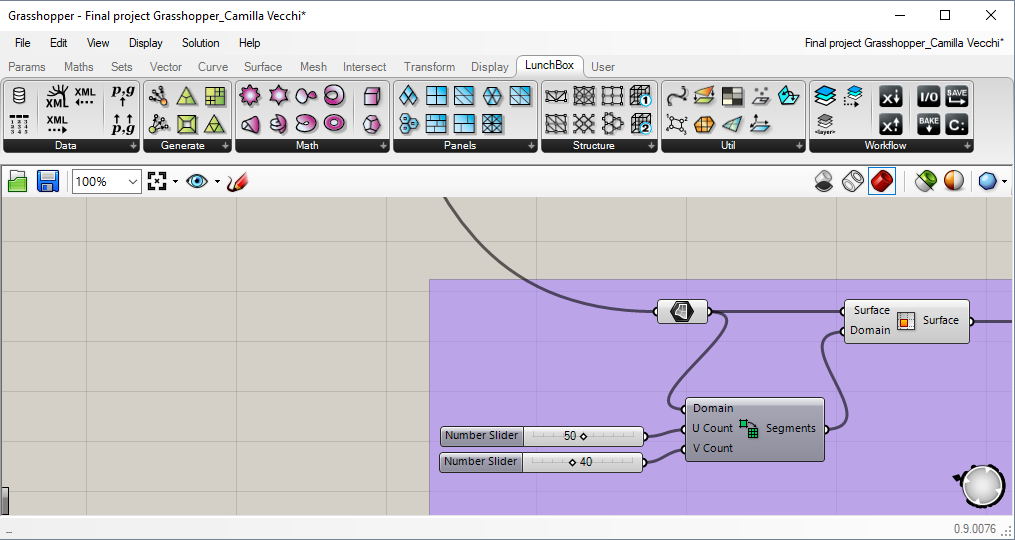
Now, from the Outer surface I did in the 1st paragraph, I used a Surface component, again to easily work later on. Then, I used Isotrim and Divide Domain2 to create a division on the surface.
With the tool Deconstruct Brep, I extracted points on the previous division. Using List Item, End Points and Line, I created the geometry of the plates.
Since they will move according to the sun position, I created two different Vectors: the first one is following the direction of the curve itself, while the other is going from the middle point of the plates geometry to the sun.
In order to make some changes in their movement, I computed the angle between the vectors with the tool Angle.

But, they cannot work without a sun, so let’s see how create it.
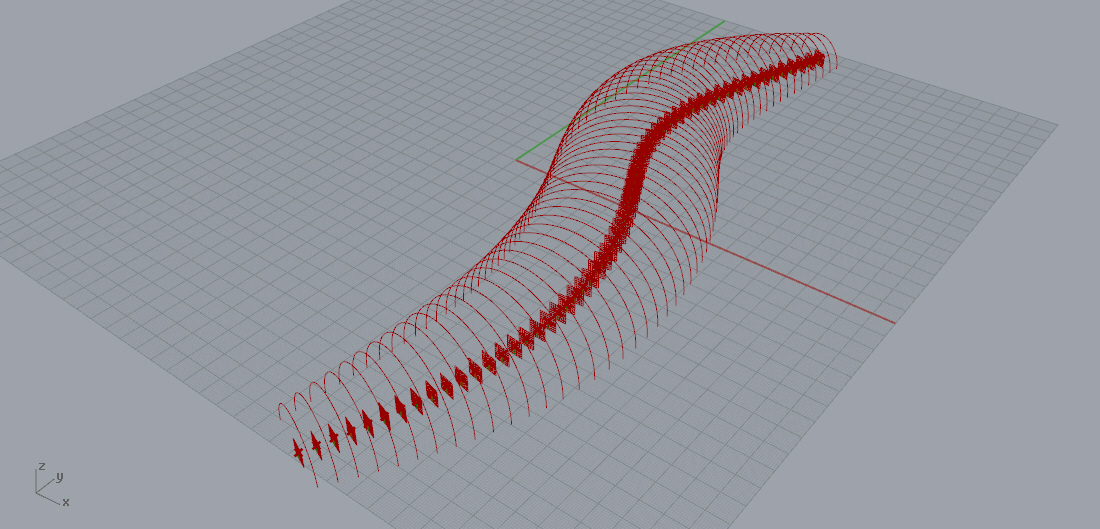
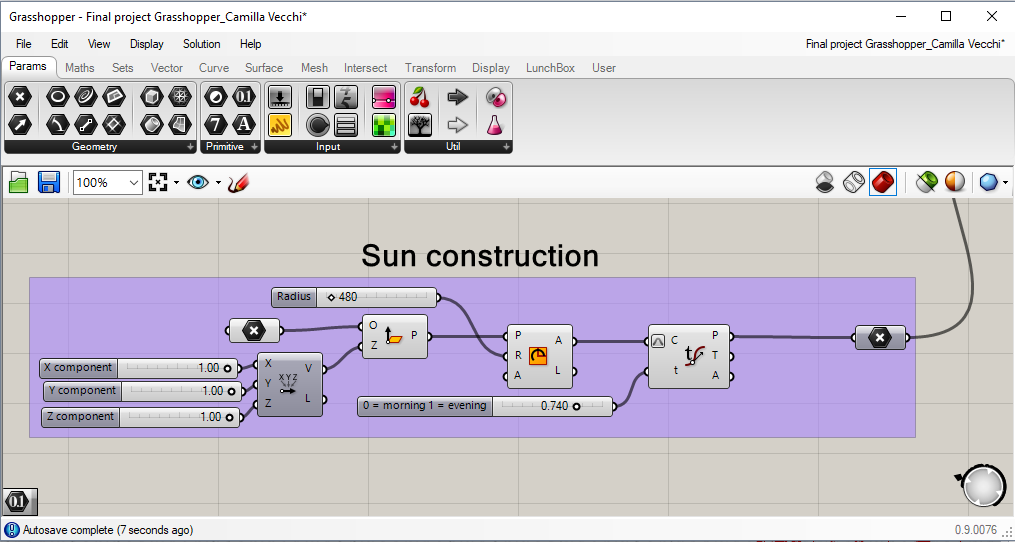
4. SUN CREATION
First, I set a point in Rhino and I parameterized it in Grasshopper. Then, I created a plane using Plane Normal and, thanks to it, I generated an Arc that is the trajectory the sun will follow.
With Evaluate Curve, I let the point/sun moves on it, with the following Parameters: I realized a Slider with 0=morning and 1=evening.
The output is used to generate the second vector in the previous paragraph.
5. SEVERAL PTIONS IN PLATES MOVEMENT
In this section, I decided to make the plates move according to different parameters.
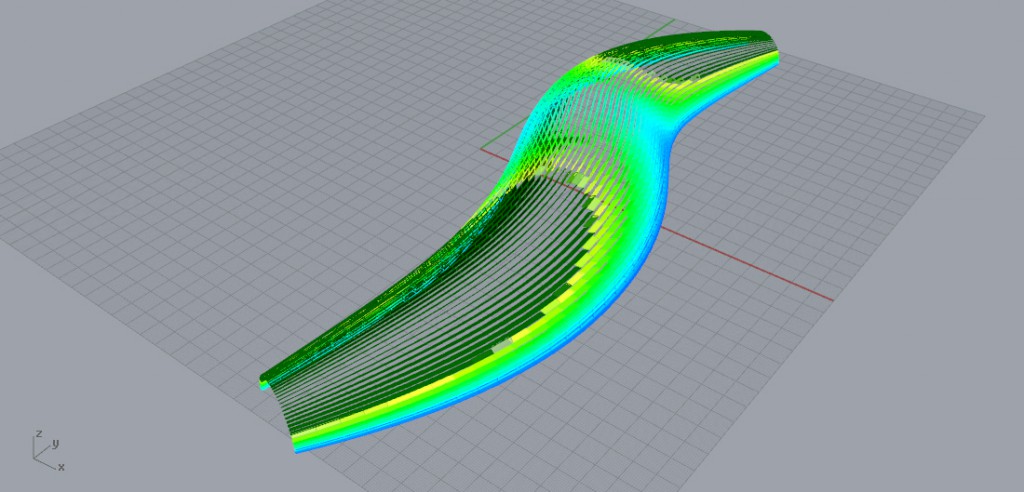
- MIN-MAX ANGLE
This is the base solution: from the Angle calculation of paragraph 3, I used a Number component to get all the angles together and work easily later on. Then, I got the min and max values using Bounds and I remapped them with Remap Numbers: as Value, I used Angle > in Source, the min-max values > as Target, a Domain saying that they should move of π /2.

Since there will be different options, I used Stream Filter to collect them and select the one I want each time.
For the final output, I Rotate Axis: in Geometry, I used Faces of Deconstruct Brep used in paragraph 3 > in Angle, I used the output of Steam Filter.
-

- Morning sun
-
- Evening sun
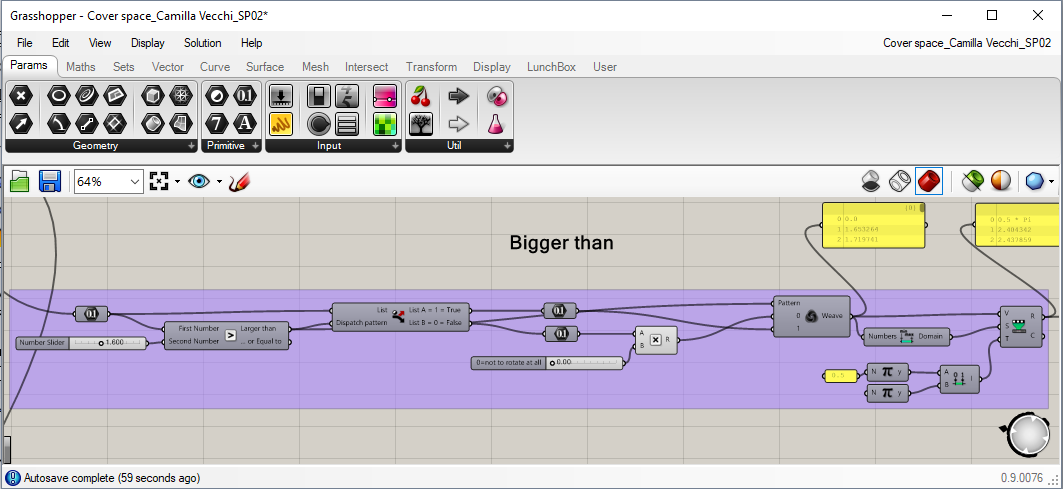
- BIGGER THAN
Again, I used Number component to collect the previous data. In this section, I wanted to let move the plates whose angle is bigger than a preset value.
SO, with Dispatch, I realized two lists, according to the obtained angle from paragraph 3 and the tool Larger Than: the first one contains all the true values, so those one whose angle is bigger than the choose one, and the second contains the false values. With the tool Multiplication, the second list is multiplied for 0 in that case in order do don’t let them rotate.
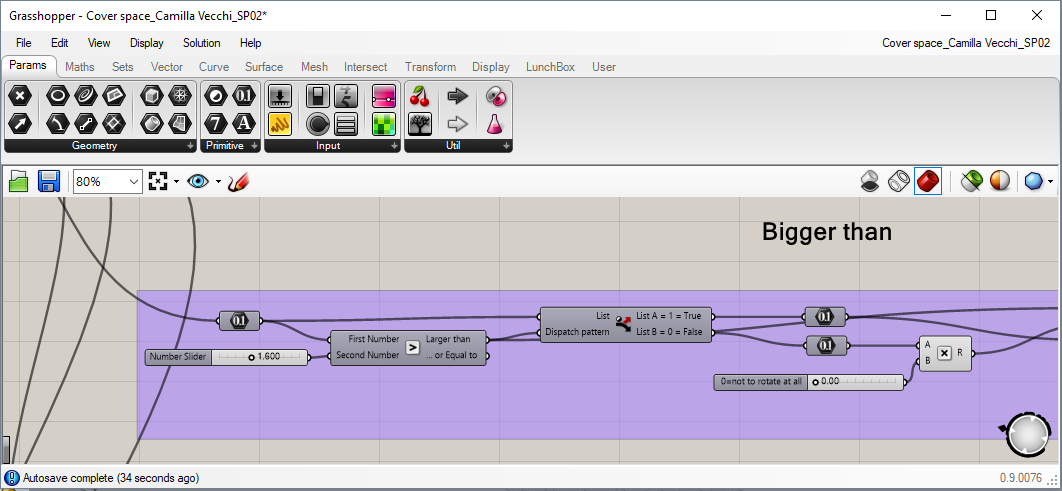
Those lists are used in Weave component, that creates a pattern according to them. The output is used in Remap Number and, after changing again the gate, we can have the final result.
Again, I just needed to change the gate in Stream Filter to have the final output.
-
- Morning sun
-
- Evening sun
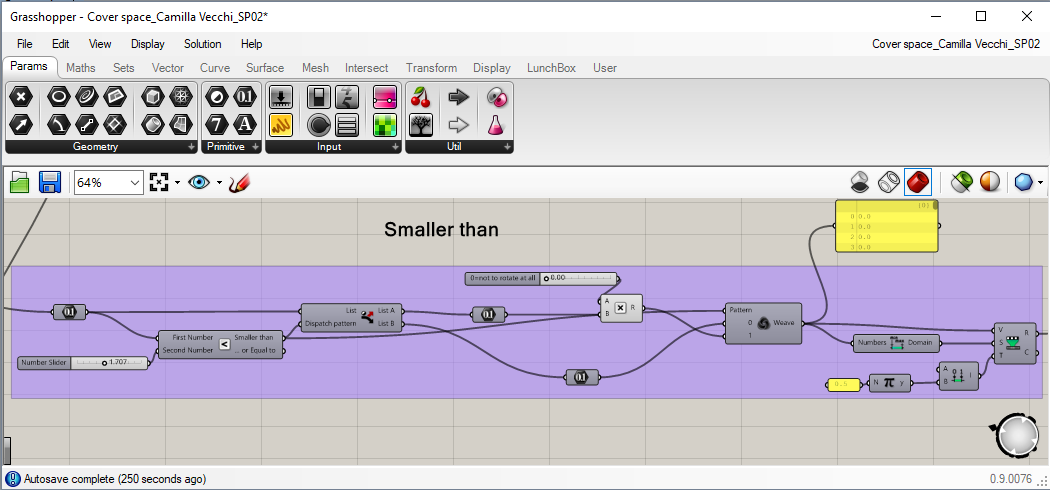
- SMALLER THAN
I have done the same as before but with the component Smaller Than. In that case, I used Multiplication on the first list, that means the plates smaller than the preset value don’t rotate while the others do
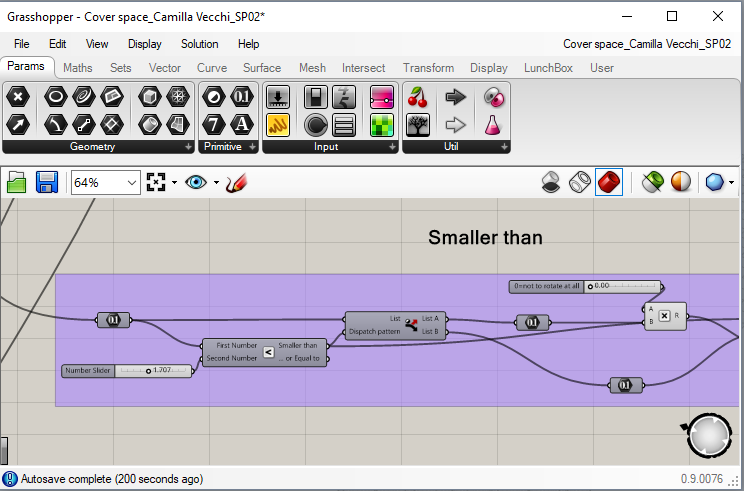
Again, I changed the gate in Stream Filter.
-
- Morning sun
-

- Evening sun
After this more convenntional outputs, I decided to play a bit and create more original parameters.
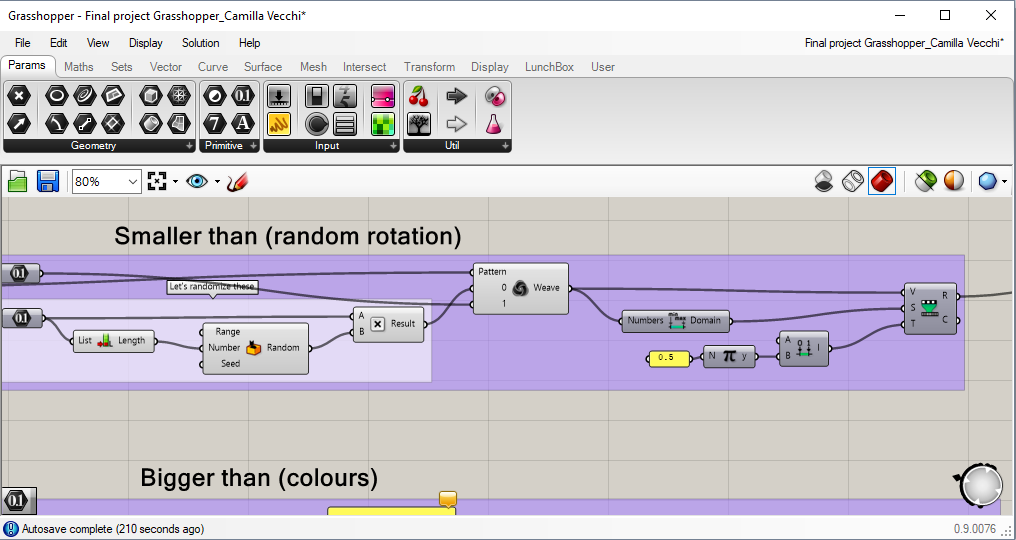
- SMALLER THAN (RANDOM ROTATION)
I used Smaller Than component and after I used Dispatch to create two lists: the first one is used as it is for the following purpose, while the second is used to create Random oriented plates.

Those lists are used in Weave component, that creates a pattern according to them. The output is used in Remap Number and, after changing again the gate, we can have the final result.
-

- Morning sun
-

- Evening sun
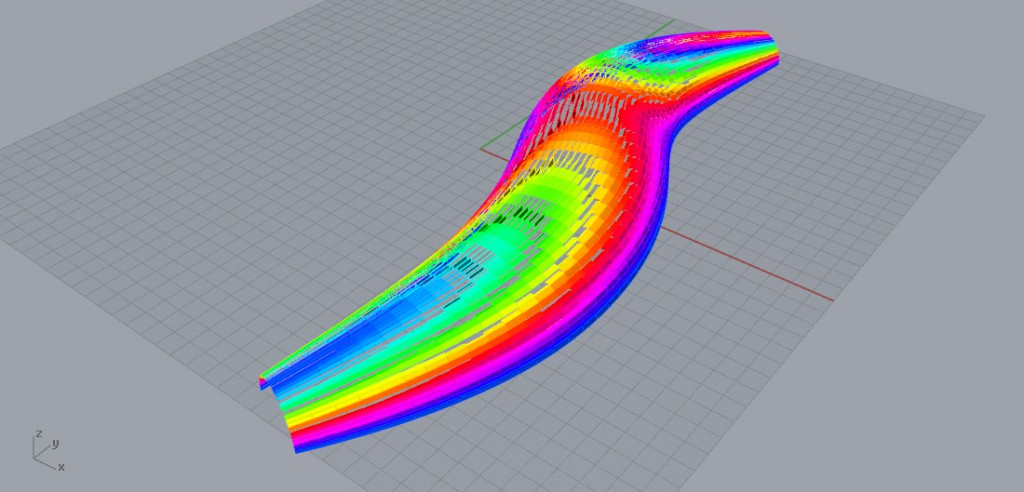
- BIGGER THAN (COLOURS)
Again, I used Bigger Than component and Dispatch to create two lists; to create something more interesting, I decided to use colours: the first list is connected to Colour HSL and the second one is used to create a Gradient: in Lower Limit, I put List Item in order to get the fist value of the list > in Upper Limit, I used again List Item but with a modification in Index in order to get the last value of the list > in Parameter, I kept the list itself.
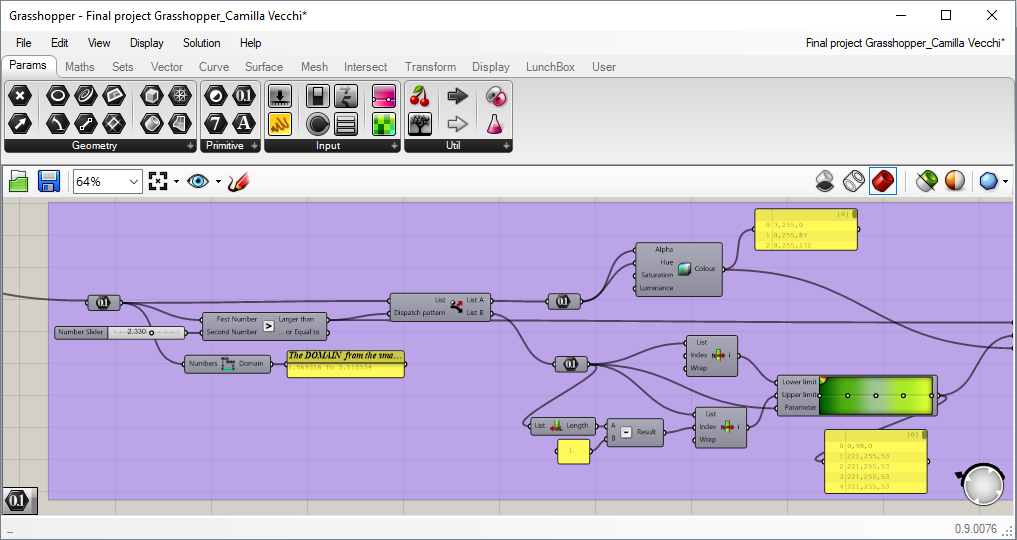
The output of Colour HSL, Gradient and Larger Than are used in Weave to create a pattern, that is shown by Remap Number.
-
- Morning sun
-
- Evening sun
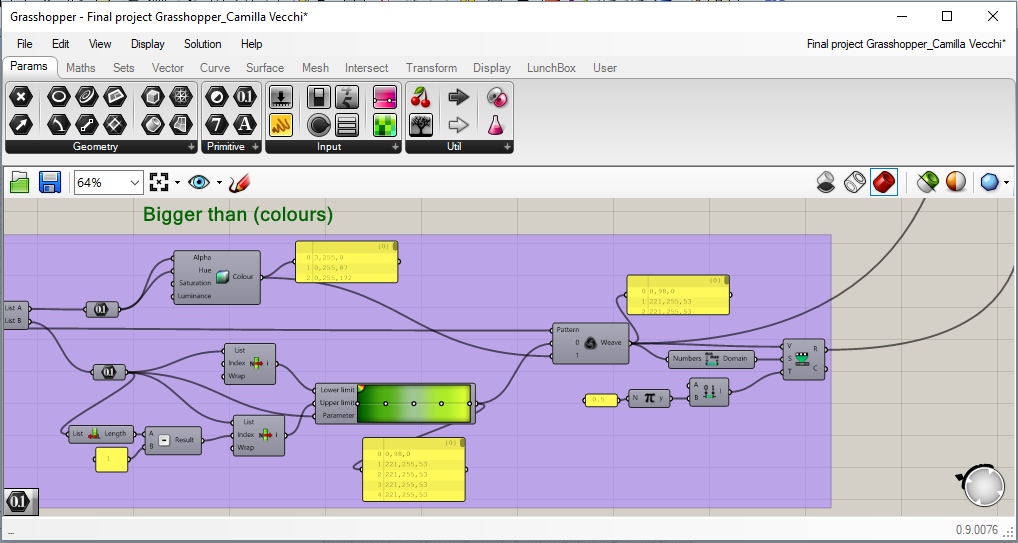
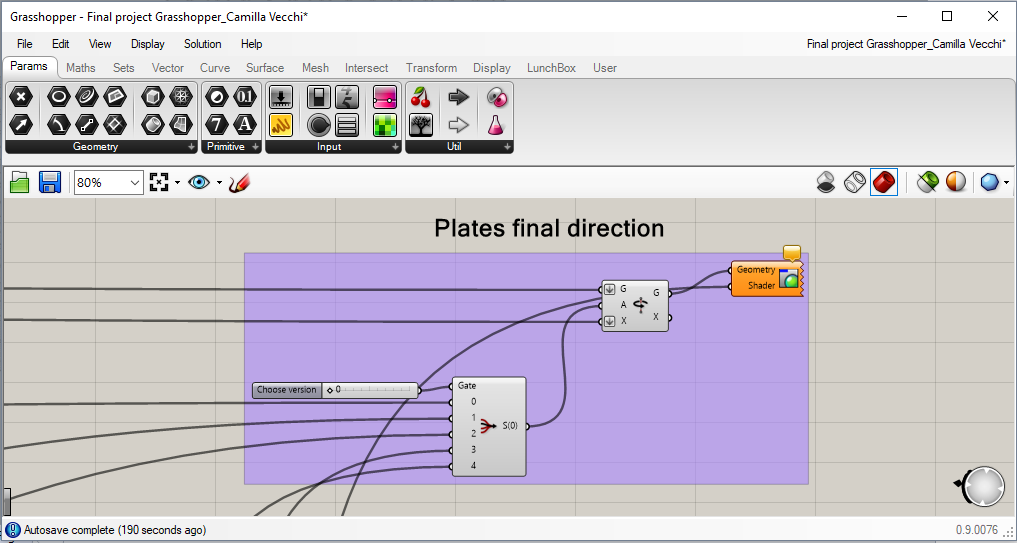
This time, to make possible to see the colours, I used Custum Preview: Geometry connected to Rotate Axis > Shader connected with the output of Weave.
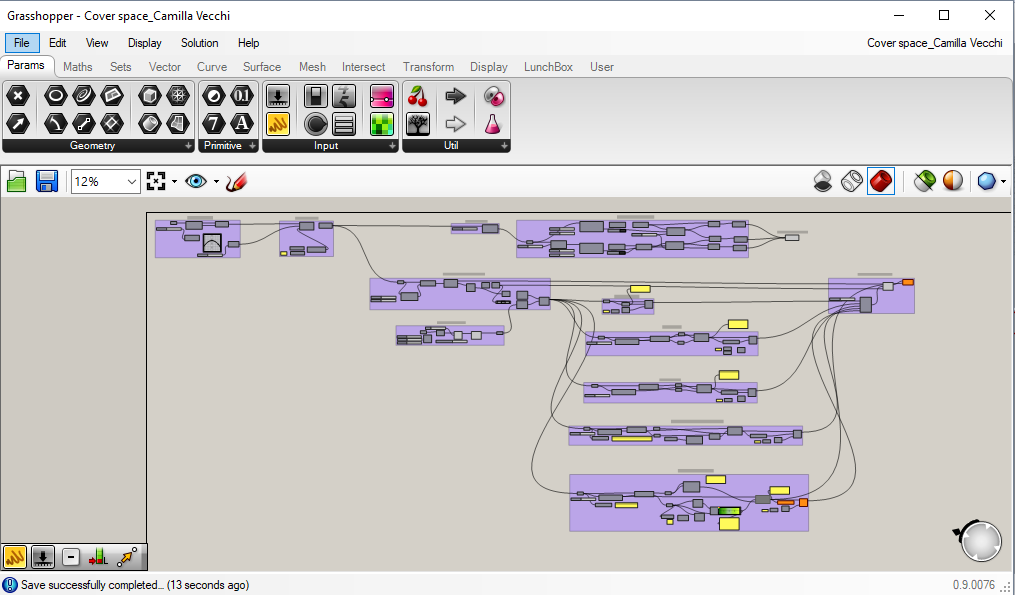
That’s the end of the tutorial: in the following pictures you can see the whole script and the different options.
-
- Midday Min-Max result
-
- Midday Bigger Than result
-
- Midday Smaller Than result
-
- Midday Random result
-
- Midday Colours result
As I said before, in order to follow script is necessary to download LanchBox plug-in.
SCRIPT: Cover space_Camilla Vecchi