
introduction to Cocoon:
Cocoon uses a algorithm called marching cubes to turn iso- surfaces into polygonal meshes. it is especially good for wrapping already made geometries with a combination with breps, curves, and points.
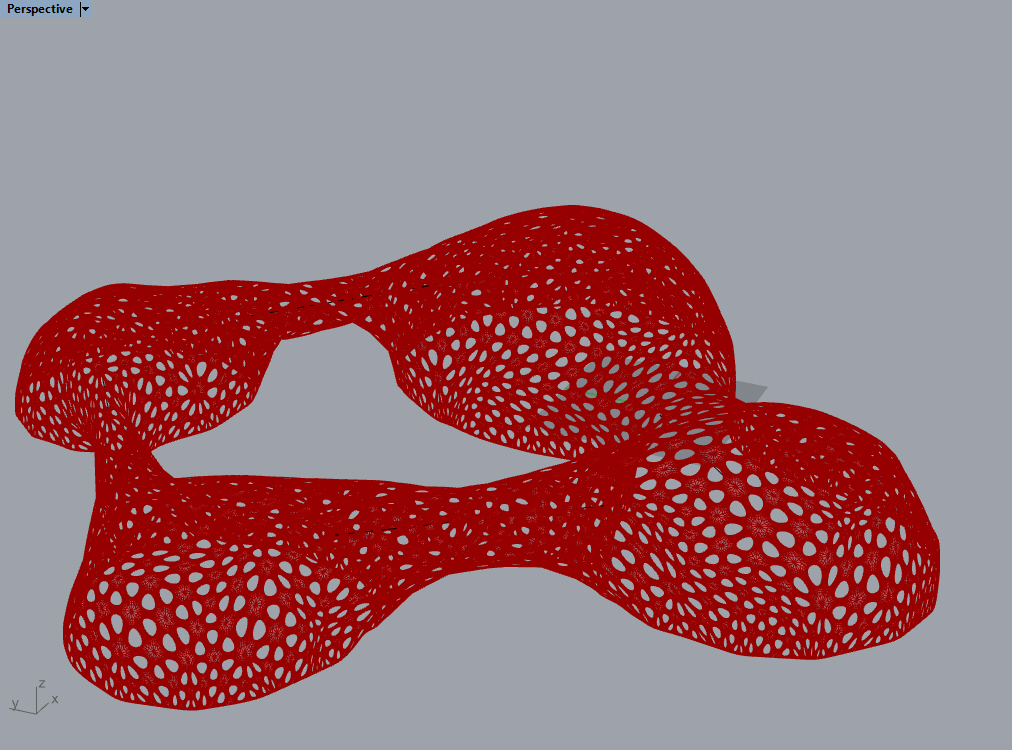
This tutorial is to show a possible way you can use cocoon to experiment with form types and then use weaver bird to wrap this new form and refine it into a mesh.
For this example I chose to use 4 points and 4 lines to show how I implemented a similar strategy to create building masses and have sky walks bridging in between.
Starting off I chose 4 points. ( you can use breps, curves, points… etc) to get the building masses. these will be spheres that you can trim or use brep to create your own shapes.
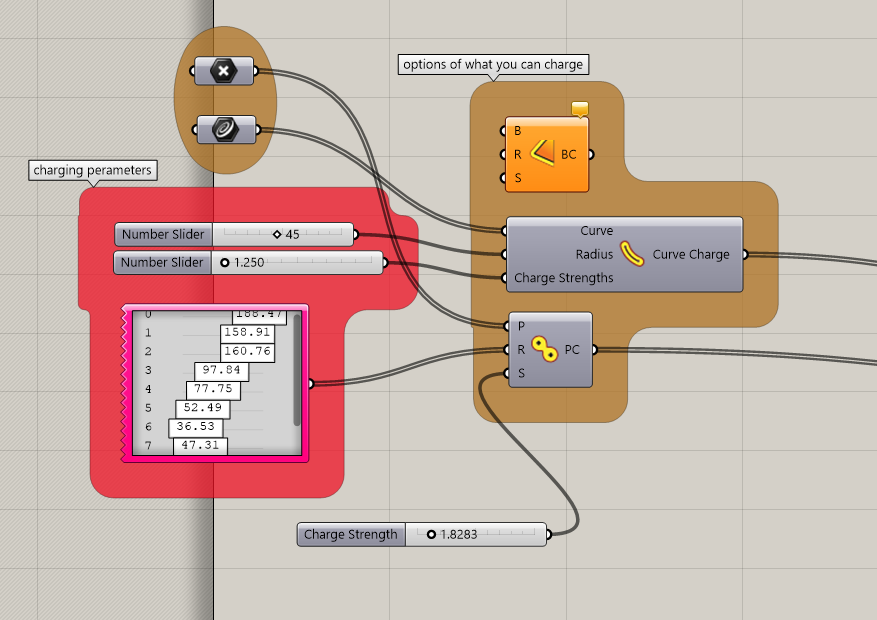
The pink gene pool is the approach I took to adjusting each point you add to the charge. The numbers in the Gene pool act as scaling factors and can be manipulated to fit the scale of your project.
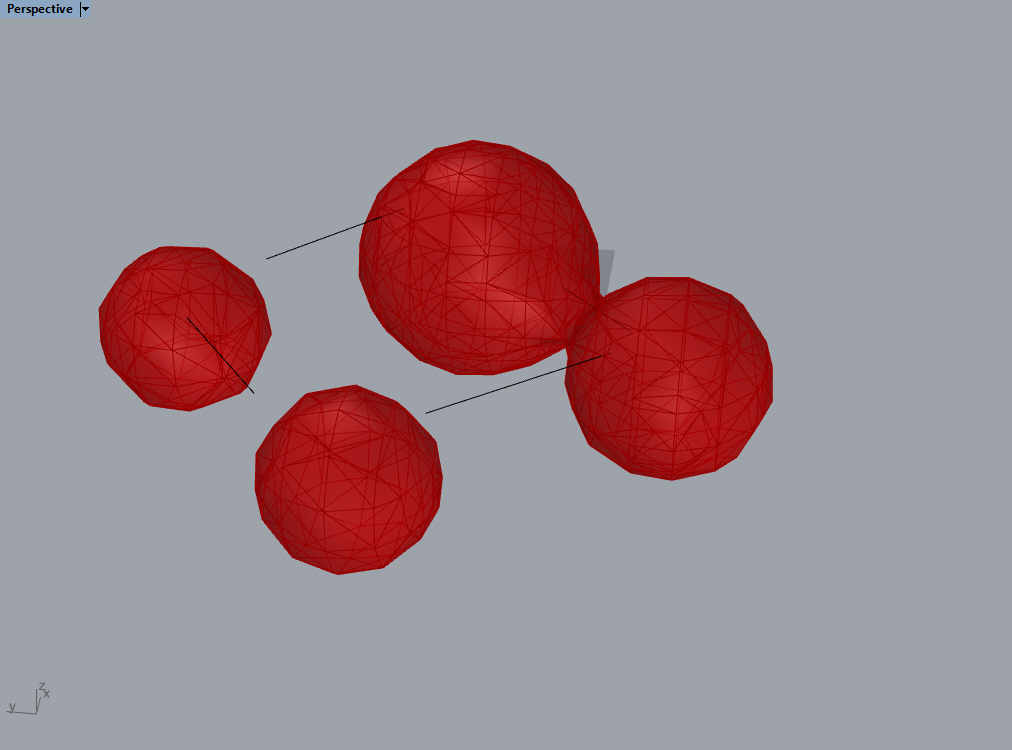
As you can see the 4 points created a series of spheres and the lines you create in rhino will be set up the same way to connect these by using the curve charge application in grasshopper. The same idea applies here, you will need to assign a slider with the radius and charge strength.
charge strength is usually a small number (under 5)
radius: the radius for the curve charge is the radius of the charge surrounding your line will be. for instance if you wanted to make a tunnel that was 15 meters in radius then you would plug in 15. cocoon also lets you set these two parameters as negative charges to allow you to form shapes with negative or carving modeling techniques.

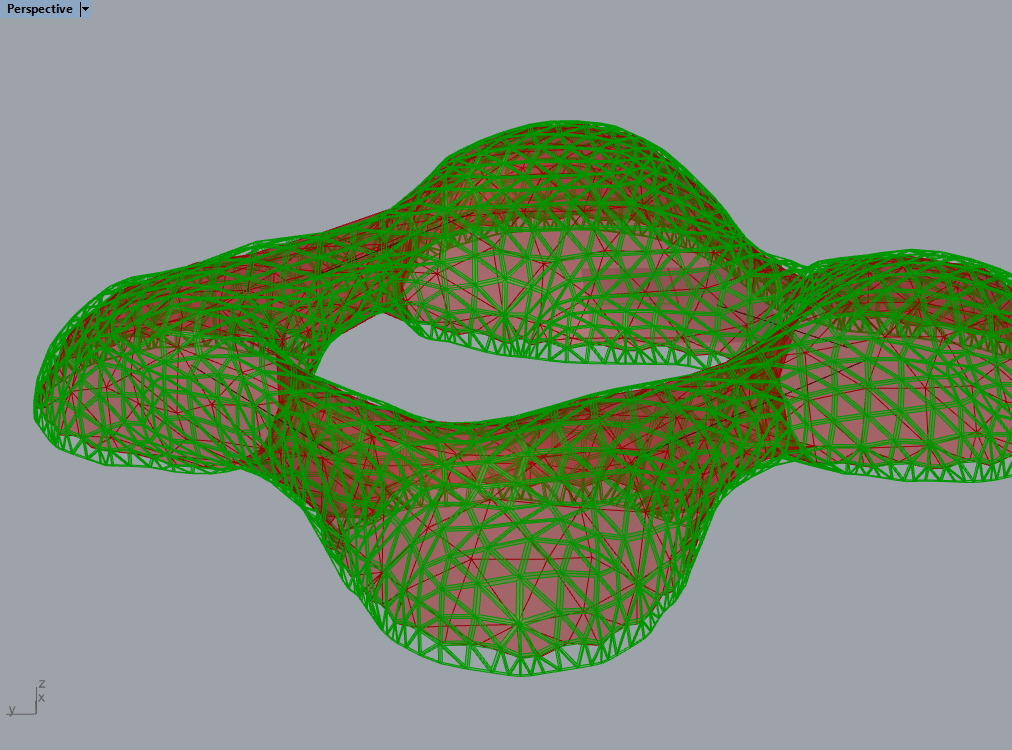
Mesh refinement tab:
refinement cleans up a great deal of ugly triangulation and valence issues that arise from marching cubes algorithm. you will need to set a number for the re-sampling iterations, a unit of length for the re-sampling a tolerance. what these do is reassess the mesh and smooth or subdivide it to get it back to an accurate iso mesh that you want. ( the larger the sample size the fewer iterations it should take to get back to normal.) i wouldn’t recommend doing more than 5-6 iterations since it is intensive and cant take a while and slow down your script.
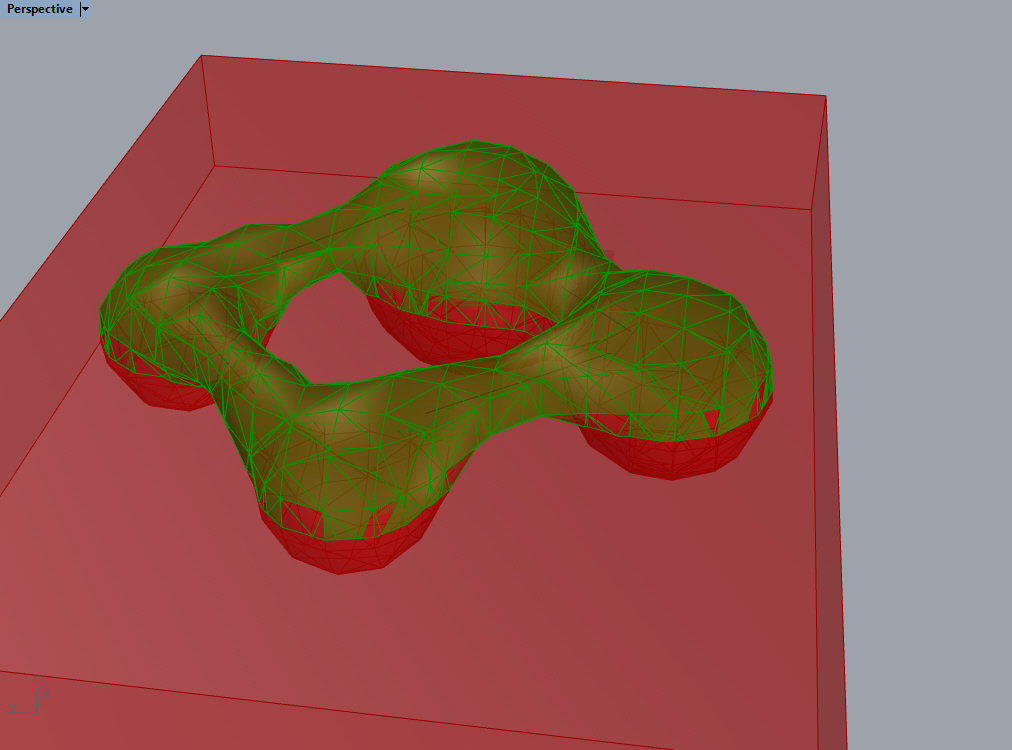
Subtracting the mesh with a box representing the ground plane.
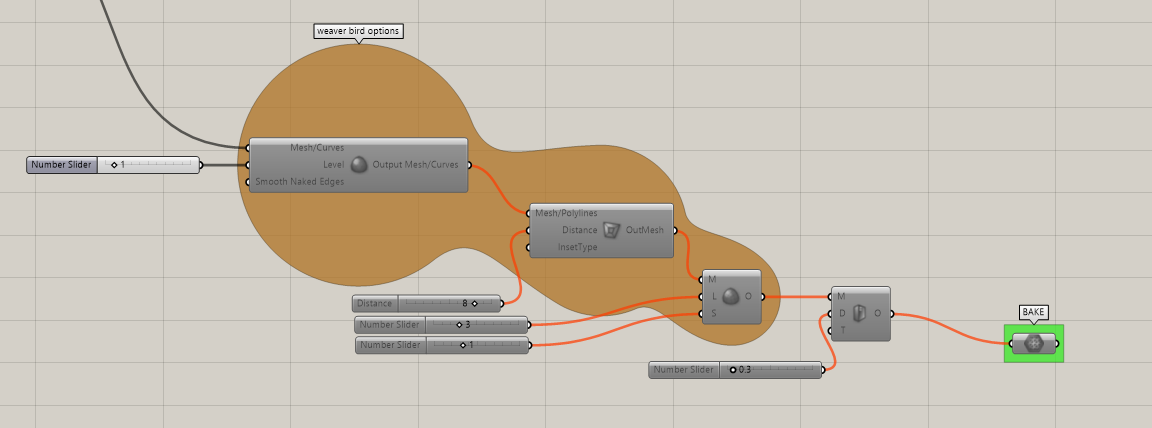
Take your refined mesh and now to plug into weaver bird or whatever plug in you would like to use to create a pattern for the mesh to follow.
Final thoughts:
This experiment was very useful, I can see myself using cocoon in the future as a tool to fix meshes that are extremely complex. I see this being most useful in sculpting and form driven projects or installations. one thing I Think would be worth looking into is the other patterns for the surface after cocoon (voronoi groups ect.) also messing around more with brep charges and with negative charges I feel could be very interesting. One major issue I ran into was how slow the script gets very fast. Learning ways to simplify and speed up the process would make adjusting parameters and creating mesh patterns mush faster and easier.
Final section of the script is dealing with the weaver bird patterns and adjusting the perimeters to get desired result.
fair warning: There is a lot of trial and error with this modeling technique in order to get your desired result.
for more info on cocoon:
http://www.bespokegeometry.com/2015/07/22/cocoon/#more-871
More info about marching cubes here: