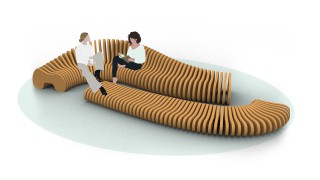
For a project I had some time ago, it was necessary for me to create furniture according to the design of the space, which was an organic-shaped space with a cafeteria or bar on the ground floor. Using Rhinoceros and Grasshopper I could come up with the main furniture for the space in a quick way.
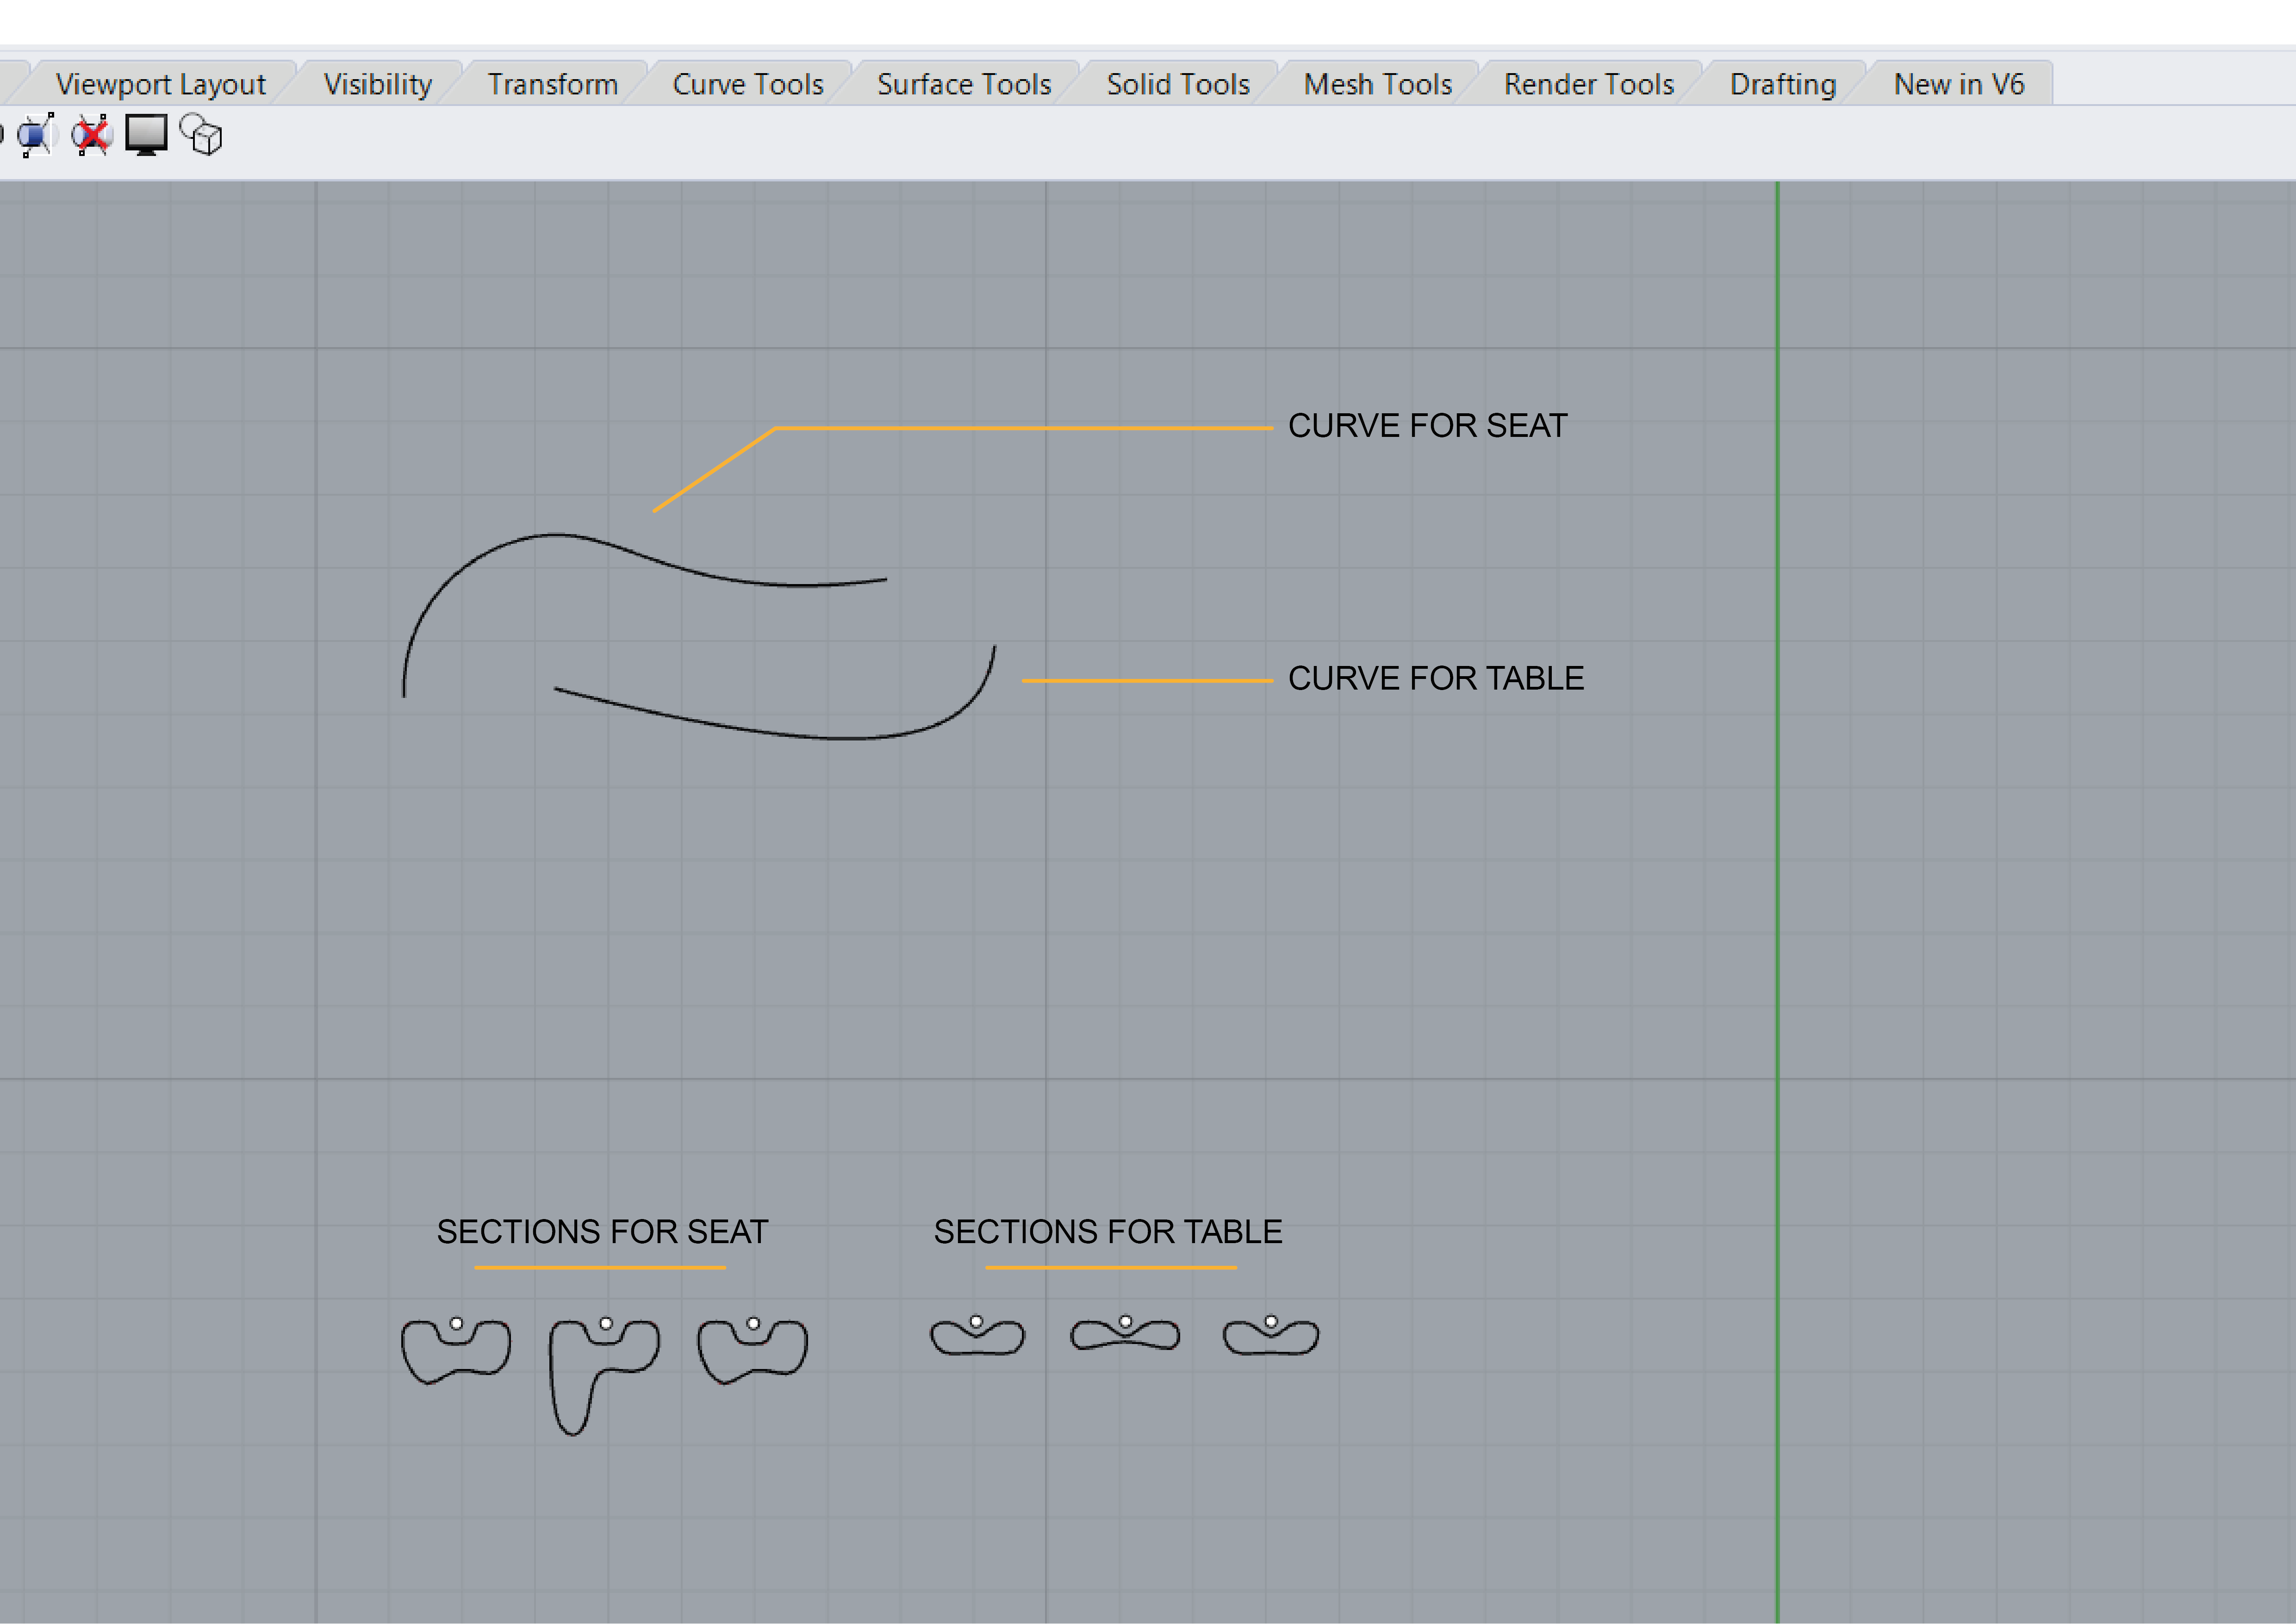
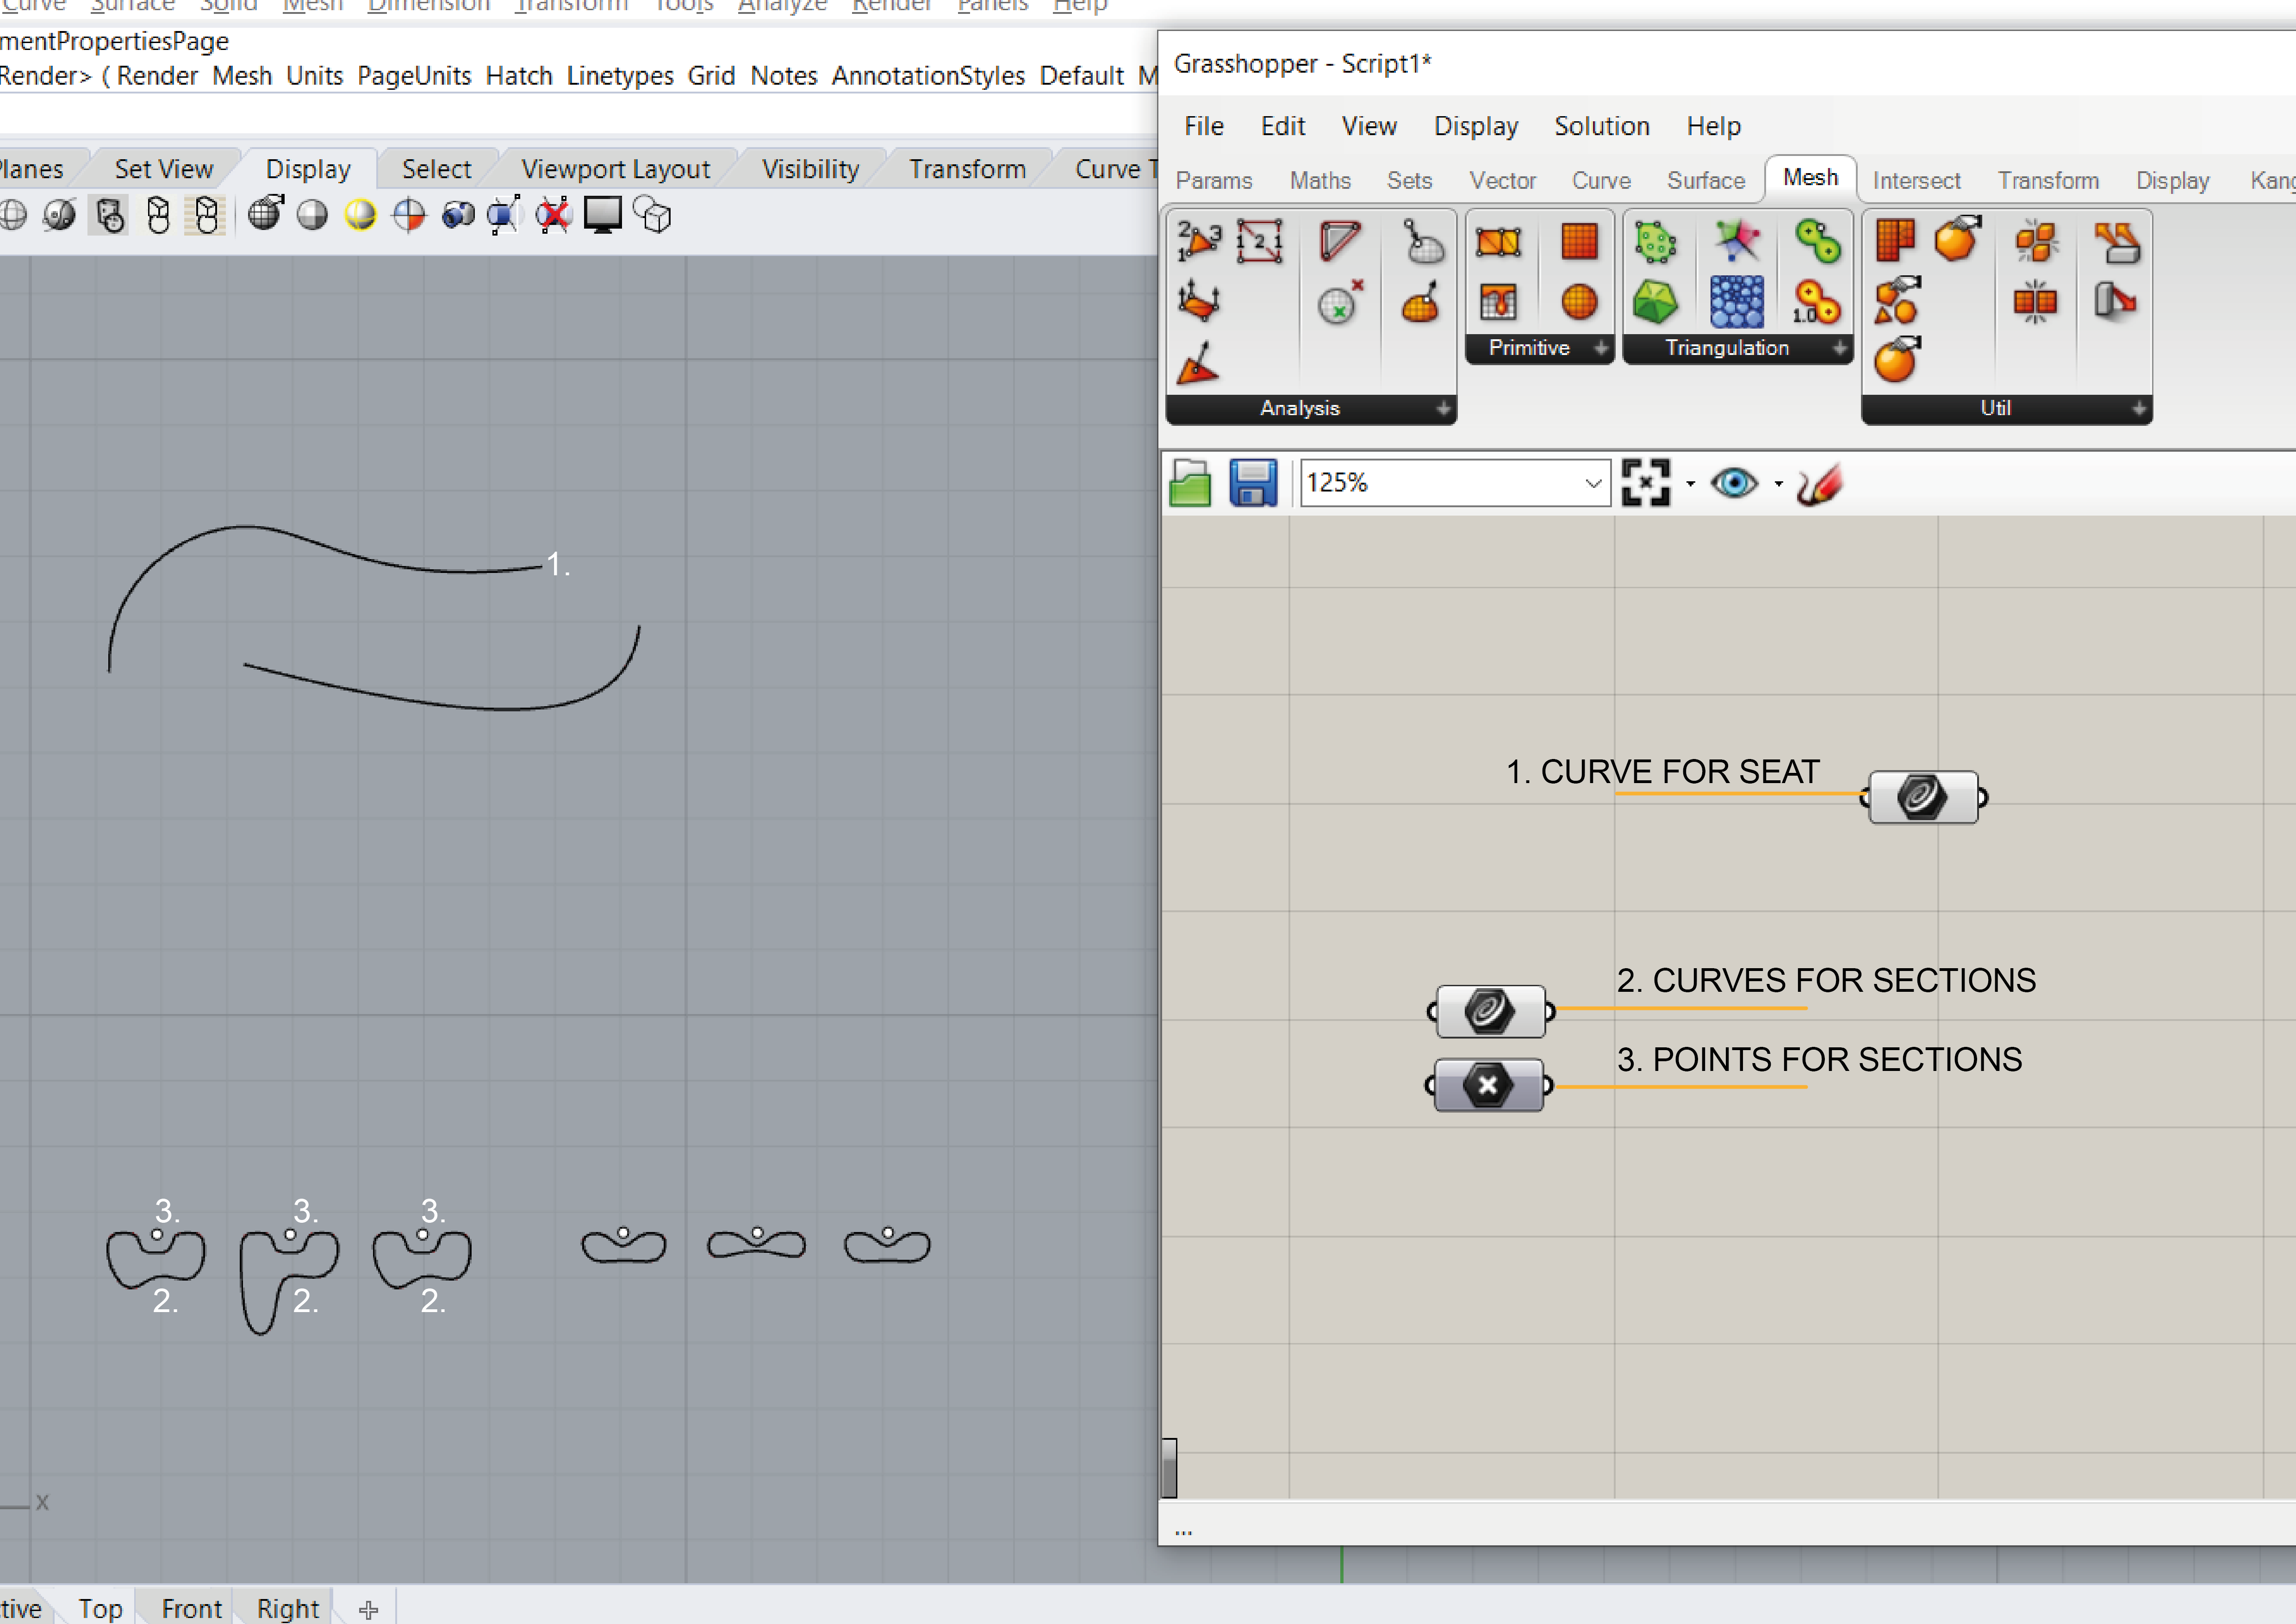
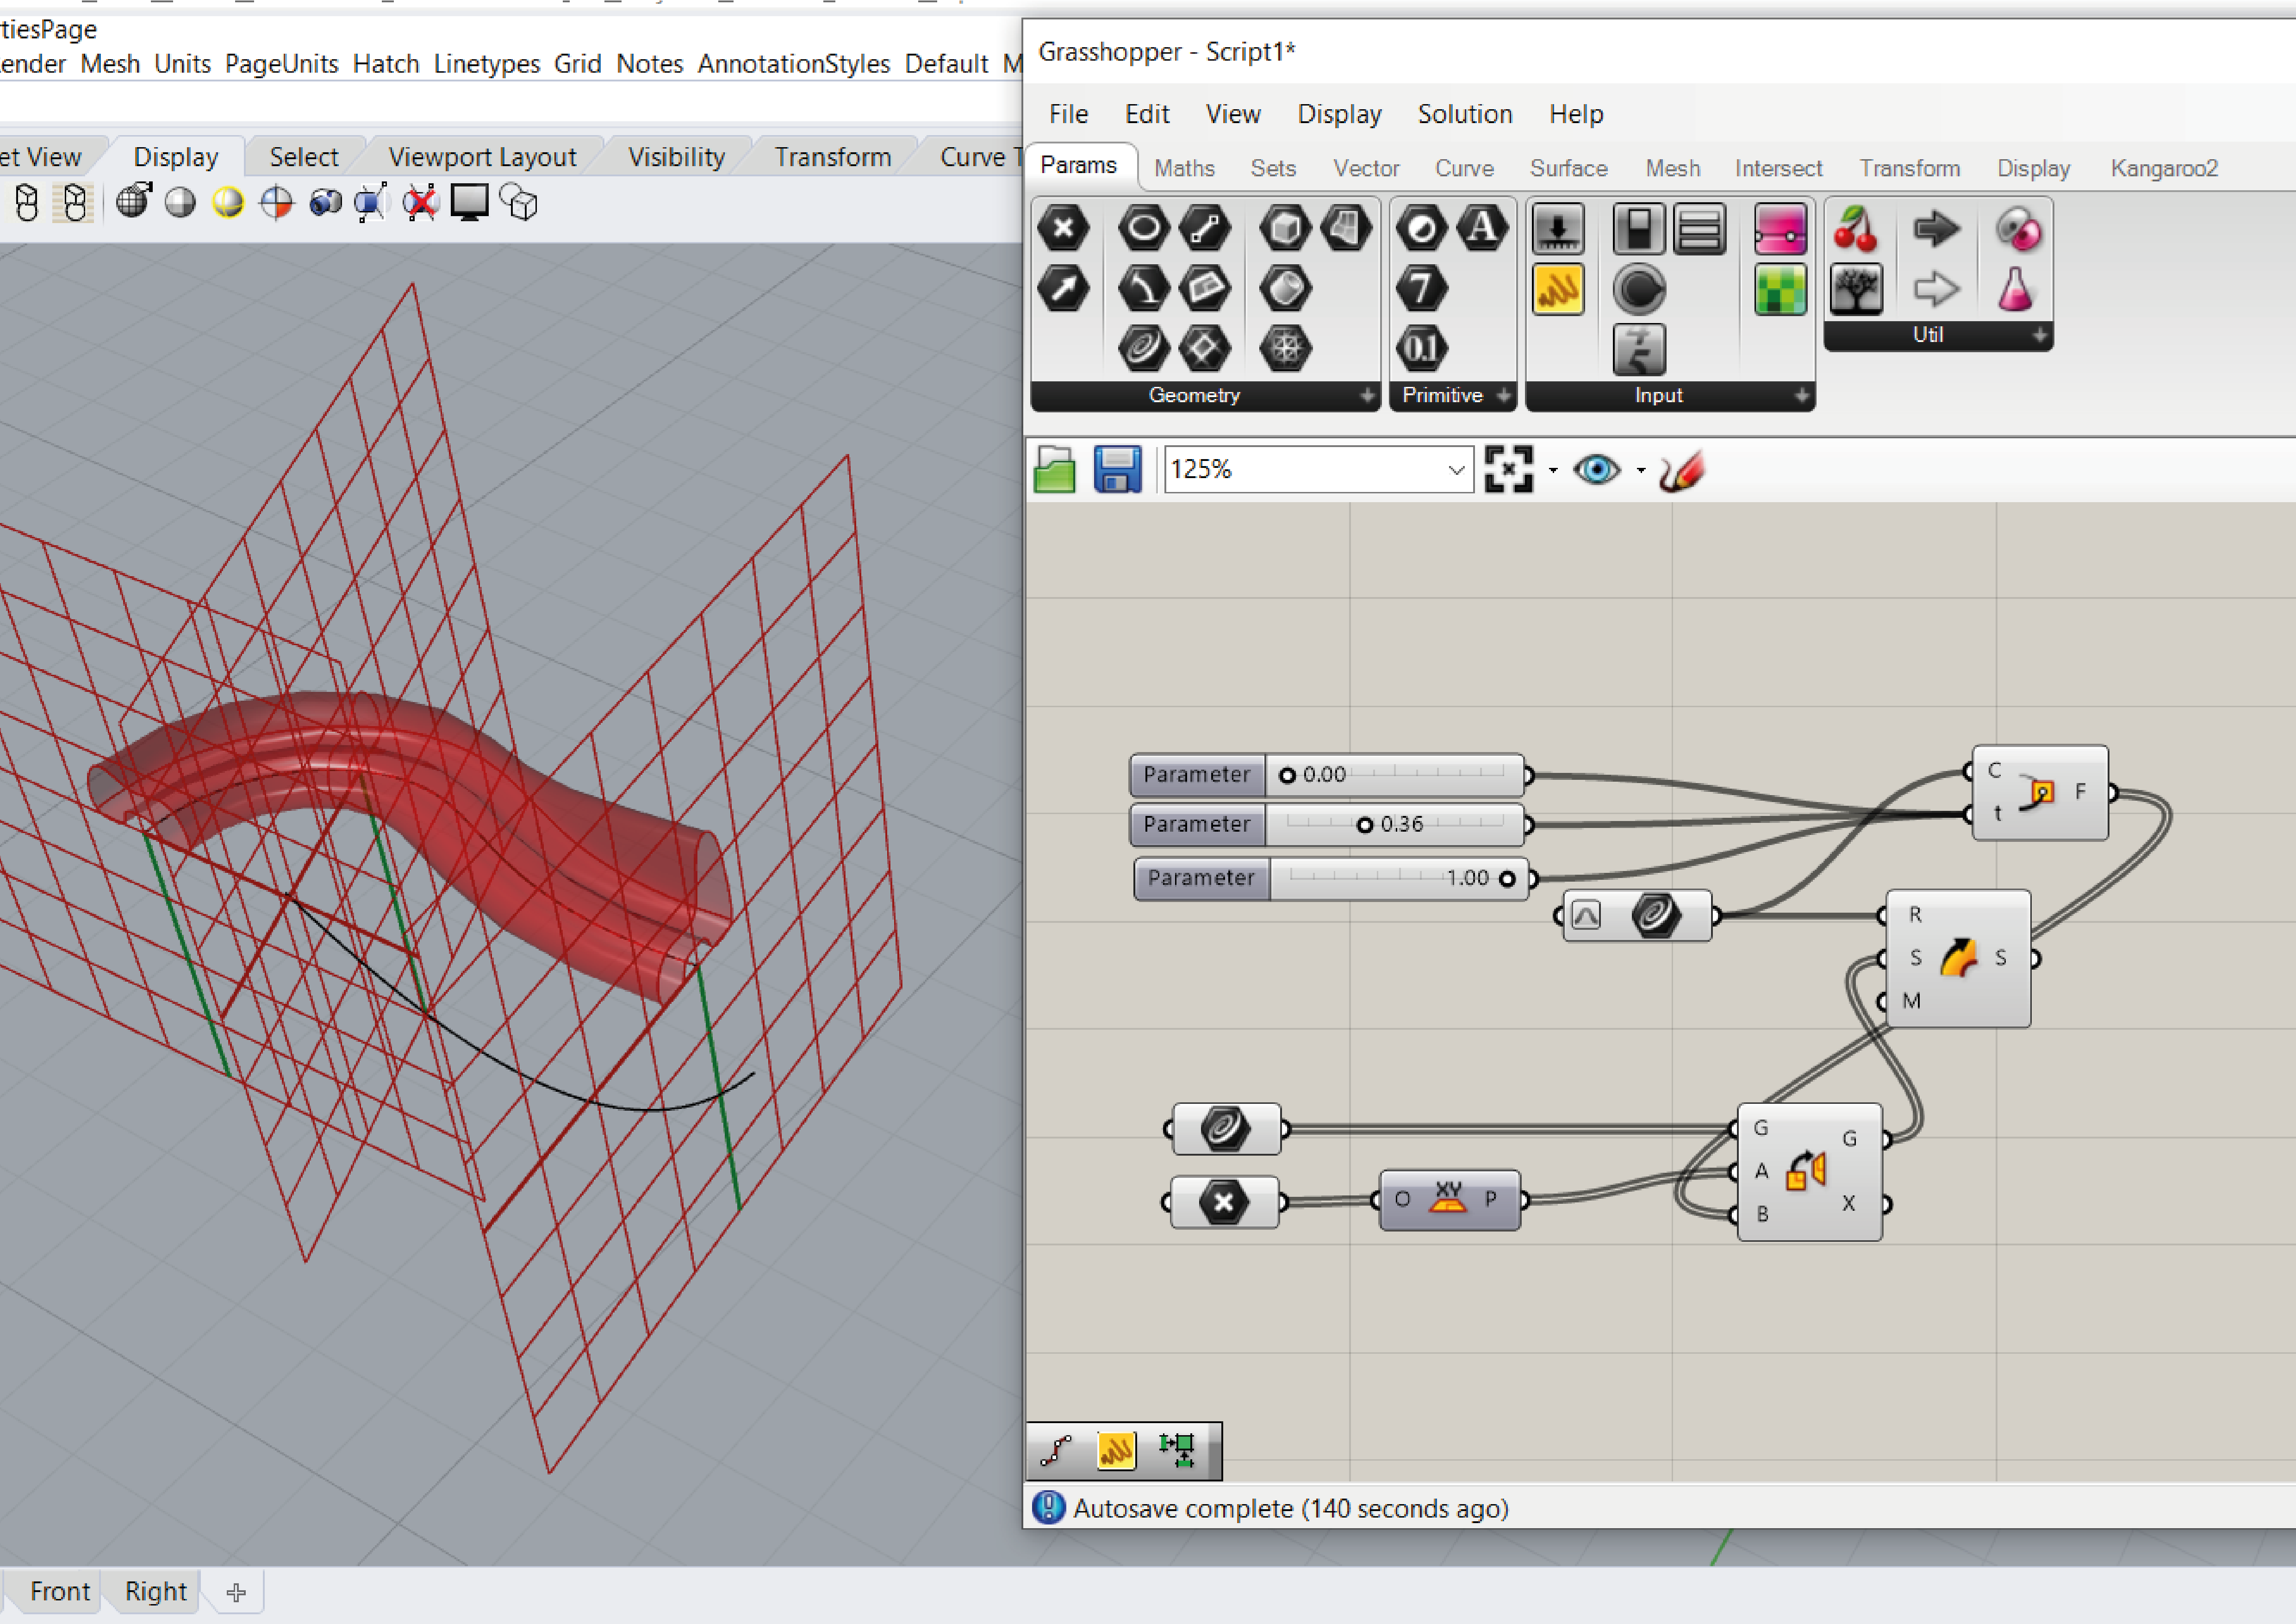
1. First off, i drew the basic shapes of the top view of Rhino. In the first image, two curves one for the seat and one for a table, along with sections for each curve. In the second image, a circle for the main cafeteria/bar and it’s corresponding section. Each section has a middle point for referencing later.

2. In Grasshopper, I used Curve to reference the curve of the seat; Curve to reference the multiple sections and Point to reference the multiple middle points of the sections, in order in which they run along the curve.
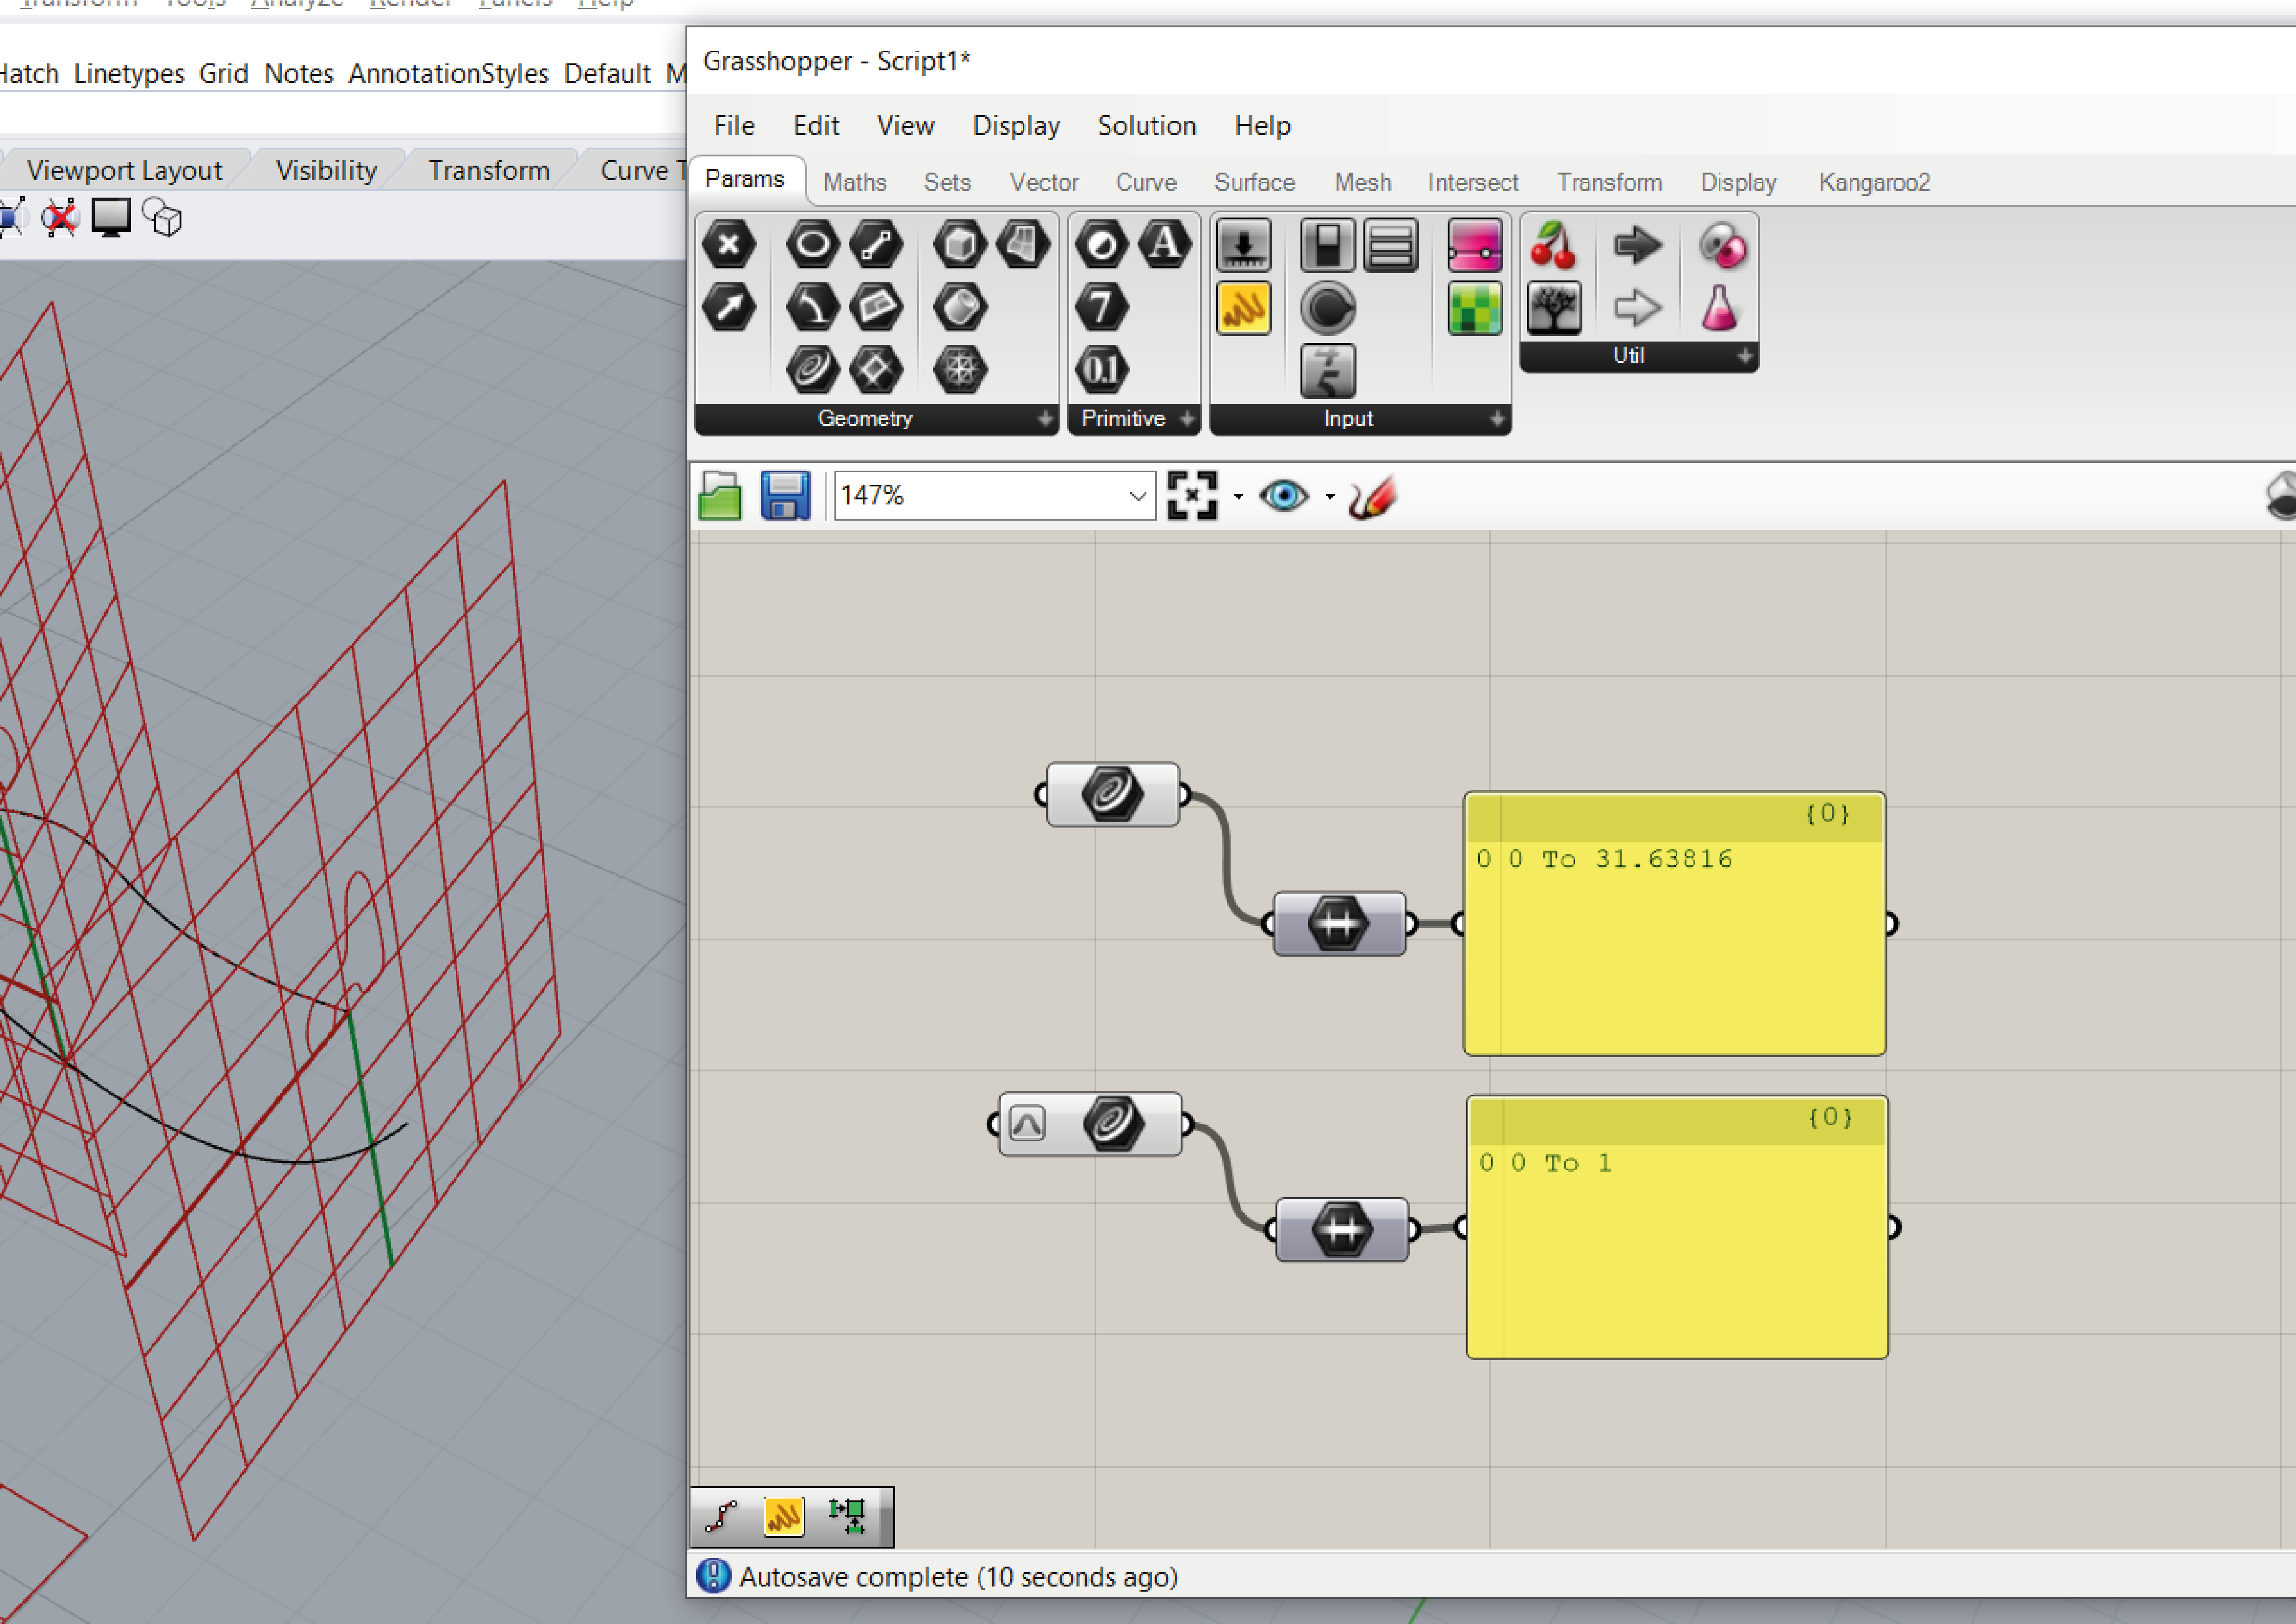
3. Then I added Sweep1, and connected the Curve component to the Rail. Then Orient, and connect the Curve of the sections to Geometry, and the Point of the middle points to Source. This is to transfer the sections from the XY plane to the YZ plane, to be able to make them move along the curve.

4. I Reparametrized the Curve of the seat, and connected it to Perp Frame, then I added three sliders, from 0 to 1.00, which locate the three sections in different places of the main curve. Then connected the Frame to the Target (B) of the Orient component, and the Geometry of said component to the Sections component of Sweep1.
Note: It’s very important to Reparametrize the main curve, so that we can control the values and switch them to 0 to 1. If we don’t Reparametrize, the sliders won’t work for the curve.
Also, activating the preview of the Sweep1 shows an approximation of the final volume.

5. Next up, I added Brep | Plane to the result of the Sweep1, and Perp Frames to the main curve, along with a slider for the count of pieces of the furniture. These two components create planes along the sweeped volume. Connecting the Perp Frames to the Brep | Plane creates as many planes as the slider allows.

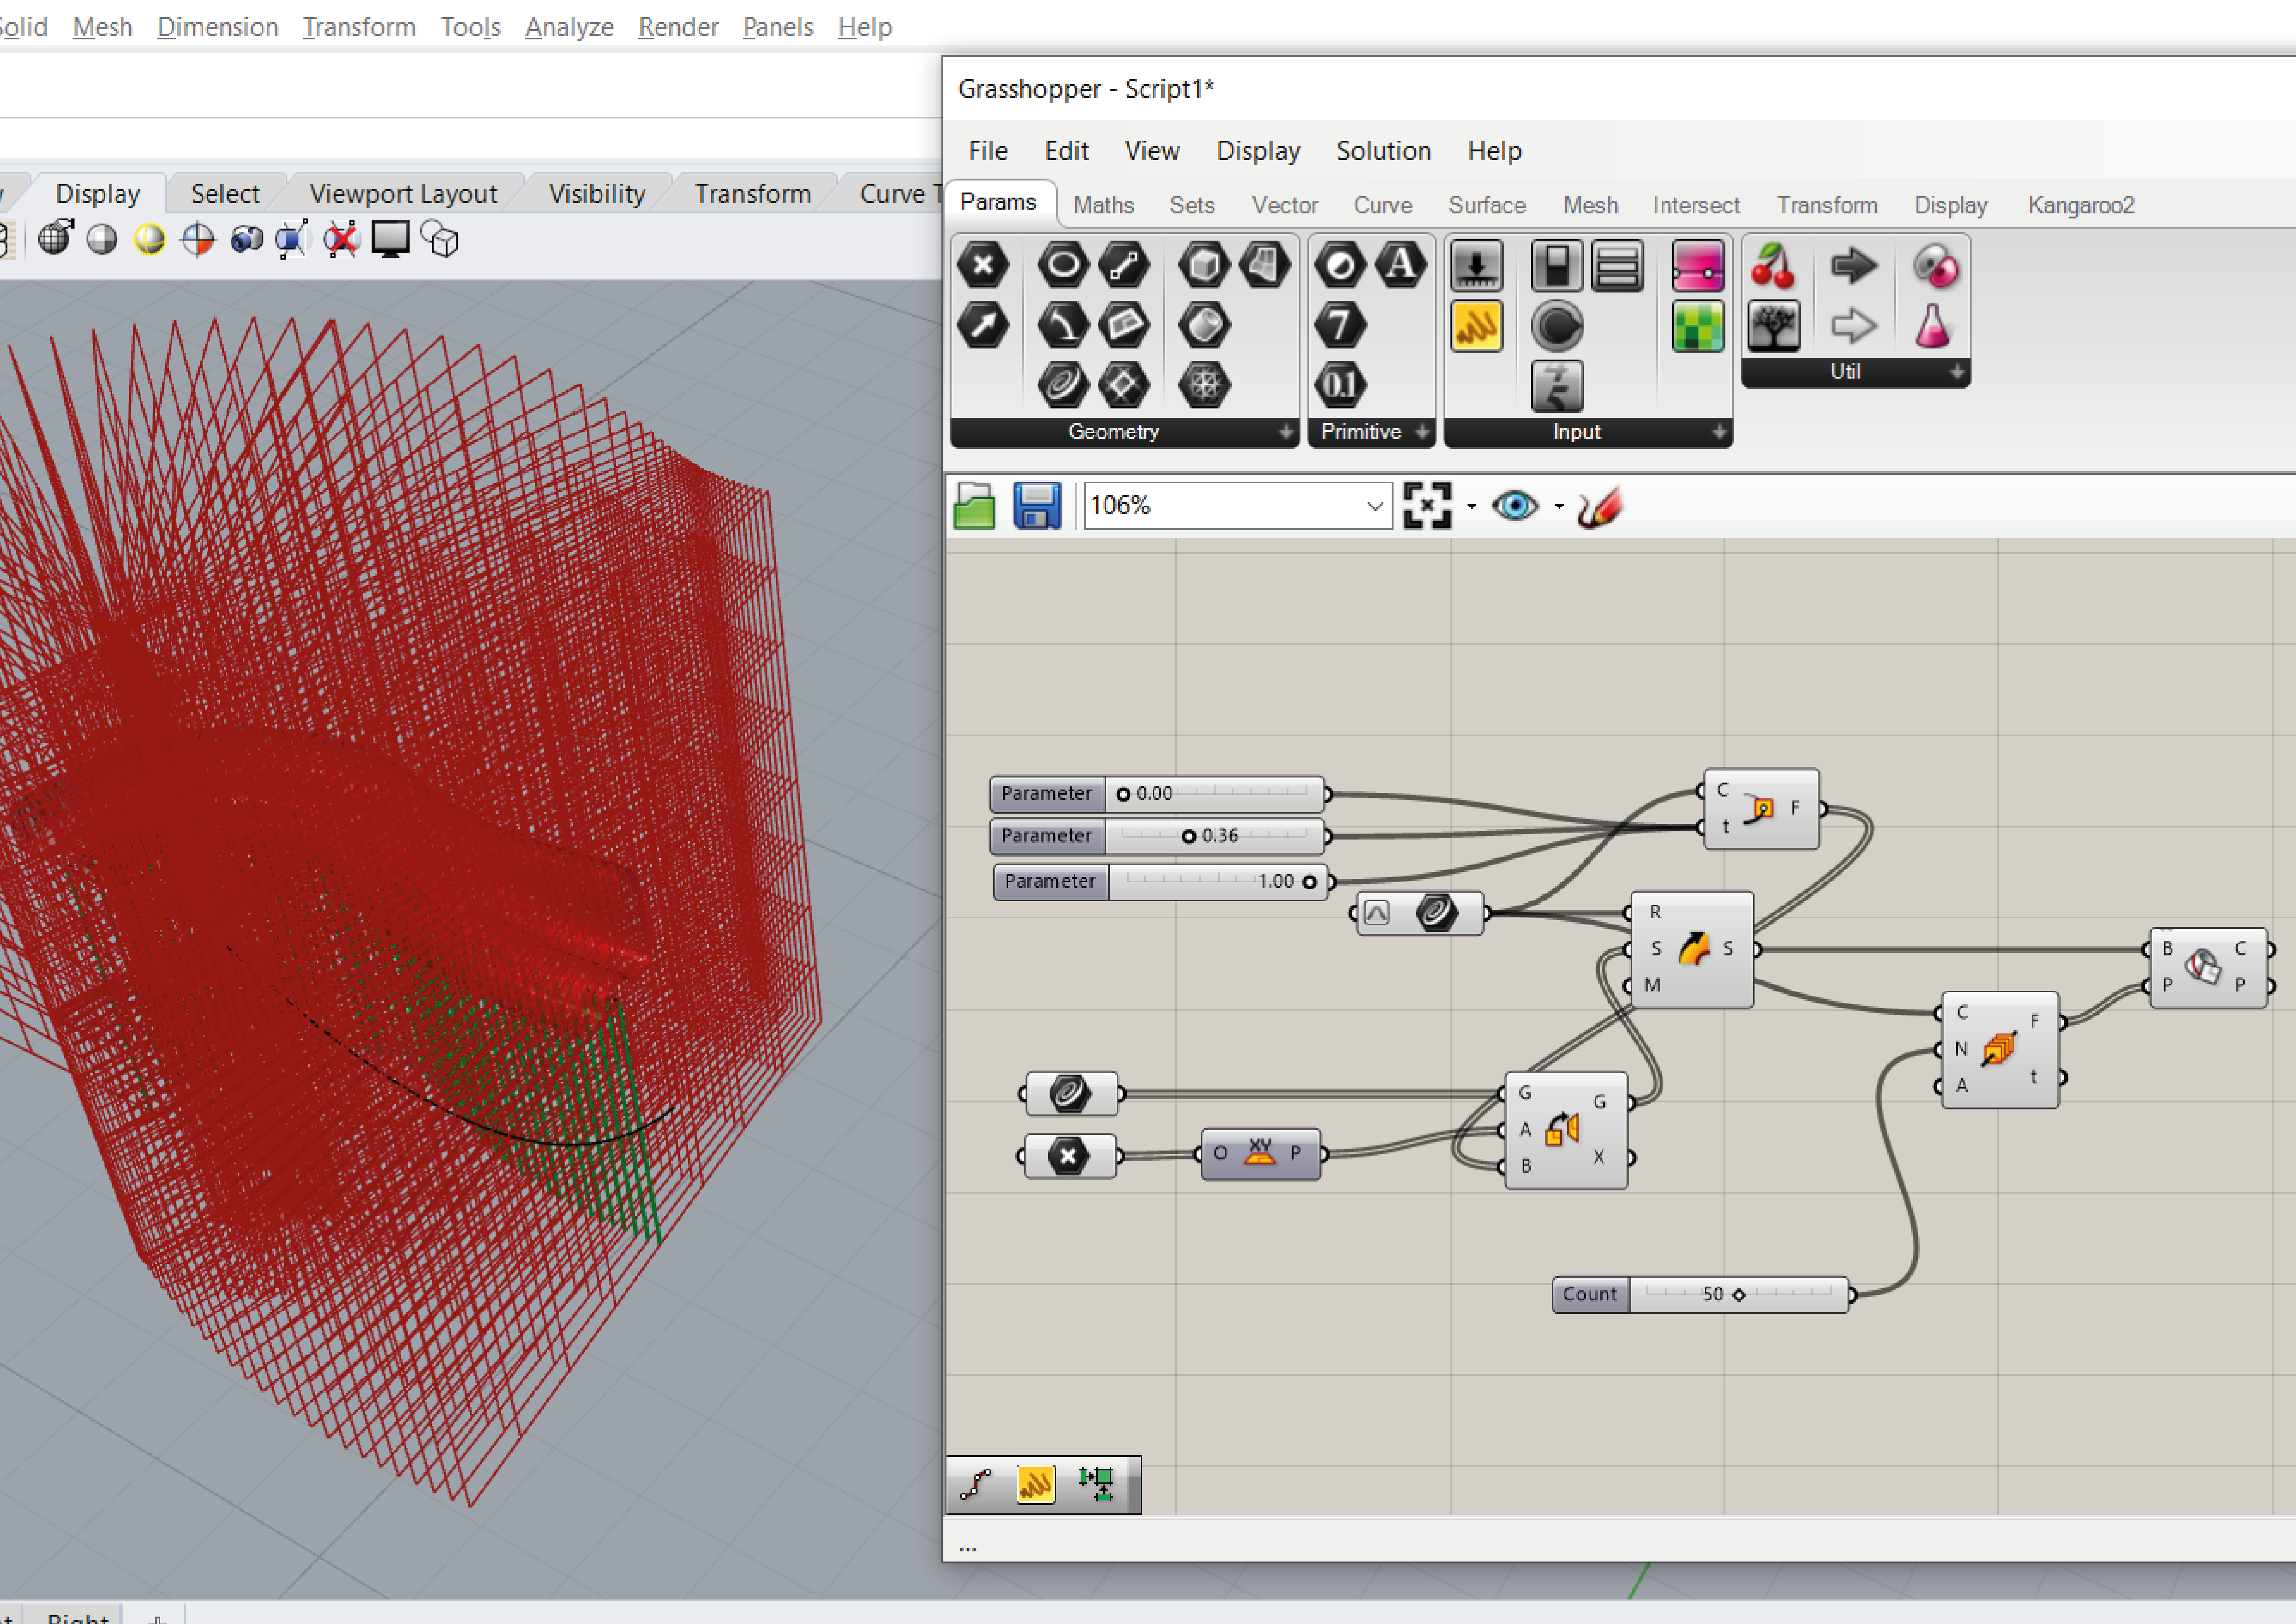
6. To create individual pieces from the planes, I added Surface to the Curves component from the Brep | Plane, and a Vector from the Perp Frames. The Vector got connected to a Multiply component along with a slider for the thickness of the piece. Then, both Surface and Multiply got connected to a Move component, however the Motion (T) of the component, used an expression of -x/2, so the original plane sits right in the middle of the thickness of the piece.
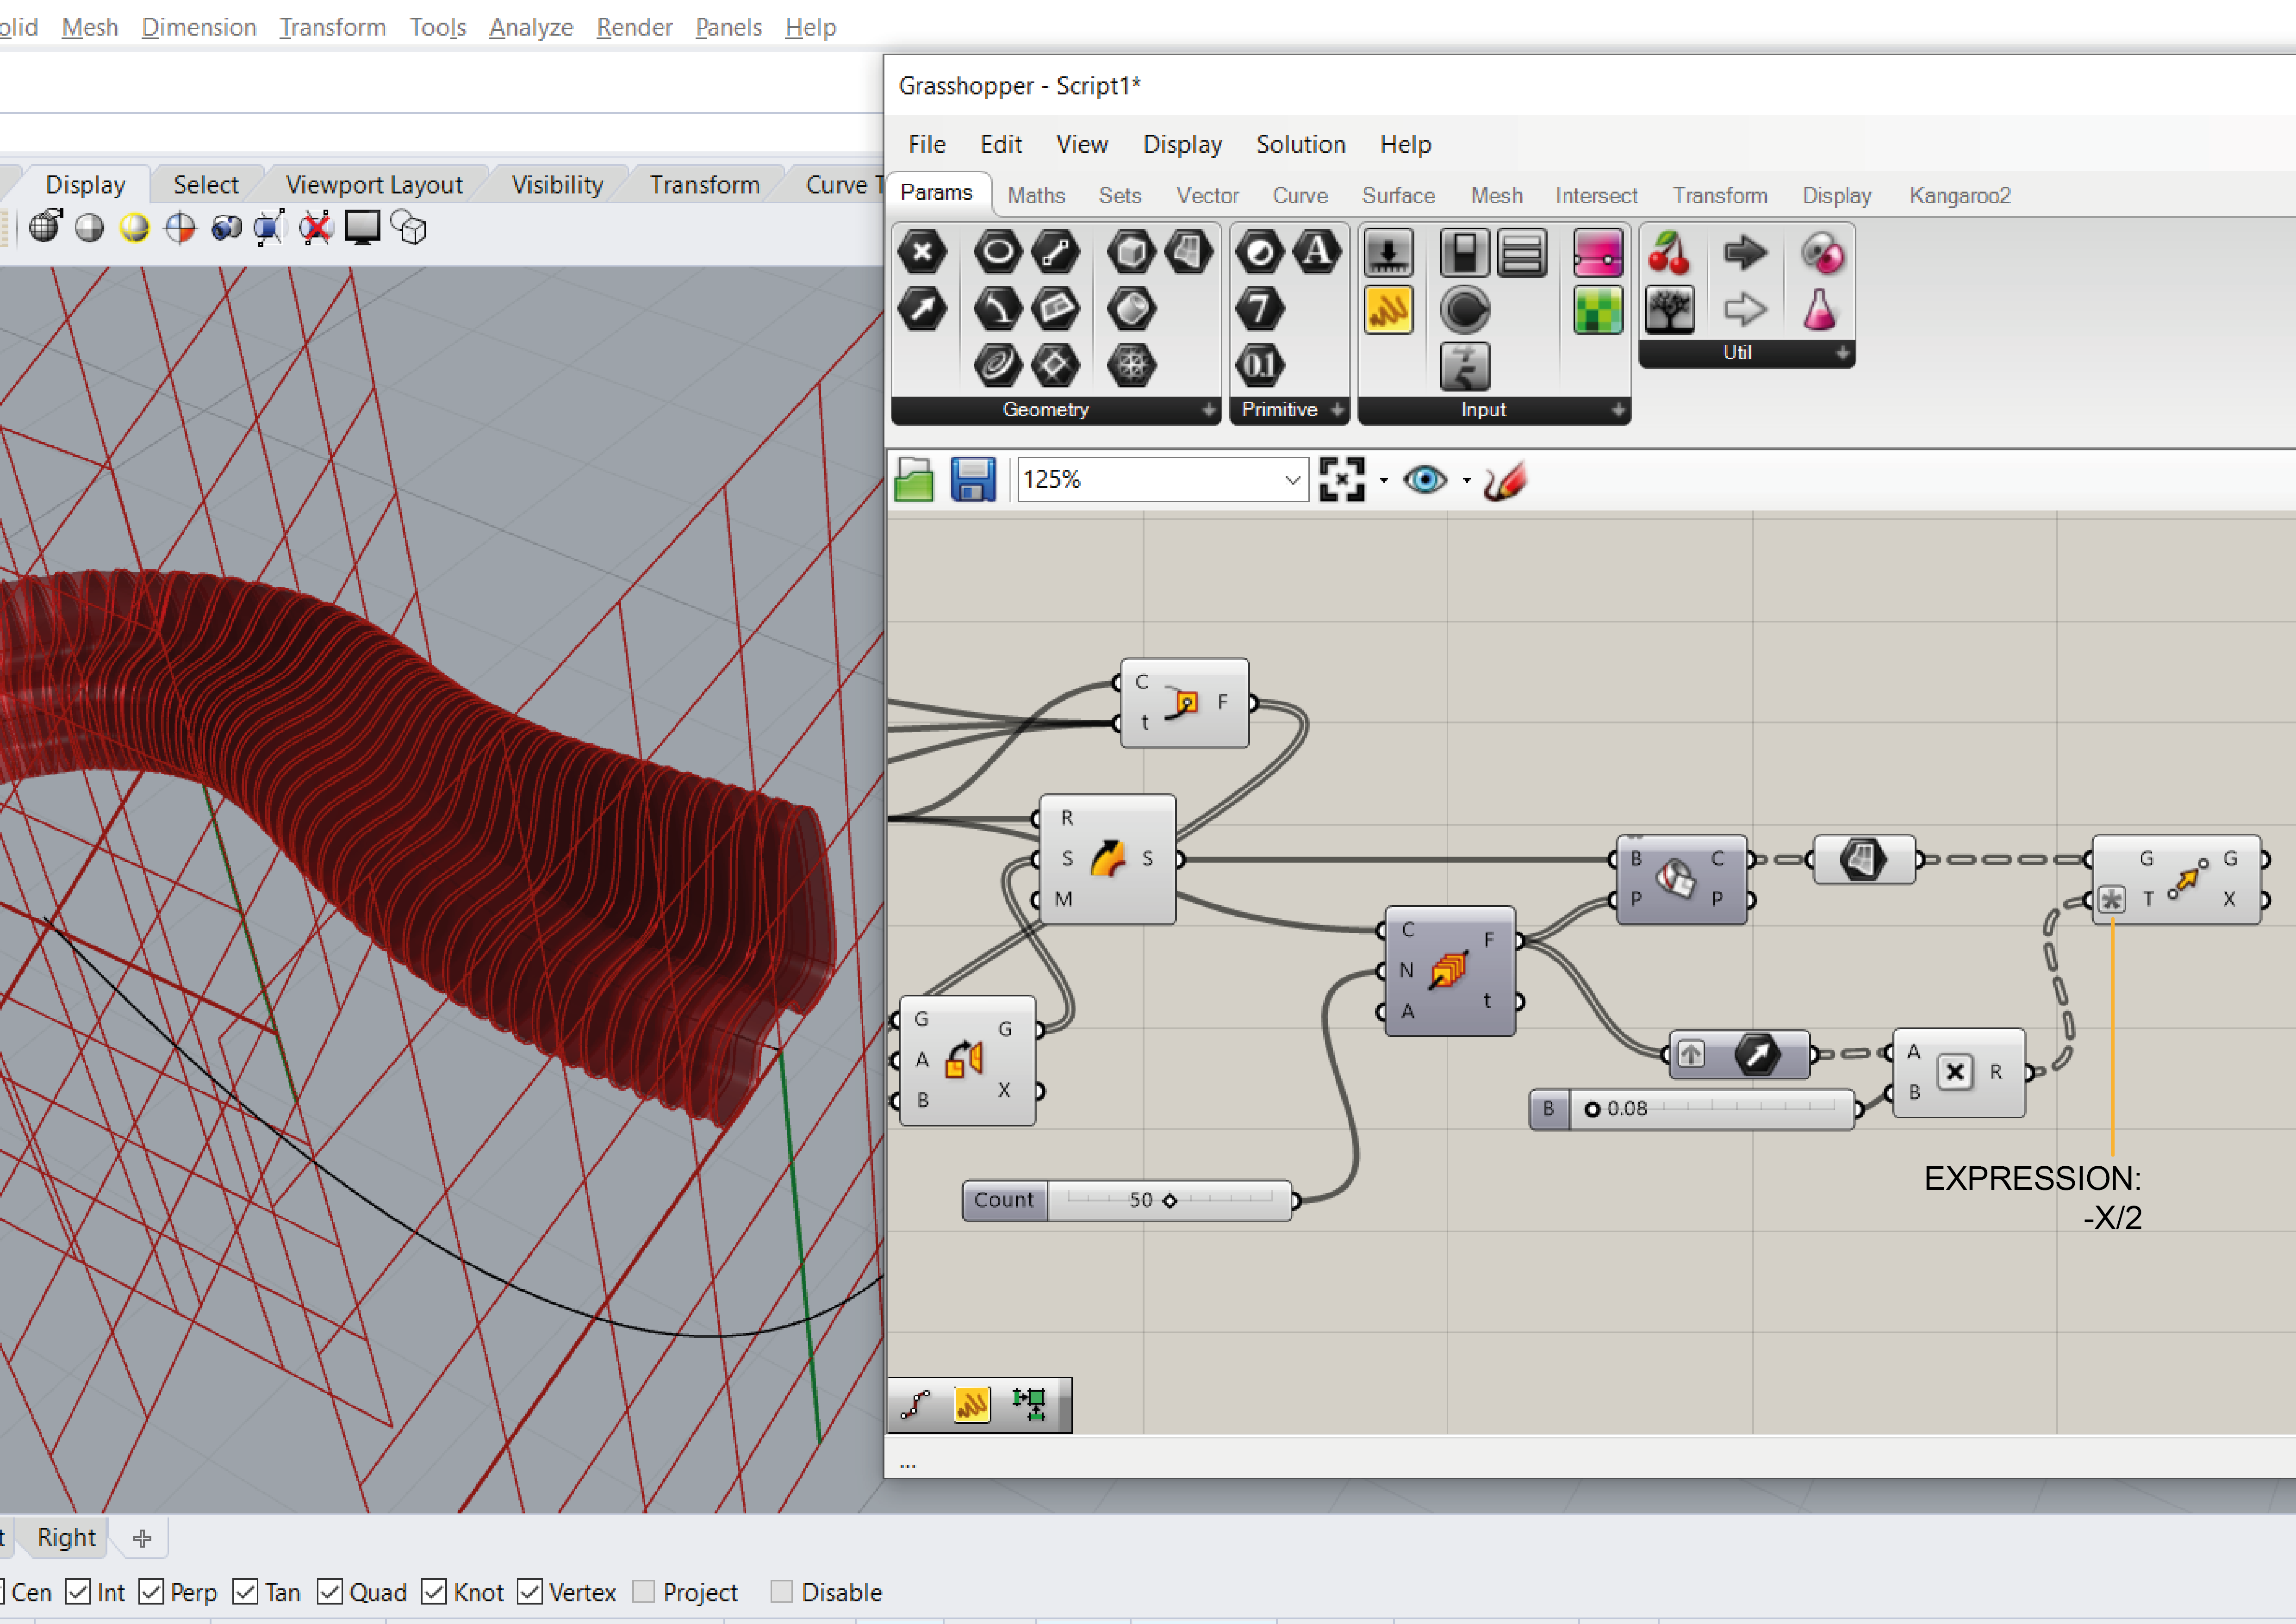
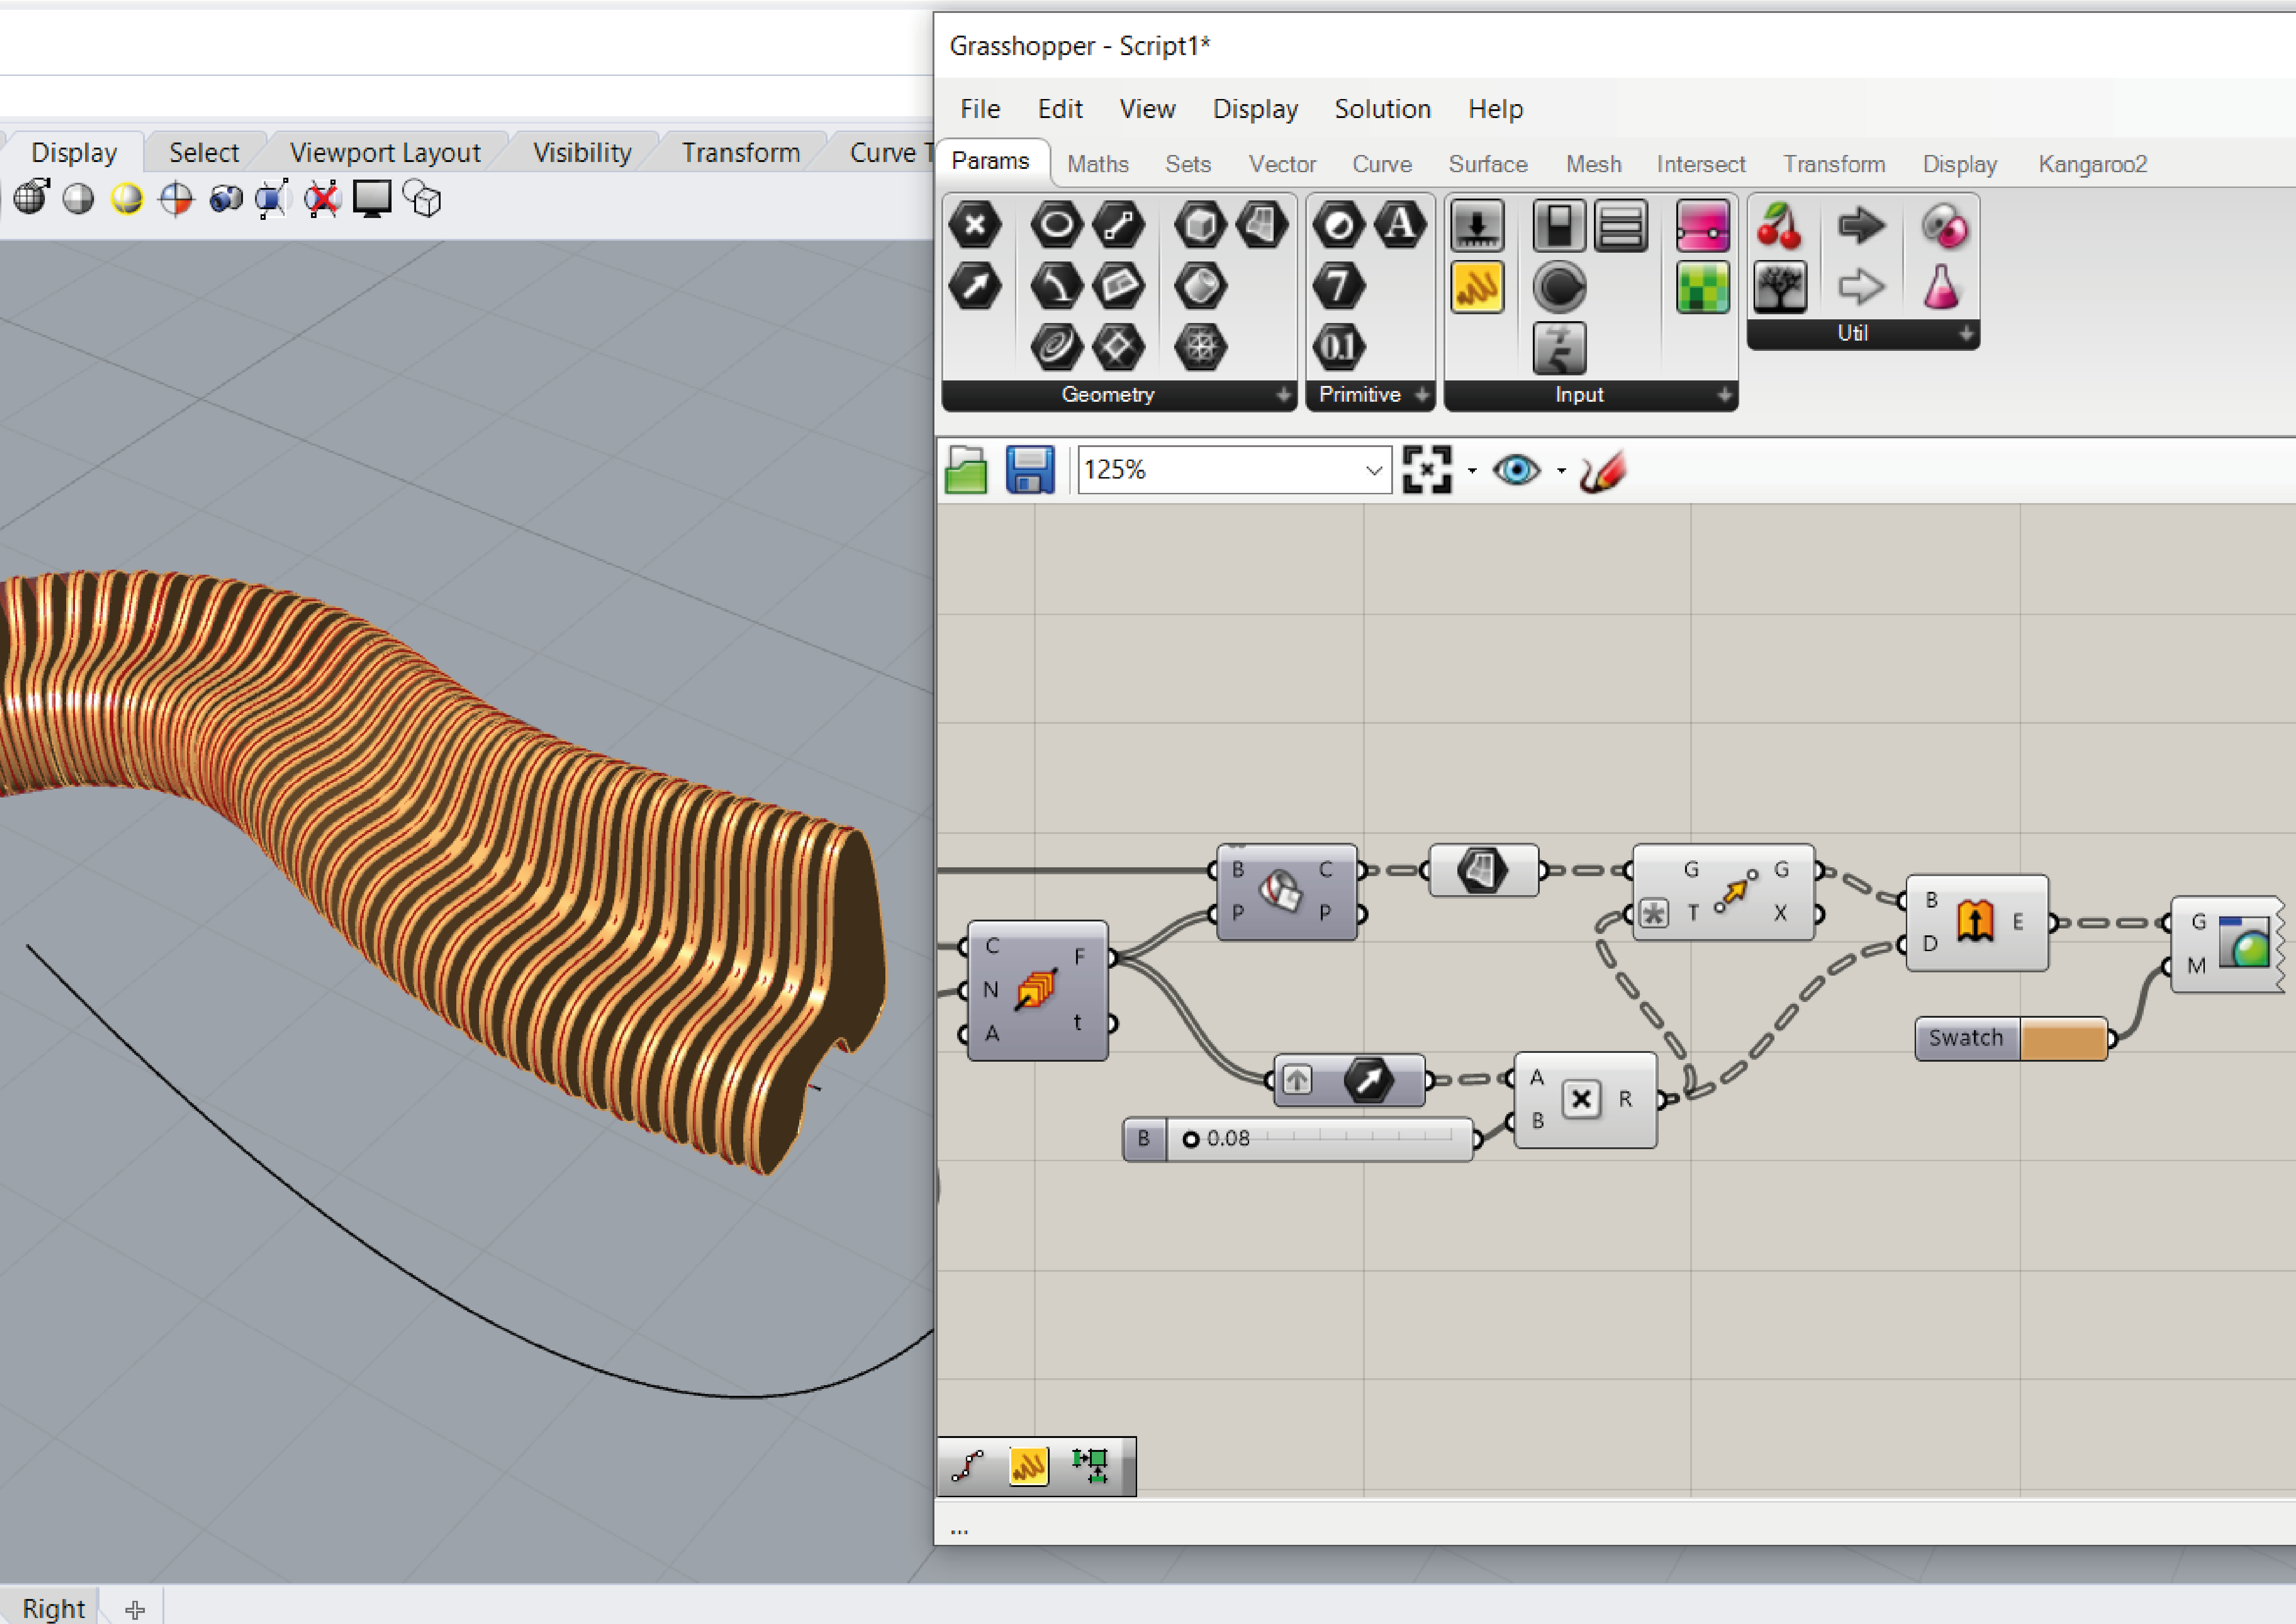
7. Finally, I added an Extrusion component, so the pieces are solid, and a Custom Preview and Colour Swatch so it has a wooden look.
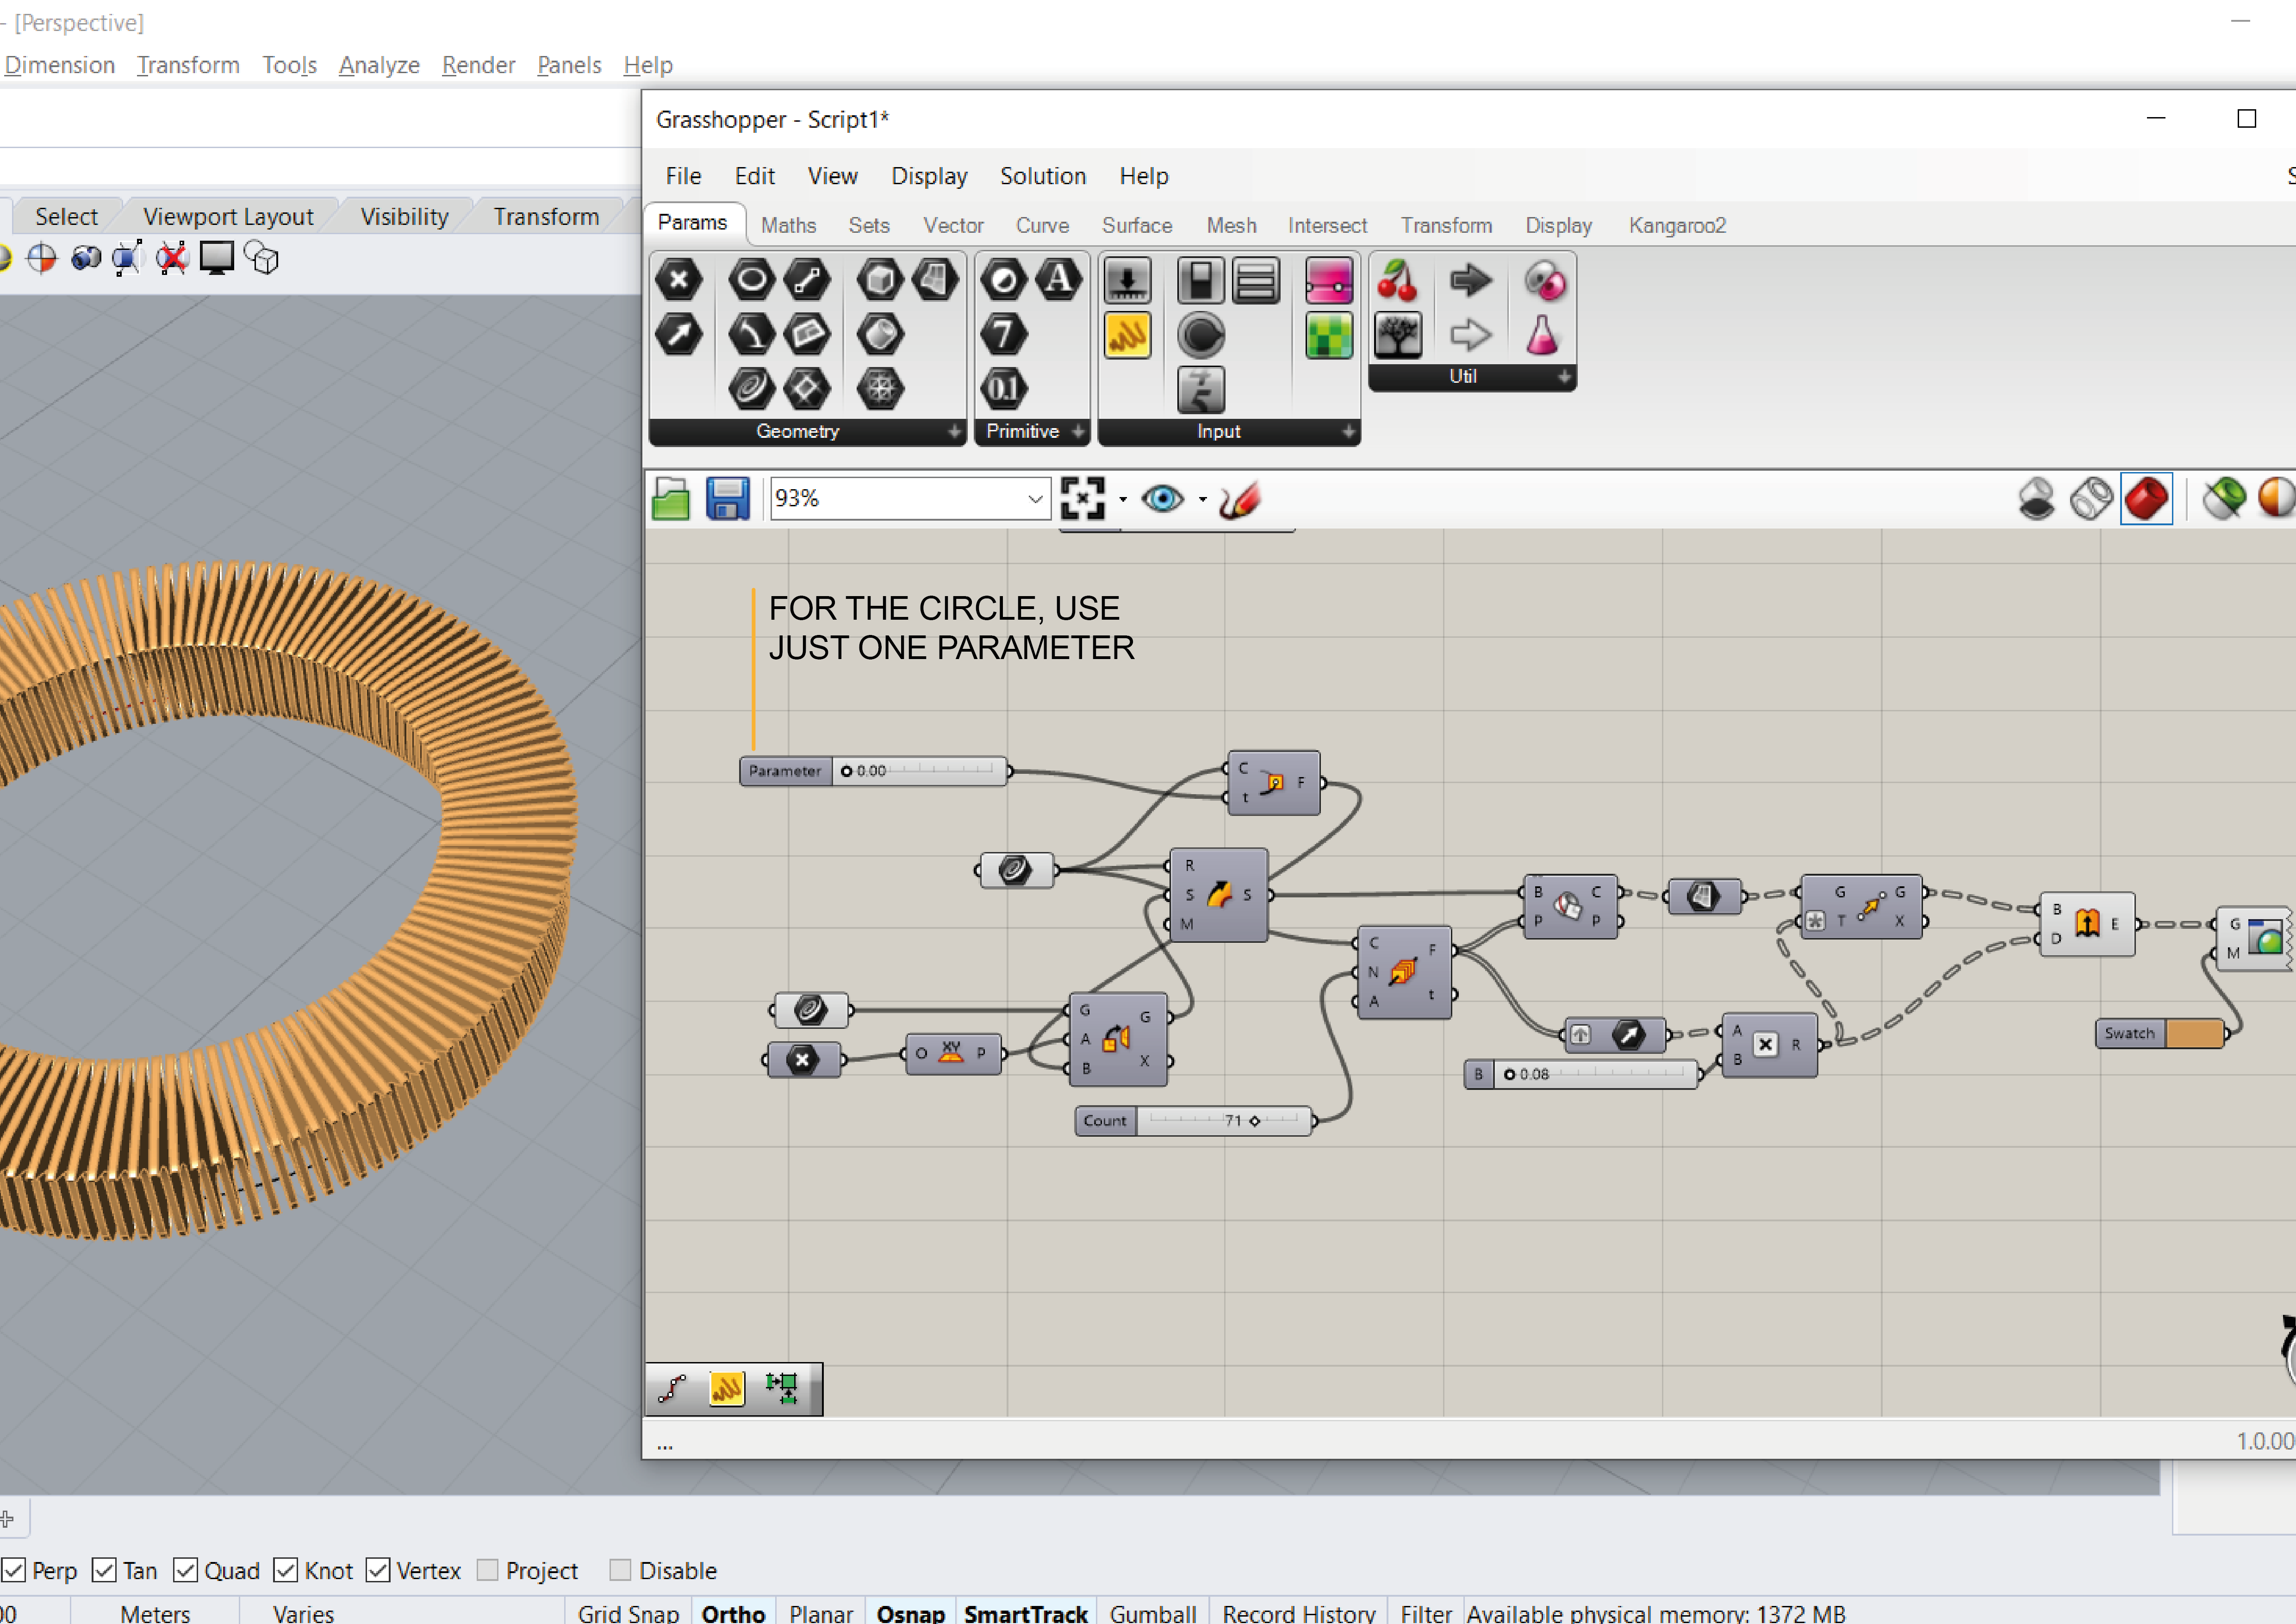
8. For the circular cafeteria/bar, I used the same steps for the script, however, just one slider is necessary on the Perp Frames, since there’s only one section for the circle.
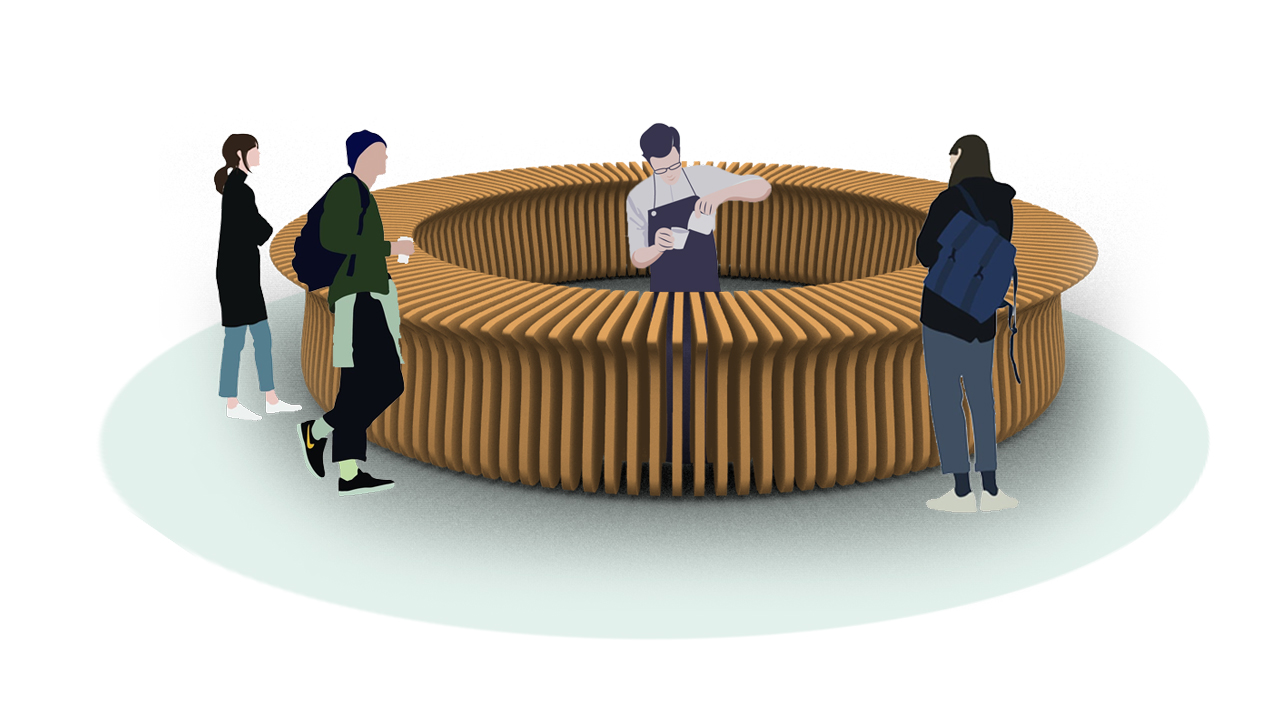
Final Images:

Final Script (with Internalized Data)
Author: Sebastián Díaz González