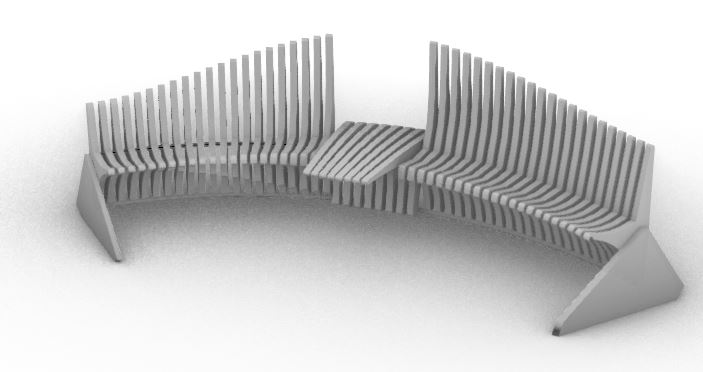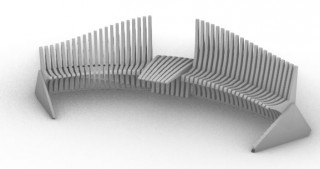
Part 1_create the seats
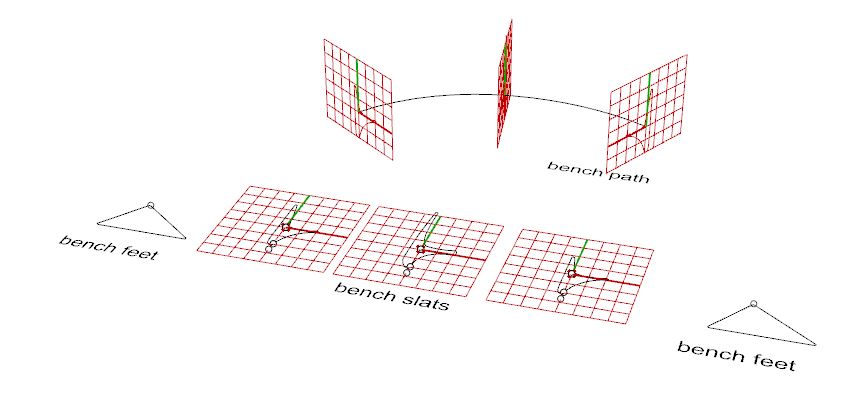
Step 1_
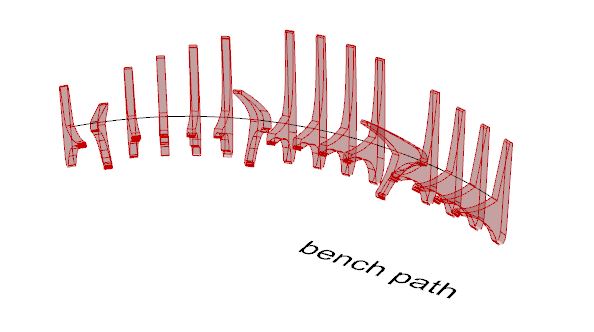
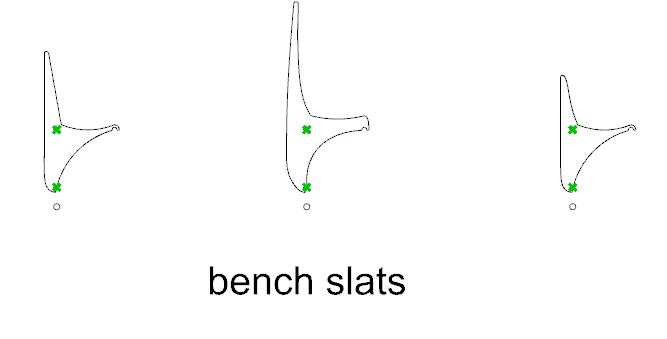
Establish a curve for the path of the bench to follow. Create closed curves for the sections the seats to follow and for the feet.

Step 2_
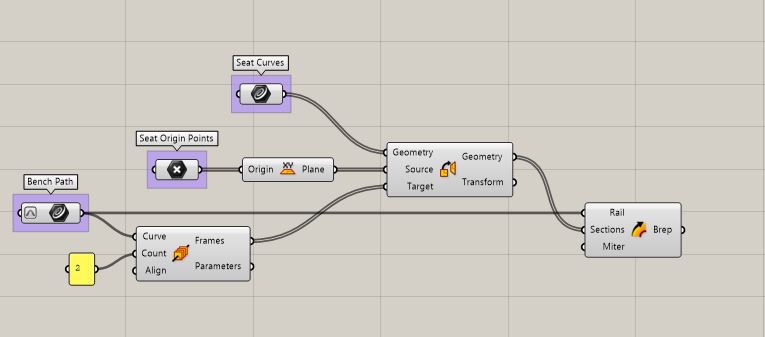
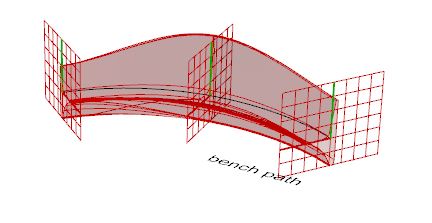
Orient the seat curves along the path of the bench. Place the curves at each endpoint and somewhere else along the line (I chose the midpoint).
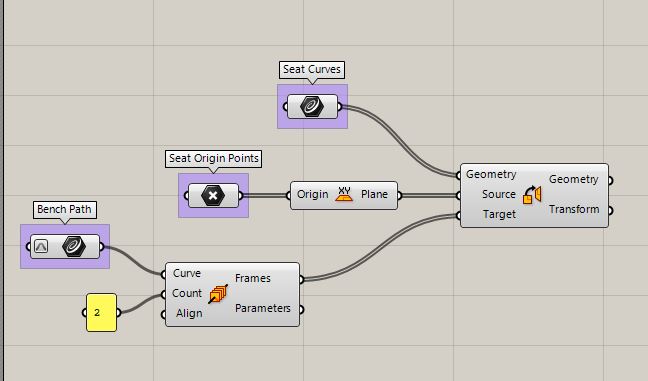
Step 3_
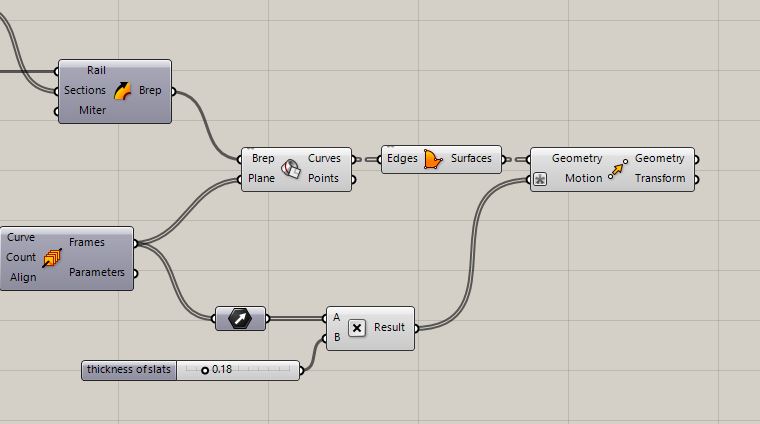
Sweep the seat curves using the path of the bench as the rail.
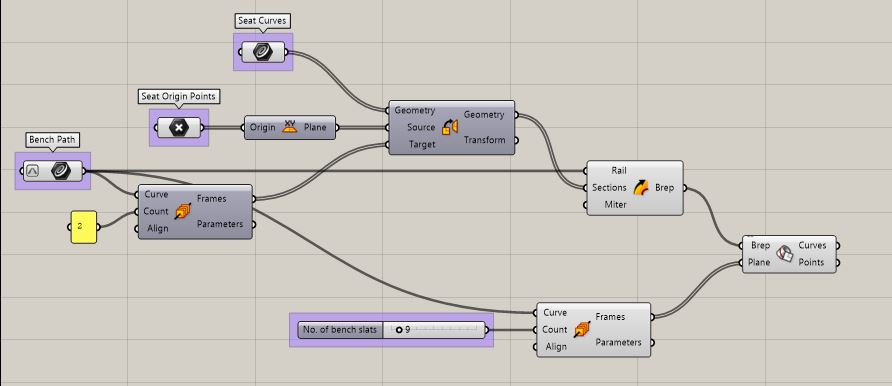
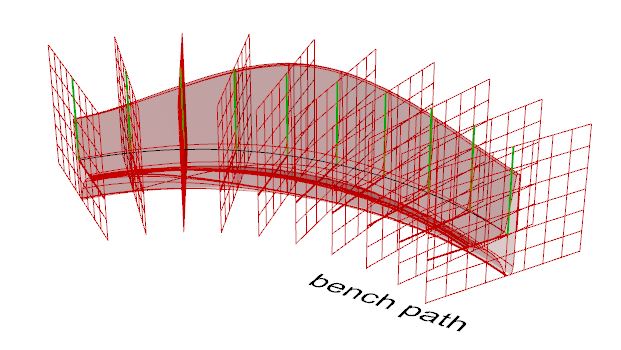
Step 4_
To divide the swept form, use Perpendicular Frames and Brep|Frame to establish the number of bench slats (I chose 9 to keep visual clutter low).
Step 5_
Create surfaces for each bench slat. Use the move command with the expression -x/2 to establish a thickness for the bench slats.

Step 6_
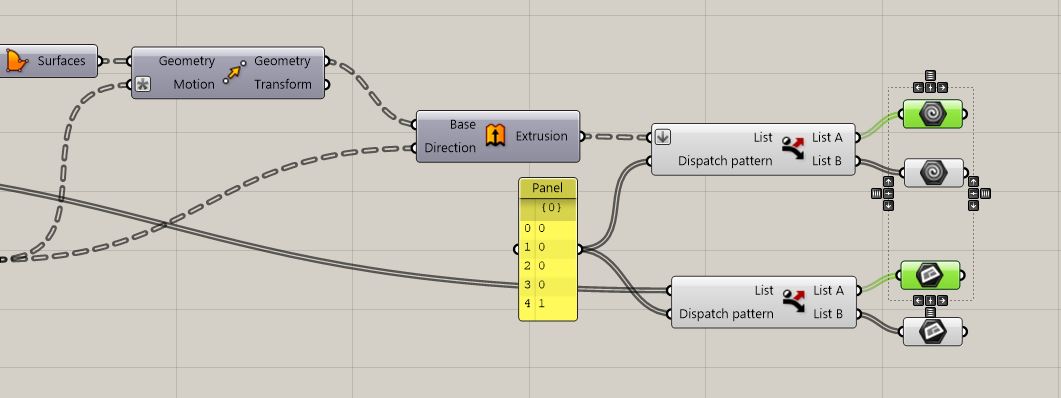
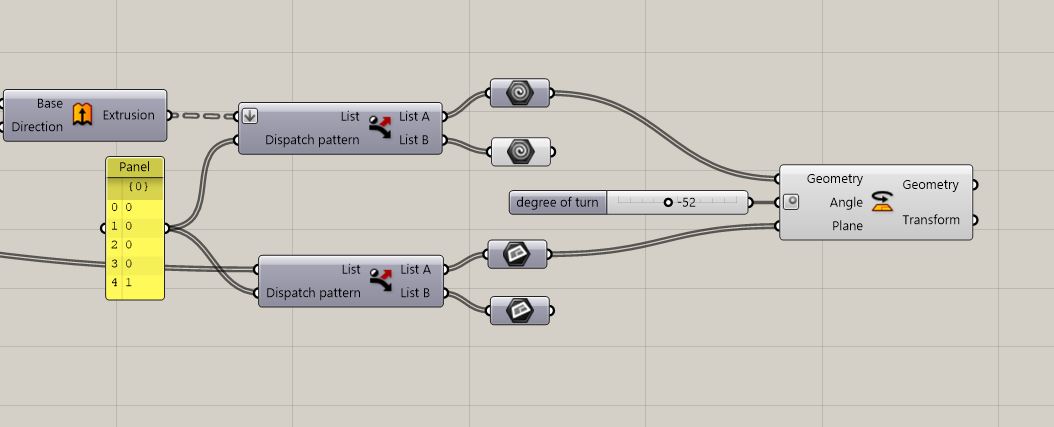
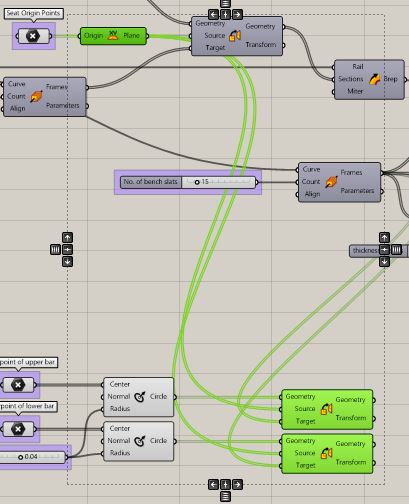
Extrude the slat surfaces. Dispatch the list of extruded forms and dispatch the list of perpendicular frames using the same pattern. (slat count changed to 15 to make pattern visual)
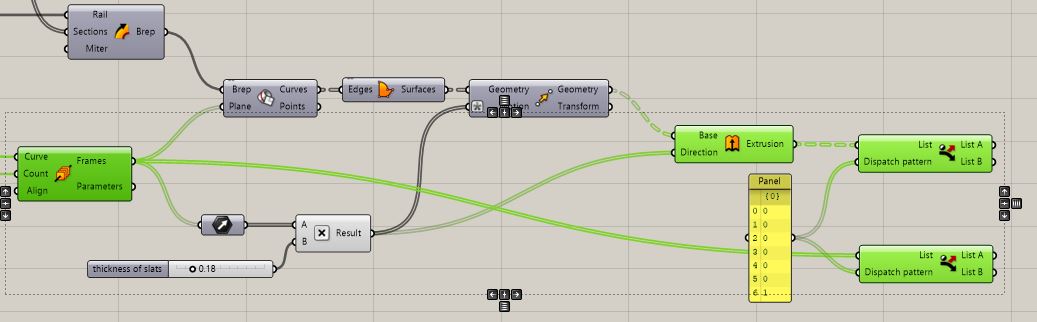
Step 7_
Dispatching these lists creates a total of 4 lists. 2 are extruded forms, 2 are planes that correspond to these forms.
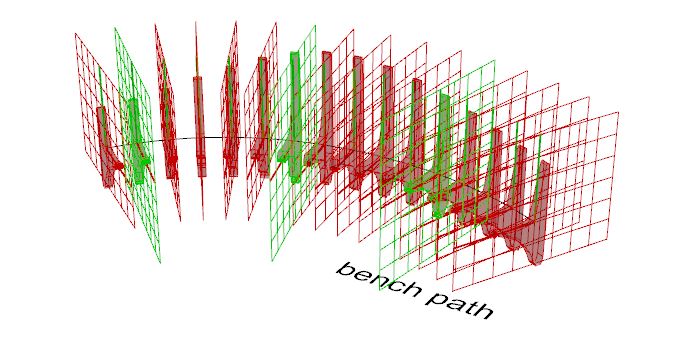
Step 8_
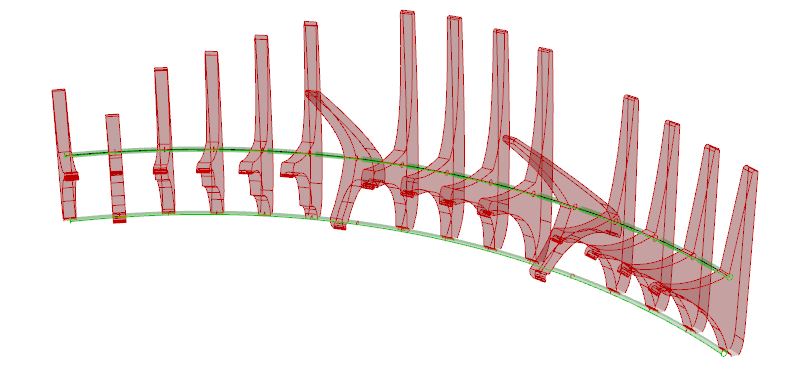
Using the corresponding planes and geometries, add a rotation command rotating them between -90 degrees and 0 degrees.
Part 2_create the bench support bars
Step 9_
Start by creating points for the upper bar and the lower bar.
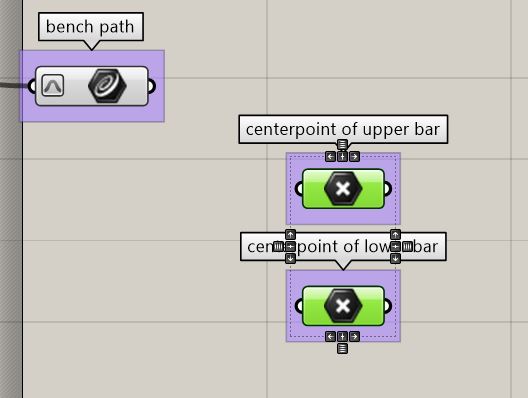
Step 10_
Create circles of equal radius at the center-points of the support bars. Orient the circles along the path of the bench using XY origin and the perpendicular frames for the bench slats.

Step 11_
Sweep the support bars using the bench path as a rail.

Part 3_create the feet
Step 12_
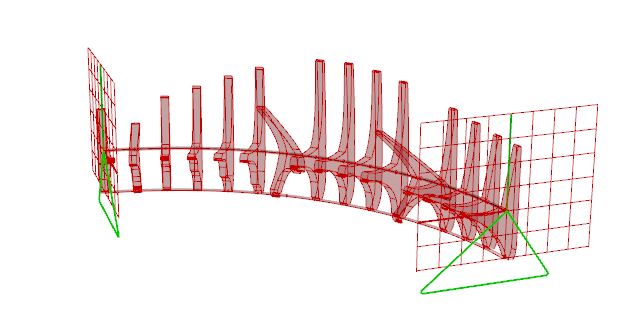
Assign origin points for each bench foot. Orient foot curves at the ends of the bench path.
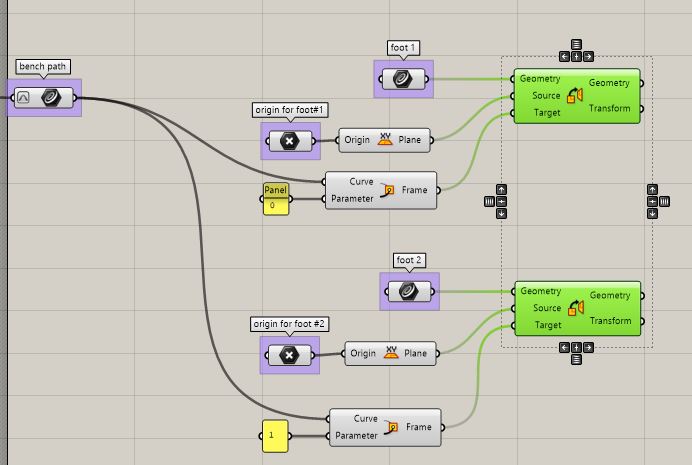
Step 13_
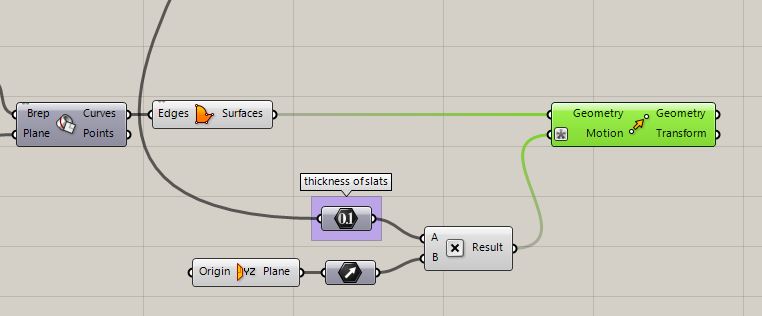
Create surfaces for the feet.
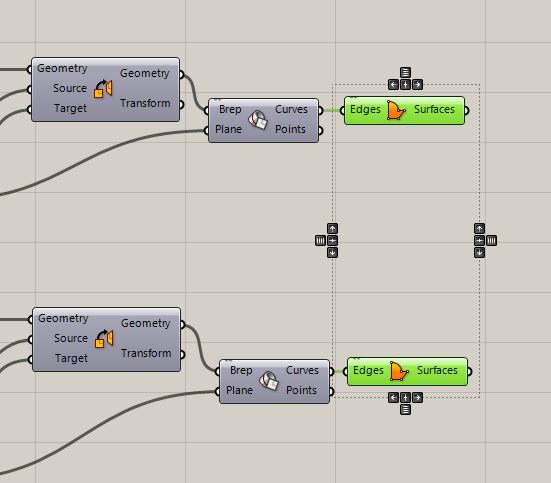
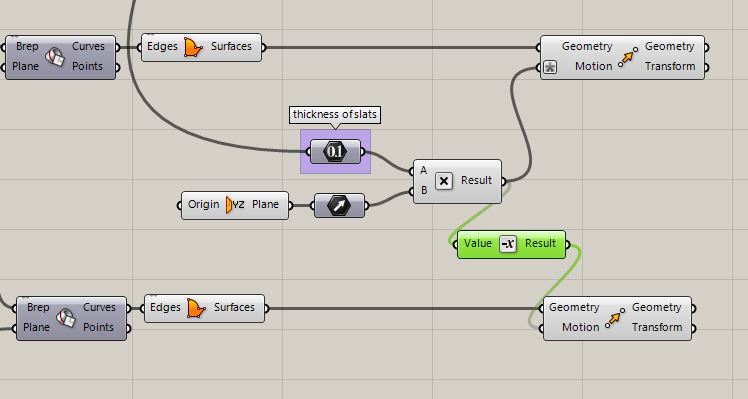
Step 14_
Move the edge of foot #1 using the thickness of the seat slats and move function with the expression x/2.
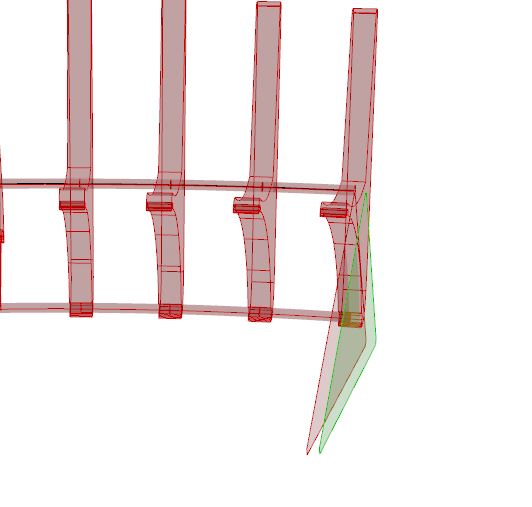
Step 15_
Move the edge of foot #2 using the negative of the multiplication function.

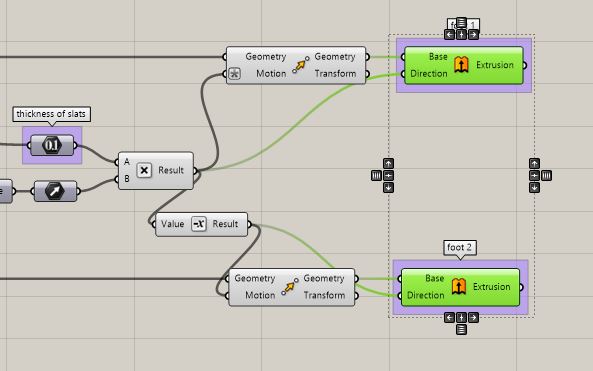
Step 16_
Extrude the edges of feet using the multiplication function for foot #1 and the negative of that for foot #2.
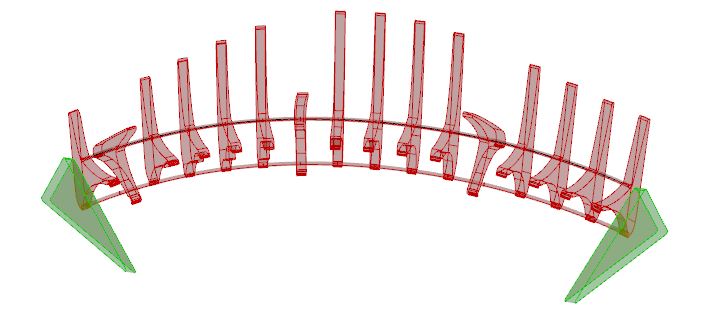
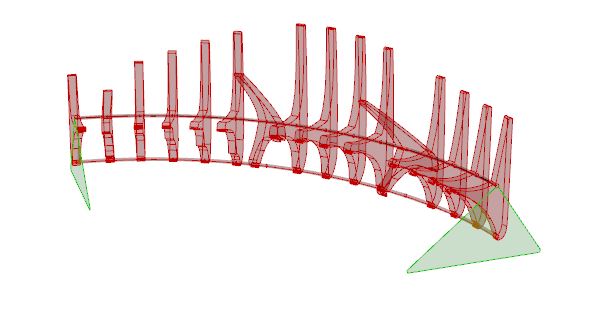
Step 17_
Vary the number and thickness of slats, pattern of slats, and path of bench to achieve the desired form.