
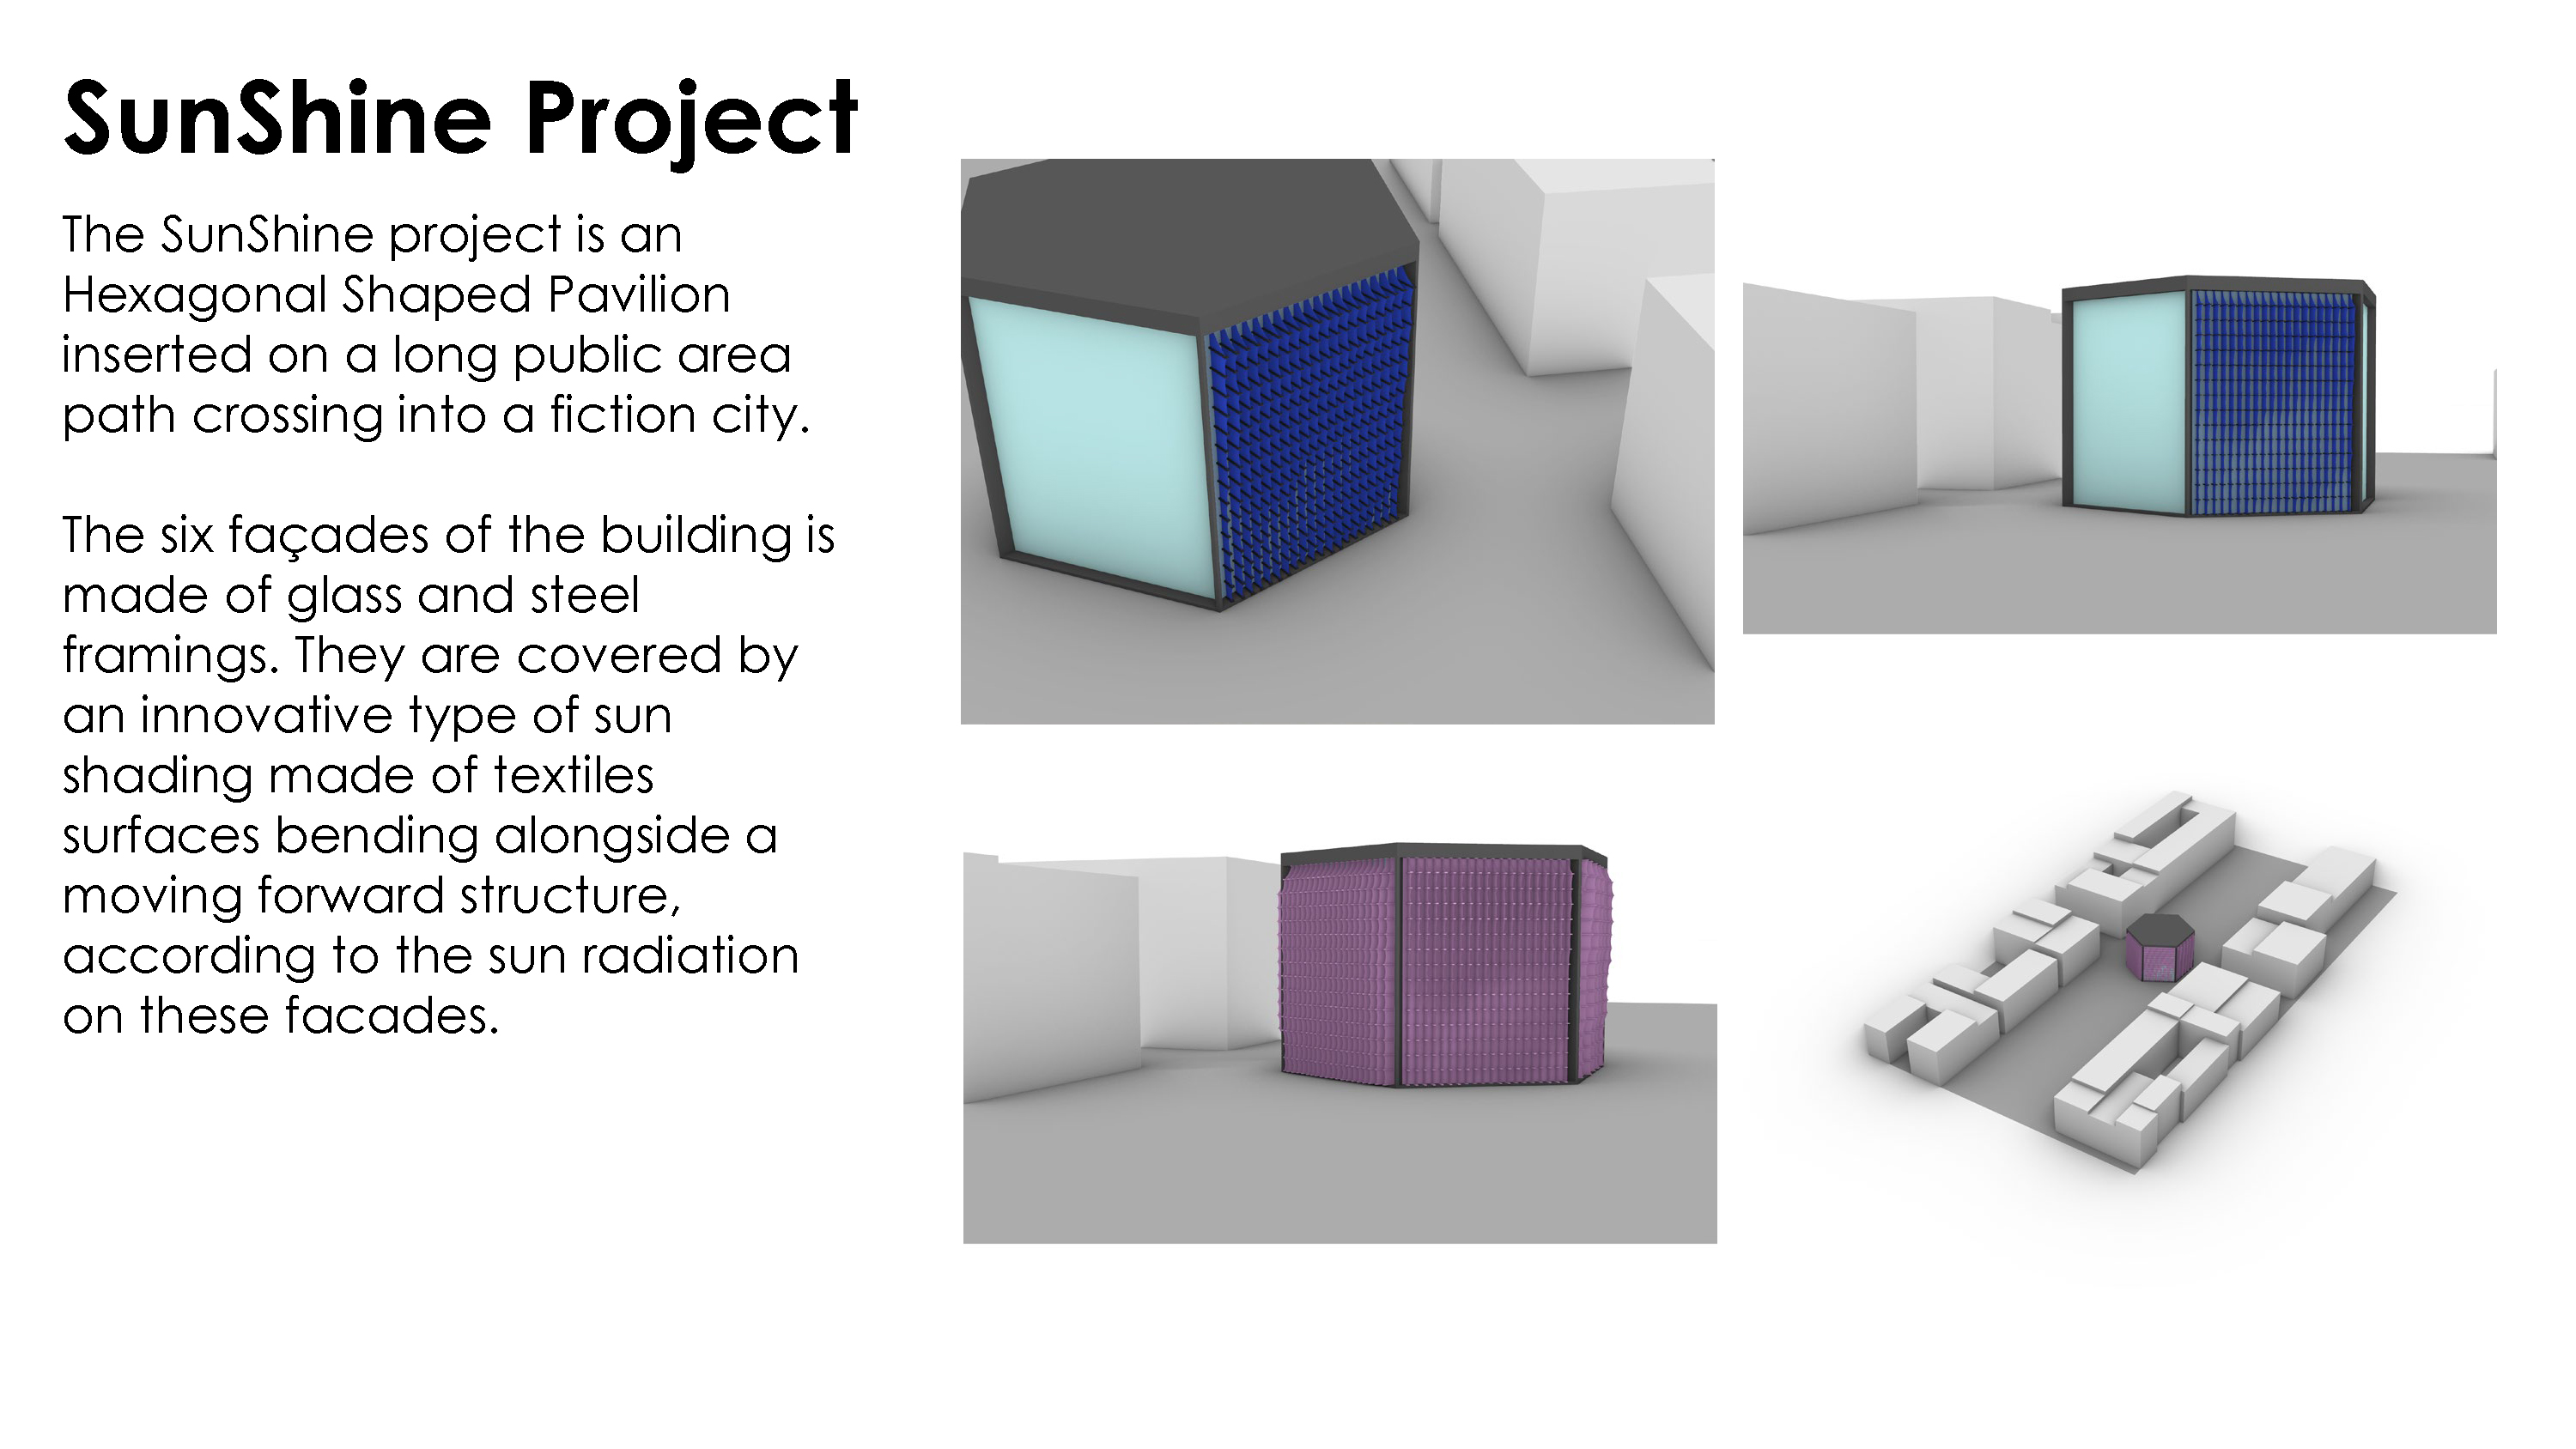
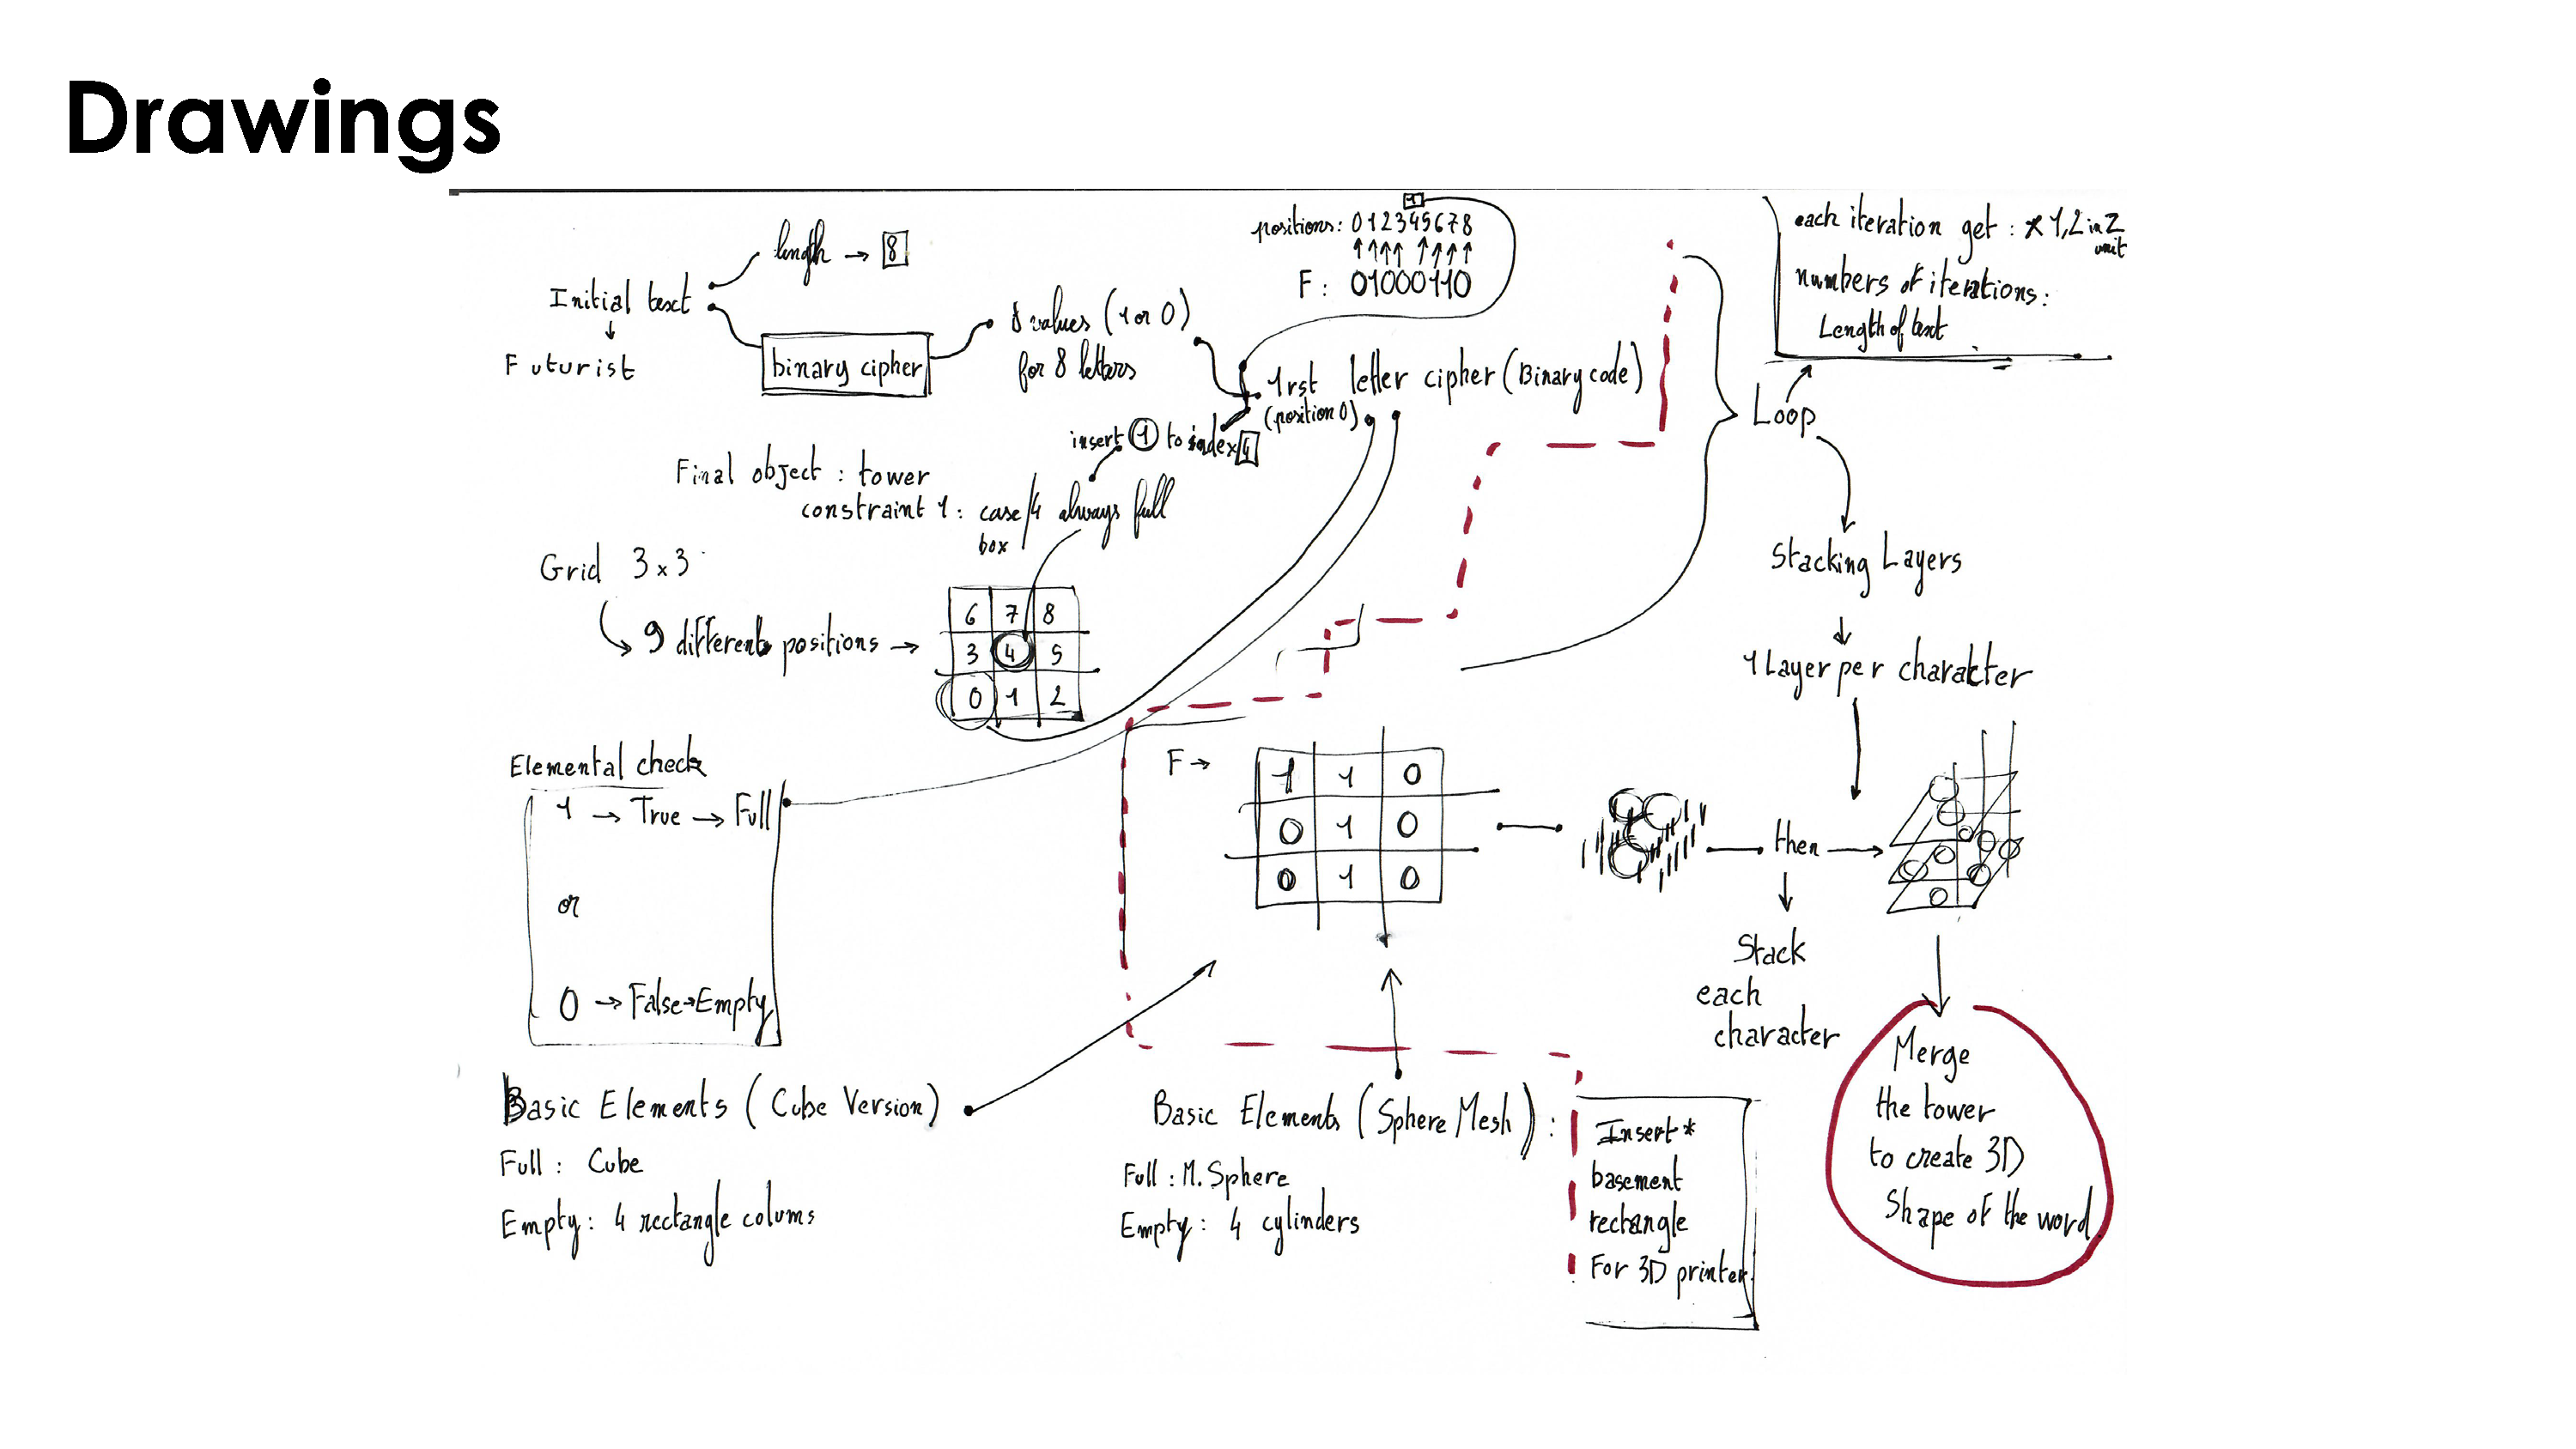
Introduction :
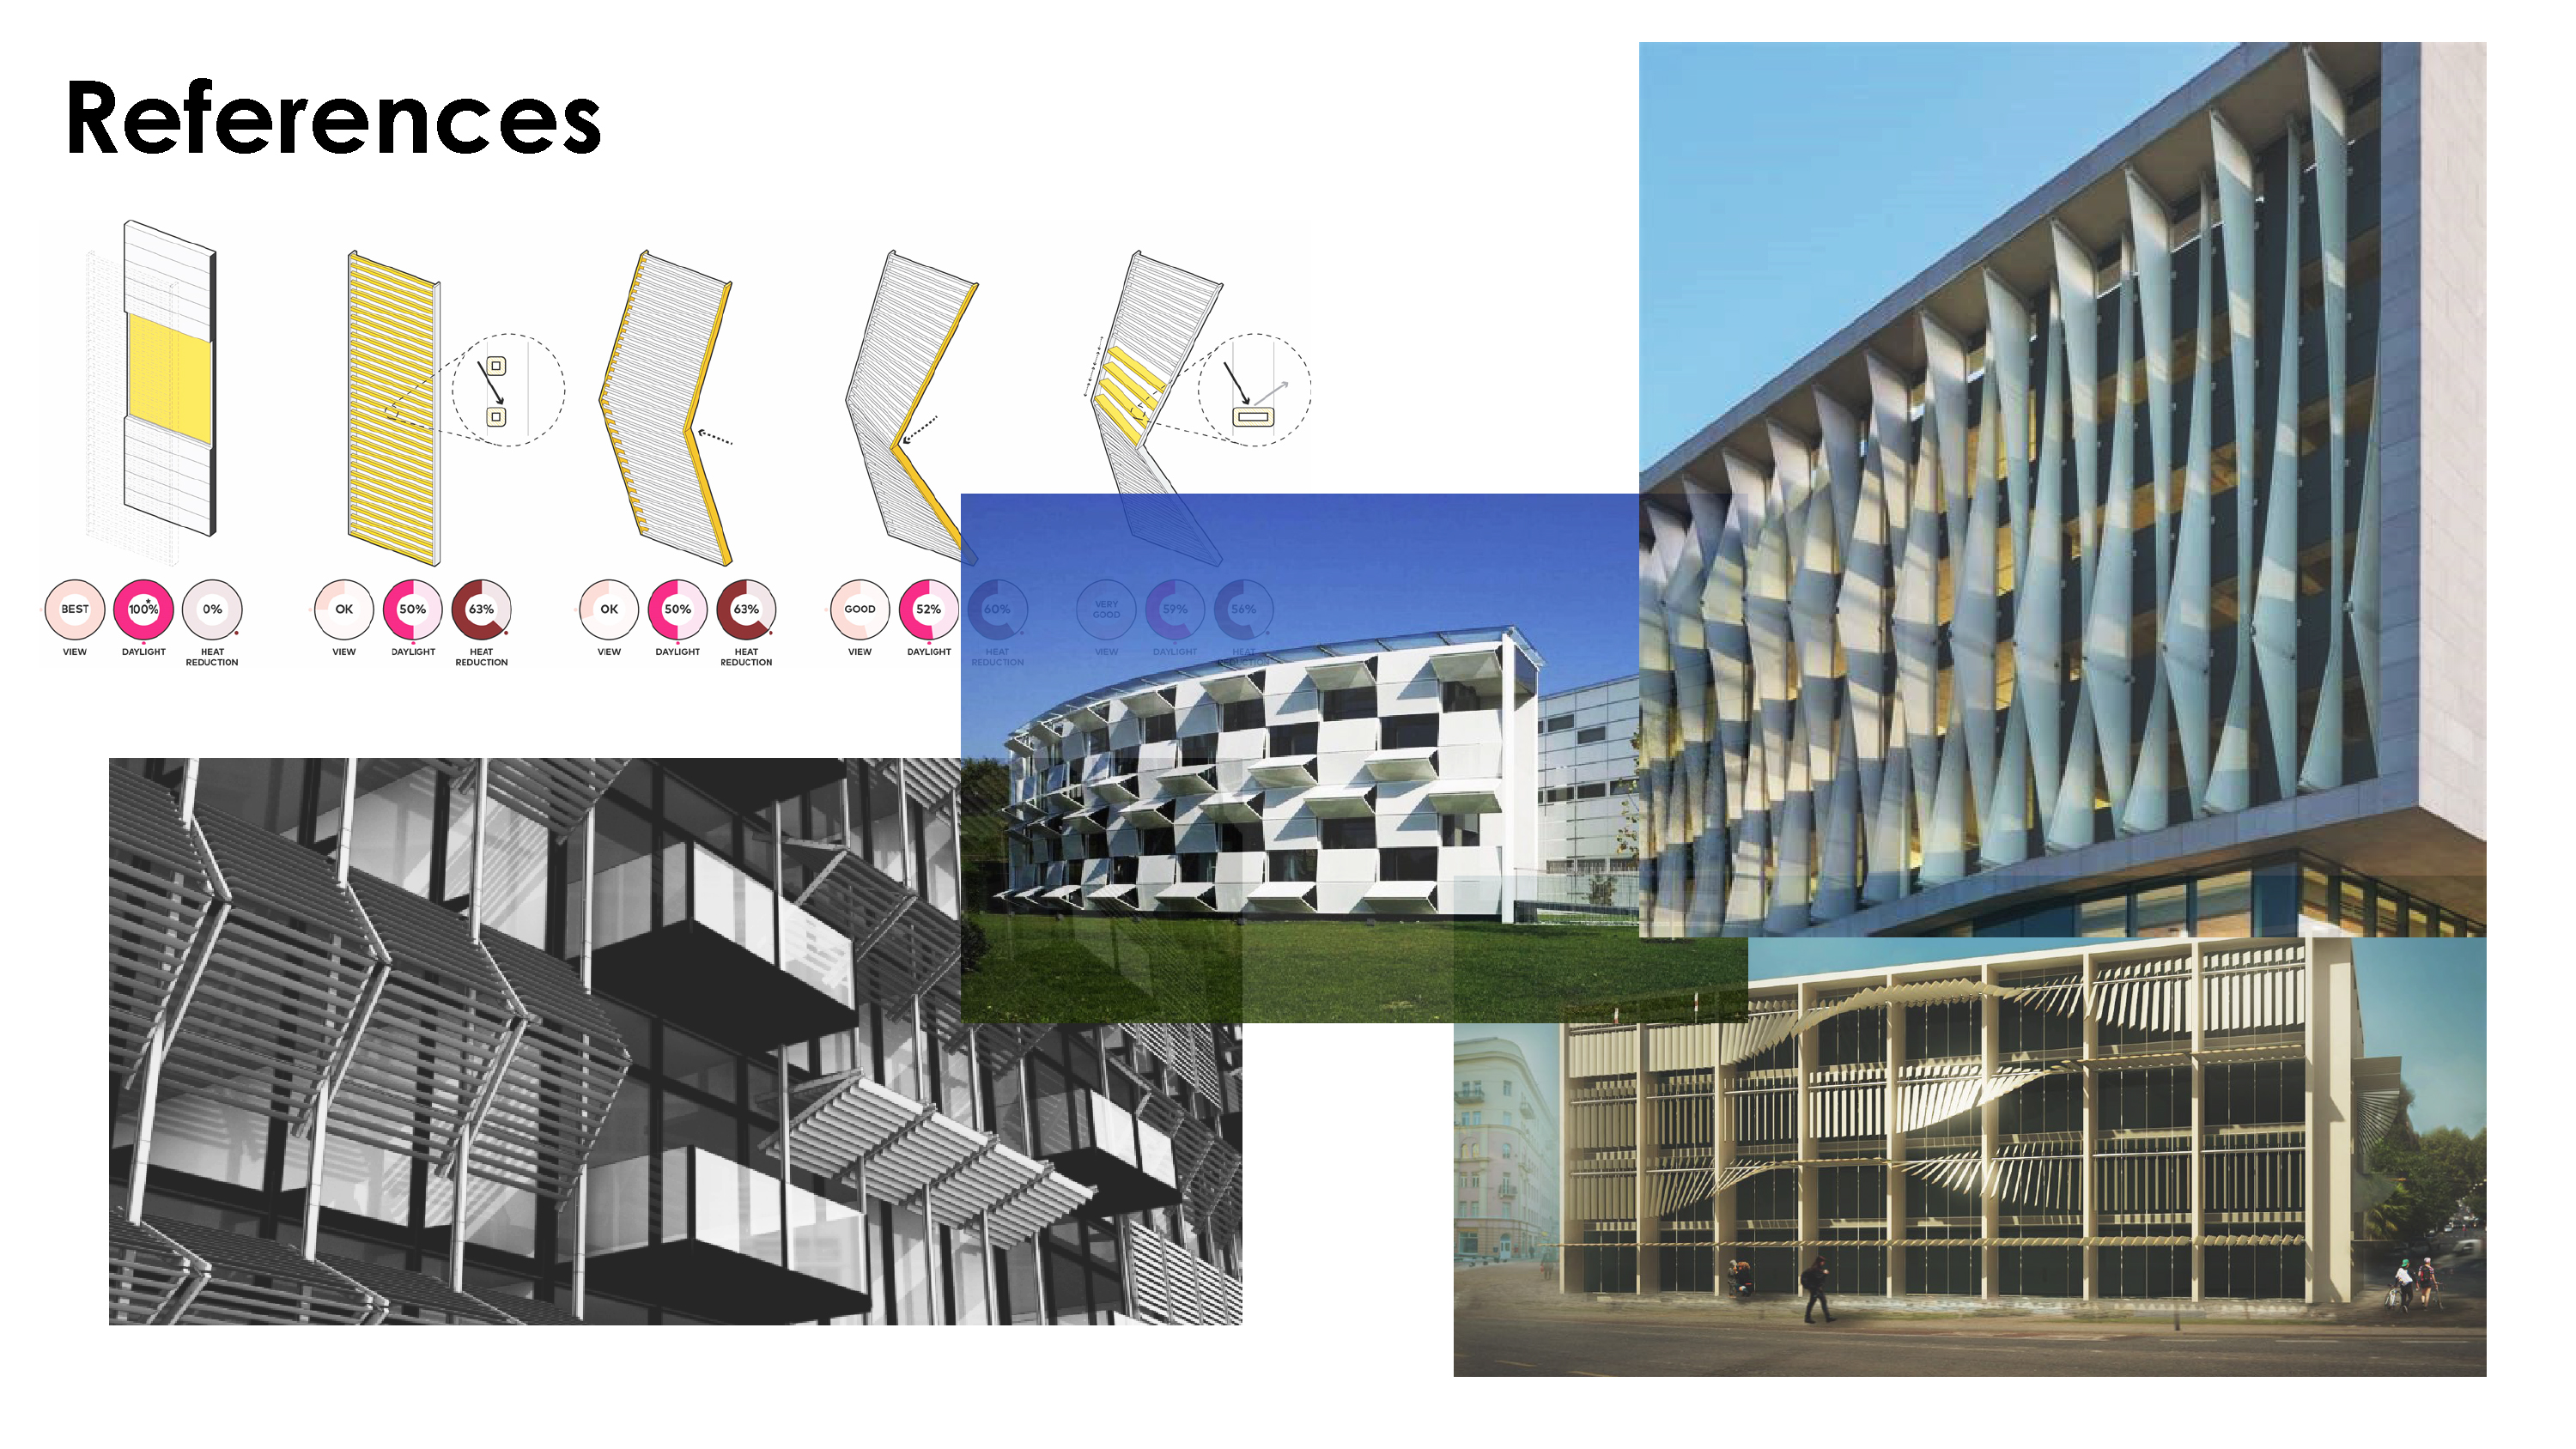
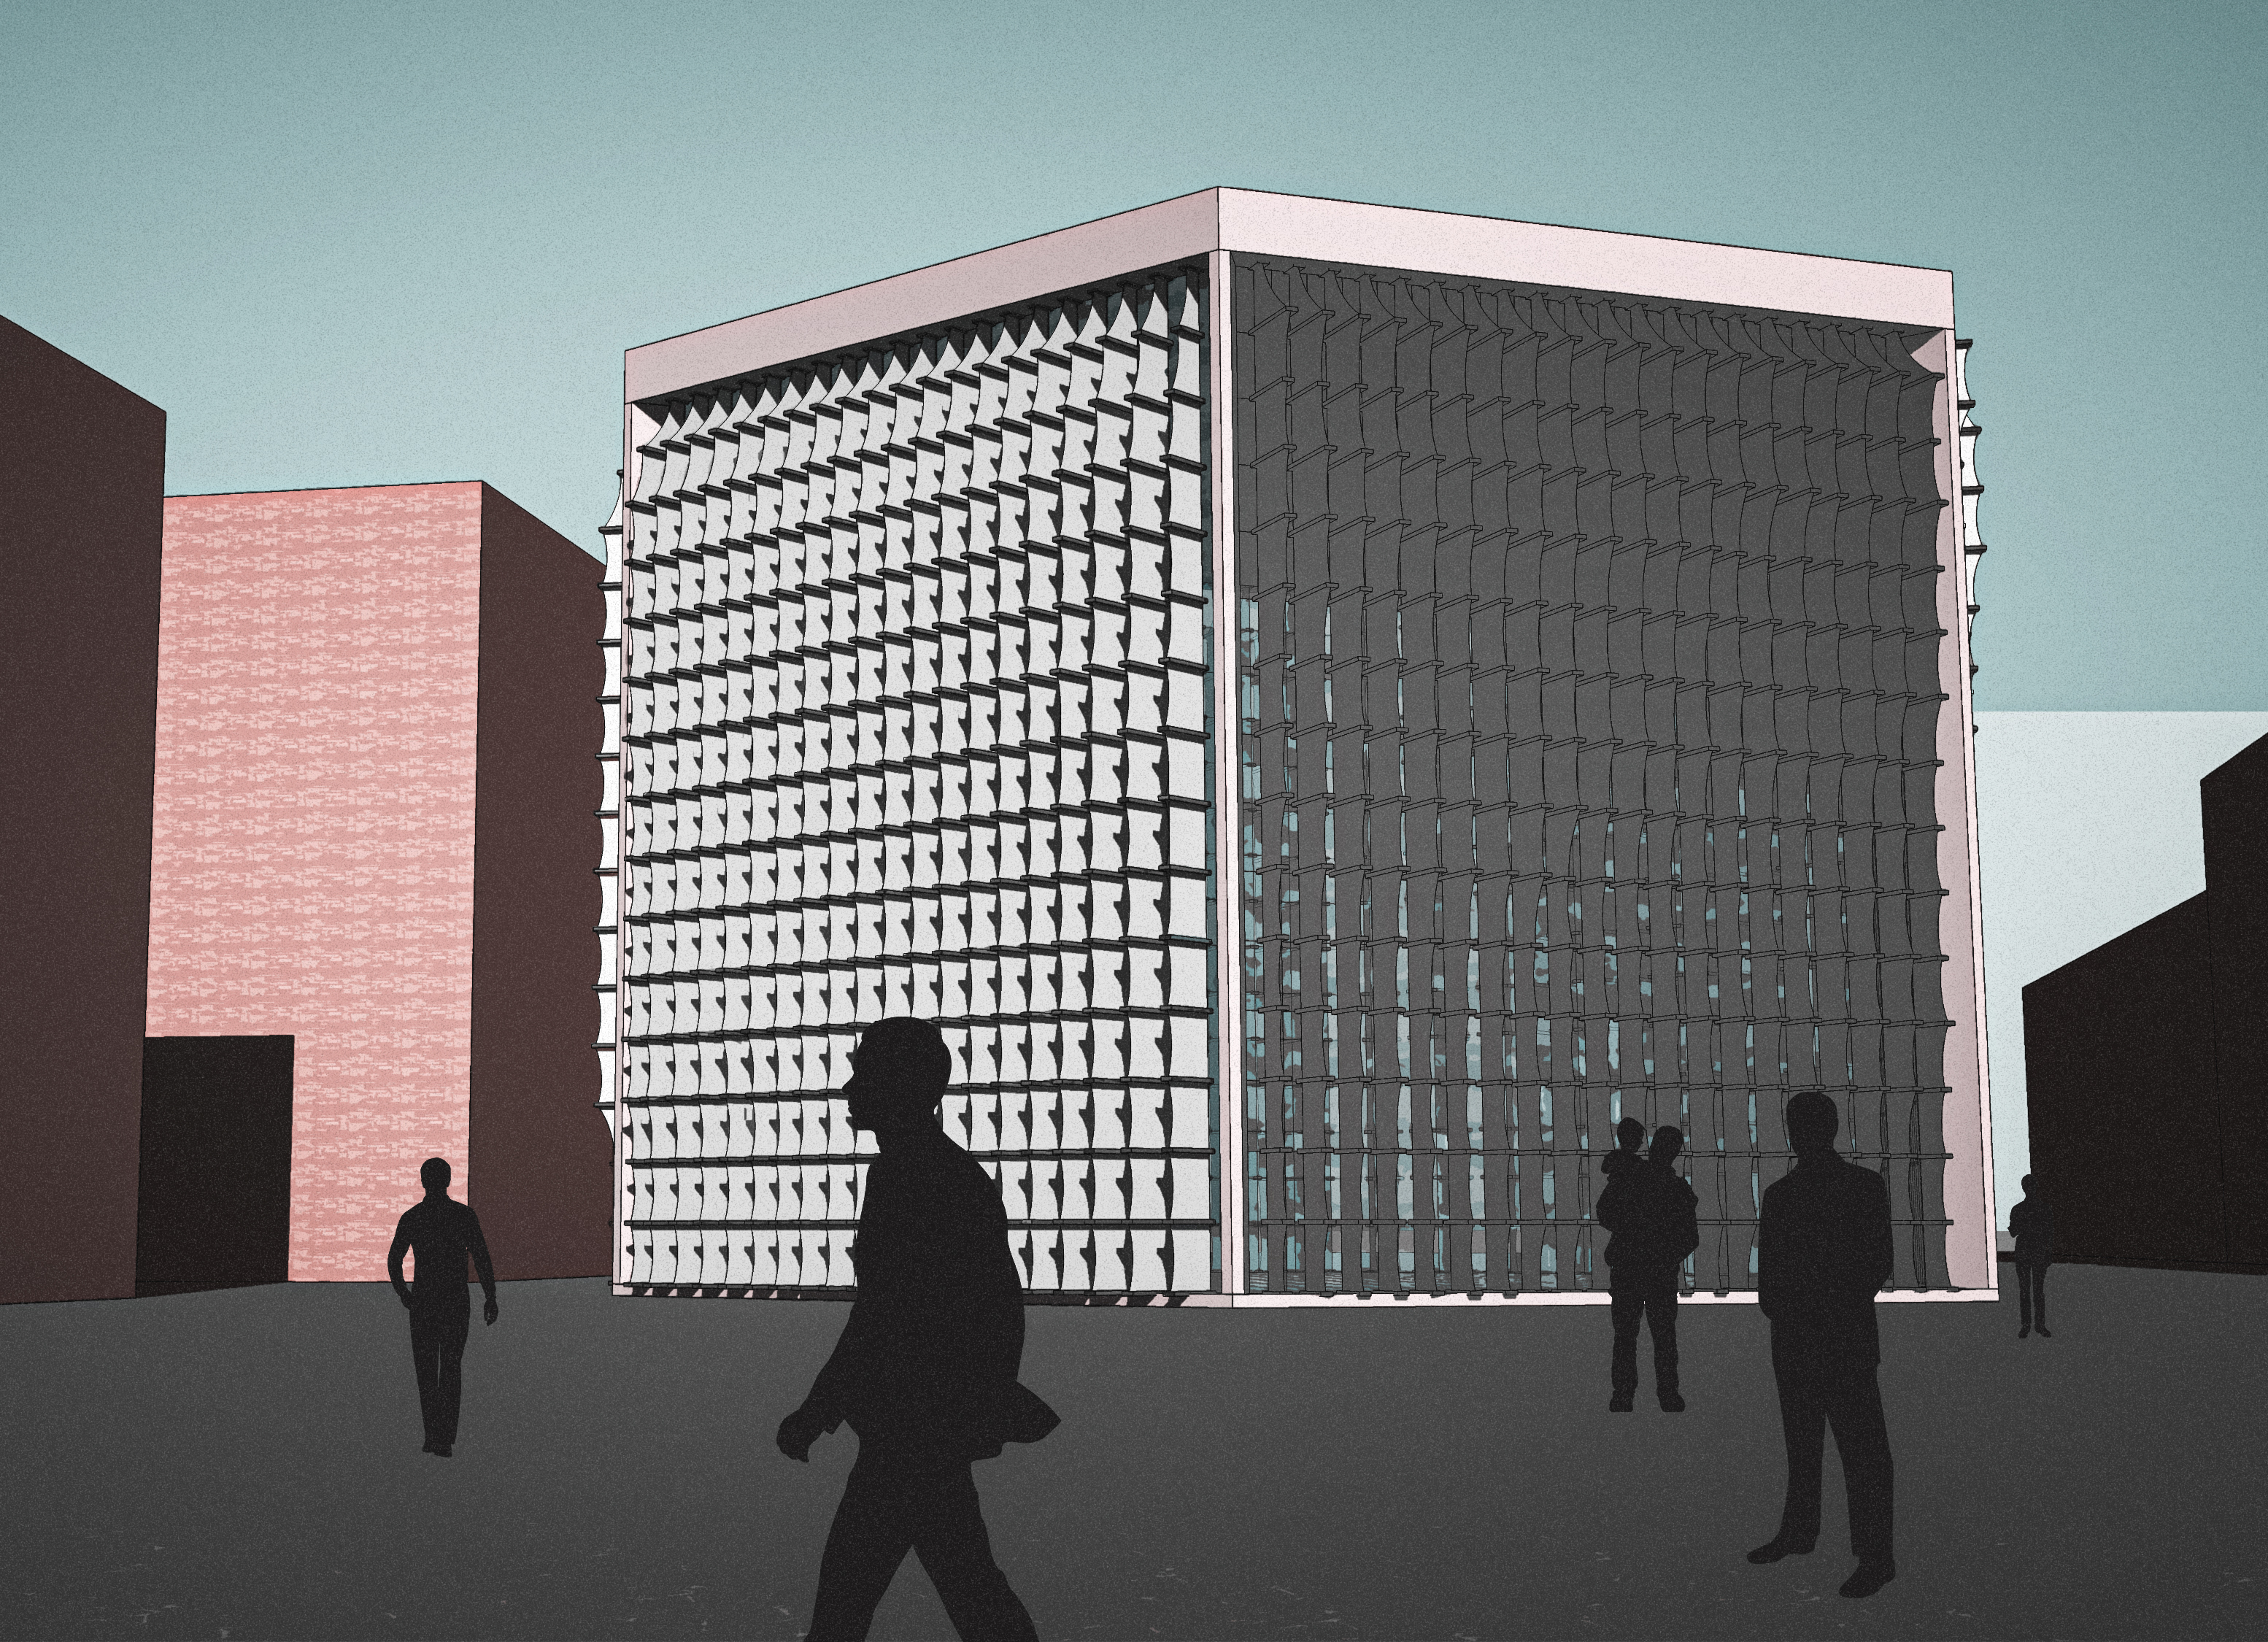
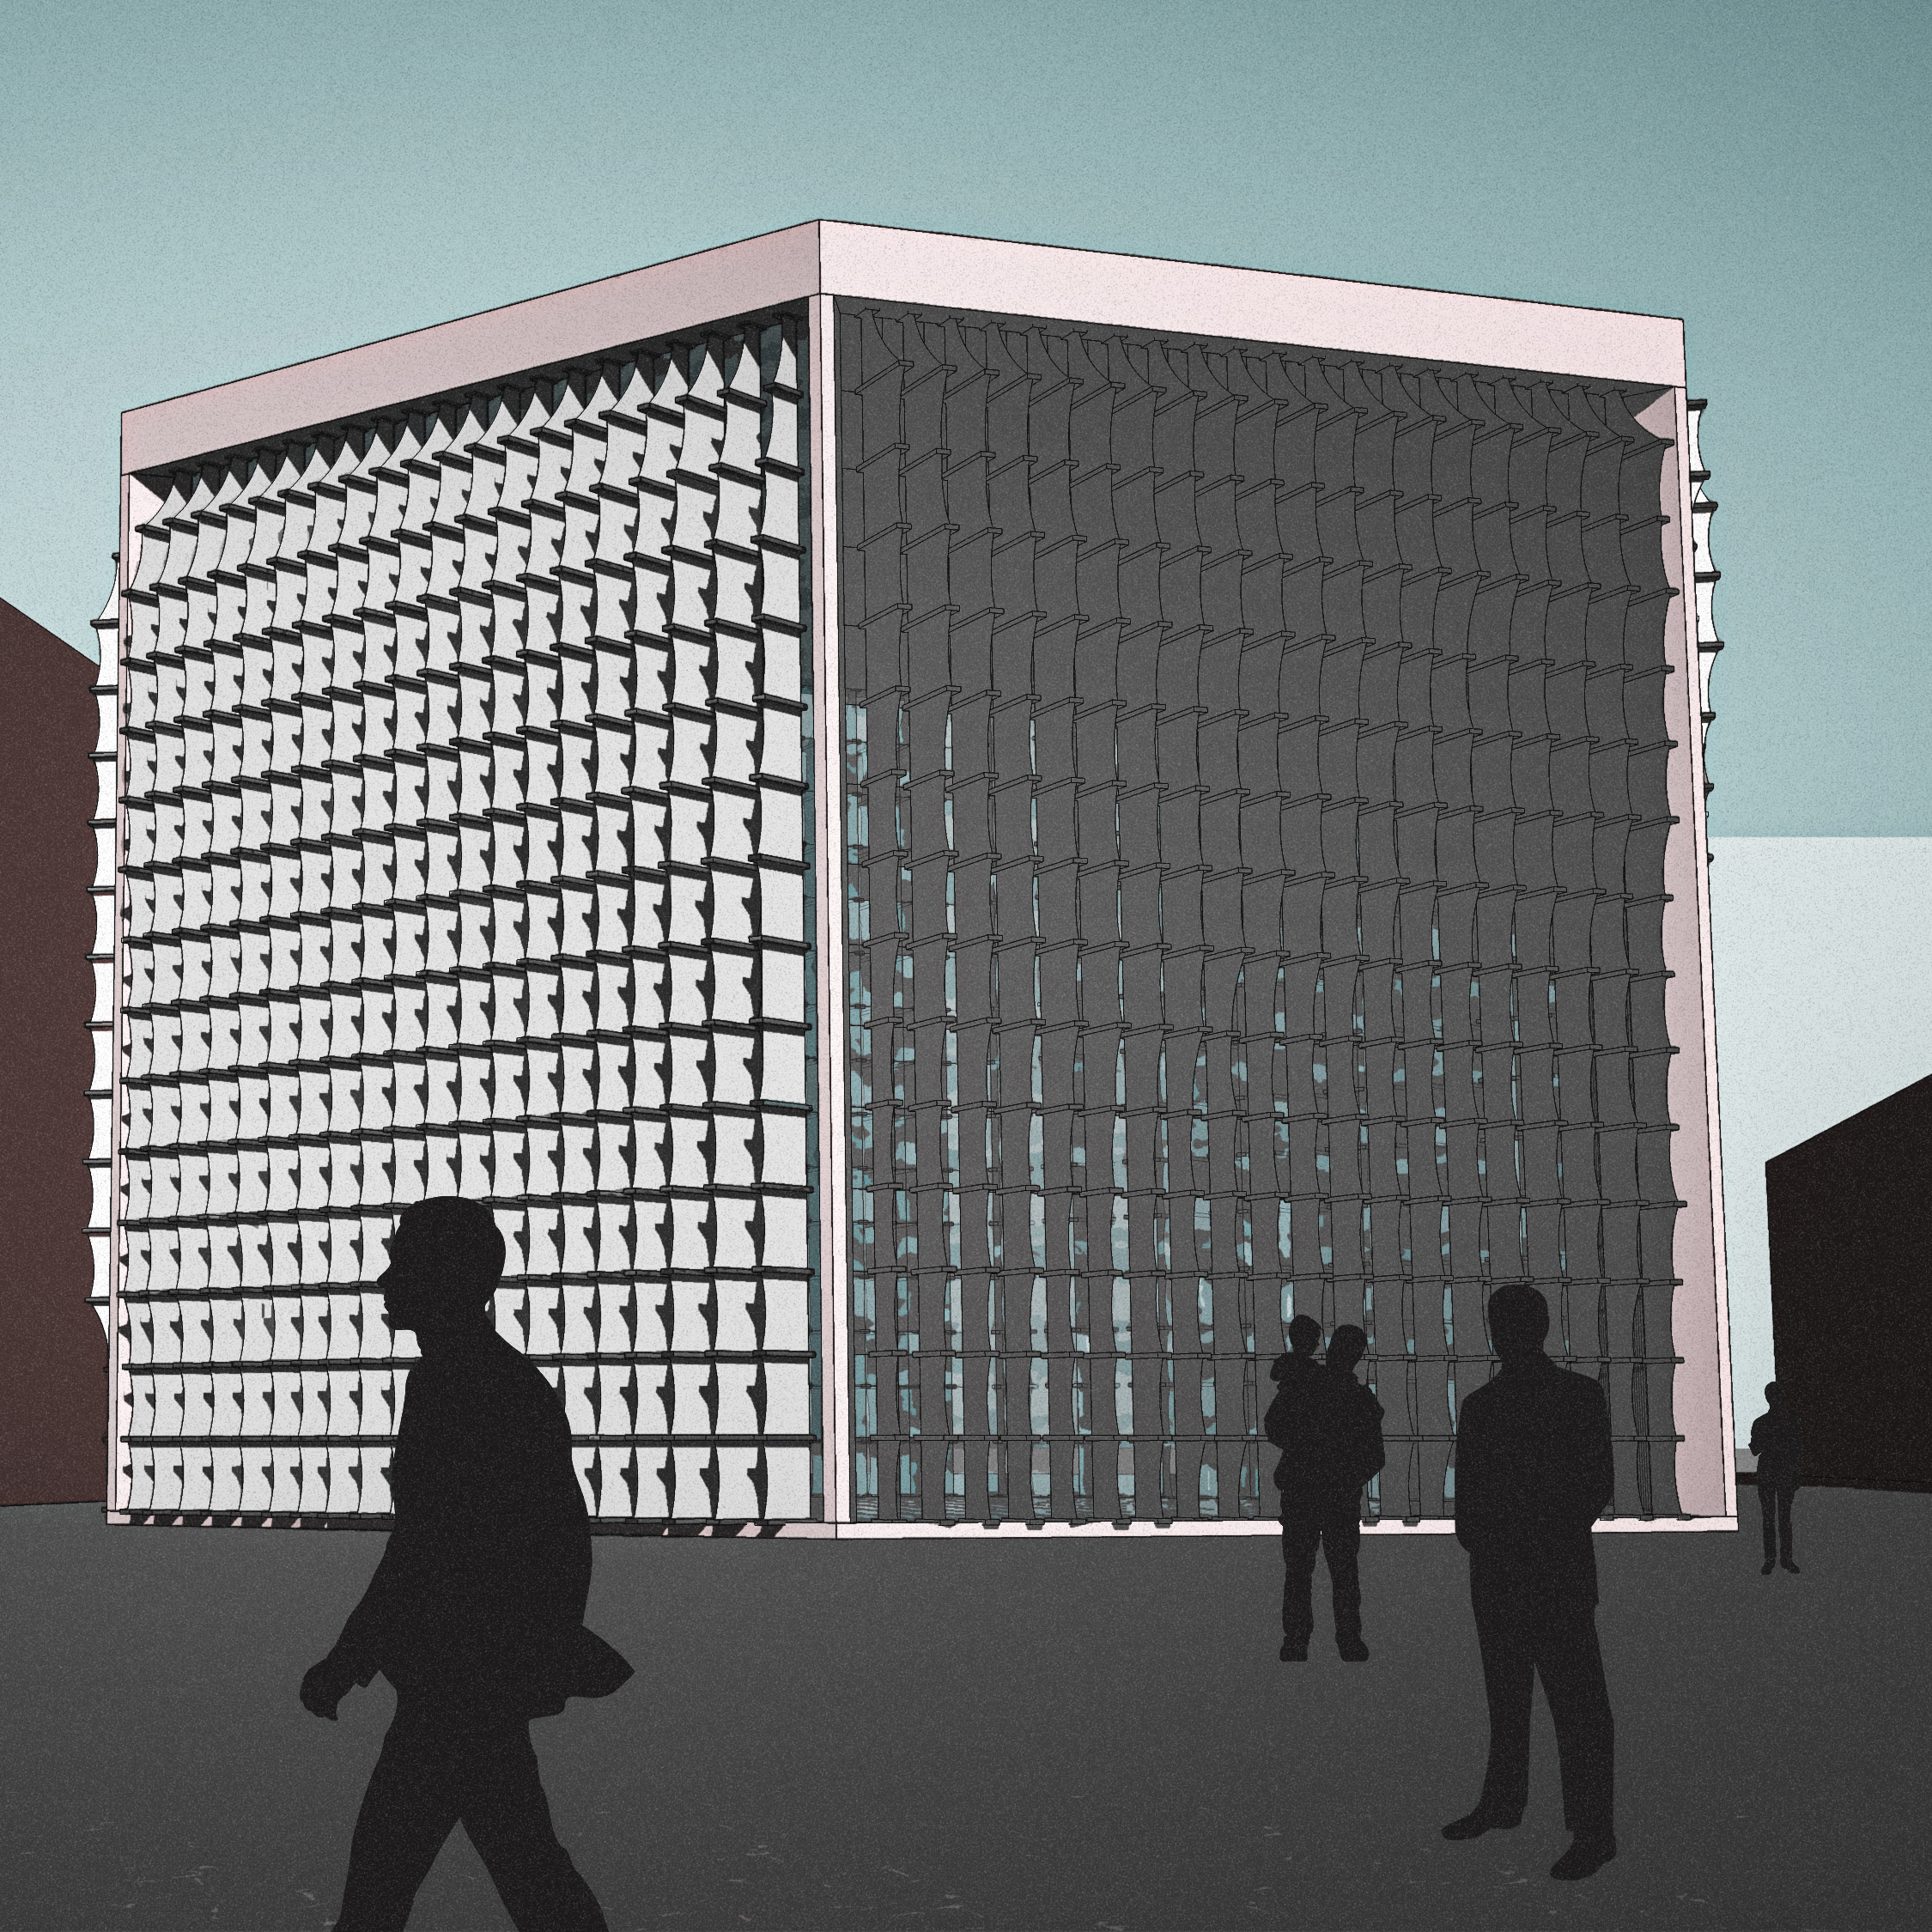
With this project, I wanted to work on an innovative sun shading system based on the sun radiation on the facades of the building. In this project, each facade would have its own sun shading to create and overall moving system.
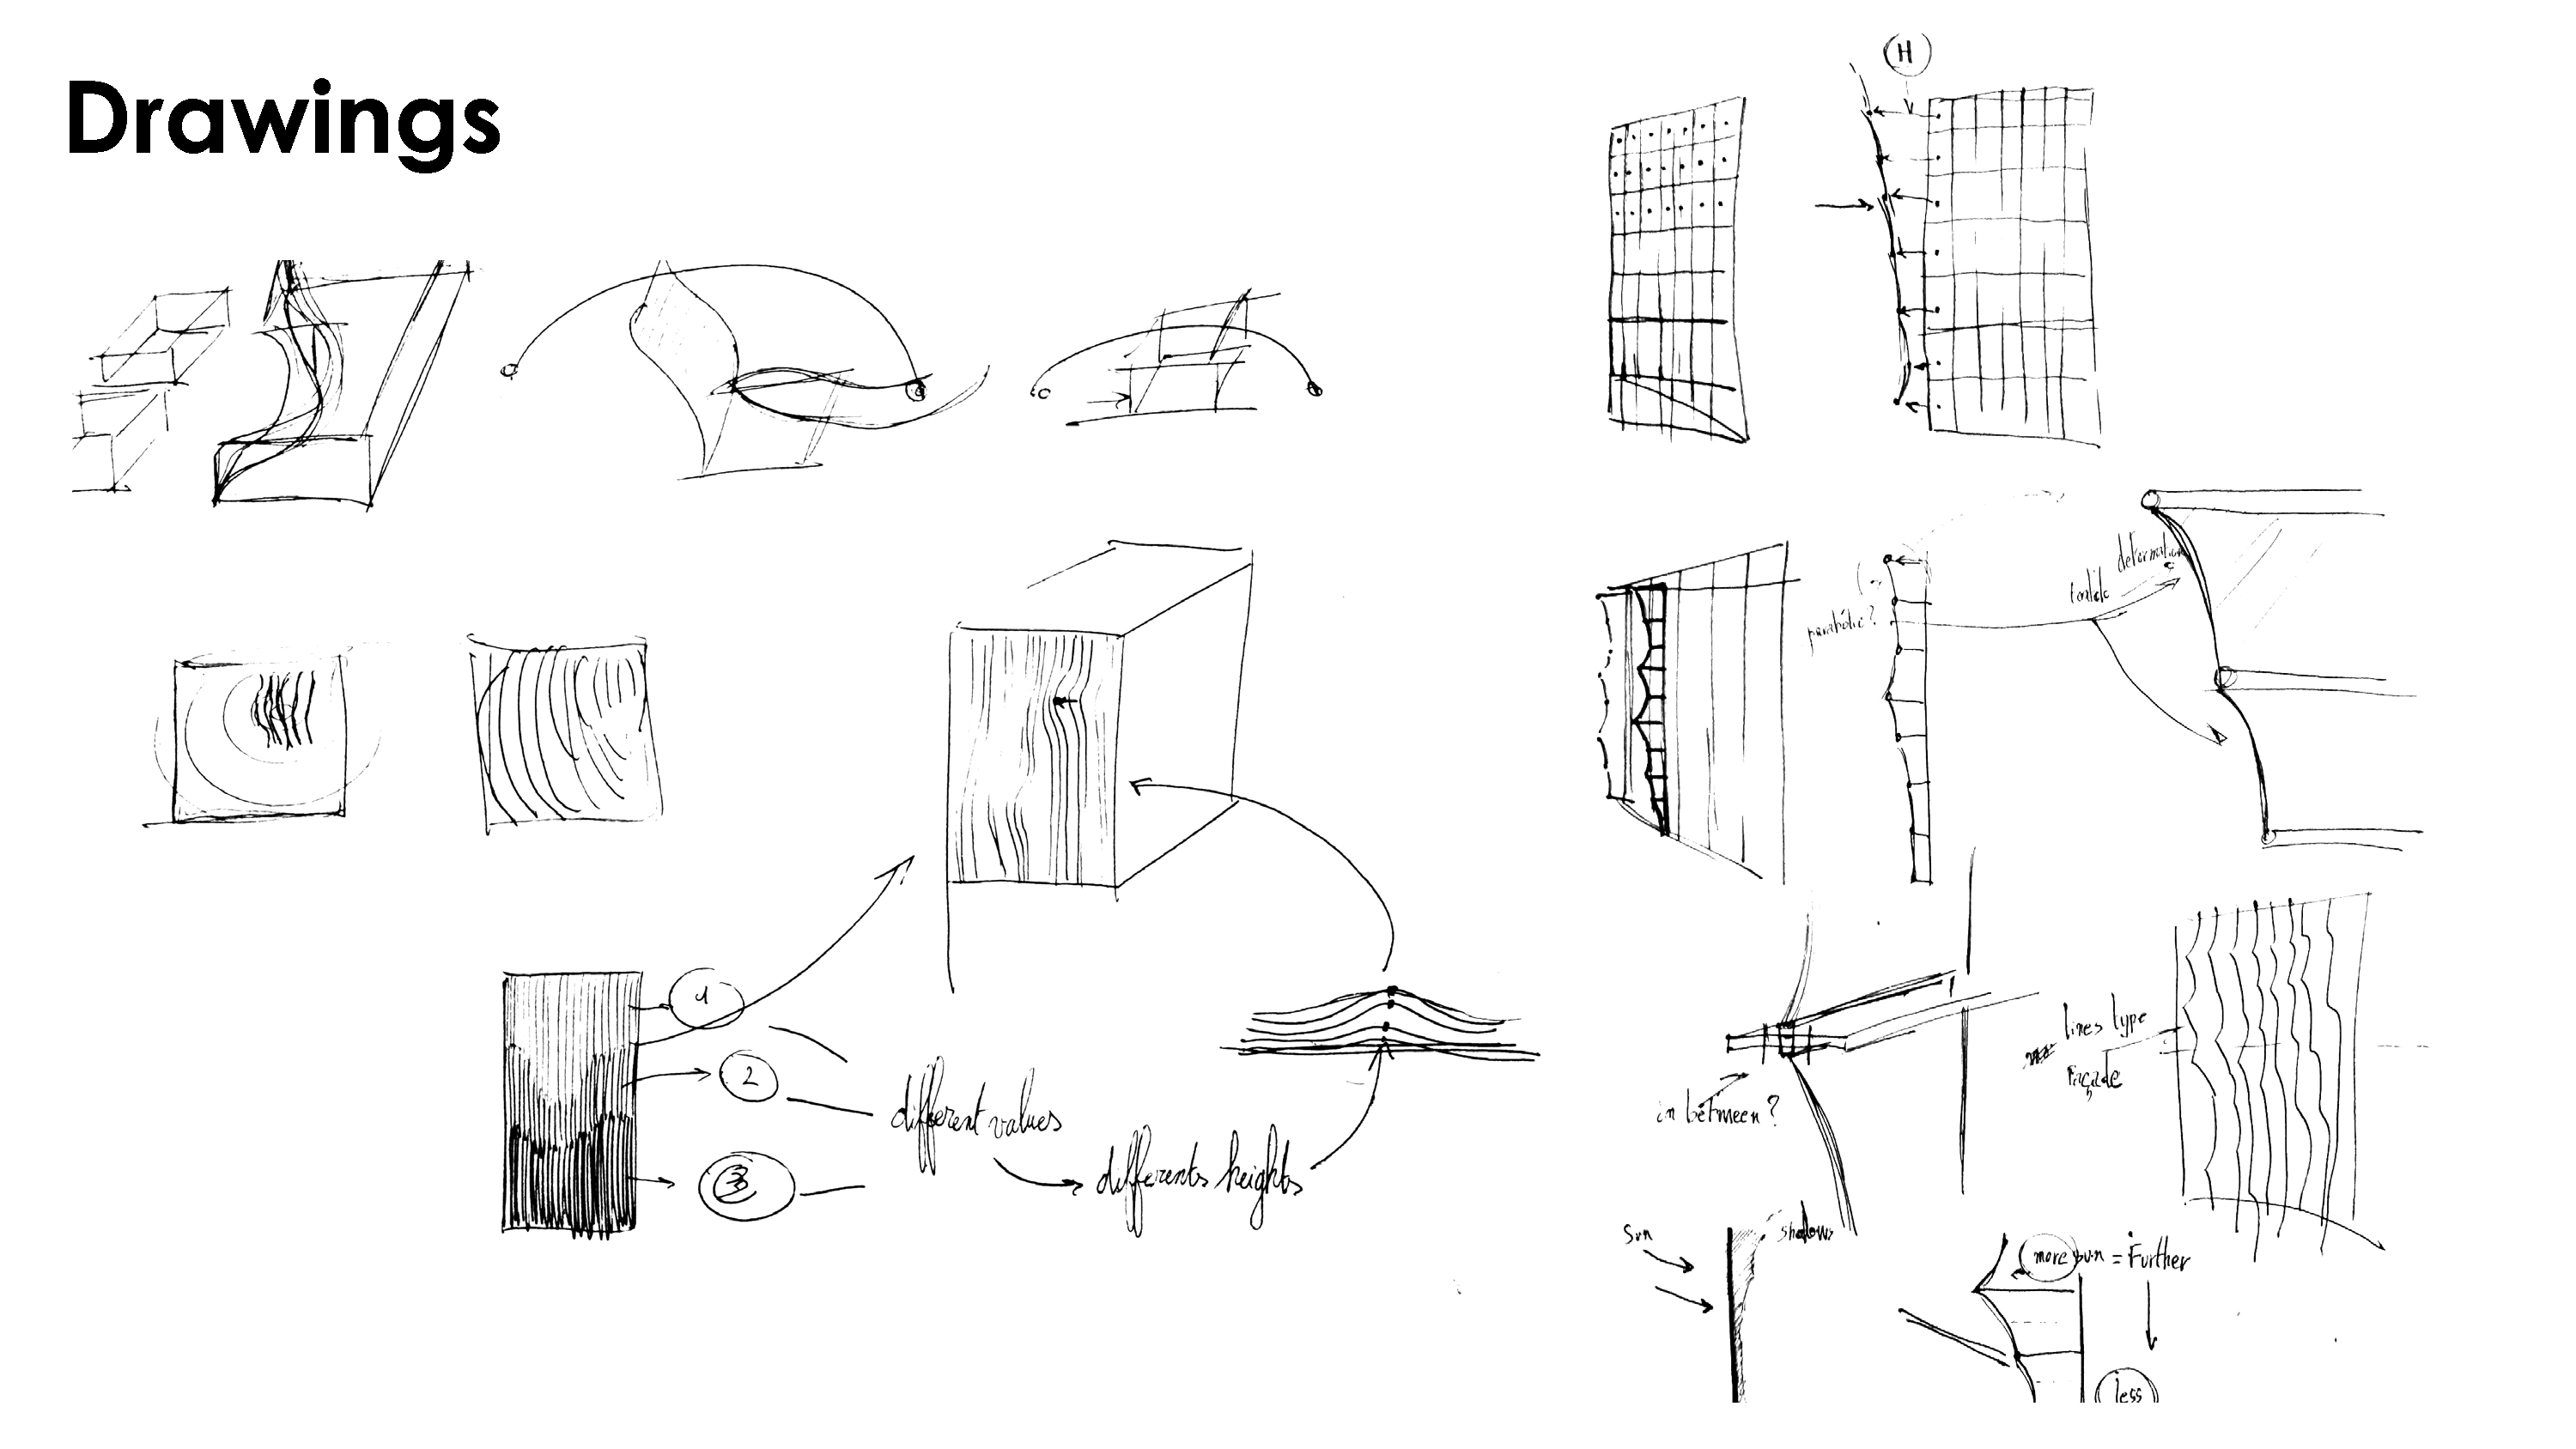
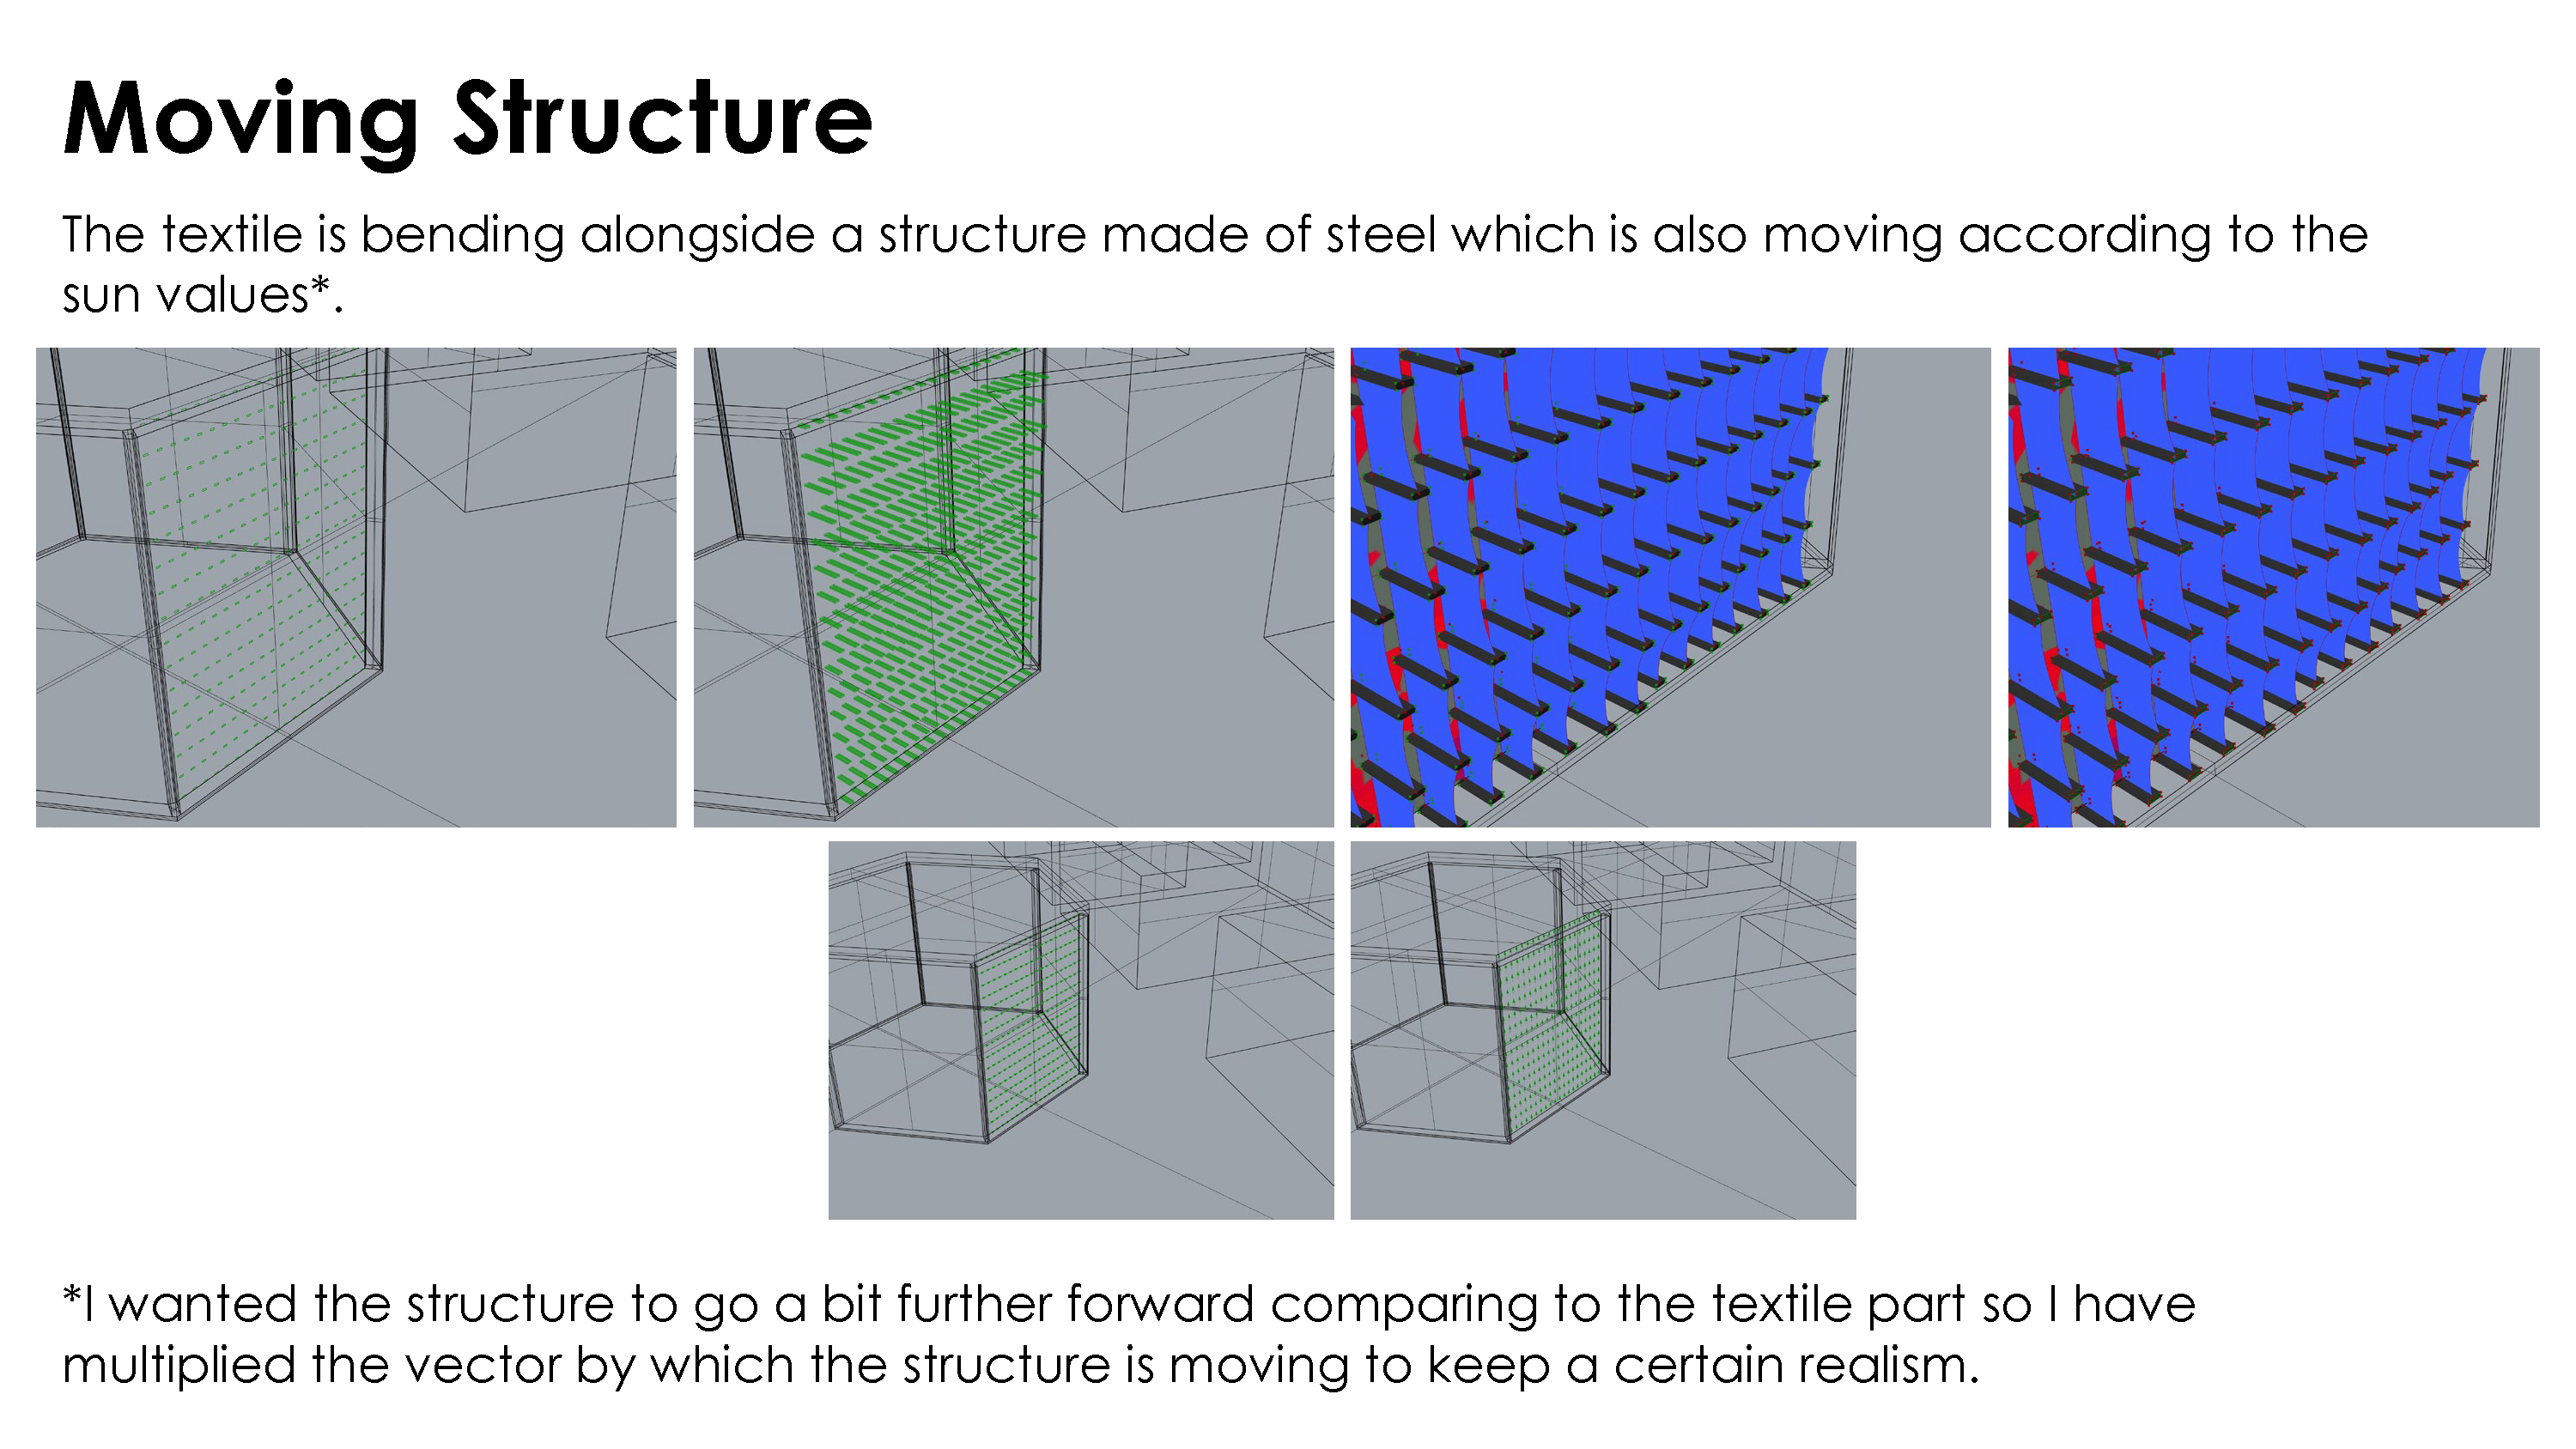
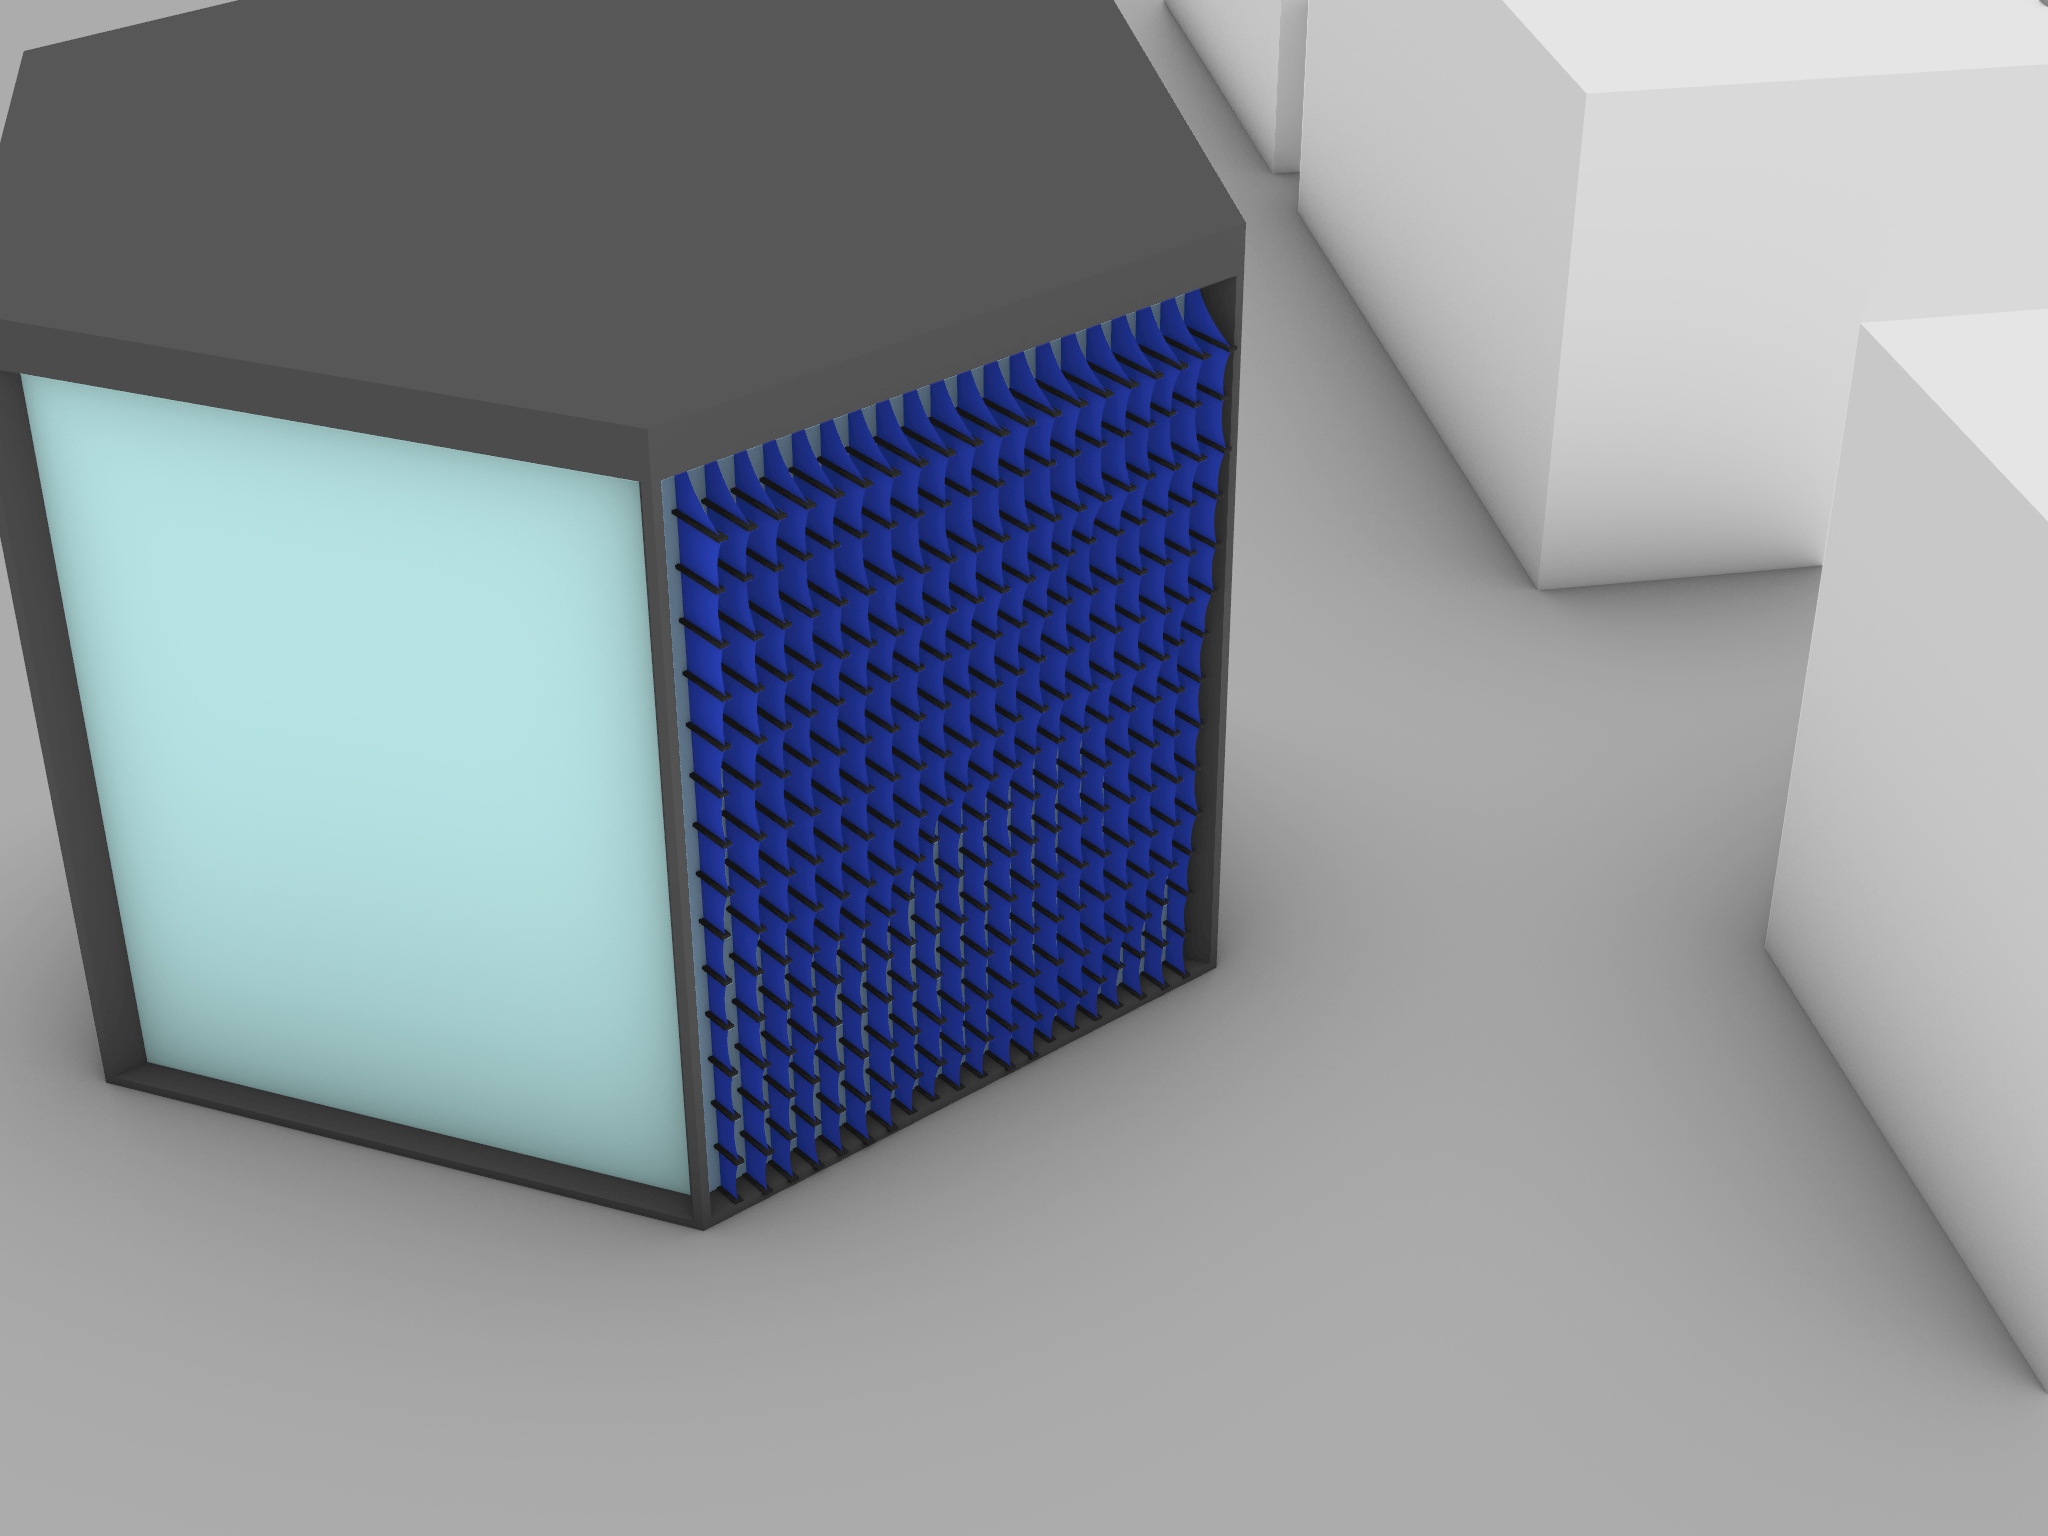
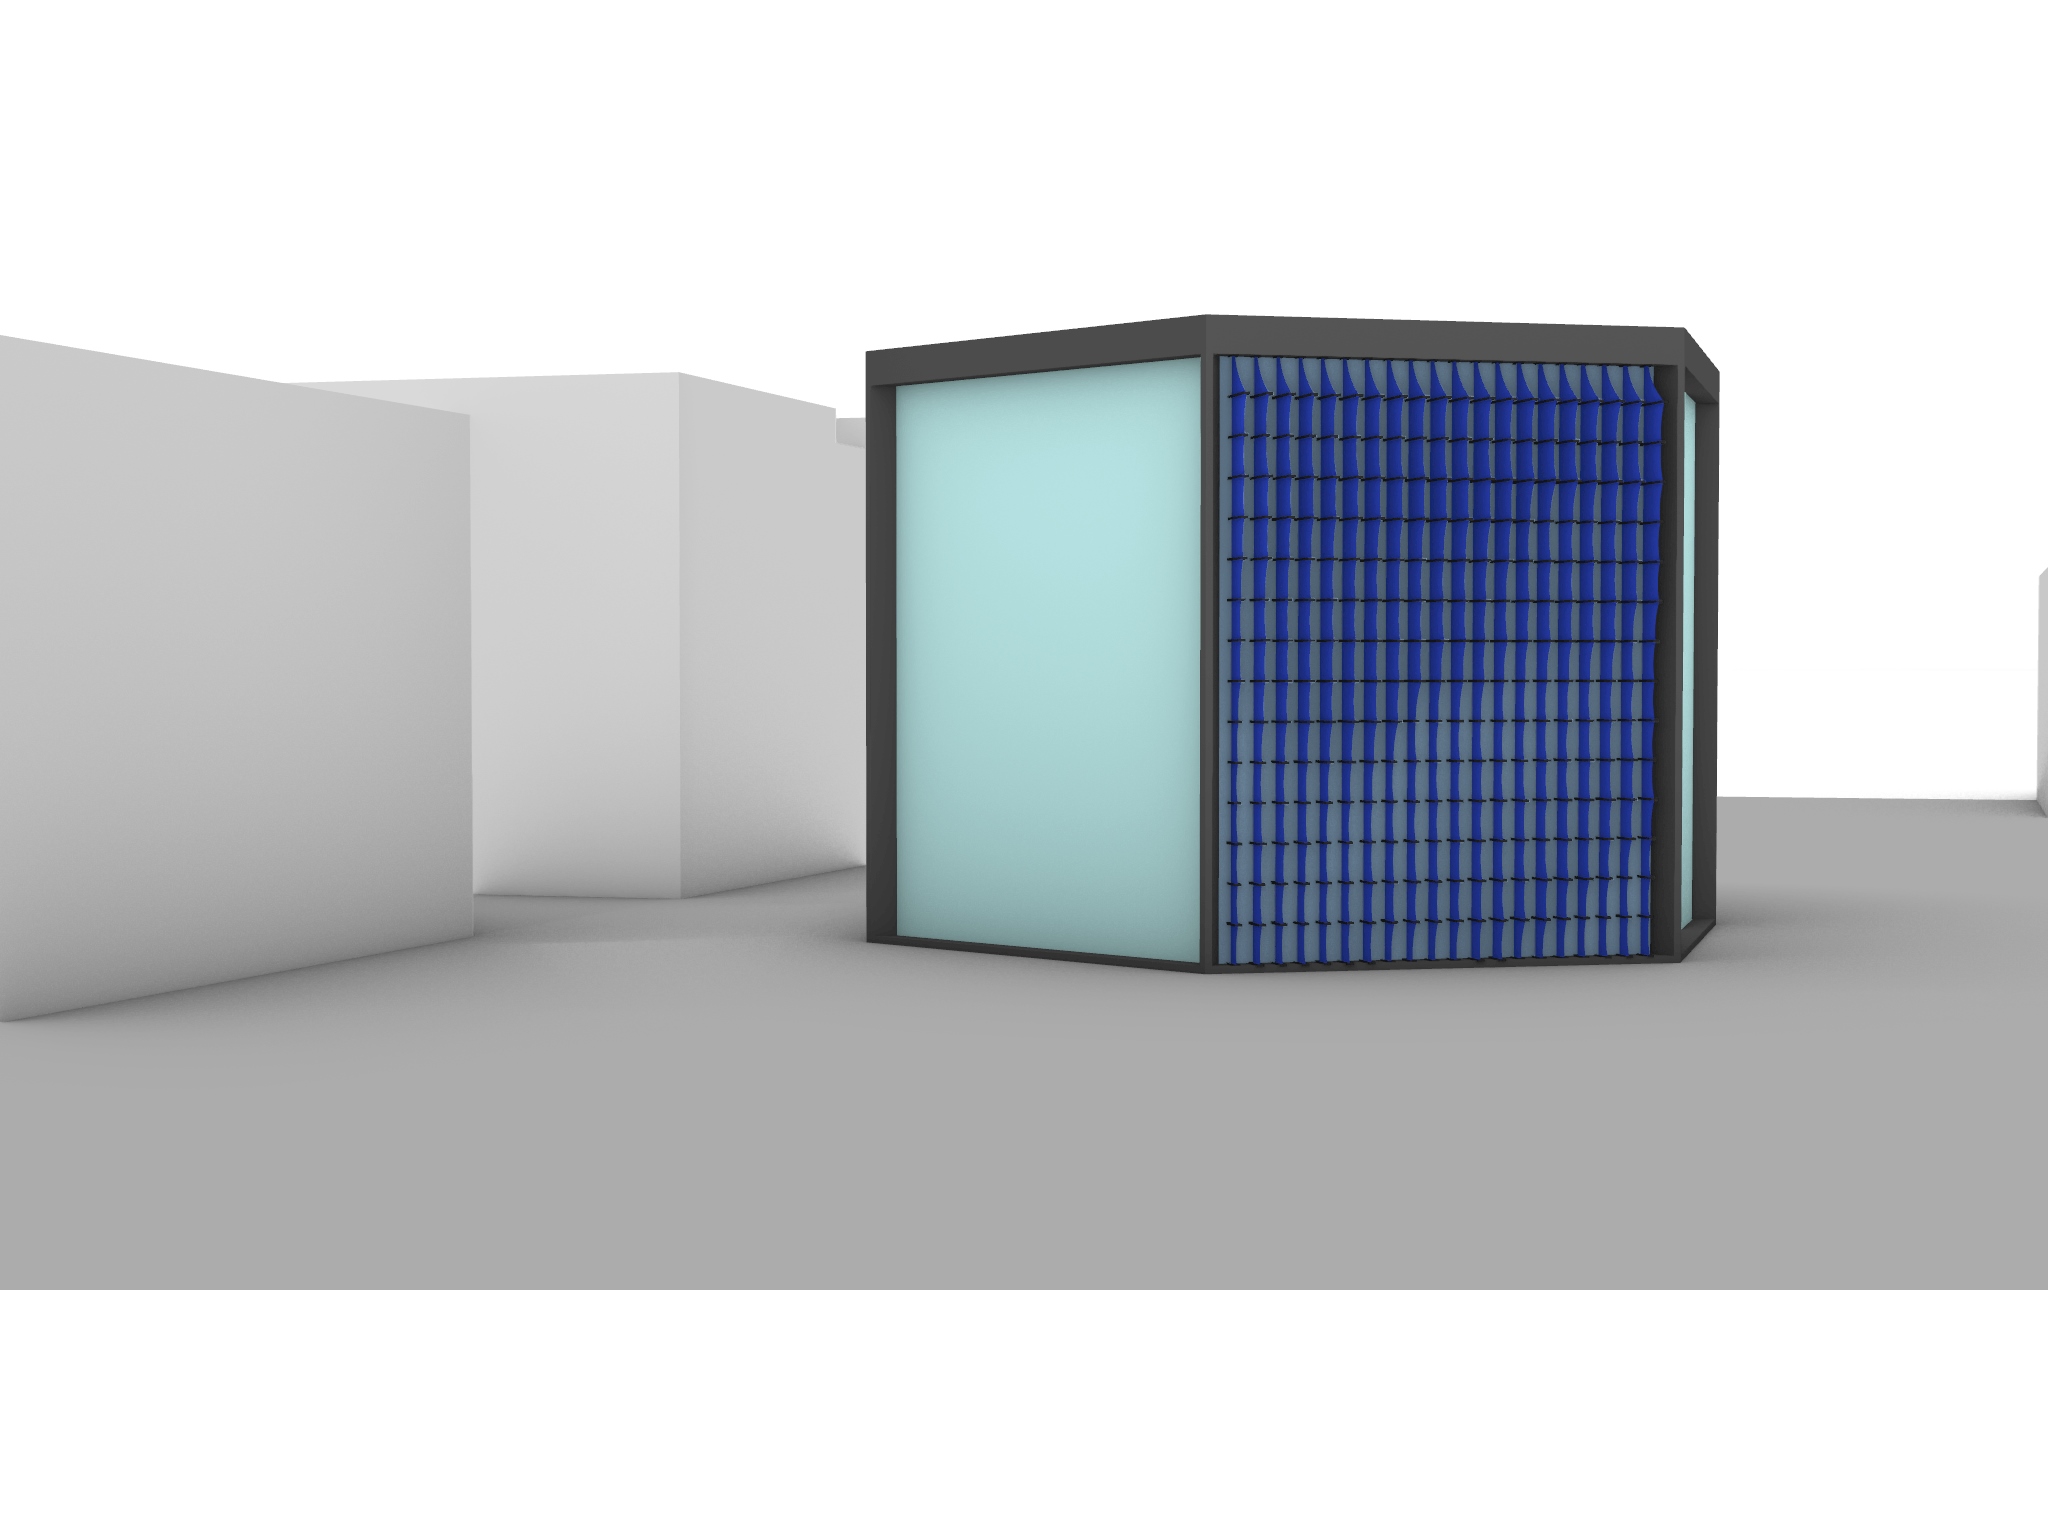
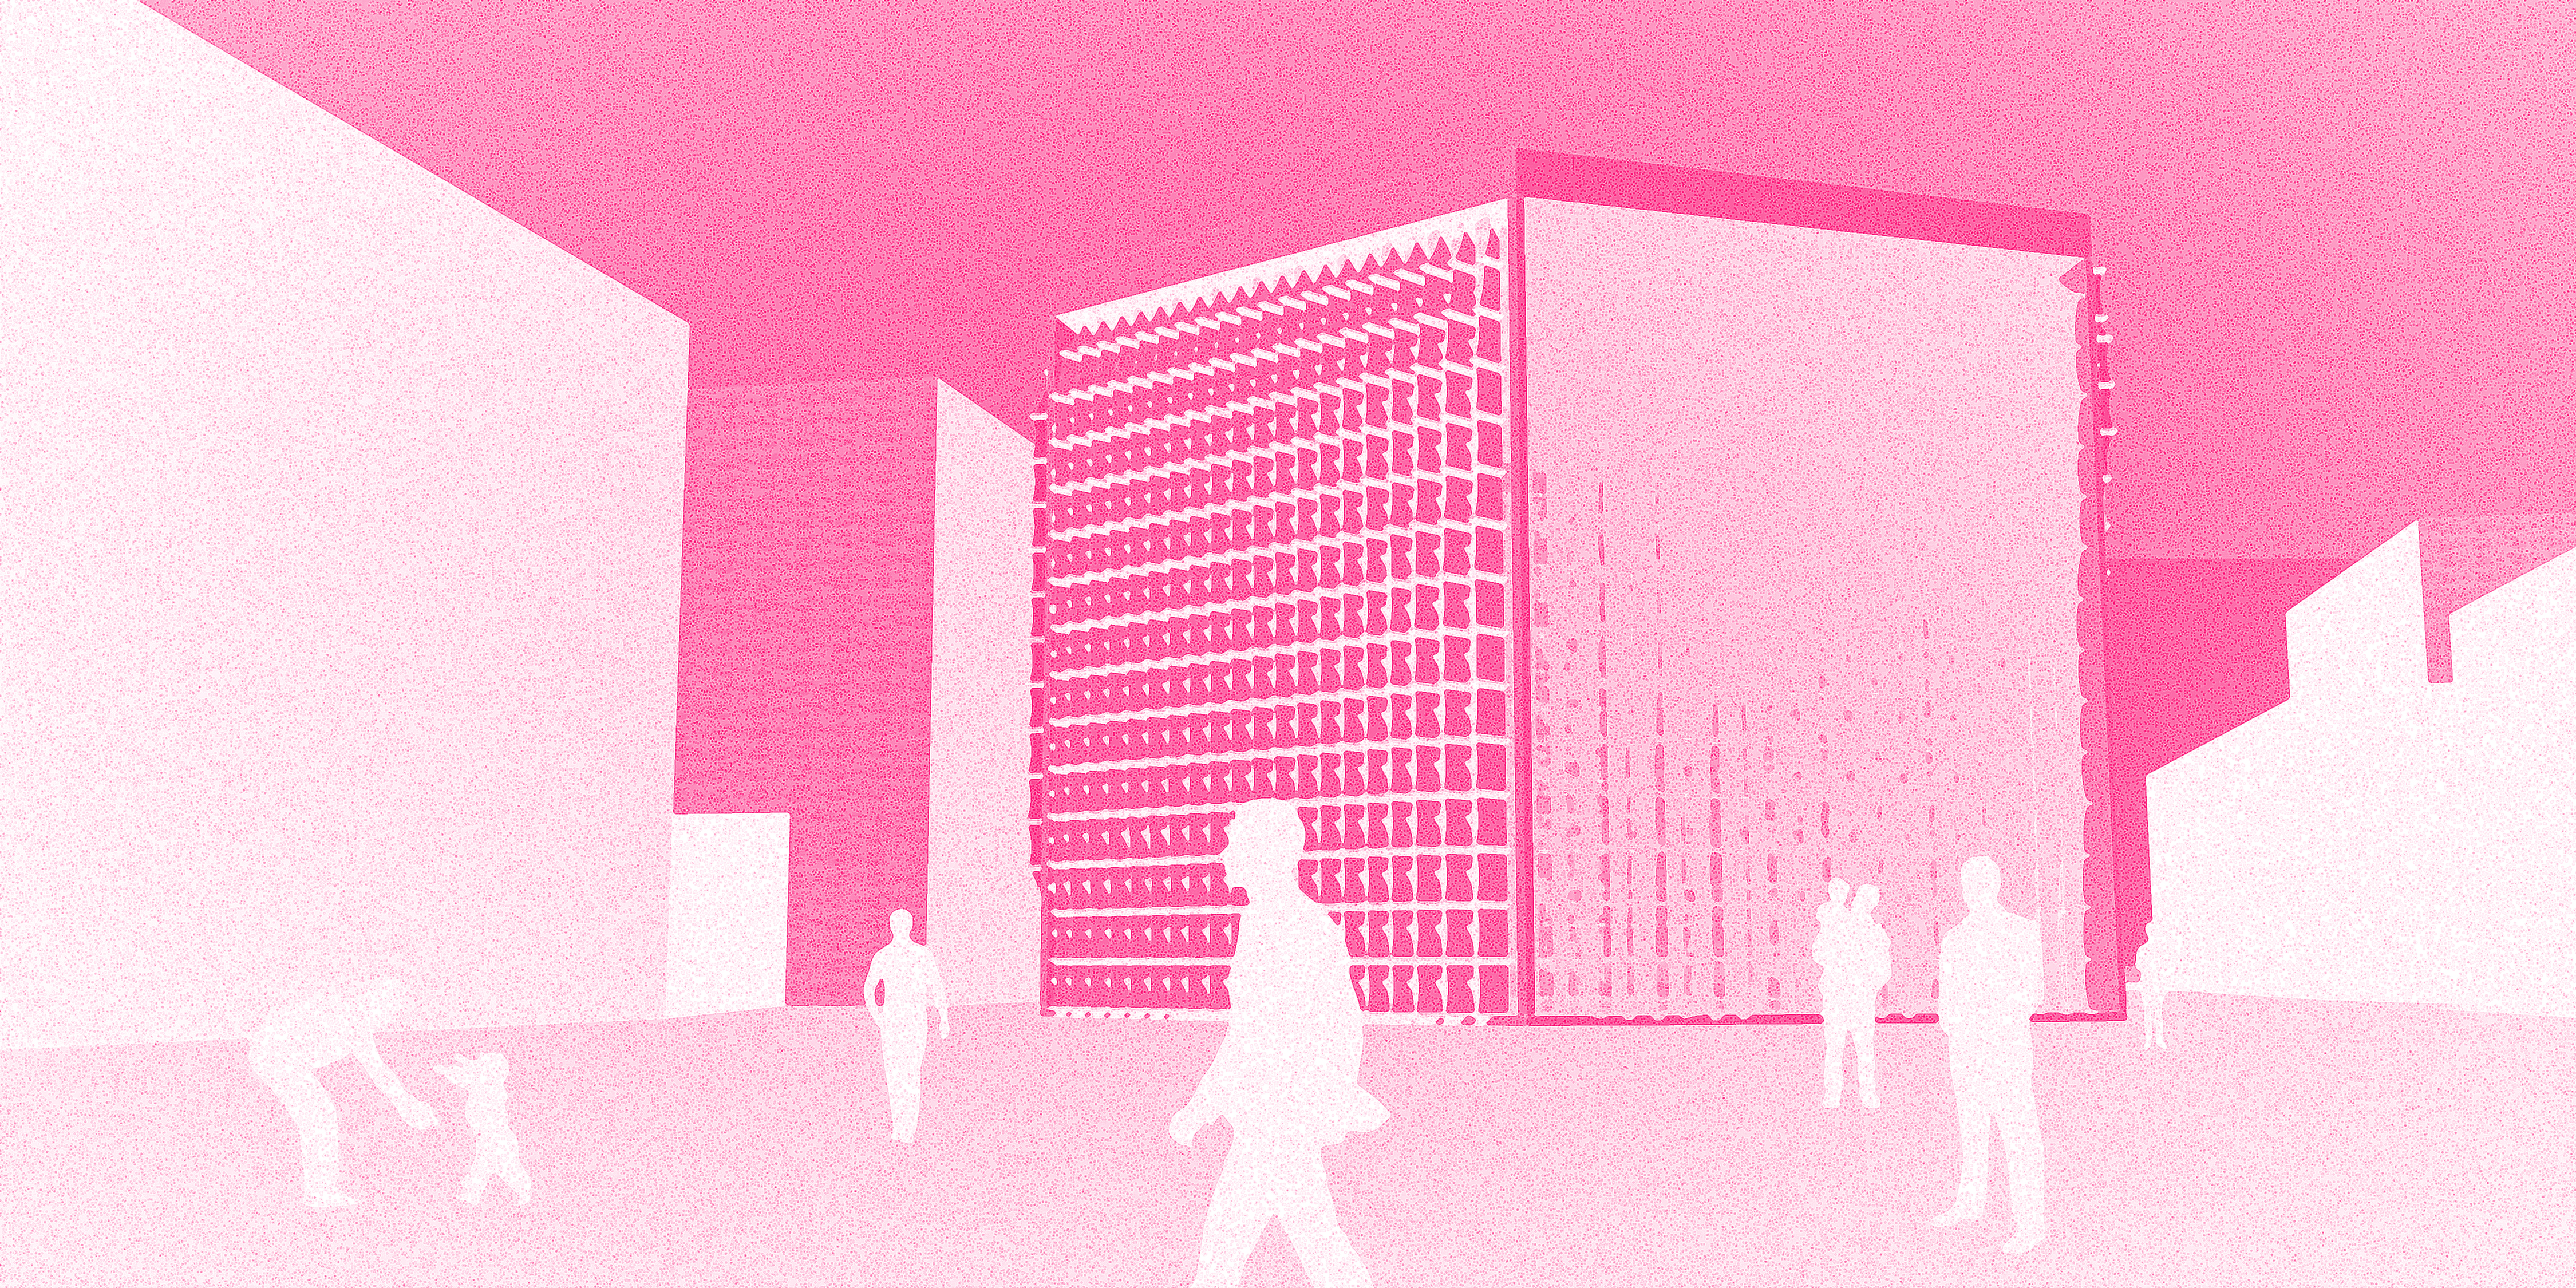
The sun shading is made of steel structures moving forward according to the sun values and alongside textile surfaces bending between those spikes.
We will use the catenary curve properties to approach the textile bending properties.
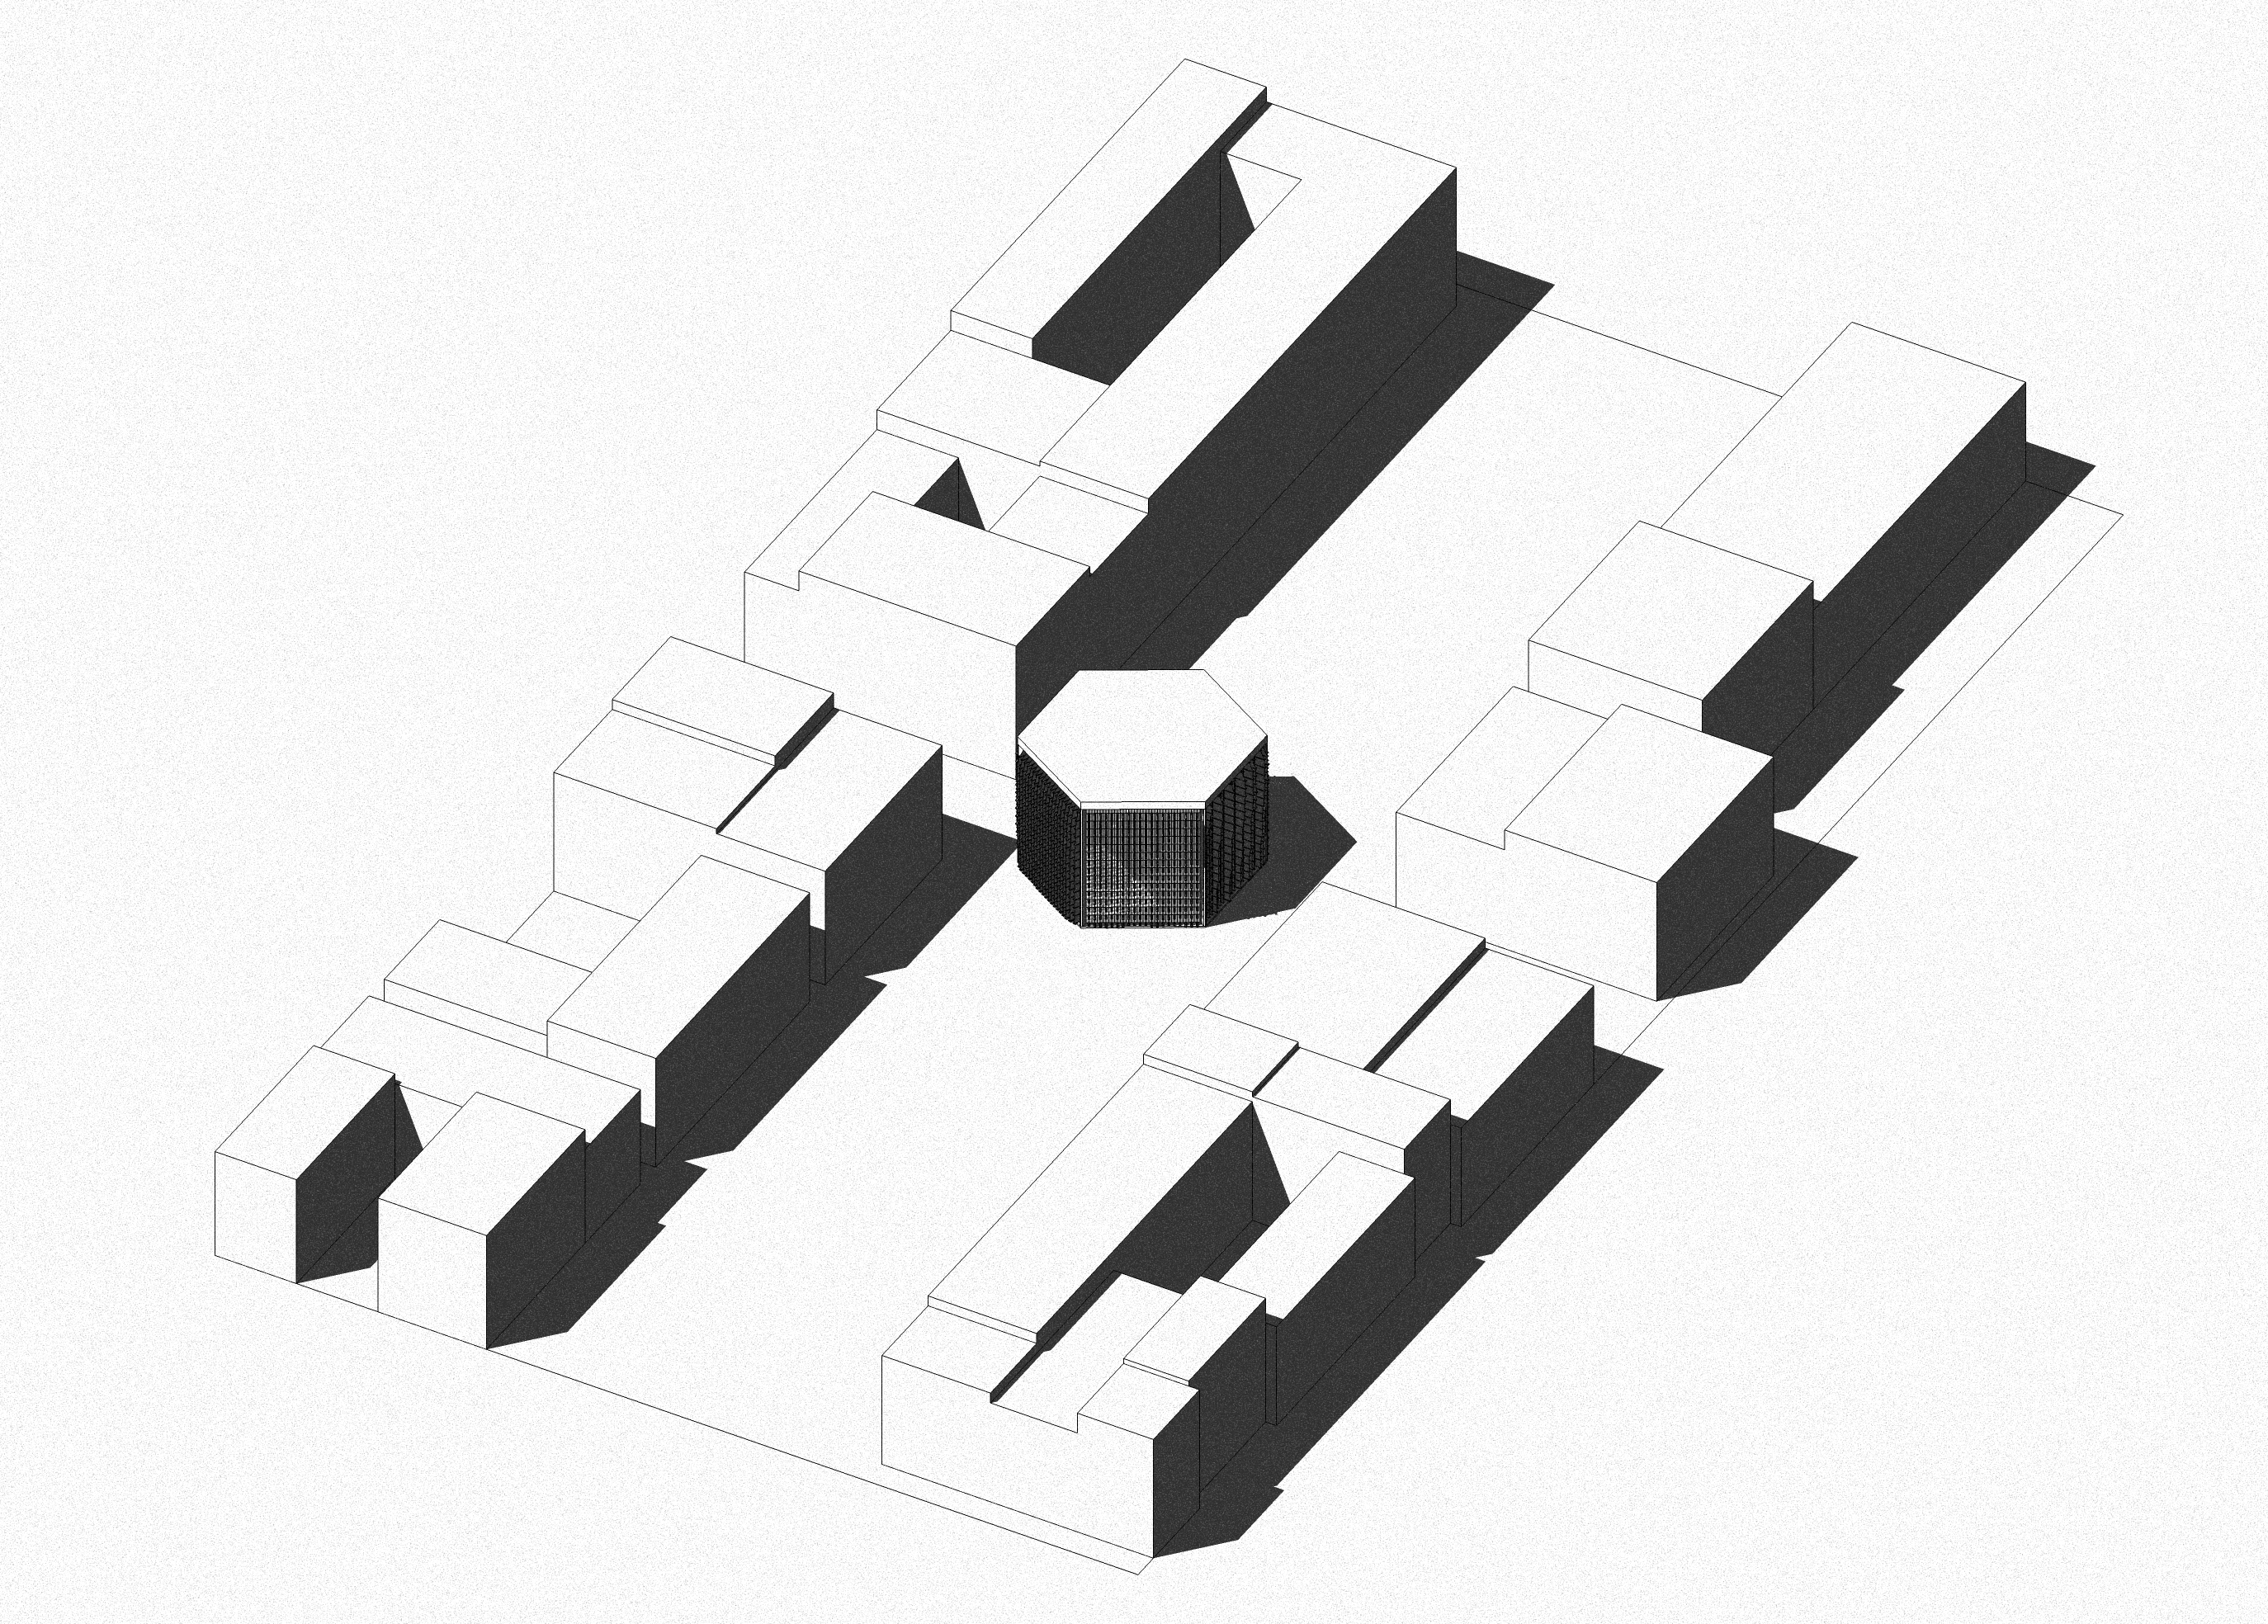
I would like to allow this process to work with every facade of every building as long as its location, its geometry, its context are given and collected. We are also able to choose the time period of the sun analysis.
For the example, the process is showing how to create the sun shading on 1 facade and allow you to change the facade. To come to the final result I have baked every facade separately after making the process run 6 times.
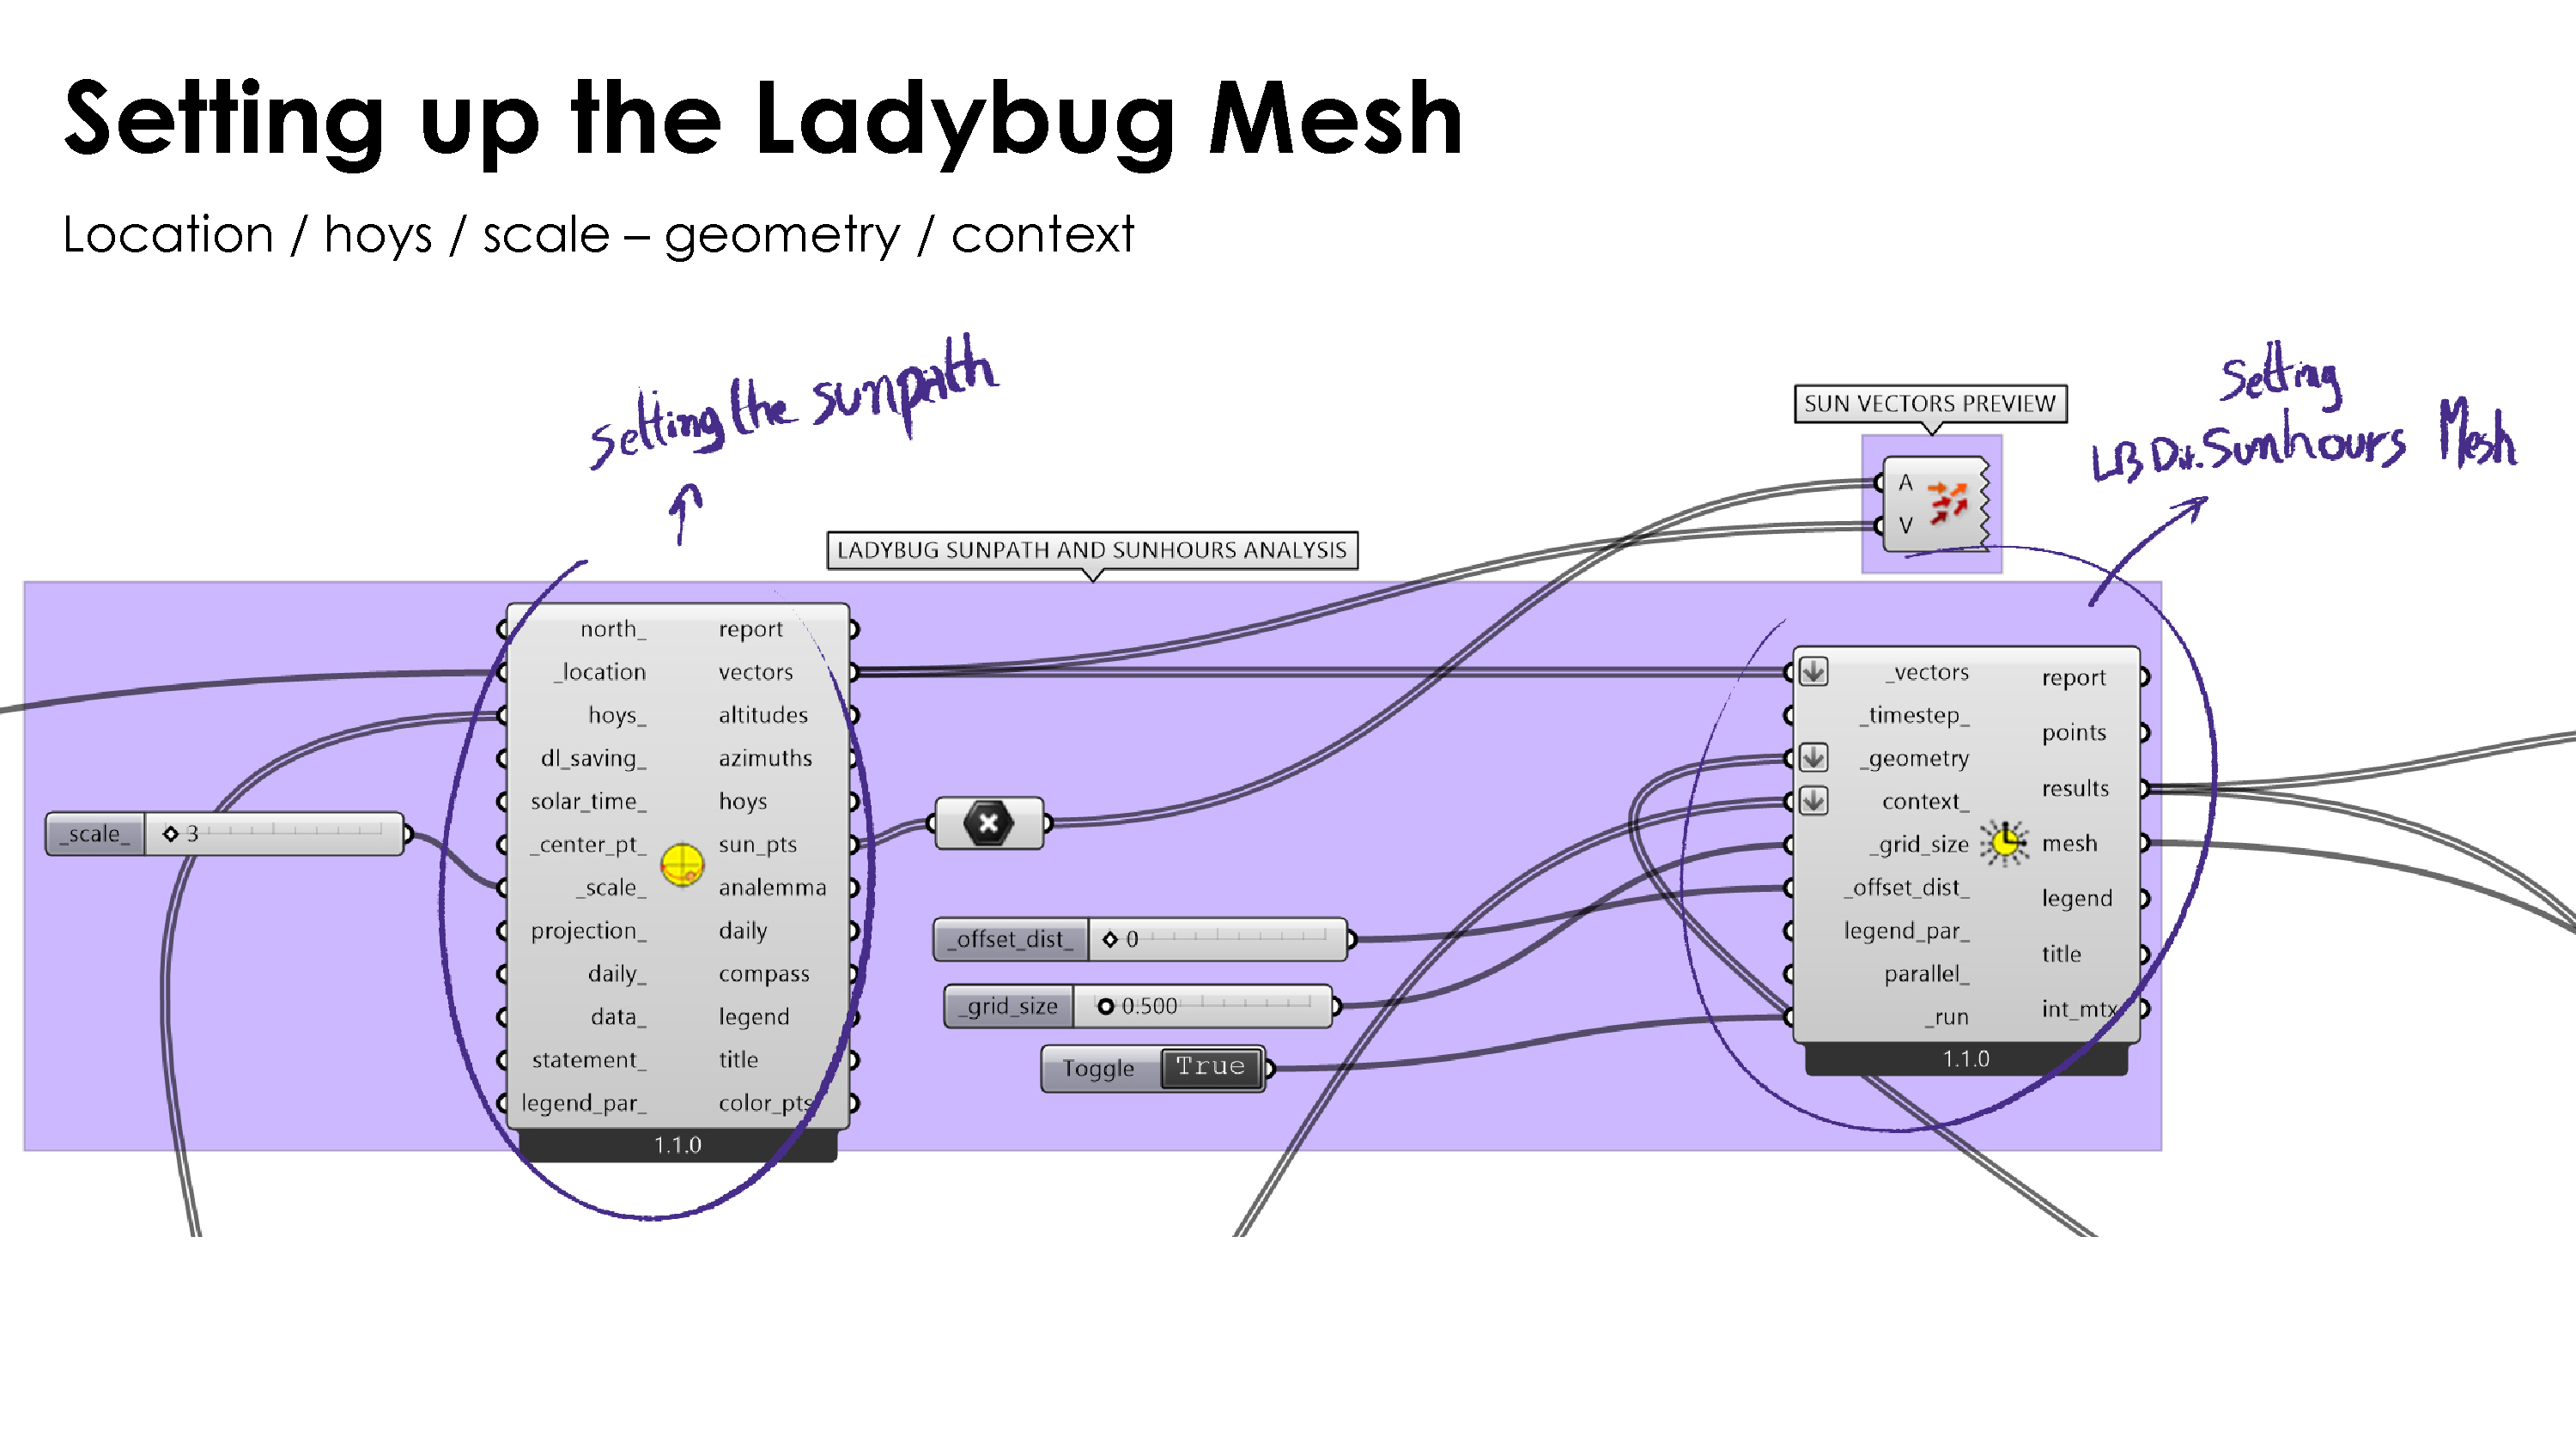
Begin with Location/Weather Data/Time period – Geometry/Context :
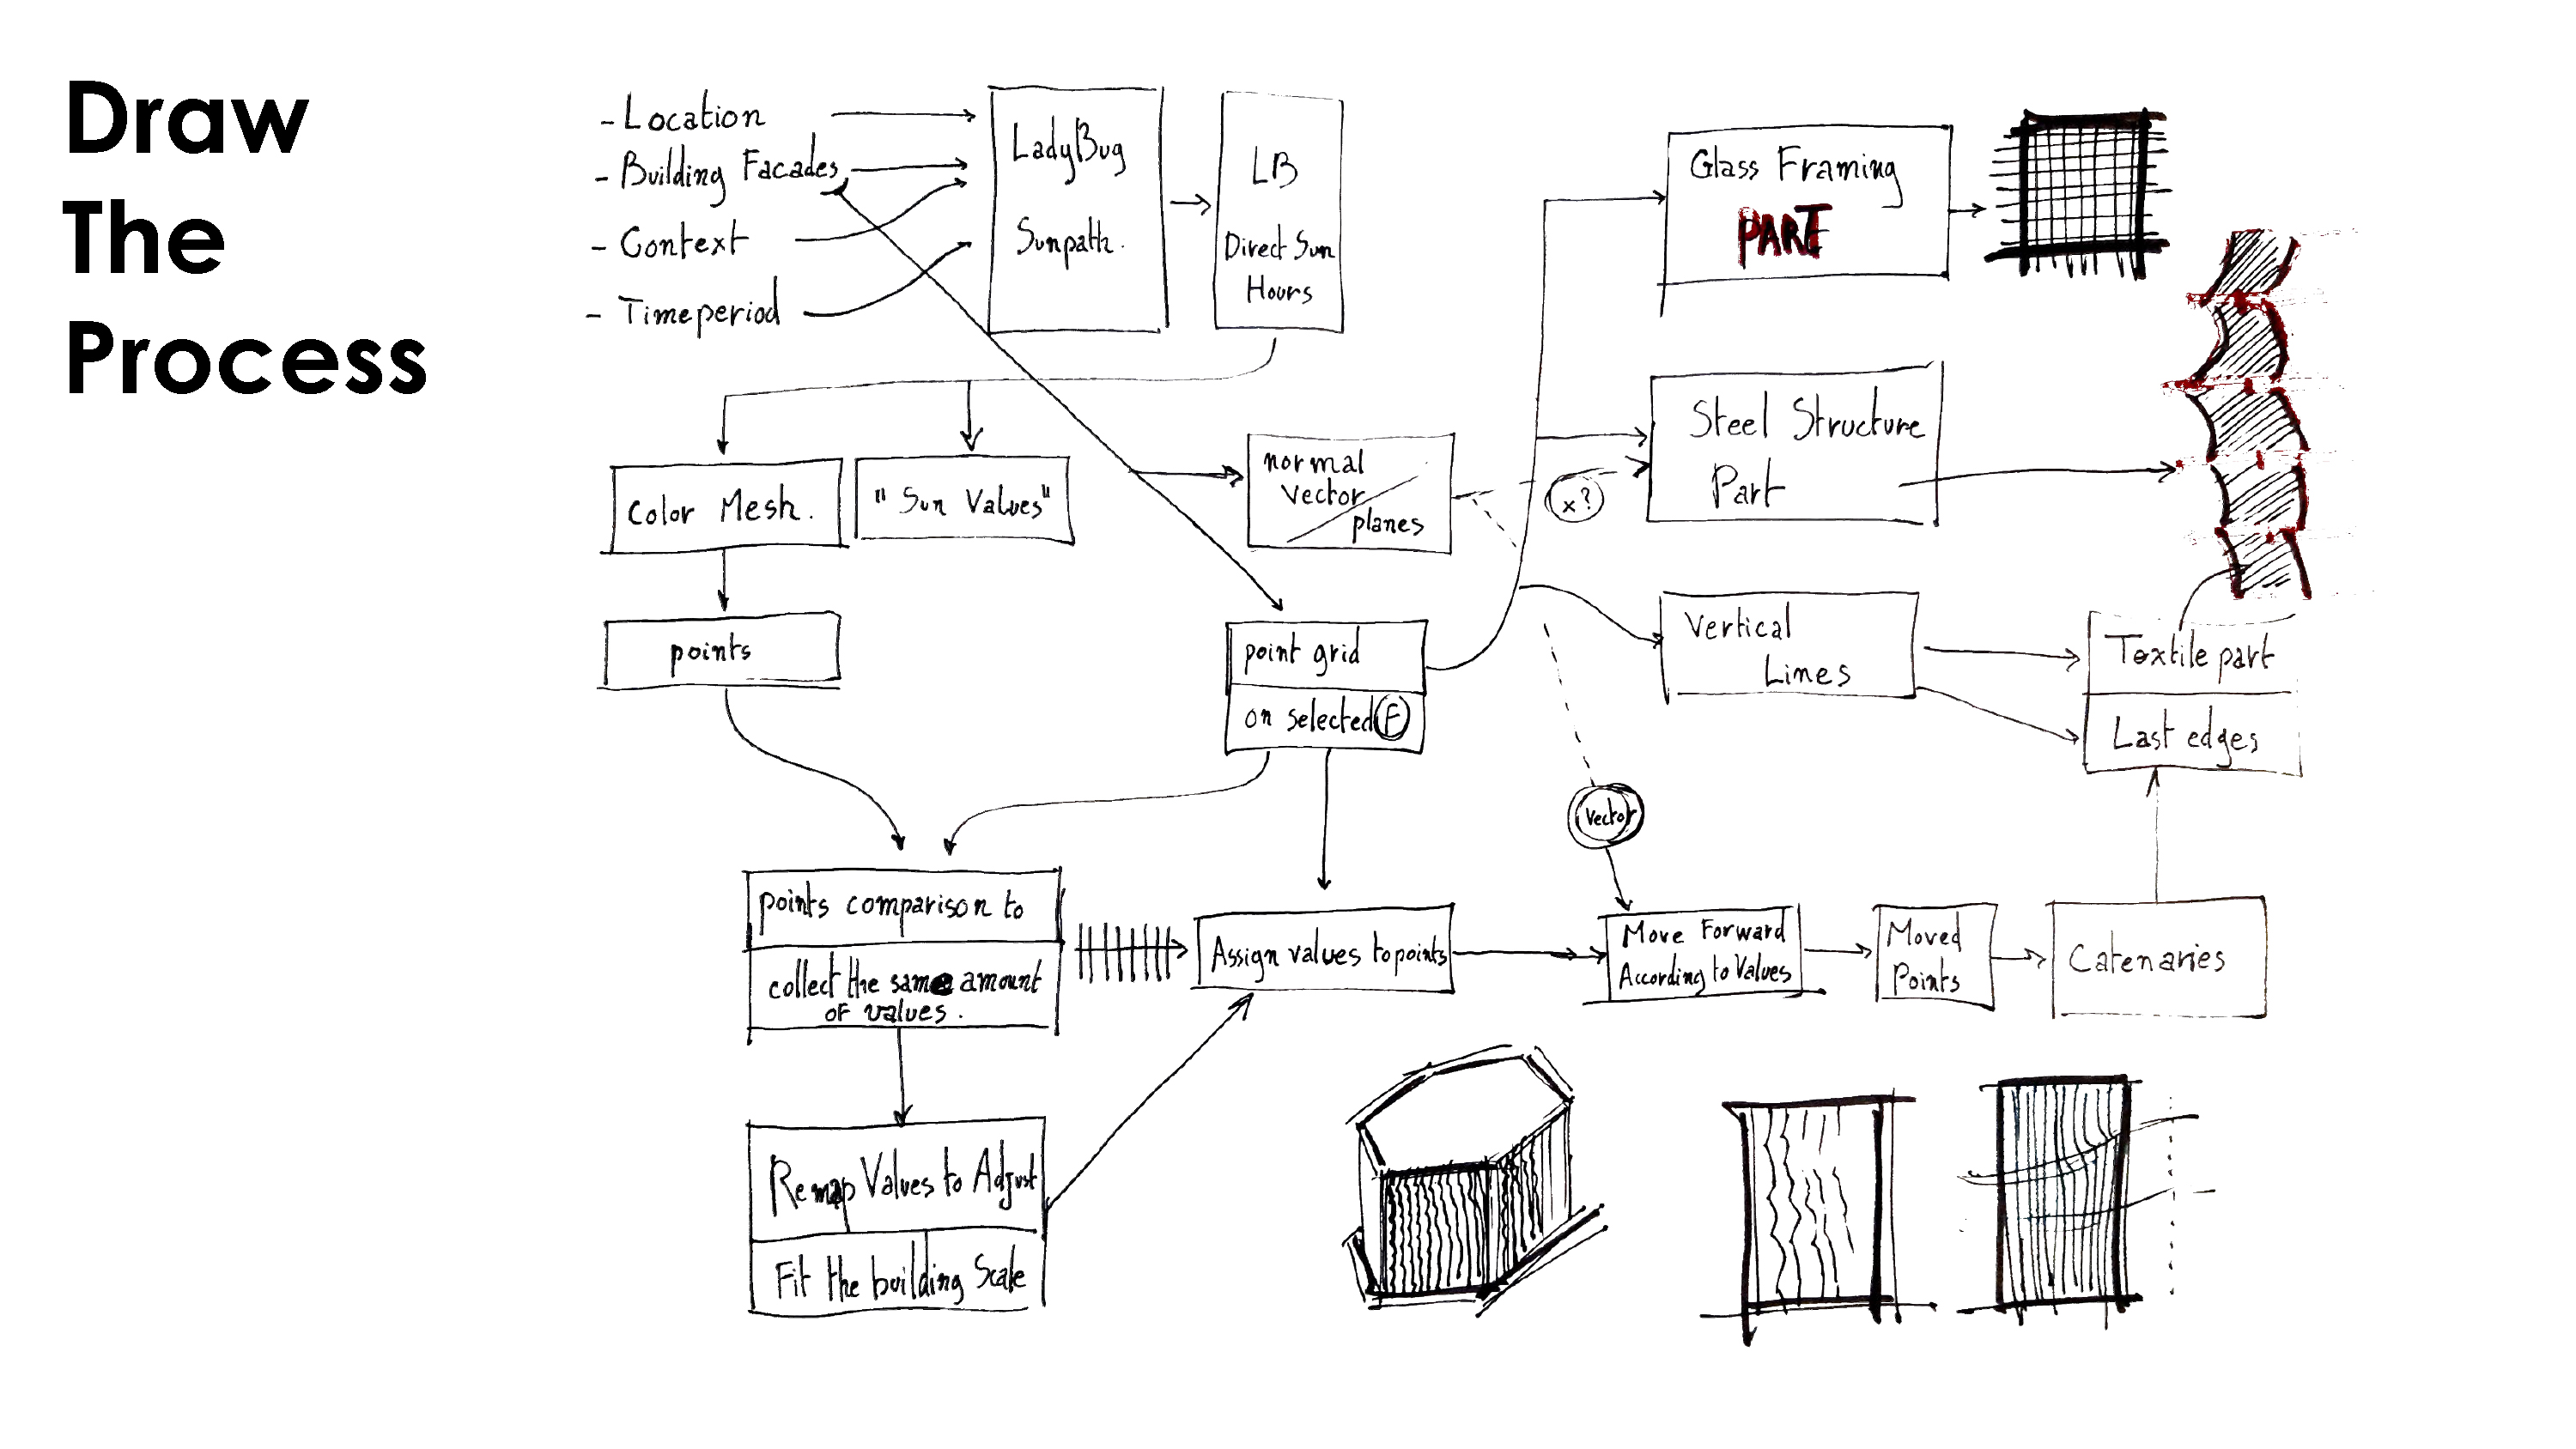
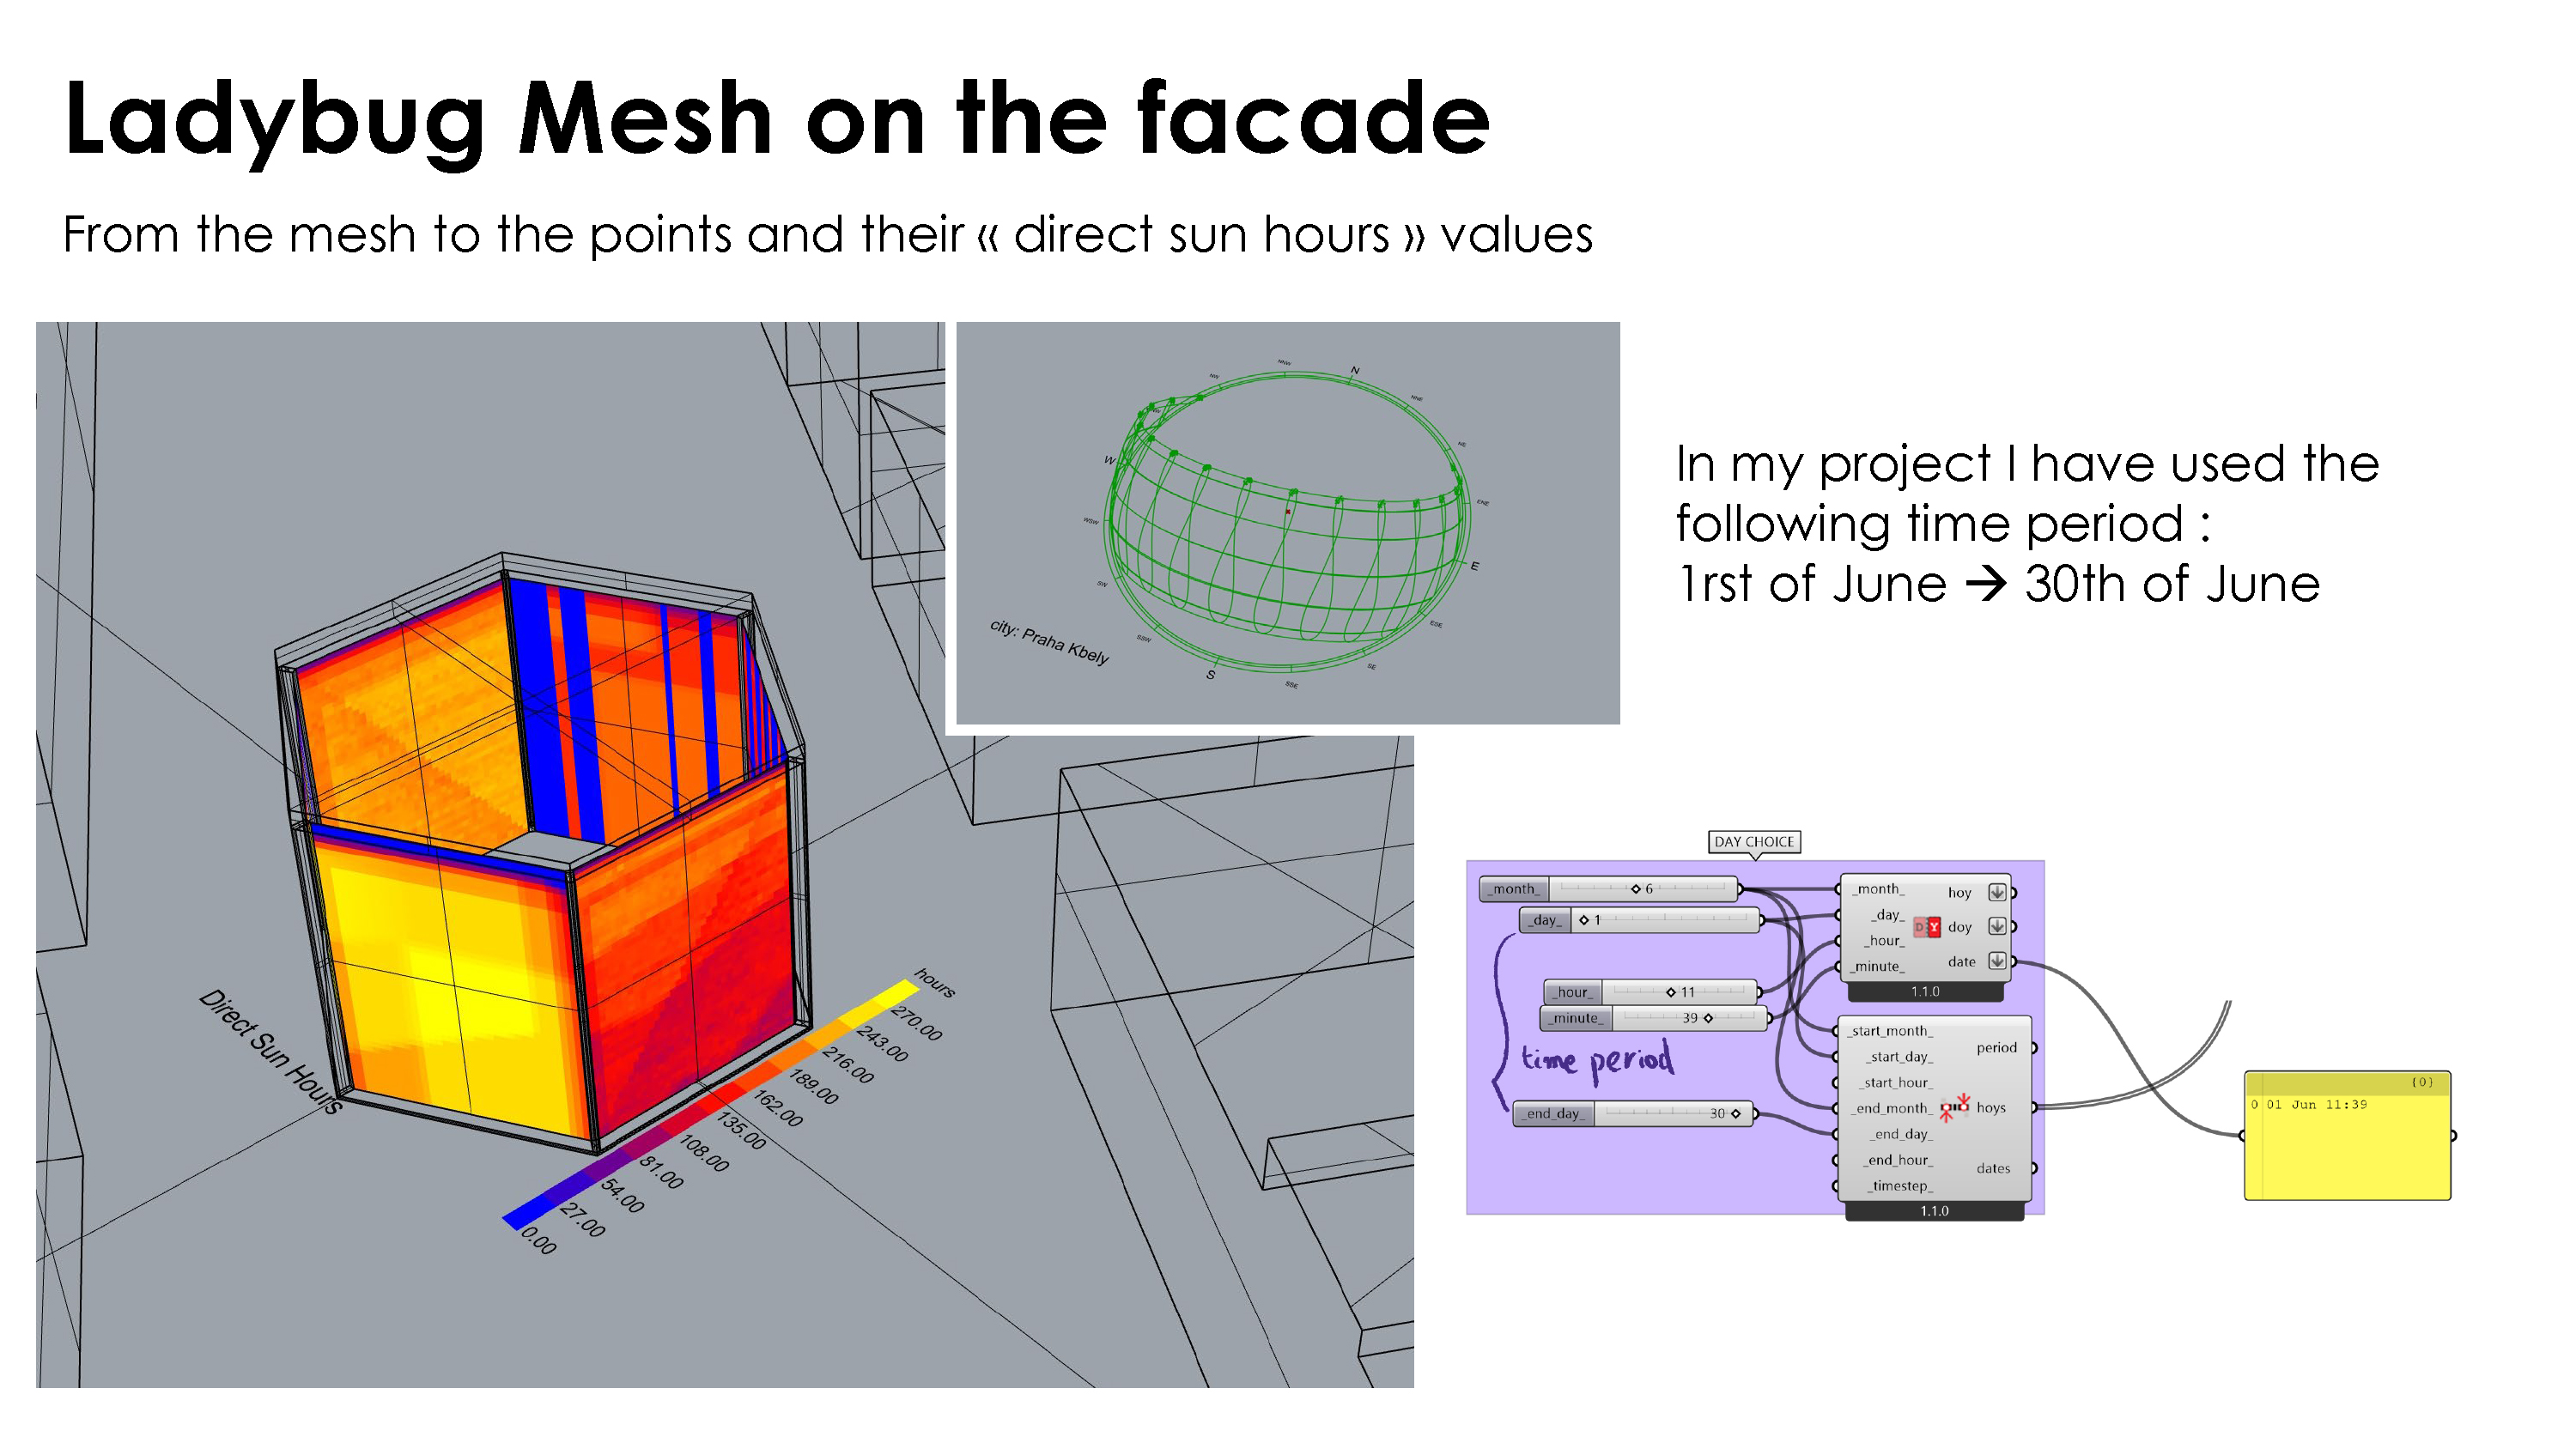
Using the Ladybug plugin, you will have to provide the location of the building, its weather data and the time period that will be analysed.
The first component is the LB Sunpath and the second one is the LB Direct Sun hours which provide you the solar radiation values alongside a color mesh on the geometry (faces) you are analysing, considering also the context of the building.
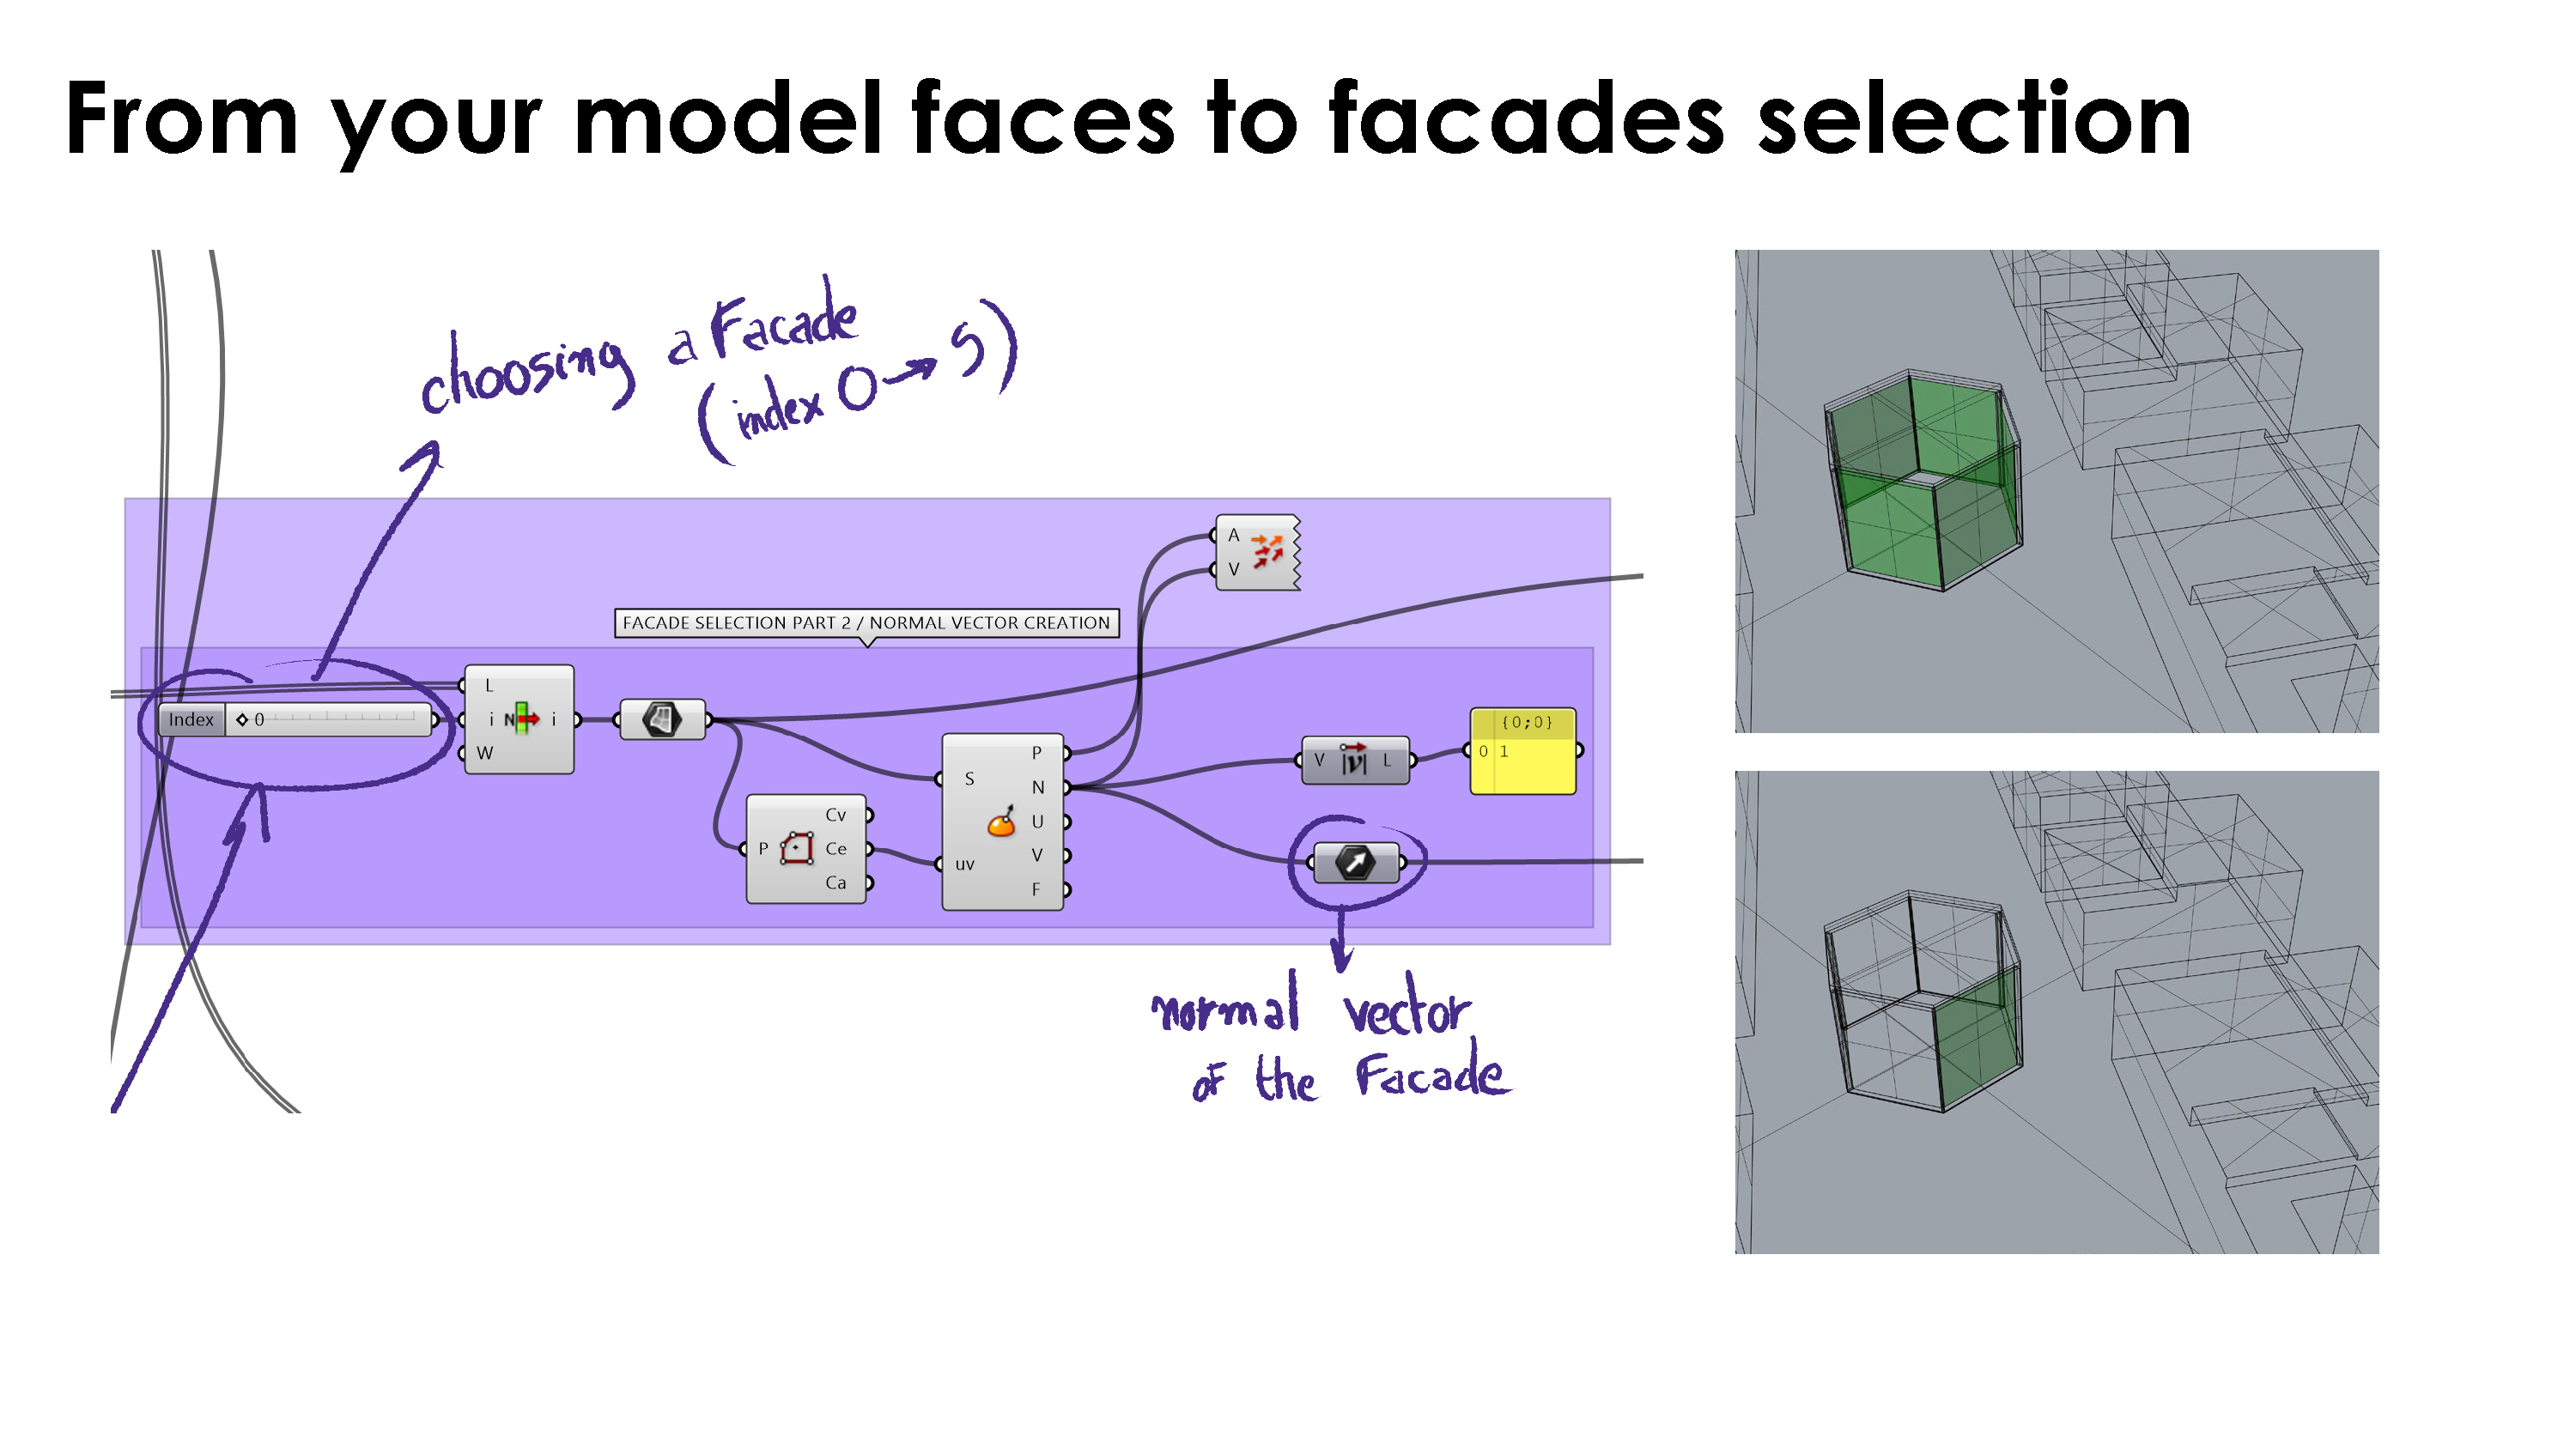
Step n°1 :
In my project, after the geometry selection I had to filter the faces as it was considering the corner faces and the upper/bottom faces which in my case aren’t considered as facades.
I used the Area component to compare the area of each face and then selecting only the faces having the area of the facades (Note that for a different building you would have to approximate your own area value that you are interested in to correctly dispatch the data trees. There I had a large difference between my faces which allow me to select every face with an area between 400 m² and 500 m²)
Then I had to choose the facade I would create the sun shading on as I didn’t want to make the whole process laggy.
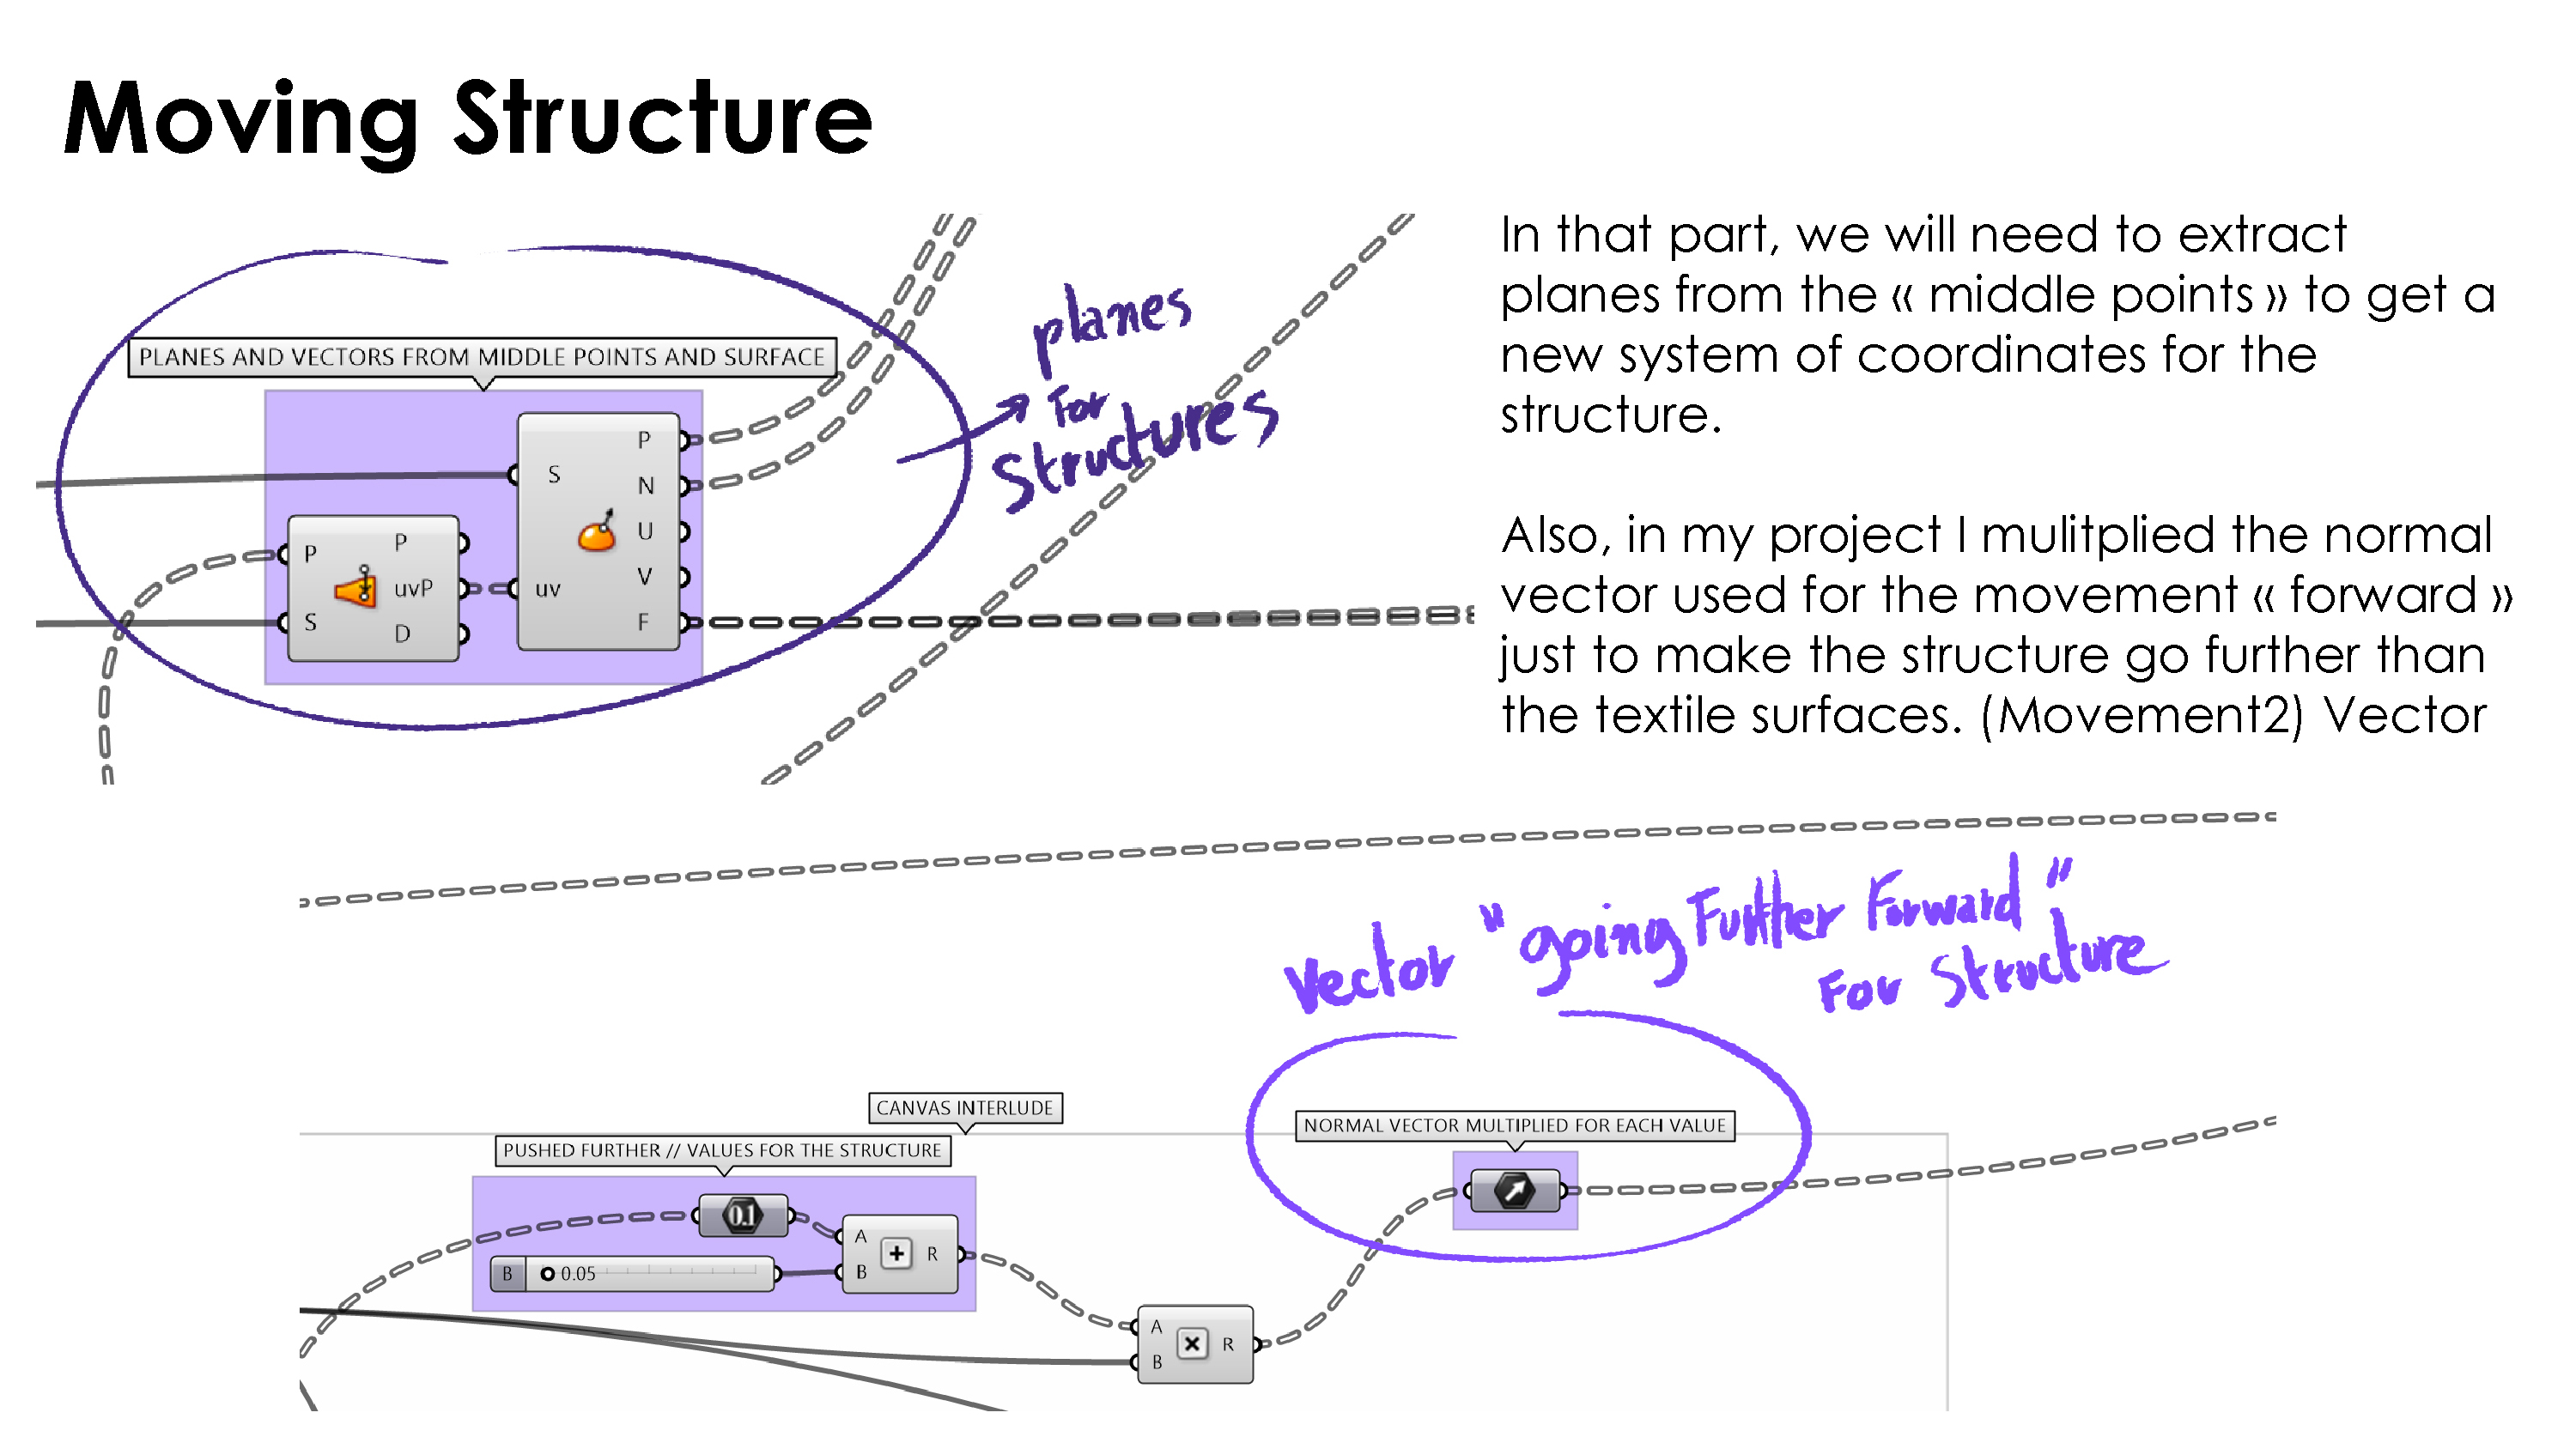
In this step I also create the normal vector that will be later used for the movement of the points on the facade.
Step n°2 :
The Ladybug Sun Direct Hours component allows me to get a color mesh with the solar radiation values which are attributed to grid points
In this part we want to isolate the values, according to a certain number of points.
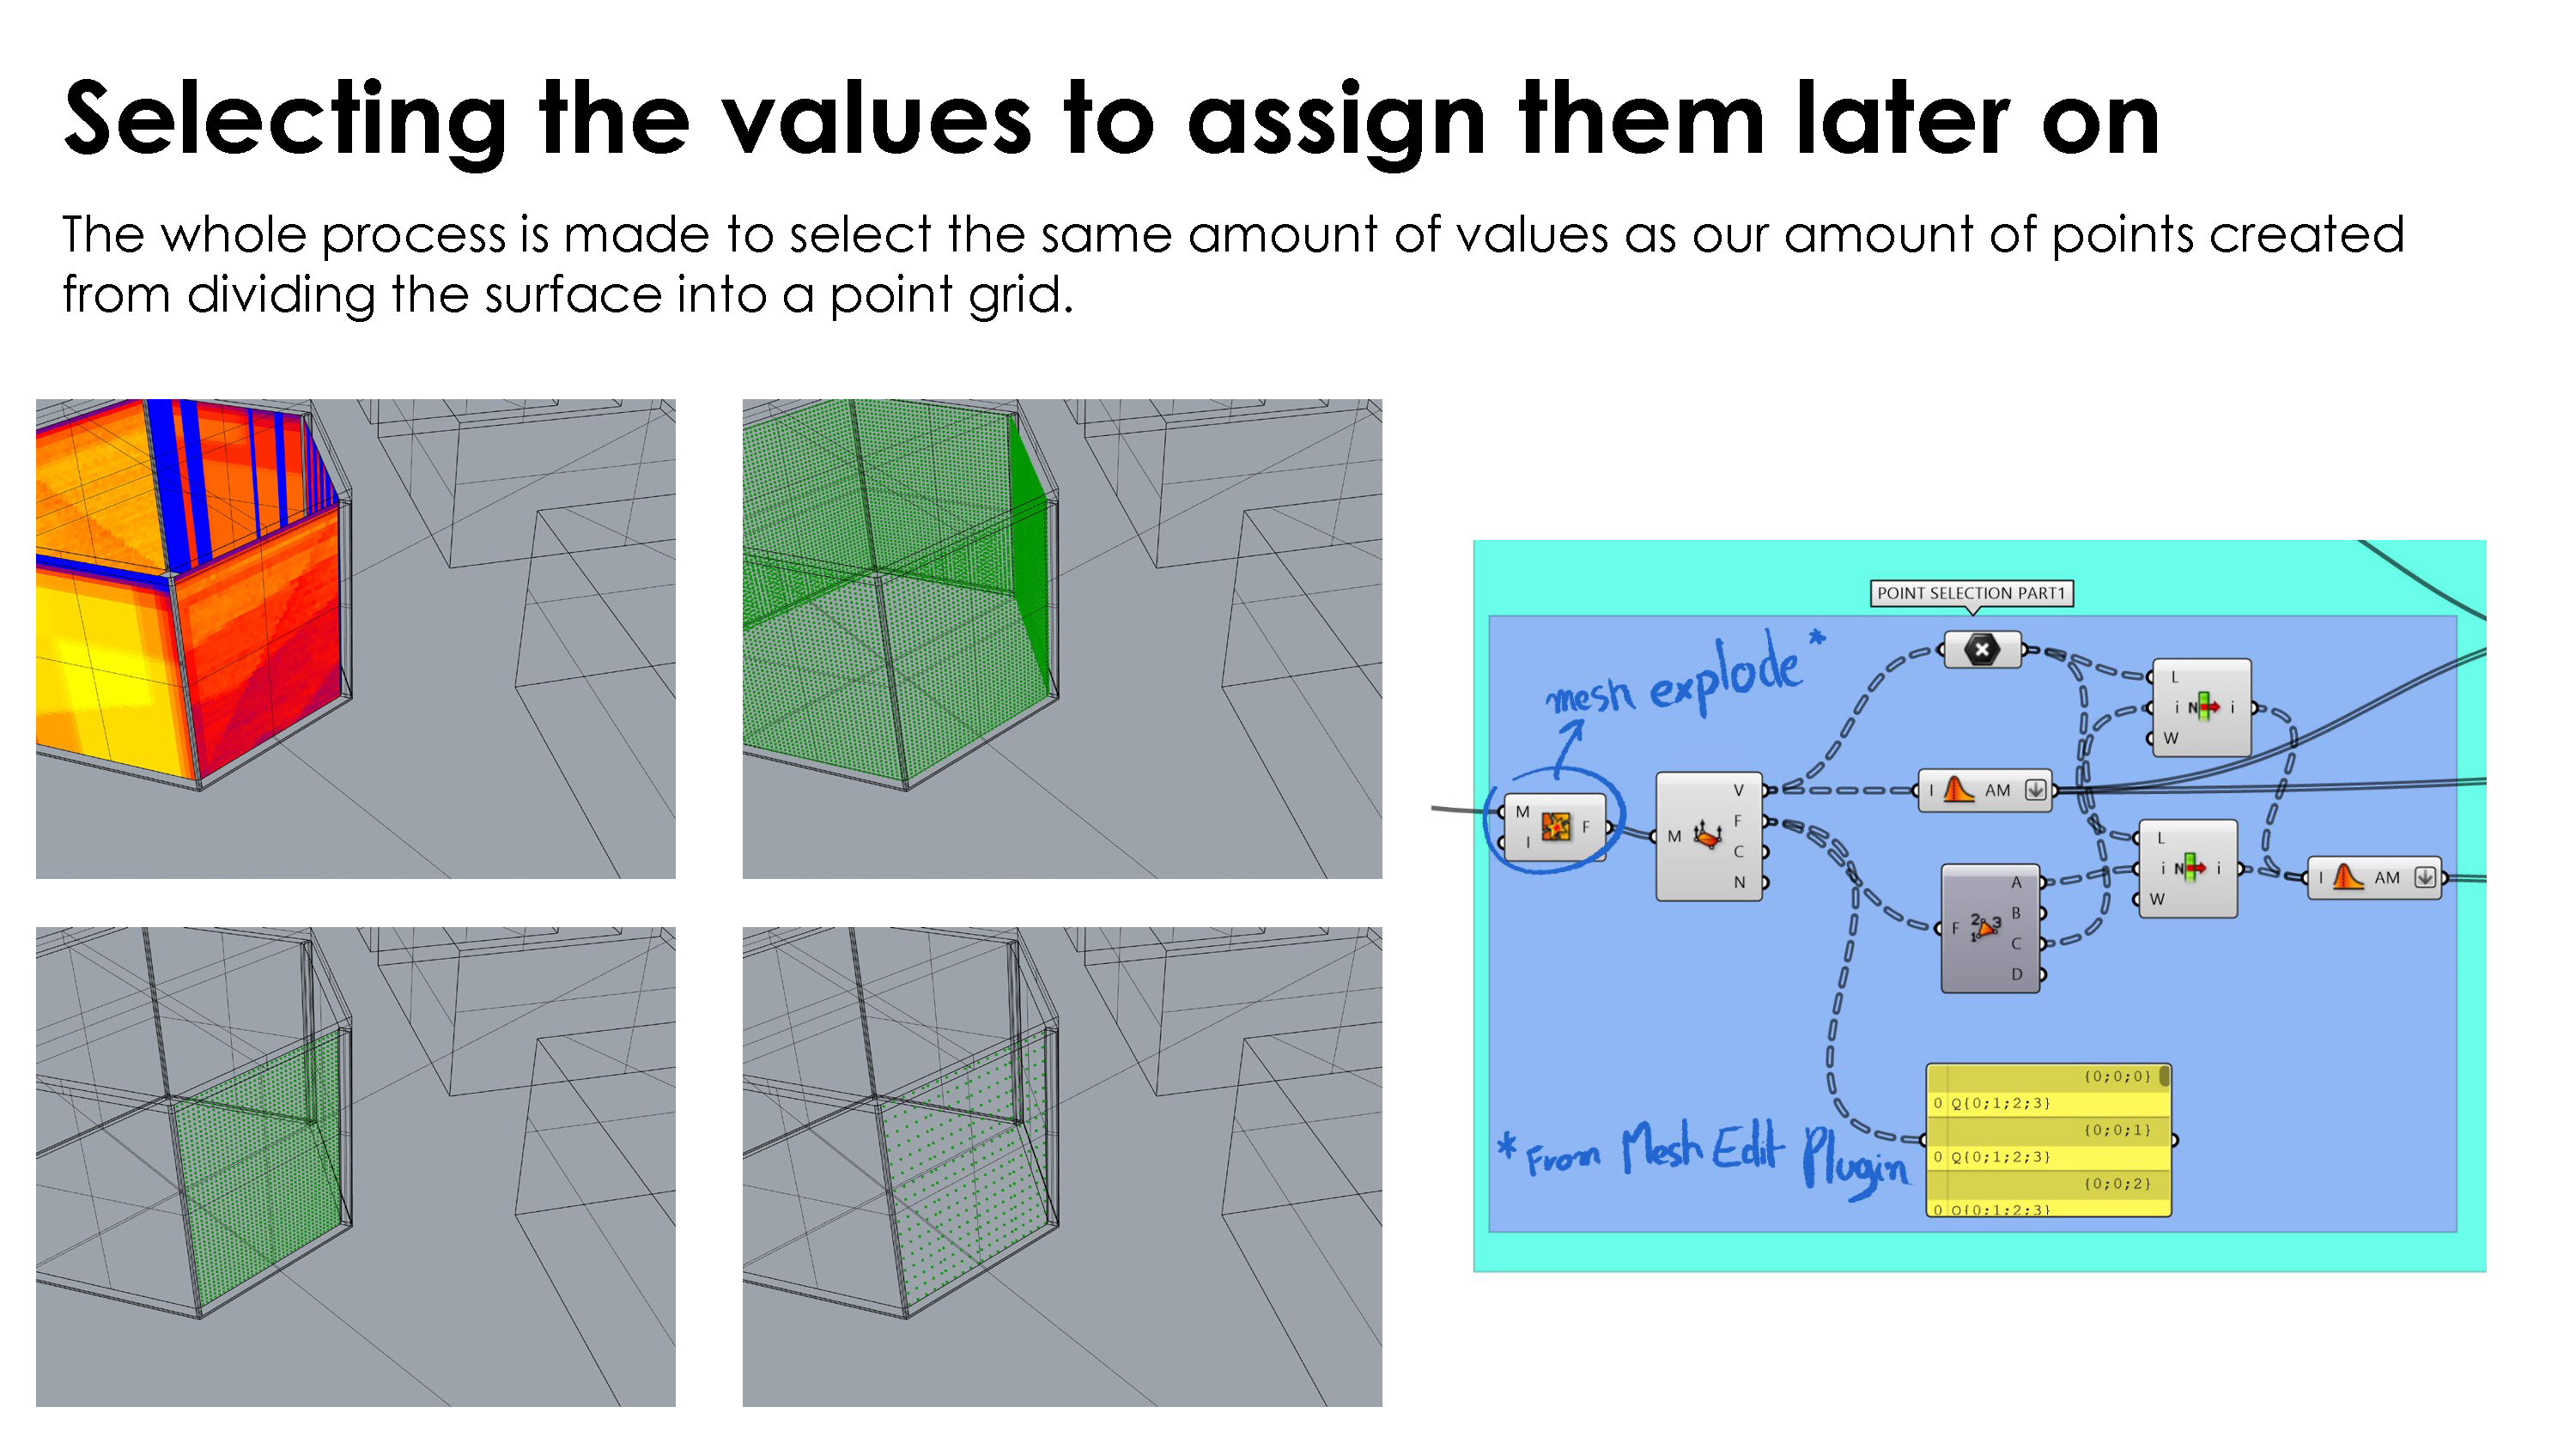

We are comparing the mesh vertices with the middle points created from the surface selected (facade selected at the beginning).
These middle points are created as follows :
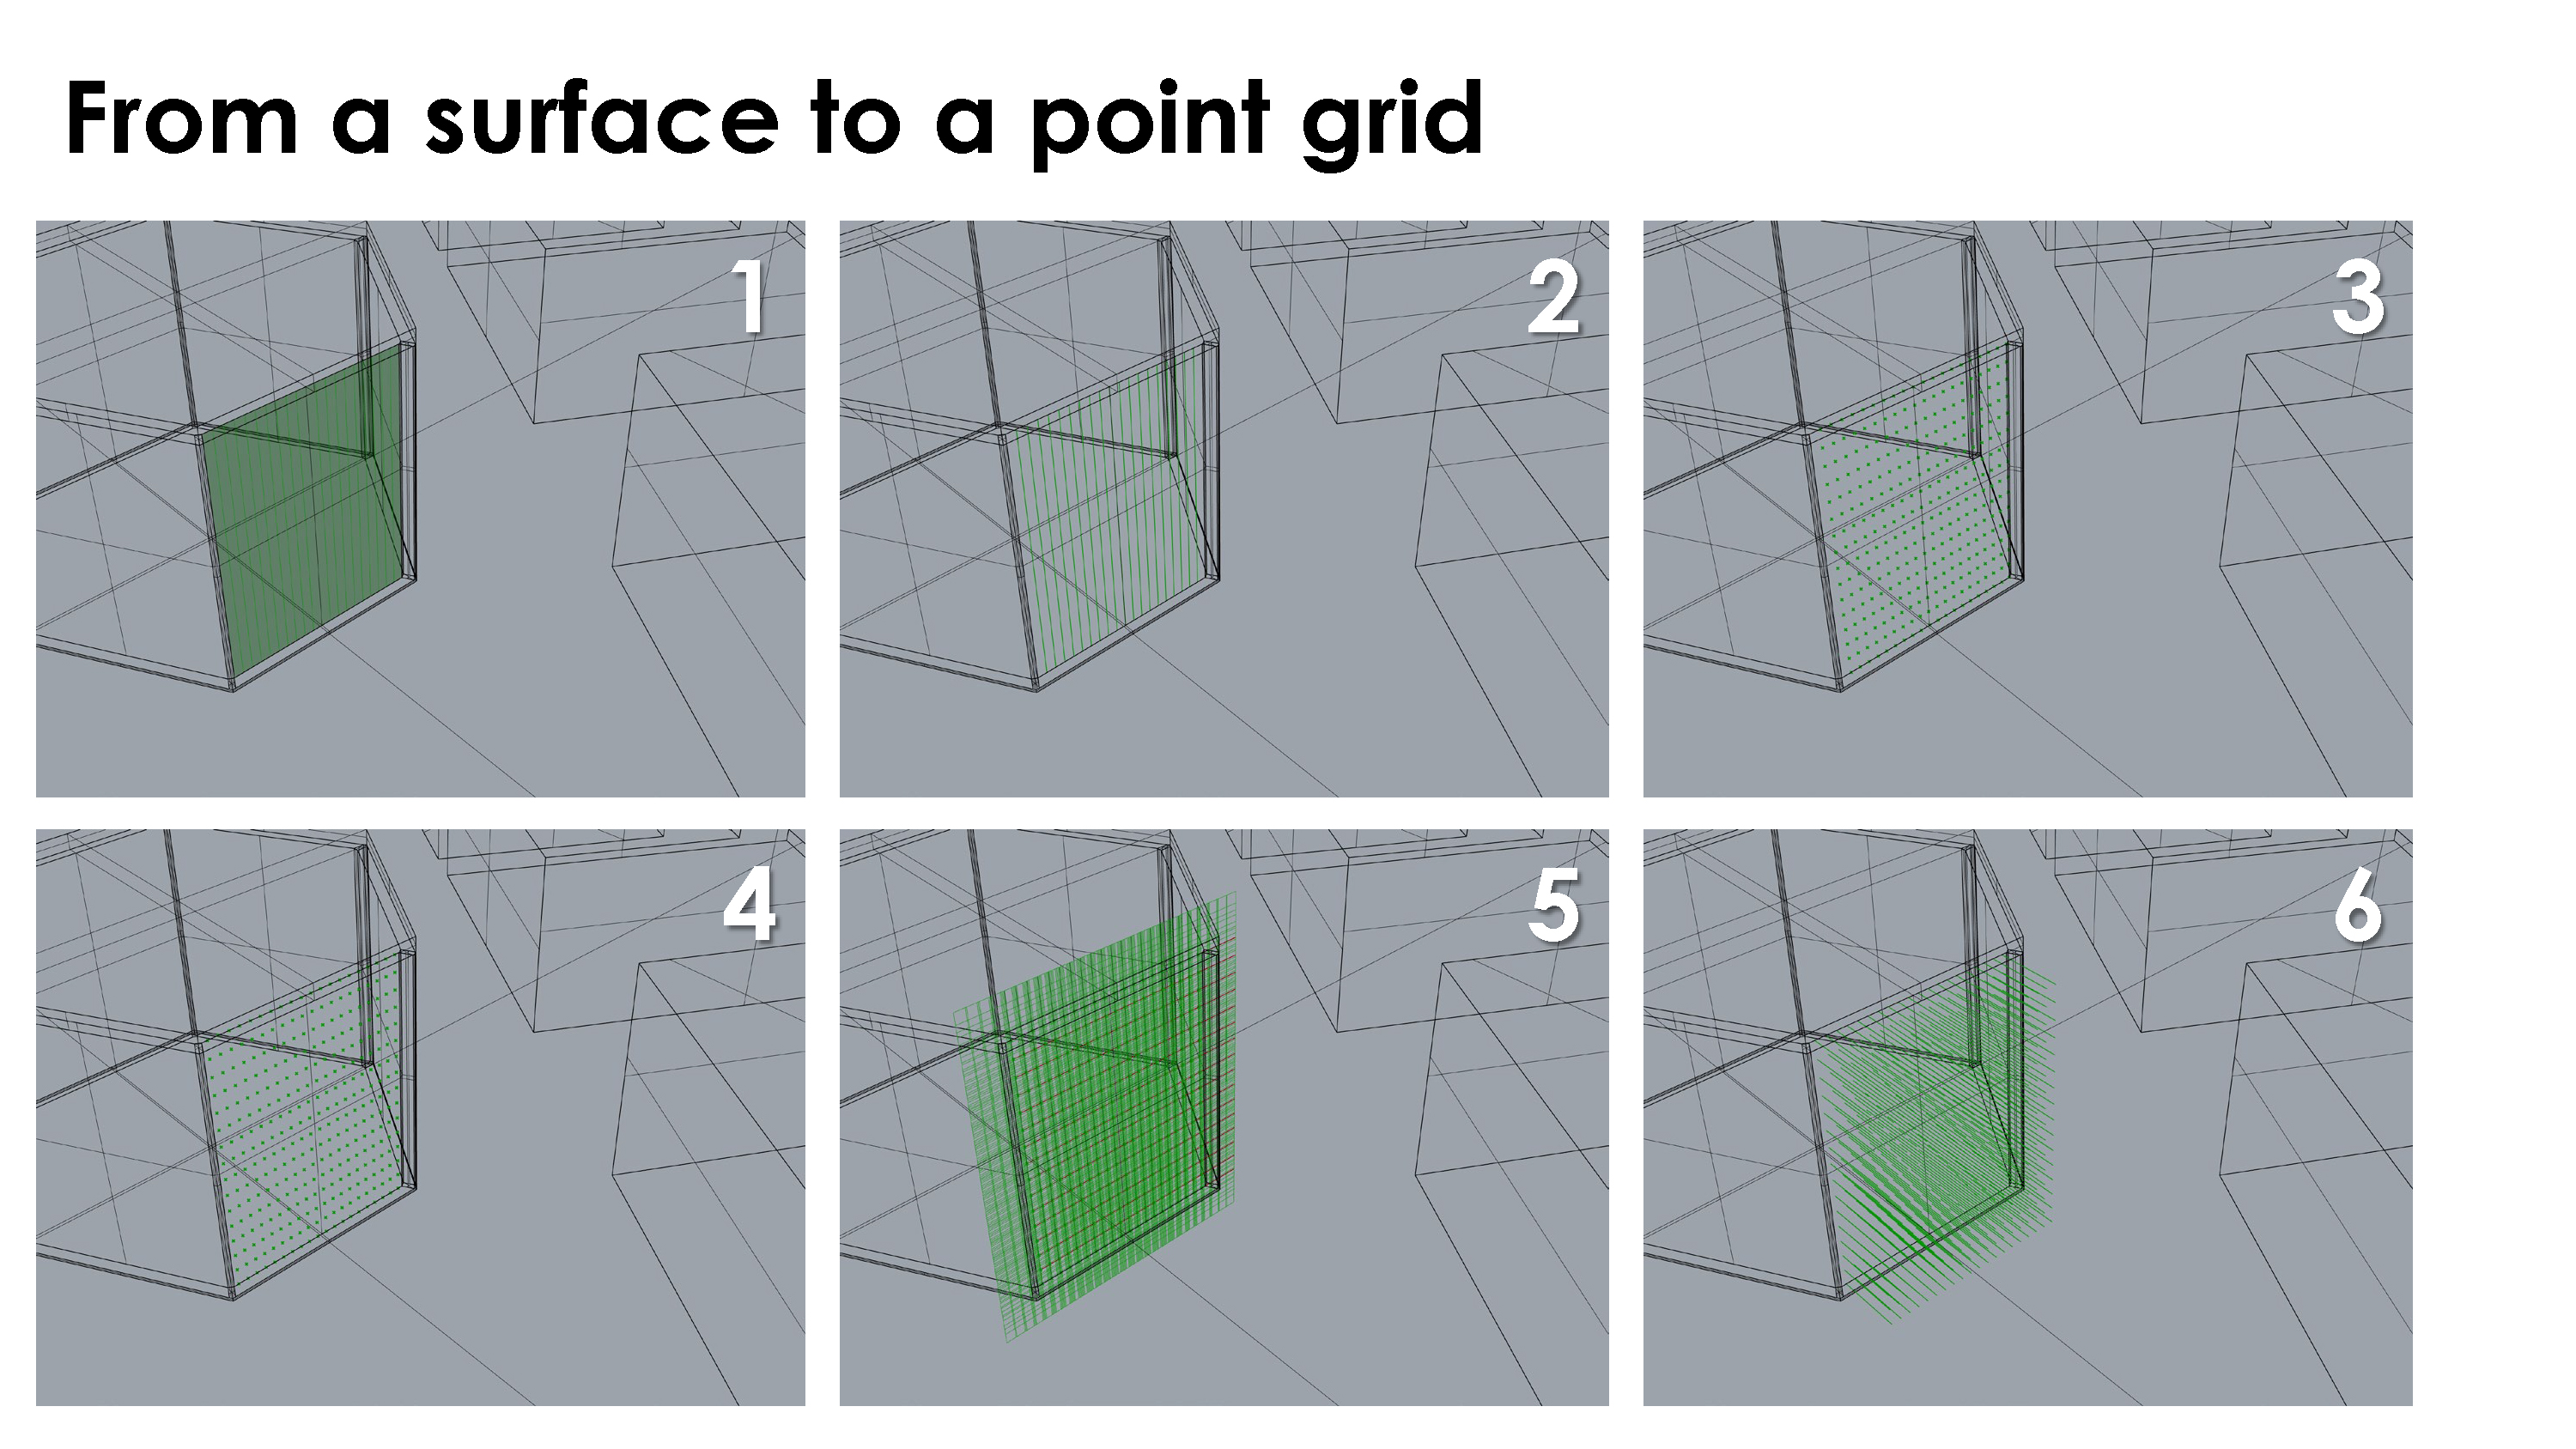
1) Divide into columns
2) Columns Edges
3) Divide Curve to get a certain amount of points, equally distanced on the curve
4) Middle Points
5) Planes
6) Vectors display
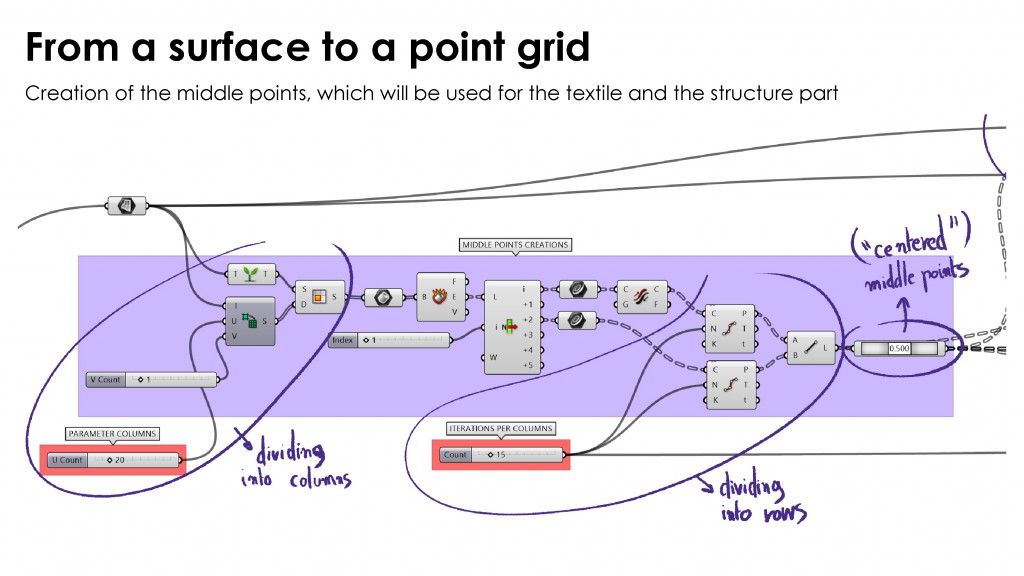

Using Closest point component allow me to get the same amount of points from the mesh points as the middle points, and then to be able to get their values from their indexes.
Now that we have the correct amount of values in a data tree, we are going to be able to reassign them to the middle points later on.
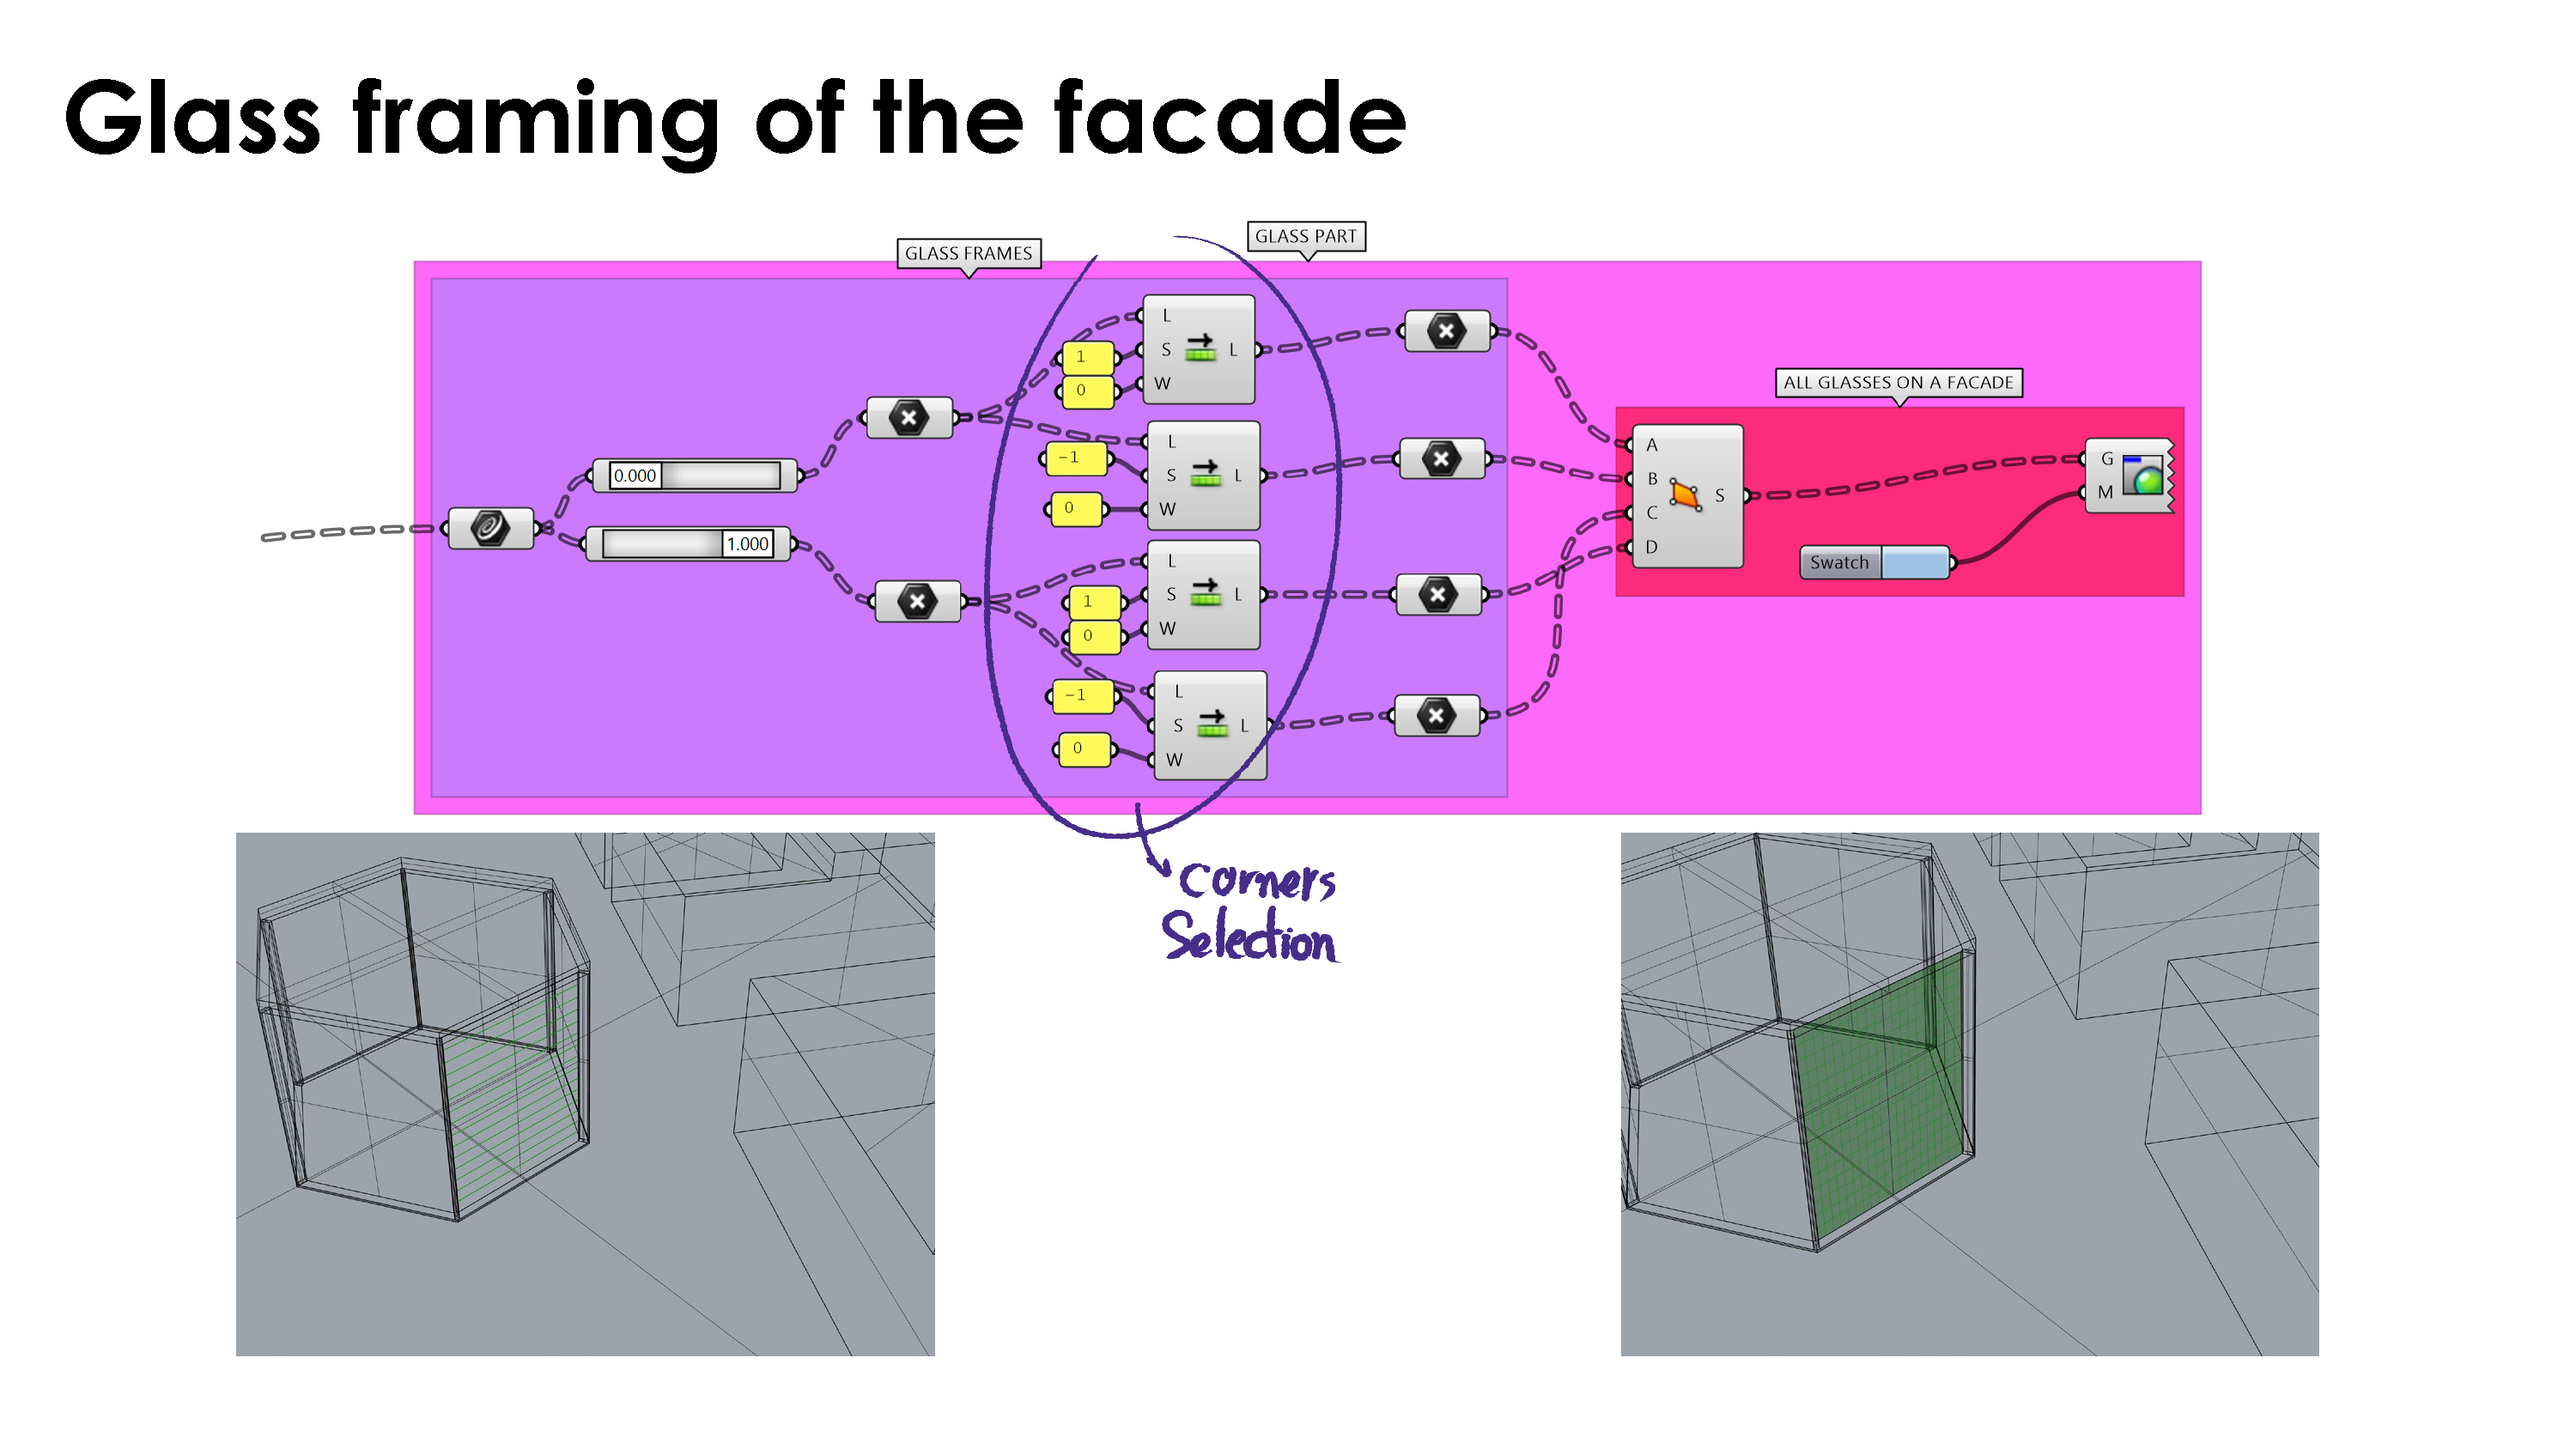
Step n°3 :
From our previous subdivision of the surface, we can get the corner points of the glass framings. i’m creating the surfaces by having all four points of the square frame. (creating surfaces with 4PointSurface component)
This part can be pushed further as I haven’t take the time to adjust it to the steel structure that will come later. But it would be a matter of a shift. Only the first and the last column of the framing would be half of a normal framing column.
I left it as it is as I was aiming for a preview on this side.
Step n°4 :
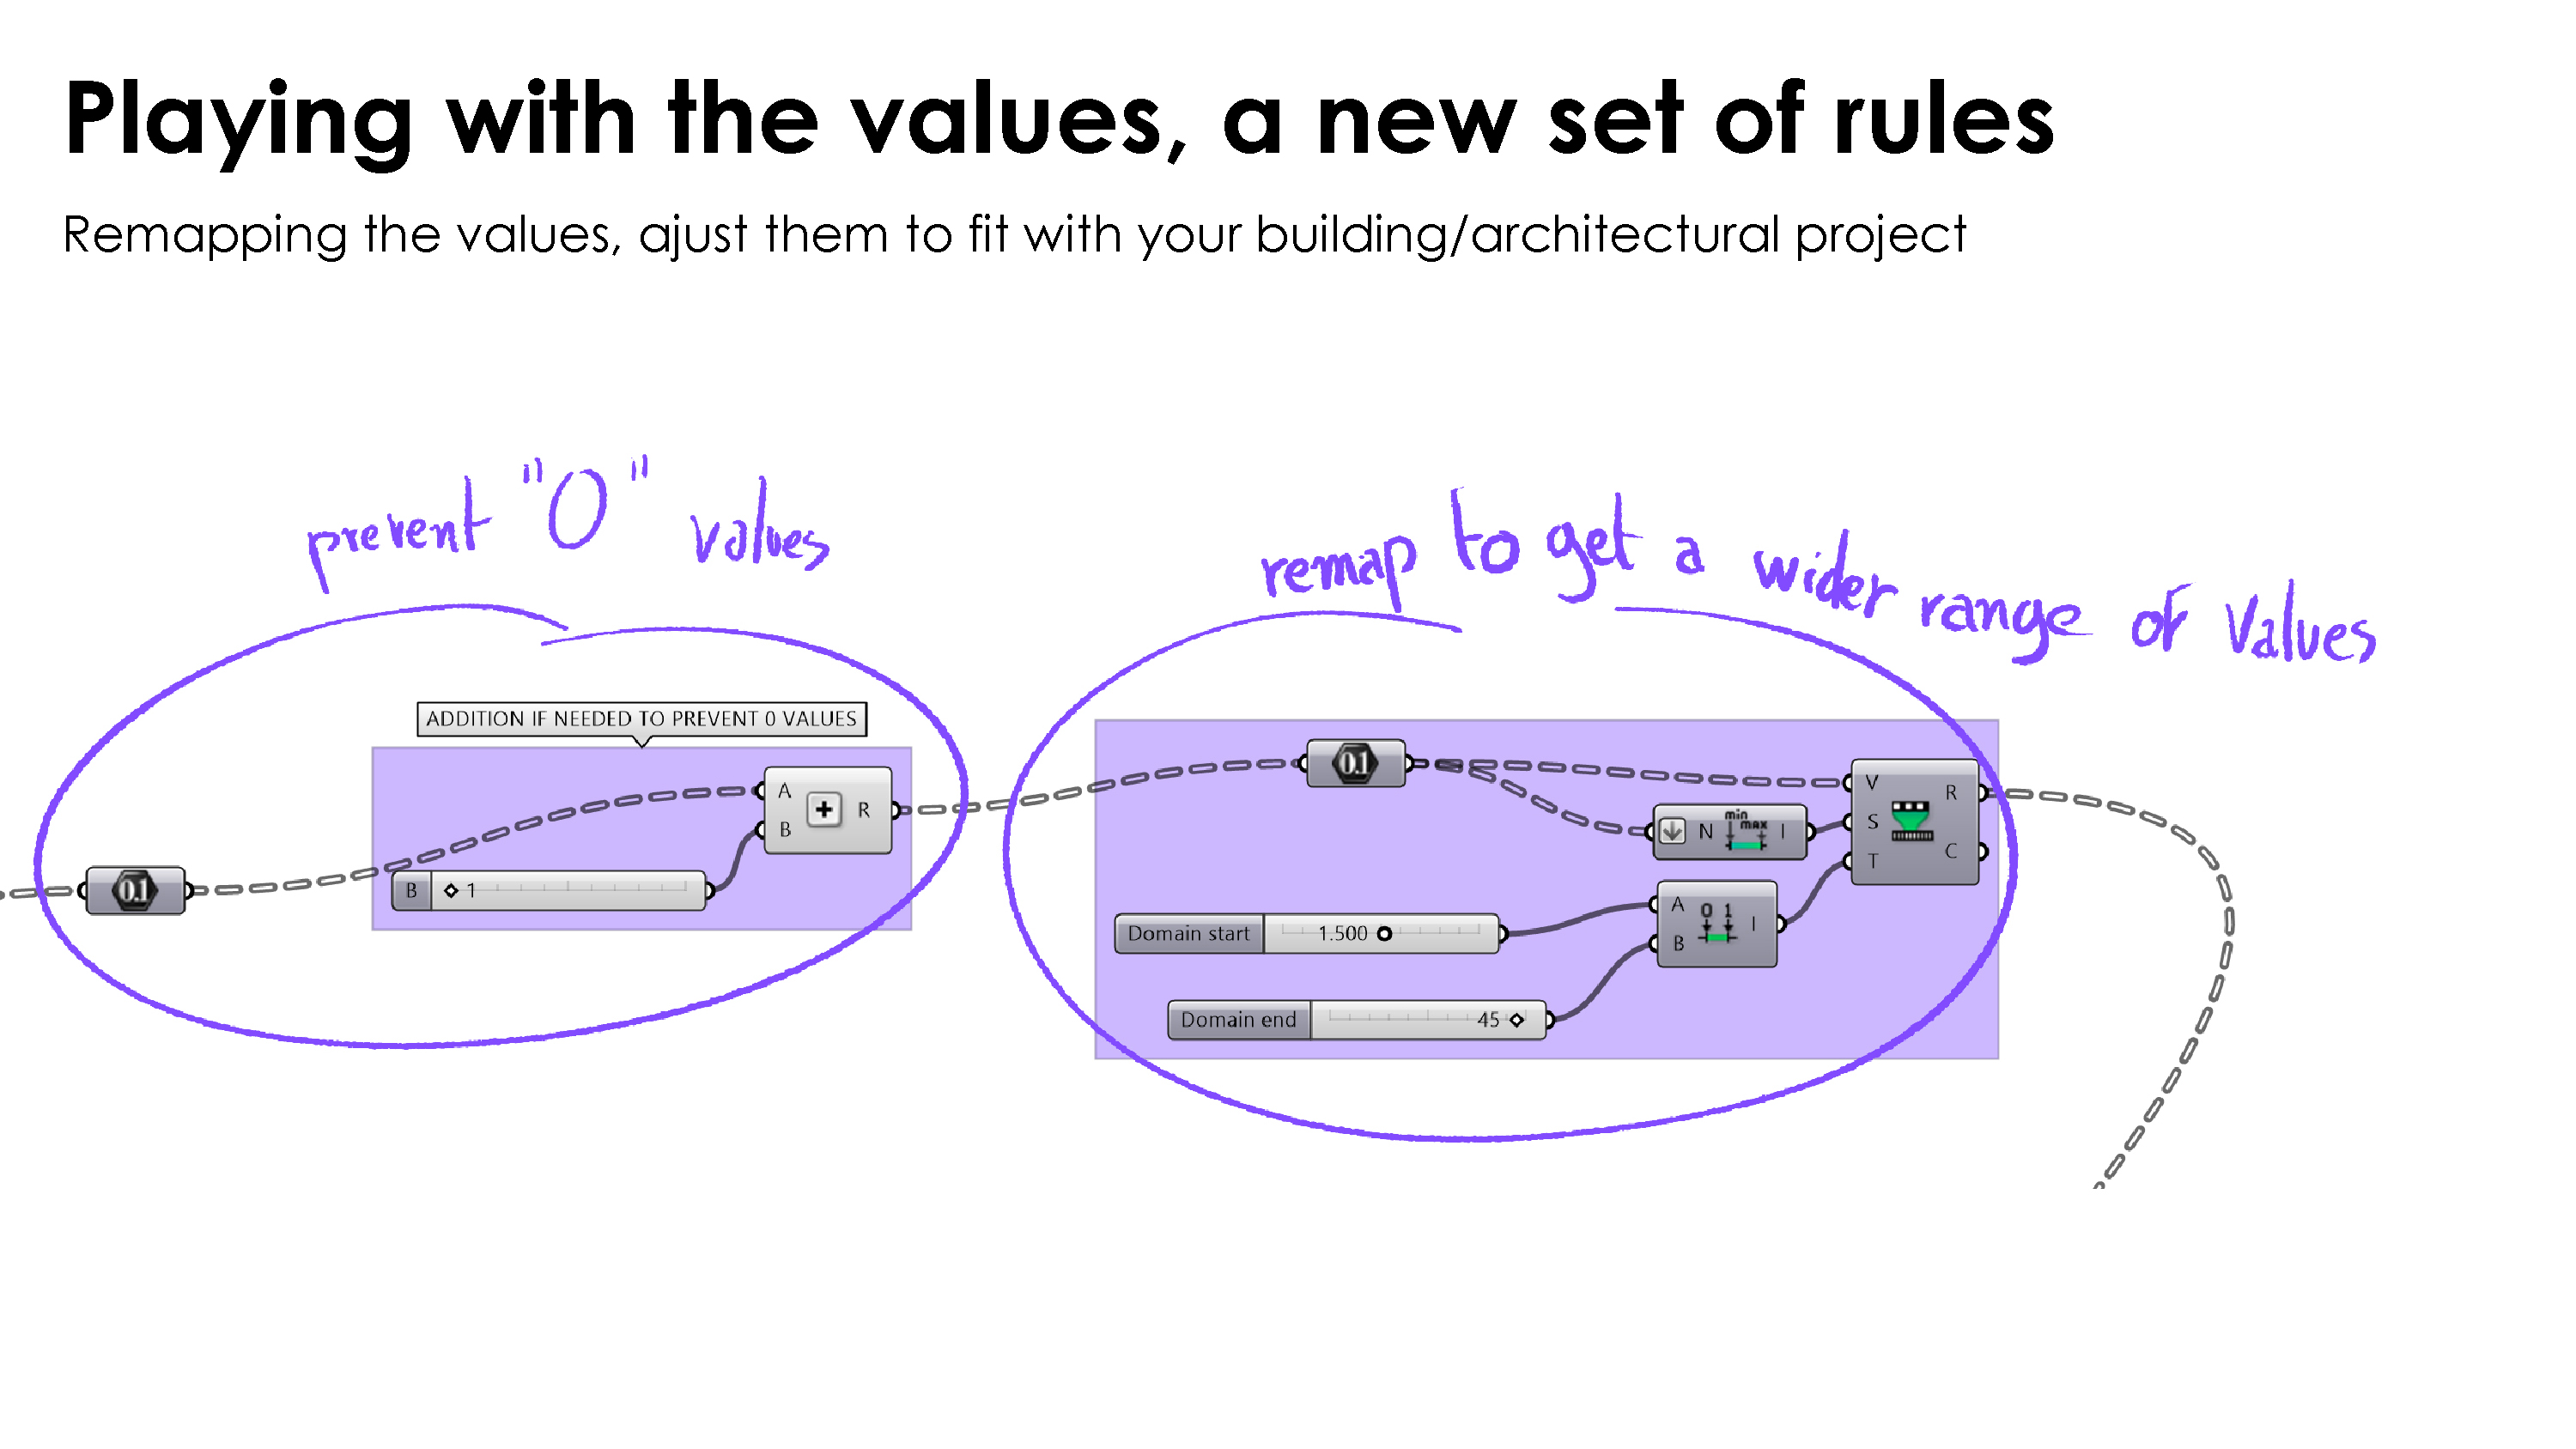
This part concern the sun values that we previously sorted out.
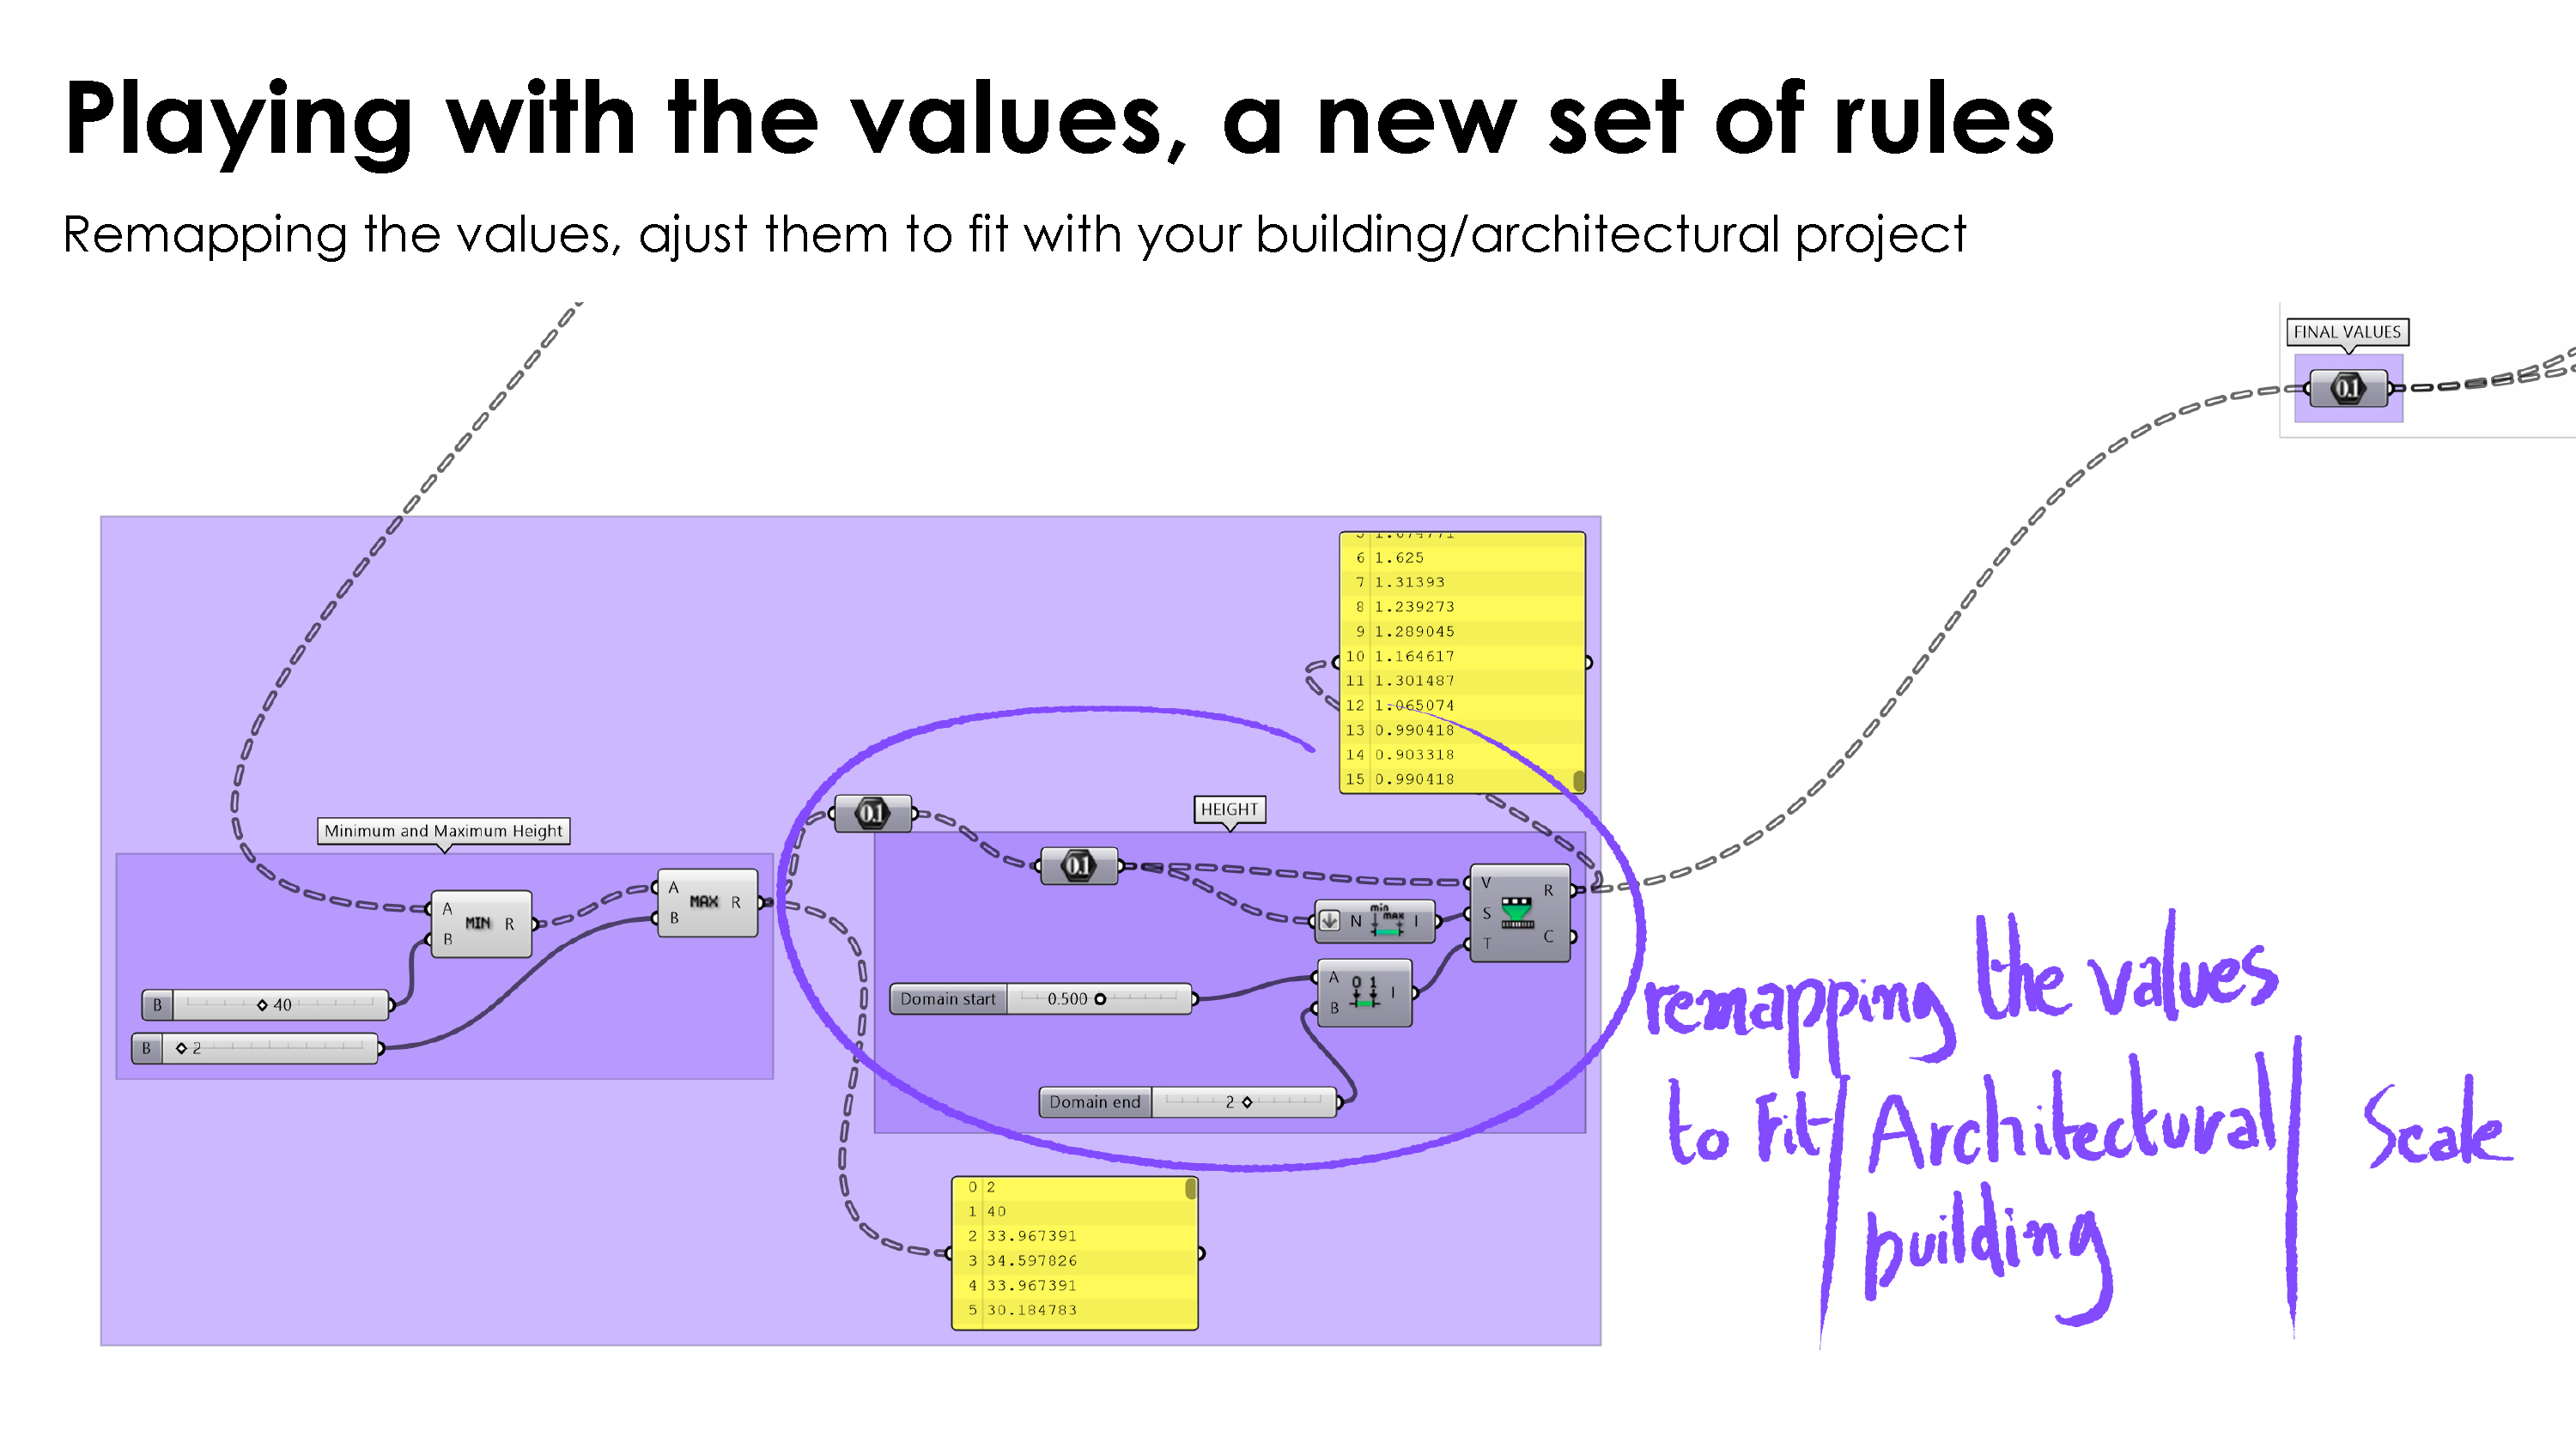
We are going to remap them using two remap process and a limitations process with the Maximum and Minimum components.
First we are going to prevent the “0” values by adding “1” to each value.
Then the first remap allow us to get a wider range of values, to play with the maximum and the minimum.
The second remap is there to adjust the valued to the building or architectural scale.
Step n°5 :
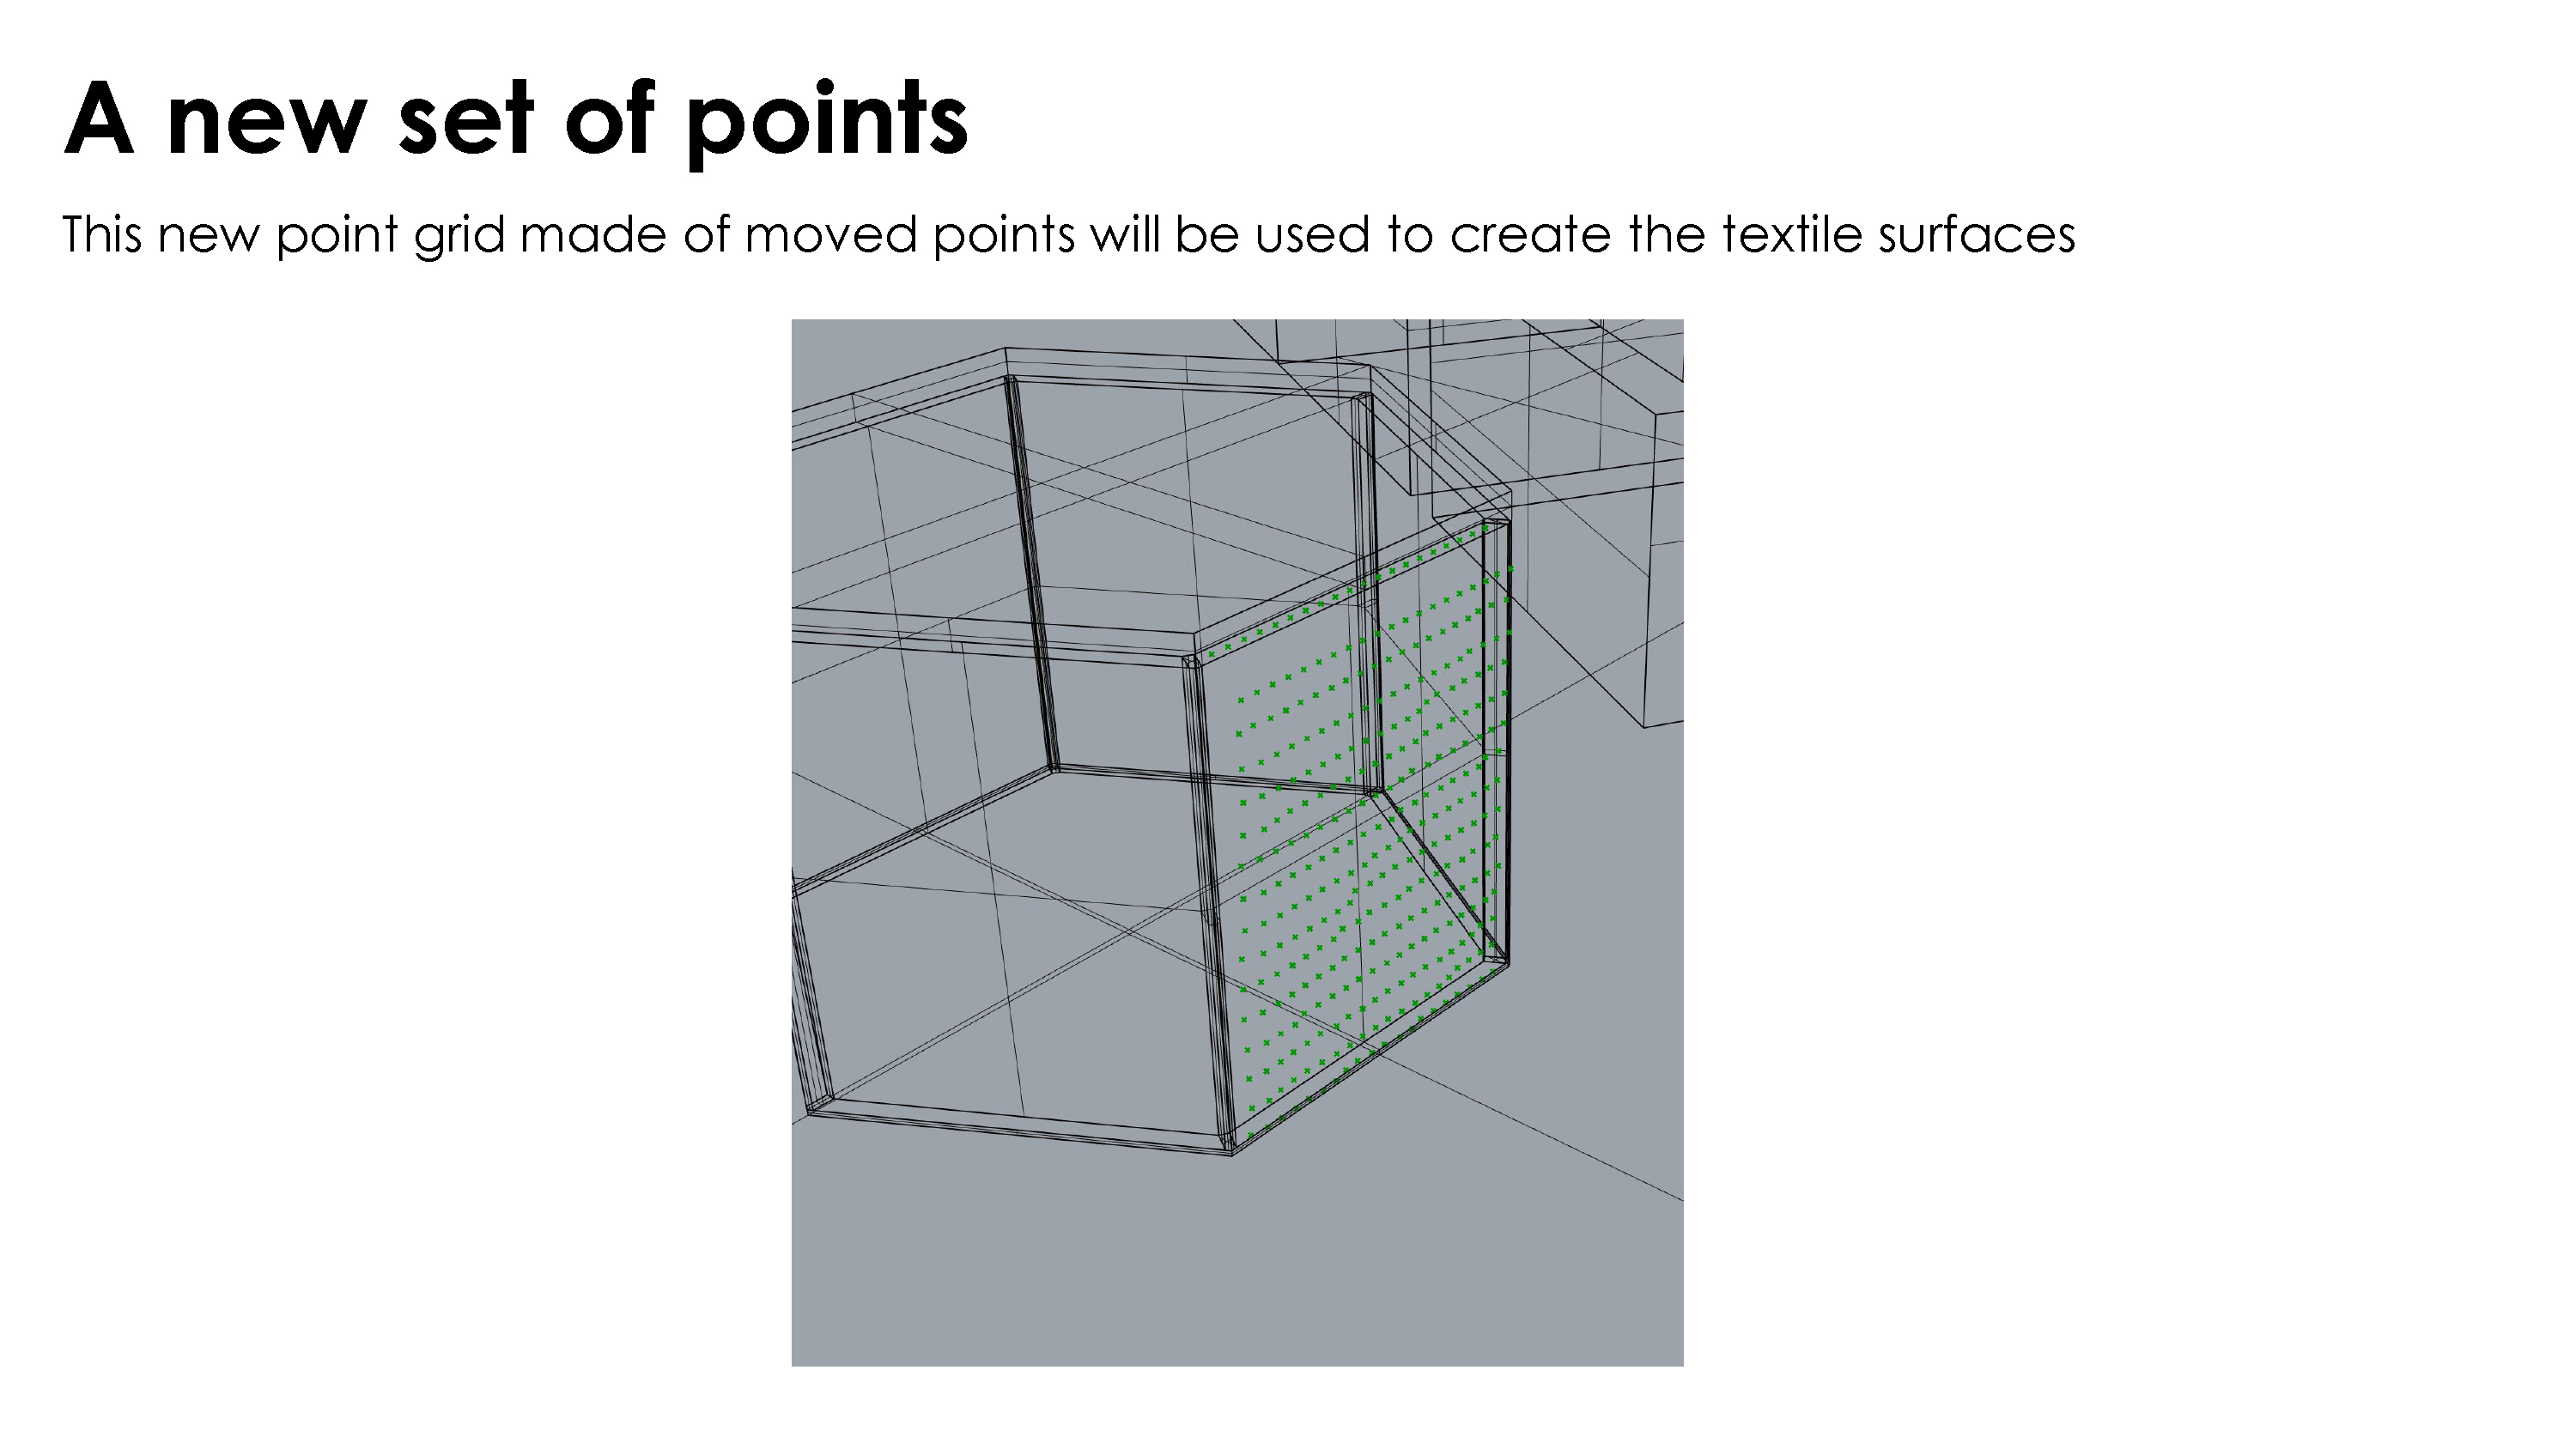
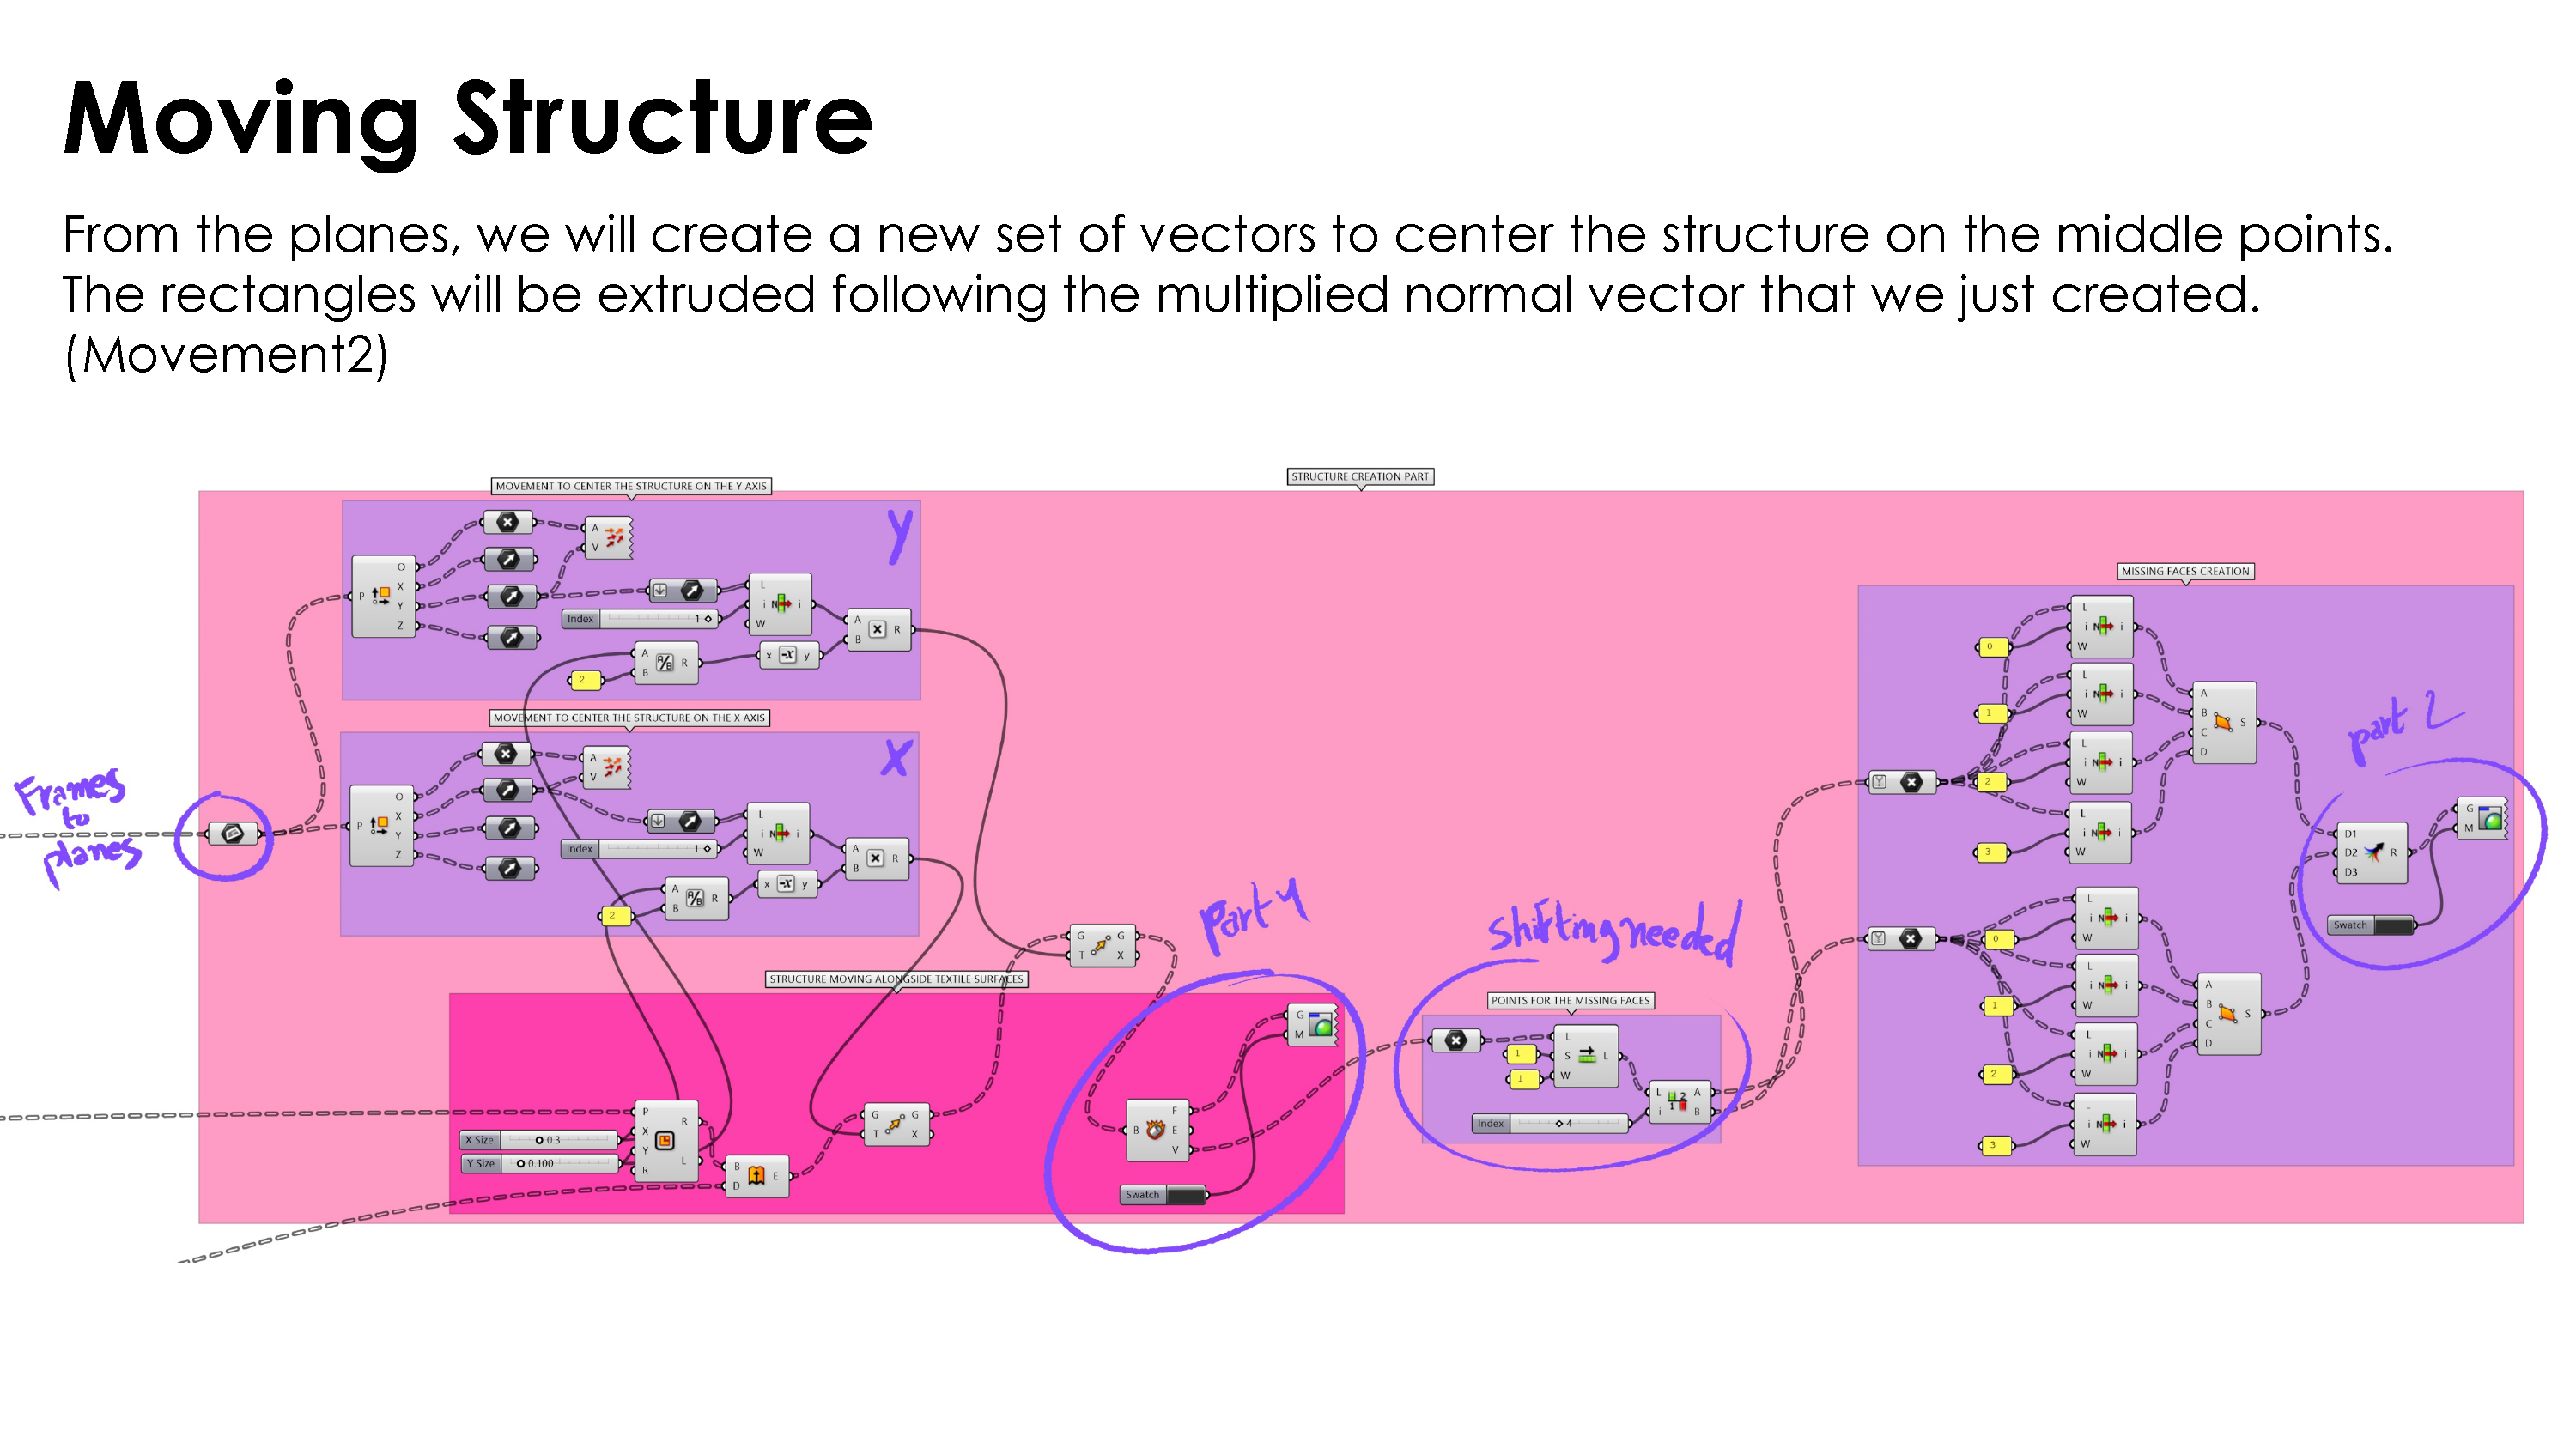
Now that we have the points (middle points), the values remapped and the direction (normal vector), we are able to move the points forward (from the facade) according to the sun values.

We now have a new set of points, a new grid made of the moved points.
Step n°6 :
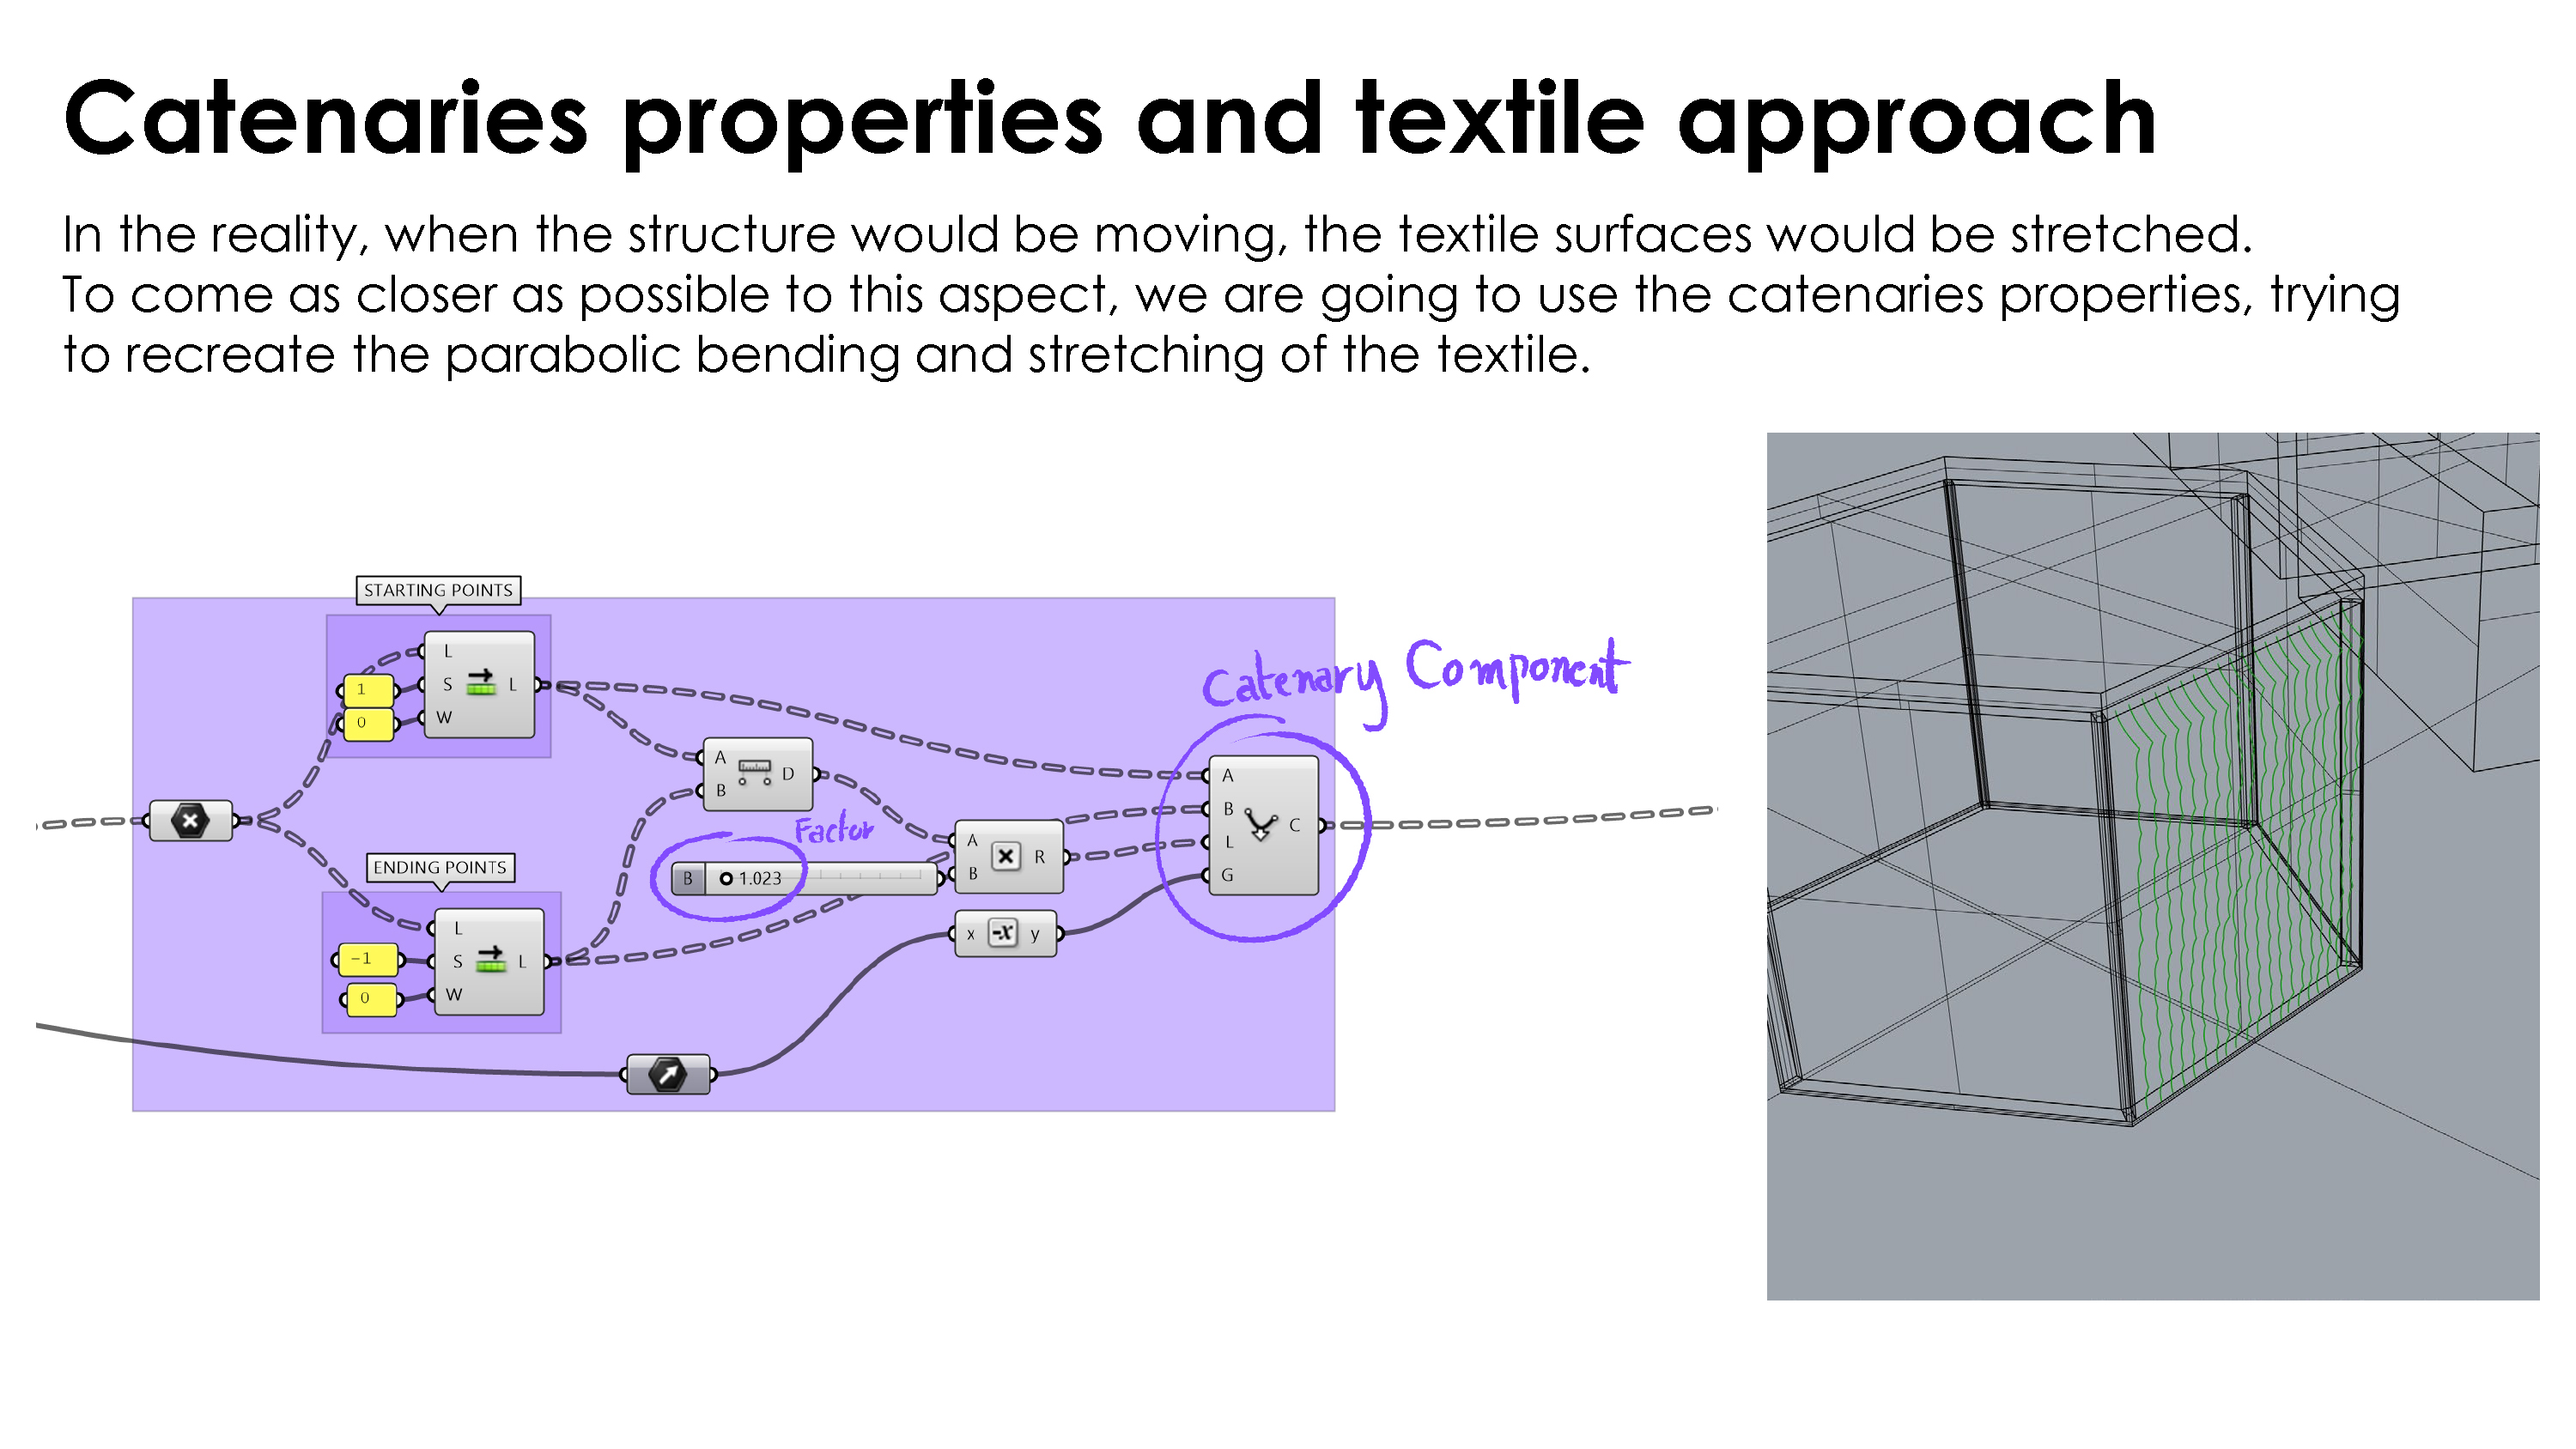 Using Shift List component, we are able to get the starting points and the ending points of every catenary, which are then going to be joined as a polyline curve. Each column (see column iterations at the beginning of the script, you can choose the number of columns) is now represented by a polyline curve made of several catenaries. The factor by which the catenary is bending is higher than the distance between the starting and the ending point (the distance is multiplied by a small factor just to get a little bump).

From the middle points, we are also able to get the first and the last row of points, to create vertical lines for each column.
Important Note (LOFT Option) :

Step n°7 :
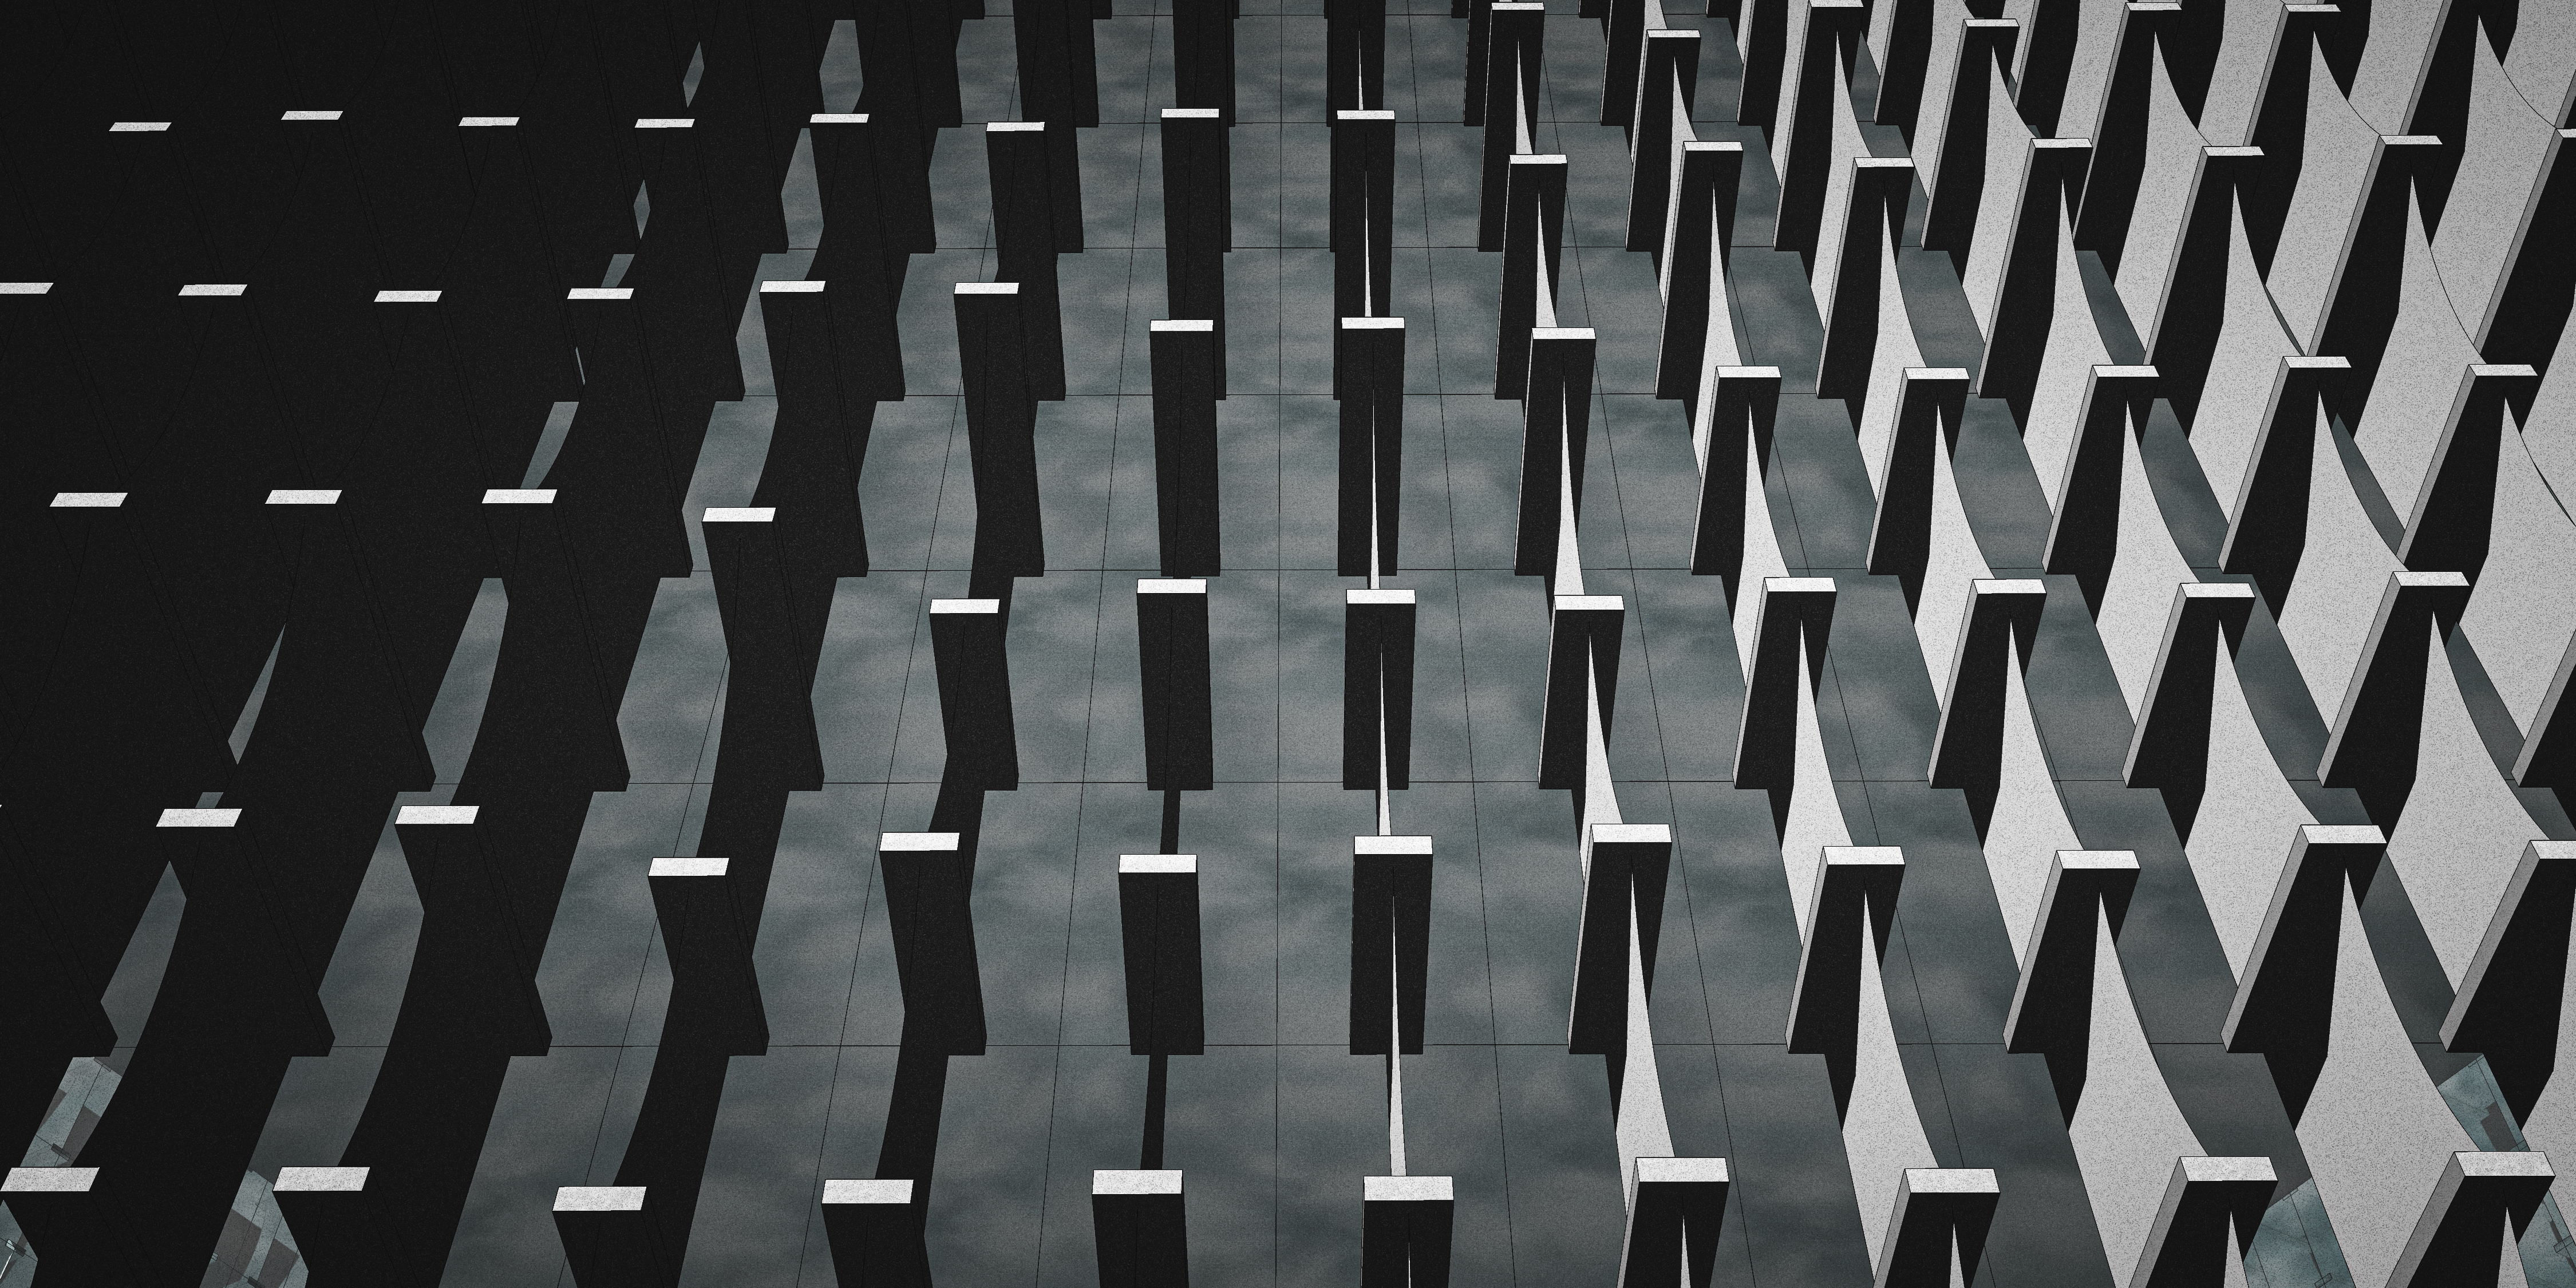
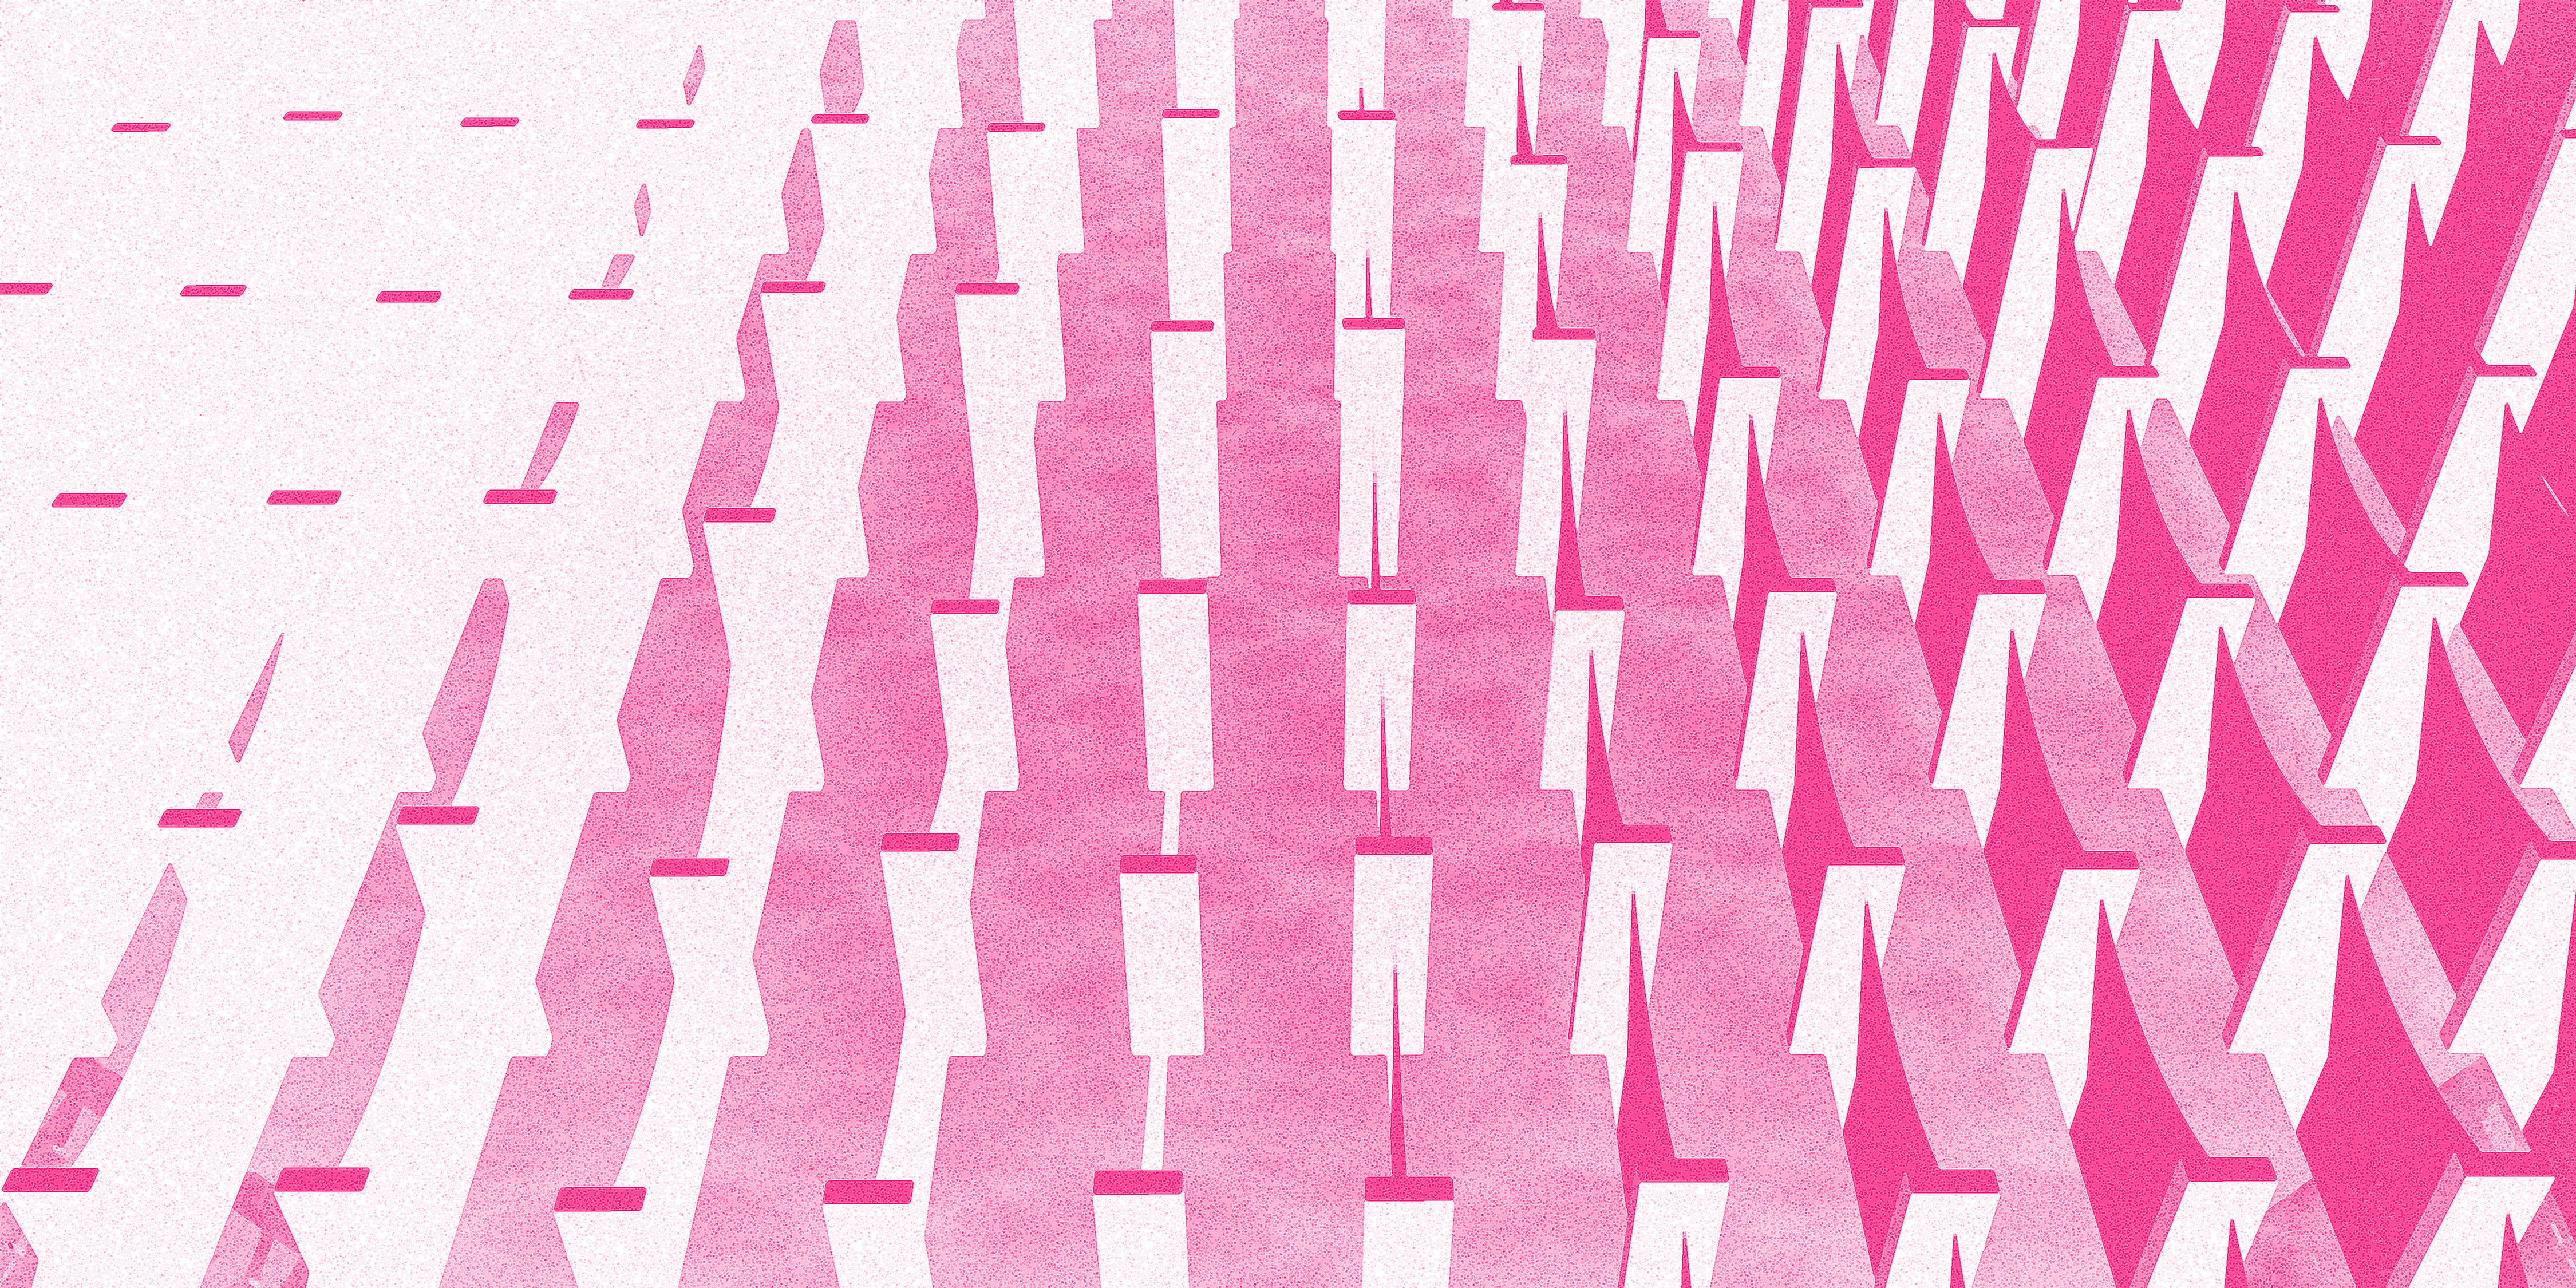
This part concerns the steel structure that is moving forward from the facade and which are making the textile surfaces move/bend.
Step n°8 :
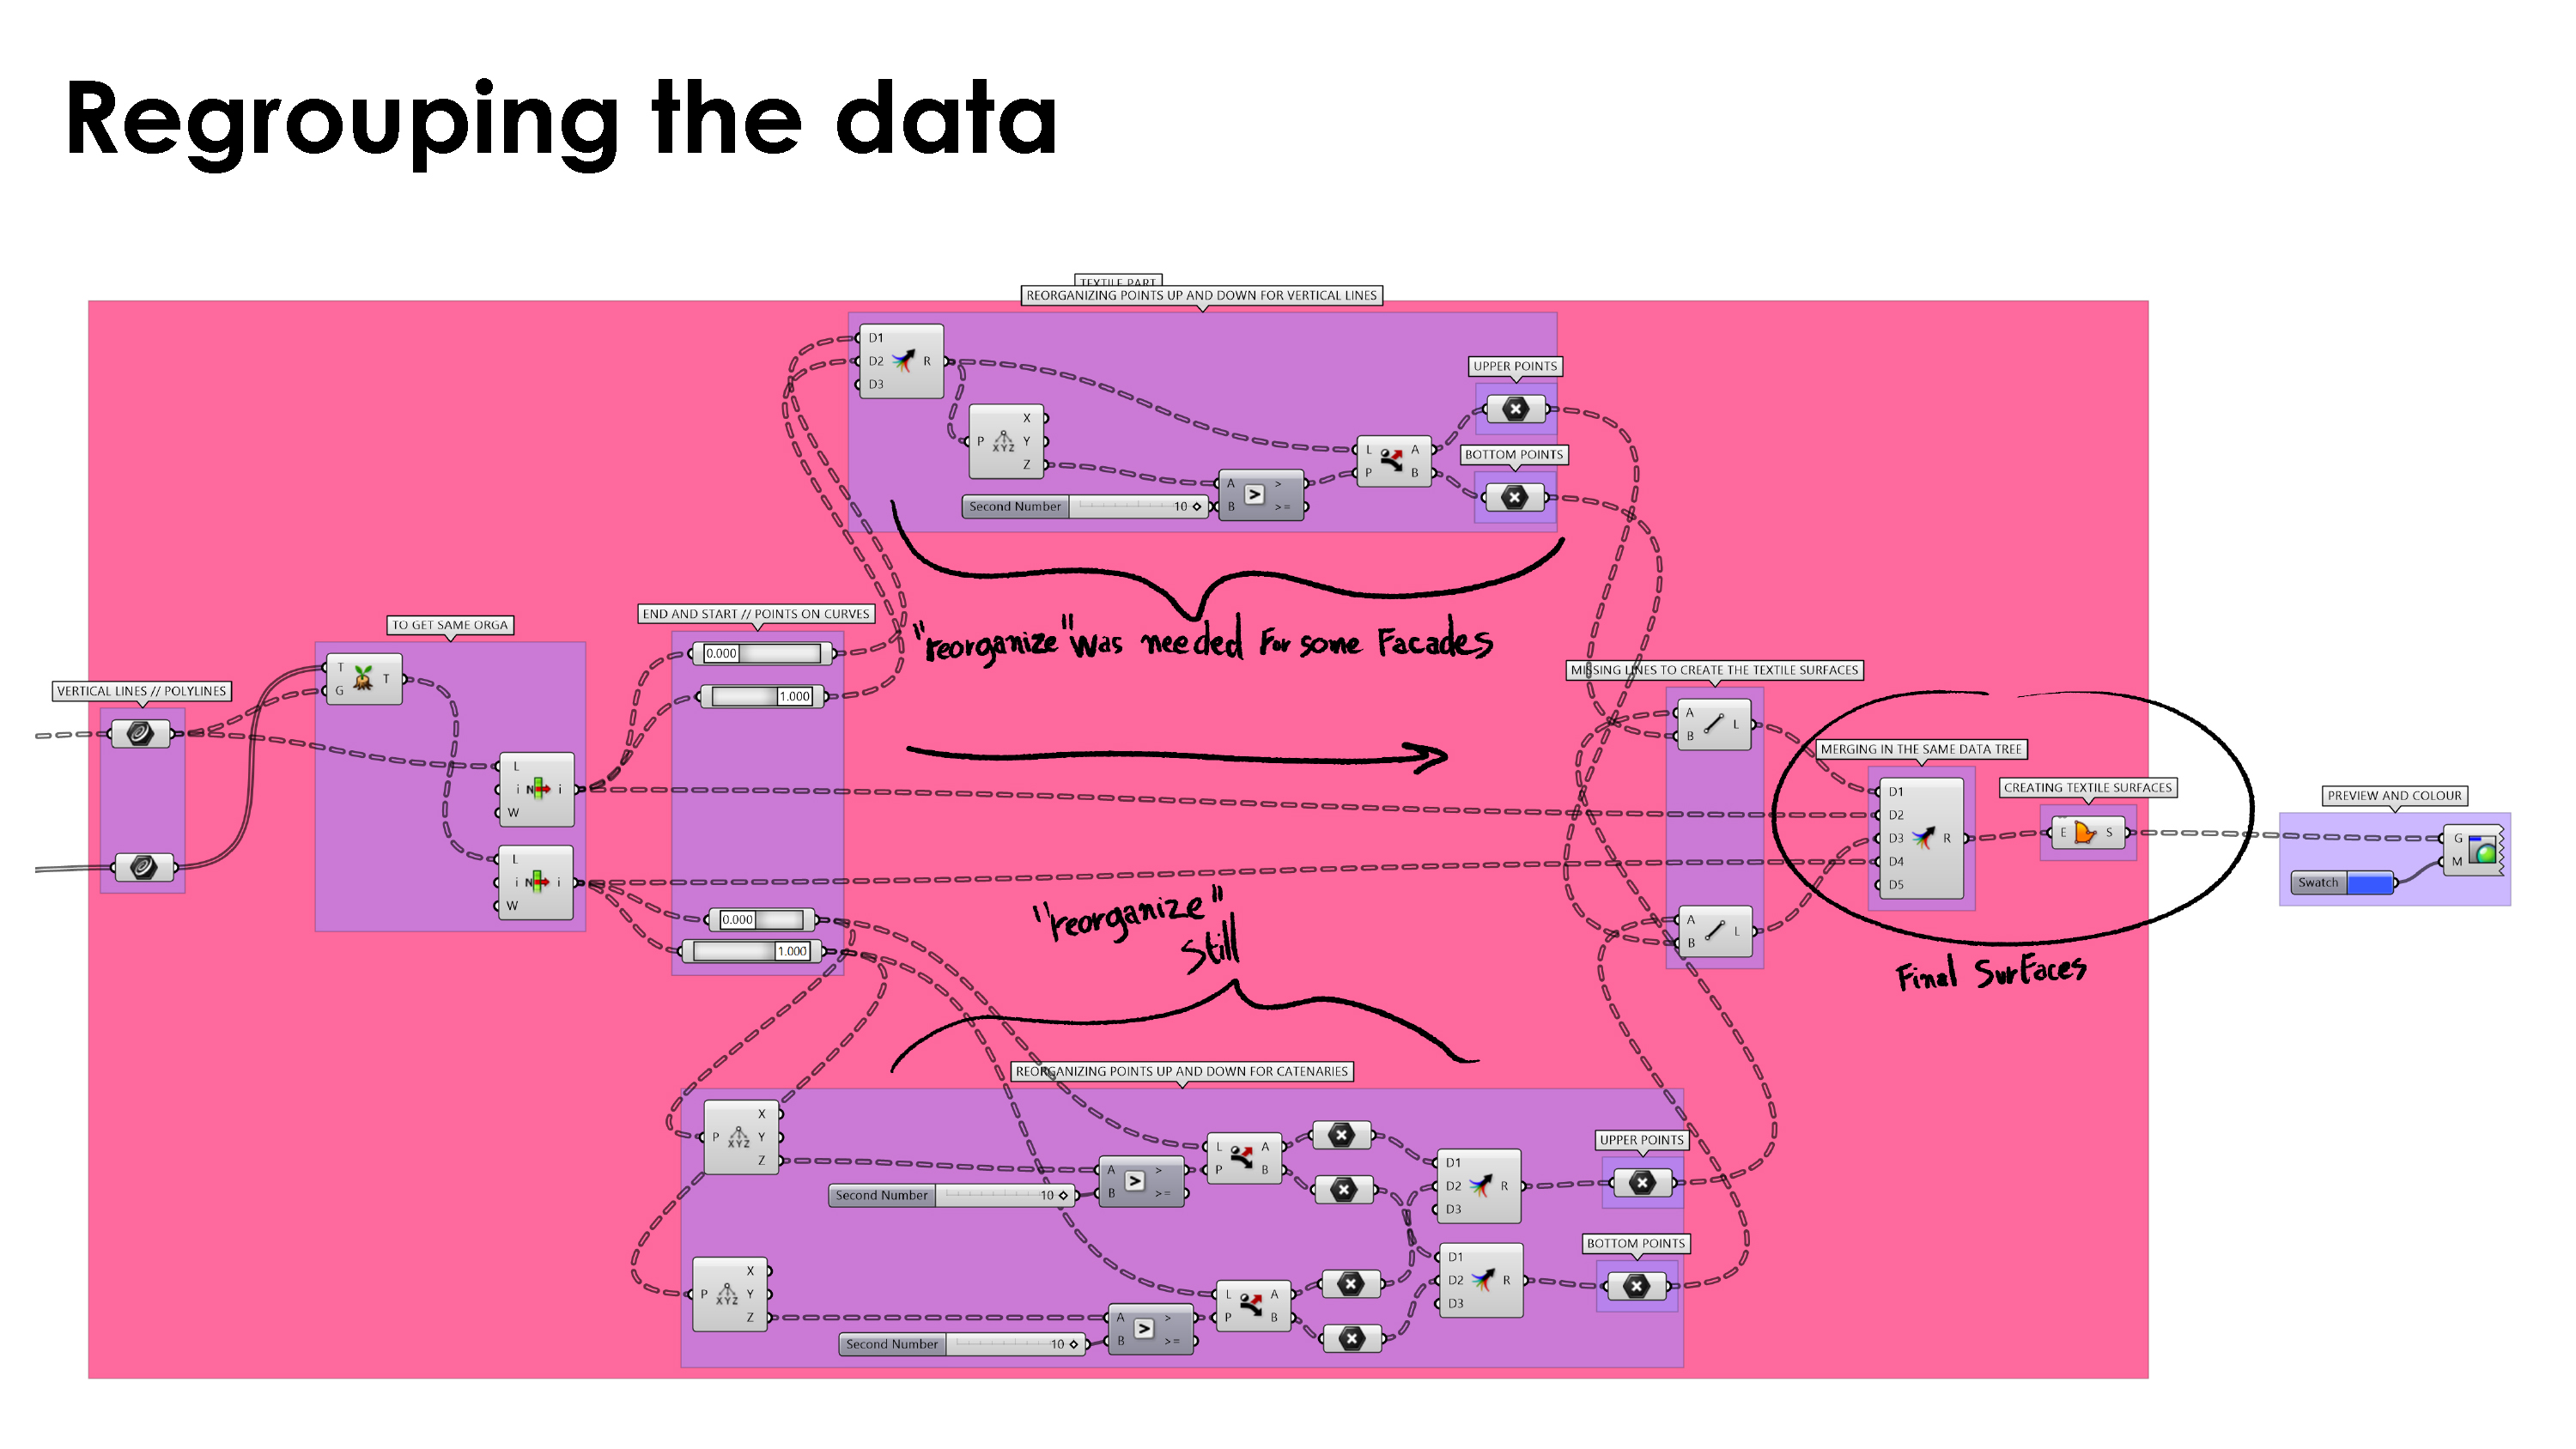
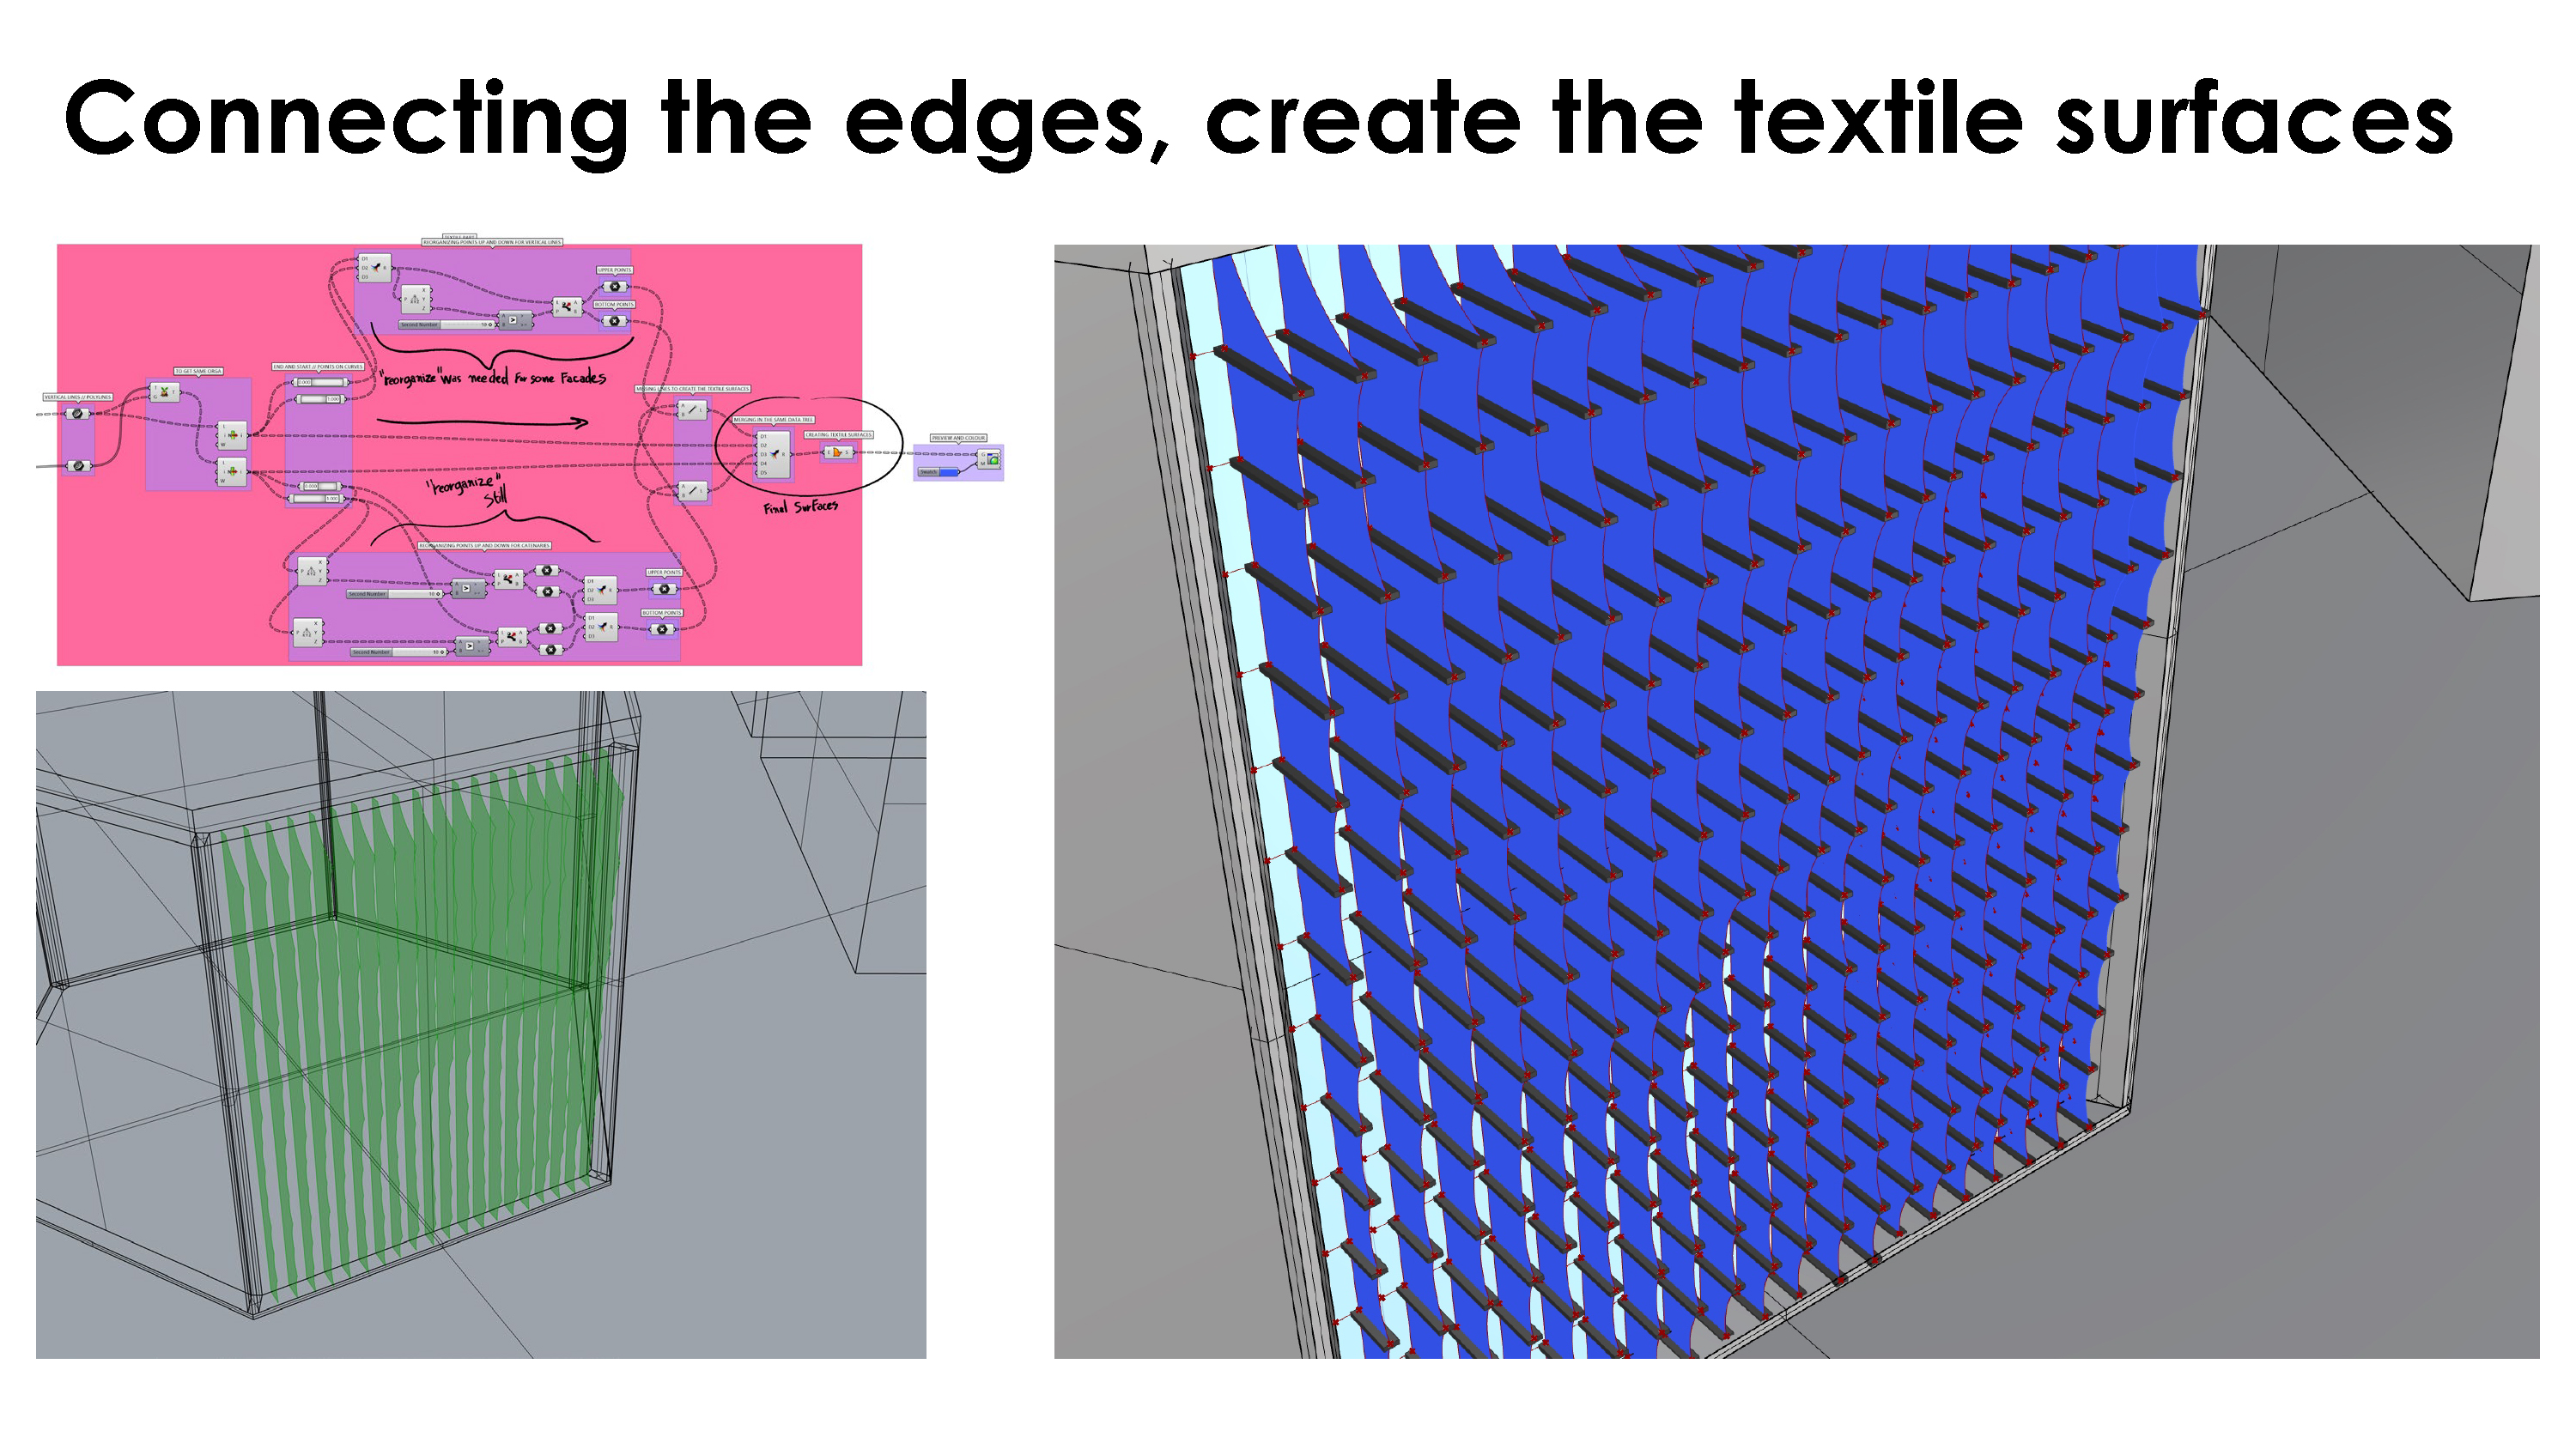
We now have the vertical lines and the catenaries polylines but to be able to create surfaces from edges we still need the upper and the bottom edges.
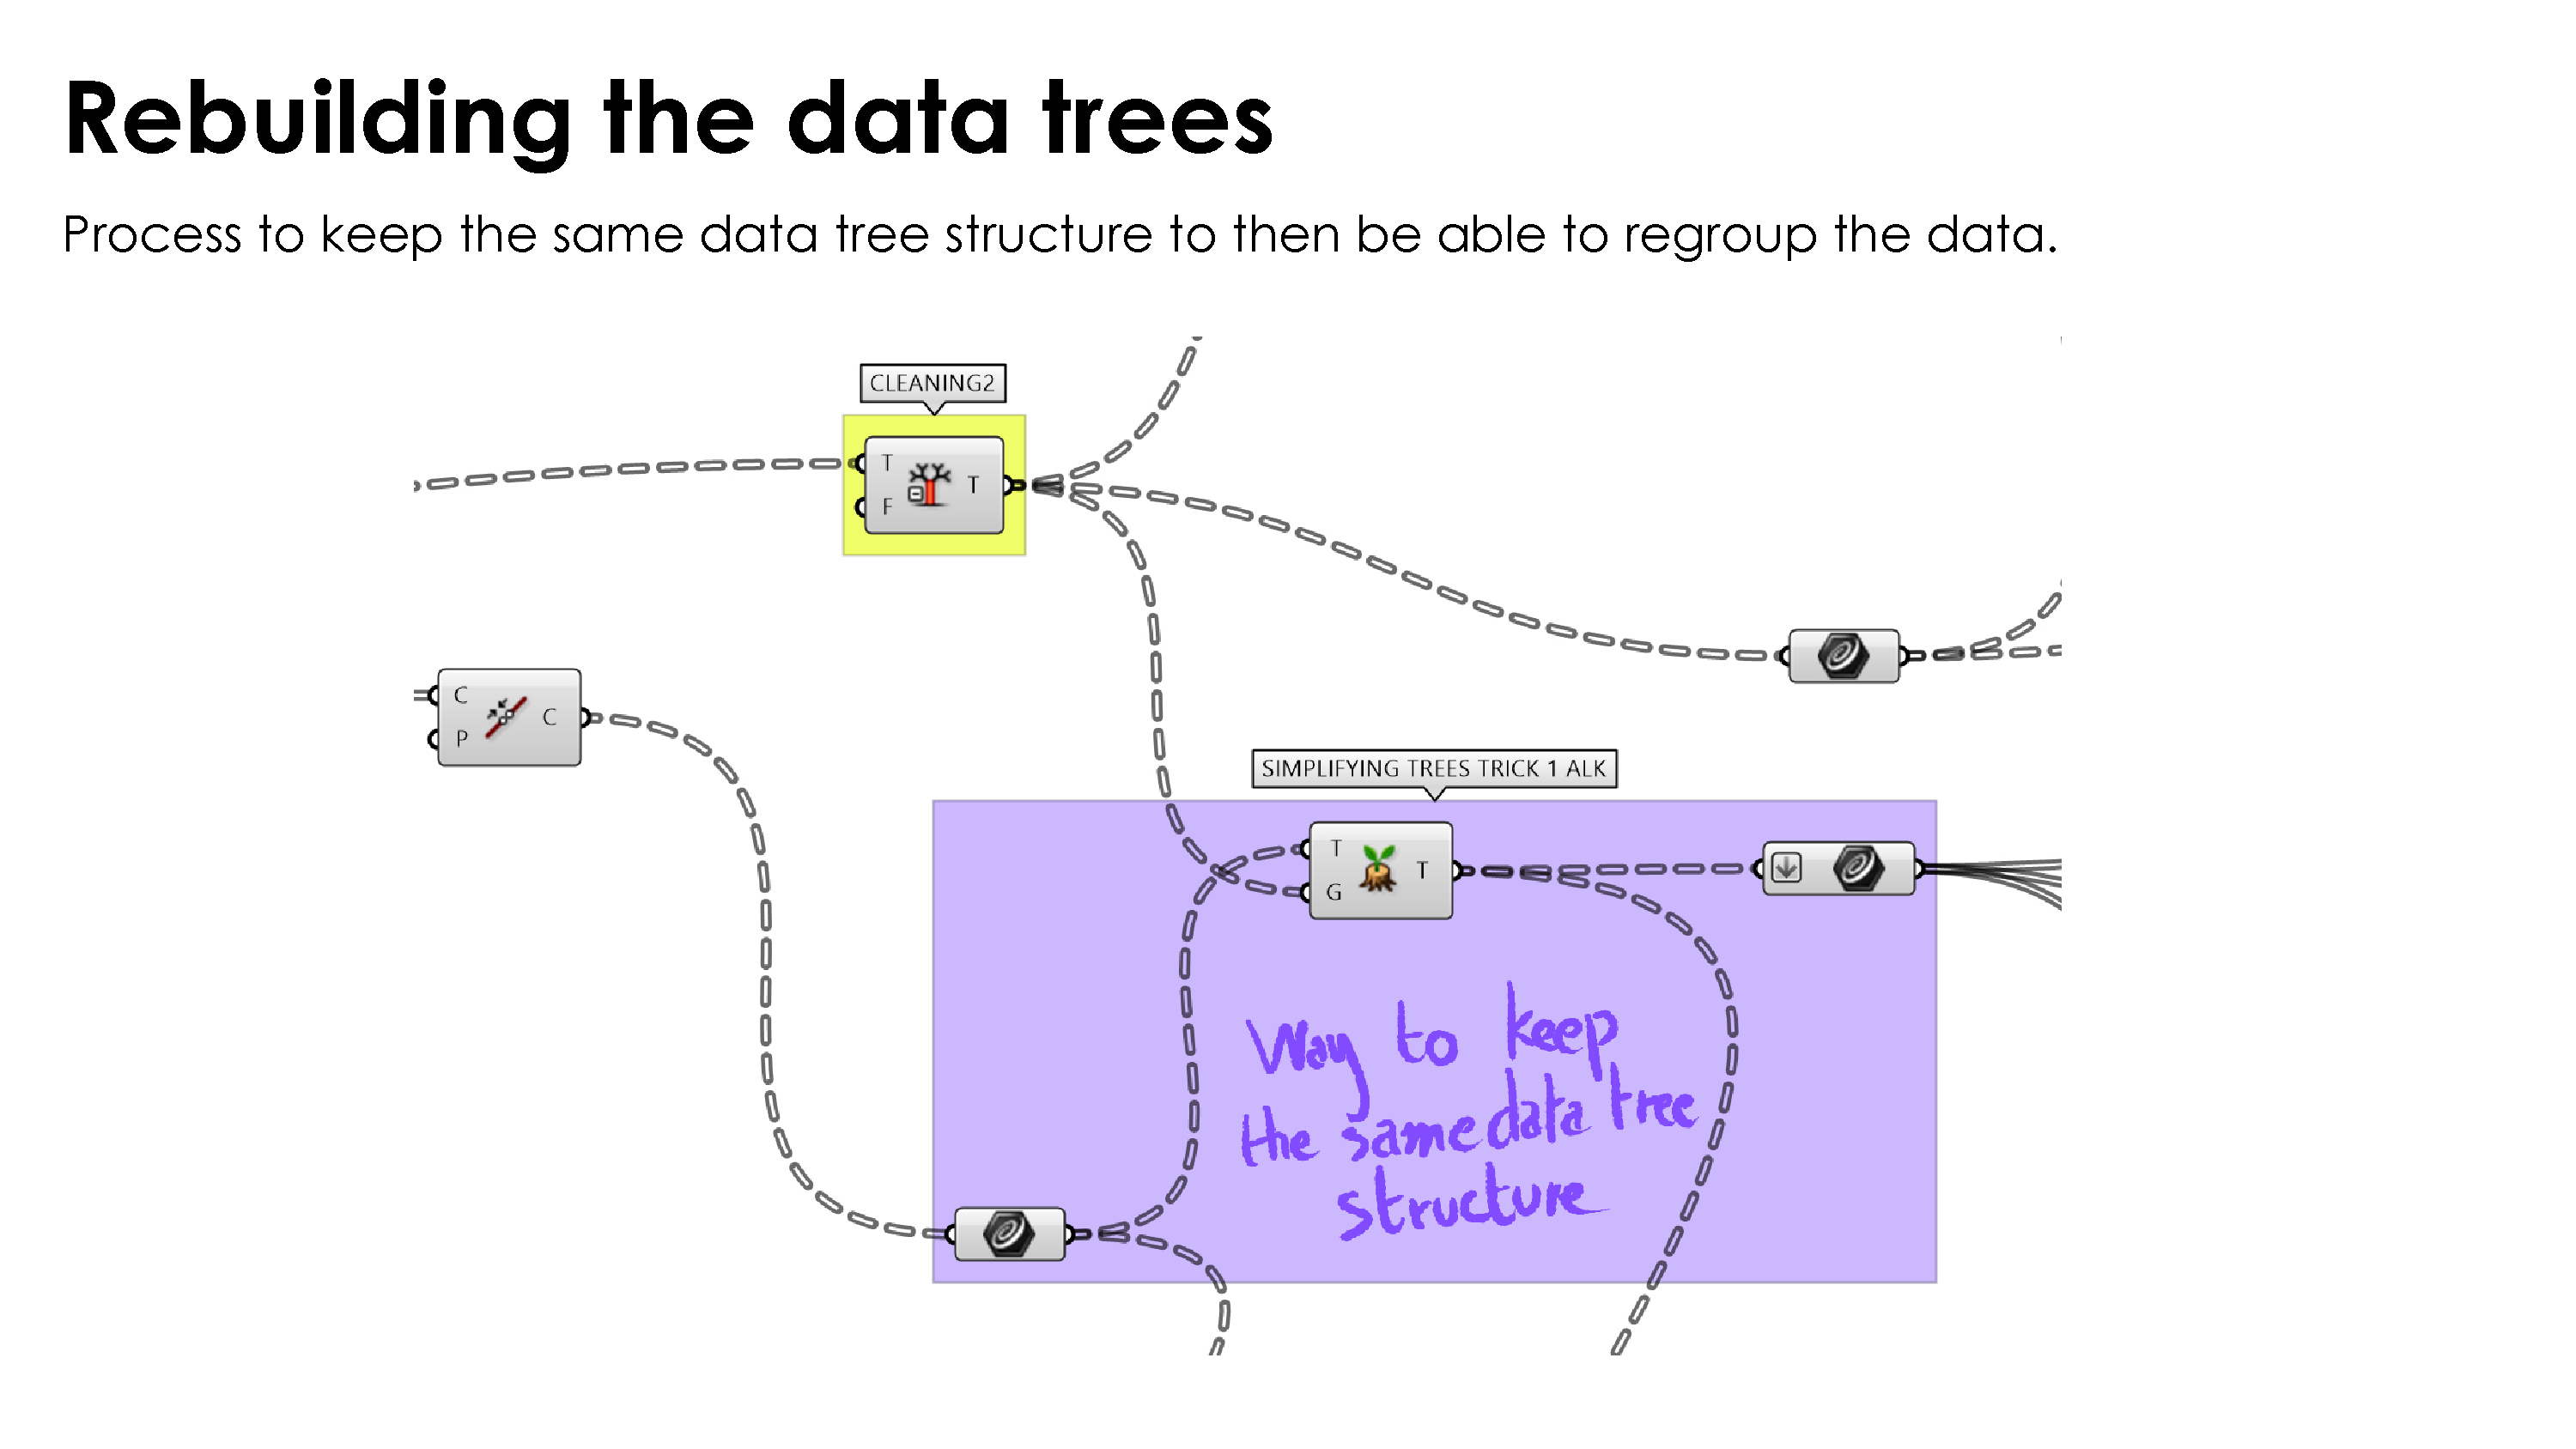
Note that I have added a part where I’m reorganizing the points as when the polylines and the vertical lines are created, sometimes it messed up the direction of the curve, and it is inverting the starting point with the ending point.
So i’m using the Z coordinate of each point (altitude of the point) to reorganize them as “Upper Starting points”, “Upper Ending points”, “Bottom Starting points” and “Bottom Ending points”.
We are then able to create the last edges and regroup the four groups of curves (Upper edges as EDGES1, Vertical lines as EDGES2, Bottom edges as EDGES3 and Catenaries polylines as EDGES4).
After regrouping them, we can use the Boundary Surface component to create the textile surfaces.
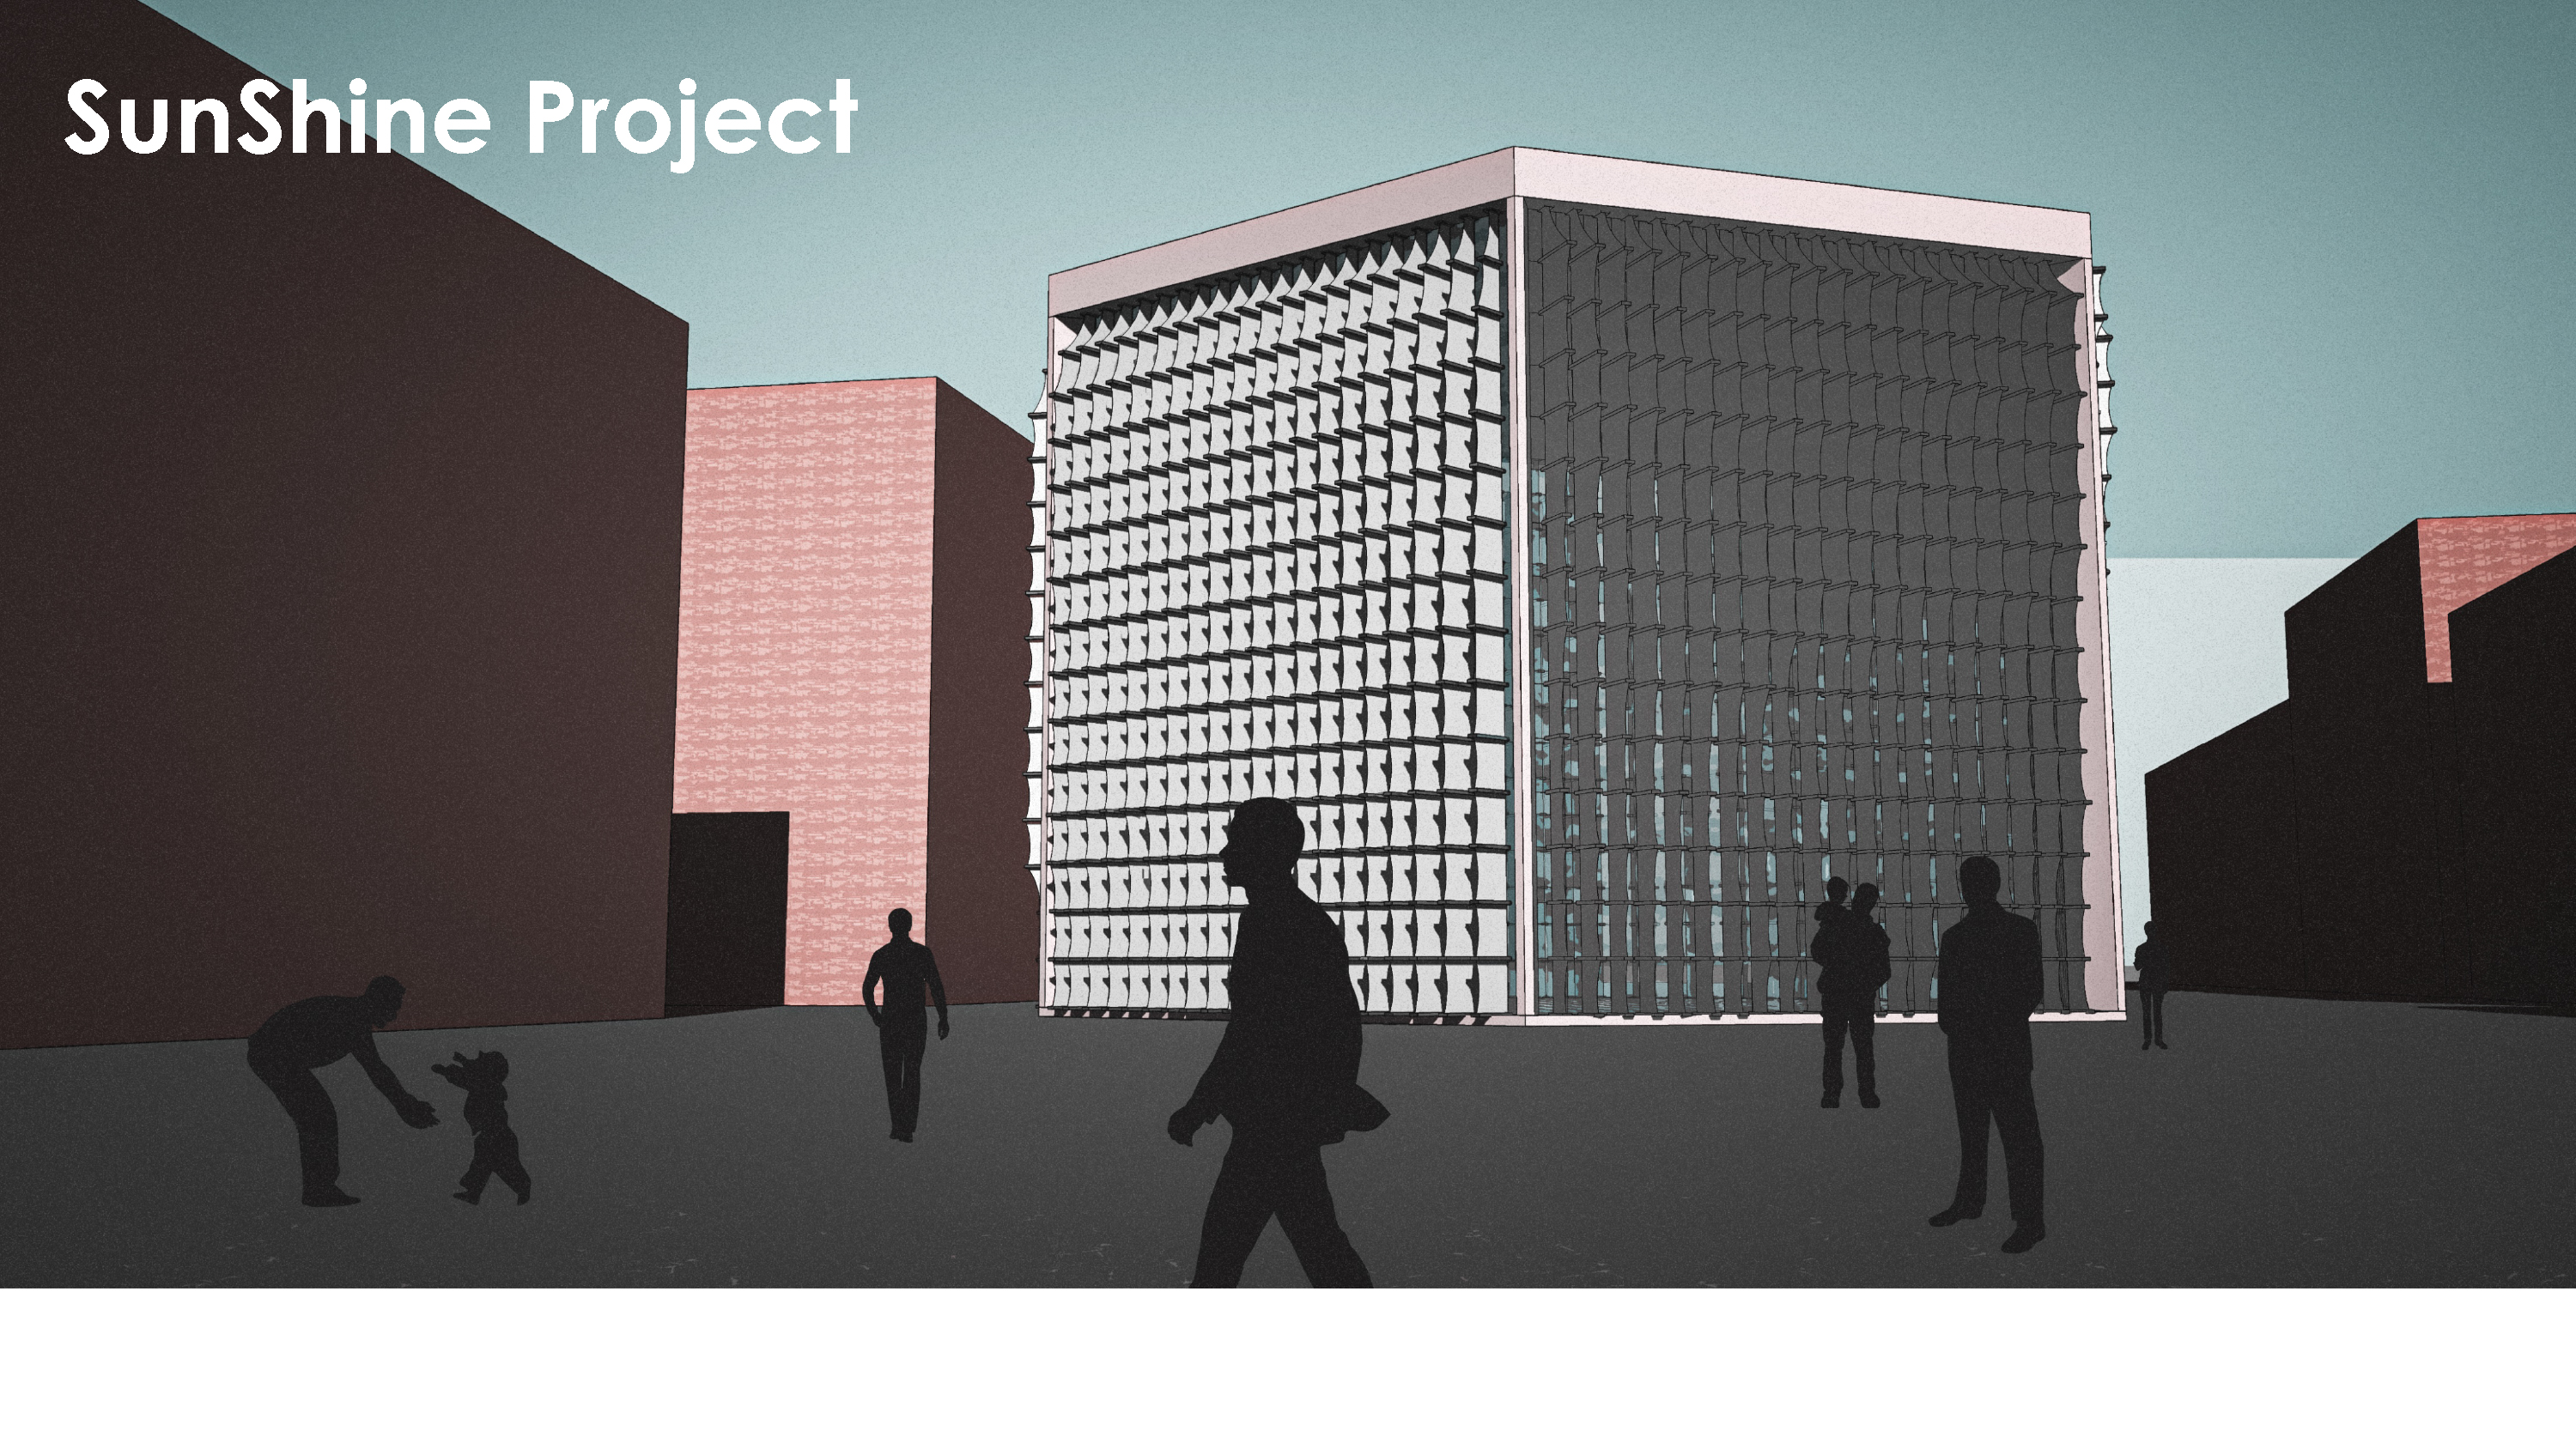
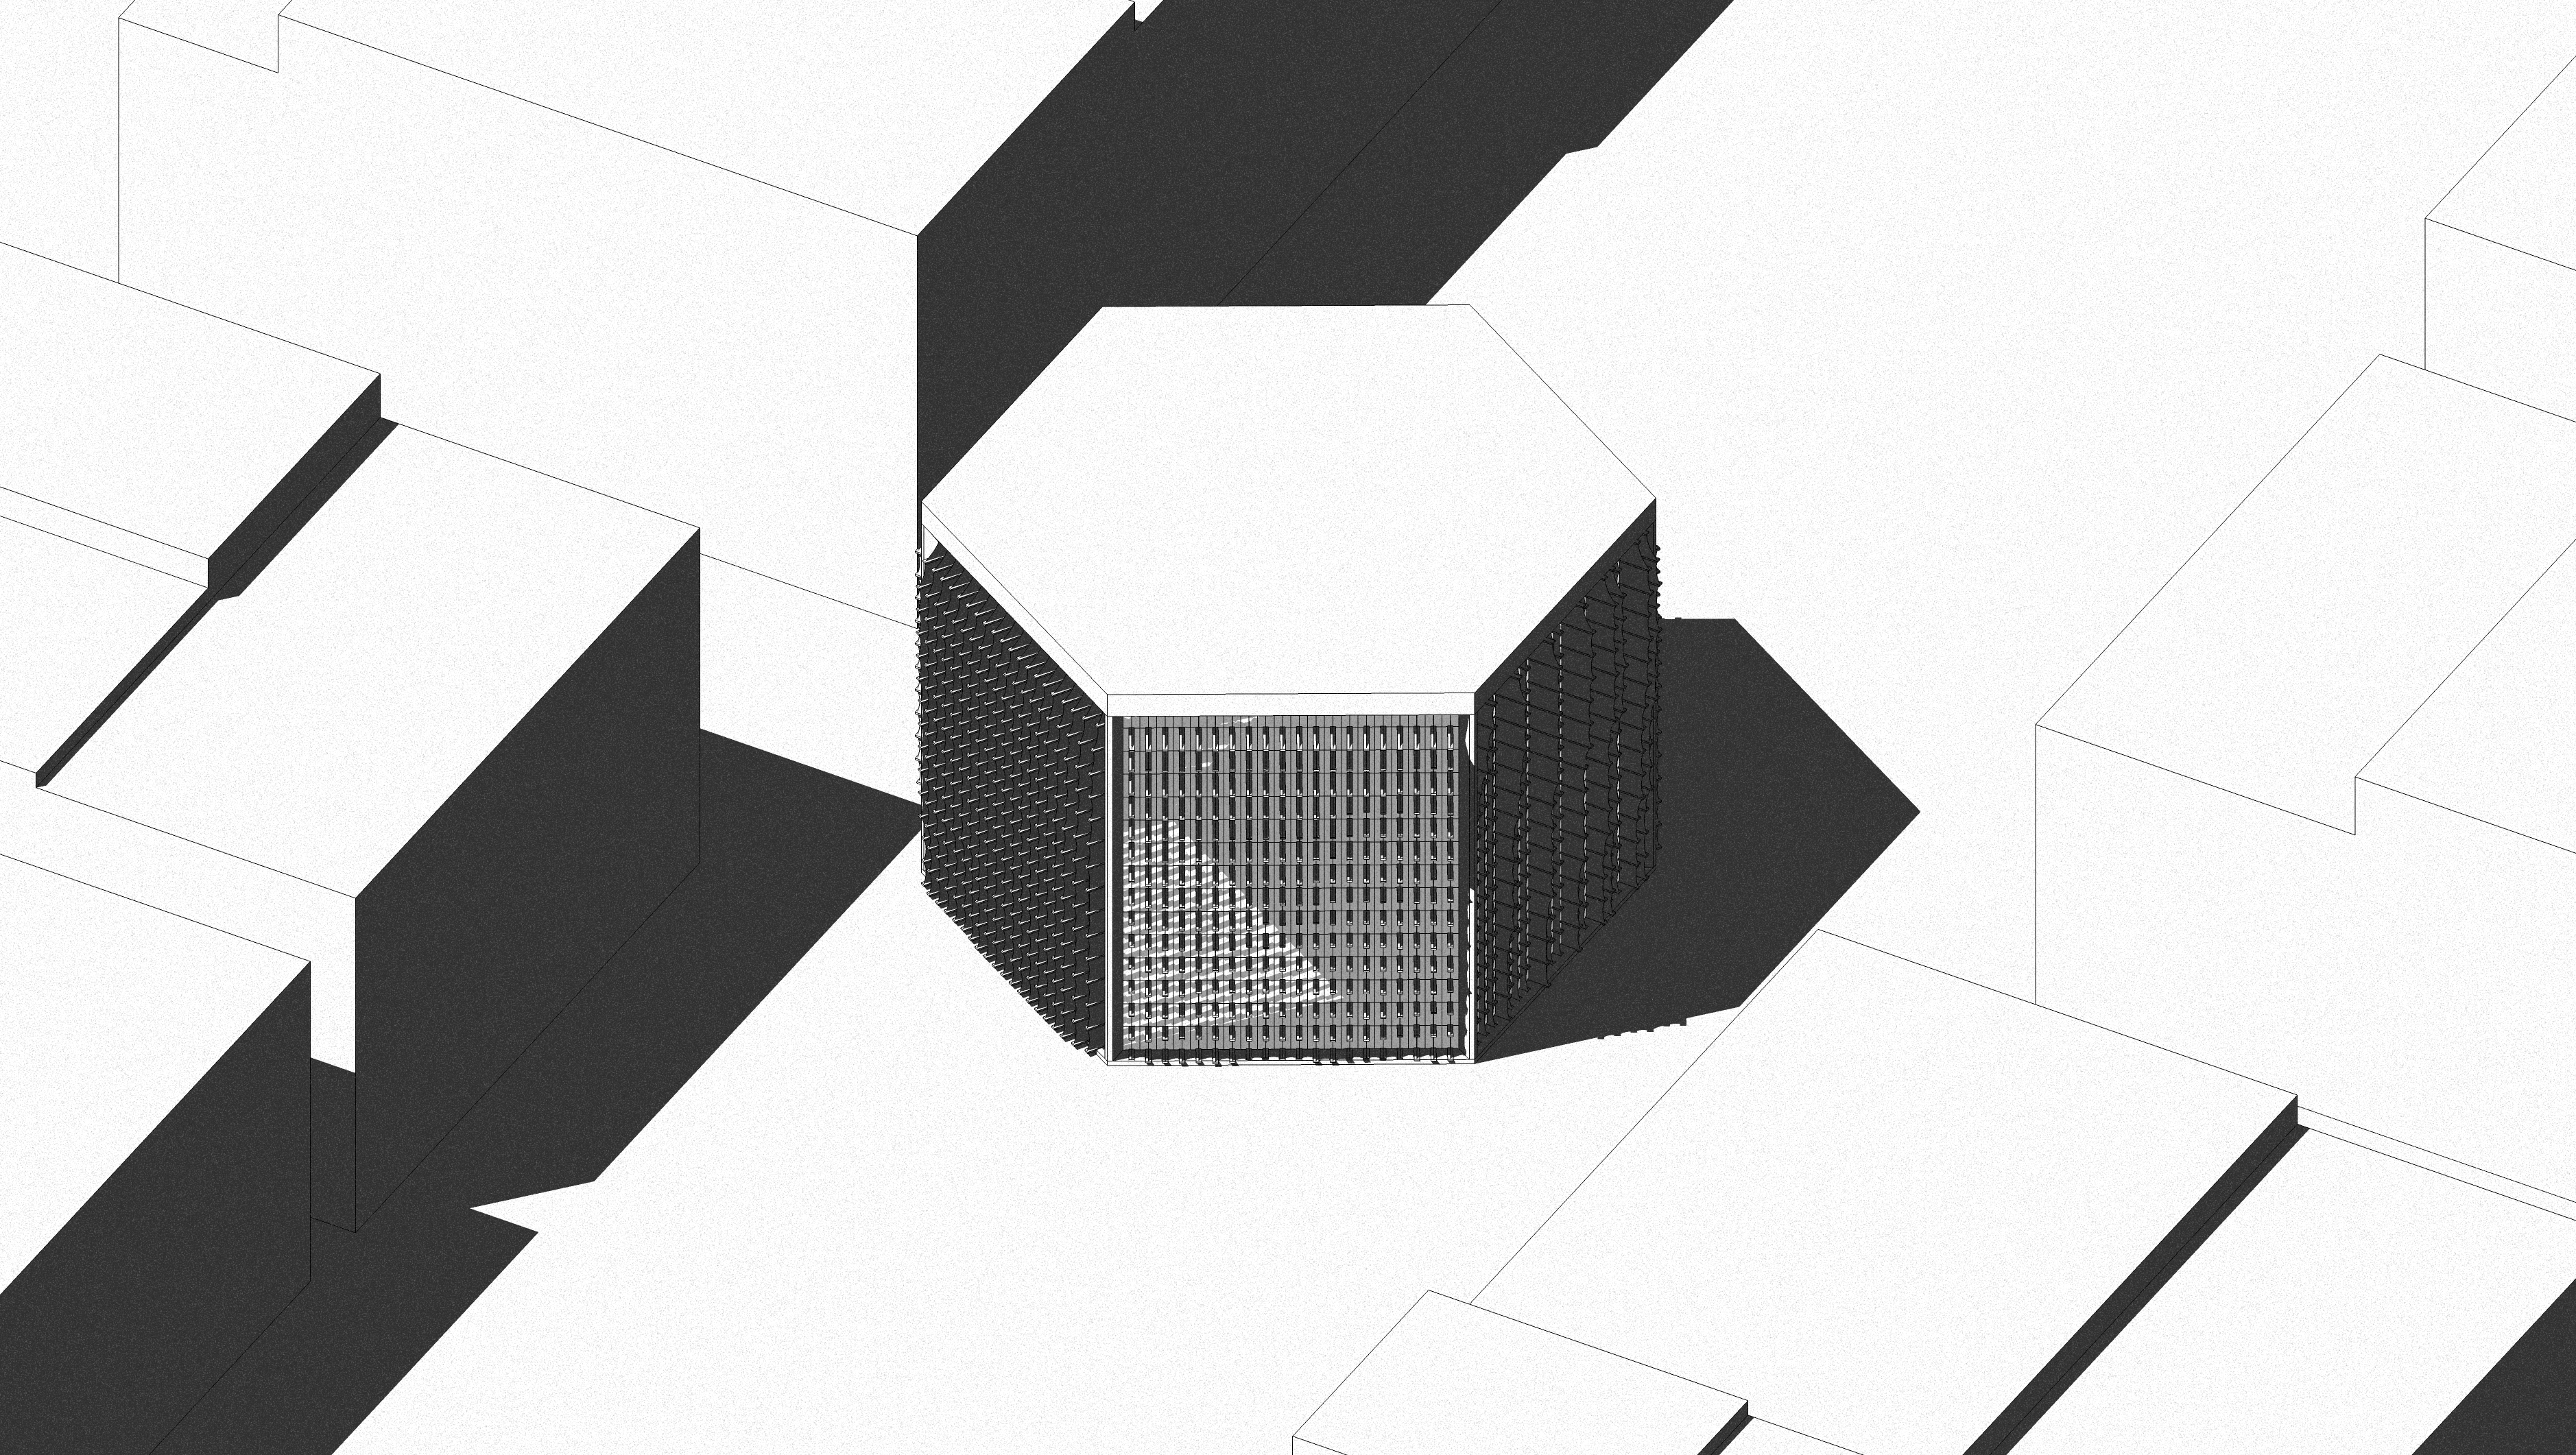
SunShine Project :
Following this process and applying it to the other facades, I created the SunShine Project.

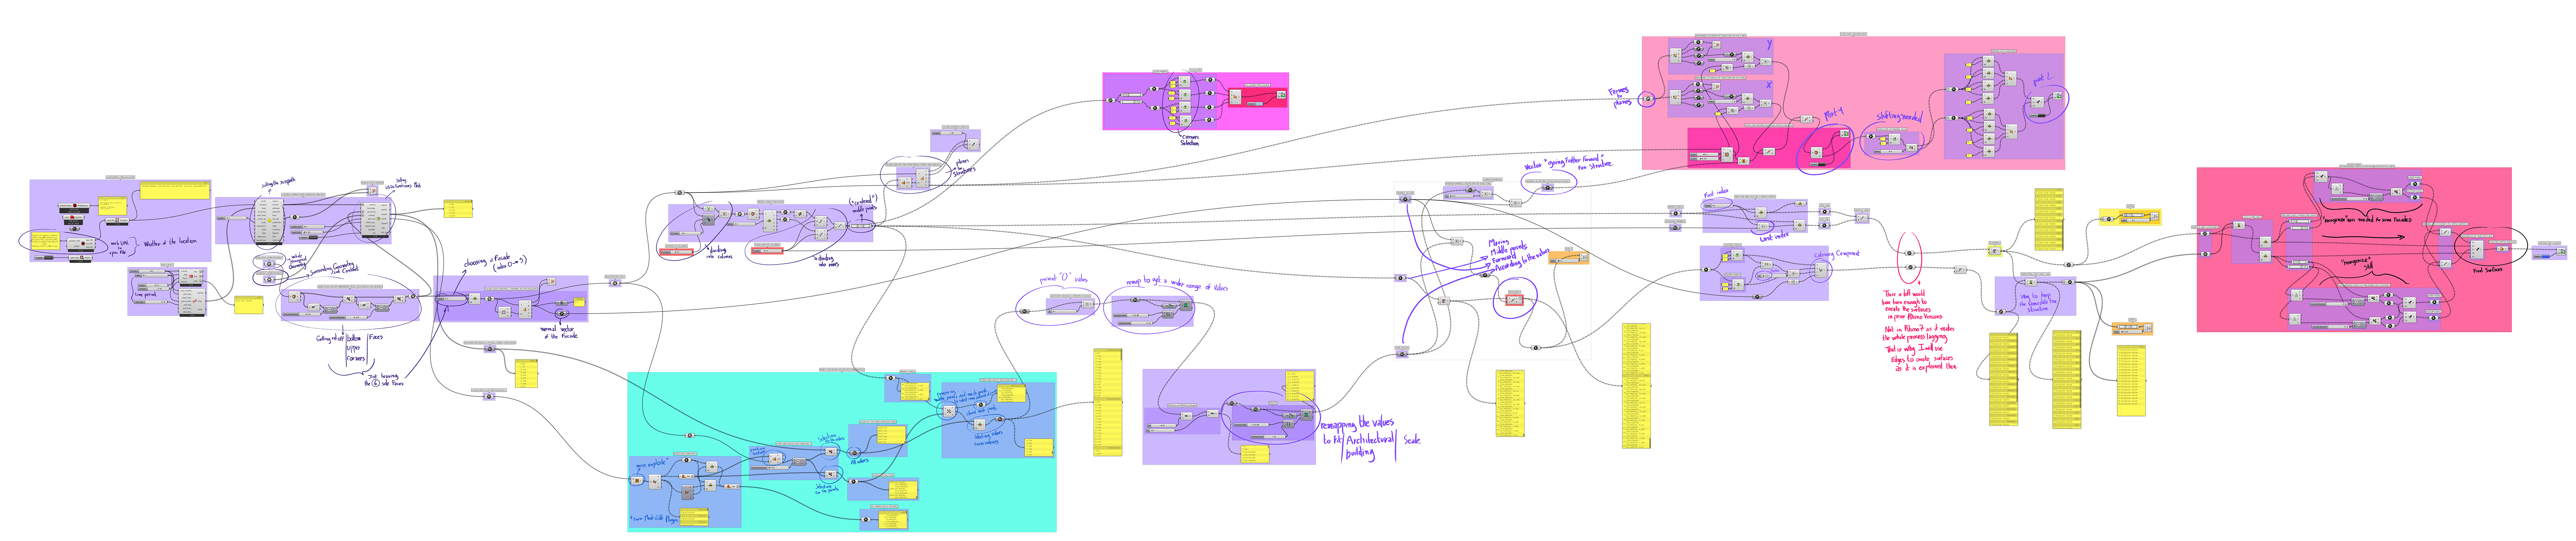
Grasshopper Canvas :
Annexes and Images :


Default image :

CAD3 // Prague // 2020 // LAPERGUE Aurélien
Grasshoper file link : LAPERGUE_SunshineProject_SunFacades
Default Rhino7 file link : LAPERGUE_SunshineProject_RhinoFile_GeometryContext
Credits :
Special thanks goes to my teachers for their support and their advice, the plugins creators of Mesh Edit and Ladybug.
Links for the plugins :
https://www.food4rhino.com/app/meshedit
https://www.food4rhino.com/app/ladybug-tools