
Introduction
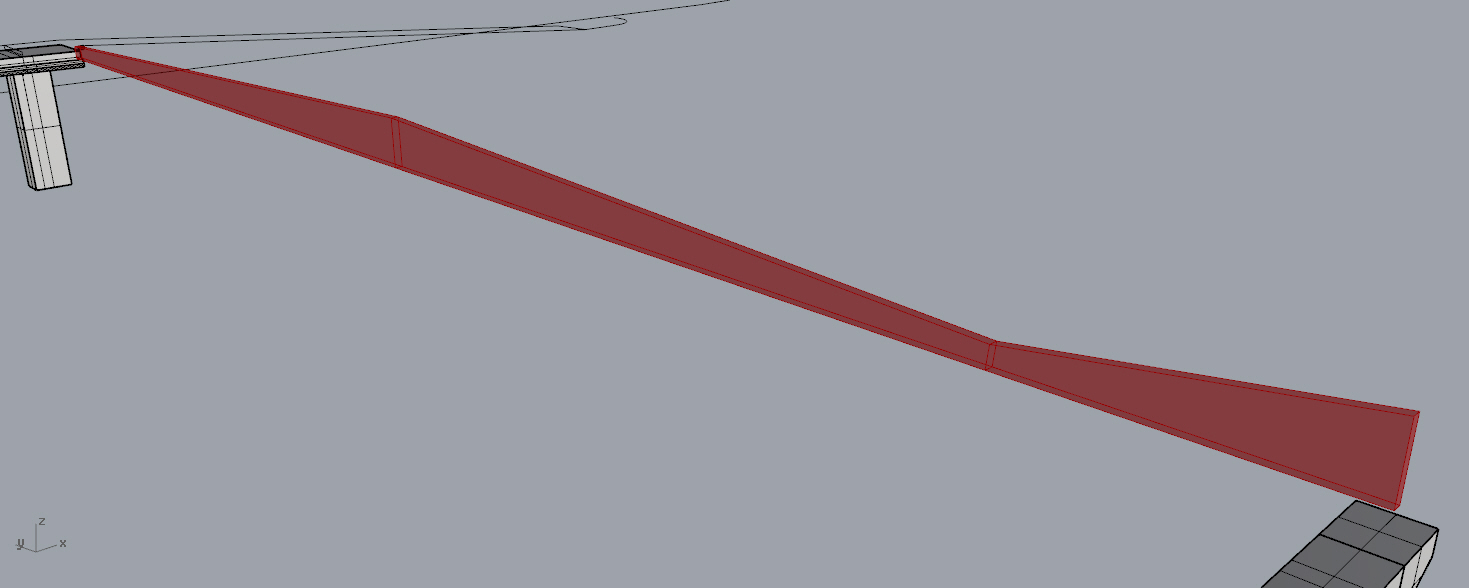
For my studio work, I designed a beam bridge. Its main structure is the variable railings, which is decided by the moment diagram of continuous beam bridges.
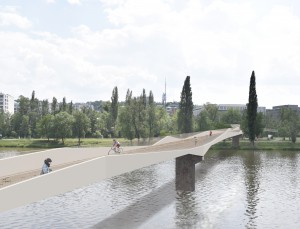

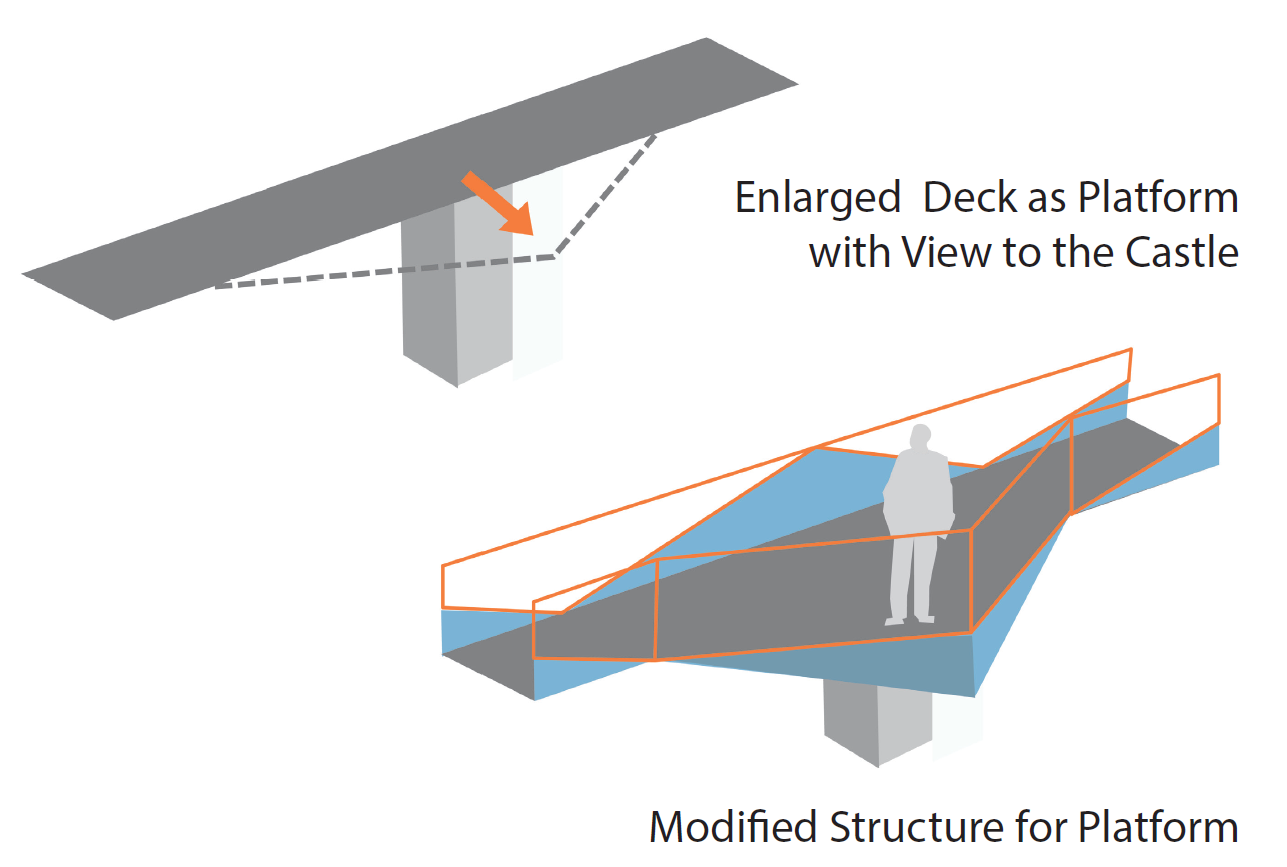
There’s also a platform formed from enlarging the deck, where the railing structure has to be adjusted to prevent blocked view.
Sub railings are also necessary for safety.
In the following tutorial, I will explain how to make the railing structure, bridge deck and sub railings in grasshopper.
All of the components used are very simple, but in the end the bridge is modeled in a way that it can be adjusted and controlled through several dimensions, such as the width of the deck and the maximum height of the structure.
1_Railing Structure

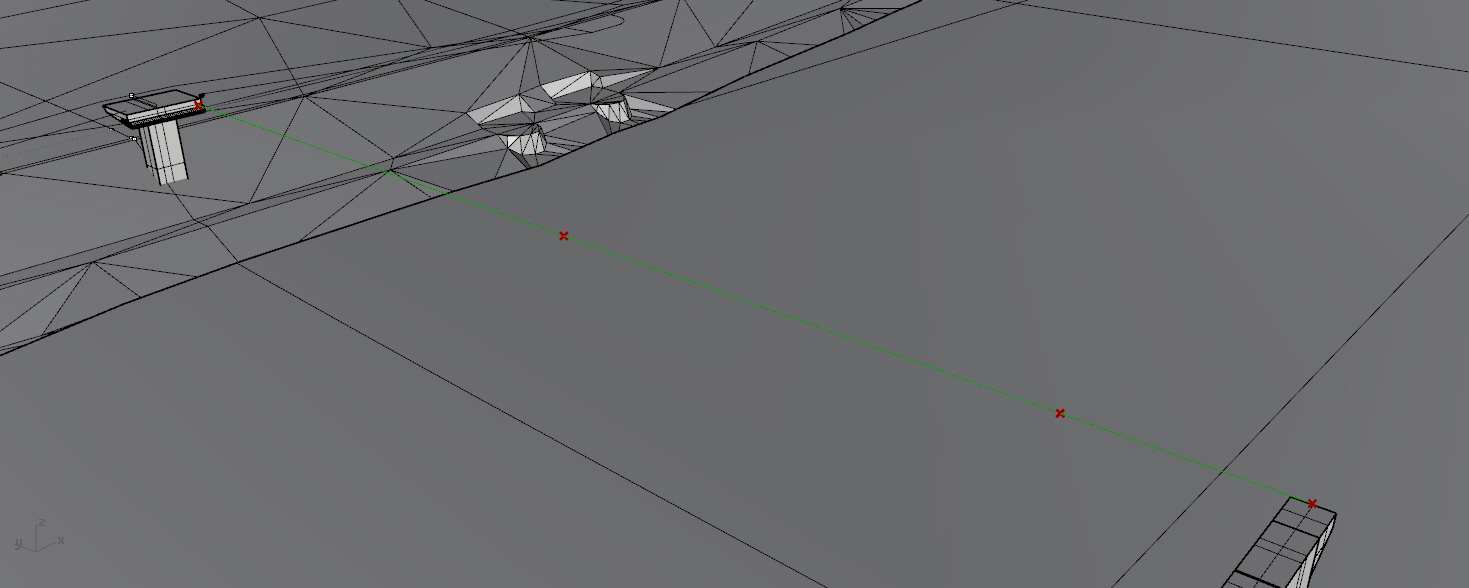
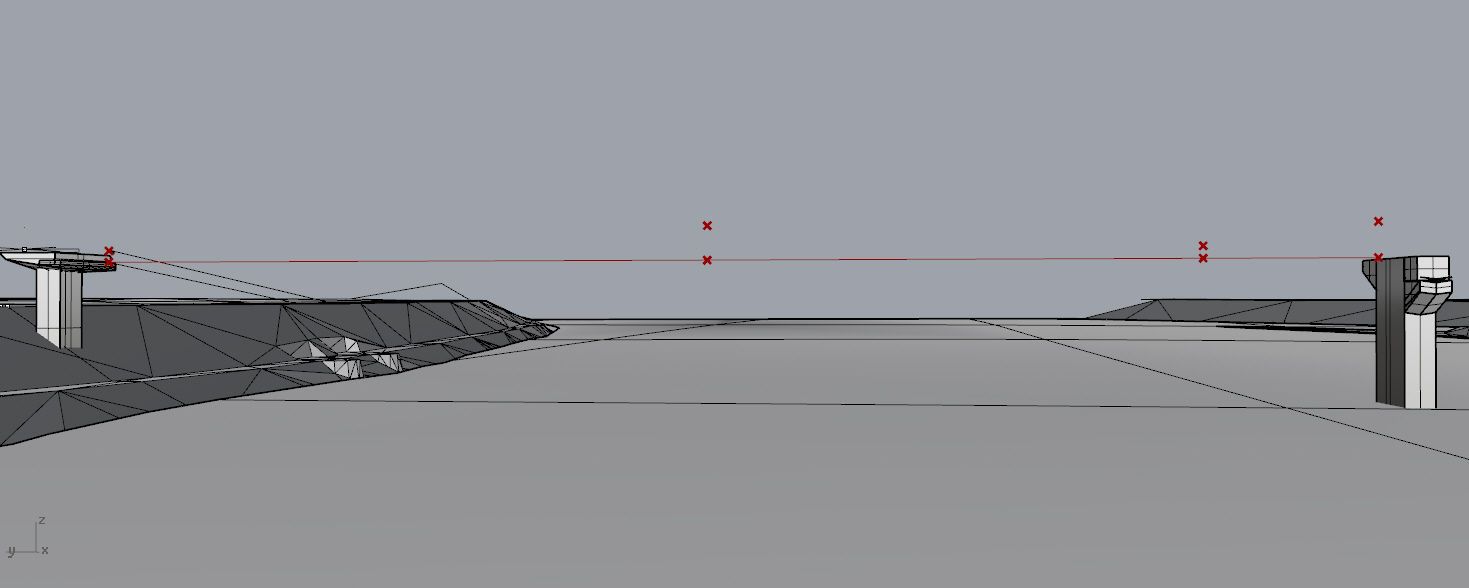
First of all, reference points are needed to locate and generate the bridge. I set them where the supporting columns are.
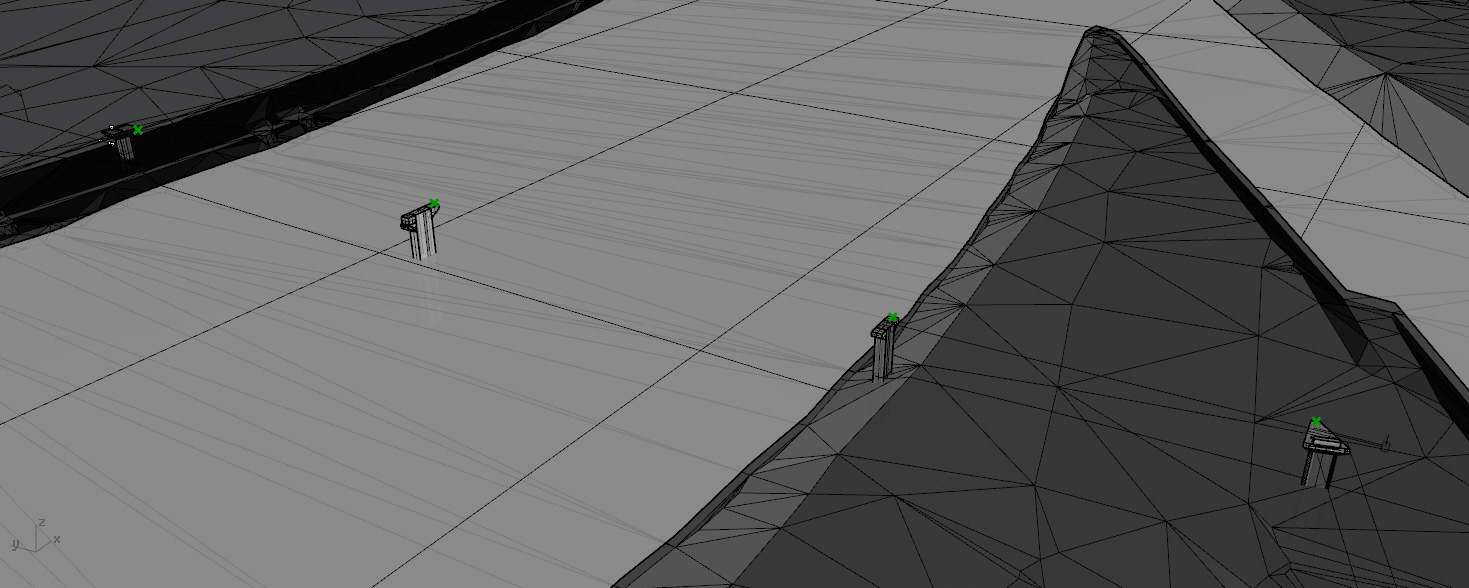
Then locate other crucial points from the reference points: points where the maximum and minimum moment happens. I do this by the “Evaluate Curve” component.
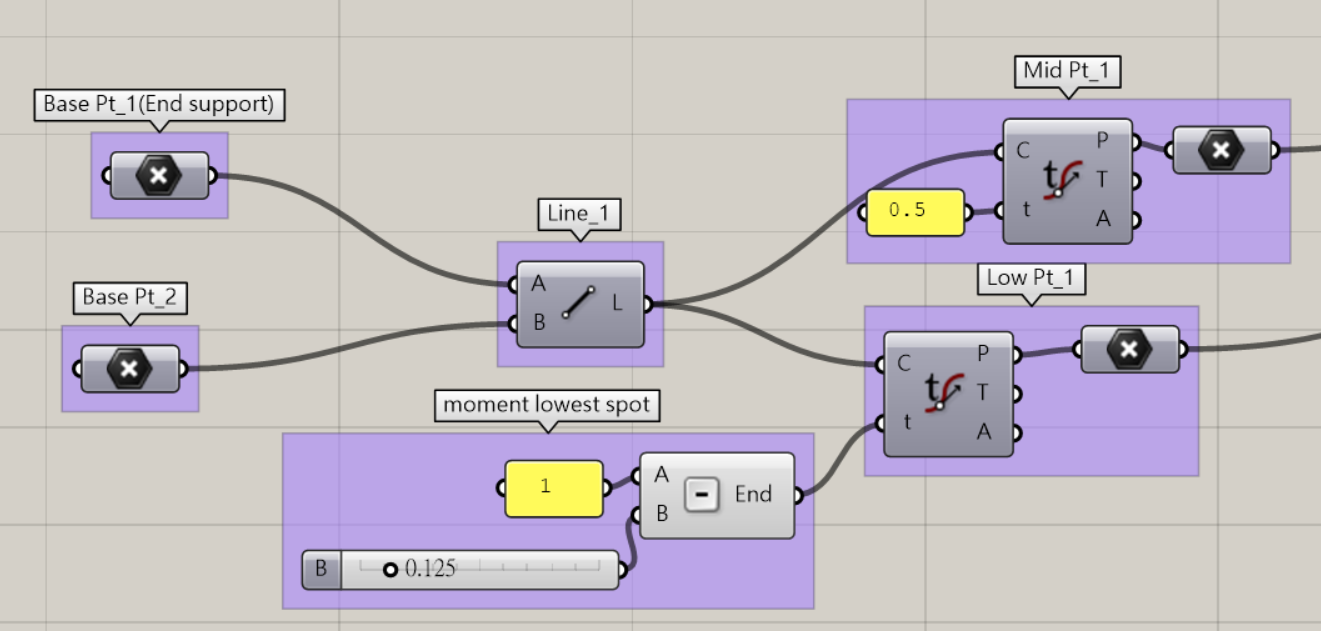
Then with the “Move” component move points to the correct heights.
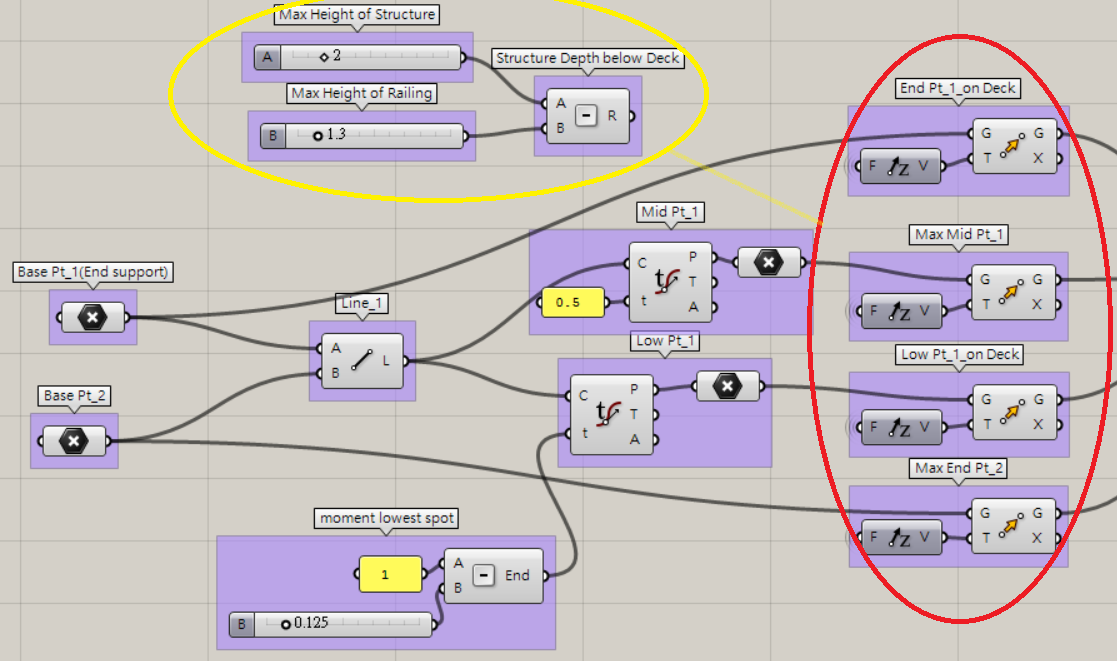
Create Polylines from the points and “Loft” them to a surface and “Extrude” the surface.
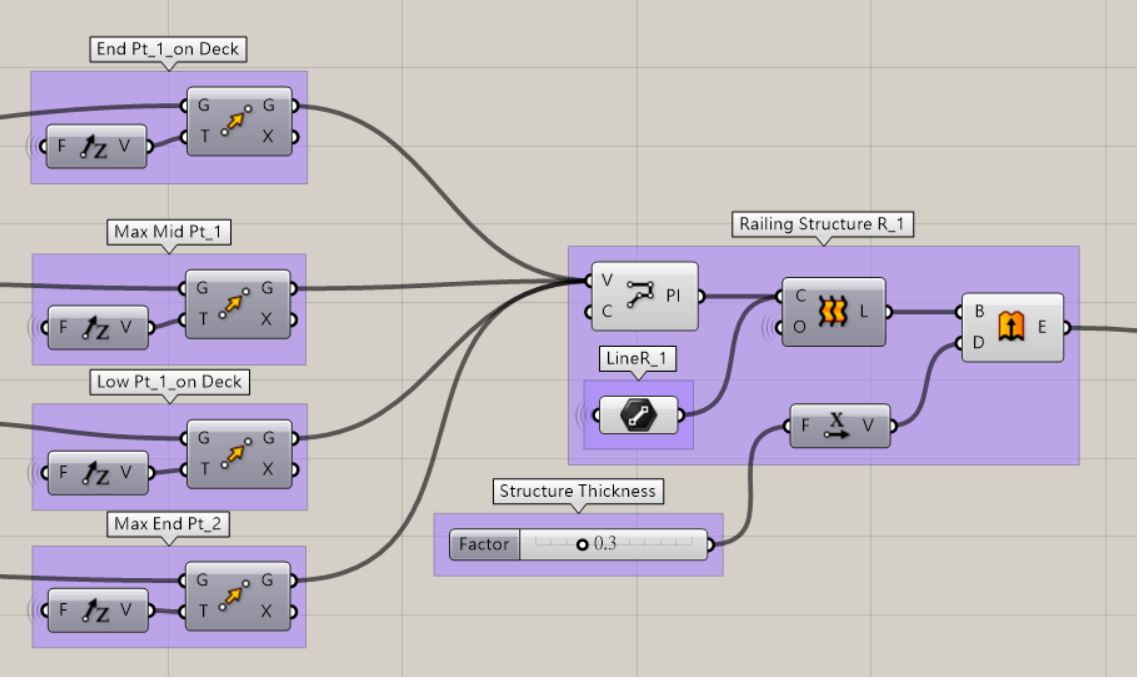
The rest of the structure follows the same logic.
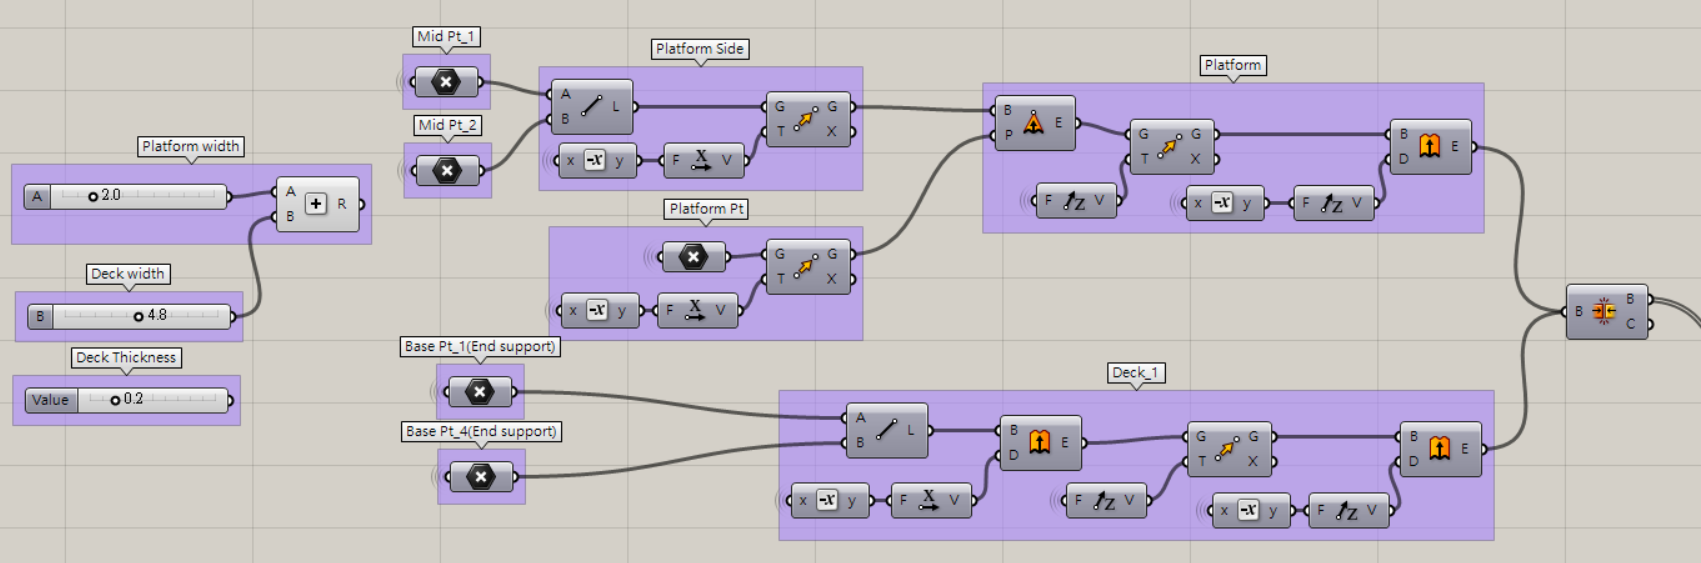
2_The Deck
Method of the Deck is similar to the Railing structure. With the “Extrude” component, you can make a surface or a solid.
I made the deck first then the platform part and joined them together.
With the control slider, you can easily adjust the value of each dimensions(deck width, platform width, deck thickness…)

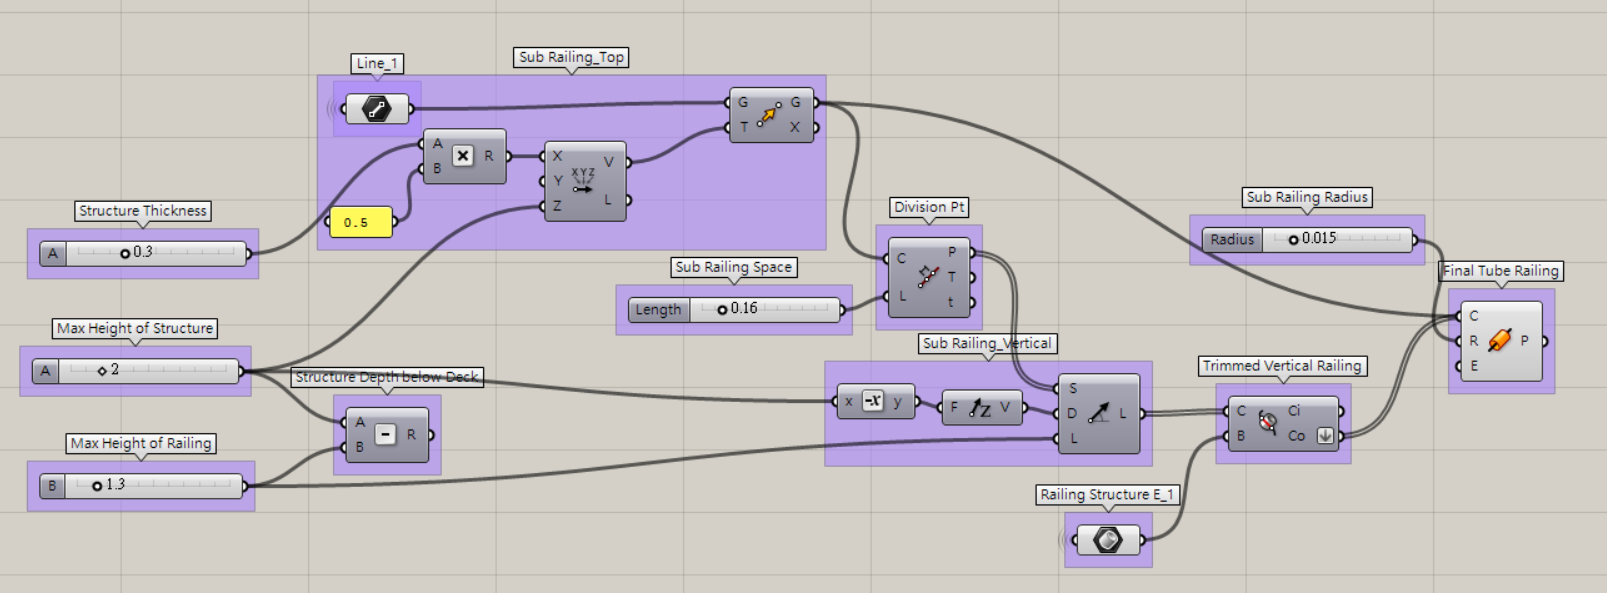
3_Sub Railing
With “Divide Length” component, you can specify the spacing of the railing and get the starting points of the vertical railings. Then simply with “Line SDL”, create the vertical lines.
Use “Trim with Brep” to trim the excessive parts of the sub railing which intersected with the main railing structure.
At last, use “Pipe” to make tube surfaces of the railing.

Conclusion
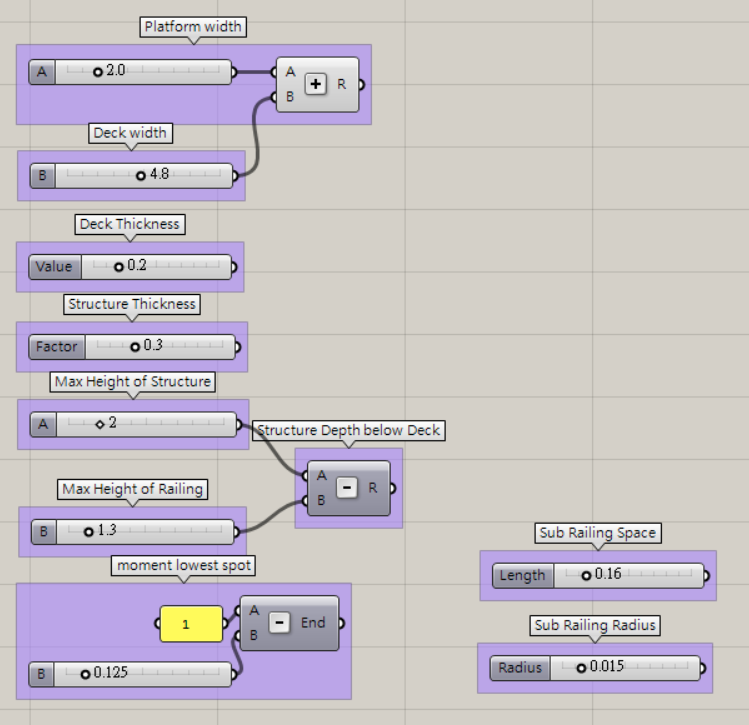
The thing I learn from doing this model is that in Grasshopper, everything is generated by the initial factors determined. Therefore, as you change the factors, the whole model changes accordingly. This is very helpful throughout the designing process and can reduce the work to remodel the entire model every time when adjustments are required.
Ex:The base reference points and the sliders below are the factors that I can adjust easily.
Link to Rhino and Grasshopper Model: bridge model