
Assignment Tutorial
Project: Jewellery Design
Aim: To design and produce an elegant and organic piece of jewellery. I decided to focus on jewellery because after learning what can be created on Grasshopper, I am aware it is very organic, fluid shapes, which reminded me of my own pieces of jewellery.
This has been my first opportunity to be taught grasshopper and rhino. Over the weeks I have learnt a lot from the lessons and have enjoyed seeing what I can produce using these software’s. The process of learning Grasshopper has been quite challenging for me, as I am use to AutoCAD and Sketch Up where there is a single command to create an element. However, with Grasshopper the model is built up of lots of variations of inputs and outputs to create the desired final model which took me a lot of getting use to.
I used this Tutorial to keep note of my development process, struggles I experienced with Grasshopper and positive outcomes that let me create the final model.
Development Work on Bands
In the beginning I tried to create different variations of cool bands that would sit around the wrist comfortably. I have attached these to show my other solutions I came up with before choosing my final design.
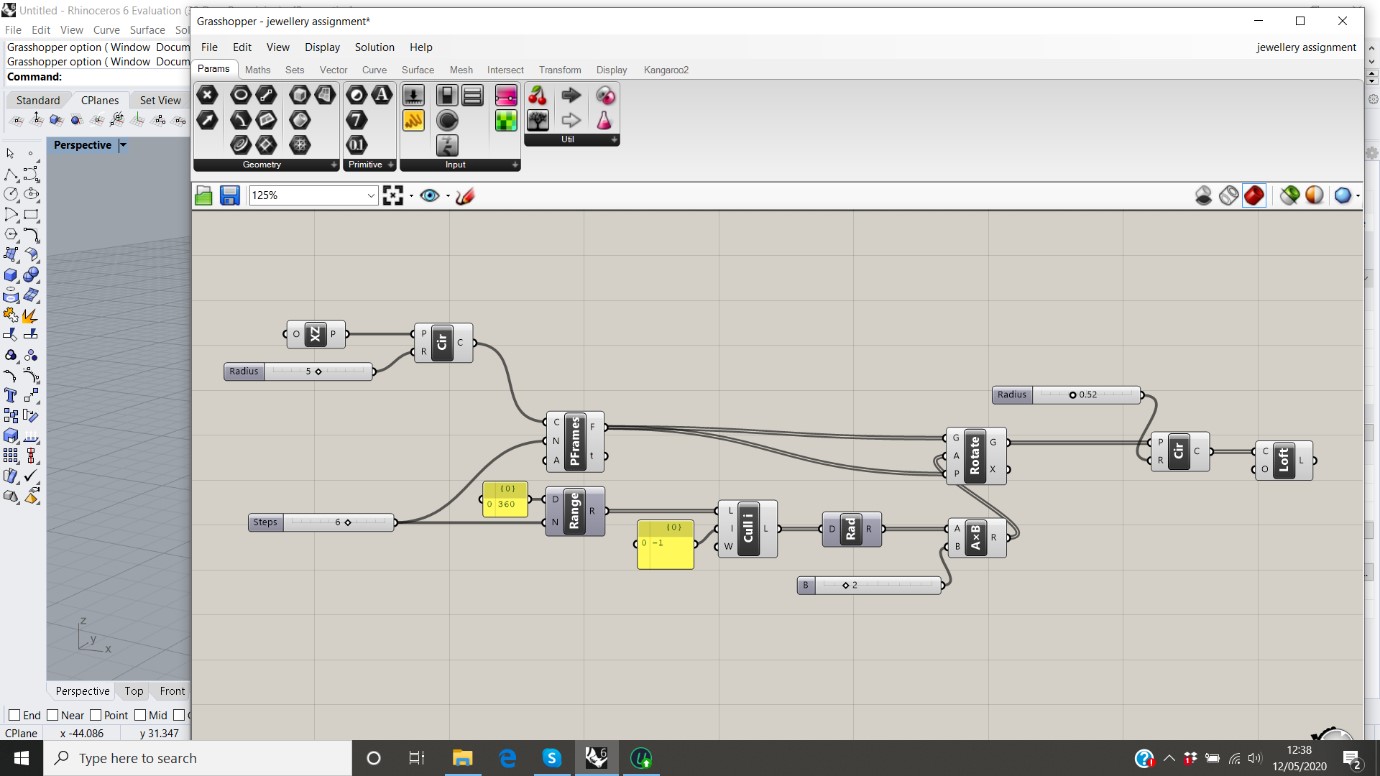
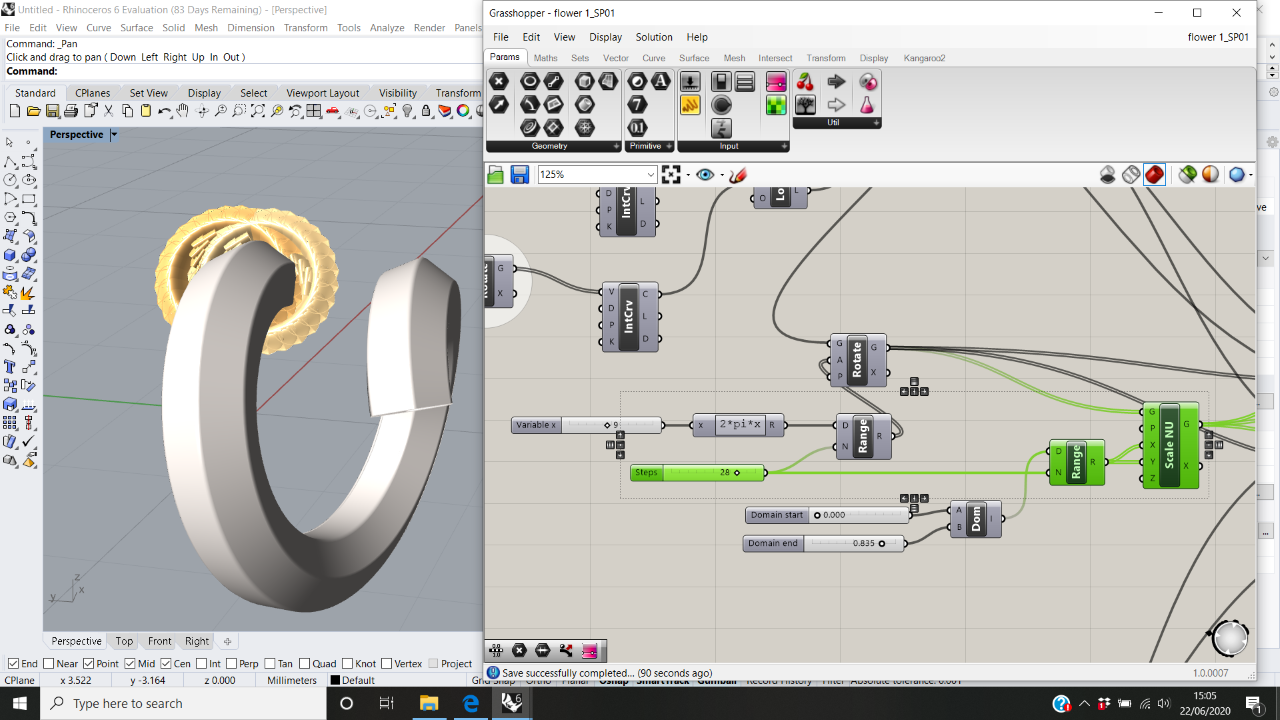
Loft – To start with I created the basic circular shape, when I used the command Loft the rotation of circles created a wave rippling through the band.
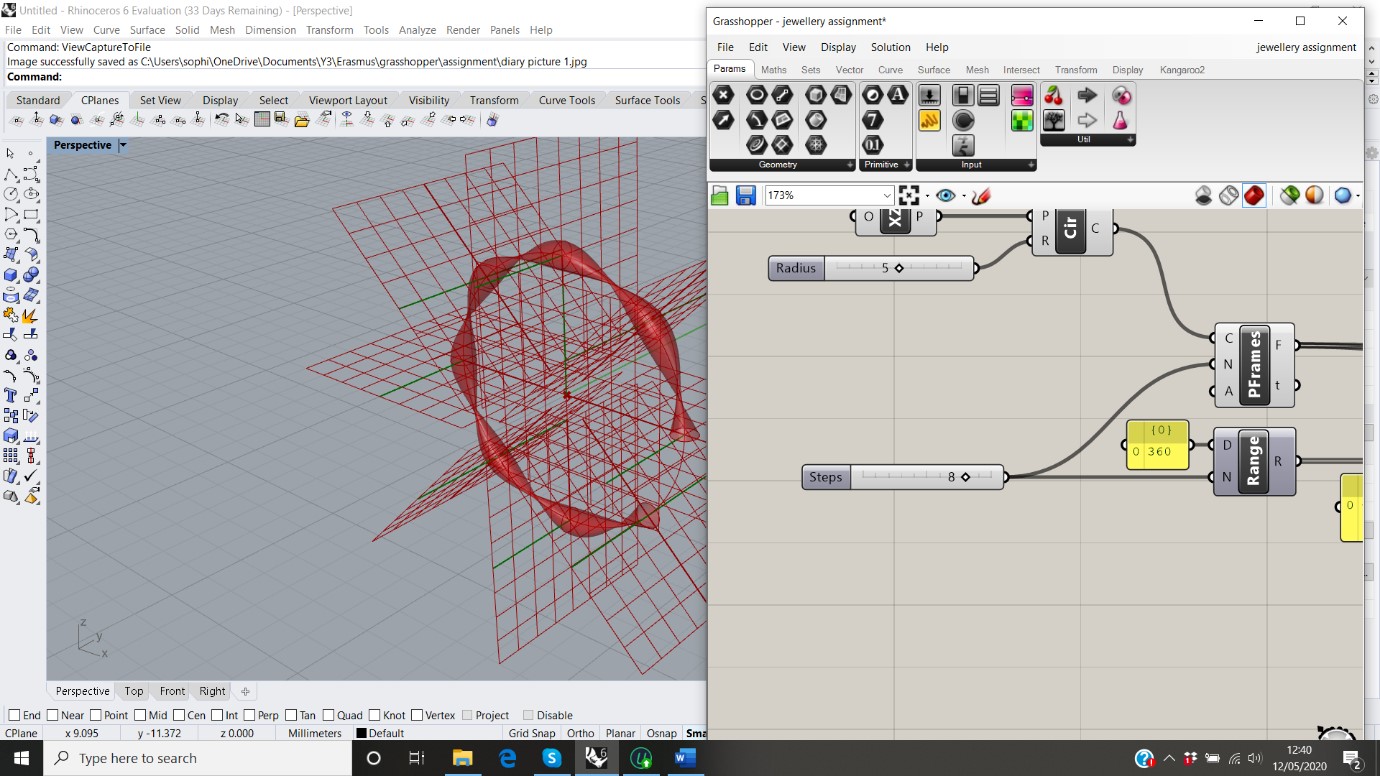
If I change the number slider going into the Range, it affects the number of waves created. With the number slider at 8, it creates a lot of waves in the band.
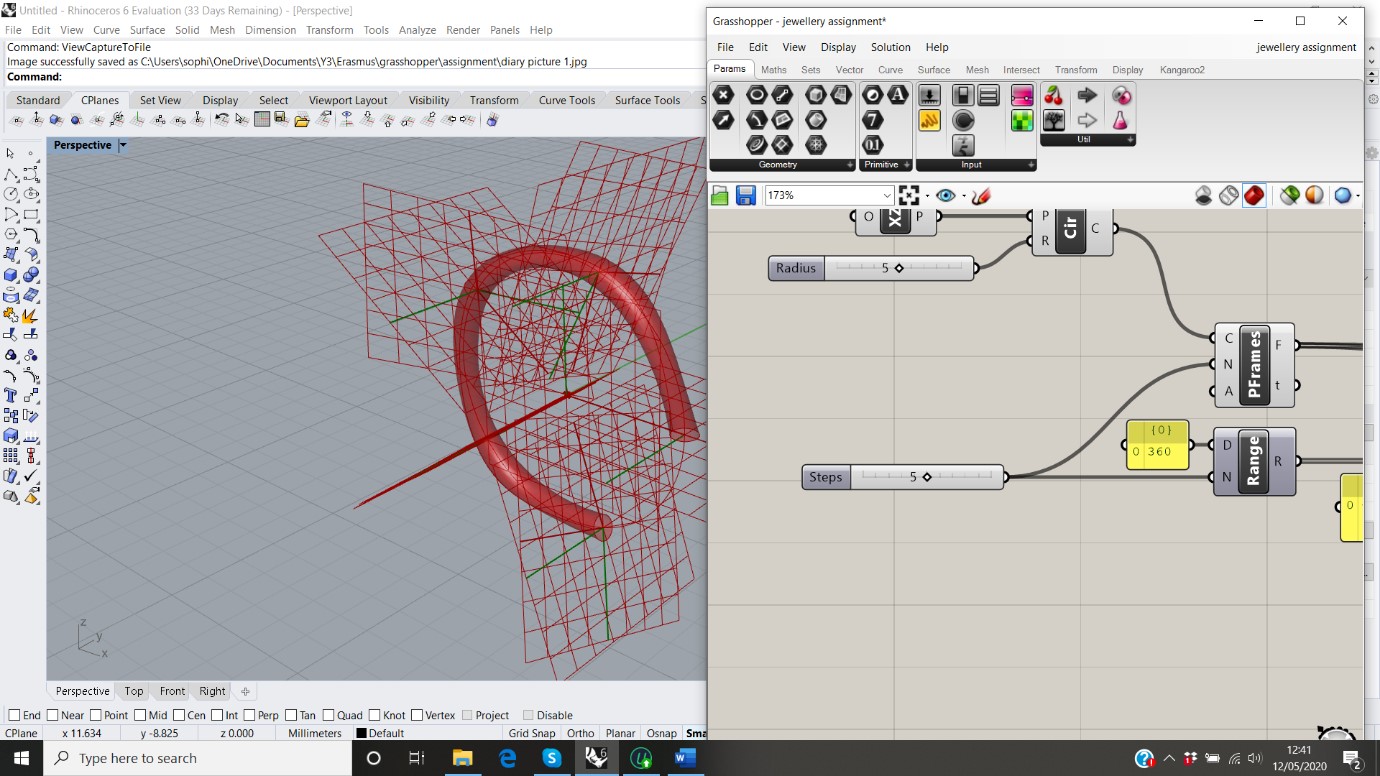
With a lower number of 5, it creates a more gentle wave through the loft.
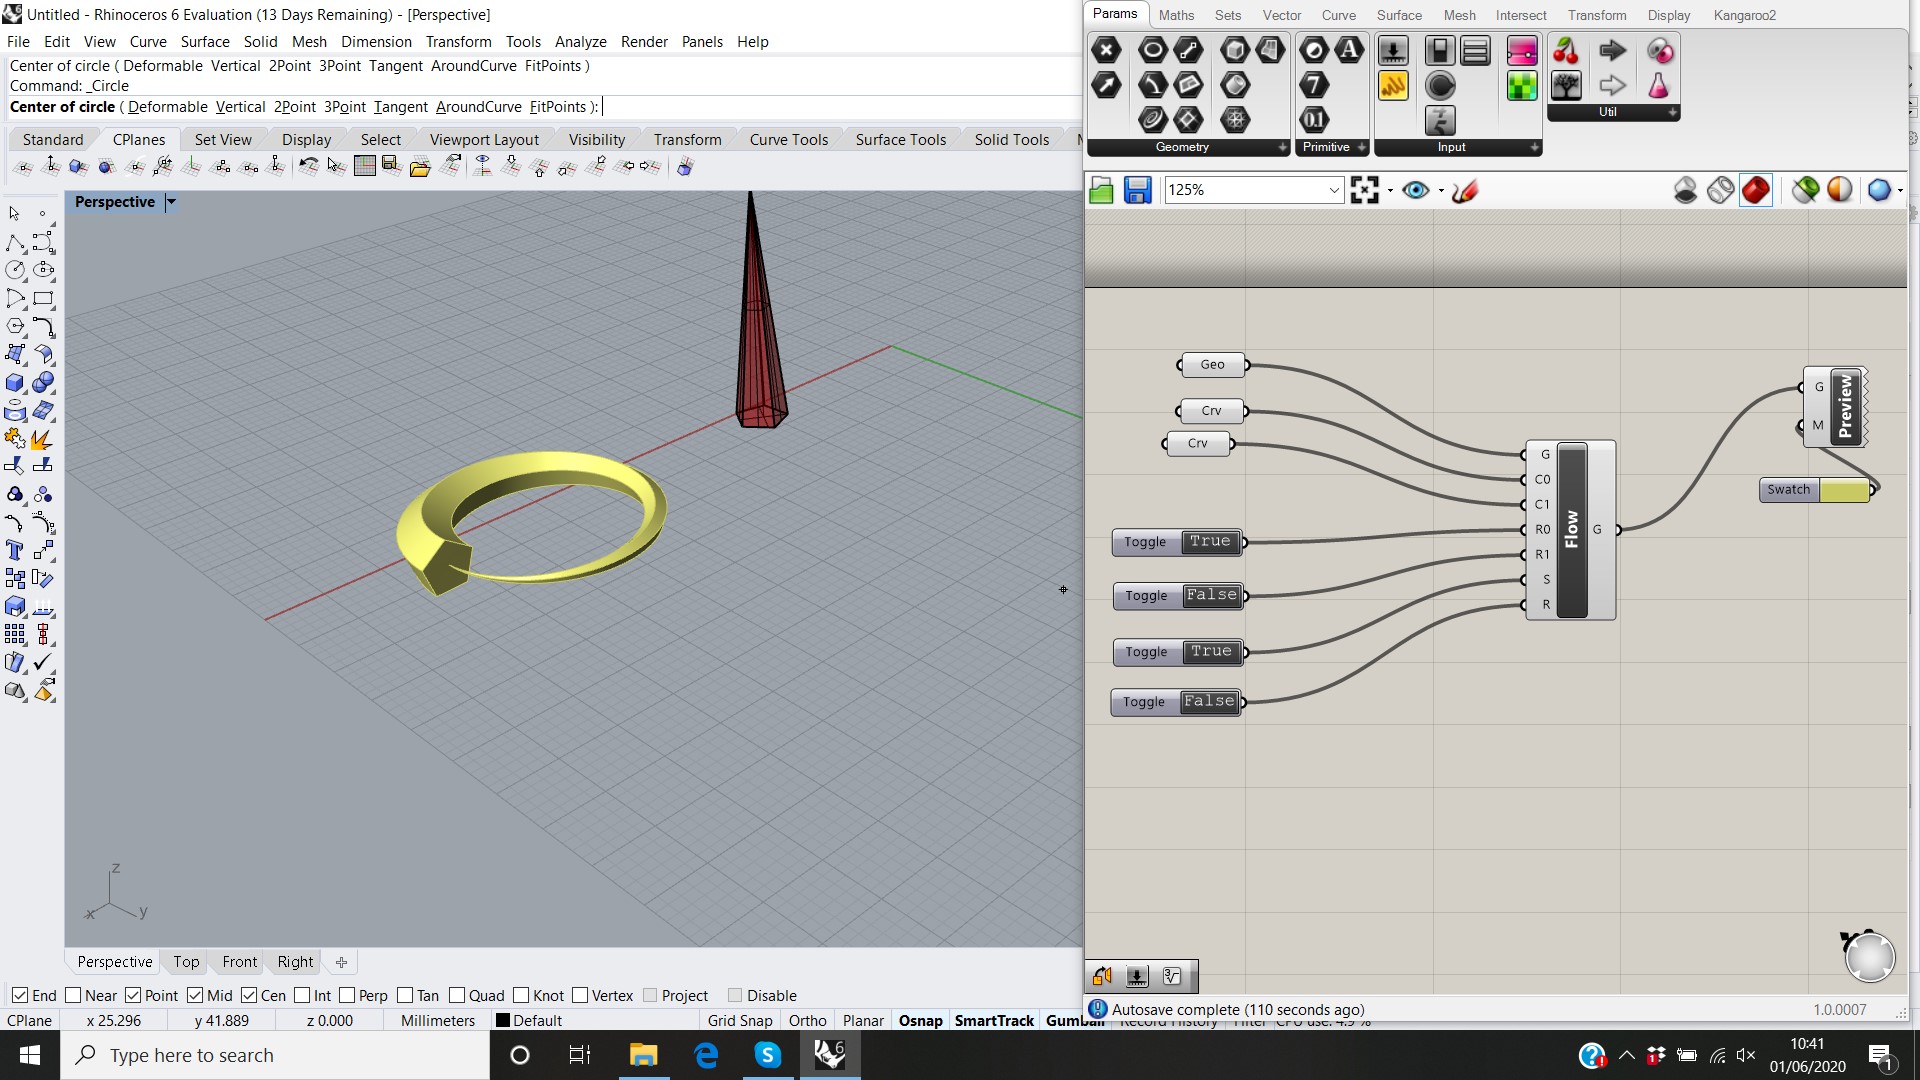
Flow – Using the command Flow, I was able to change and manipulate a 3D pyramid round a Circle. I found this tool really useful as I only used a limited number of inputs and outputs but it still processed the shape I wanted really quickly. I think this would make a really nice bracelet on its own.
Final Design
This part of the tutorial focusses on my final piece of work and the adaptations and tweaks I have made to create the final design.
DOUBLE HELIX BAND
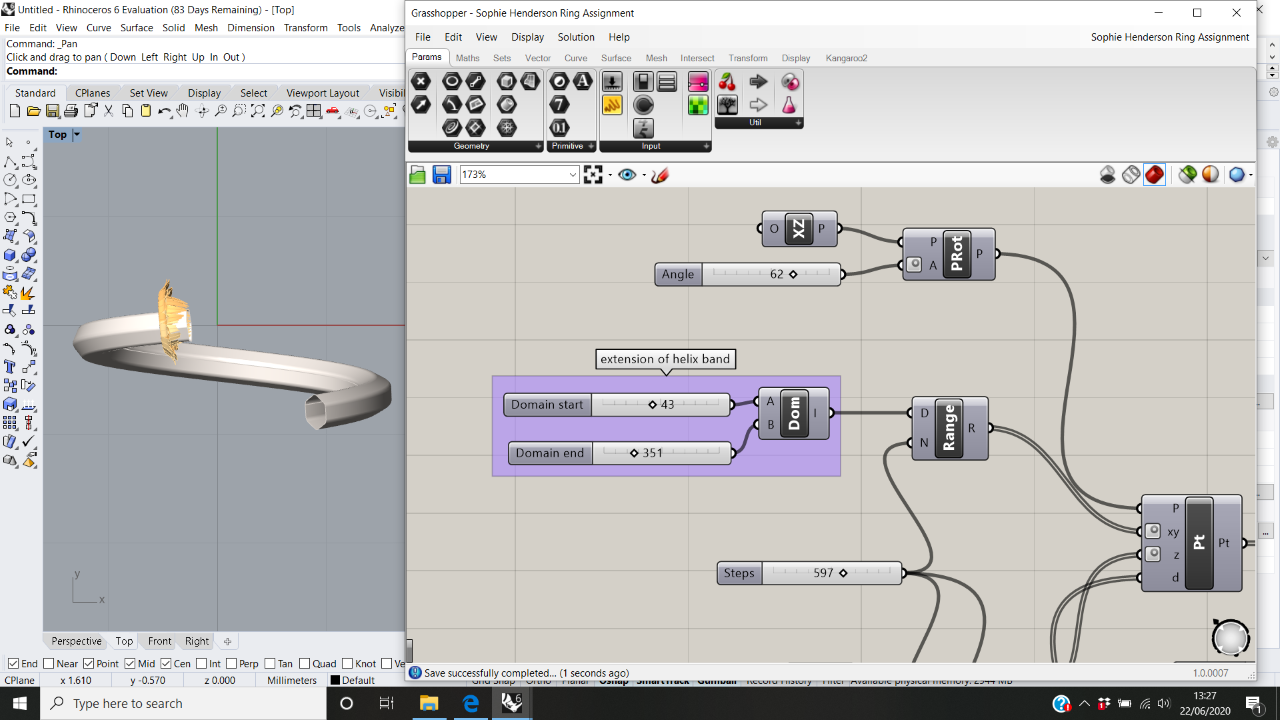
For this concept I created a double helix spiral by sweeping (Sweep1) a hexagonal plane round 390 degrees. I liked the look of this design because it will sit securely around the wrist. The design can easily by adjusted by the number sliders inserted into the Domain & Range, this is highlighted in the blue groups called extension of helix band and width between helix.To develop this I would like to add a gem stone or an organic shape such as a flower to the hexagonal planes to close the loft.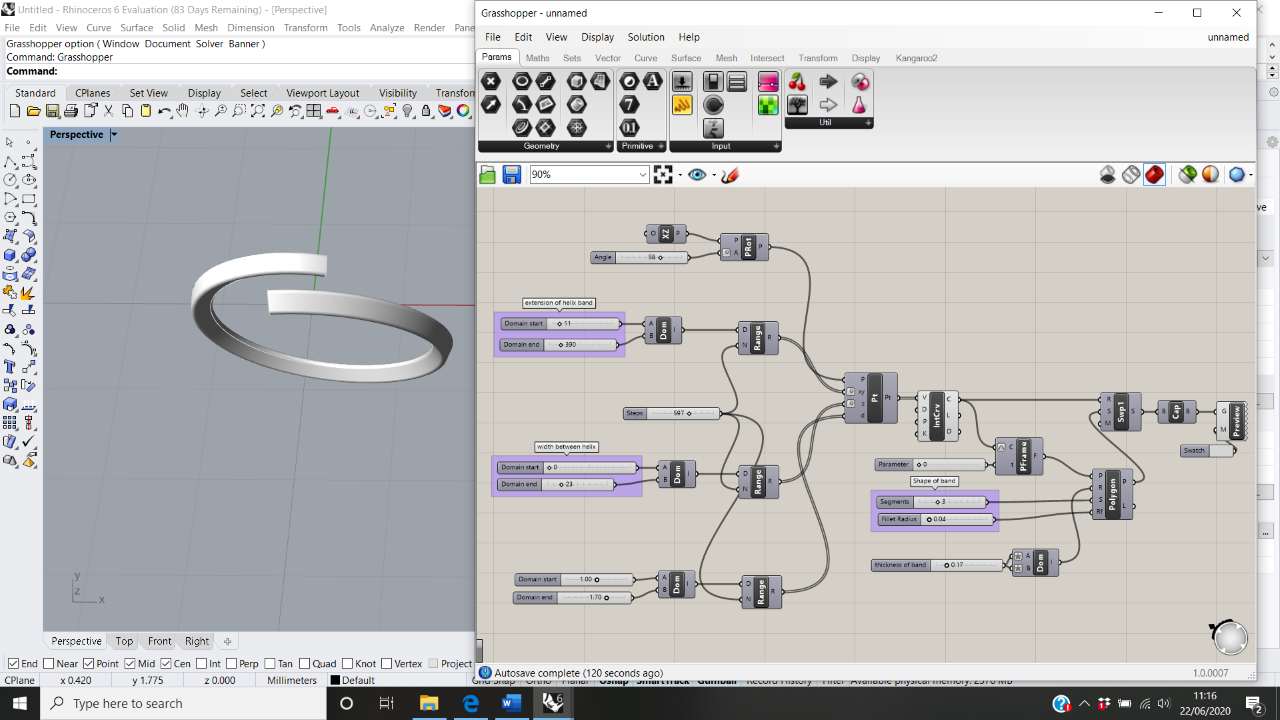
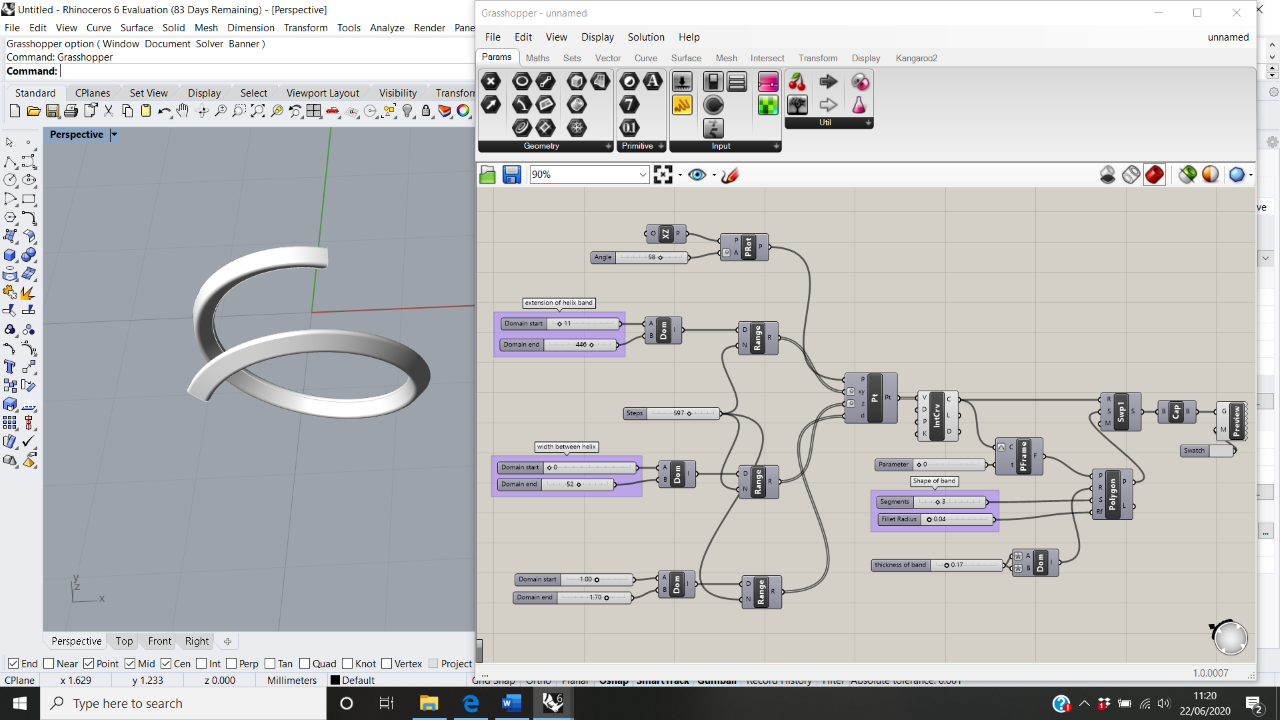
By adjusting the Domain inputs, as mentioned above, it can change the appearance really easily. The image below shows the domain into the XY Point input increased to 440 degrees. This creates a more distinct wrap around of the band.
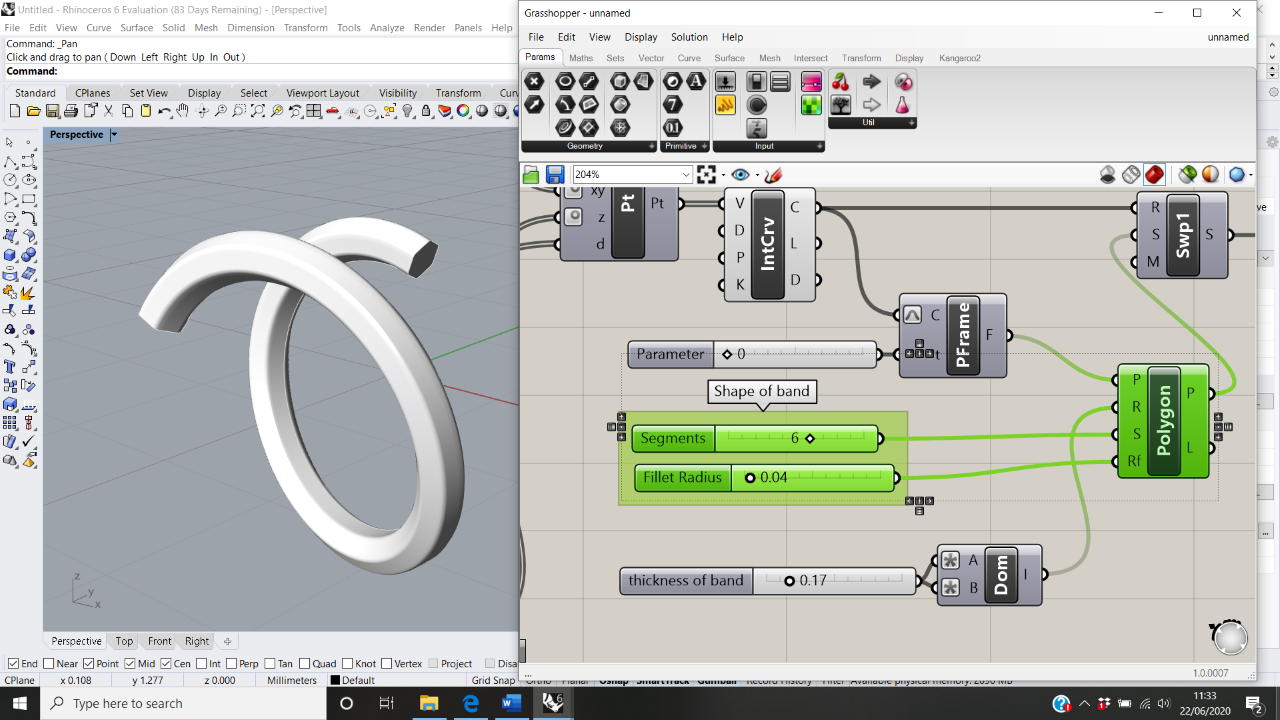
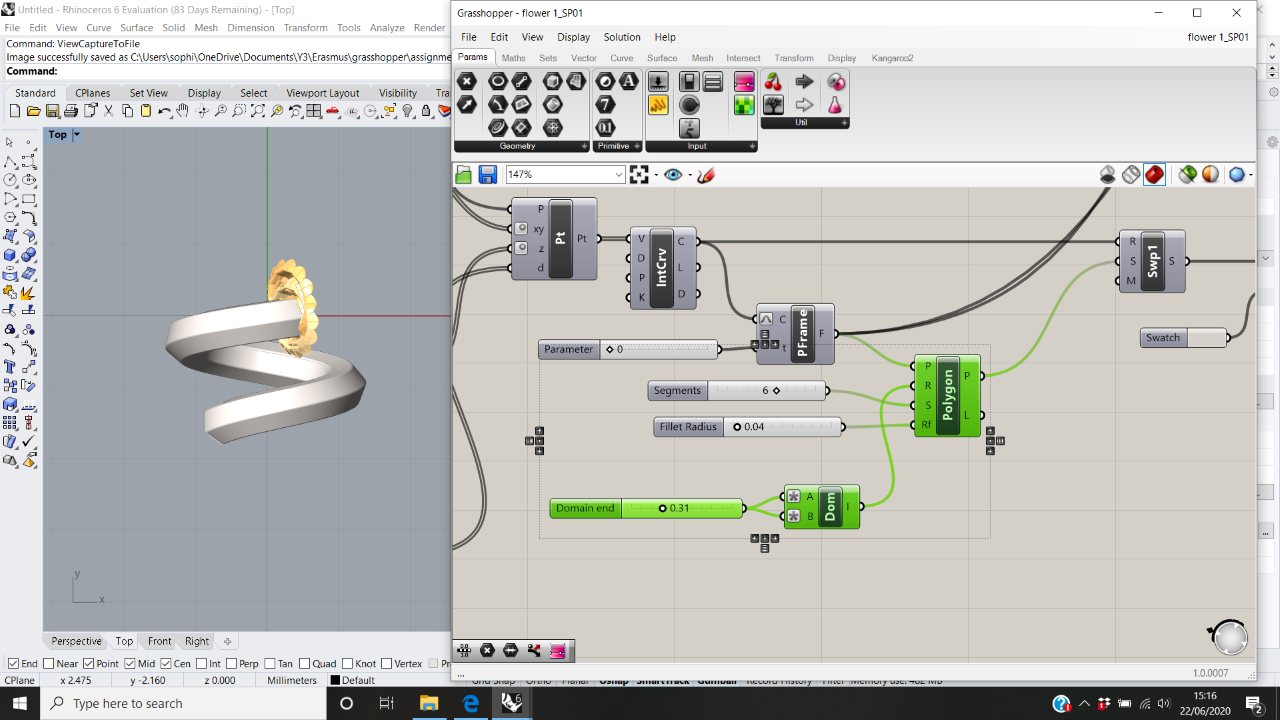
Band – Polygon
Originally the band had 3 segments going into the polygon, this created a pyramid shape. However, I changed the appearance by increasing the segments to 6. I think this makes the band fuller and more solid.
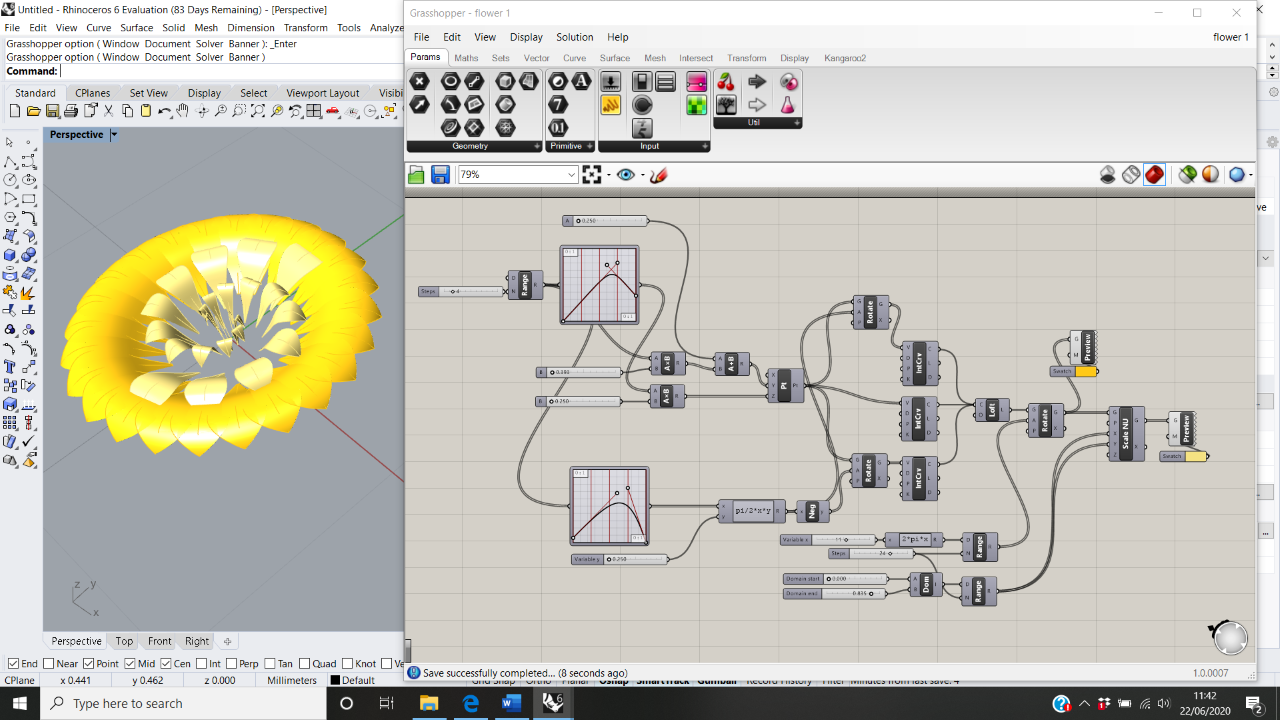
Flower – Graph Mapper
I created a simple flower shape and I thought this could be nice at the end of the helix band, instead of a basic jewel. Using Graph Mapper I was able to change the bend in petal. The next task was to attach this flower to the Helix Band I had already created, this caused confusion for me as I didn’t know how to add another shape from rhino and attach it to the end of the hexagonal plane.
The issue I had was how to attach the flower to the helix band. I have tried Move to Plane and Splop as possible solutions to attach the two elements together. The sketch below shows a simple explanation of what I wanted to achieve.

Development – Attaching the Flower (ORIENT)
The solution for attaching the flower to the helix band was by using Orient. Orient is a command that moves geometry from one axis system to another. Orient has 3 inputs and to make it work for my design I added the Geometry of the petals and the final plane which was the Perp Frame because that is the axis that I wanted my flower to sit on.
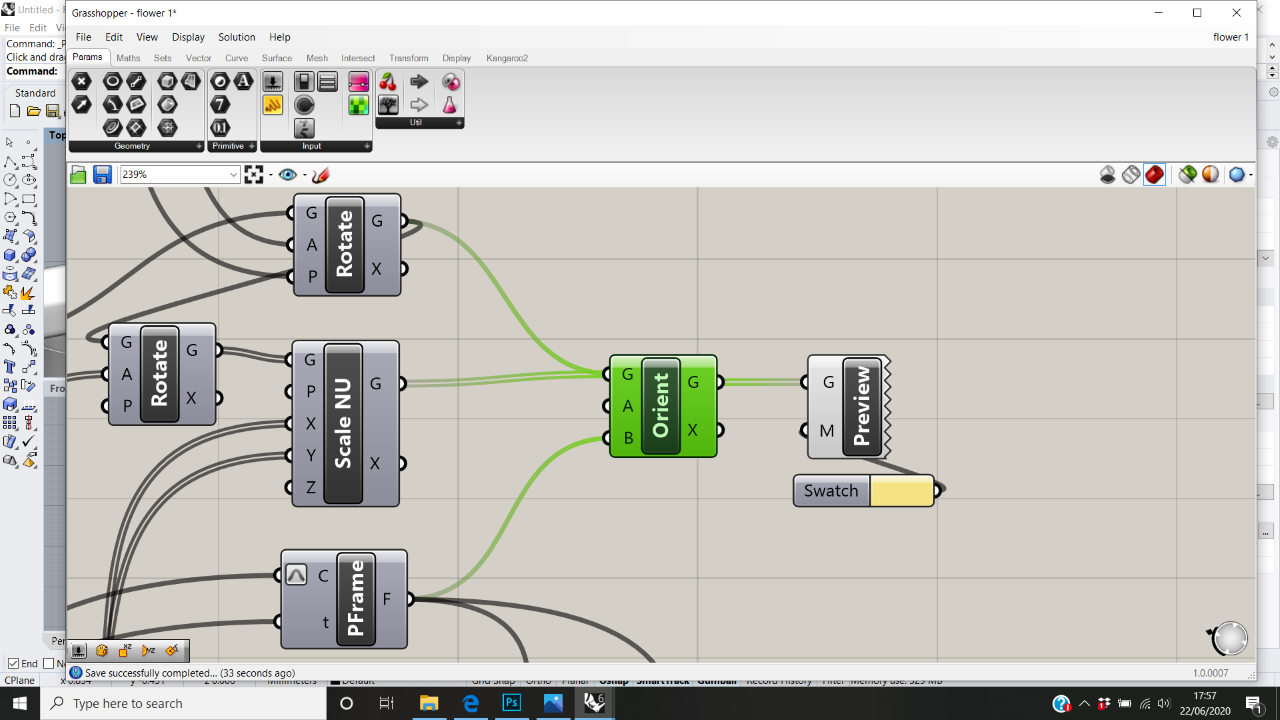
I was originally confused with Orient because I was connecting the polygon to the final plane input, instead of the Perp Frame.
This image shows the flower attached to the helix band.
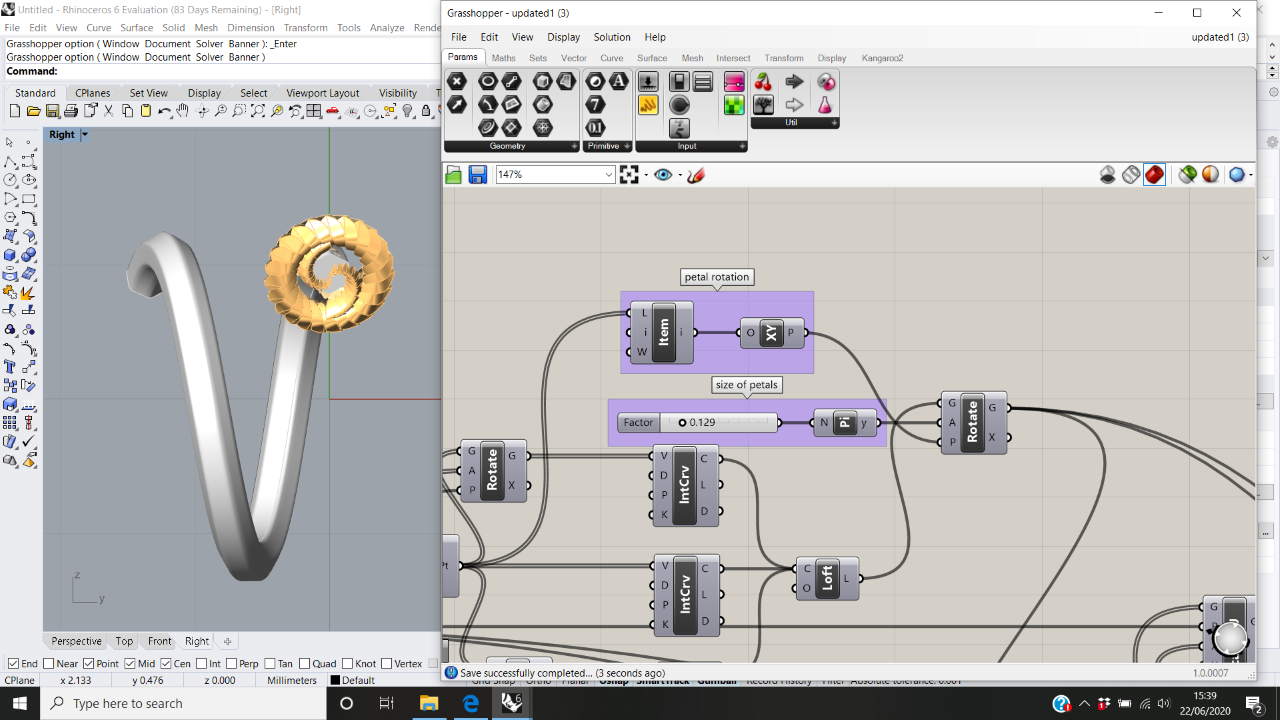
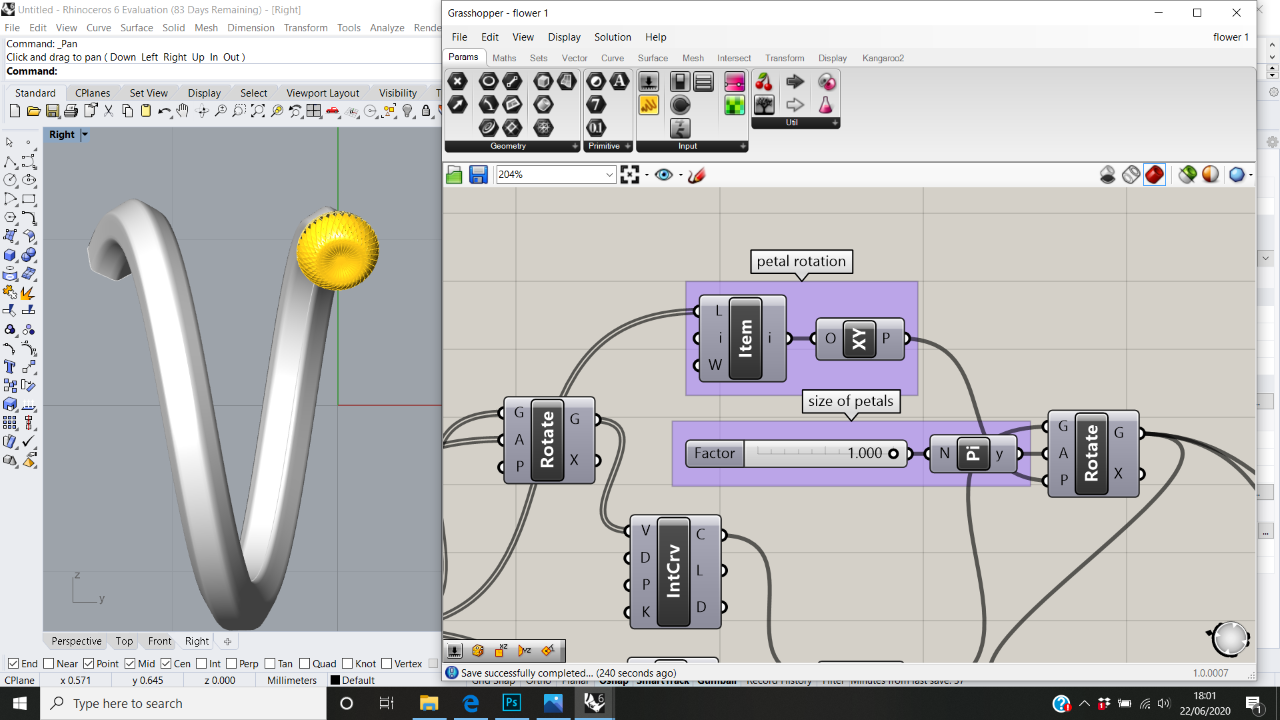
Development- FLOWER (List Item, Plane & Rotation)
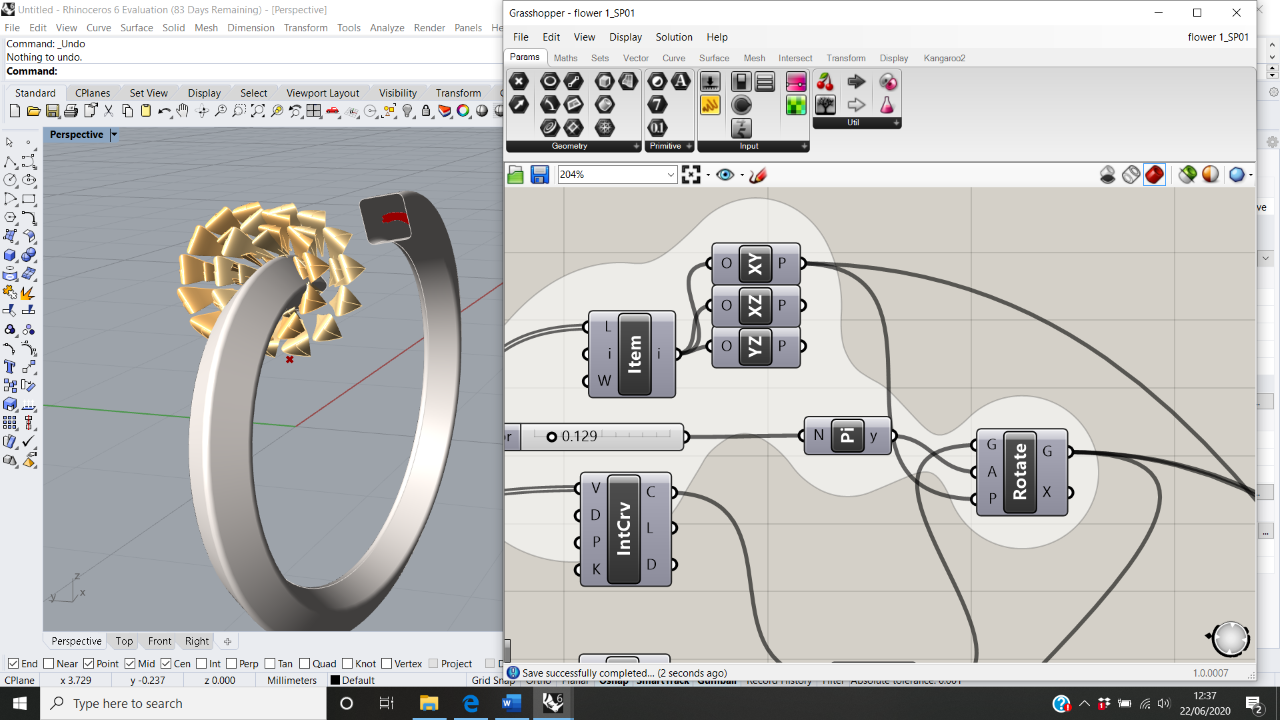
The original flower was a very simple shape. By adding a List Item I was able to see what plane created the coolest rotation of the petals. This is one of my favourite elements of Grasshopper as it shows several variations quickly and I could see how my design could be transformed. The XY Plane created an even spread of the petals throughout the rotation.
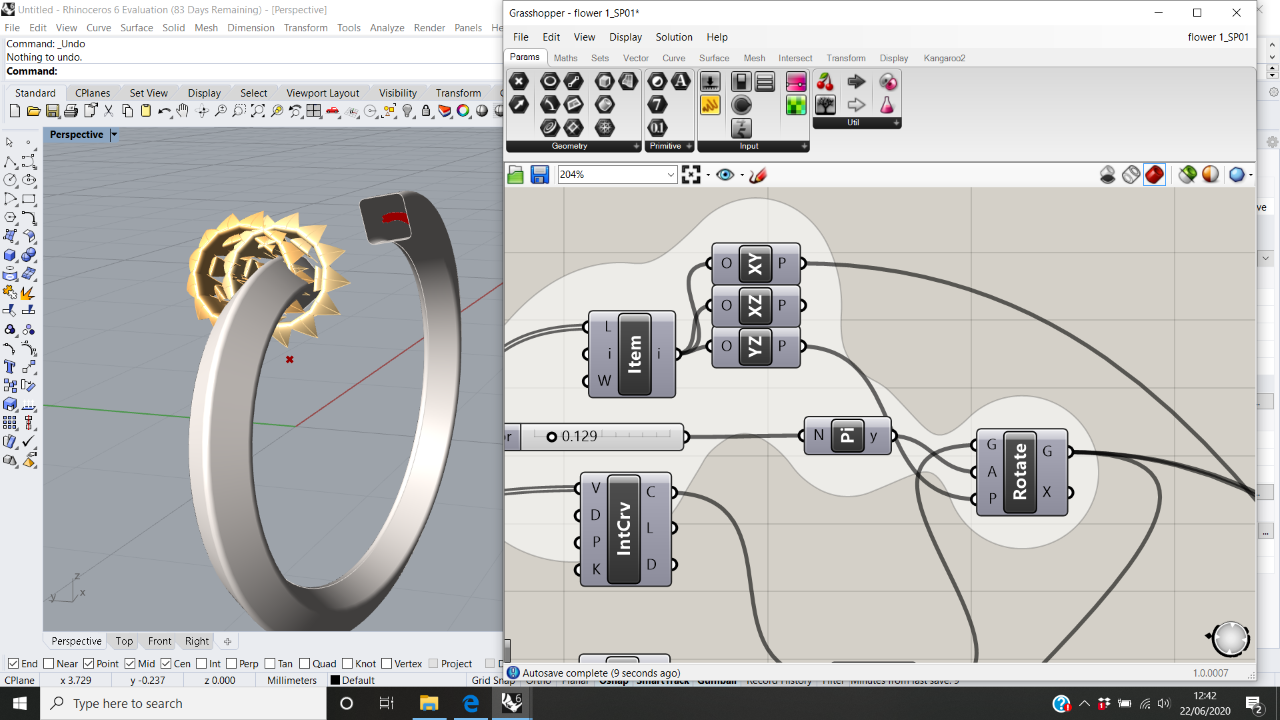
Th XZ Plane rotated the petals too much for my liking and there were a lot of gaps in between the petals which wouldn’t work well for a piece of jewellery.

The YZ Plane rotated the petals so there were no gaps but the overall style of the petals looked very simple.
Development – Adjustments to Graph Mapper, Domain and Range
I liked this design development as it was very organic and I liked the way it flows. To create this design I adjusted the Graph mappers to distort the shape of the petal.
I also adjusted the domain start and end to create a larger gap in the band. This step was mentioned previously but I think it’s really important to show the different variations you can produce by adjusting the number sliders into Domain and Range.

Development – Adjustments to Scale of petals & Radius thickness of band
I was happy with this outcome however there were areas that needed tidying up. For example the petals were not centred so the flower blossom did not sit appropriately to the frame. The Scale of the petals is changed by the number of steps into the Range, in the image below it is at 13, which shows the petals sitting together nicely as a blossom.

The image below shows an example of how increasing the range into the scale creates more petals tightly together to create a fuller blossom.
The band was too thick, however, this can be adjusted by reducing the number slider attached to the radius of the band. As you can see the domain end is at 0.31, but I will reduce it significantly to make the band more delicate.

Final Outcome
For the final outcome I tidied up my grasshopper file to get rid of any mistakes I encountered and did not notice along the way.
Initially I liked the look of my design when the petals were larger in size, however I understand this could make it uncomfortable around the wrist as it could jag into you.
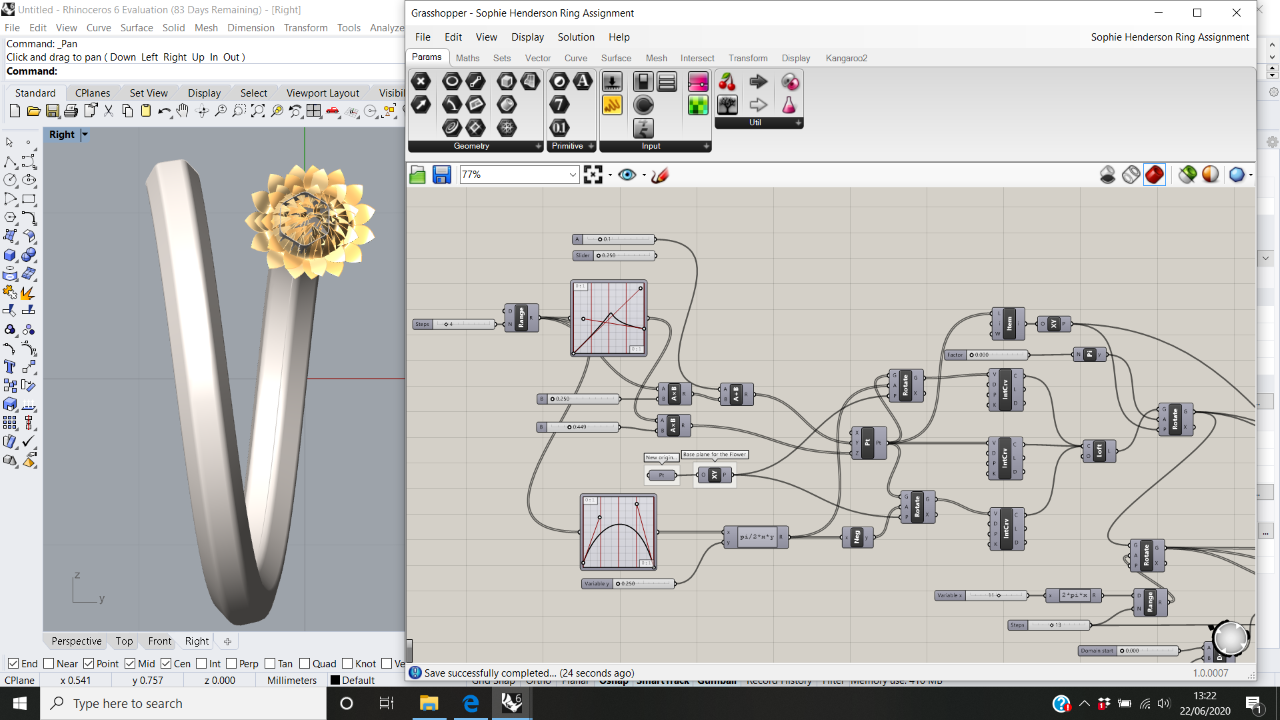
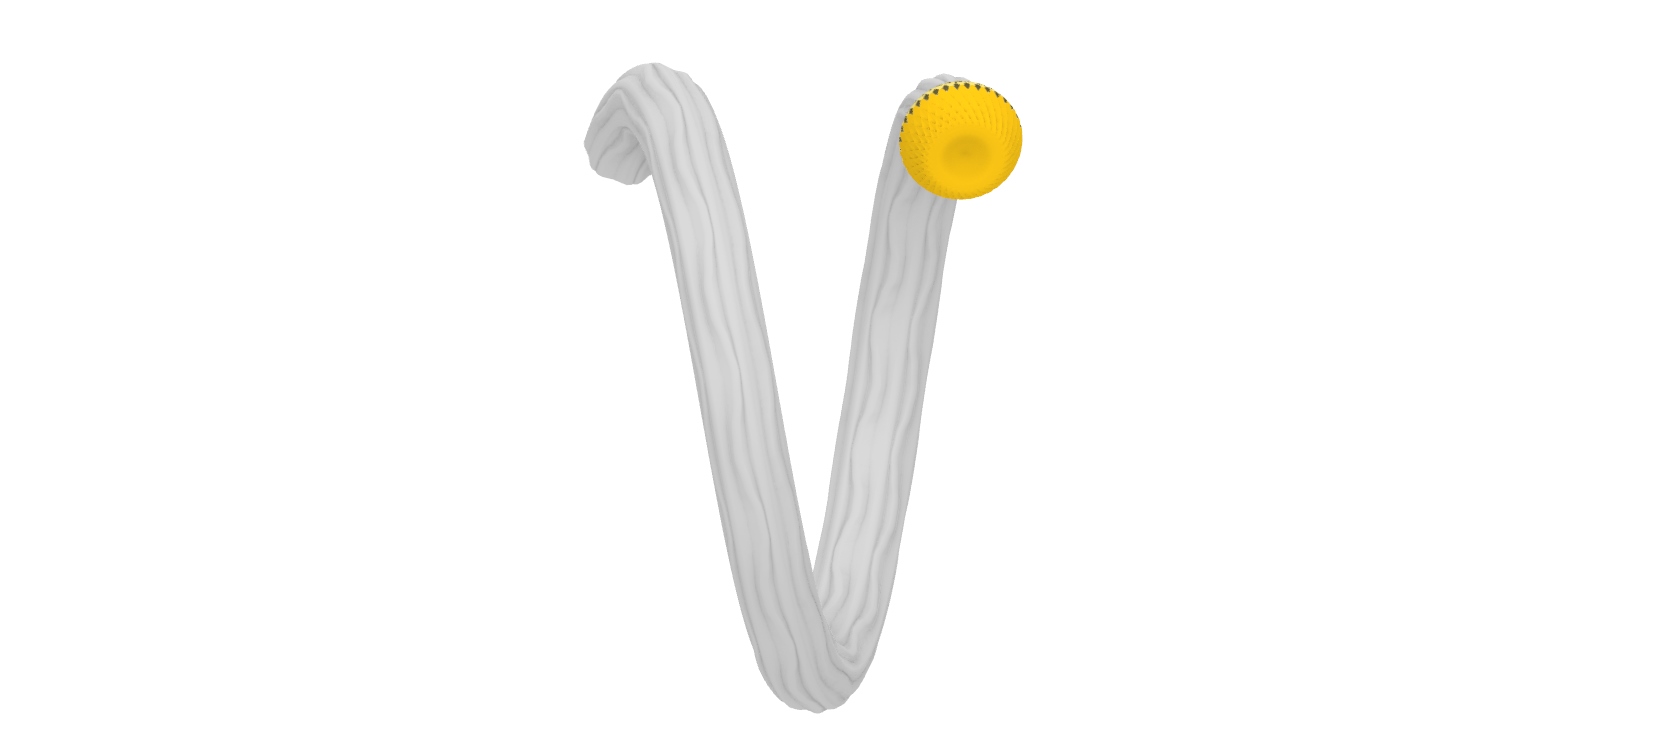
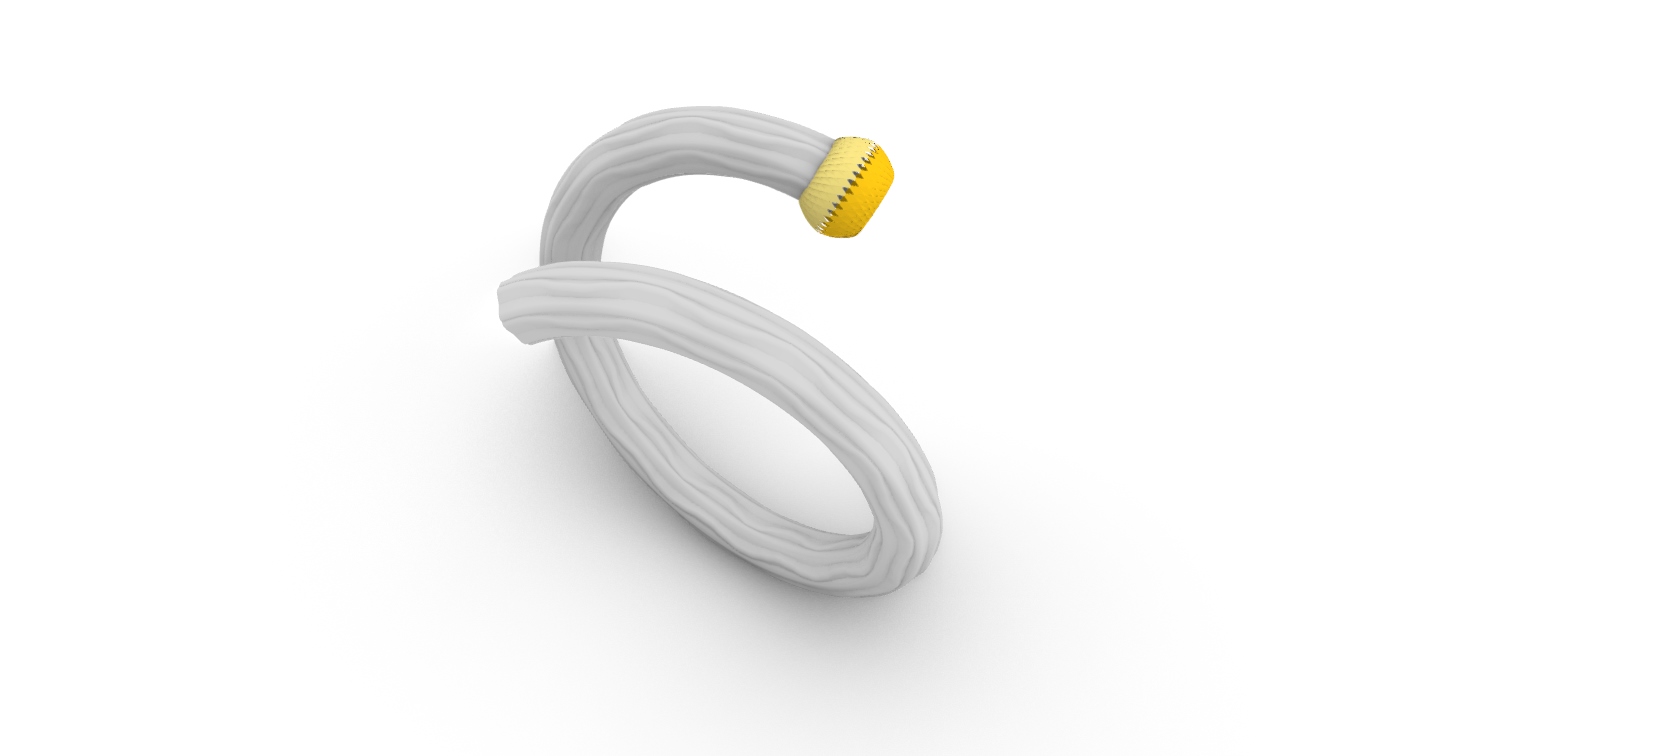
Therefore, the solution to this problem was to reduce the size of the petals so it was a similar size and width to the curve of the band. This means there will be no jagged edges and it will be smooth around the petals. Also the flower is super compact and dense now which creates a cool design, almost like a gemstone and a flower mixed together.
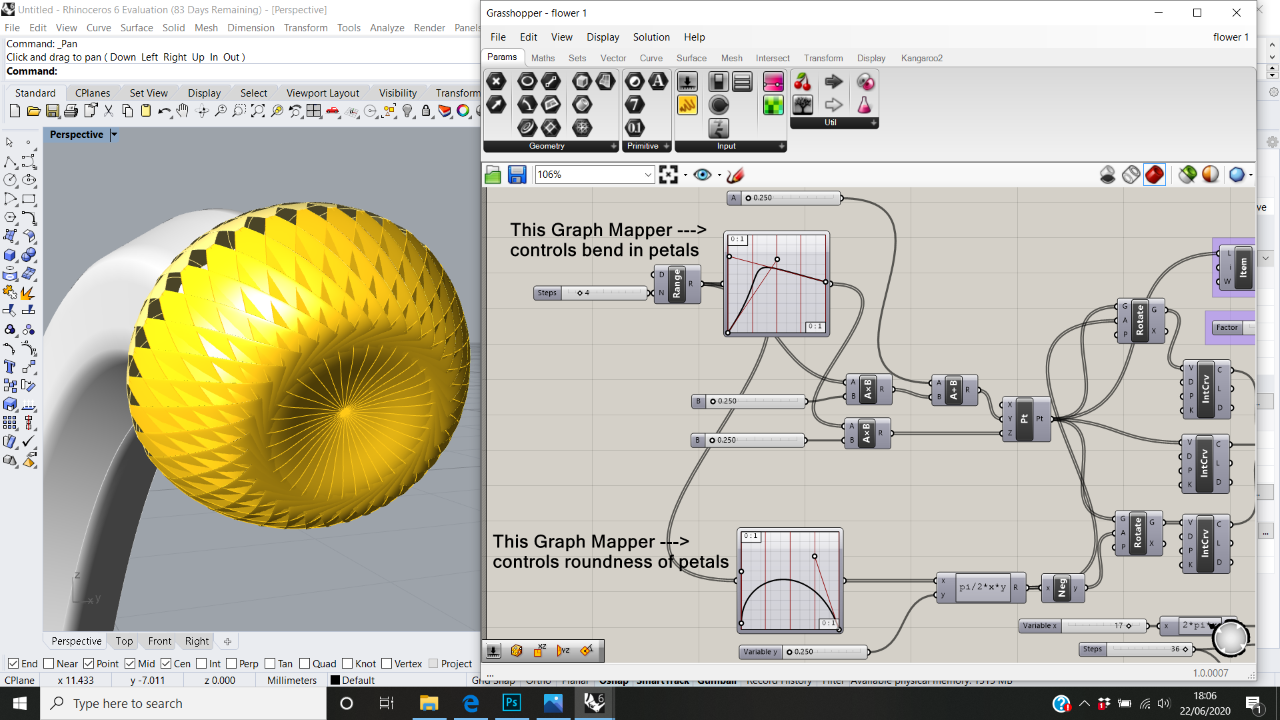
Below shows the Graph Mapper creating softer, rounder edges for the petals. Therefore, both the size of petals and graph mapper have created the perfect size of decoration on the end of the band.
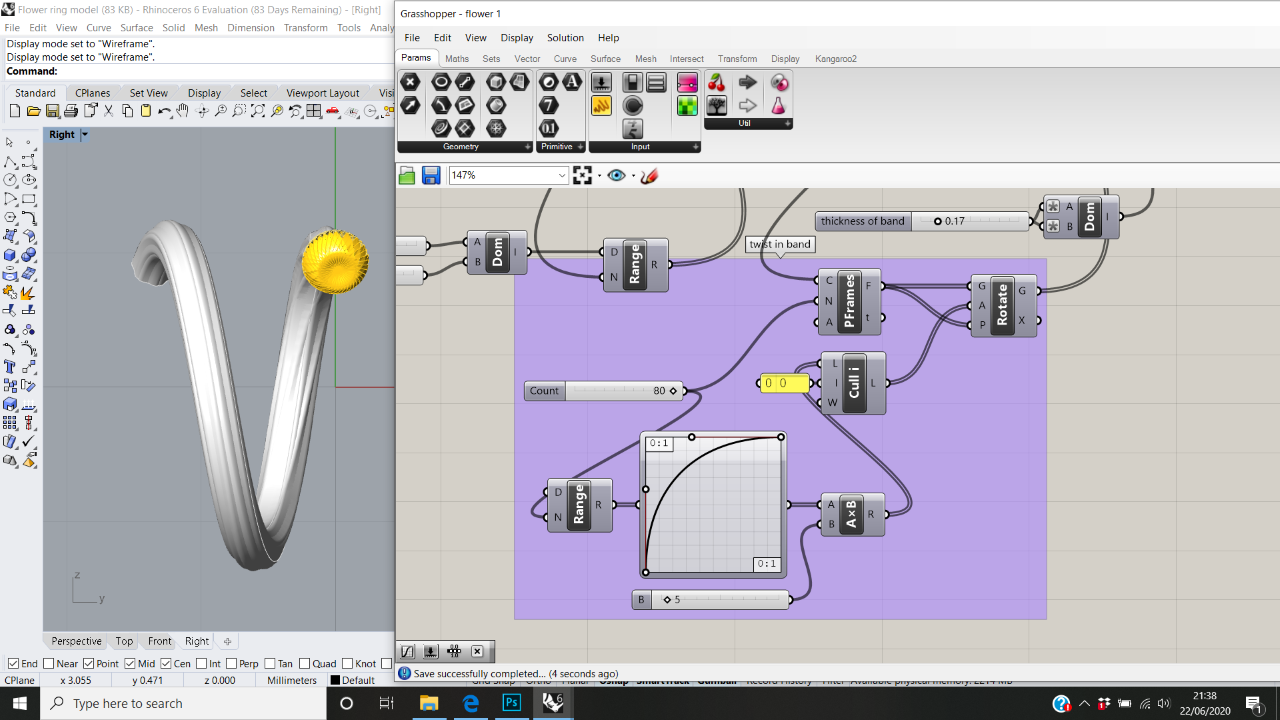
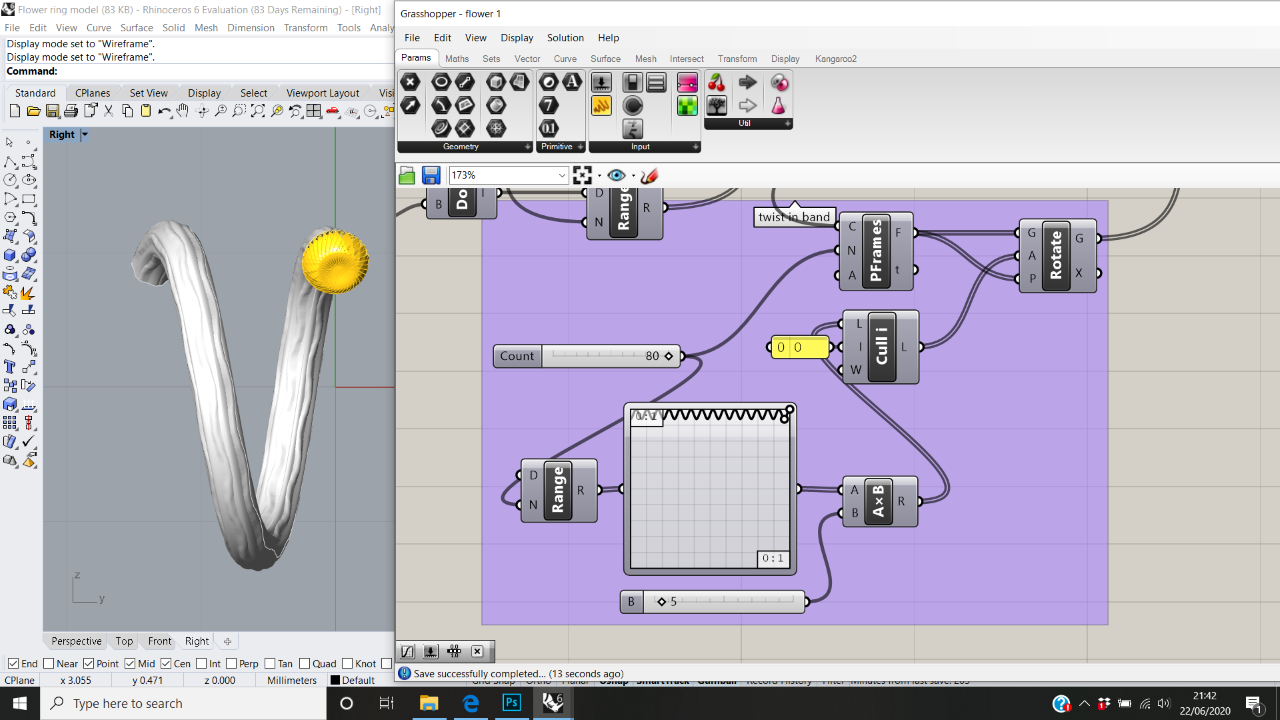
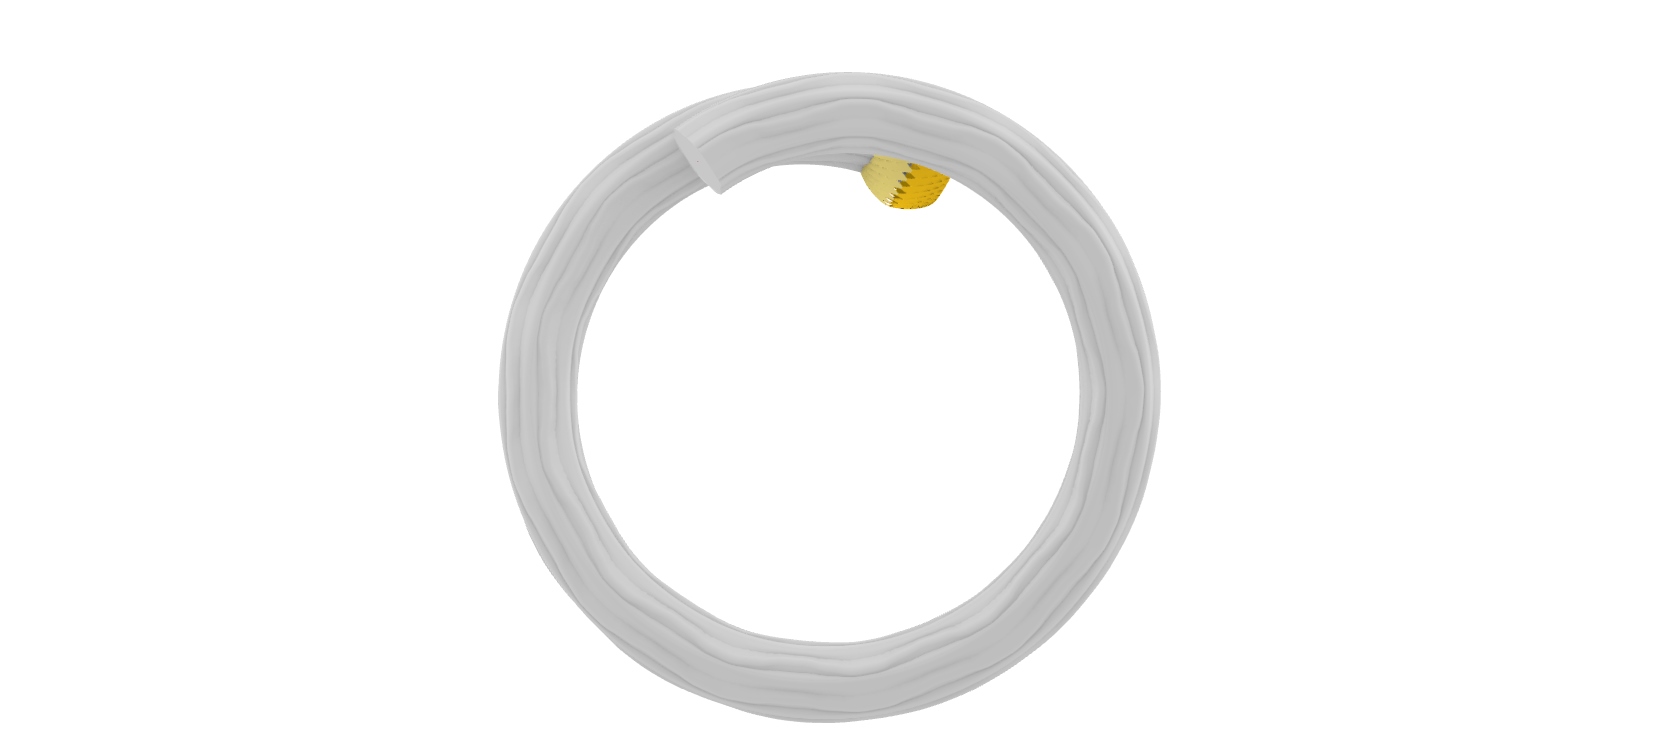
The last adjustment I wanted to make used Graph Mapper again, but it was to make a difference to the existing band. I tried a Sinc Graph Mapper and it created clean indentations and twists on the band that started to get a little more twisted towards the end with the Flower.
The Sine Graph Mapper created my favourite twist as it did not follow a set pattern and it looked very organic and natural and I feel that it matches the theme of nature with the flower appropriately.
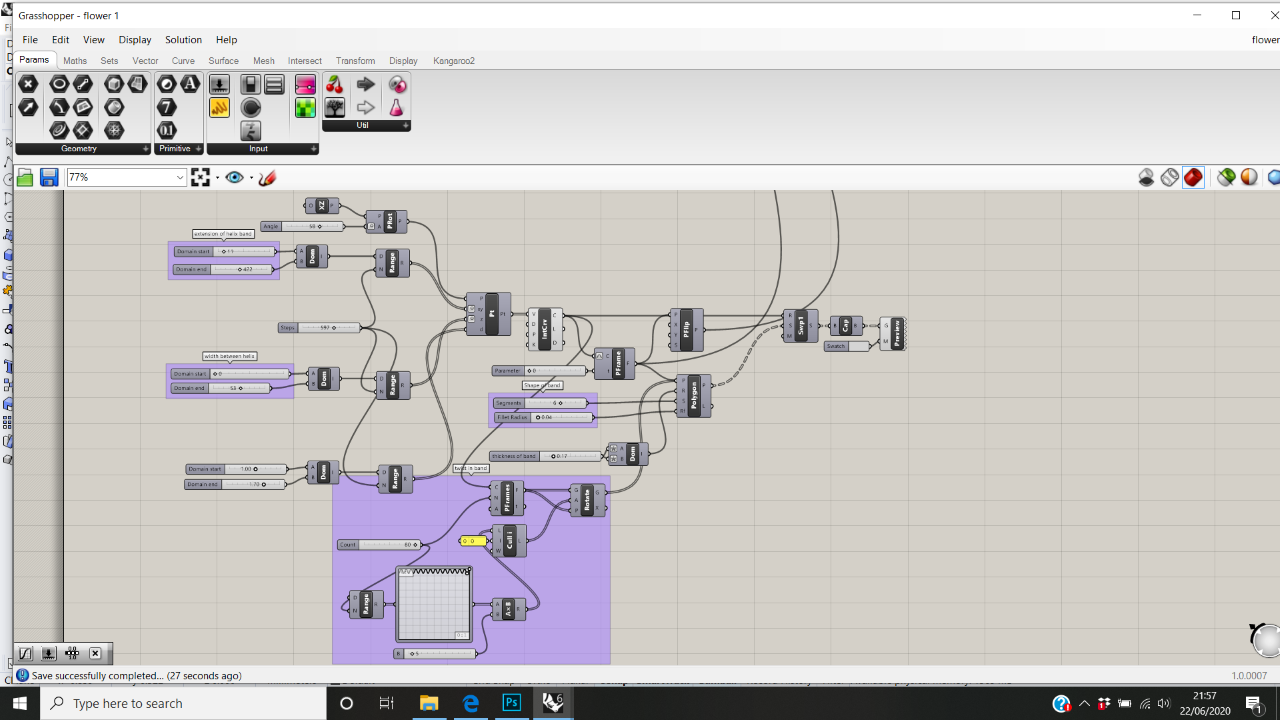
The data below shows the steps I took to create the band element.
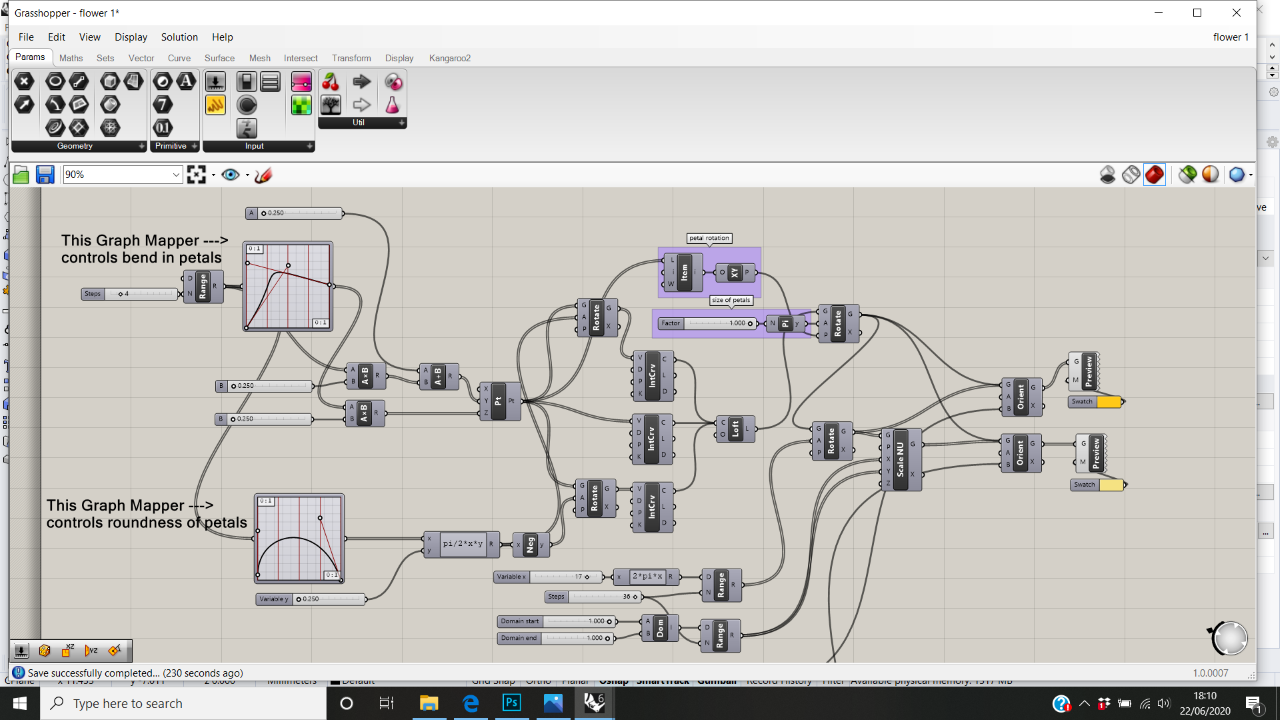
The image below shows the data to create the flower element that attaches on to the band.
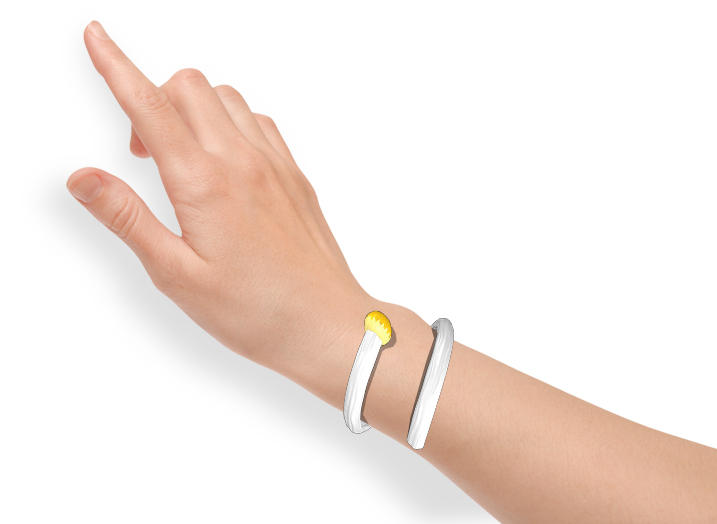
The changes I made to the final outcome were for comfort and some finishing touches so it would sit nicely on the wrist.
The final design element was to Flip the Plane of the flowers so it covered both sides. This was an area where I struggled a lot. There are several types of ‘Flip’ command, for example Flip Curve, Flip Mesh, Flip Matrix and from using software’s such as AutoCAD I am use to having one single command that solves the solution.
The development in my tutorial shows how large an impact number sliders, ranges and graph mappers have on the final aesthetics of the model. I think grasshopper was a useful software to design jewellery on due to its easily adaptable features. Also, renaming and grouping elements together made it easier for me to understand what the command does.
Overall, I am pleased with my final model outcome, it covers what I originally wanted to design and create which was an organic and unique piece of jewellery.


Final Assignment File
Grasshopper: Final Tutorial
Rhino6: Final tutorial bracelet
Development Process Files