
Lucas Van Melderen
B211-500CAD3+555CAD3 / 2021-22
–
Design concept :
The idea is to design a spherical lamp whose scale and arrangement of openings would refer to the reflection of light on a potential sphere. Its illumination will therefore be relative to the shading of a potential sphere. The geometry of the openings will be cyclical to maintain the spherical effect of the project. The manufacture of the result will also be considered.
Required plugins for the script:
- Parakeet (for the geodesic dome) : https://www.food4rhino.com/en/app/parakeet
- Ivy (for the manufacture’s step) : https://www.food4rhino.com/en/app/ivy
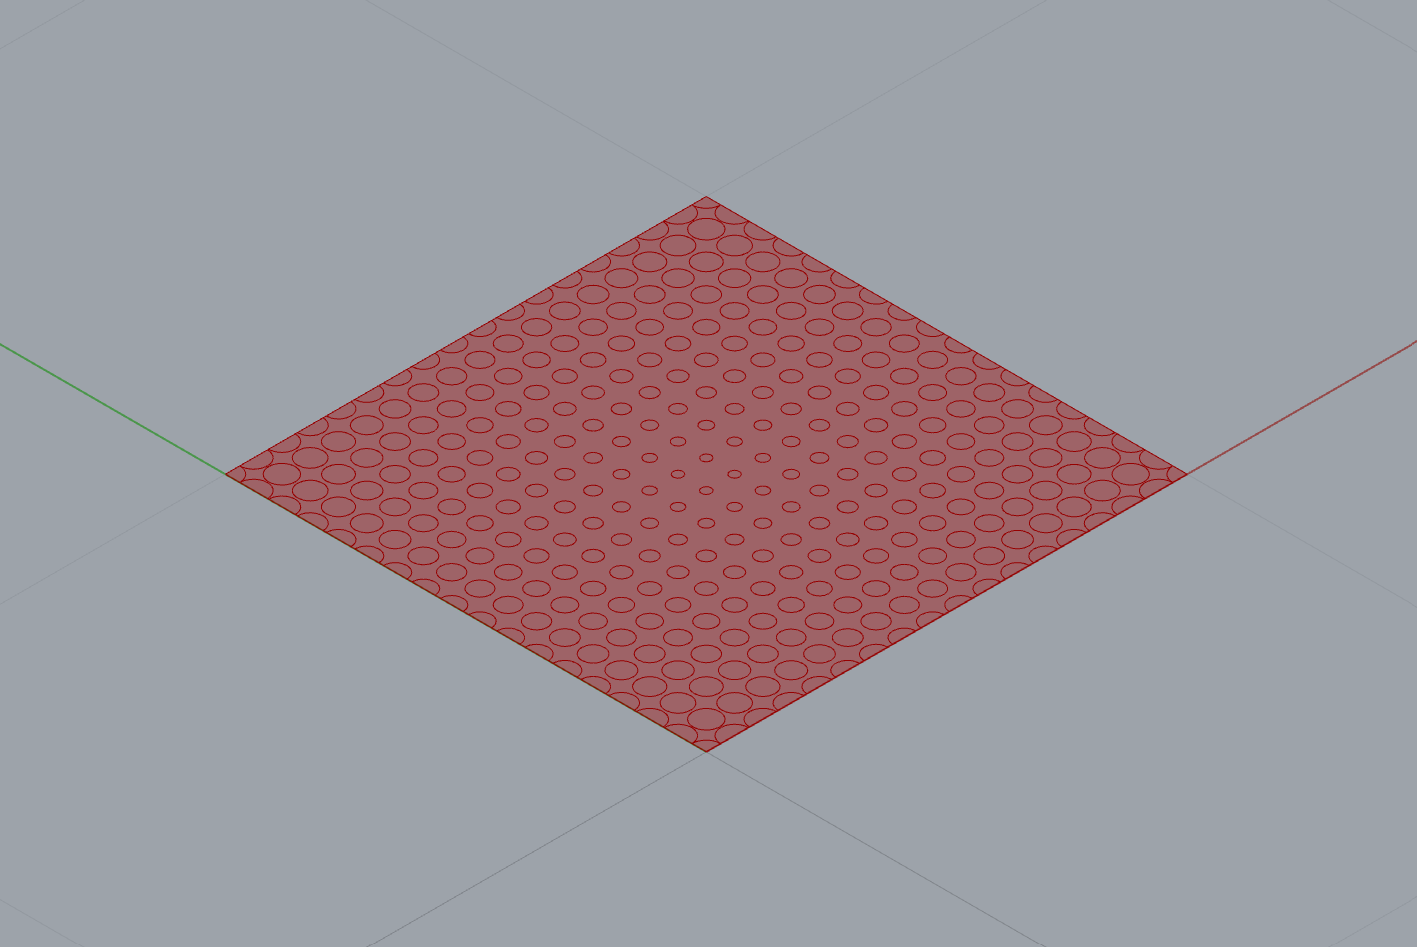
Step 1 : Perforations related to an attractor point on a plane surface
In order to better understand the rest of the process, we start by applying the concept of perforation to a flat surface.
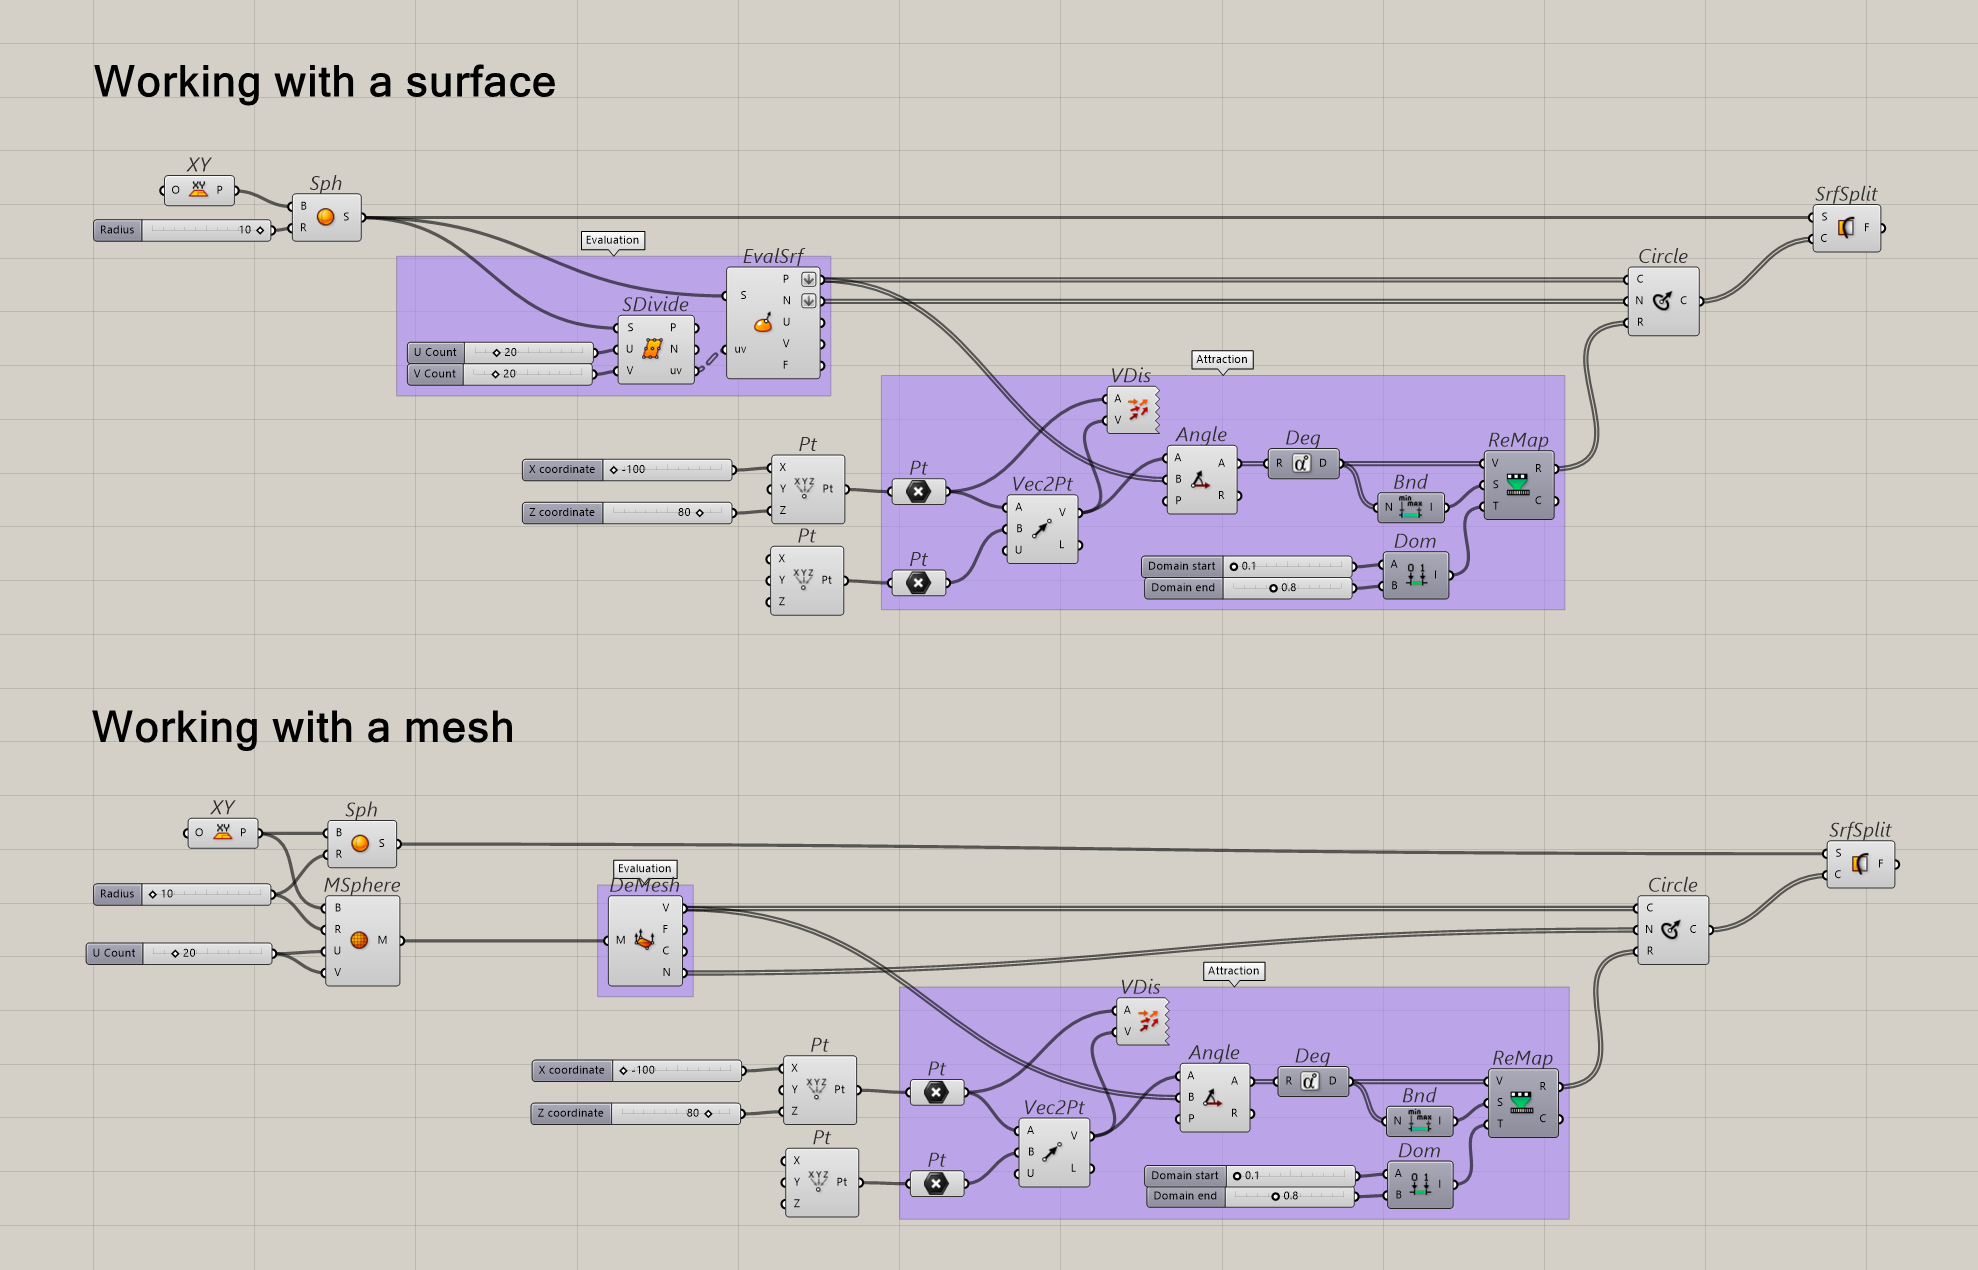
This manipulation can be approached in two ways : either by working with a surface or with a mesh. It is important to develop these two ways because most of the options that we will have in the next steps can use these two options. However, the process remains the same in both cases:
- Define a distribution of points within the surface
- Evaluate/deconstruct the surface in order to remove its properties
- Define a point of attraction
- Determine the domain based on the distance between the points distributed on the surface and the point of attraction
- Generate circles centred on the points distributed on the surface, directed by the previously defined normal and sized according to the established domain
- Gather the circles and the surface into a single split unit

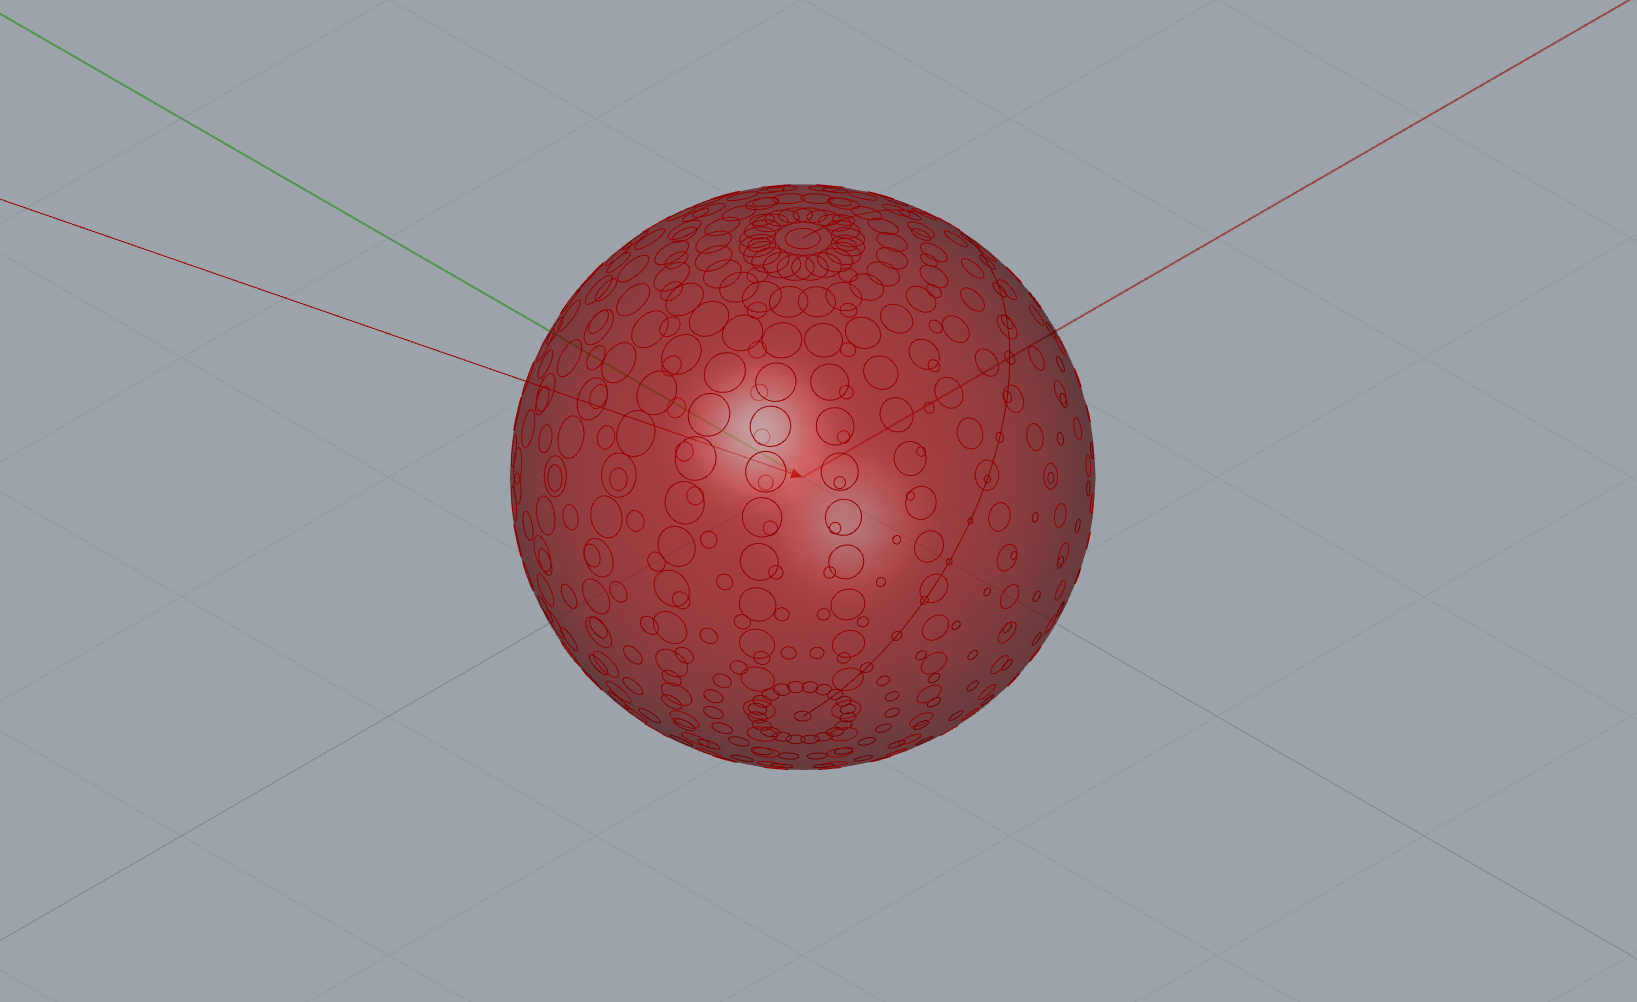
Step 2 : Perforations related to an attractor vector on a sphere surface
Now that the foundations are laid, we can apply the process to a spherical surface. In order to keep the concept based on light reflection as realistic as possible, we will also implement an attraction vector rather than a simple point of attraction.
The process remains the same as before. However, using a vector changes the rule of attraction a bit. The domain must be varied according to the difference in angles between the distributed points and the vector.
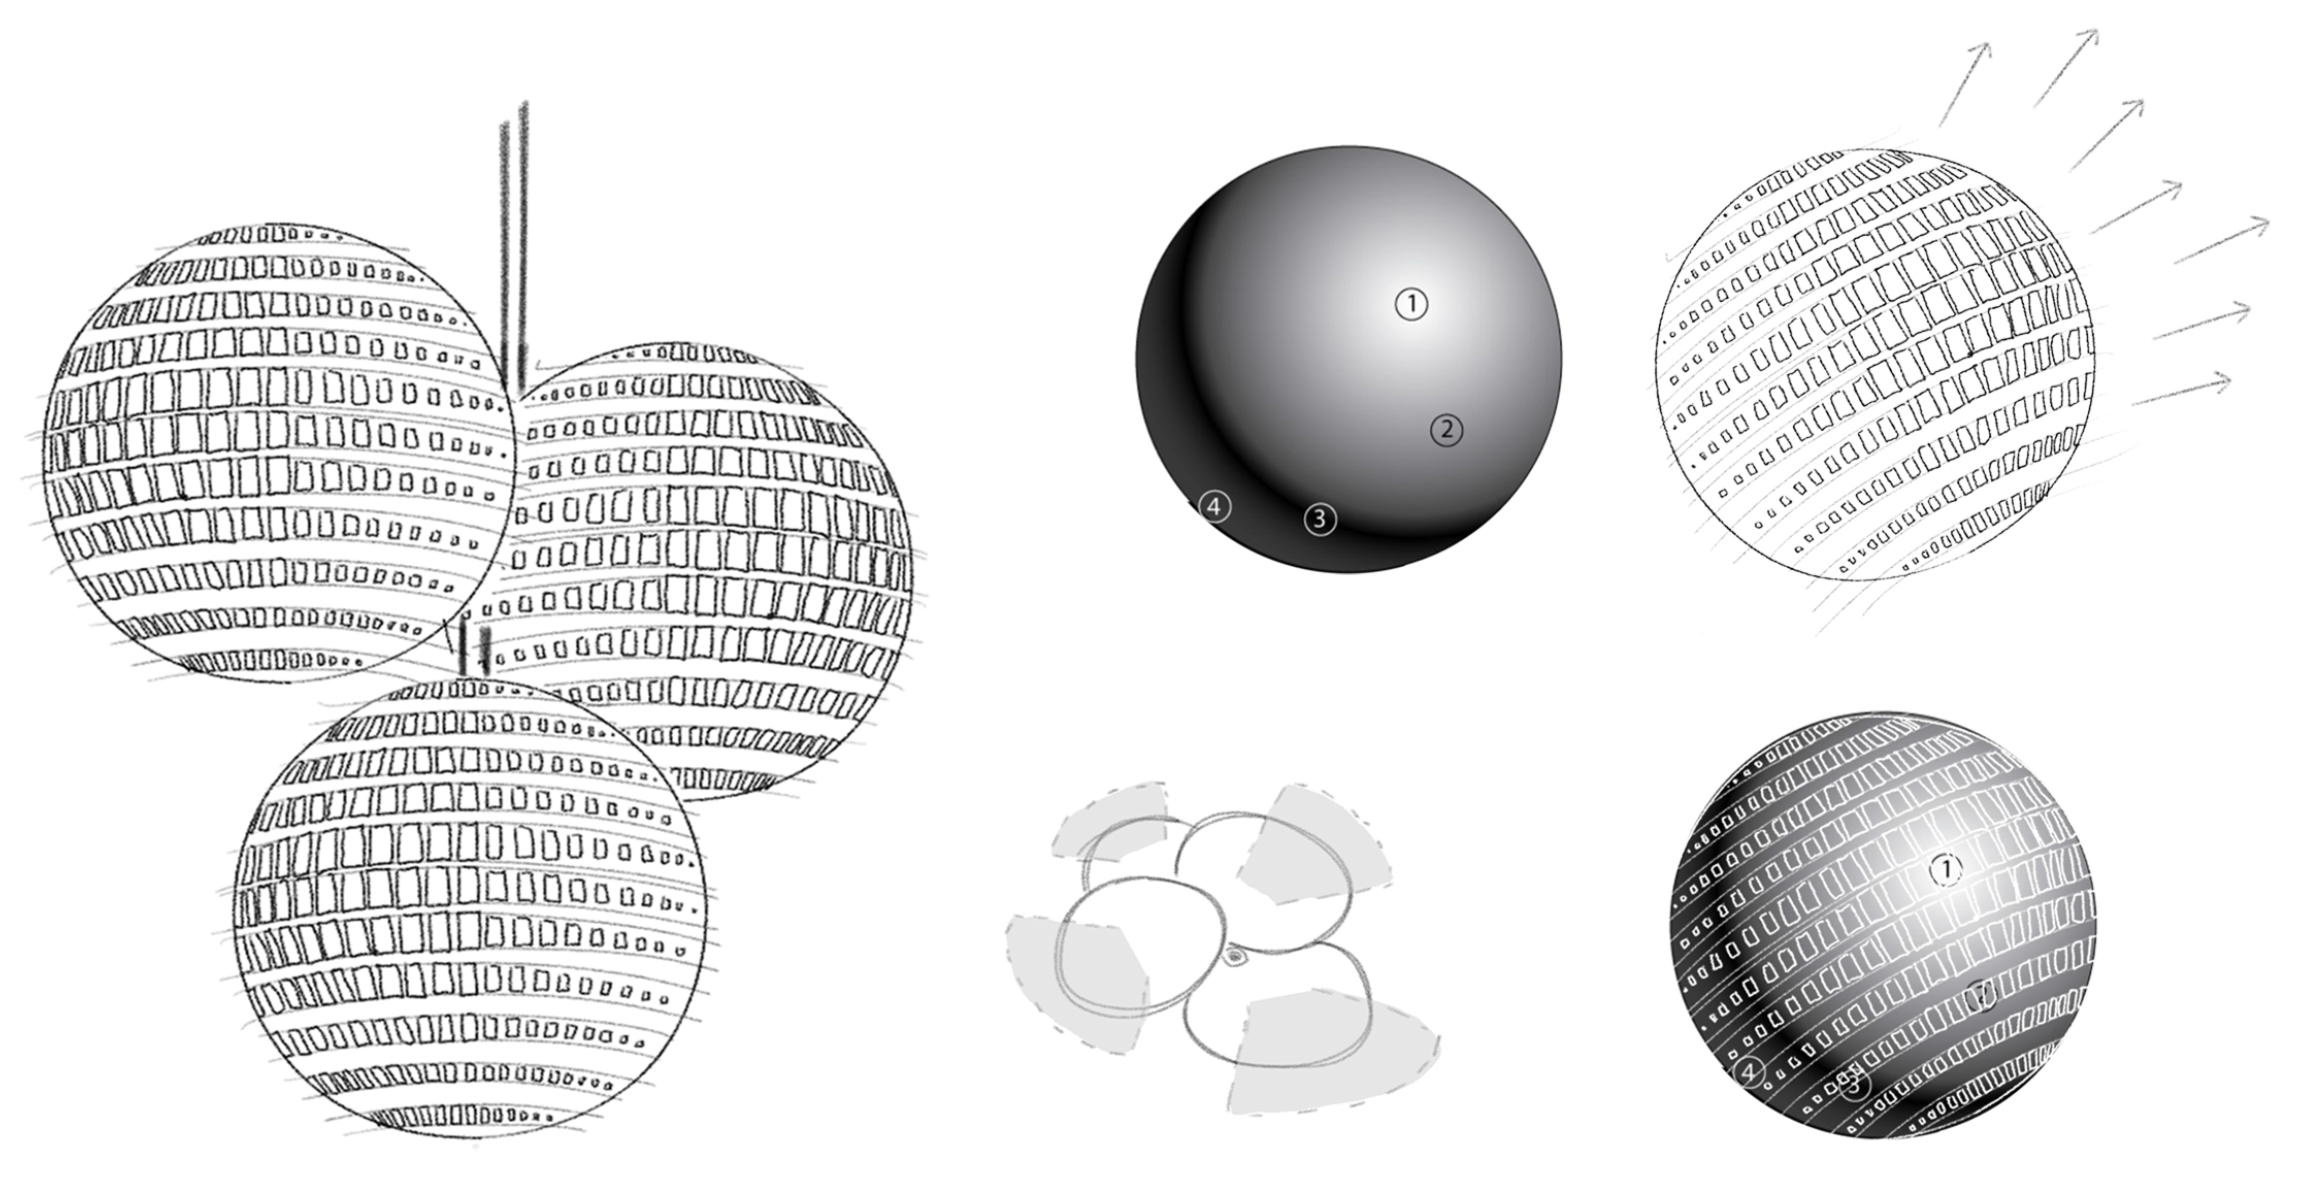
Step 3 : The different types of sphere and their consequences on this project
As can be seen in the previous step, the result is not very satisfactory because the distribution of points on the spherical surface is not uniform. We therefore see agglomerations of points at the top of the spherical surface. To reach the objective, we will have to move towards another way of creating a sphere.
Here are 3 common options:
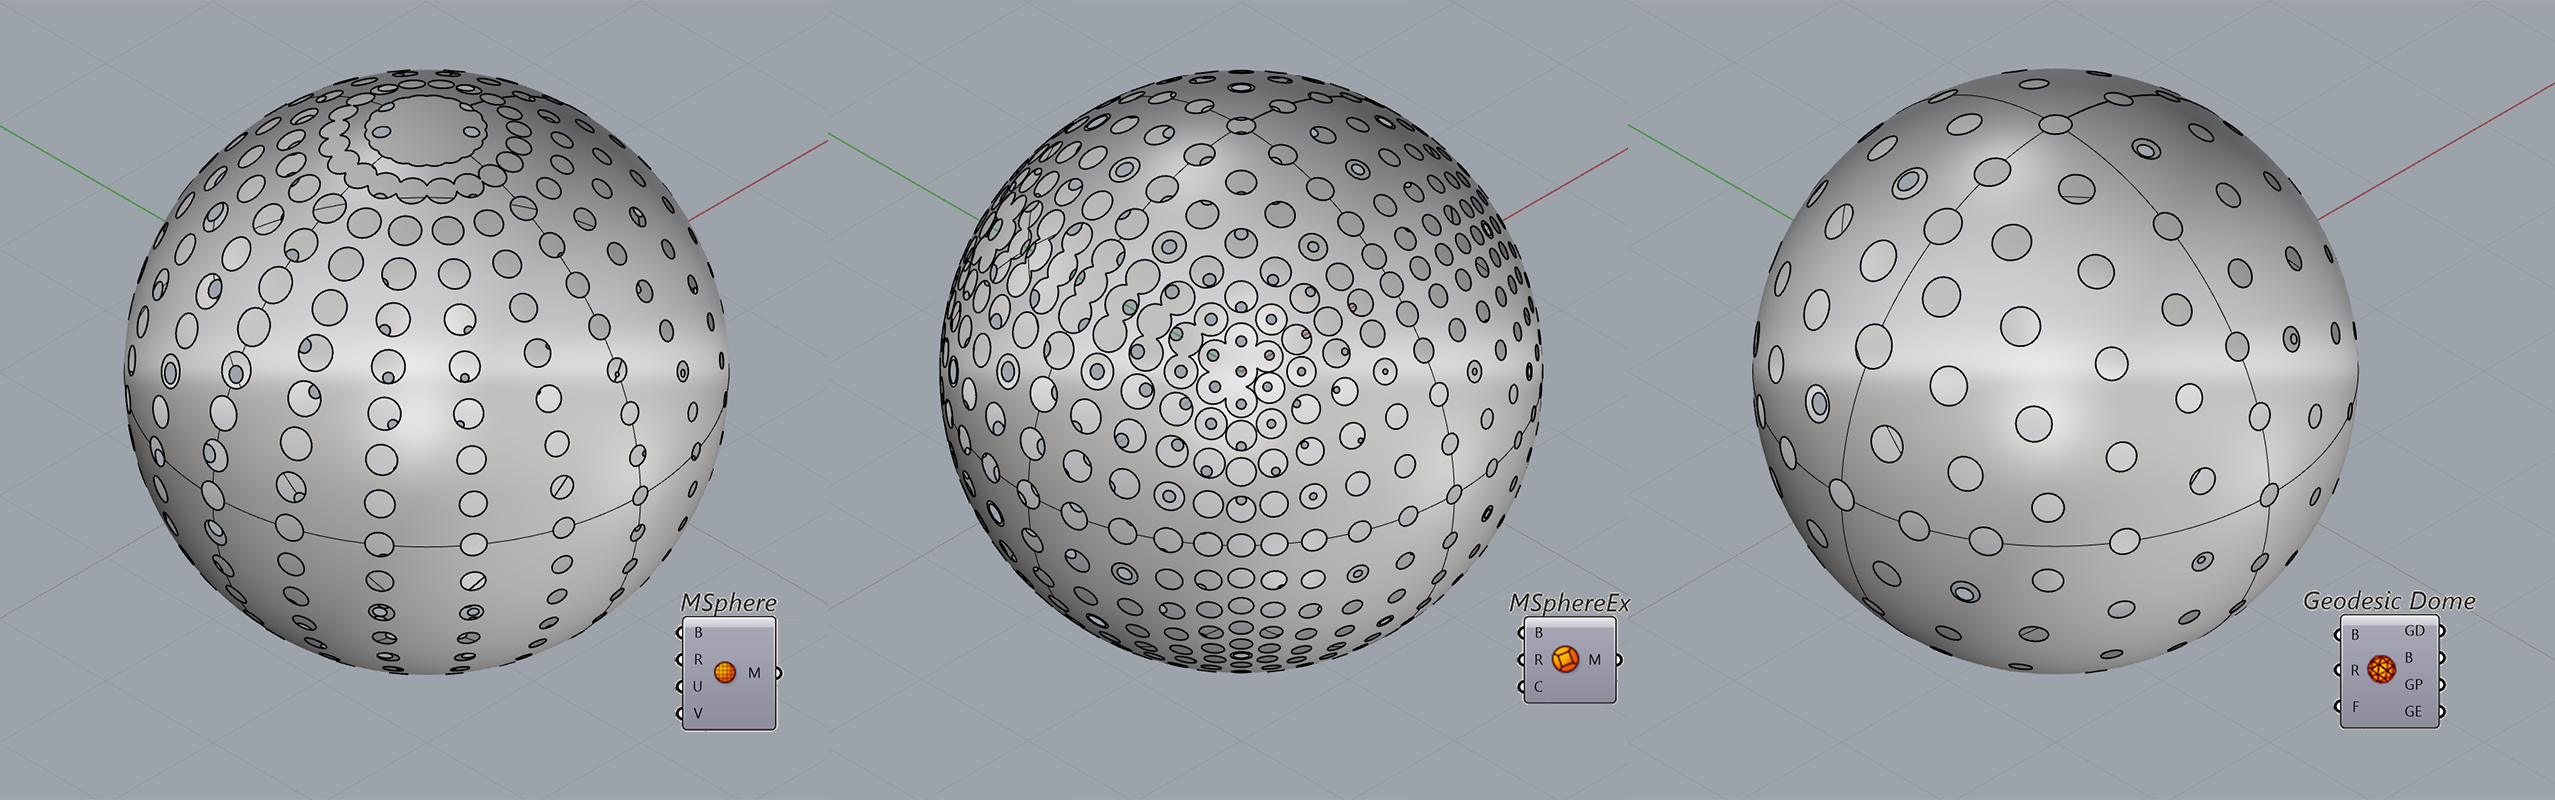
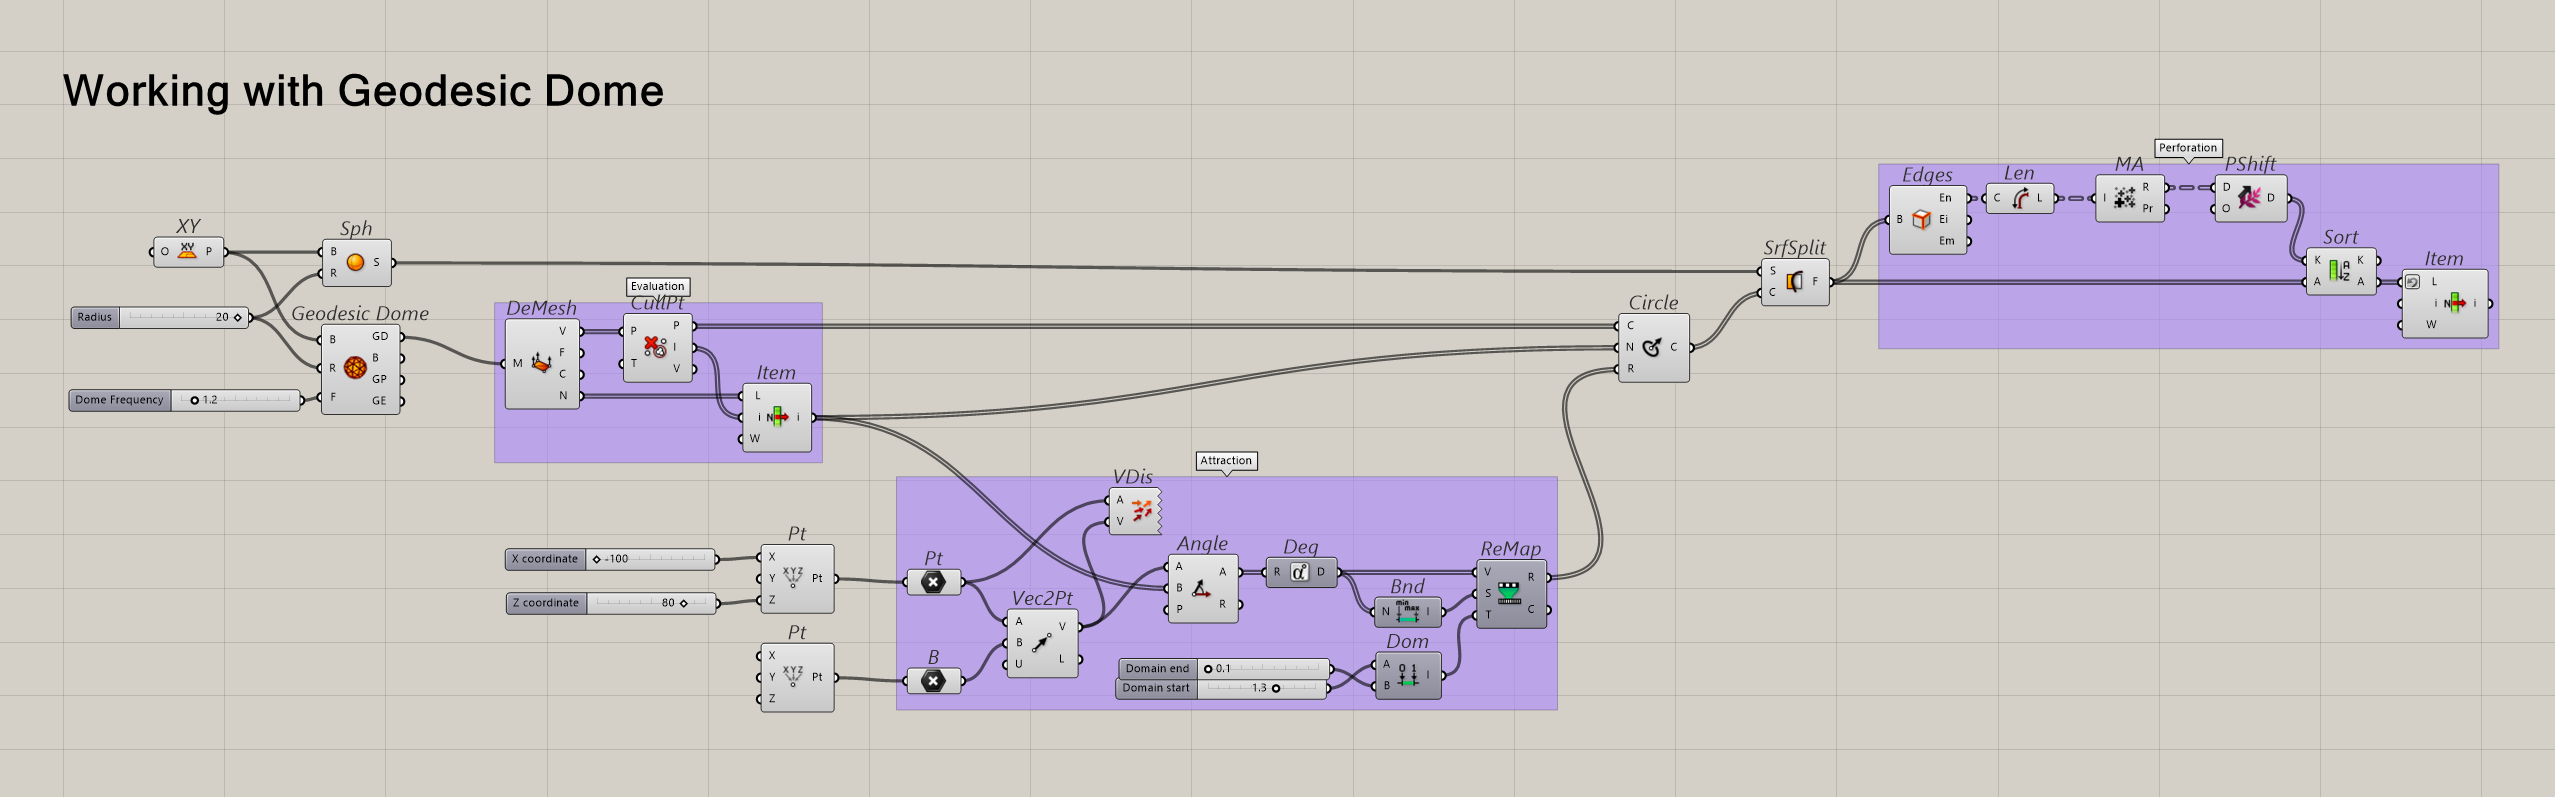
The Geodesic Dome (of Parakeet plugin) is without doubt the one that best meets the criteria of this project. So I will take his script as an example for this step (you can find the other scripts in the gh. file).
When working with the geodesic dome, it is necessary to eliminate the duplicate points that this option can create. An efficient way to do this is to use “CullPt”.As we are approaching the end, we can add the perforation procedure to this step in order to see more clearly. This procedure can be quite heavy to perform in some cases. I have therefore opted for a more fractional procedure, but one that allows for a reduction in calculation time. This consists in asking to isolate the naked edges as well as their length. Sort them according to that and keep only the biggest ones by reversing the list item.
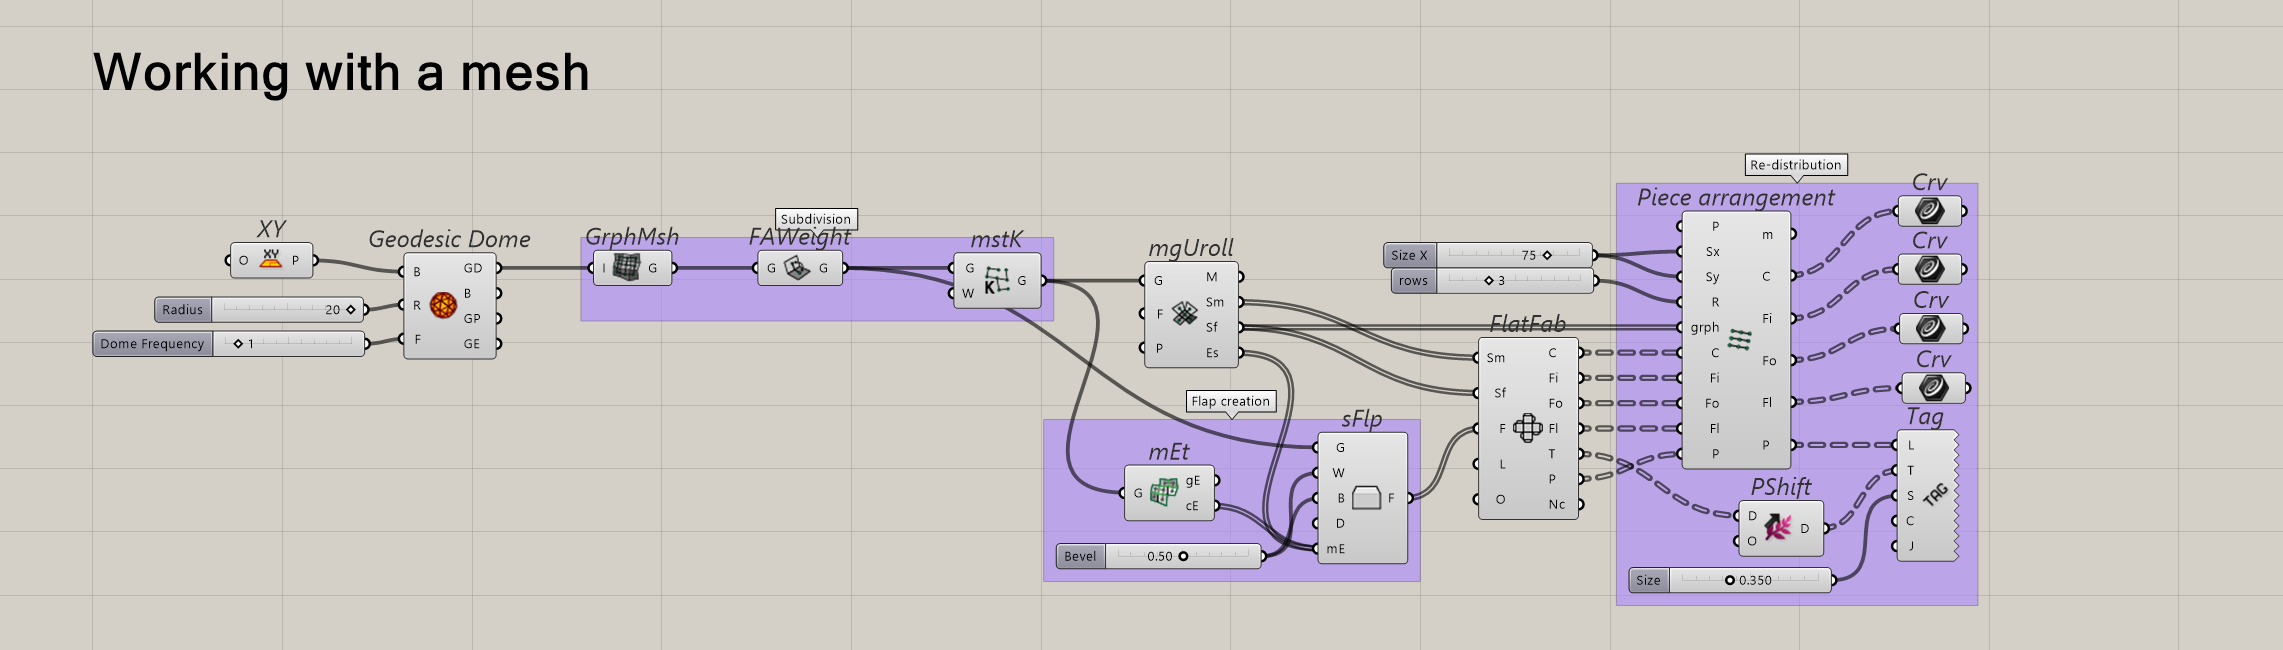
Step 4 : Manufacturing – unrolling a sphere
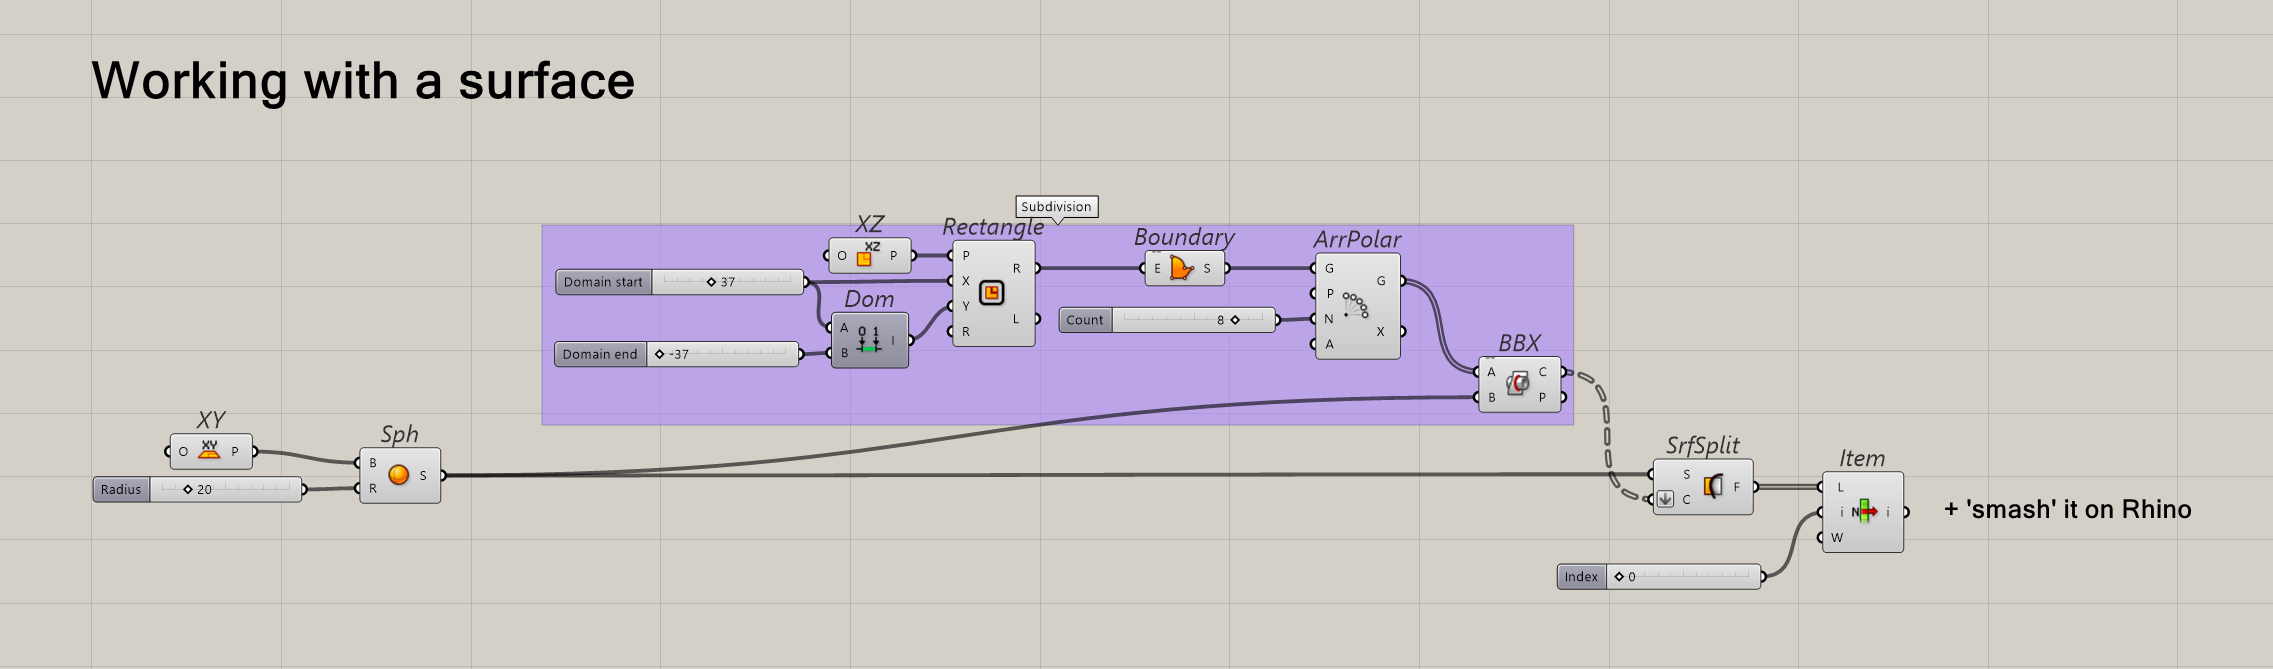
Dealing with a sphere always creates production complexity.We can isolate 2 ways of unrolling a spherical surface in order to produce it.
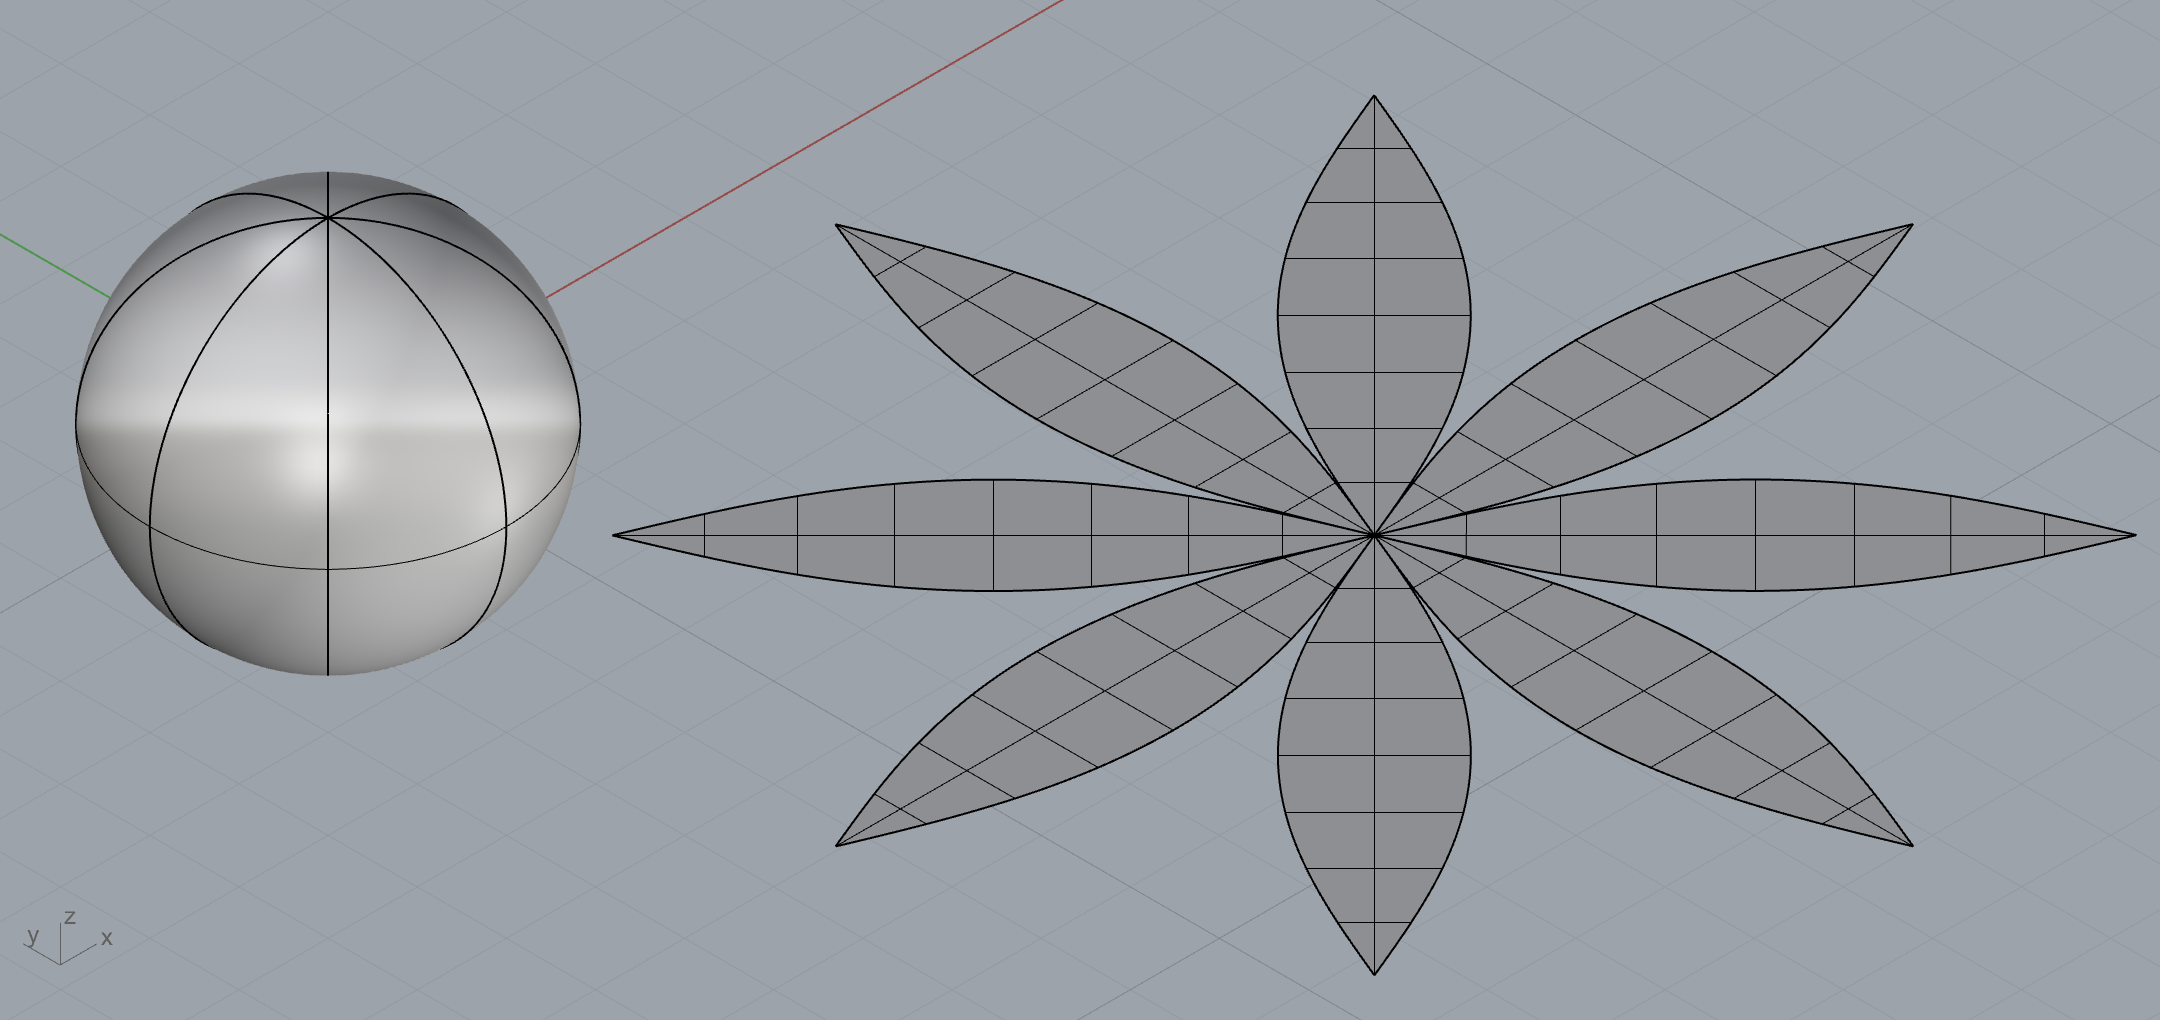
- Option A : try to keep the curved effect of the surface
The idea here is quite rudimentary, we just cut it with vertical planes as we would cut a pie. Then you just have to unroll the slices (Rhino’s “join” and “smash” command being more efficient here than other Grasshopper options). The negative point of this option is that it is not 100% accurate. There is a small percentage of deformation added to the equation so it is interesting to use it for soft and stretchy materials.
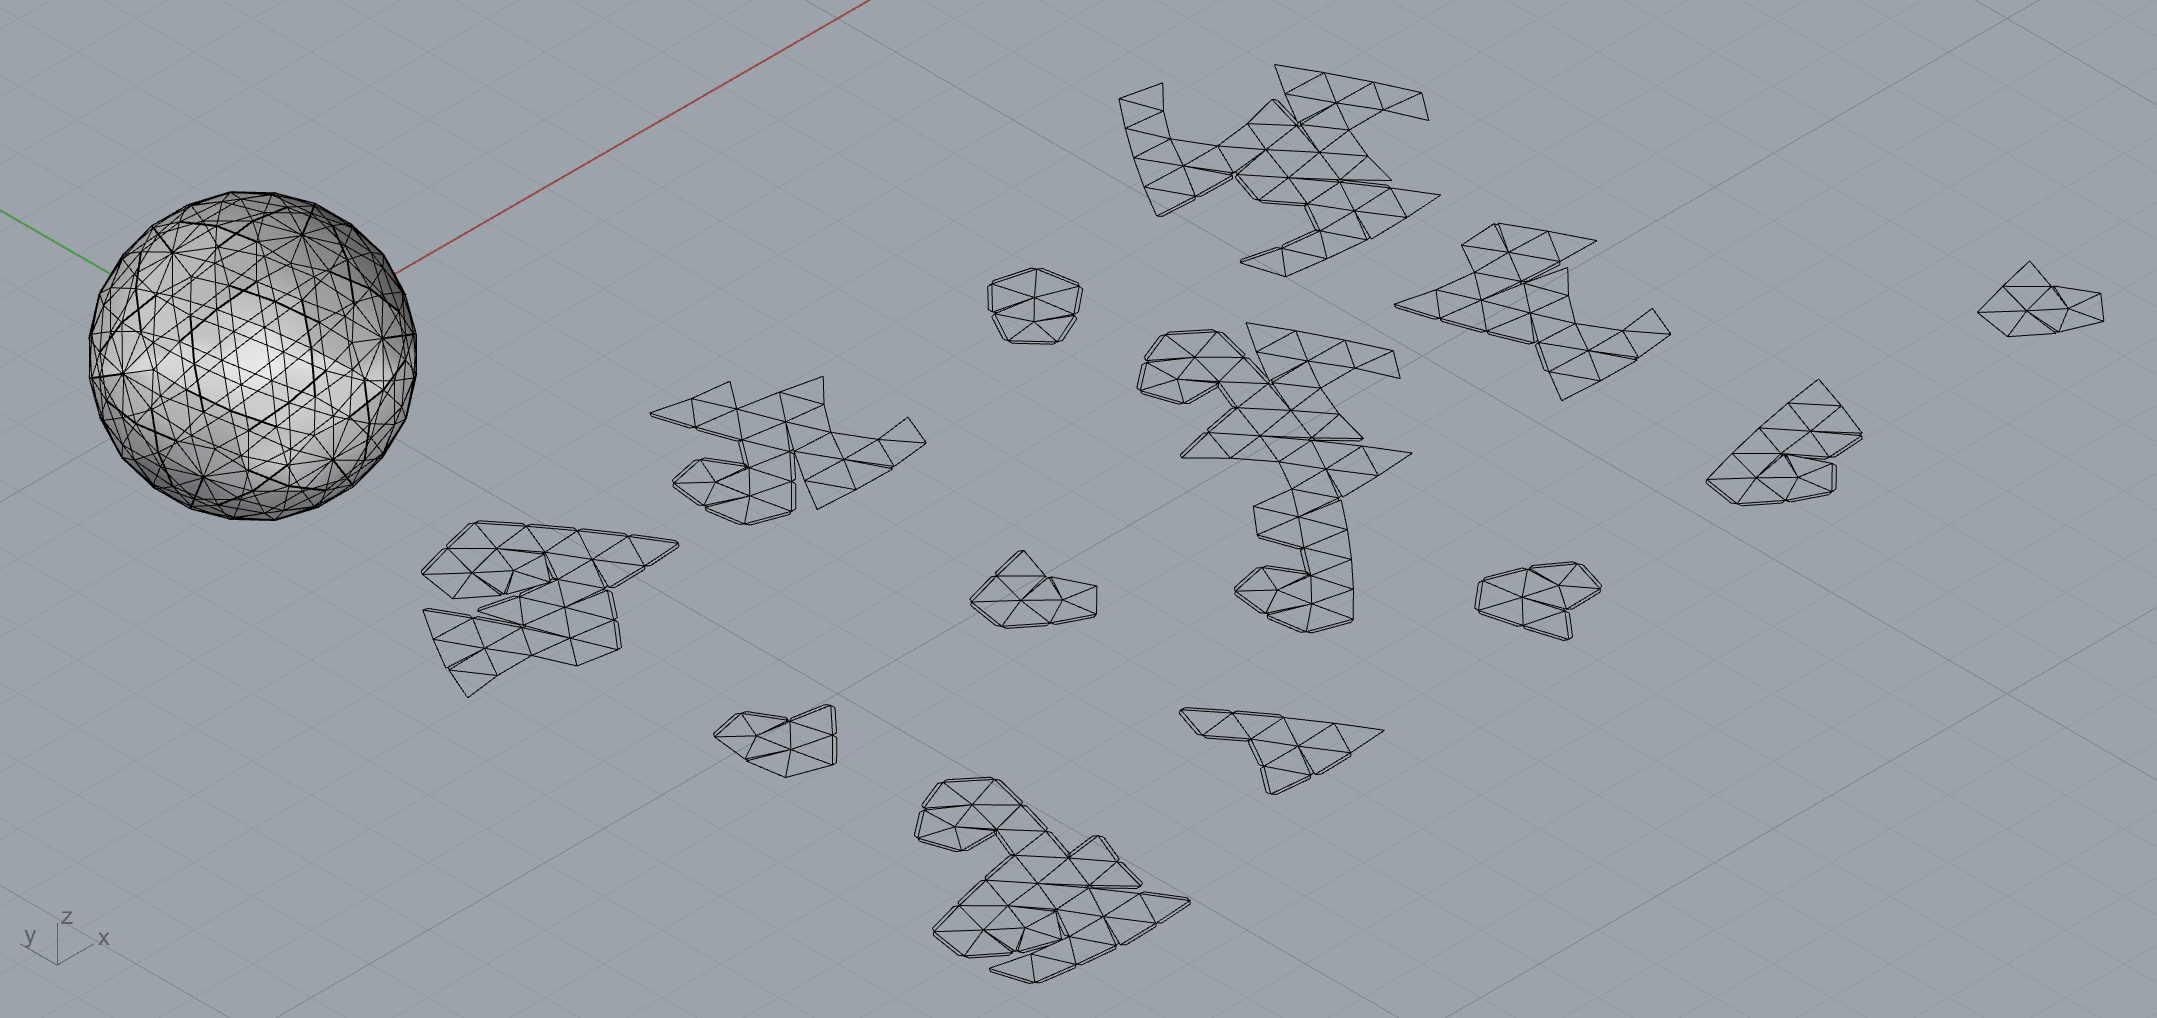
- Option B : Transform the sphere into a multitude of flat surfaces (Geodesic dome)
For this, the Ivy plugin is by far the best option. It first allows you to subdivide your geodesic dome into a graph that takes your current corners as folding corners to optimise the final cut. It then integrates the creation of the flaps to facilitate the assembly of the project. Finally, it proposes to distribute the flattened pieces so that there is no overlap between them.
This seems to be the most optimal option, but it only works on flat surfaces without curves. Indeed, curves of the perforations complicate the mesh and make the optimisation proposed by Ivy impossible. So I went for option A for my project.
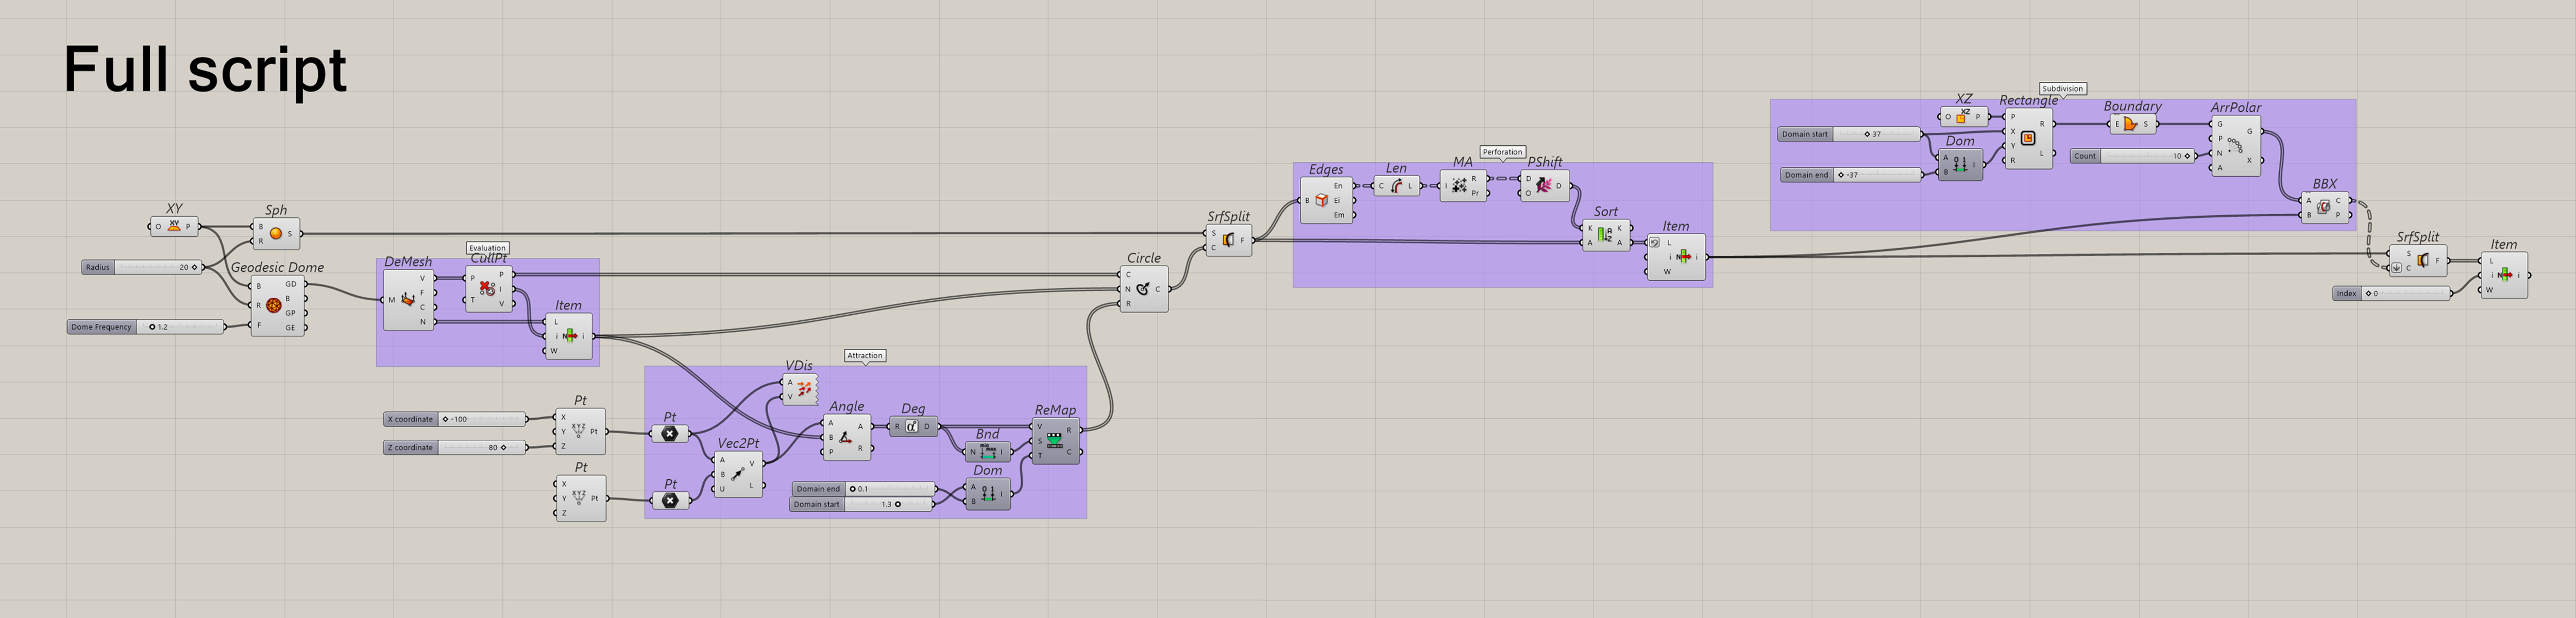
Final result :
Here is the final script and and render result. For the sake of realism, I added (for the render) a second sphere inside the first one to avoid the direct glare that the lamp could create without this layer.
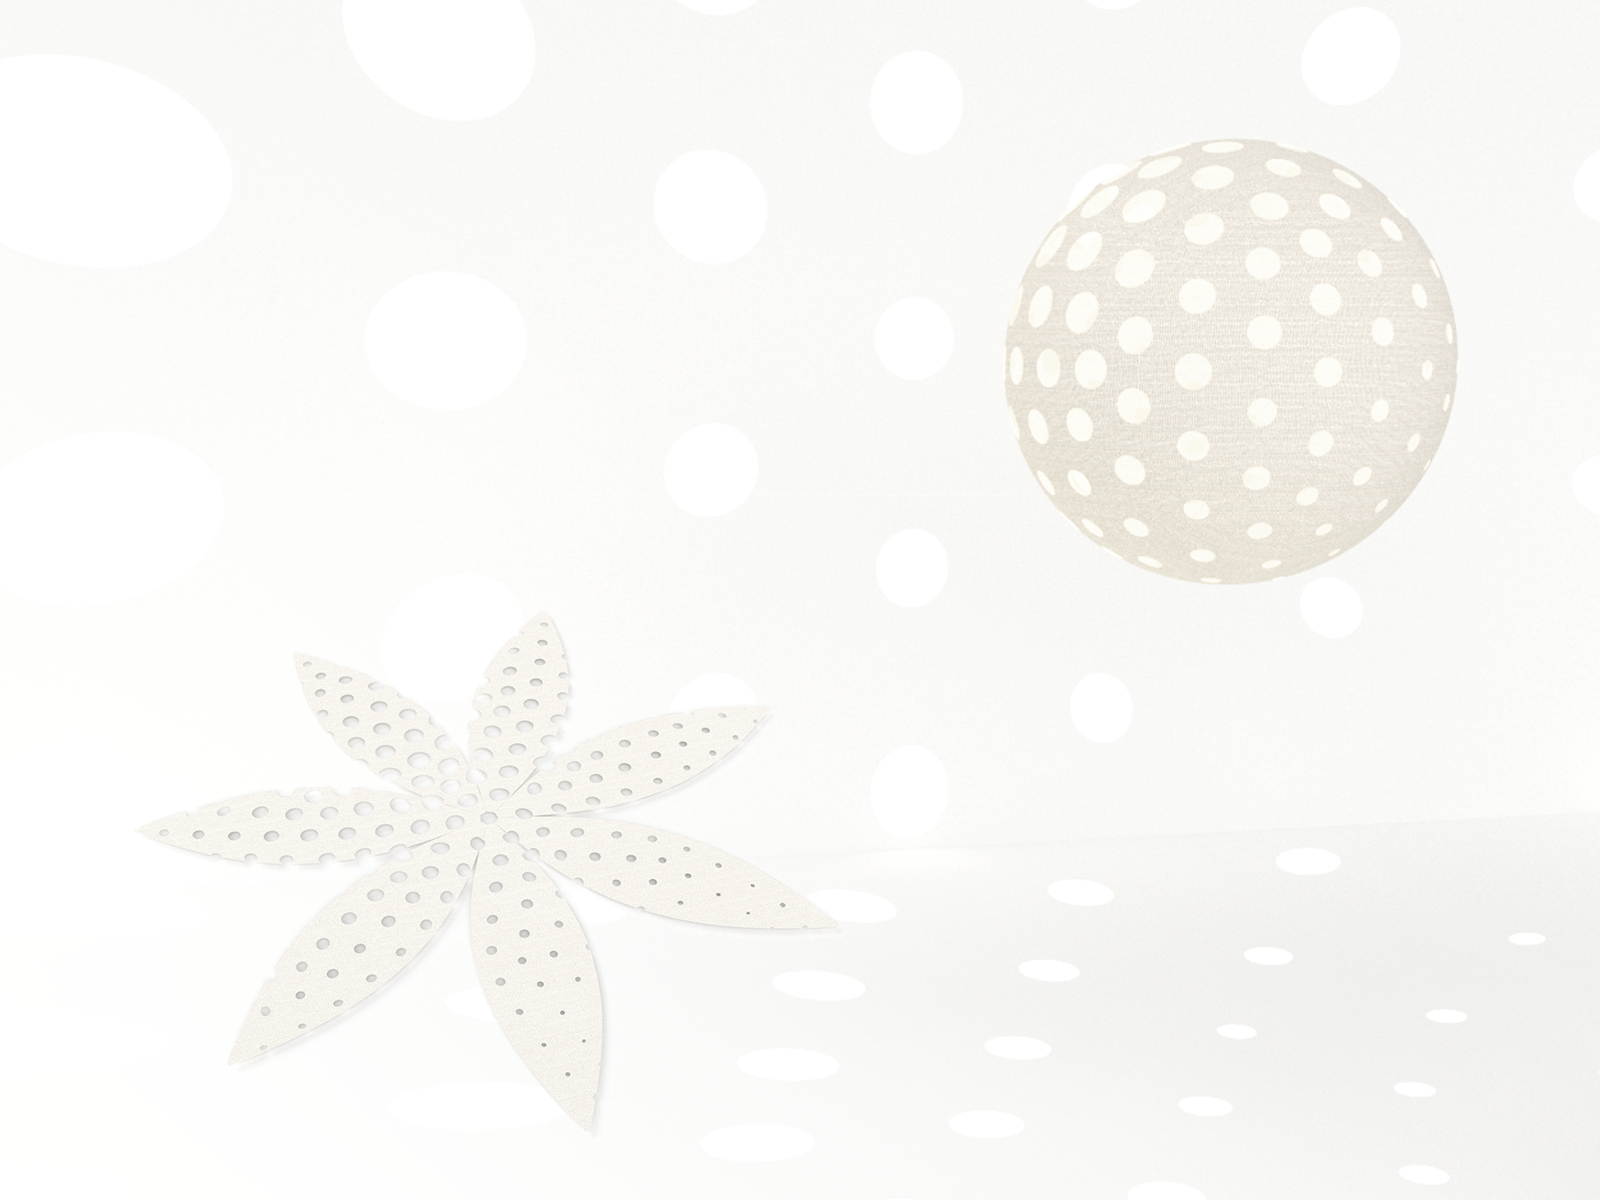
Variations :
Grasshopper file :
Lamp design based on the potential reflection of light
Rhino file :
Lamp design based on the potential reflection of light