Introduction
This exercise has been developed in the context of the Experimental Studio conducted by Katerina Nováková and Jiří Vele. The project is about a 3D-printed house built of concrete. The students have been asked to design a wall which can be useful for the inhabitants.
This tutorial will present a wall with variations based on Voronoï shape. The idea is to use the created ‘‘holes’’ to welcome climbing plants. Plant pots and steel strings will be added on the concrete to offer a vertical garden to the inhabitants.
Grasshopper Script
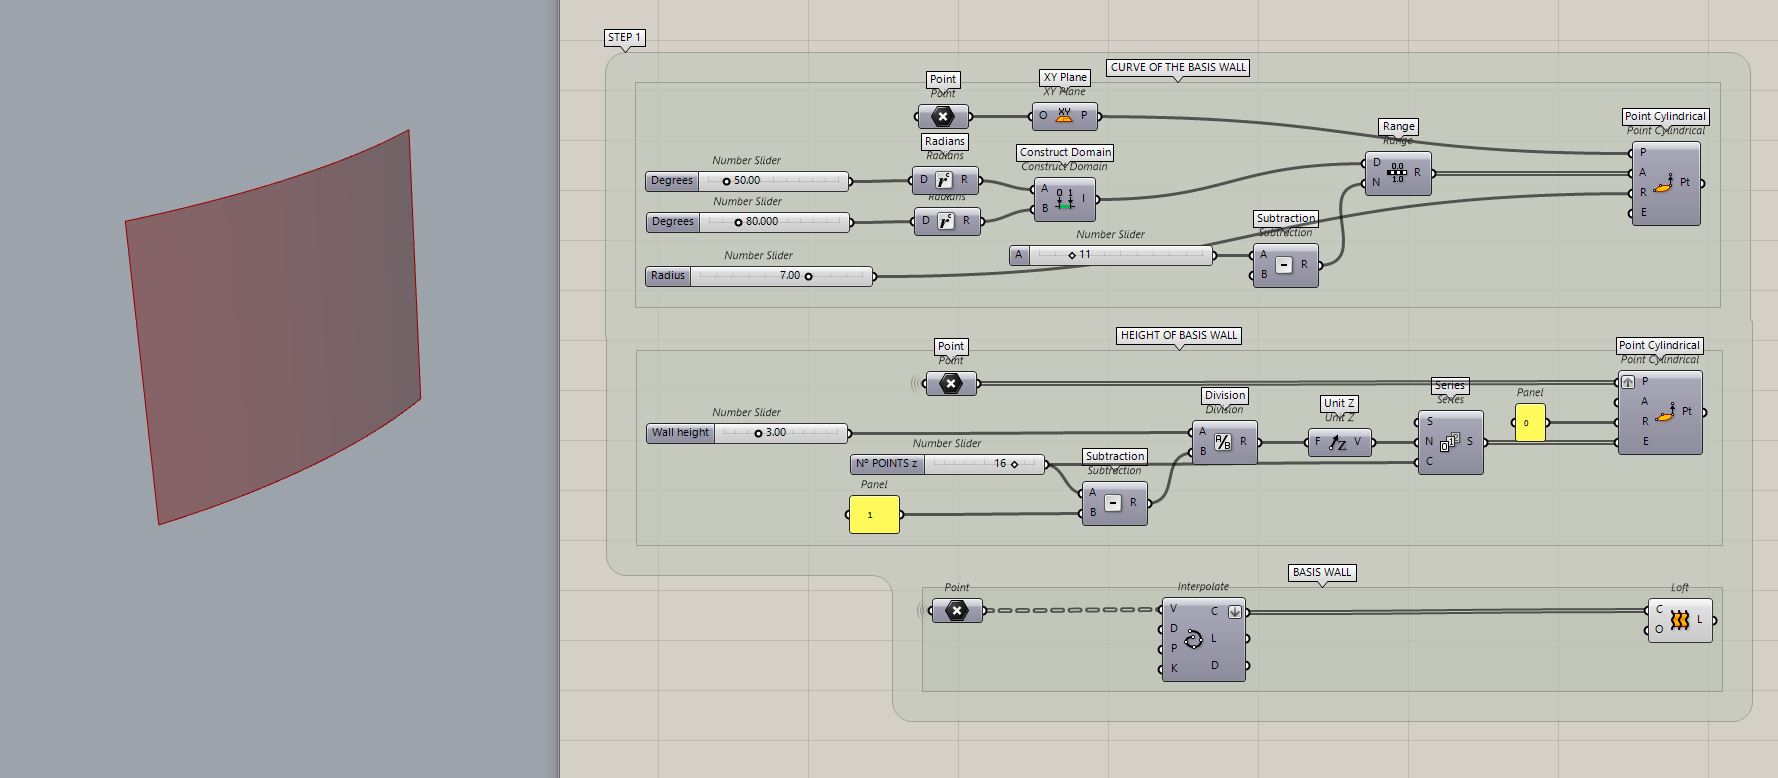
1. Draw the curve of the wall out of points with the correct informations (radius and length) according to the project.
2. Create the height of the wall according to the project (there 3 meters for example). Take the points from the Step 1 and use Series and Point Cylindrical to expand the points in height.
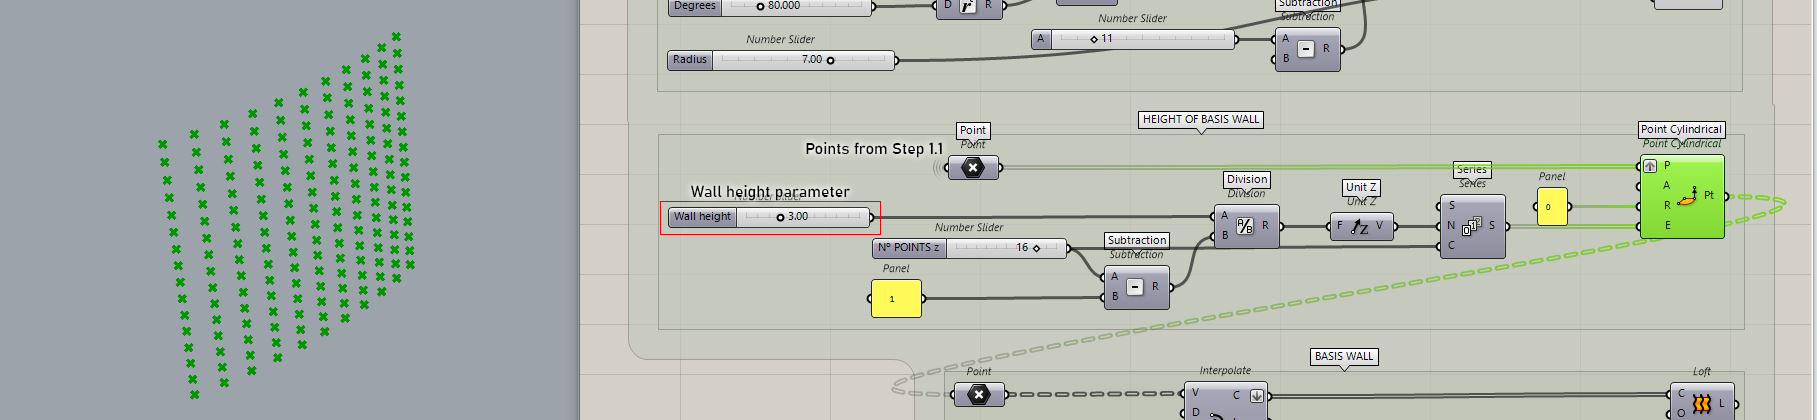
3. From the points, create curves and then Loft to have a surface.
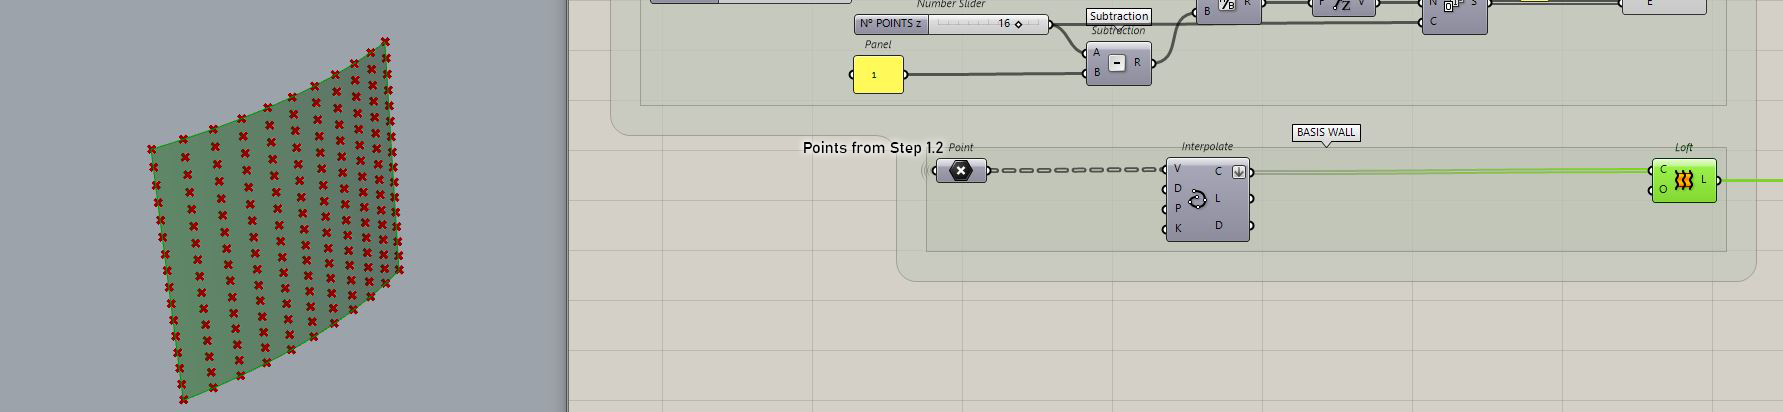
Step 1 result :
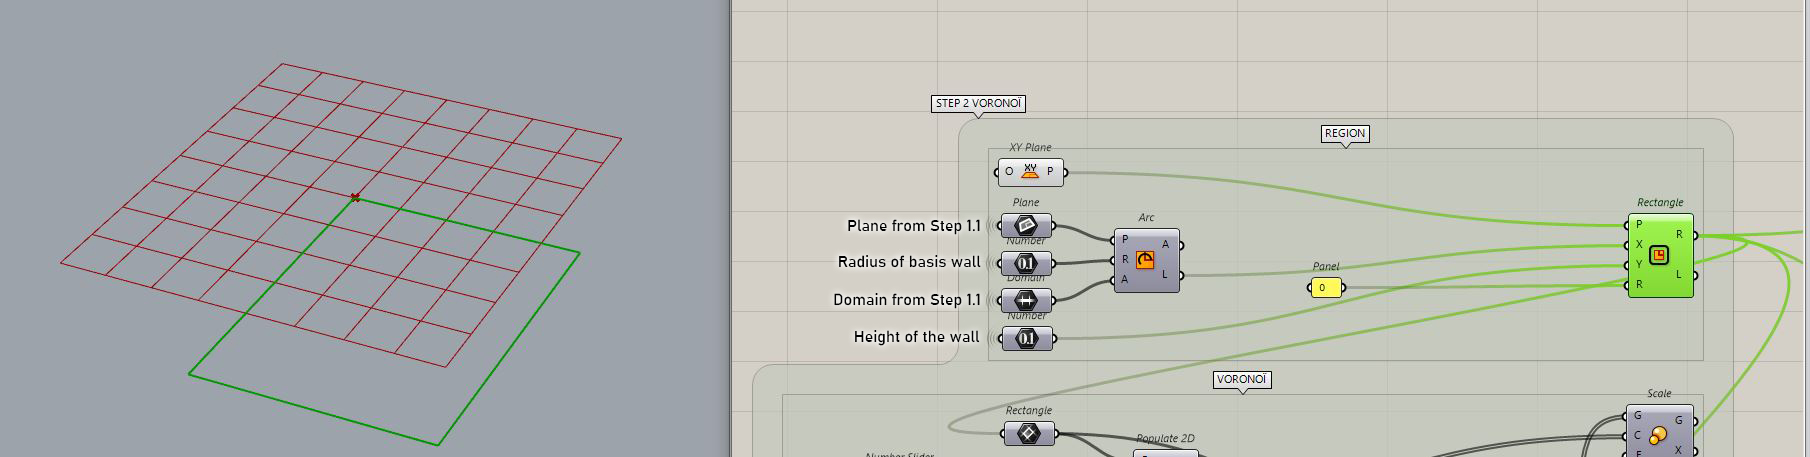
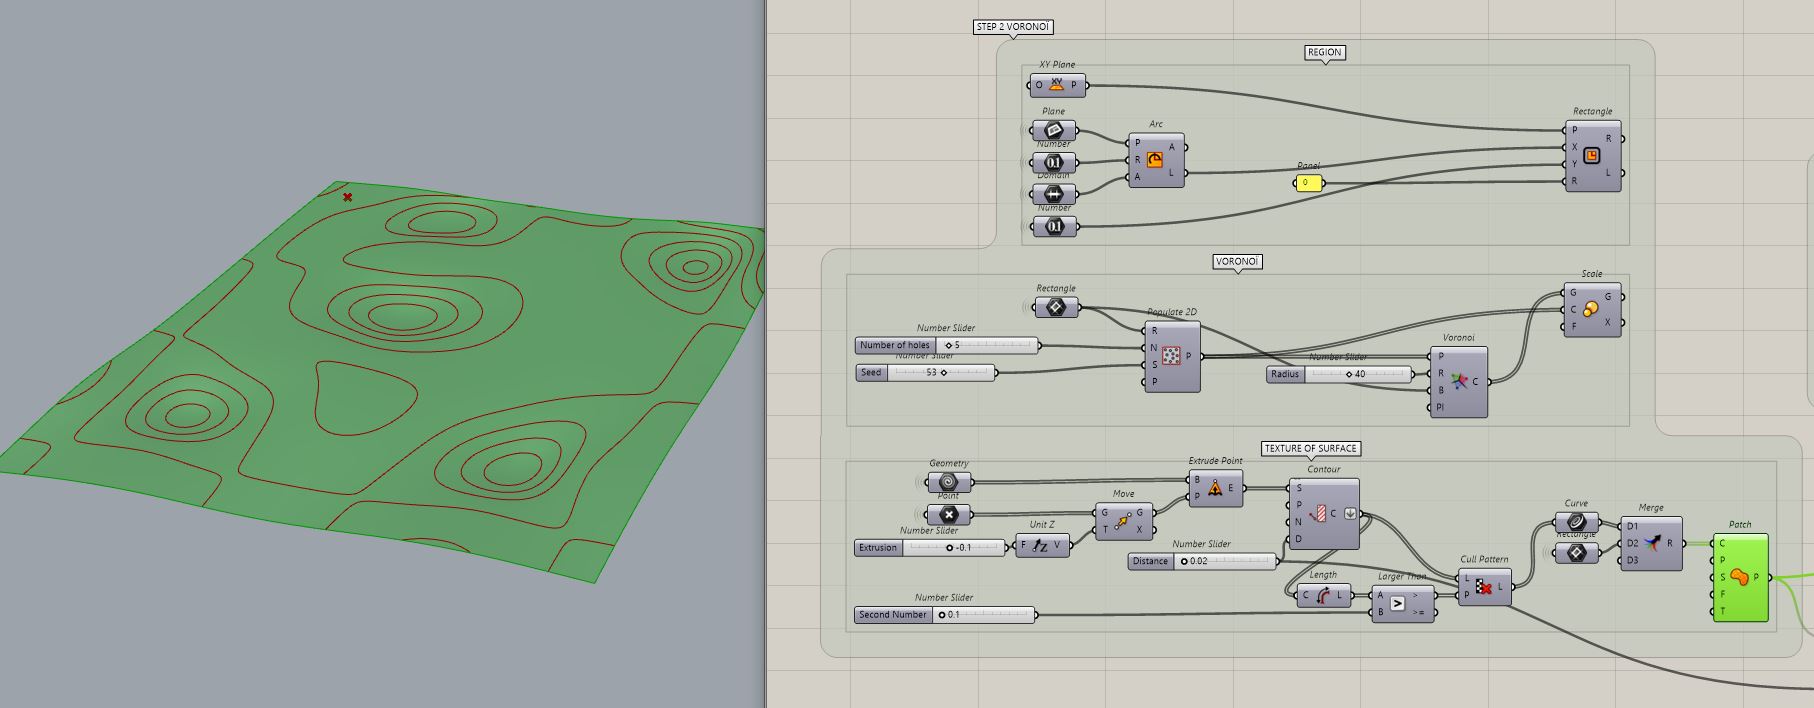
Step 2 : Create the pattern. For this project we want a wall with some curvy holes placed randomly on the surface. We are going to use Voronoï for this.
1. We have to define the region where the pattern will be developed. In order to do that, we use the length of an arc with the parameters from the Step 1.1 as the X side of the rectangle. And we use the height parameter from Step 1.2 as the Y side.
2. We make the Voronoï out of random points then scale it to have the independant holes. The parameters of Populate 2D allow to change the number of holes in the wall by the number of points.

3. Create the texture of the surface with extruding the geometry. Contour and Cull Pattern allow to control the height and to smooth the bottom of the holes. Then Patch creates the surface.

Step 2 result :
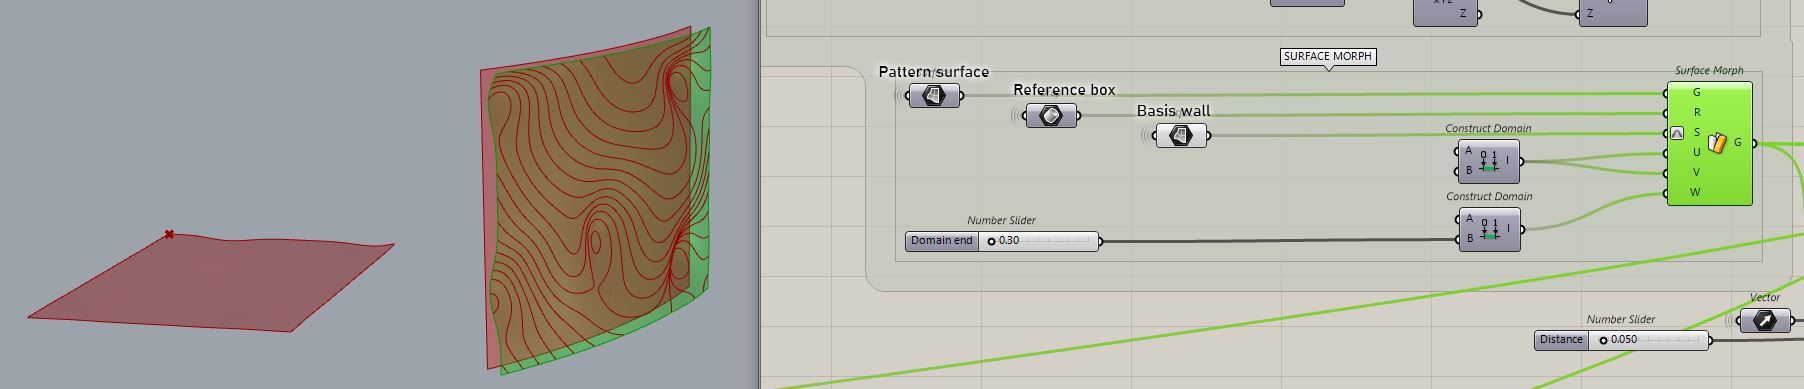
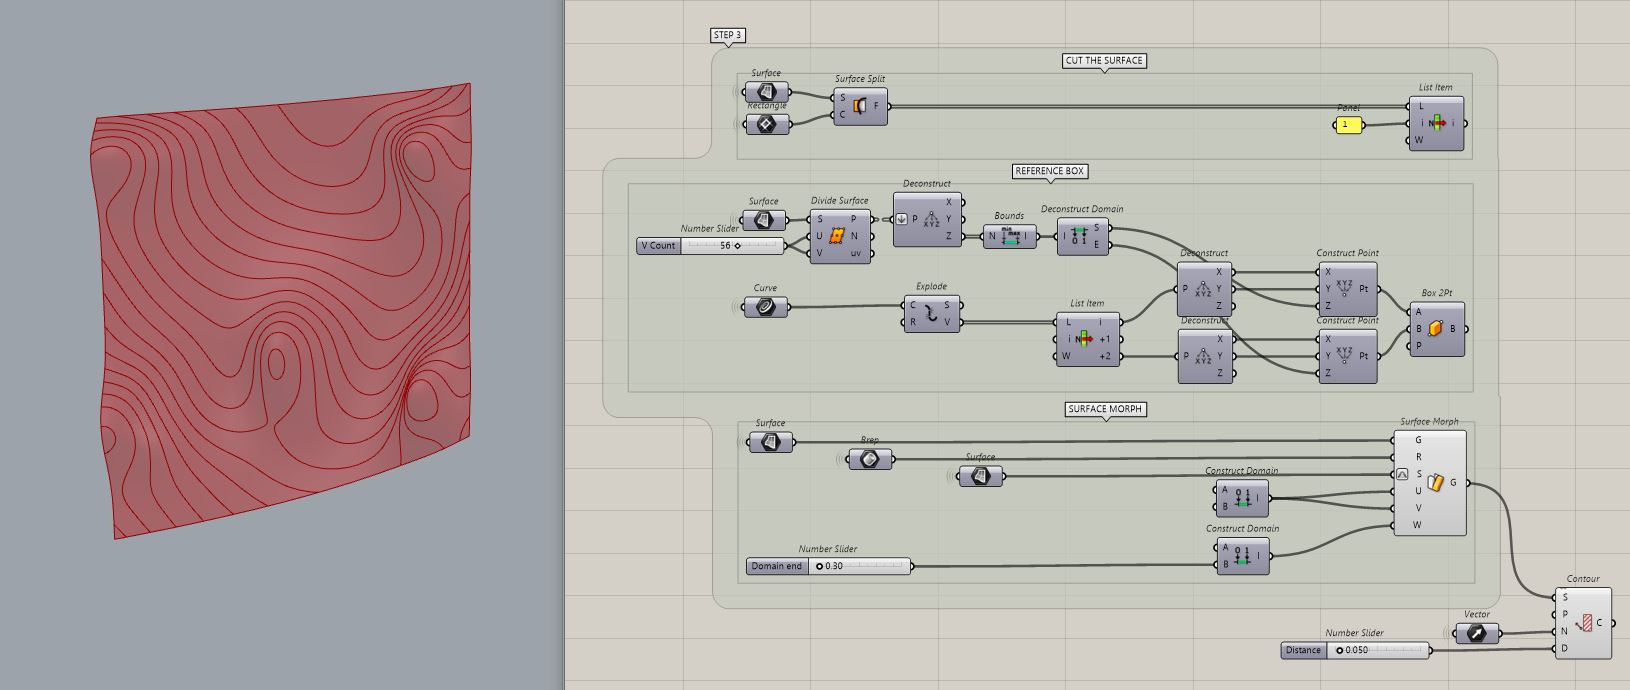
Step 3 : Associate the pattern to the wall. We are going to use the component Surface Morph in order to have the surface of the wall. We are going to put the pattern from Step 2 on the basis wall of Step 1.
1. We have to ‘‘clean’’ the surface we want to use as a pattern. It is going to be the G(eometry) input of Surface Morph. We use the region of Step 2.1 to redefine the limits of the surface.

2. We create a box from the volume in which the surface is developing. This box will serve as a R(eference) for Surface Morph to know in which limits it is working.

3. With the pattern, the reference box and the surface from Step 1, the component Surface Morph can work. The Domain parameters serve to increase or decrease the depth of the pattern.
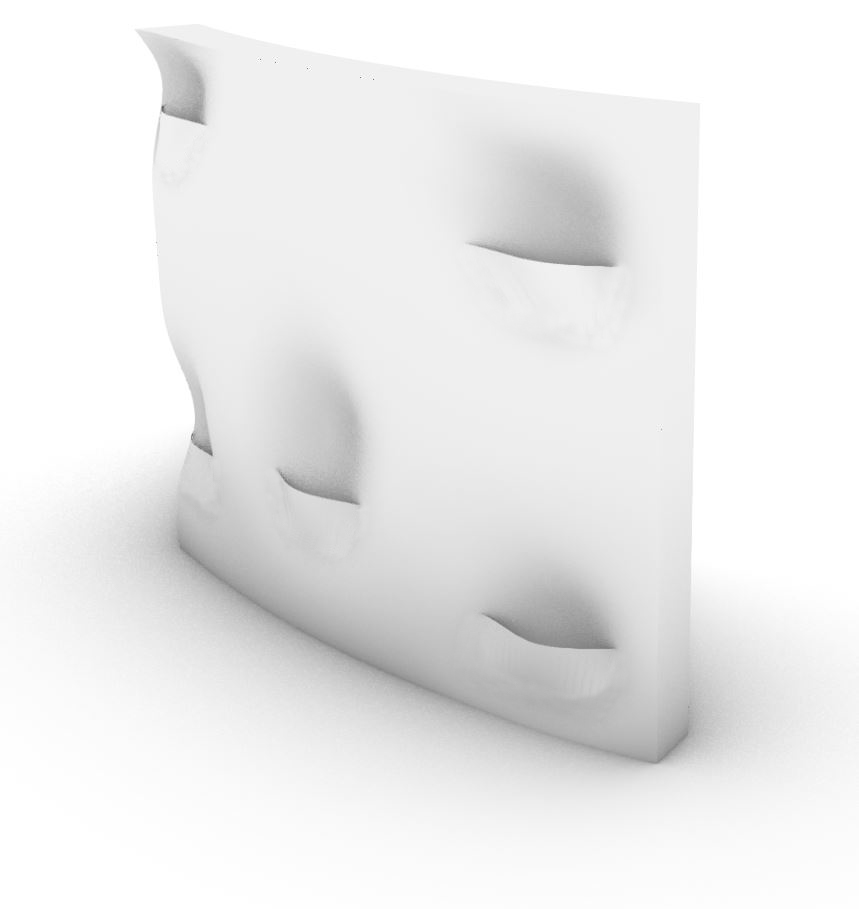
Step 3 result :
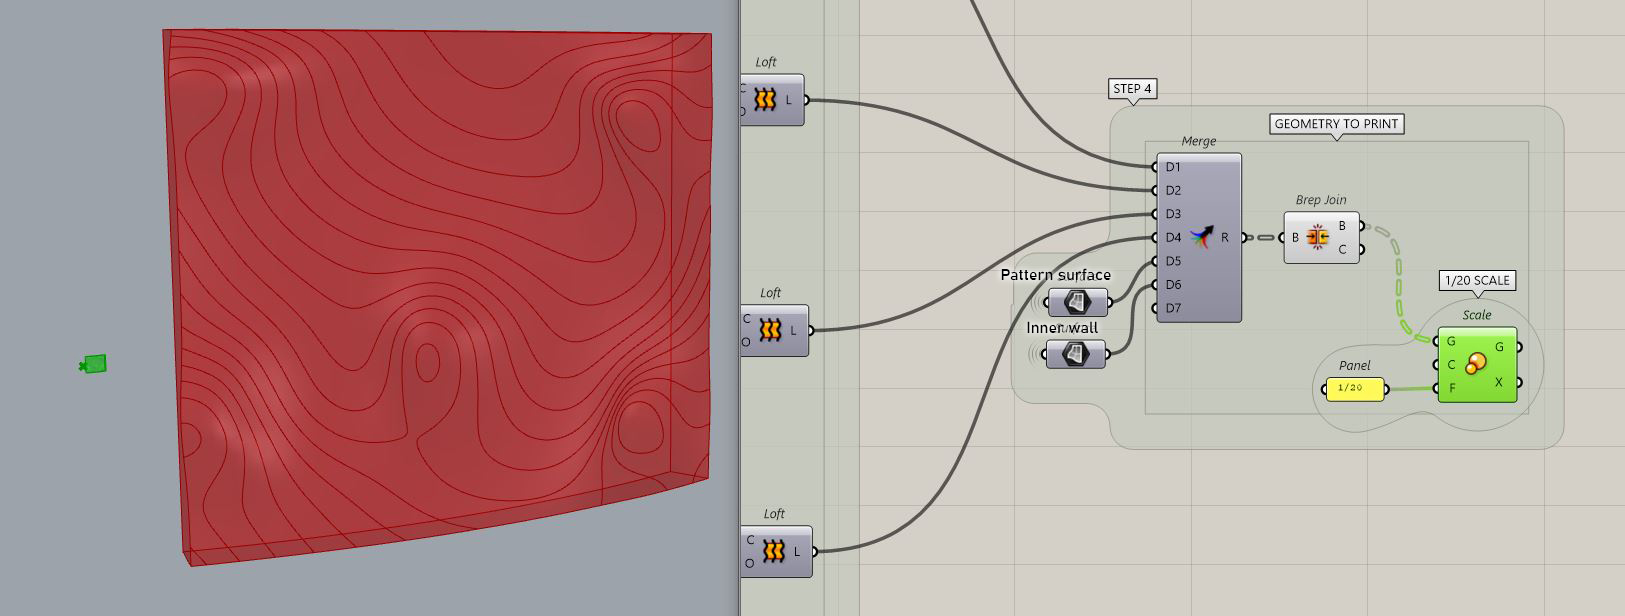
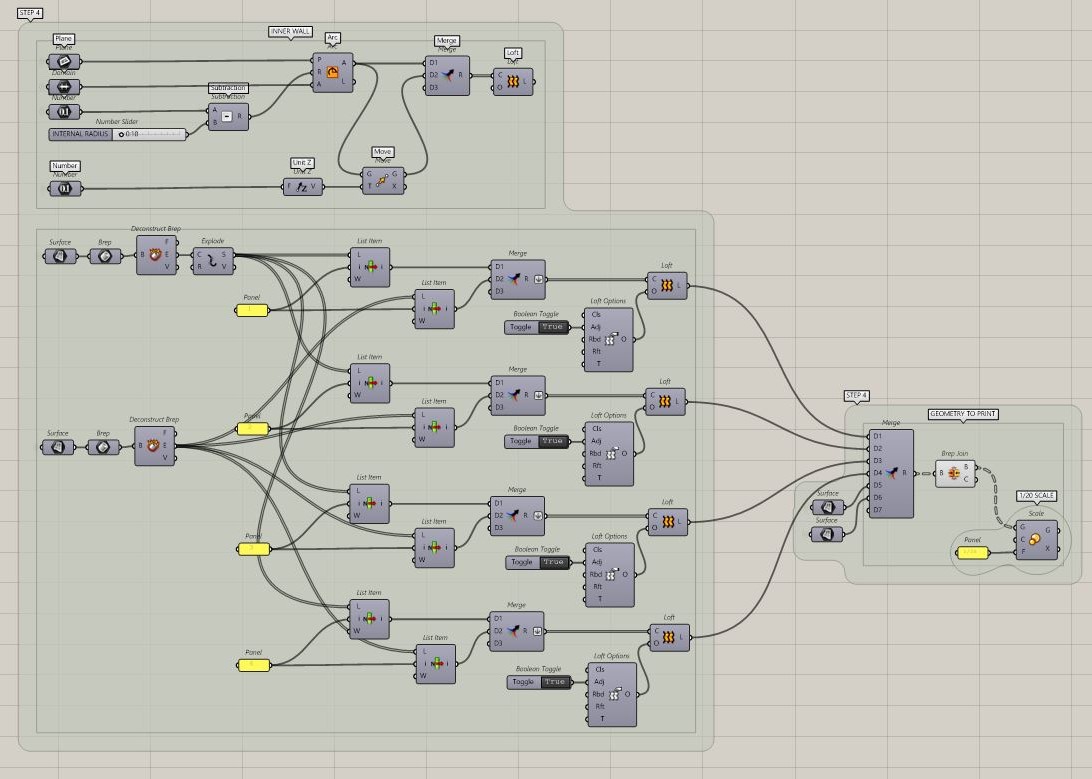
Step 4 : Build the wall in order to print some samples in different scales. We have to give a thickness to the wall.
1. We have to build the inner wall. In order to do that, we take the Arc from the Step 1 and modify its Radius value. Then we apply the same height parameter and create the surface.
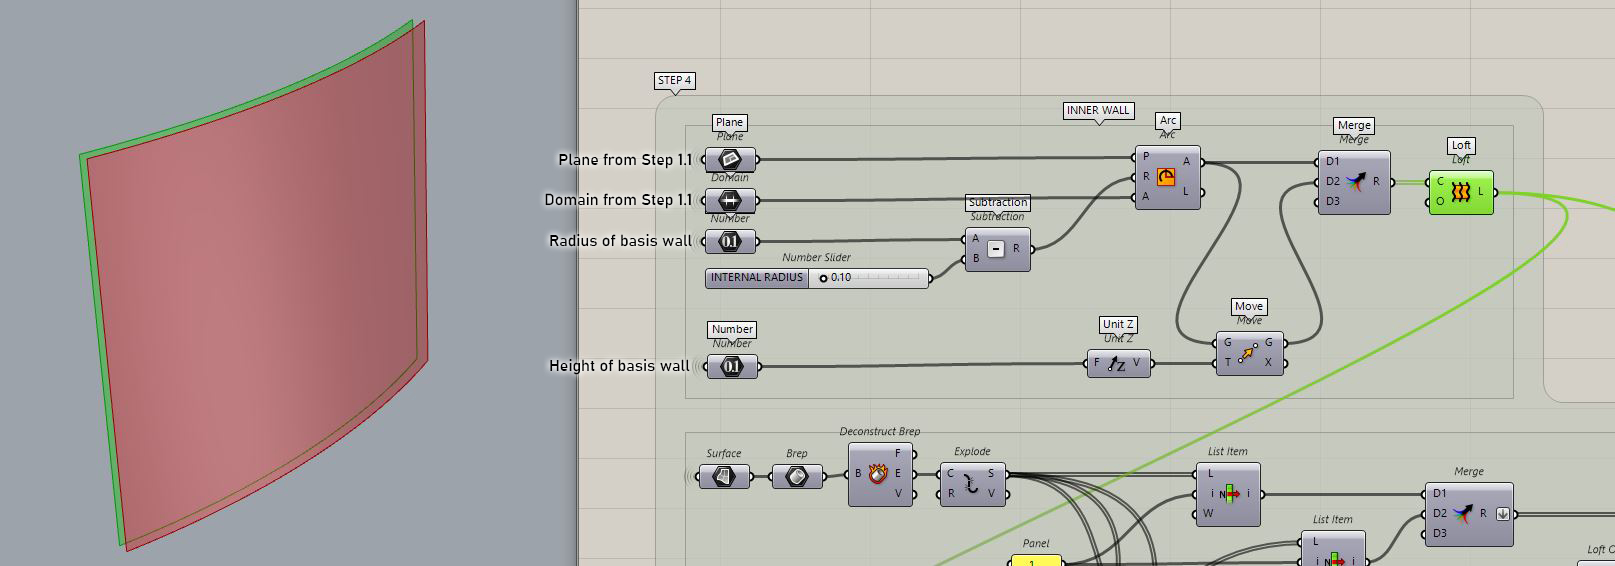
2. To have the close wall, we isolate the edges of each surface (Pattern Surface and Inner Surface) and Loft them two by two.
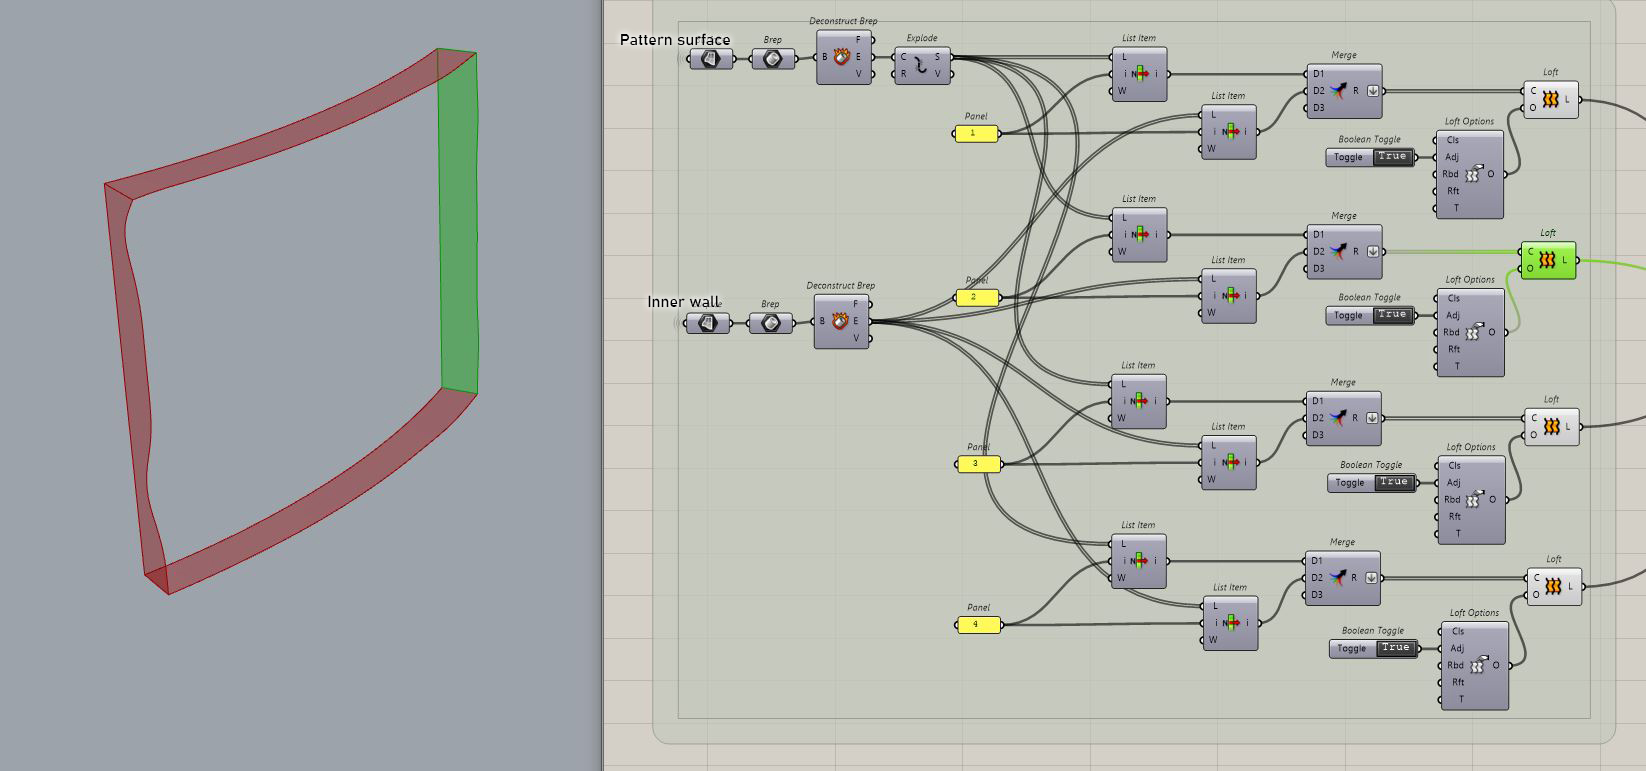
3. Then, all the surfaces can be Merge and Join. For printing, we can use the component Scale and then bake the geometry.
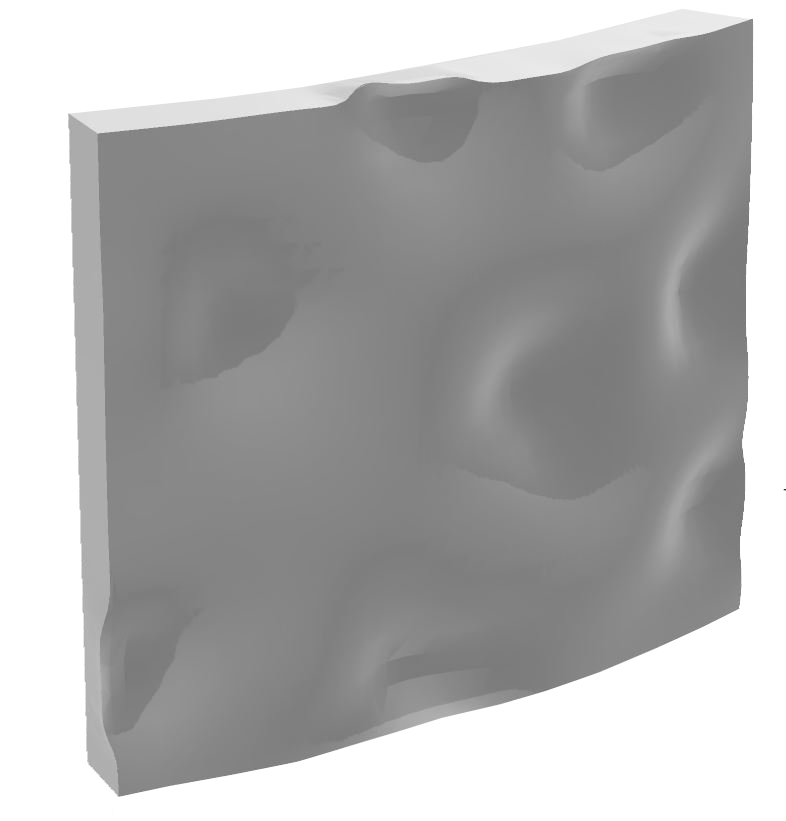
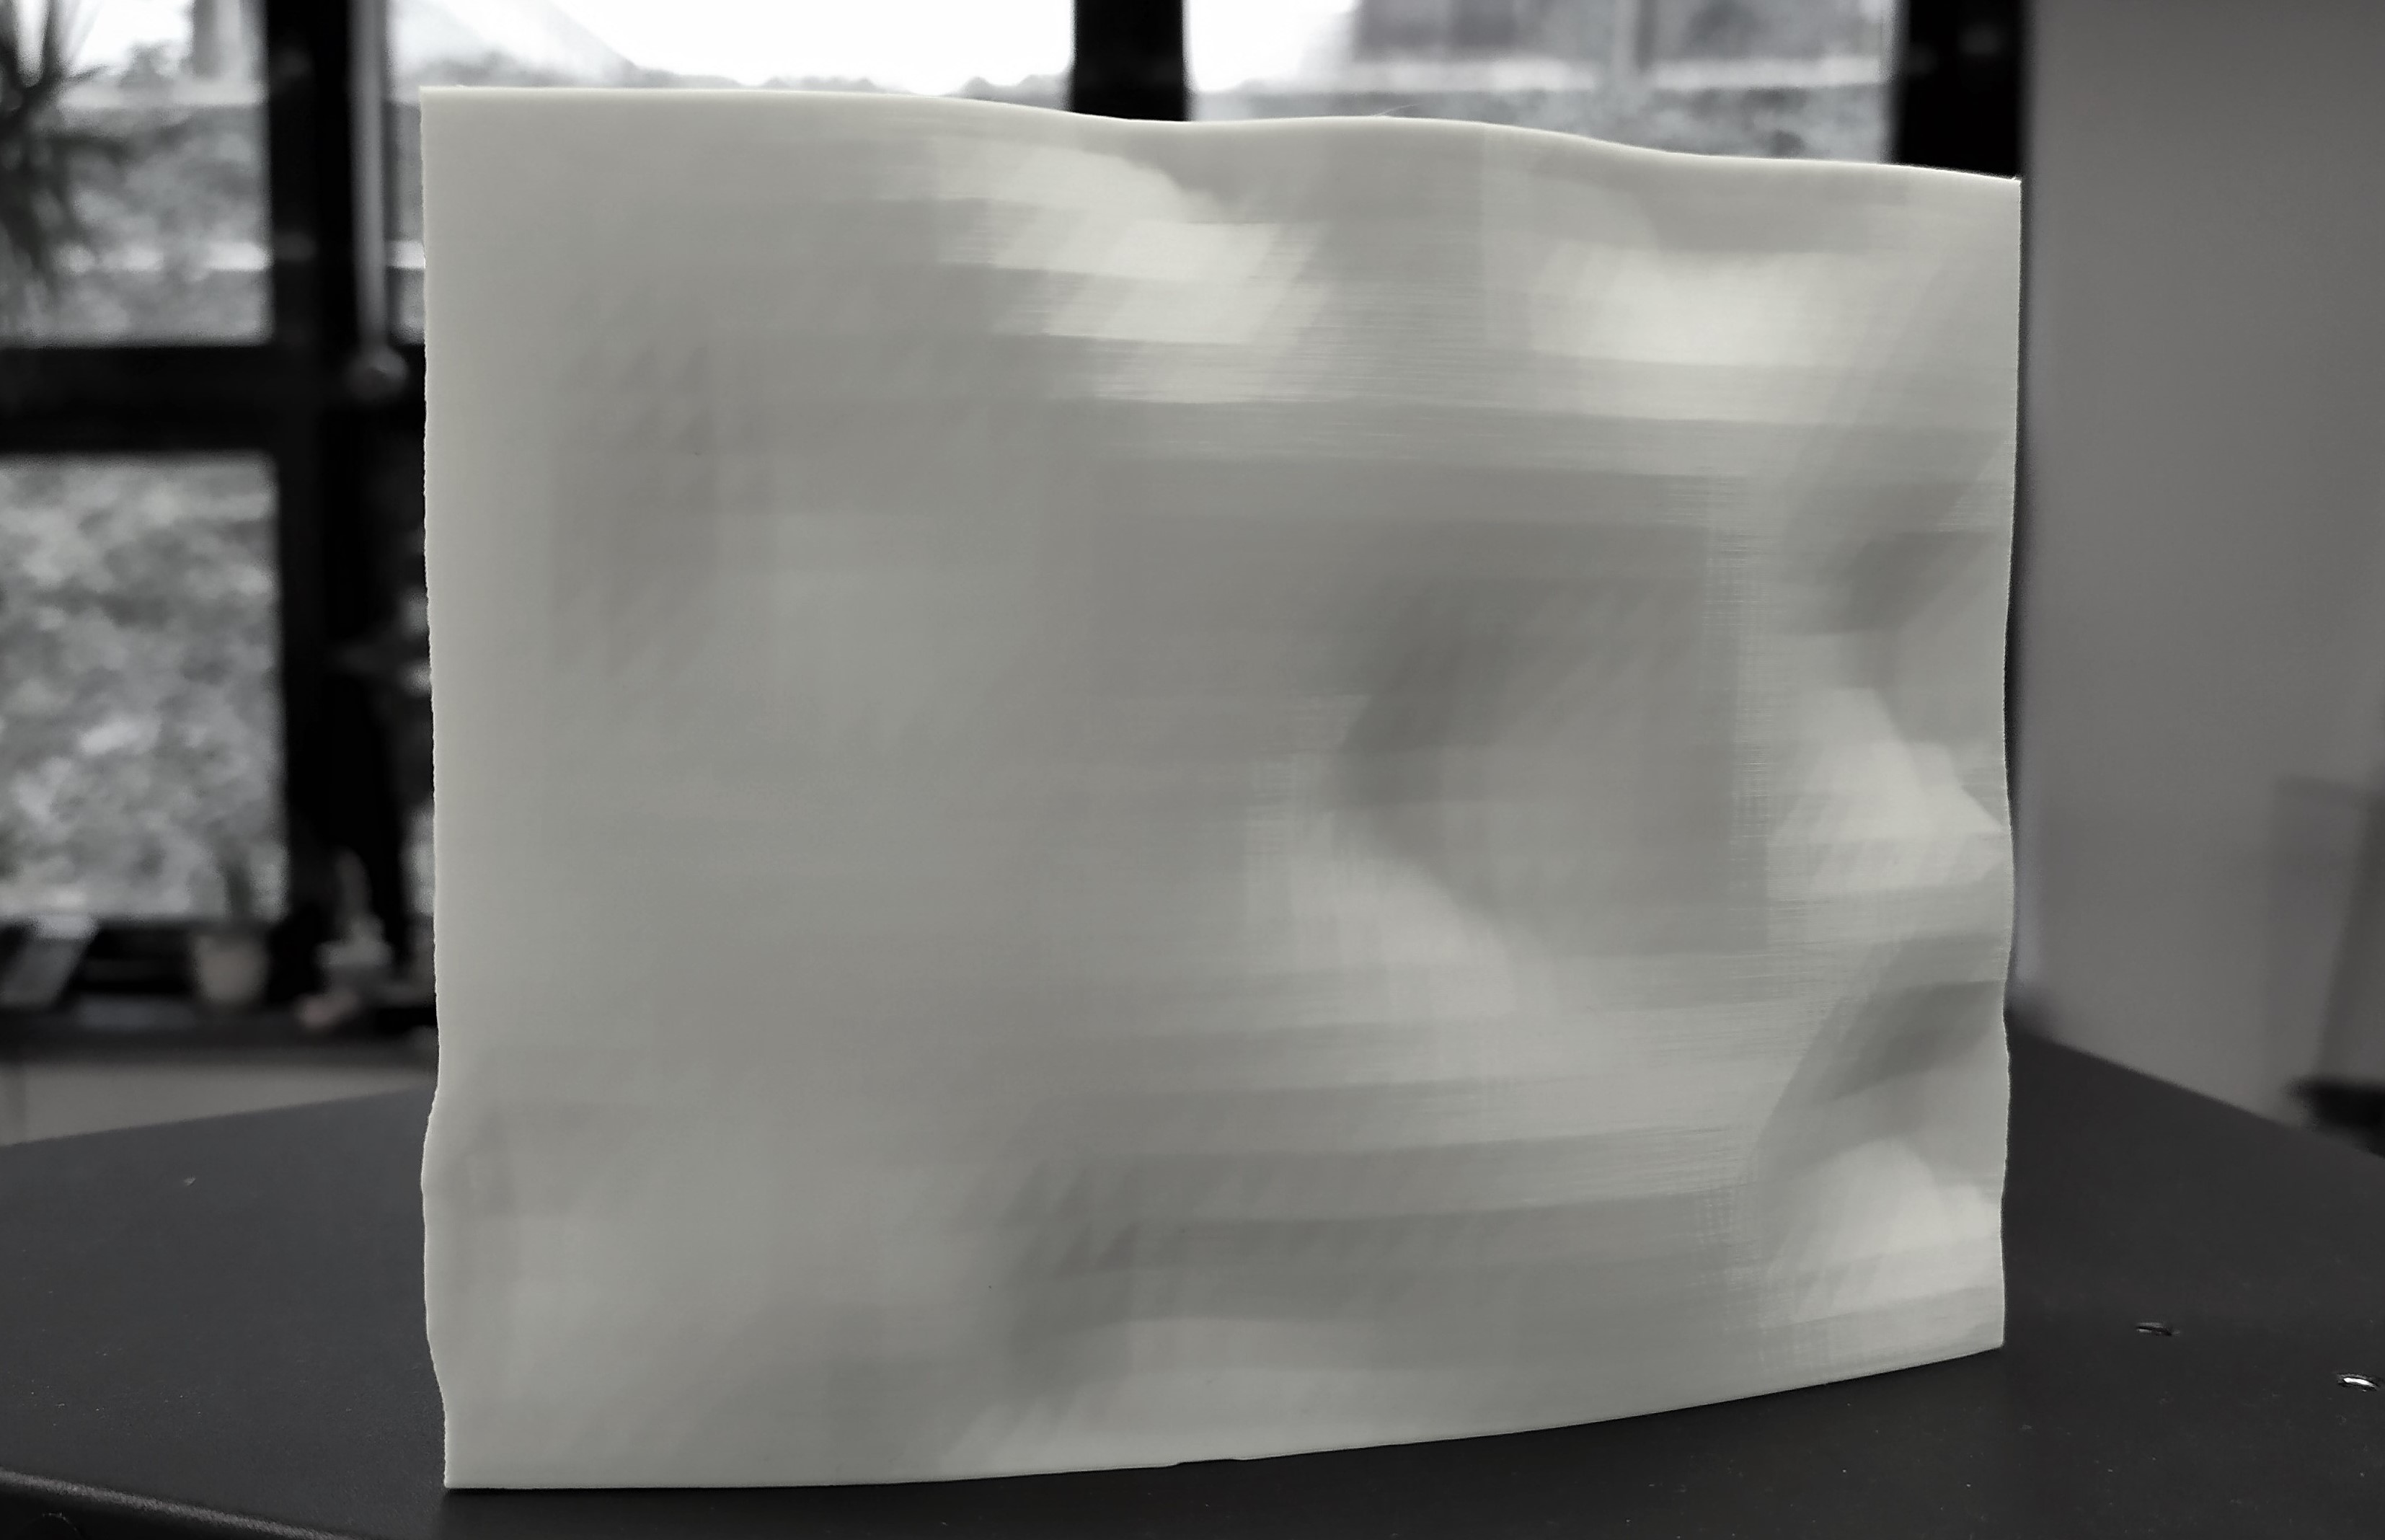
Step 4 result and printable samples :
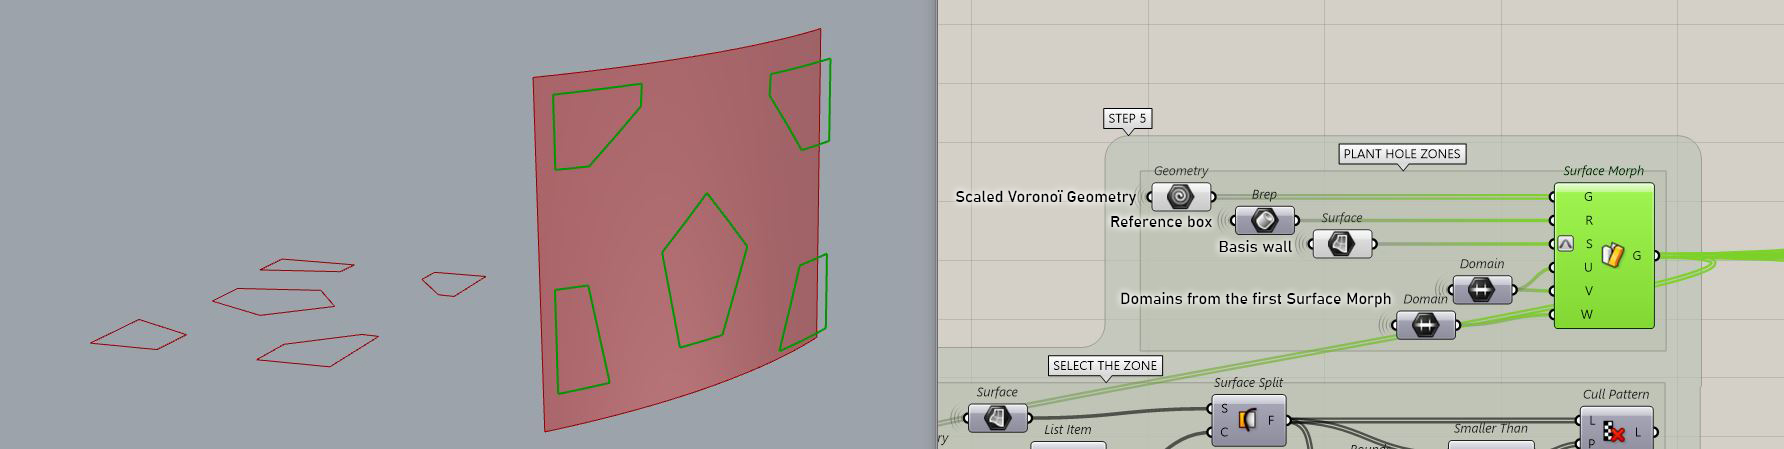
Step 5 : Add the plant pots to the wall. These geometries will serve to put the plants and could be printed out of plastic for example.
1. We use Surface Morph again to draw the zones on the wall. Only the G(eometry) input has changed for the scaled Voronoï geometry of Step 2.2.
2. We select the zone where we want to add the plant pot and we cut the pattern surface in order to isolate the zone.
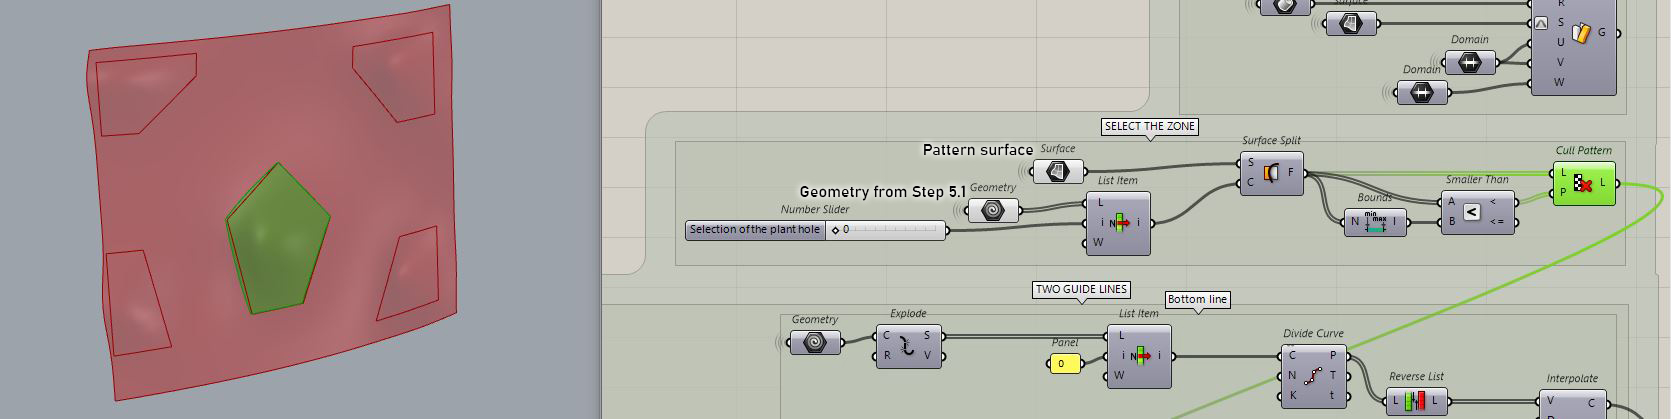
3. We cut the zone at the height of the plant pot (there 0.3 meters) and select the two curves which will be the top and the bottom of the surface.

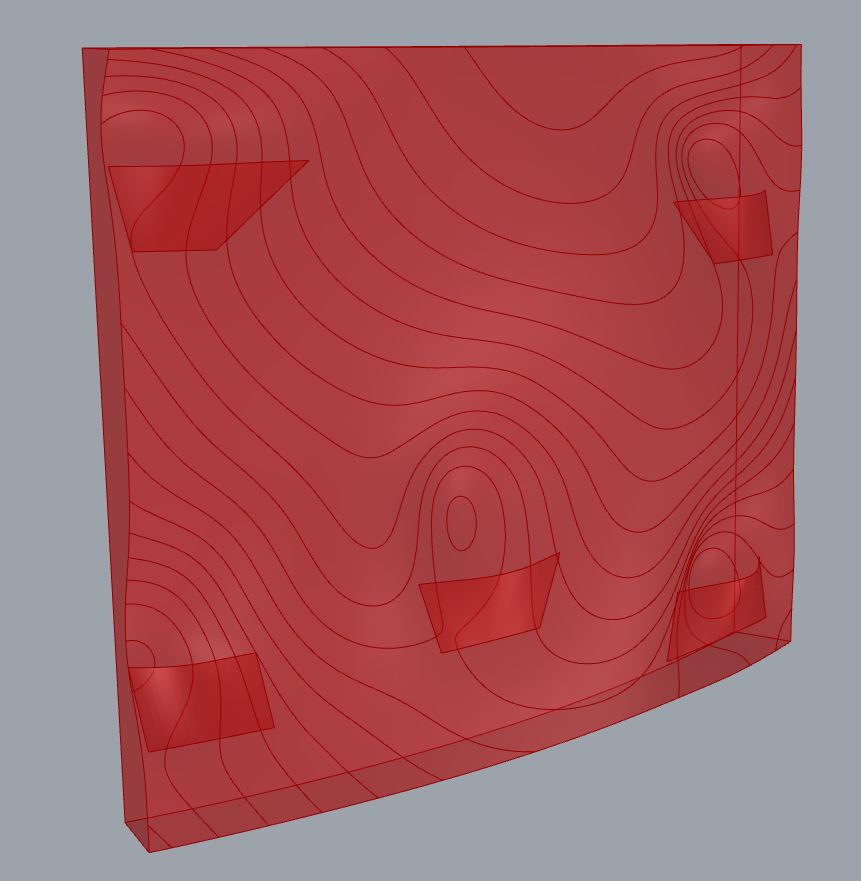
Step 5 result :

Final result
Grasshopper file :
Marco Polo Challenge – Planted 3D printed wall – Aure Birota Moncet