
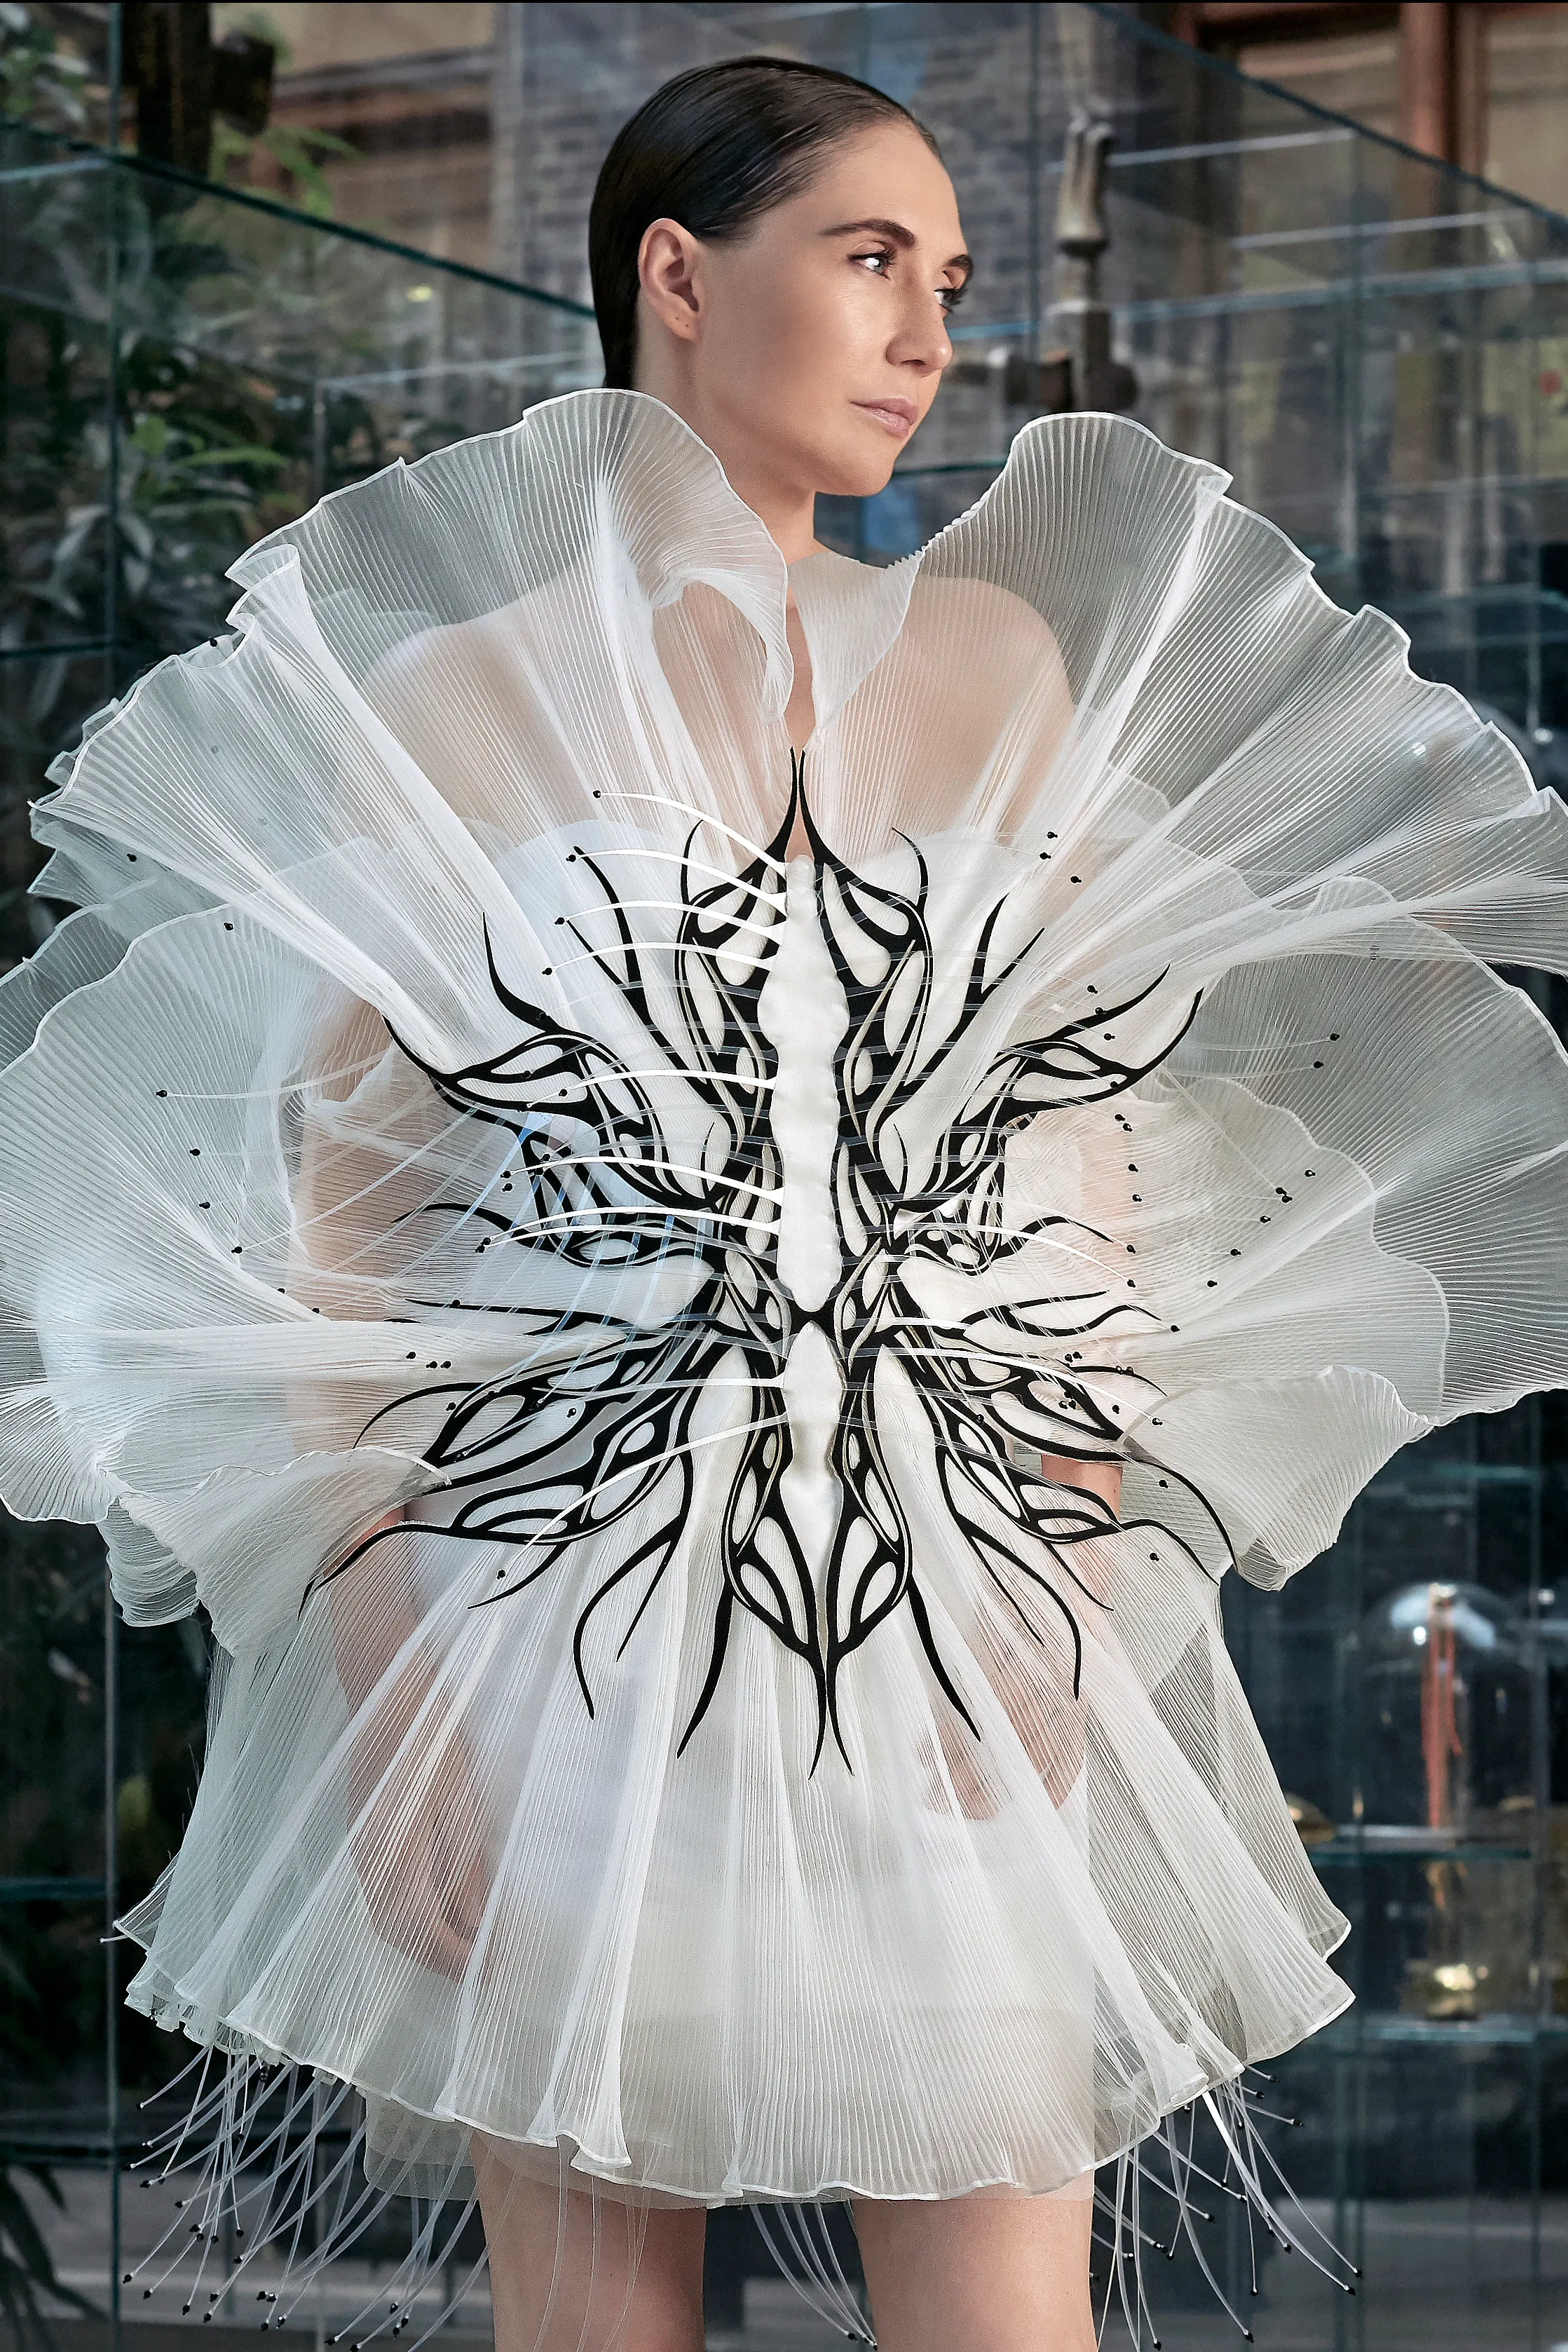
Personal Opinion
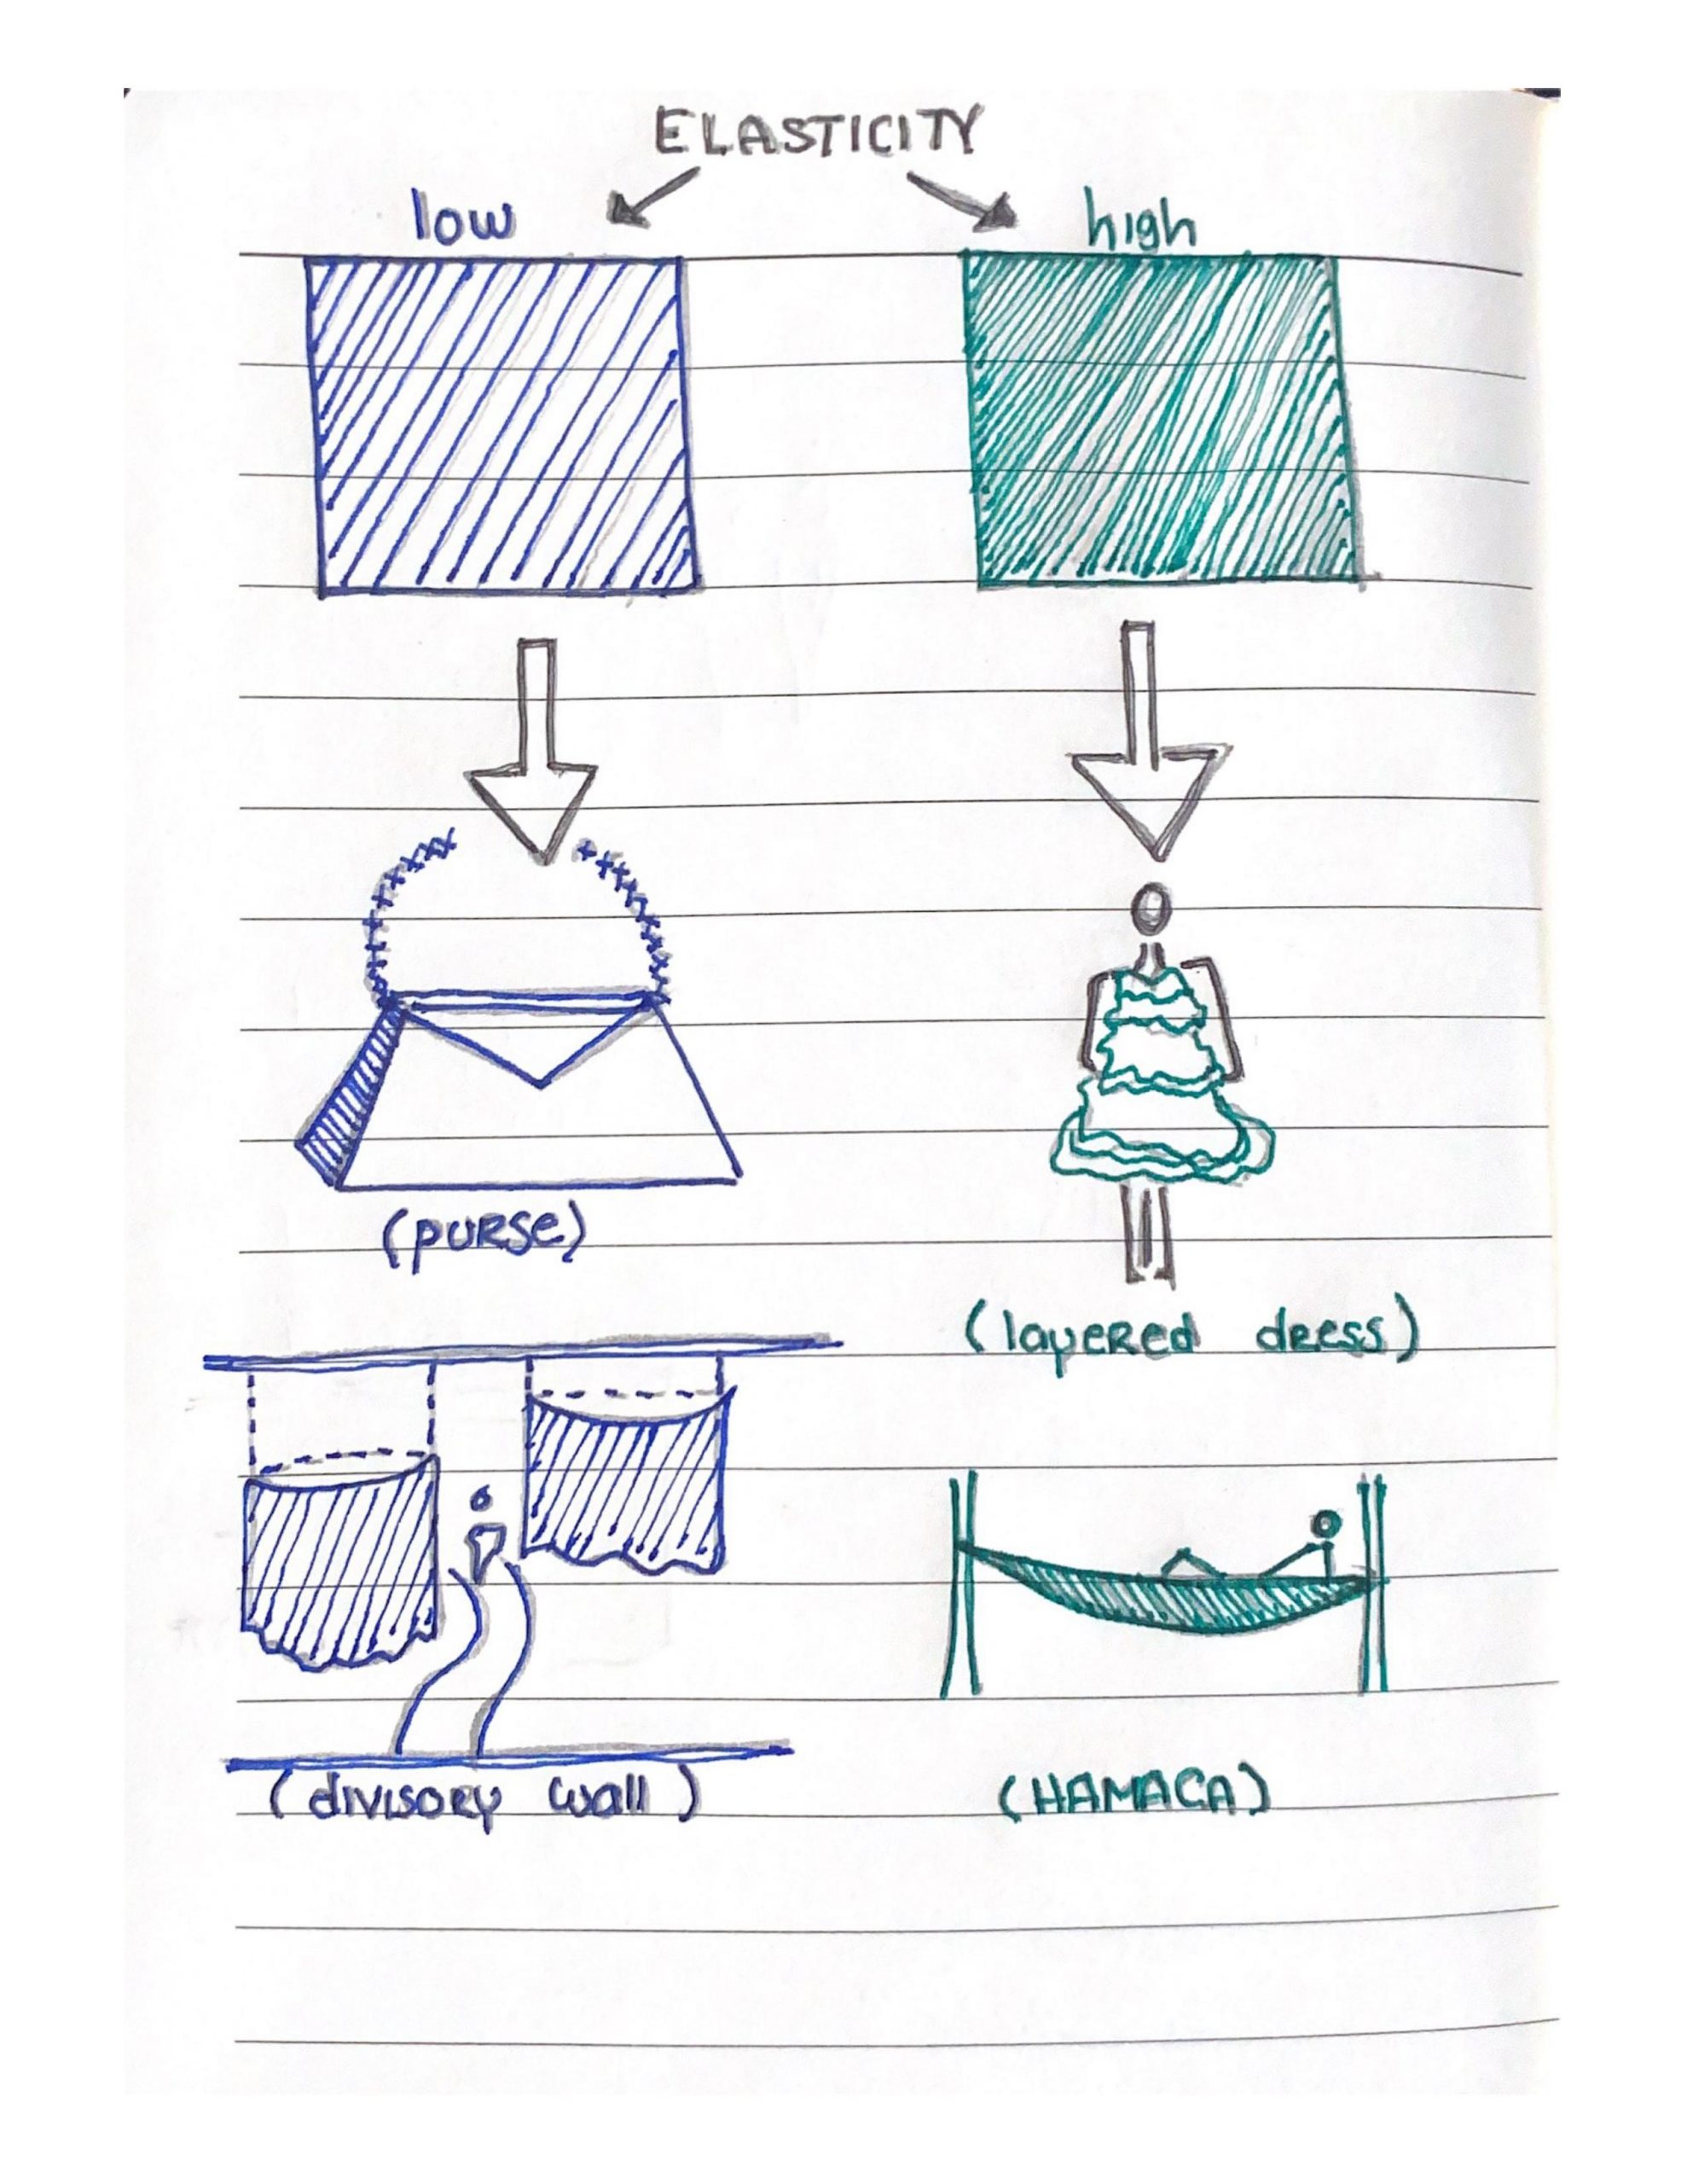
Presently, 39,000 tons of clothing are discarded each year; we are aware that life span of general fabric is about 2 years. Through this assignment we can discover ways to create parametric fabric which could be 3D printed as it have different properties such as differen elasticity parameters and also through this we can increase the durability of fabric which can be recycled further for new use. Other options for usage can be used for exhibitions, construction sites for safety, fun seating / waiting seats and partitions.
Inspo:

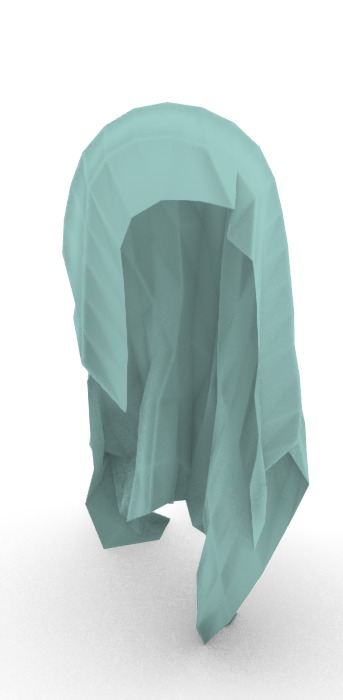
Sketches:
-Inside the file you can see the different scripts for the independent fabric, the full curtain and the half-circumference curtain.
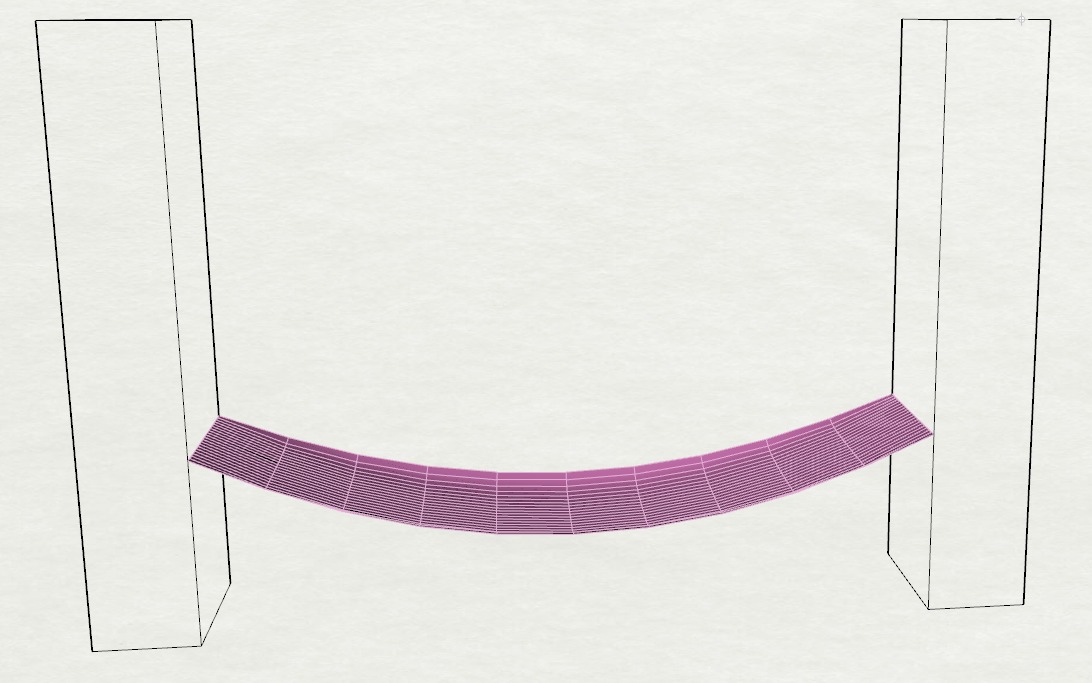
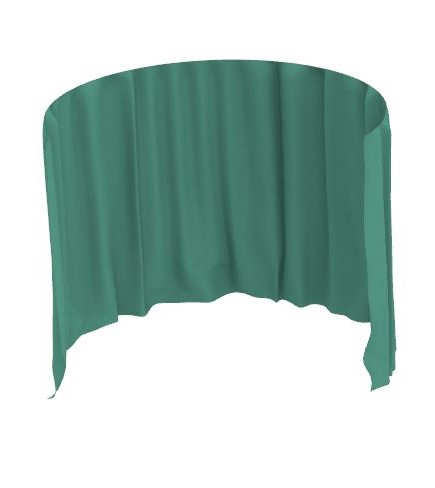
-HAMACA
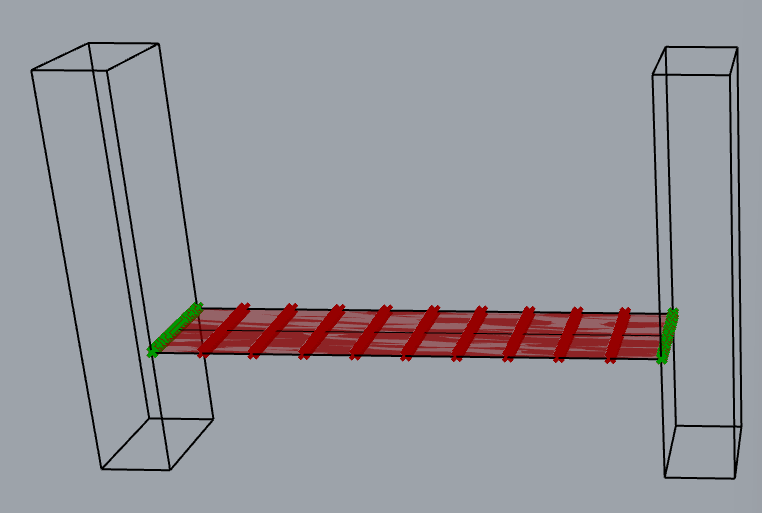
- First we are going to use “Surface” component and reference it to our drawn surface in rhino, after it we are going to convert it into a mesh with “Mesh Surface” component
2. We are going to desconstruct this mesh because we want to separate our vertices : the ones that aren´t going to move and the one that are going to fall.
Connect our initial mesh to the “Mesh Desconstruct” component and use “Partition List” to divide the groups (note: input S with expression “x+1” connected to mesh surface V count input) use “List Item” component to get the first list of vertices. For the second list reverse en input L of list of vertices
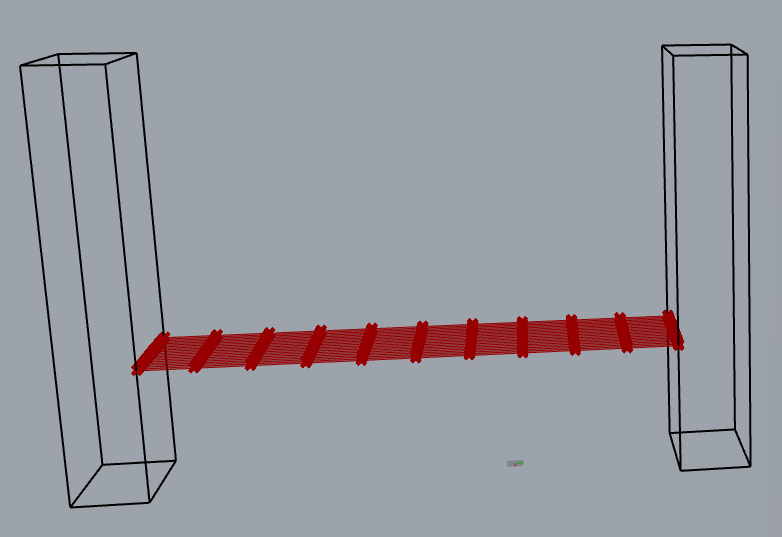
Contain them and anchor them

3. In the “show” component we will conect the mesh we are working with to apply the simulation
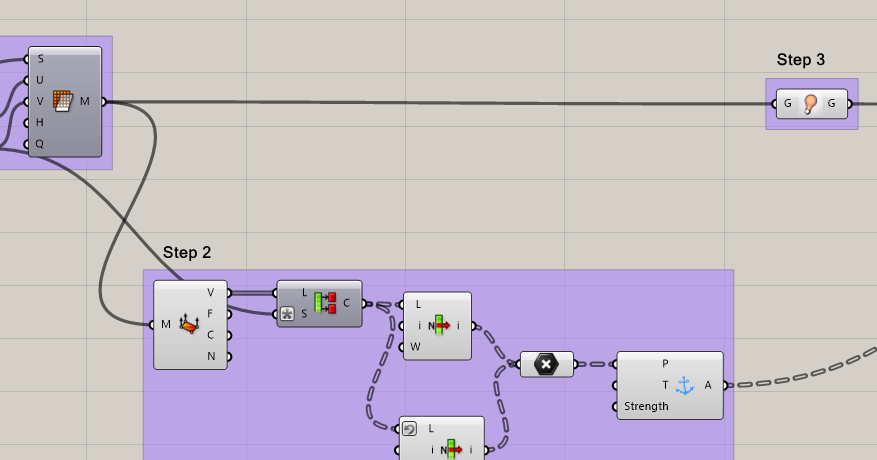
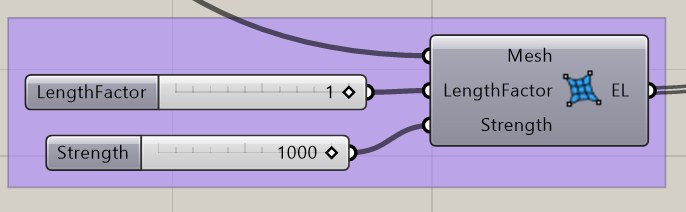
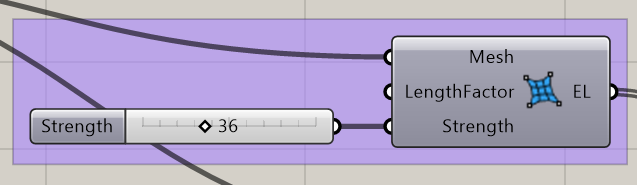
4. Now we are goint to work with the vertices that are going to fall. Use “EdgeLenghts” component and connect the meshe created, give the parameter 1.0 to “LengthFactor” and 10.0 to “Strength”.
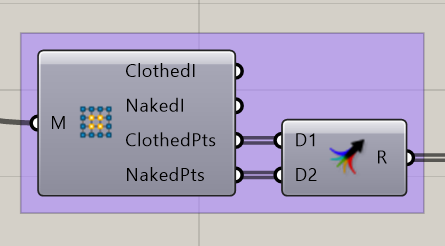
5. Get the vertices of a mesh with the “Naked Vertices” component. It summarize the points that can be retrieved from “ClothedPts” and “NakedPts” in the “Merge” component.
6. The “Load” component is used to apply a vertical downward load. We connect the vertices of the mesh we have just obtained and apply a load in the -Z direction.
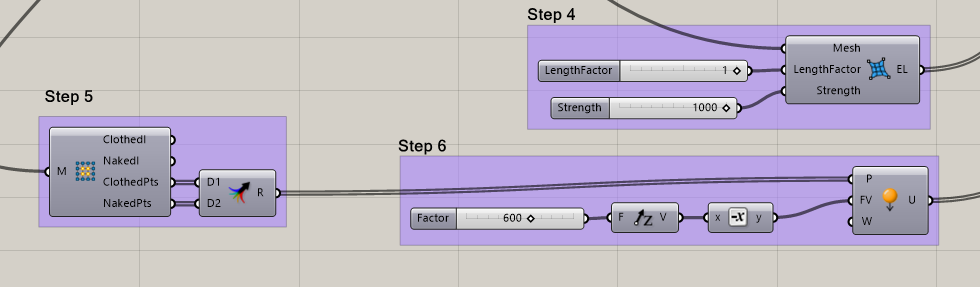
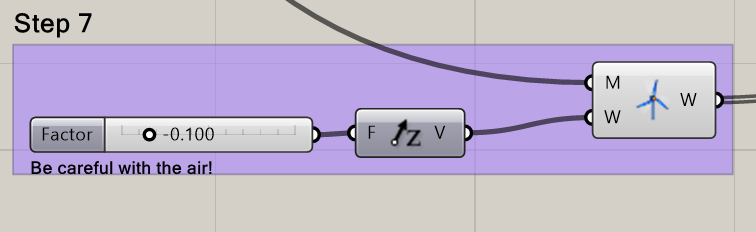
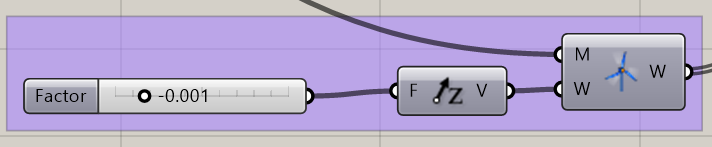
7. The “Wind” component is used to set the wind loads. As we want to create wind from the top down, we connect a negative value to the “UnitZ” component. Set the component to -0.001. You can customize the parameter of wind loads from any direction you like by changing the vector direction.Connect the triangle mesh to this component.
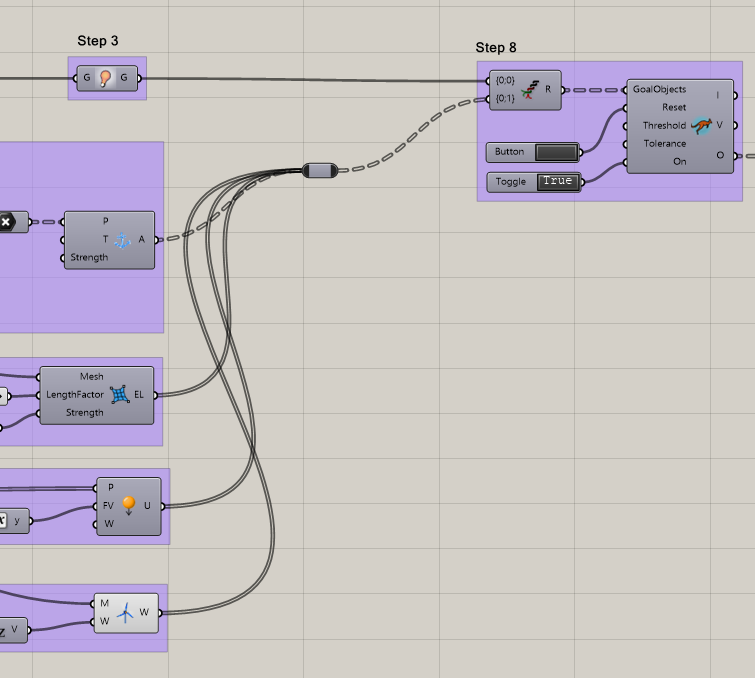
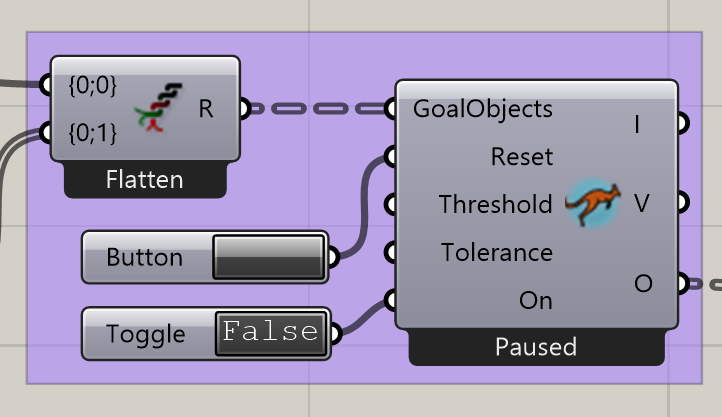
8. The “Entwine” component brings together the goal objects: the show component is connected first in a separate branch. The rest are connected together and Flattened.
We are going to operate with “Bouncy Solver” component. Set the “Boolean Toggle” component to True to start the operation, move the Number Slider of the step 6 to see the simulation. Set it to False to pause it and press the “Button” to reset the simulation.
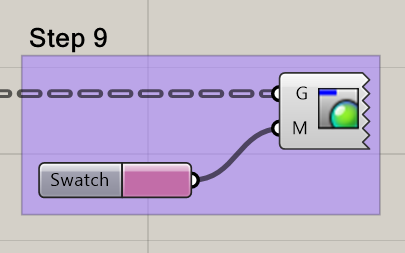
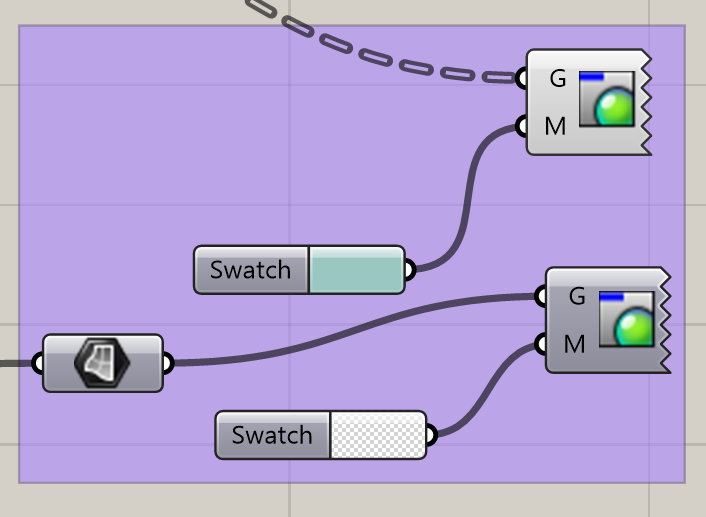
9. Finally we are only going to use “Custom Previw” and “Colour Swatch” to selct the color of our Hamaca

THE FOLLOWING STEPS DISCRIBE A BIT ONE OF THE OTHERS SCRIPTS FOR THE DIFFERENT USES YOU CAN HAVE
-FABRIC

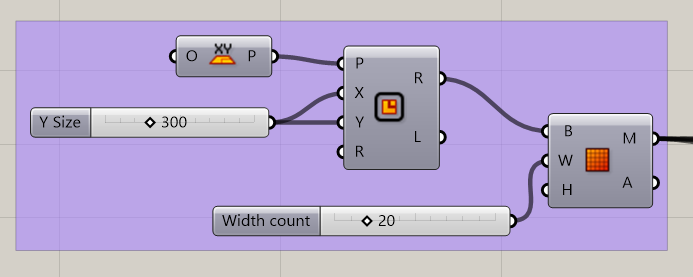
1.1 Create a rectangle in “XY plane” (you are free to decide which plane) and “Rectangle” component.
The square created is converted into a mesh with “Mesh Plane” component.
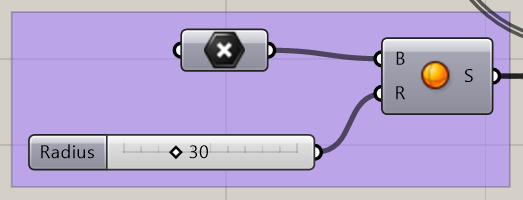
1.2 Create a sphere with “Sphere” component. The center point of the sphere is specified by hitting a point in Rhinoceros.
Note: Turn on the layer “Body”
3. “Show” component
4.”EdgeLenghts”
7. “Wind”
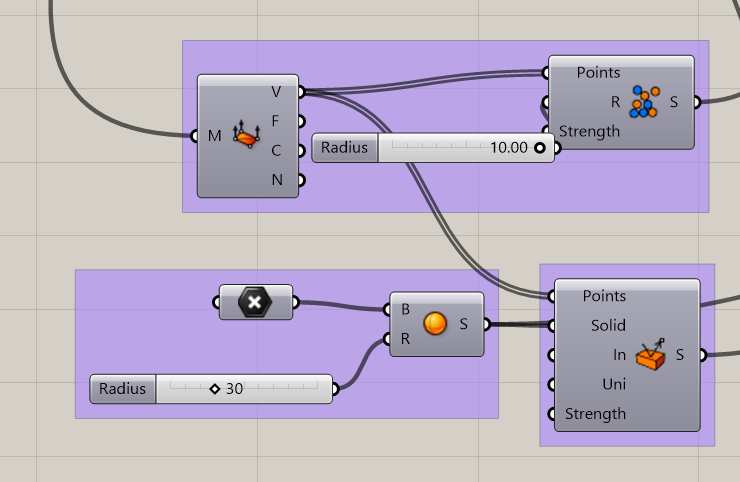
7.1 We will set up two types of colliders: first we will use the “Deconstruct Mesh” component to get the vertices of the mesh.
After that use “SphereCollider” component. This one is set up to prevent the meshes of the cloth from intersecting each other when the cloth hit and deforms. Set a sphere with a specified radius in the radius input. This way, the created mesh will behave like a cloth.
Also add a “SolidPointCollide” component, conect to point input the mesh vertices you have been working with and in solid input the sphere you have created in the step 1.2. This will determine the collision between the mesh and the sphere.
8 “Entwine” component”
“Bouncy Solver”, (move the Number Slider connected to the “Sphere” to make your sphere bigger or smaller)
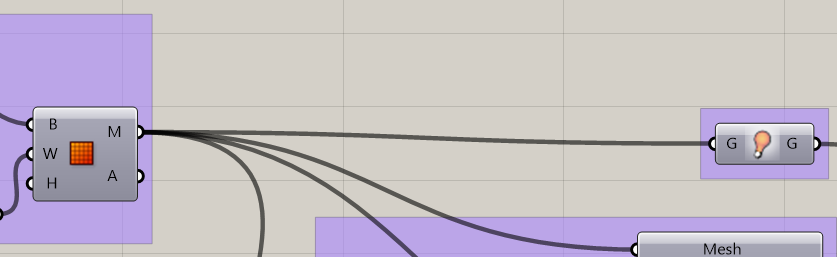
9. Finally, the fabric is coloured with the “Custom Preview” component and the “Colour Swatch” component, respectively.
Thanks to
- Plugin: KANGAROO PHYSICS (by Daniel Piker) https://www.food4rhino.com/en/app/kangaroo-physics
- PUFFERFISH (by ekimroyrp) https://www.food4rhino.com/en/app/pufferfish