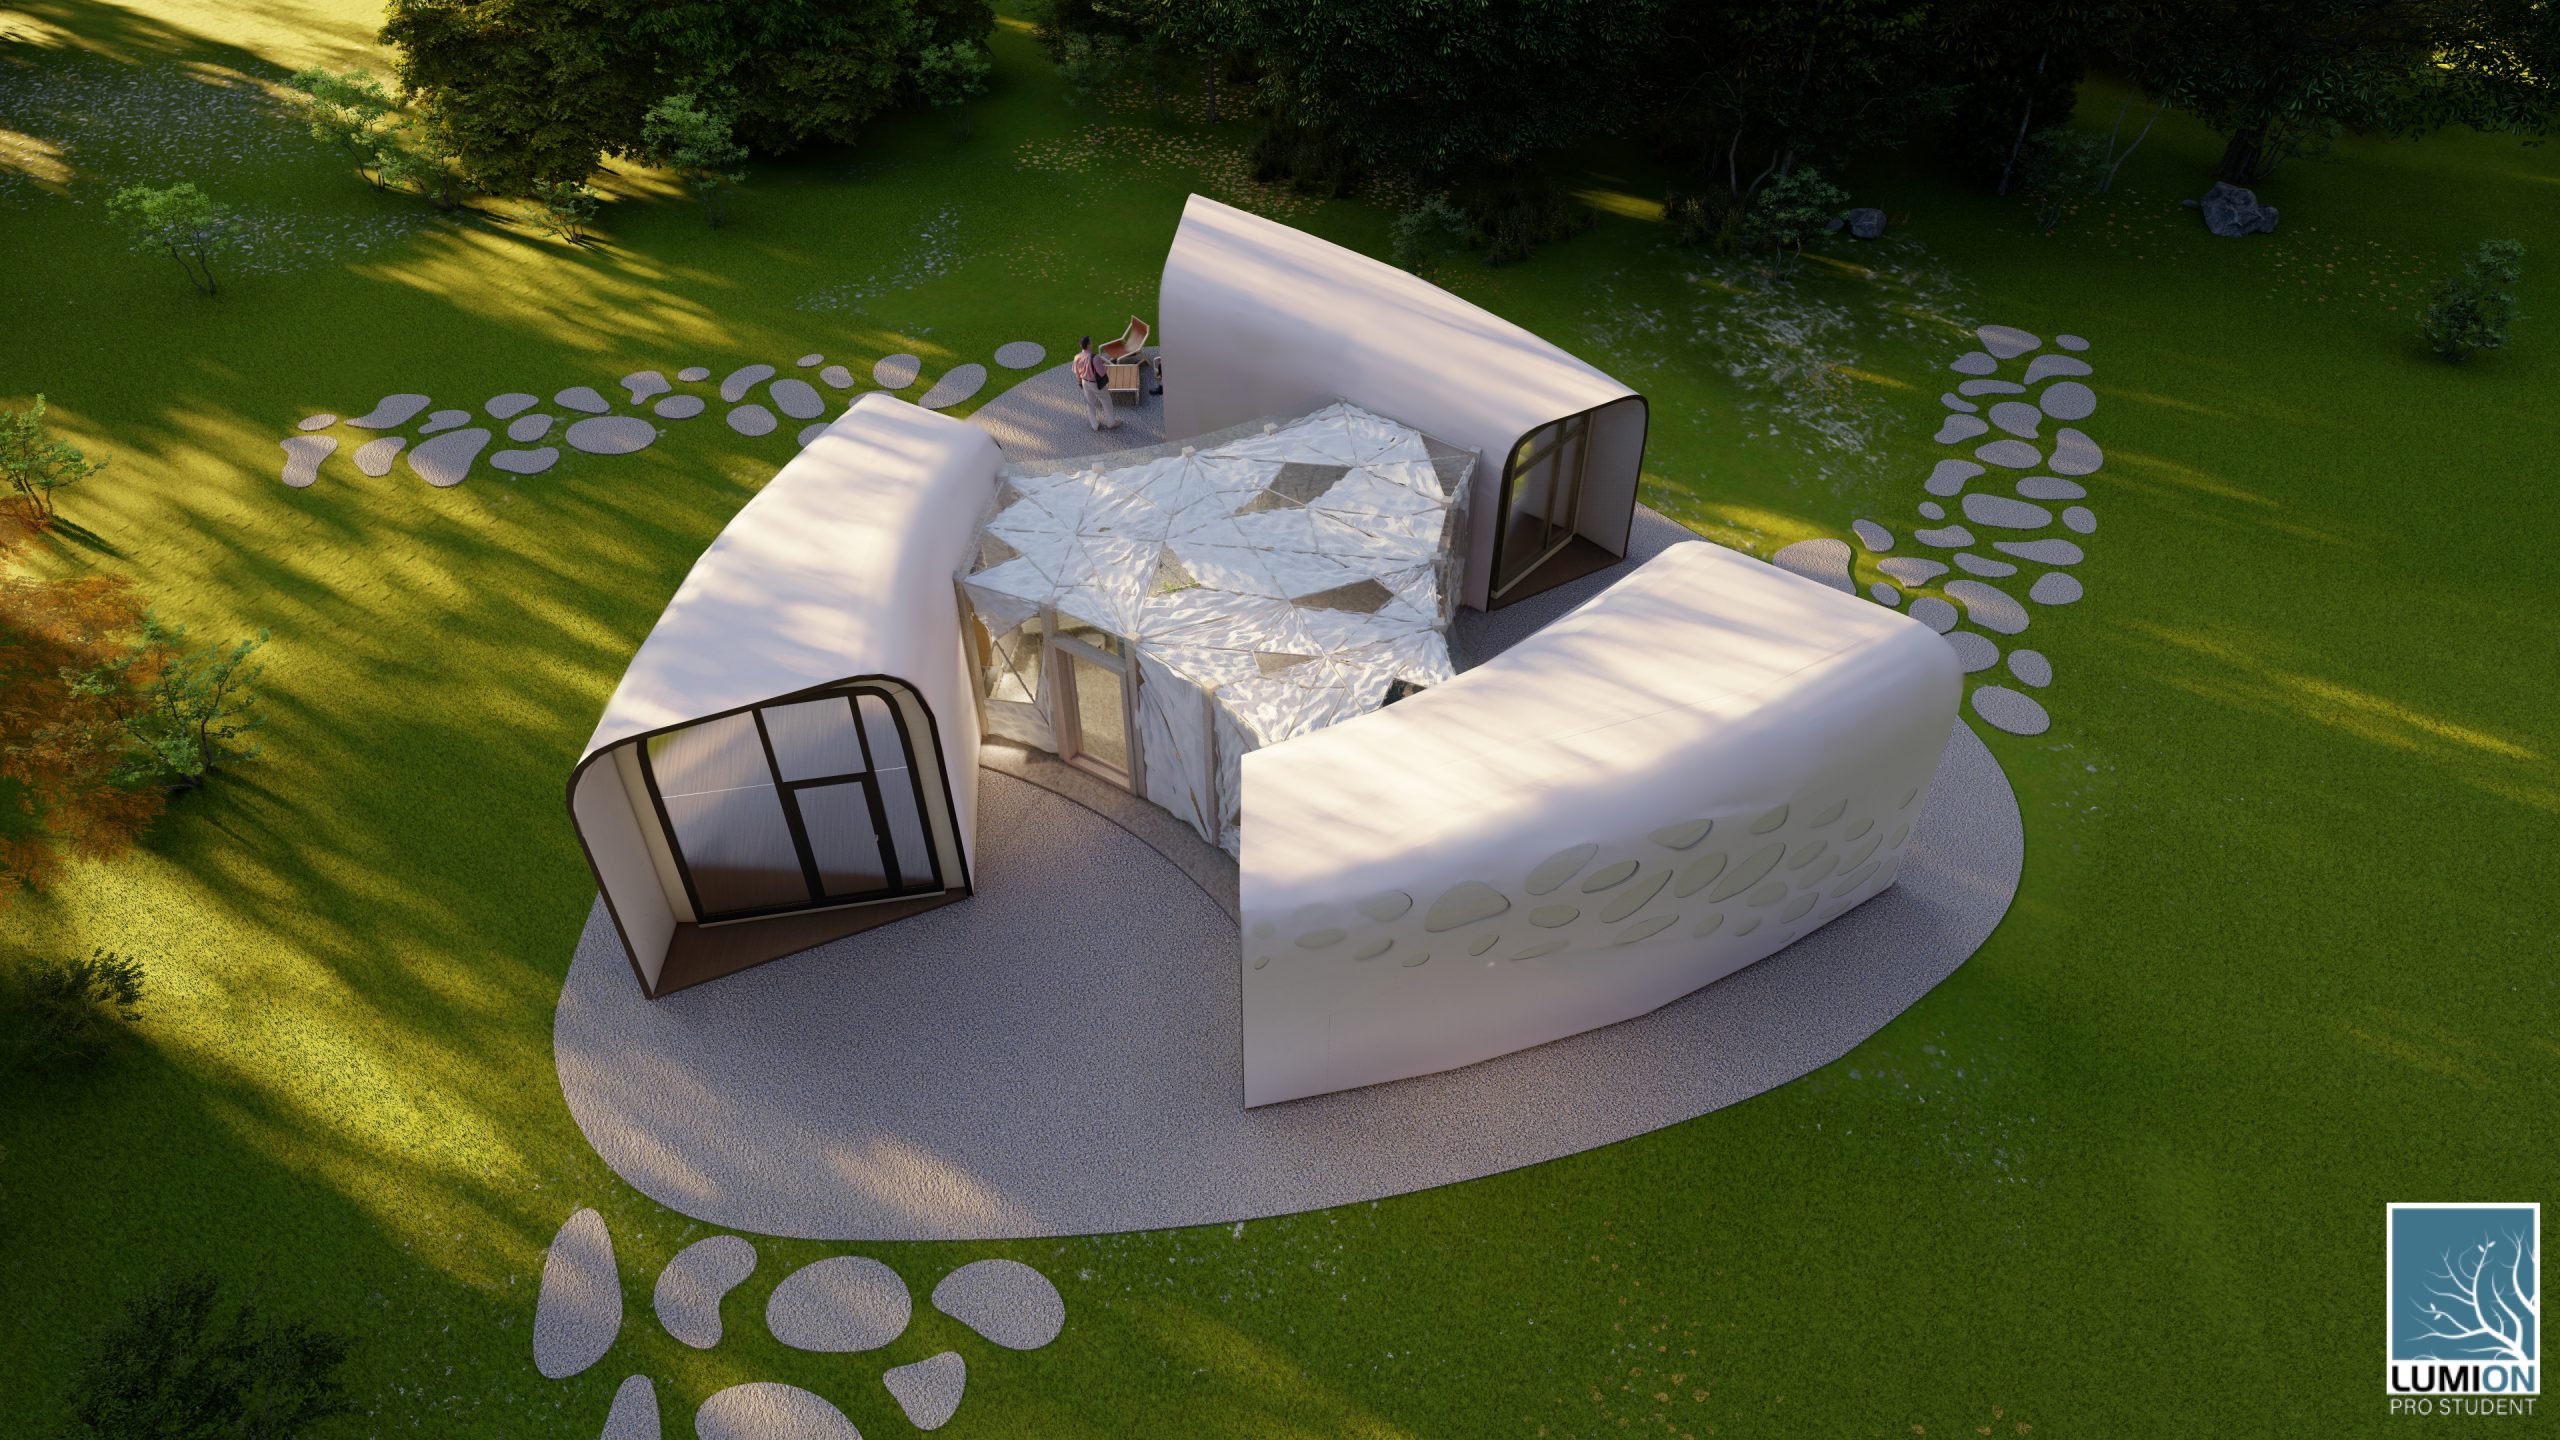
This project I was inspired by organic architecture Since the material I plan to use is Mycelium – I also was inspired by the mycelium texture

I also created a video if you wish to follow along! – https://youtu.be/_X_YQOdBQUs
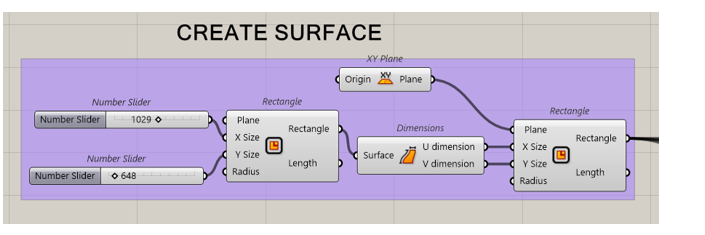
First thing you do – create a surface.
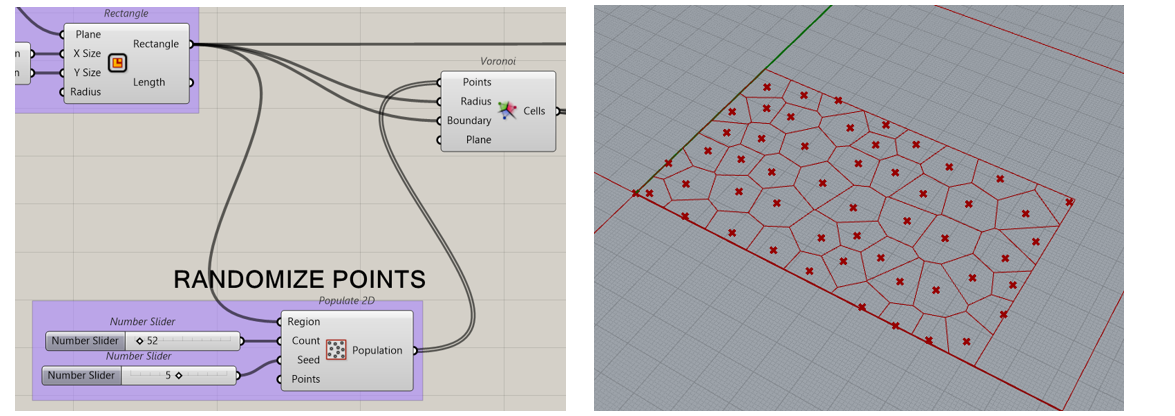
-Then you randomize points (using “populate 2D” command) and make random polygon shapes with the “Voronoi” command.
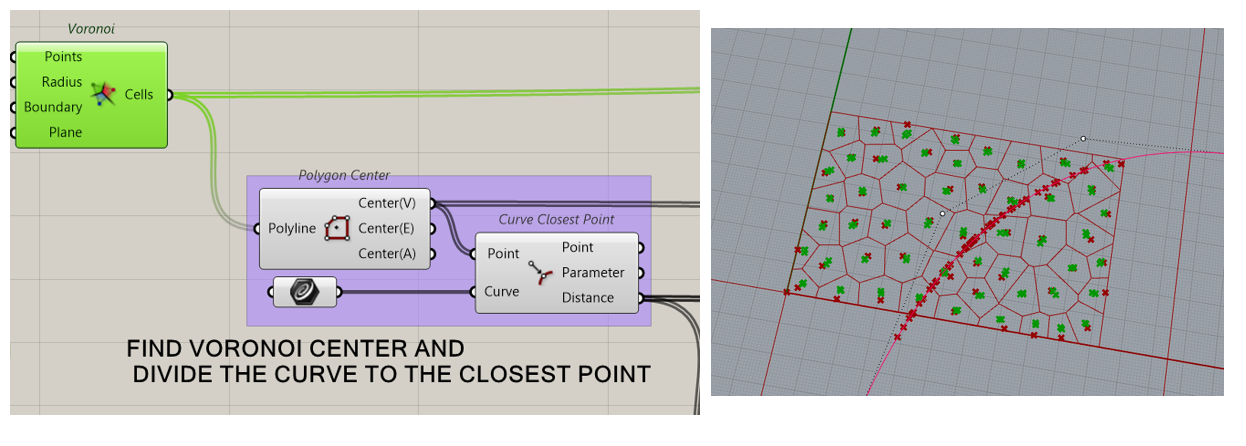
Now we find the polygons center point with the command “polygon center” command, as well as we create a curve in rhino – this will be our attractor line! Conect this command to “curve closest point”.
We select separately the closest polygons shapes and points to the attractor line. We use the sort list command and change their value by multiplying them. Then connect as seen in the picture below.
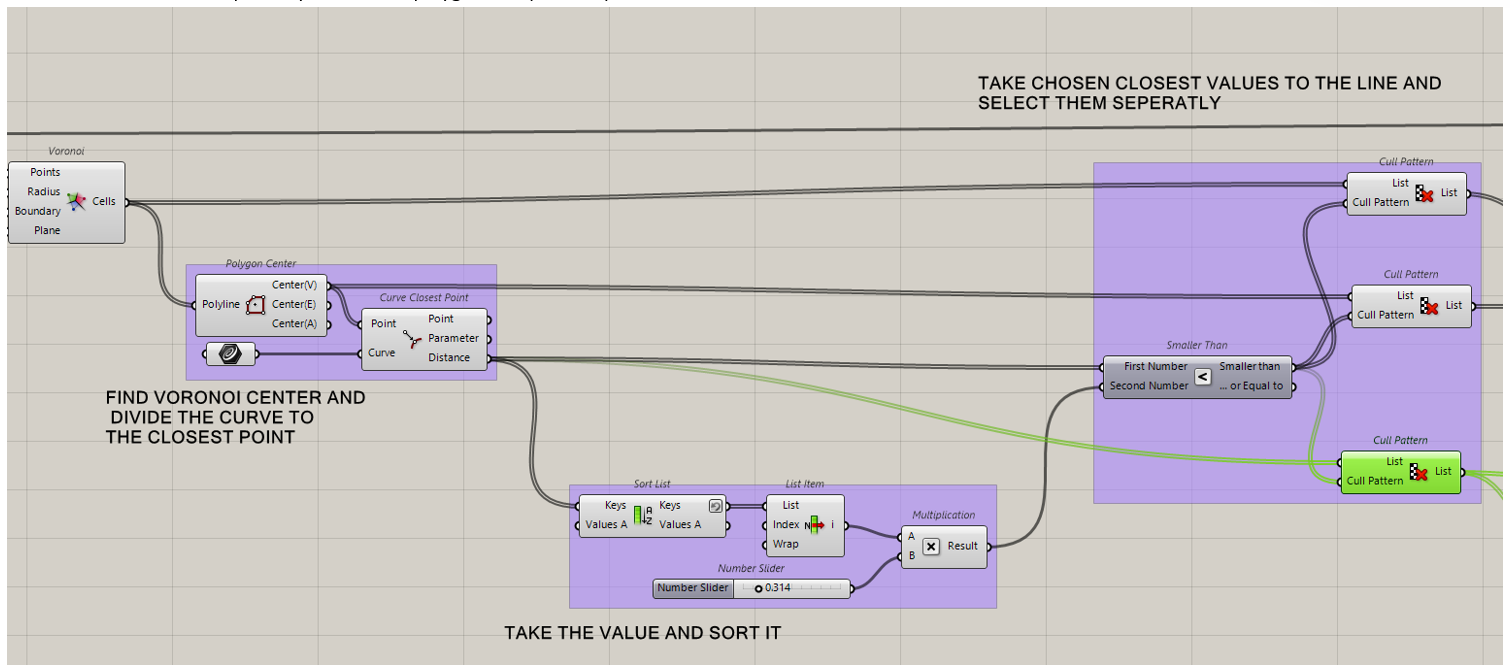
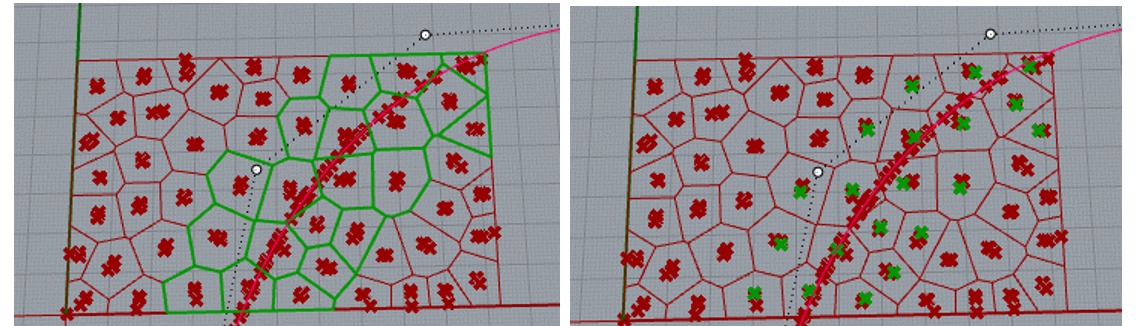
Now we want the closest polygons to be bigger and further polygons – smaller.
Then we set the limit – how big the closer polygons will be and how small the further ones will be.
Do not forget to flatten numbers in bounds – to get only one list of values.
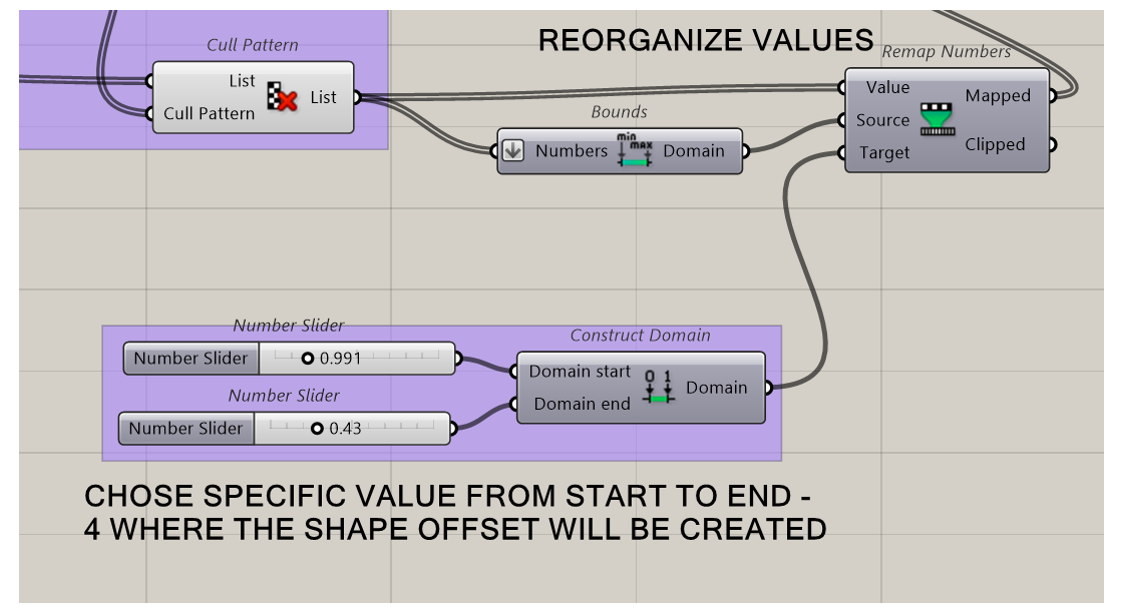
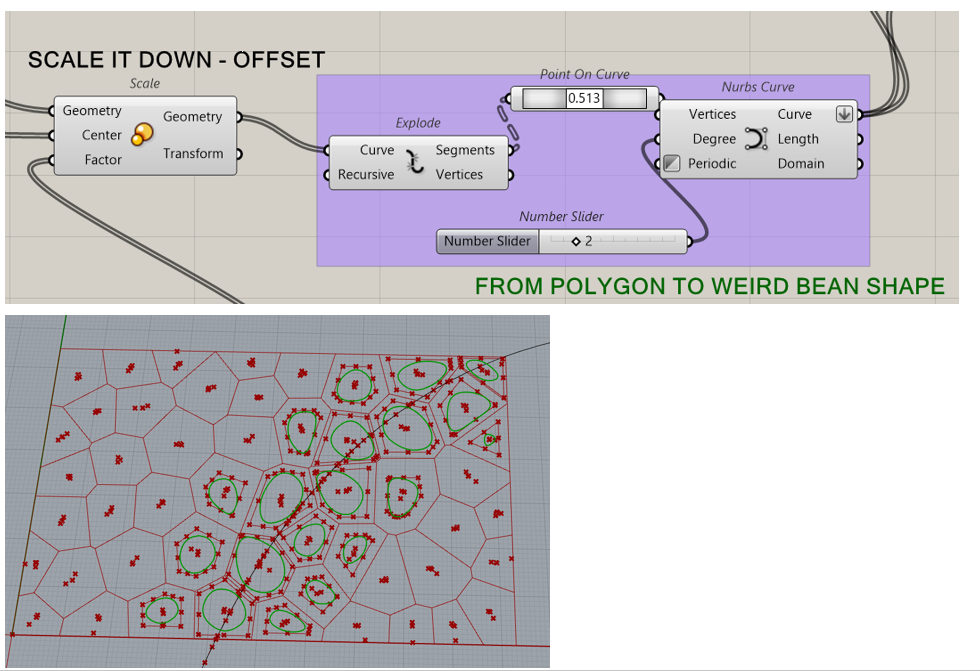
Now we scale down with the chosen values from remap command – and we have a offseted polygon. The closer to the line the bigger.

Now we want a bean shaped forms. We explode the offseted polygons and use nurbs curve command to create a curved shape. DON’T forget to invert the nurbs curve – so it connects start and end of the shape.
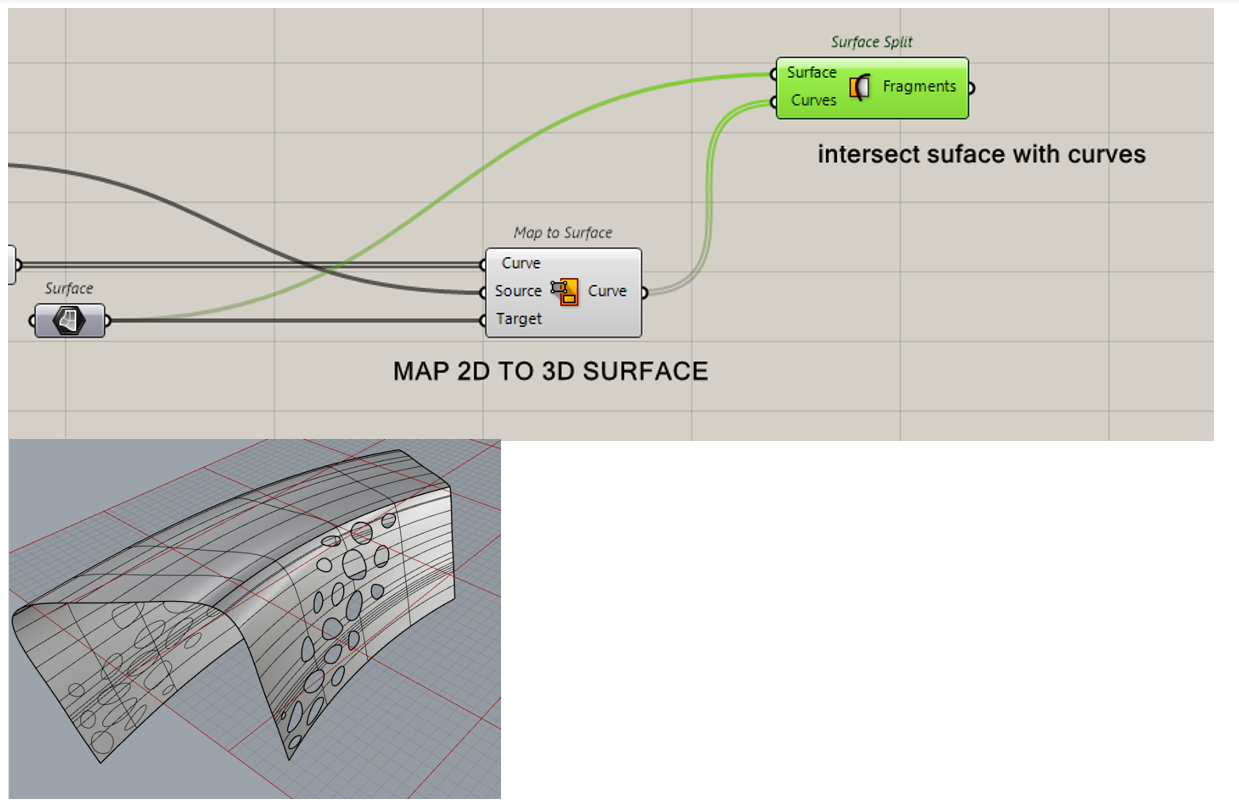
Now we want to map these shapes to our custom surface. We use the command “map to surface”. If the drawing is strange – you should try changing the plane size in grasshopper and see if it matches with the surface size.

And finally we split the surface with our curves and voila! We have the required shape! P.S. don’t forget to bake it!
Everything together –

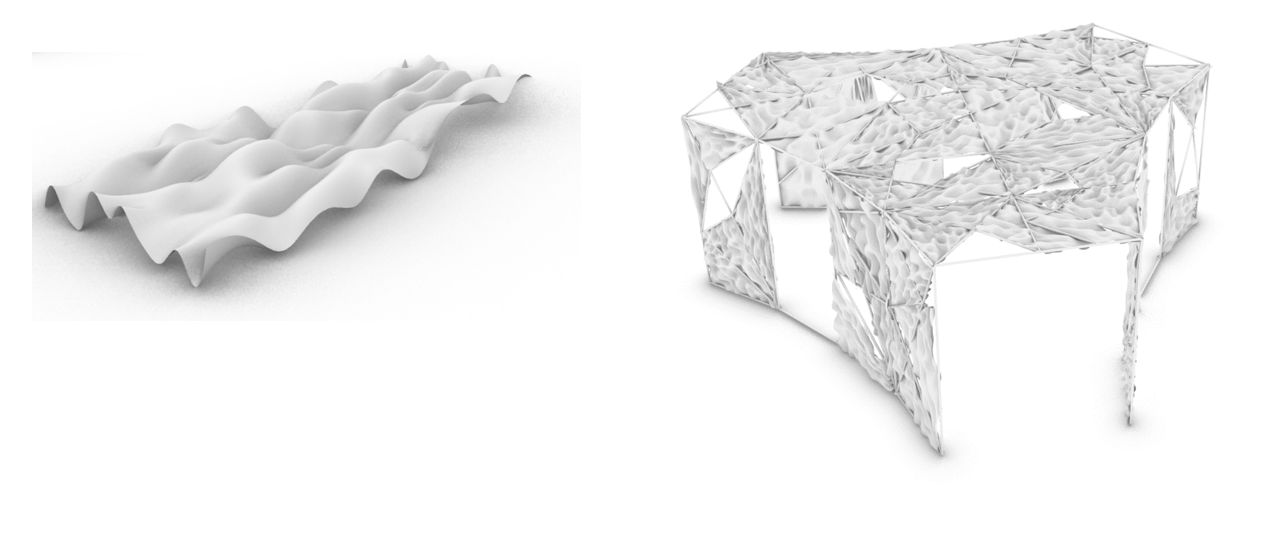
Results!

BONUS:
For my mycelium texture I needed a wavy texture – so I came up with this! It is basically possible to transform basic surfaces.
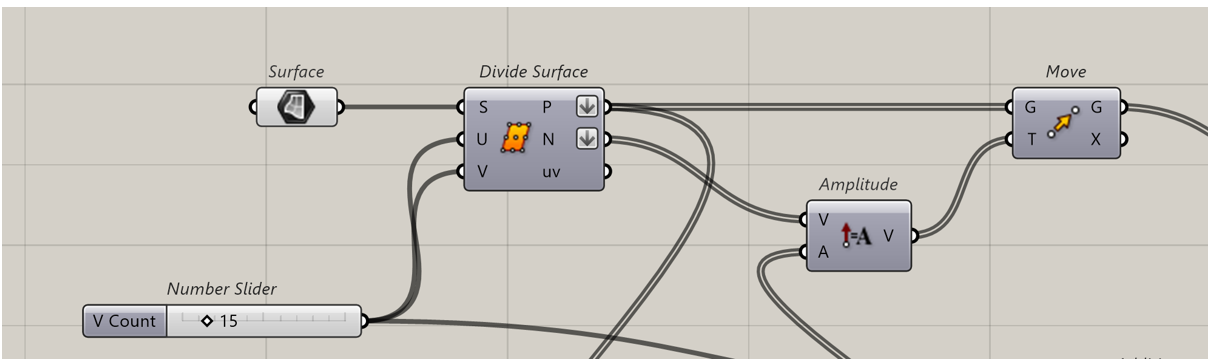
At first create and select the surface and add it to the command – divide surface.
After that choose in how many parts you want to divide the surface in. REMEMBER TO FLATTEN THEM BOTH!
Divide surface command connect with Move and Amplitude command as seen in the picture. REMEMBER TO FLATTEN THEM BOTH!
We want to move these points up and down In random amplitudes to create a randomized wavy effect.
To randomize the amplitude, we create at first a domain – where we set the maximum and minimum values. Then we need to connect it to the command – Random.
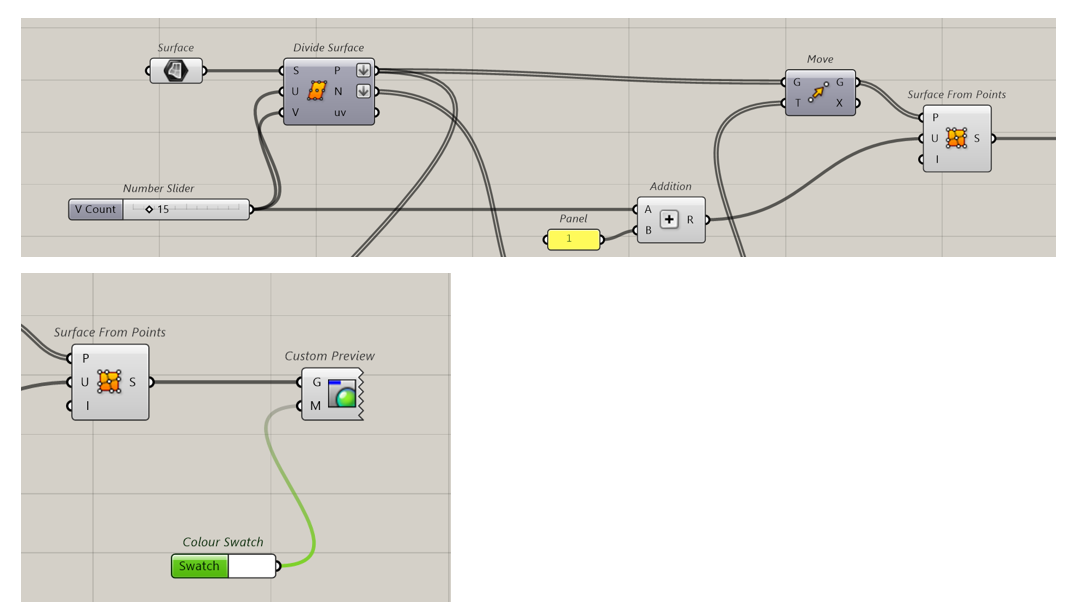
Remember that we need a specific number of points that corresponds to the parts we divided the surface in – just connect points to the list length command, and then to the random command point count. The seed for the random command can be whatever you want – you can try to the find the shape you like the most.

After that we add command – addition so we can create a surface from the newly created points. For the addition add a panel with the value 1.
And you can also add some color for the shape!
And voila! You have your shape!
P.s. don’t forget to bake it!
This is the picture of my rendering final picture! Hope this is helpful!