Plug-ins
Pachyderm by Arthur van der Harten
MeshEdit by Uto
Tutorials
Simulating Acoustics by Gediminas Kirdeikisz
Calculate Sound by Gediminas Kirdeikisz
There’s still so much that still has to be discovered in the field of acoustics and parametric design and especially in the world of theatre design. In this work, an acoustic panel will be designed that will be adaptable to the needs of the acoustic reverberation time of the theatre hall in which it is placed.
The work will be divided into four parts: the design of the theatre hall, the design of the acoustic panel, the visualization of the sound and the design adaptation to the reverberation time of the hall.
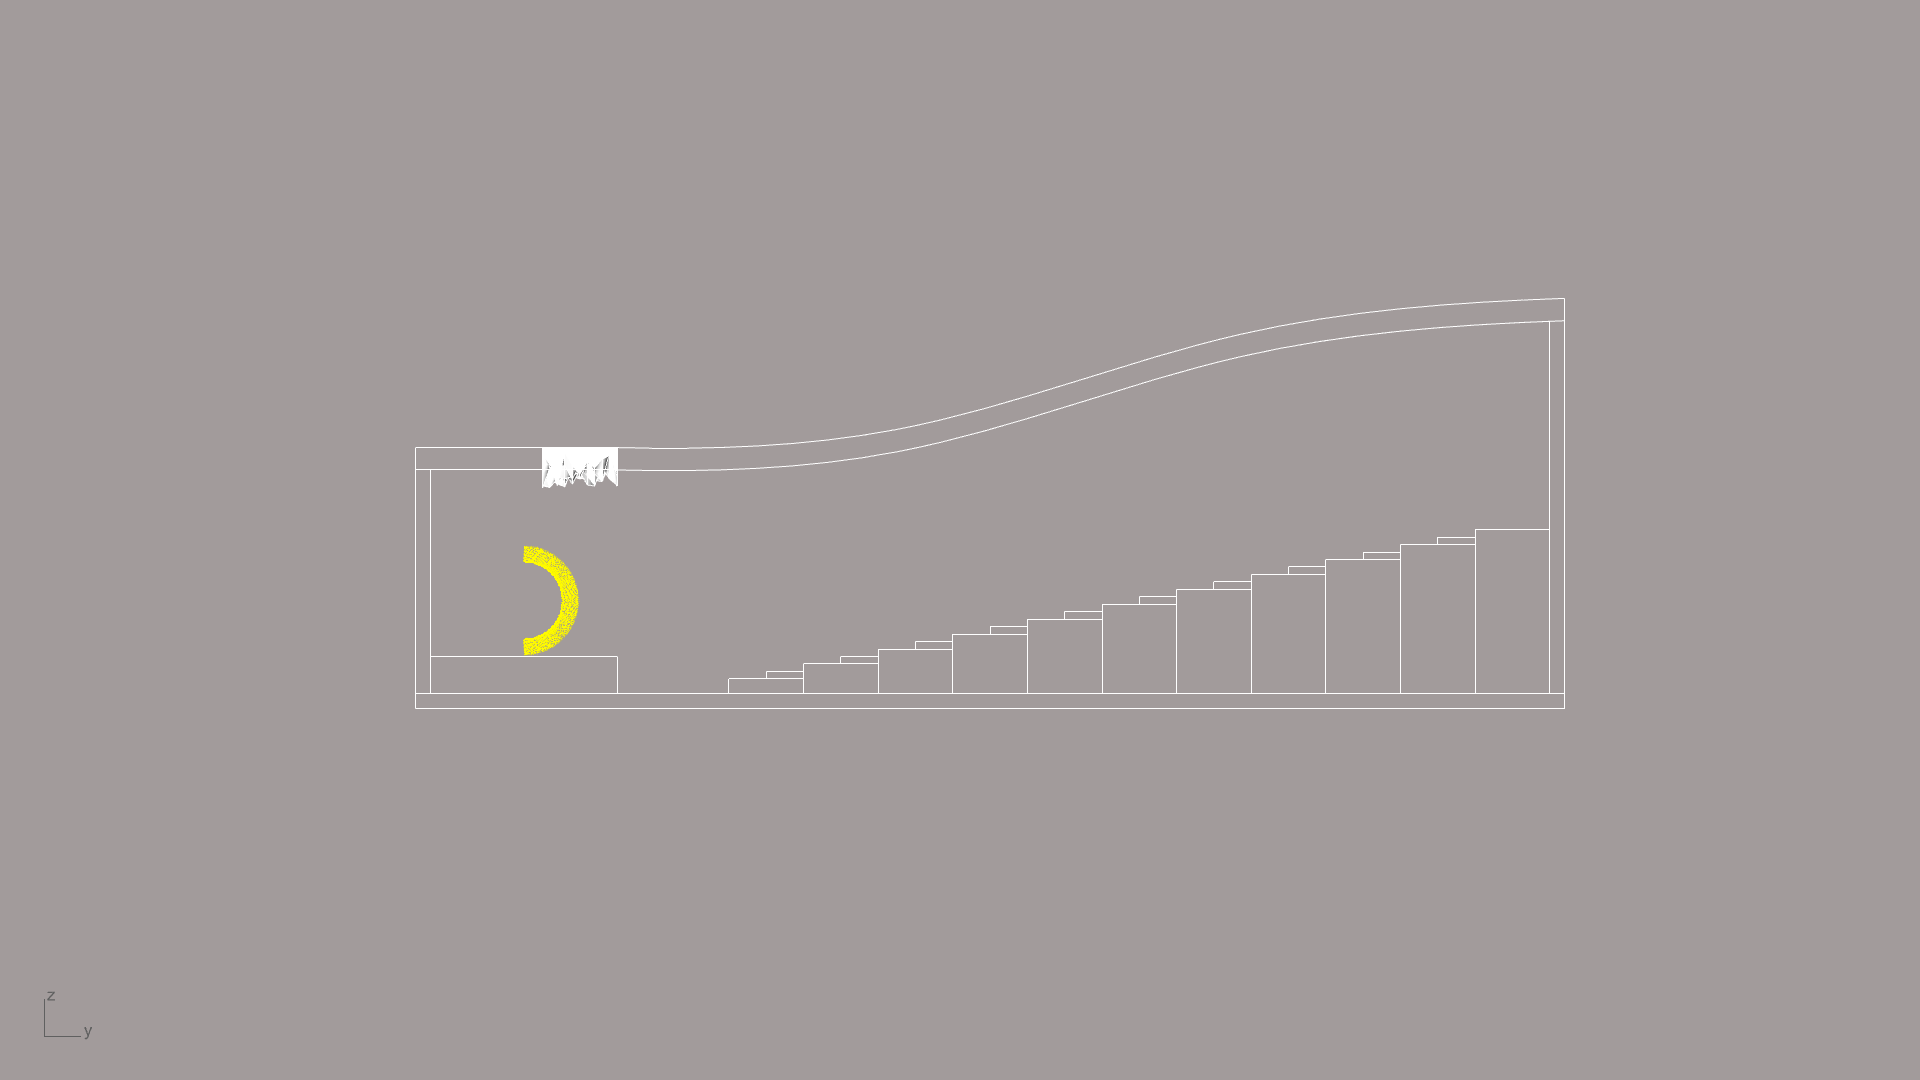
1. Design Theatre Hall
The design of the theatre hall is based on my studio work. It is a medium-sized theatre hall, with a sloped and curvy ceiling and 200 seats. When creating your own design in Rhino, make sure you work with layers for the ceiling, floor and walls. If you finished your design, type PachyDerm_Acoustic in the command line. Here, you can assign acoustic materials to your Rhino layers. Later, you’ll connect these layers in Grasshopper. Make sure you set your units to meters, otherwise the PachyDerm plugin will not work.
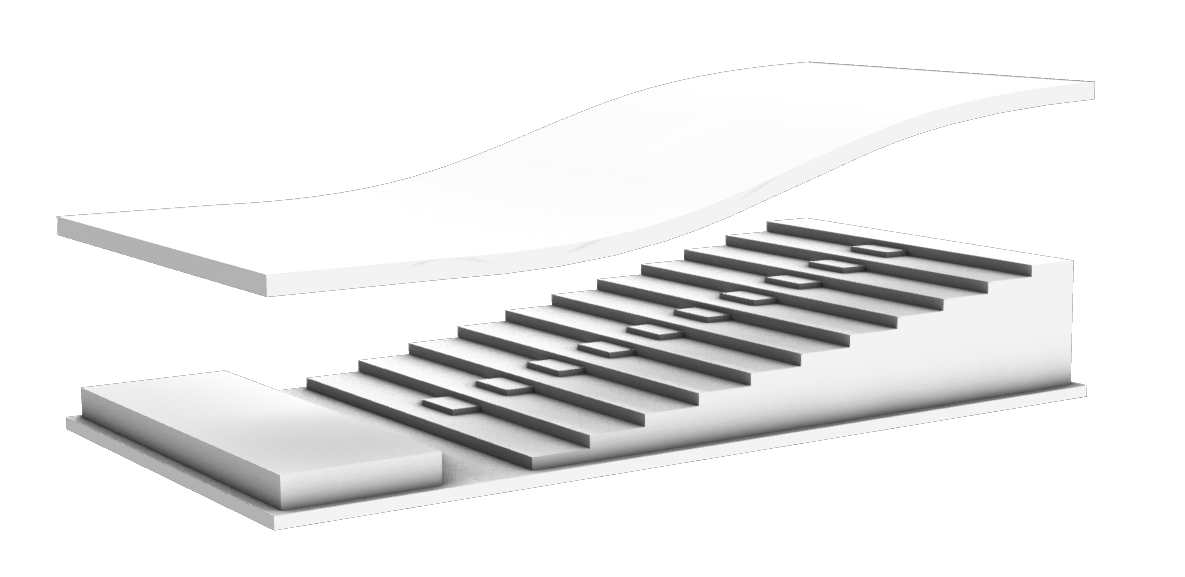
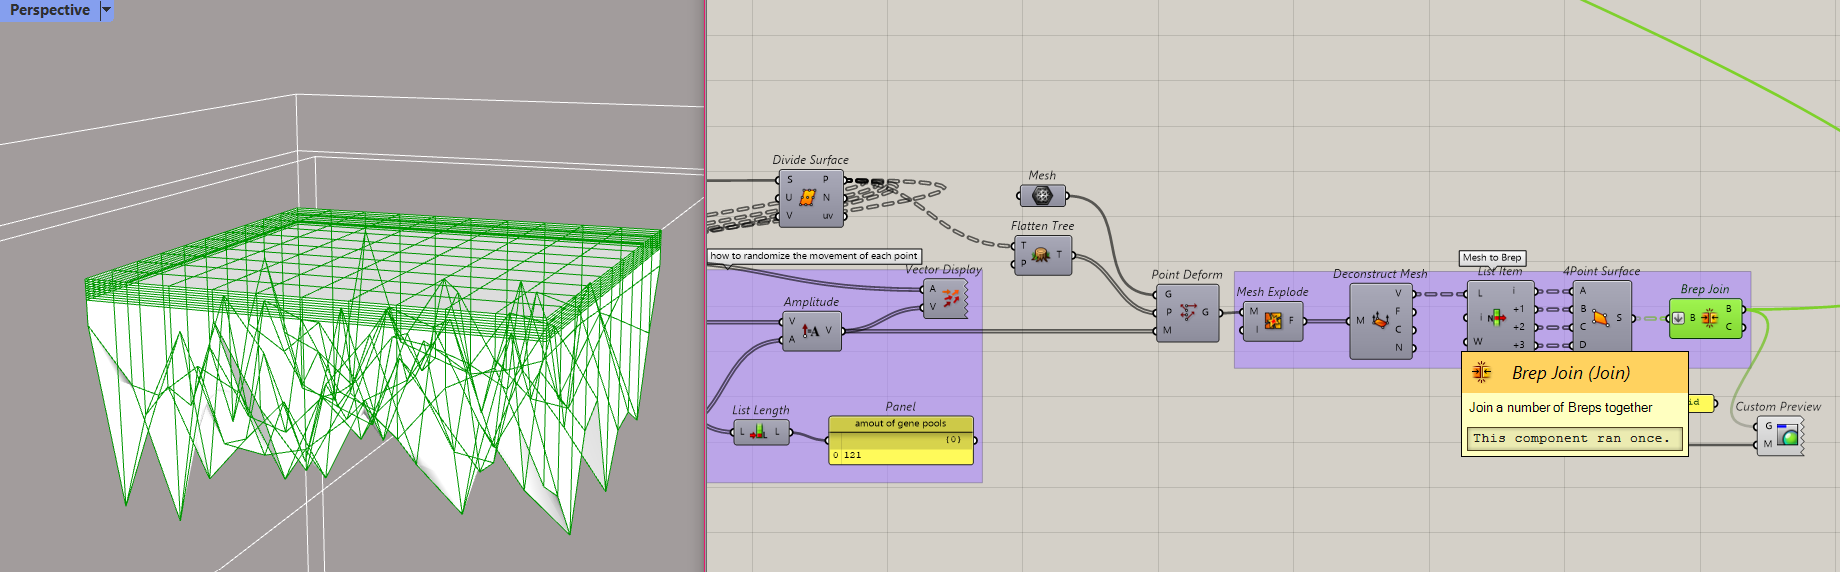
2. Design acoustic panel
I’ve placed the acoustic panel on the ceiling, right above the sound source (speaker/singer/musician/etc.), but you can place the panel on any wall or ceiling area you’d like on the inside of the room.

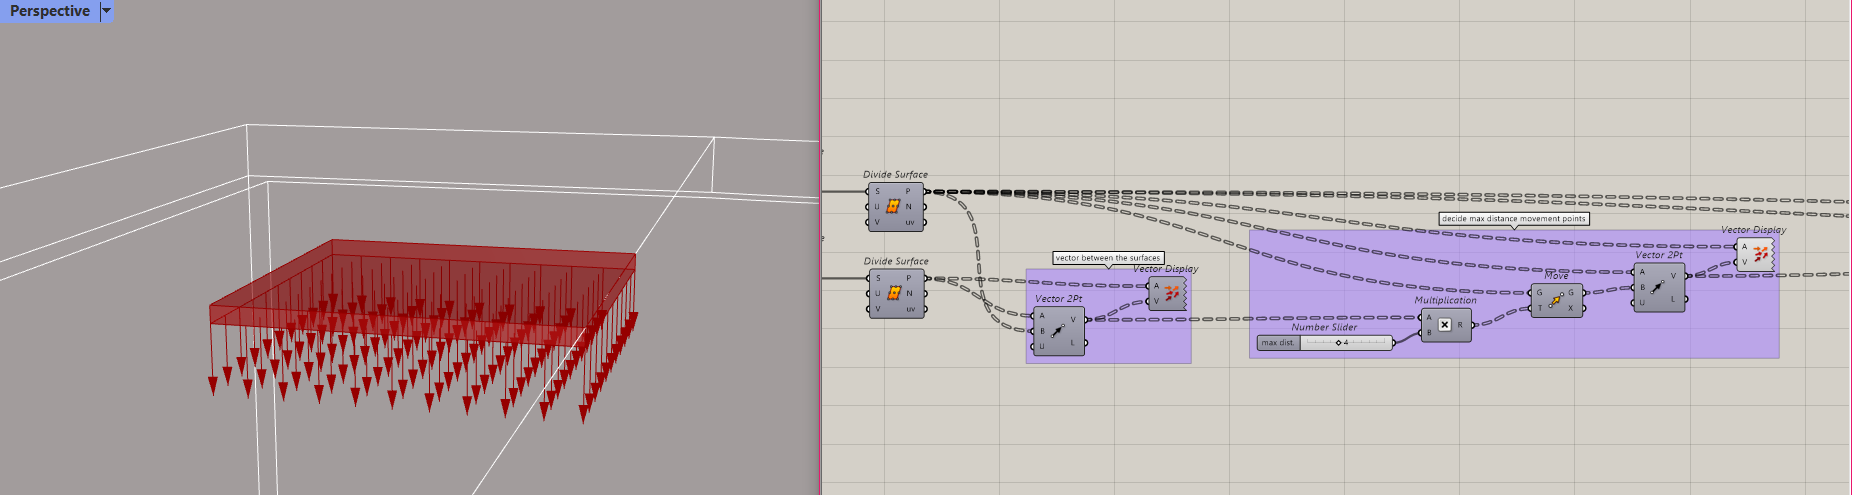
At first, you place a closed curve in Rhino that will decide the placement of the panel, as well as the dimensions in the x and y directions. You then create a box (the -0.1 being the depth of the box), define the corners points and create the upper and lower surface from these points. Then, you divide the surfaces into a raster of points. These will be the points we’ll later move down to create the acoustic panel volume. That’s why we need to determine the vector between the points of those two surfaces.

You’d have to determine the maximum distance that the points will move in order to create the panel shape. You can move the points from the lower surface to a maximum distance. For the ‘T’ you multiply your previous vectors from step 1 by a factor. My factor is 4, so my maximum moving distance will be
0.1 x 4 = 0.4 meter.
Now randomise the amplitude of these vectors by connecting it to a gene pool. Take the list length of your vectors to know the number of gene pools. Make sure you flatten your vectors and points to randomise each movement separately.
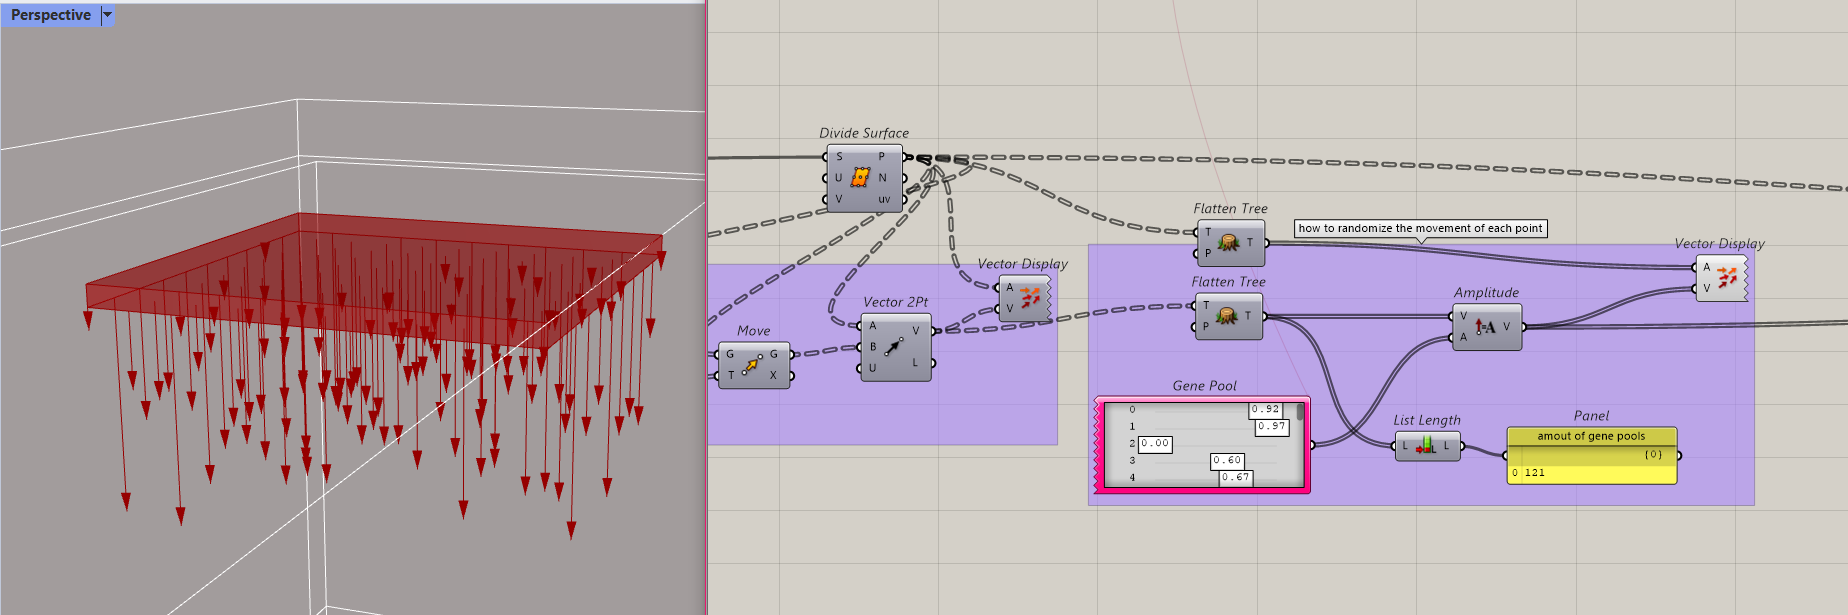
In the last step, point deform the points of your lower surface with the amplitude vectors from step 3. Create a mesh with the same dimensions as your box from step 1 and attach it to the point deform. The PachyDerm plugin will only work with a brep, so you’ll have to configure your deformed mesh into a brep. using the MeshEdit plugin. You can attach it to a custom preview to create a solid colour. This will be useful for the acoustic visualization later on.
3. Visualisation of the sound
The movement of the sound will be visualized using the Pachyderm plugin and the ‘Simulating acoustics’ tutorial by Kirdeikisz. For this part, I’ve followed the tutorial from Kirdeikisz step by step except for the last part. There, I wanted to only visualize the sound that would clash with the acoustic panel. Therefore, you can deconstruct the points of the pachyderm rays and limit them by setting a ‘smaller than’ and ‘larger than’ component.
In my case, I’ve limited the visualization to the edges of the panel by deconstructing two corner points that have the same y direction and using their x value as a limitation.
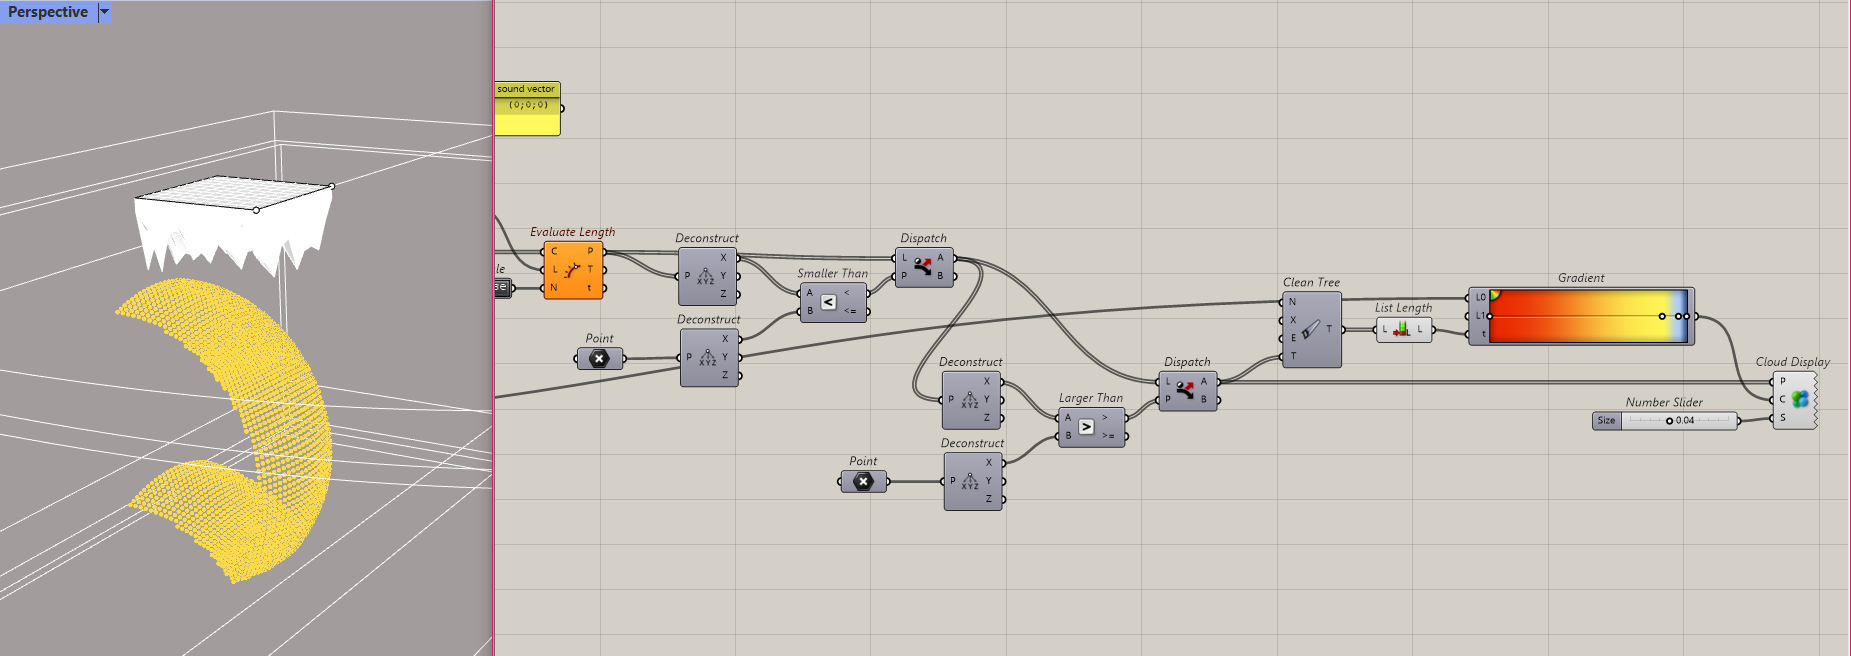
At the end of the video tutorial of Kirdeikisz you can learn how to create a moving visualisation of the sound through the room. In my case, the theatre room looks like this:
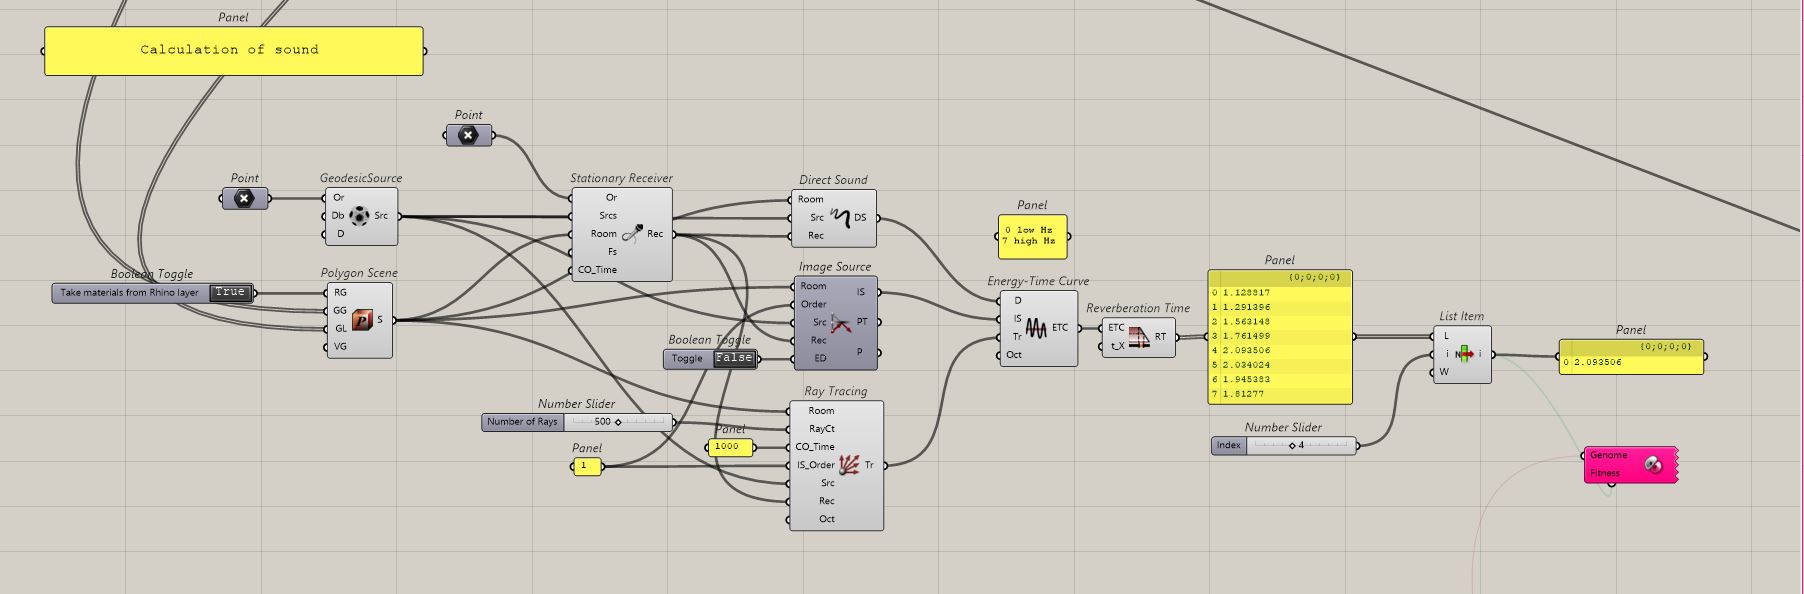
4. Adapting to the reverberation time
The reverberation time of the theatre hall is calculated with the help of the tutorial ‘calculate sound’ by Gediminas Kirdeikisz. The calculation is shown below.
To adapt the design of the panel to the reverberation time it is causing in the theatre hall, a Galapagos evolution can be added to the grasshopper file. The Genome is connected to the Gene Pool we inserted during the creation of the panel design (step 3). Since the Fitness needs to be connected to a single input, you have to select one interval of the frequency scope as a base for your evolution. You can connect ‘list item’ to the reverberation time and select one of the eight octaves (pick a number between 0-7).
I’ve run the Galapagos, but the ray-tracing calculations, which are needed to check the reverberation time for each panel design, took too much time to gain a proper result. After 8 hours Galapagos didn’t show a result and seemed to be stuck.
Future development
In the future, it would be interesting to try to reduce the ray-tracing time in order to run the Galapagos evolution. It also could be interesting to optimize the placement of the panel within the room. I would suggest creating 8 different panels, each optimized to the reverberation time per group of Hz. The reverberation time will differ per theatre hall. For a general-purpose auditorium for both speech and music, a reverberation time of 2 seconds would be optimal.
Then, optimize the placement of these 8 panels through the room and check the reverberation time. The reverberation time should be equalised through all registers to 2 seconds. This would mean that the theatre would be optimised for a mixed-use of speech and music.