Goal |
The purpose of the tutorial is to provide a simplified explanation of how to create a parametric tunnel using the Rhino7 and Grasshopper software. The focus is on wooden curves, variable height, different rotation around the fulcrum.
Materials |
The proposed materials for the tunnel are laminated timber boards made according to the designed shapes. The dimensions of the boards, their placement is variable.
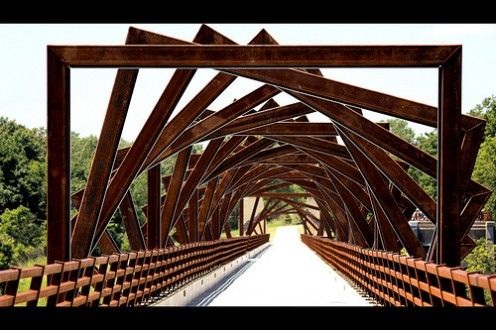
References |

Files and Links |
- Grasshopper File:
- Rhino File:
Full Script |

STEPS |
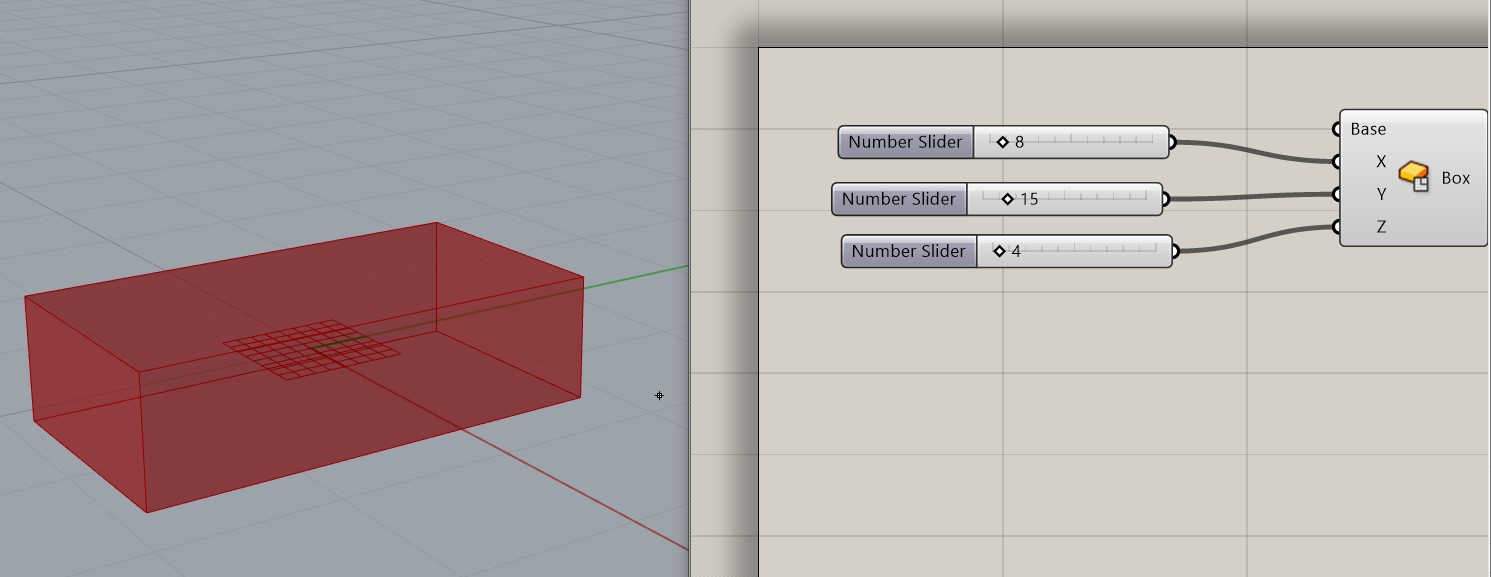
The first thing to do is to create a center box that will define the direction and size of the bridge. Contect x y z with number sliders
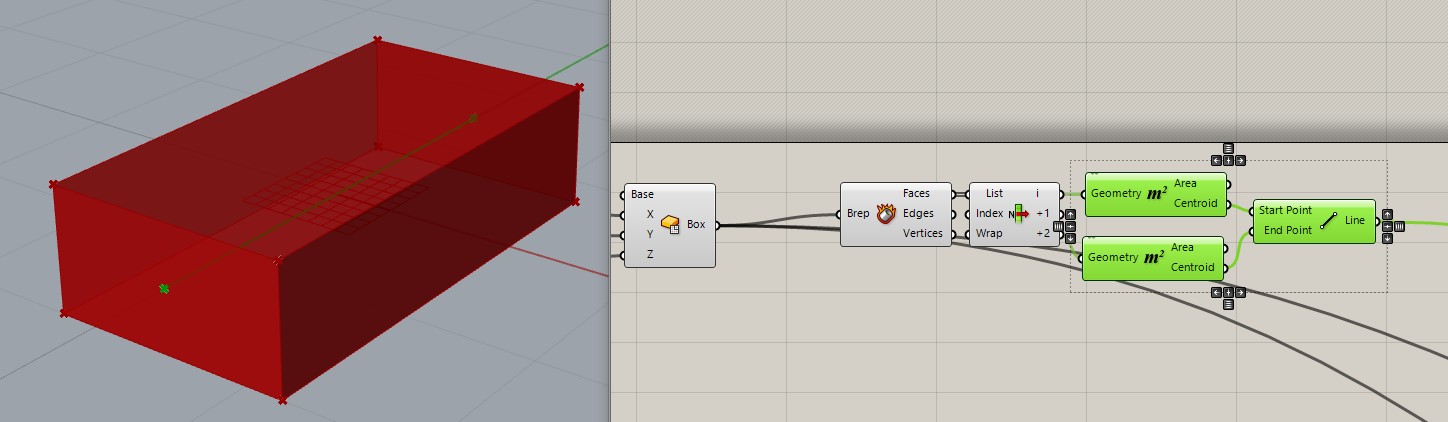
Find to centres and connect wih the line – Deconstruct Brep. Connect list item to surfaces – find opposite surfaces. Using Area component find the centre of surfaces and connect with Line.
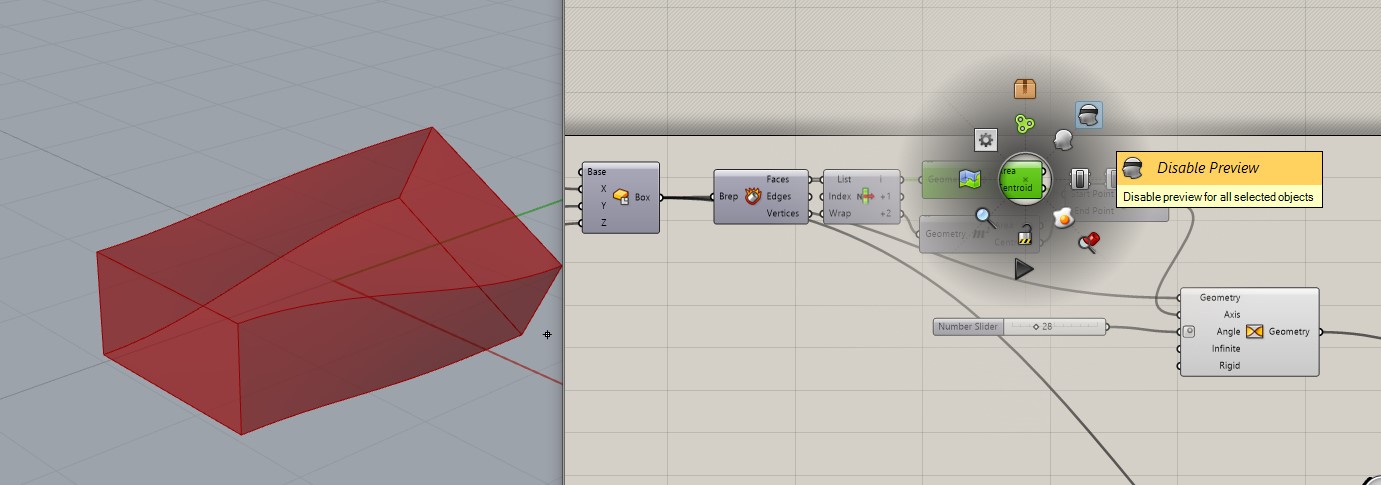
Twist – connect box to geometry, specify axes of rotation. Connect Line to Axis on Twist. Create number sliders to angle, and change to degrees by right buttom. Disable preview to another components.
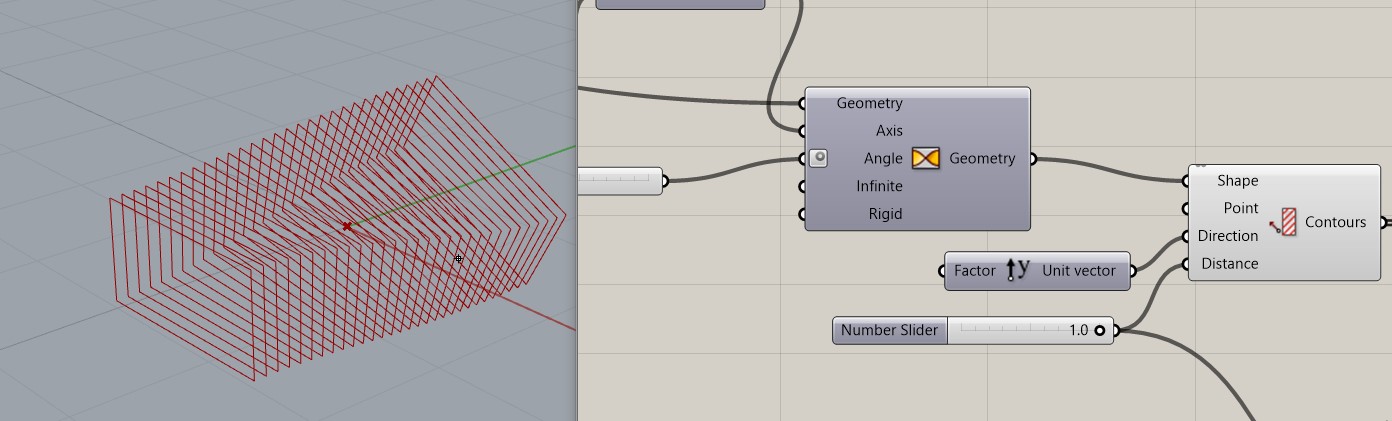
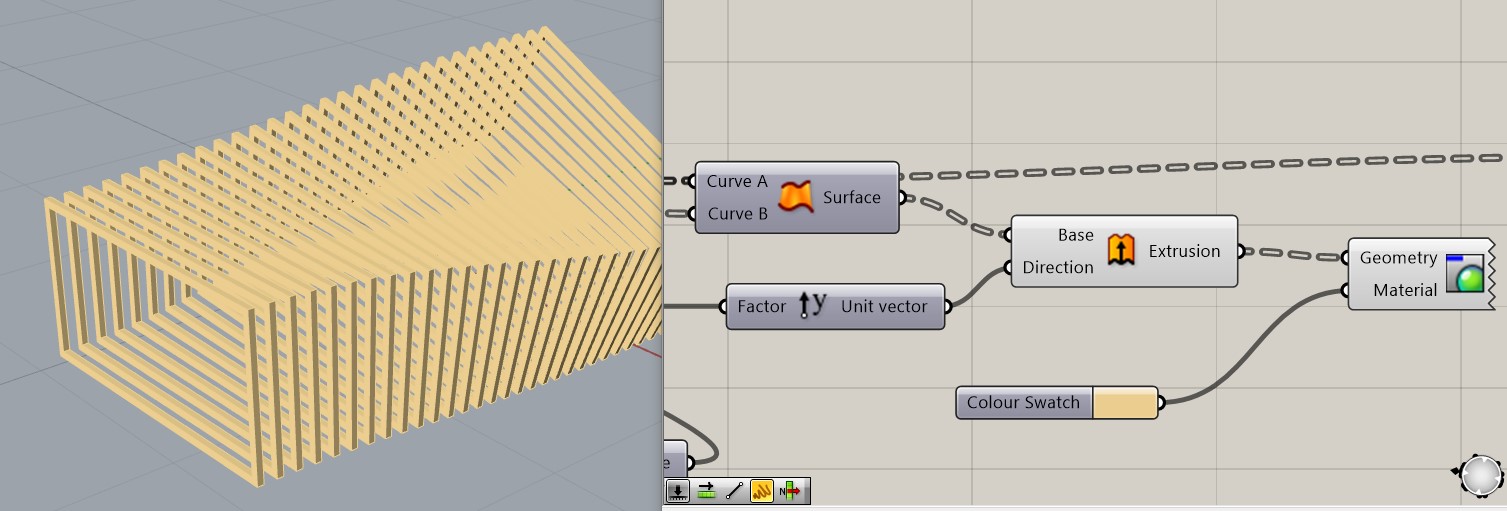
Create contour on Y direction. Create number slider 1 to distance.
Create faces between curves. Offset curve – connect counturs to curve. With Division it is possible to change the distance value – divide the distance between the countours . Ruled surfaces – create the faces between these curves. And disable preview all about Ruled surfaces.

Extrude – connect surfaces to base. Unit Y – extrude to Y direction. And at the same time connect resolt to factor. Disable preview of Ruled surfaces. And choose the color by colour swatch and custom preview.
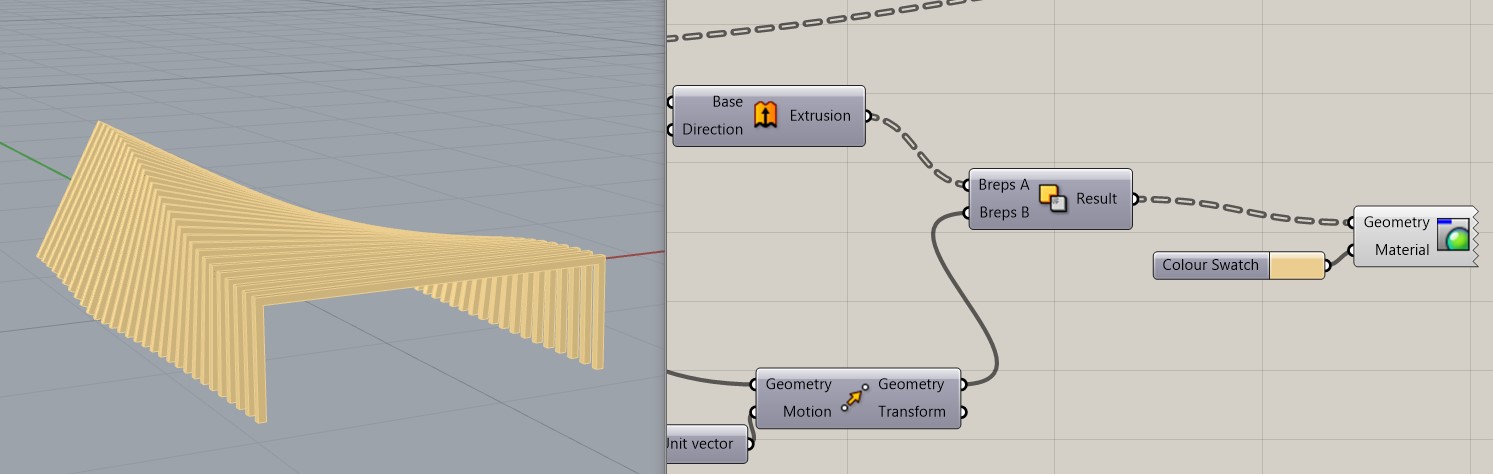
Scale NU to implement solid difference. Connect box to geometry. Create number slider x and y. Geometry connect to geometrz Move. Move down – unit Z number slider -5.00<0

Solid difference. Connect with extrude and move. Connect result to geometry (custom preview). DIsable preview
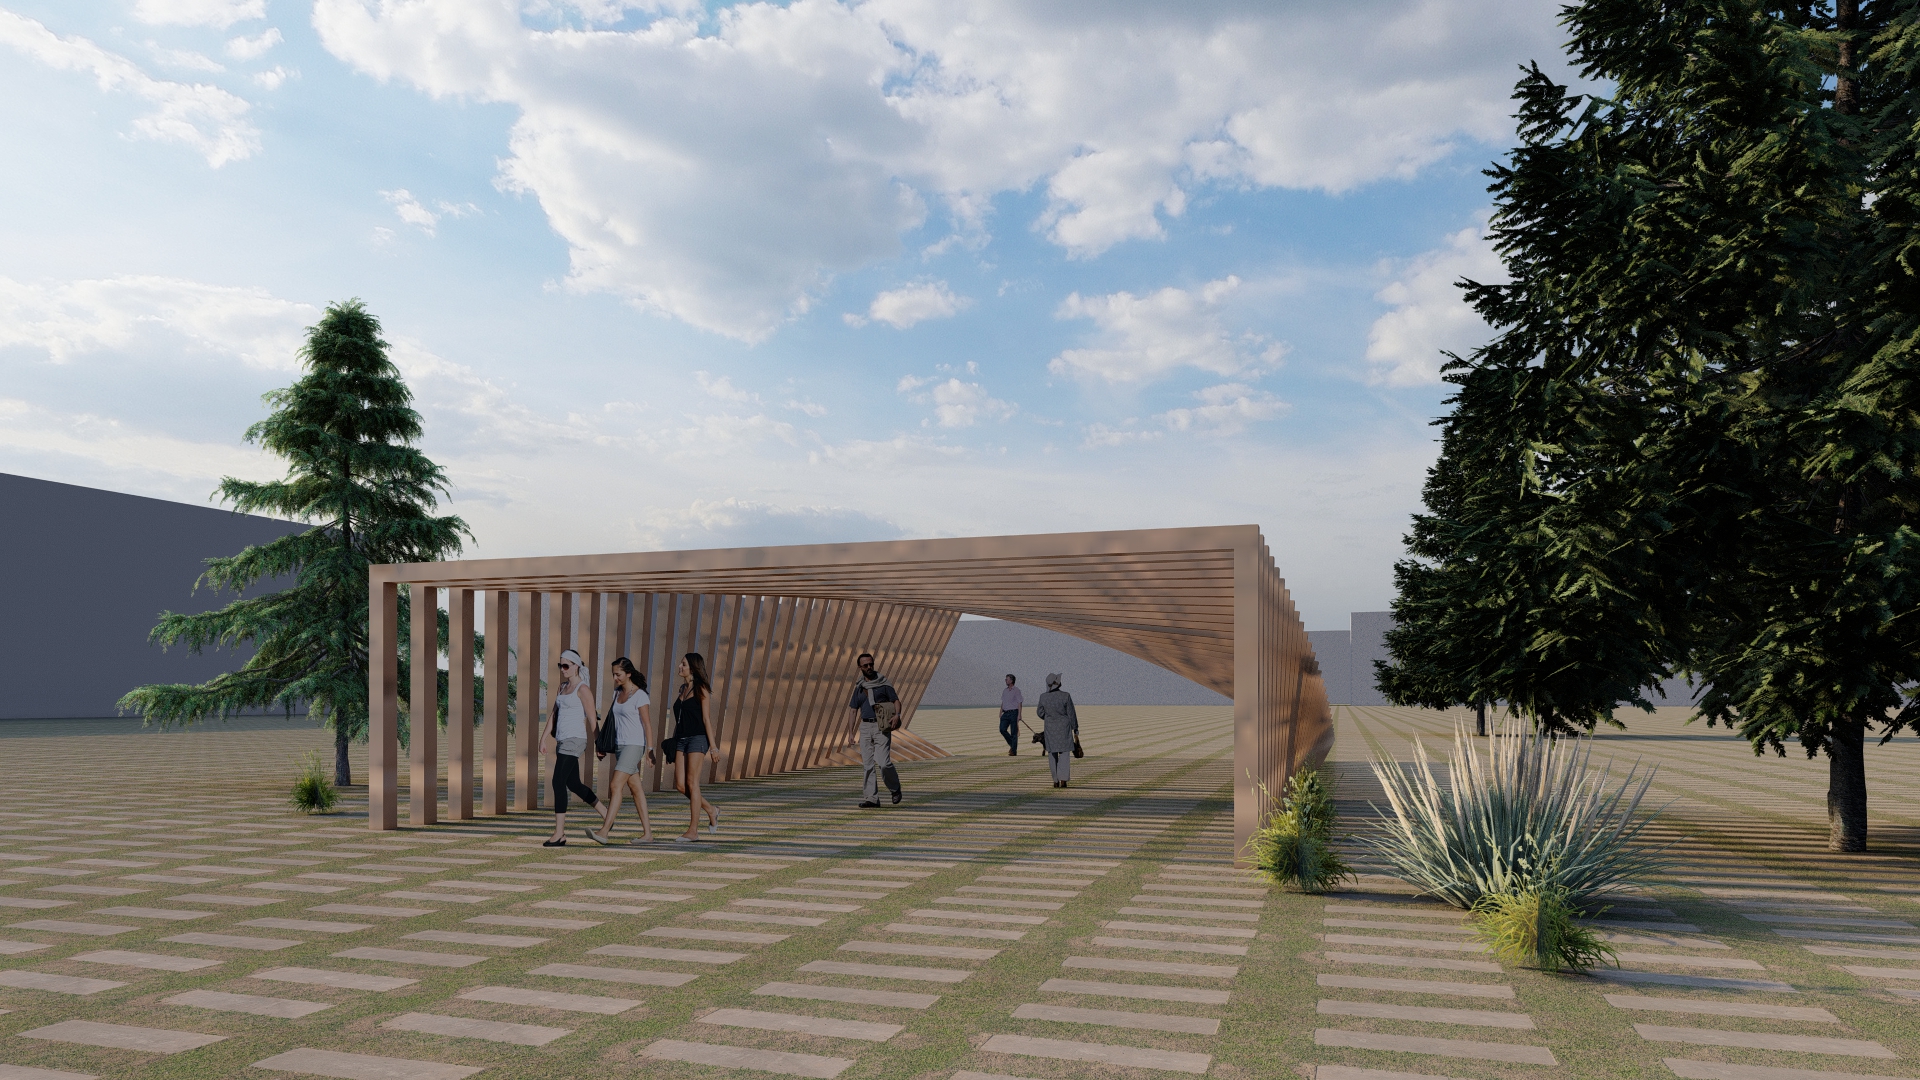
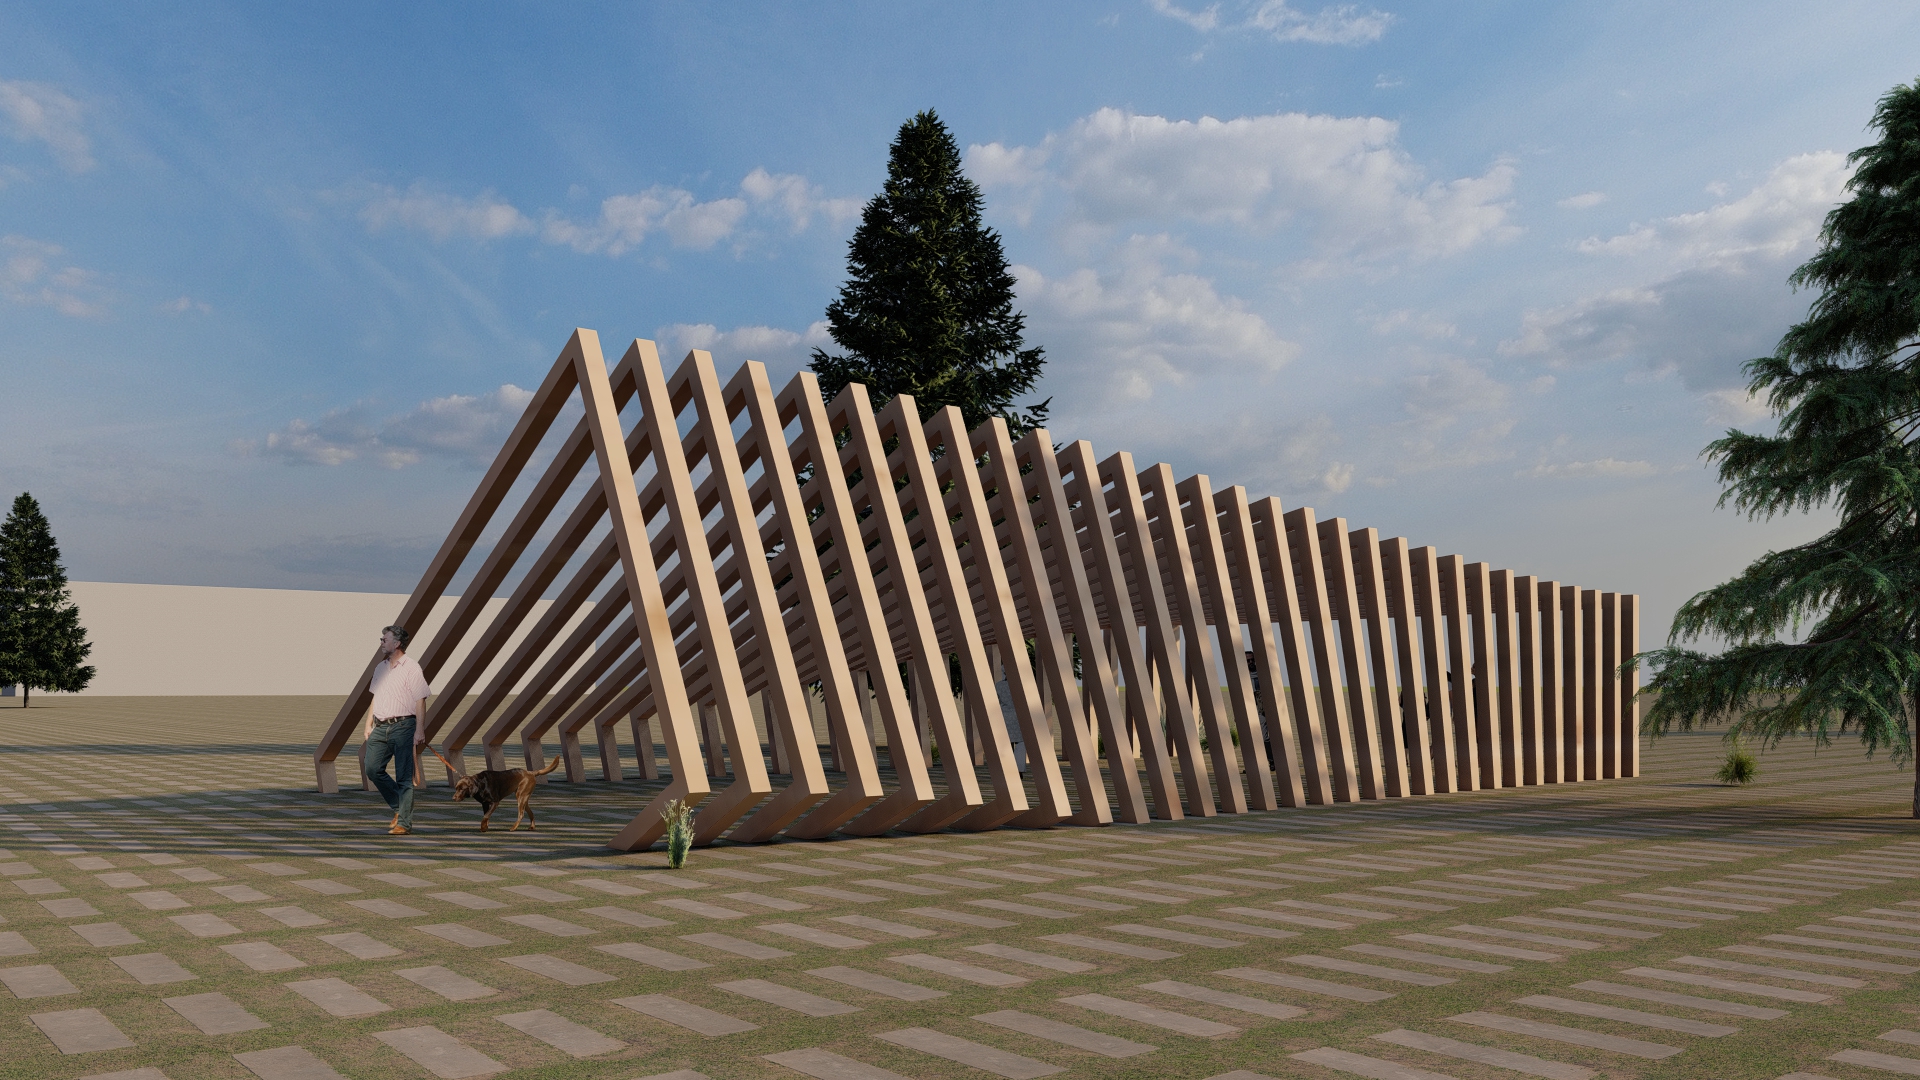
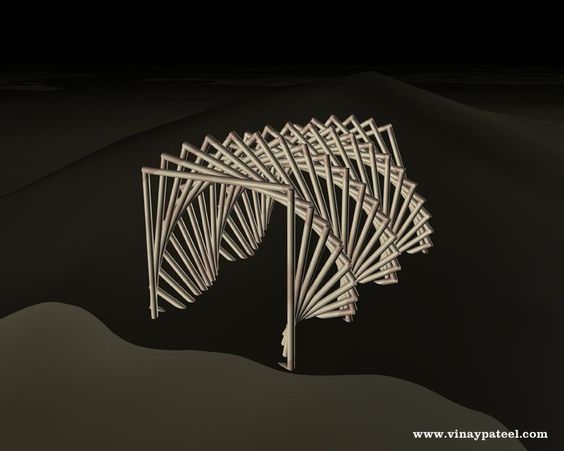
RESULTS |
Exporting and rendering in Lumion