Roof structure
Author: Elitsa Rabina
Goal:
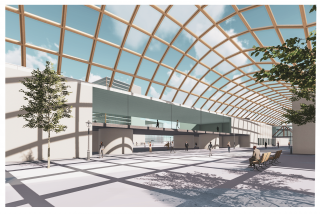
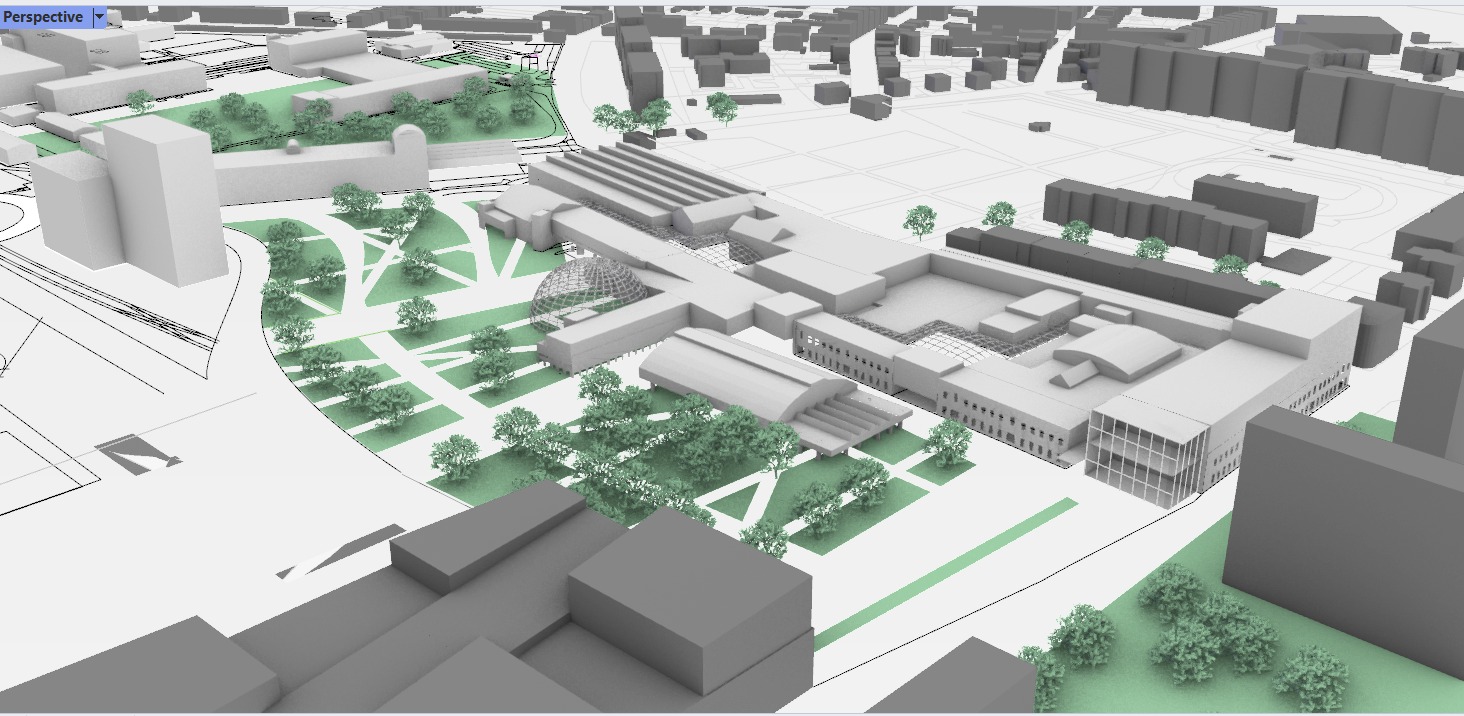
To create a glass-steel coverage which is optimized by the mesh relaxation functions in Grasshopper. The structure has to cover a street in the Mlada Boleslav Skoda Museum and to create a space, where people can walk protected but also will have enough sunlight.
When I started with the creating of the structure I first couldn’t achieve the quadratic shape of the faces which I wanted to, so I started a second try and succed, but because it can happen to others also, I will attach the previous version of the coverage in the Grasshopper file too.
The final result:
Step 1
First creating a custom surface that was connecting my buildings in Rhino and putting it into the Grasshopper surface component.
Step 2
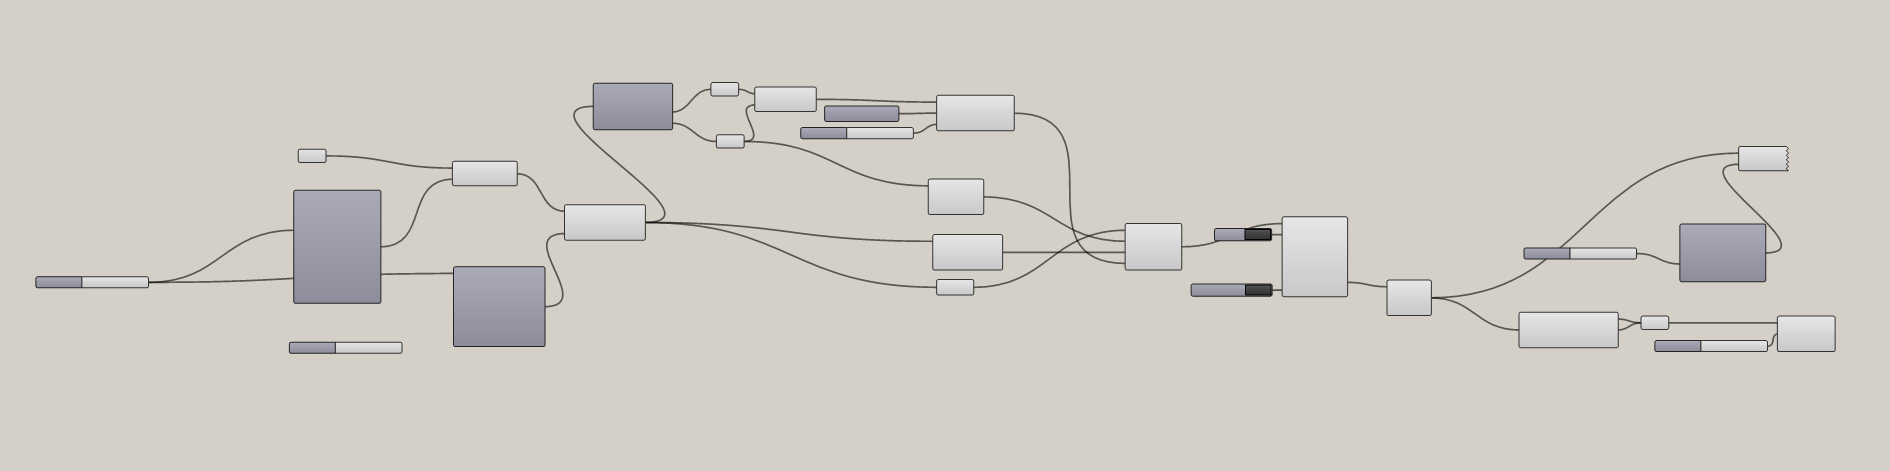
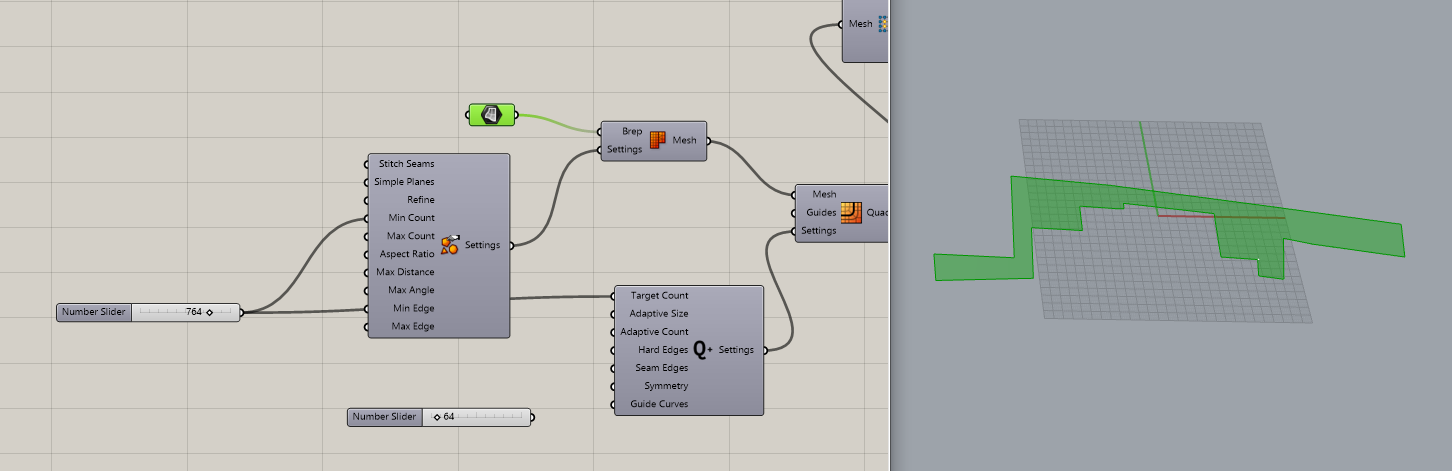
Turning the surface from Brep into a Mesh in order to remesh the shape and to can use specific type of faces for the future coverage . For this step I used the Quad mesh which is turning the mesh into an object wit only quad faces which is allowing to work easy by just adjusting the settings of the remeshing. For example in my case I have 764 quads to aim for the final result of the remeshed object but it allows many more options if needed.
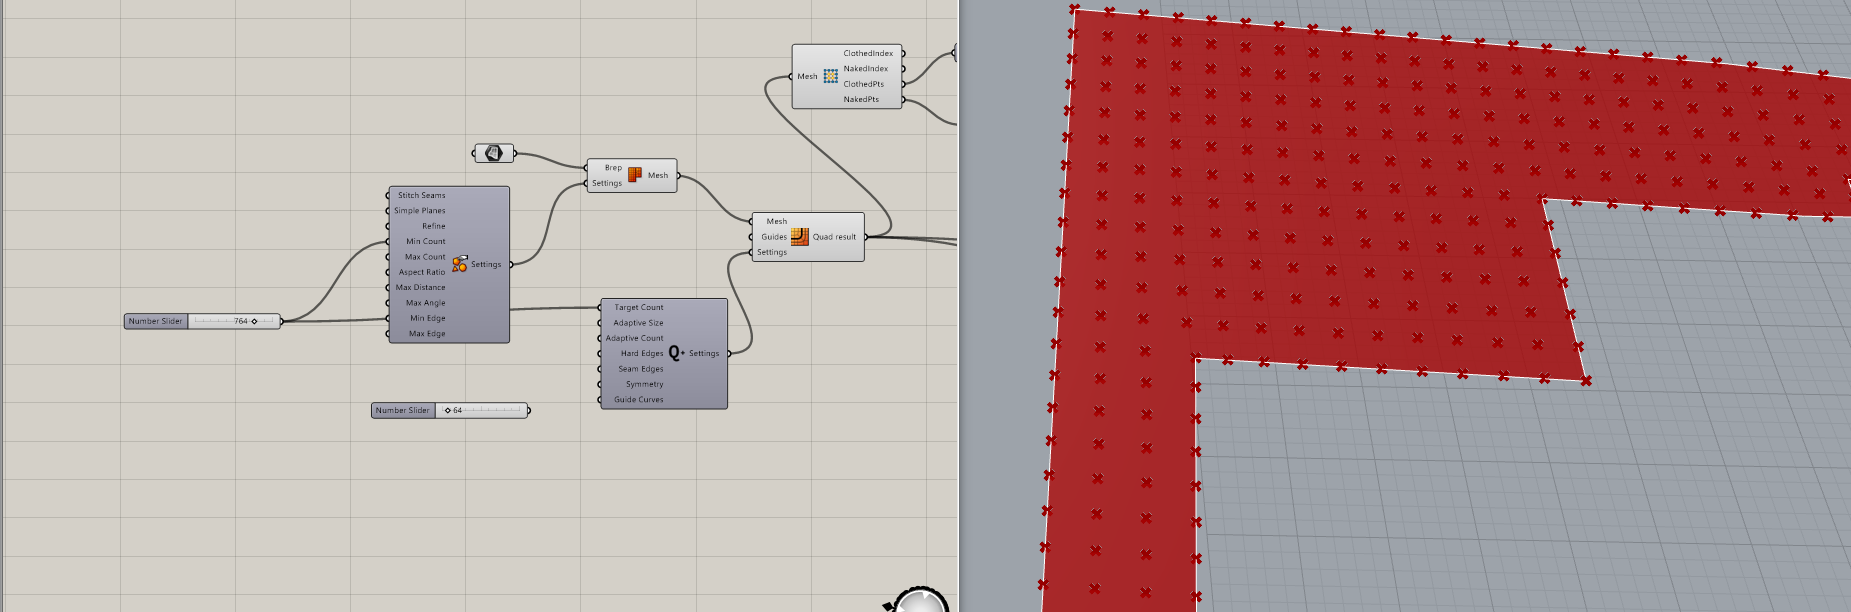
Step 3
To can work with the two point groups individually I seperated the naked verticles into -points surrounded or not surrounded by faces . This gives the opportunity to to use the outlined points as an Anchor points in the next step and to transform only the inside points of the mesh in order to create a logical bubble coverage.

Step 4- defining the Goal objects for the Kangaroo

To define the goal there are few steps that should be done.
1. Add the load to define the gravity – the weight factor can be from 0 to 10 and define the direction in which the mesh should be transformed. In my case it is the z factor.Here I have the weight factor on both components- naked and clothed indexes because it is a Live Physics simulation which means that every part of the coverage will be loaded.
2. Define the Anchor points- points that don’t move during the relaxation. The anchor points are the naked ones so when the coverage built itself it will start from the existing buildings and transform in the middle without moving from its outline .
3. The lenght shows how far the points can move and are connected with the quad mesh so the points do not go out of the bounding.
4. Use the show component to can see the mesh transformation.If you skip this component it won’t be possible to see any results before you add a component allowing the visualisation afterwards.
5. Use Entwine component to flatten and combine the data in order to make it into single list. First I used the merge component and flattened all of the inputs but the I saw that with this component it is even easier.
Step 5
Adding all goals to the kangaroo and seeing what structure is created. For the kangaroo component it is really important to have a button and a boolen toggle so you can turn the process of transformation on and off while working on its improvement, otherwise it is really easy for the computer to get overwhelmed.

Step 6
Using the shift list to clean the data tree.

Step 7
Before baking the object so I can use it in my studio project I modified it firstly with the material change. I used the material component to adjust the settings and make the first part of the coverage a glassstructure.
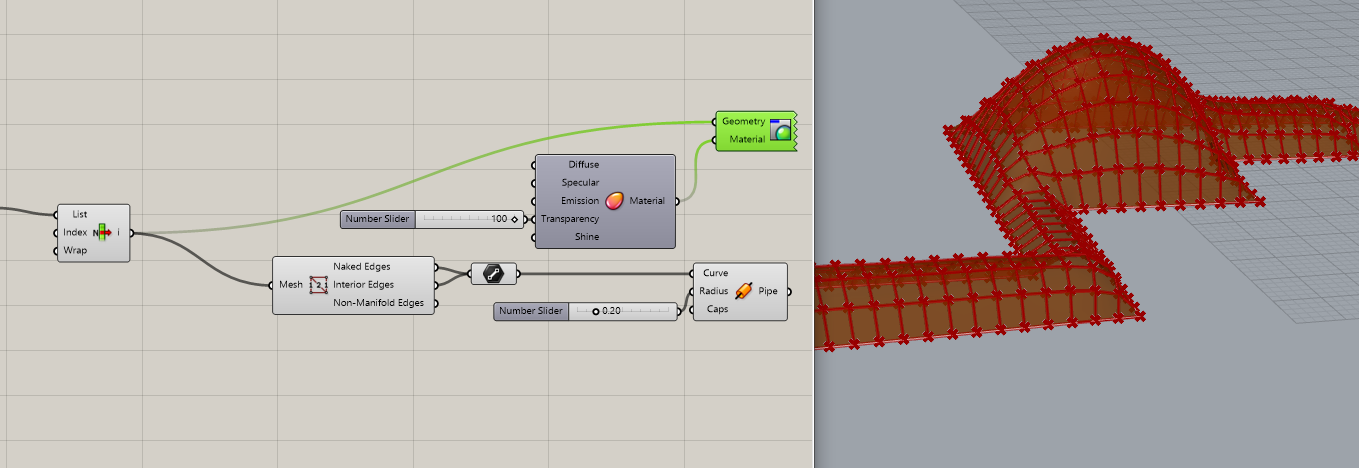
Step 8
To create the beams of the coverage I made the interior edges as a list and created a pipe around the connected line.

Result
I ended up with a coverage made out of beams and glass and which can be transformed any time when I need it to be. For example I changed the gravity factor or the quad mesh settings and I had as a result a different looking mesh.
As a second structure I made a bubble form coverage. I used almost the same components but with a different geometry.
Step 1
Defining the circle with its radius and boundary edges.

Step 2
Populating the existing geometry with random points and triangulation of the mesh in otder to create a triangular faces for the structure.
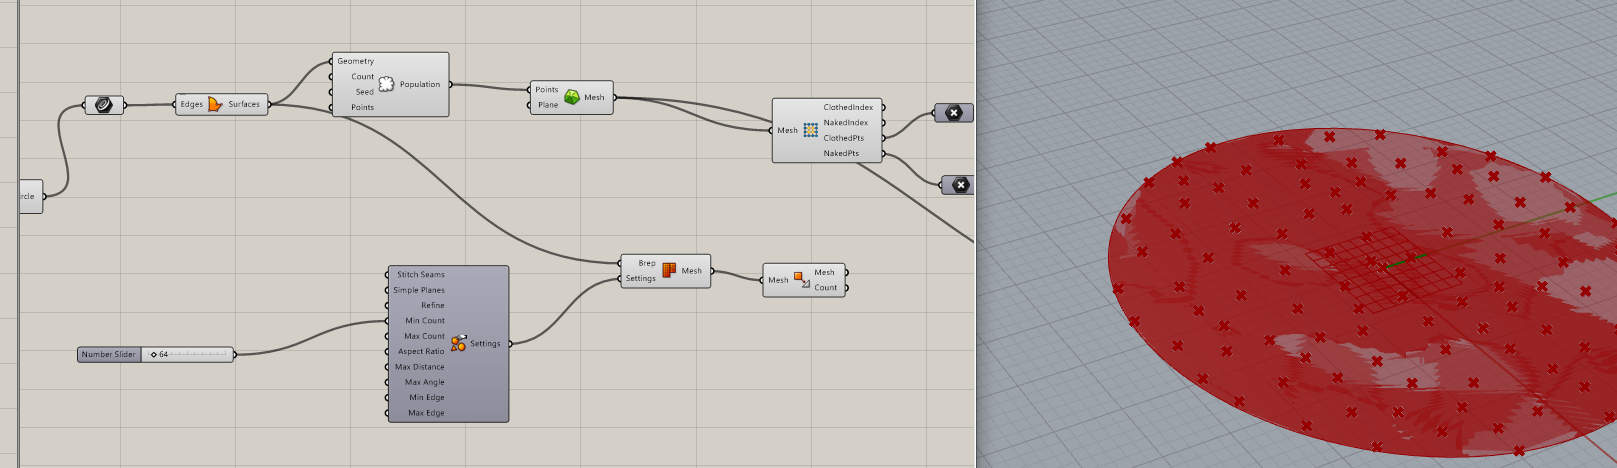
The next steps are the same as by the other shape- defining the goals of the kangaroo, than adding the pipe and material components.
End result of the bubble.

The structures can have various looks it depends just on the needed result. Everything is easy to modify by a simple change of the mesh structure or the weight of the load.
Grasshopper file
Rhino file