This script takes the terrain you created for your studio project and turns it into sheets for lasering. Quick and easy. It takes time off your hands when you need it the most!
First and foremost you have to create a mesh or morph terrain and save it as an .obj or anything that rhino is capable of working with. Make sure your terrain is smaller than the dimensions of the laser, otherwise the script won’t be able to place the pieces on the sheets. Your mesh needs to be prepared well or the scrip will not work. There are several “diagnosis” groups that will help you make sure everything is going according to plan.
OVERVIEW
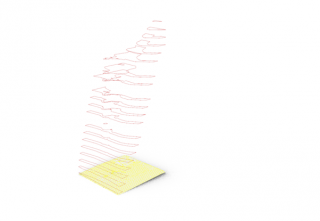
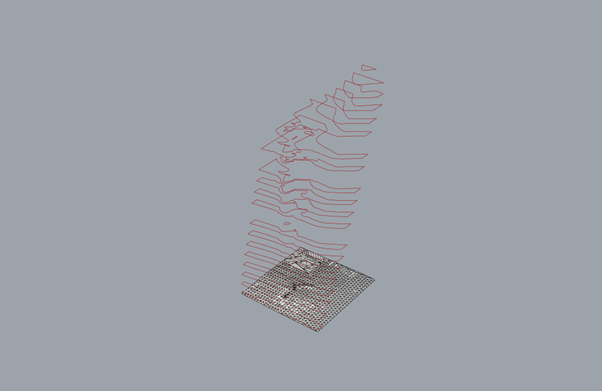
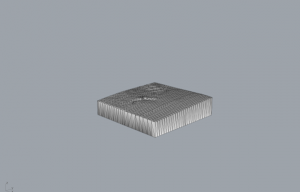
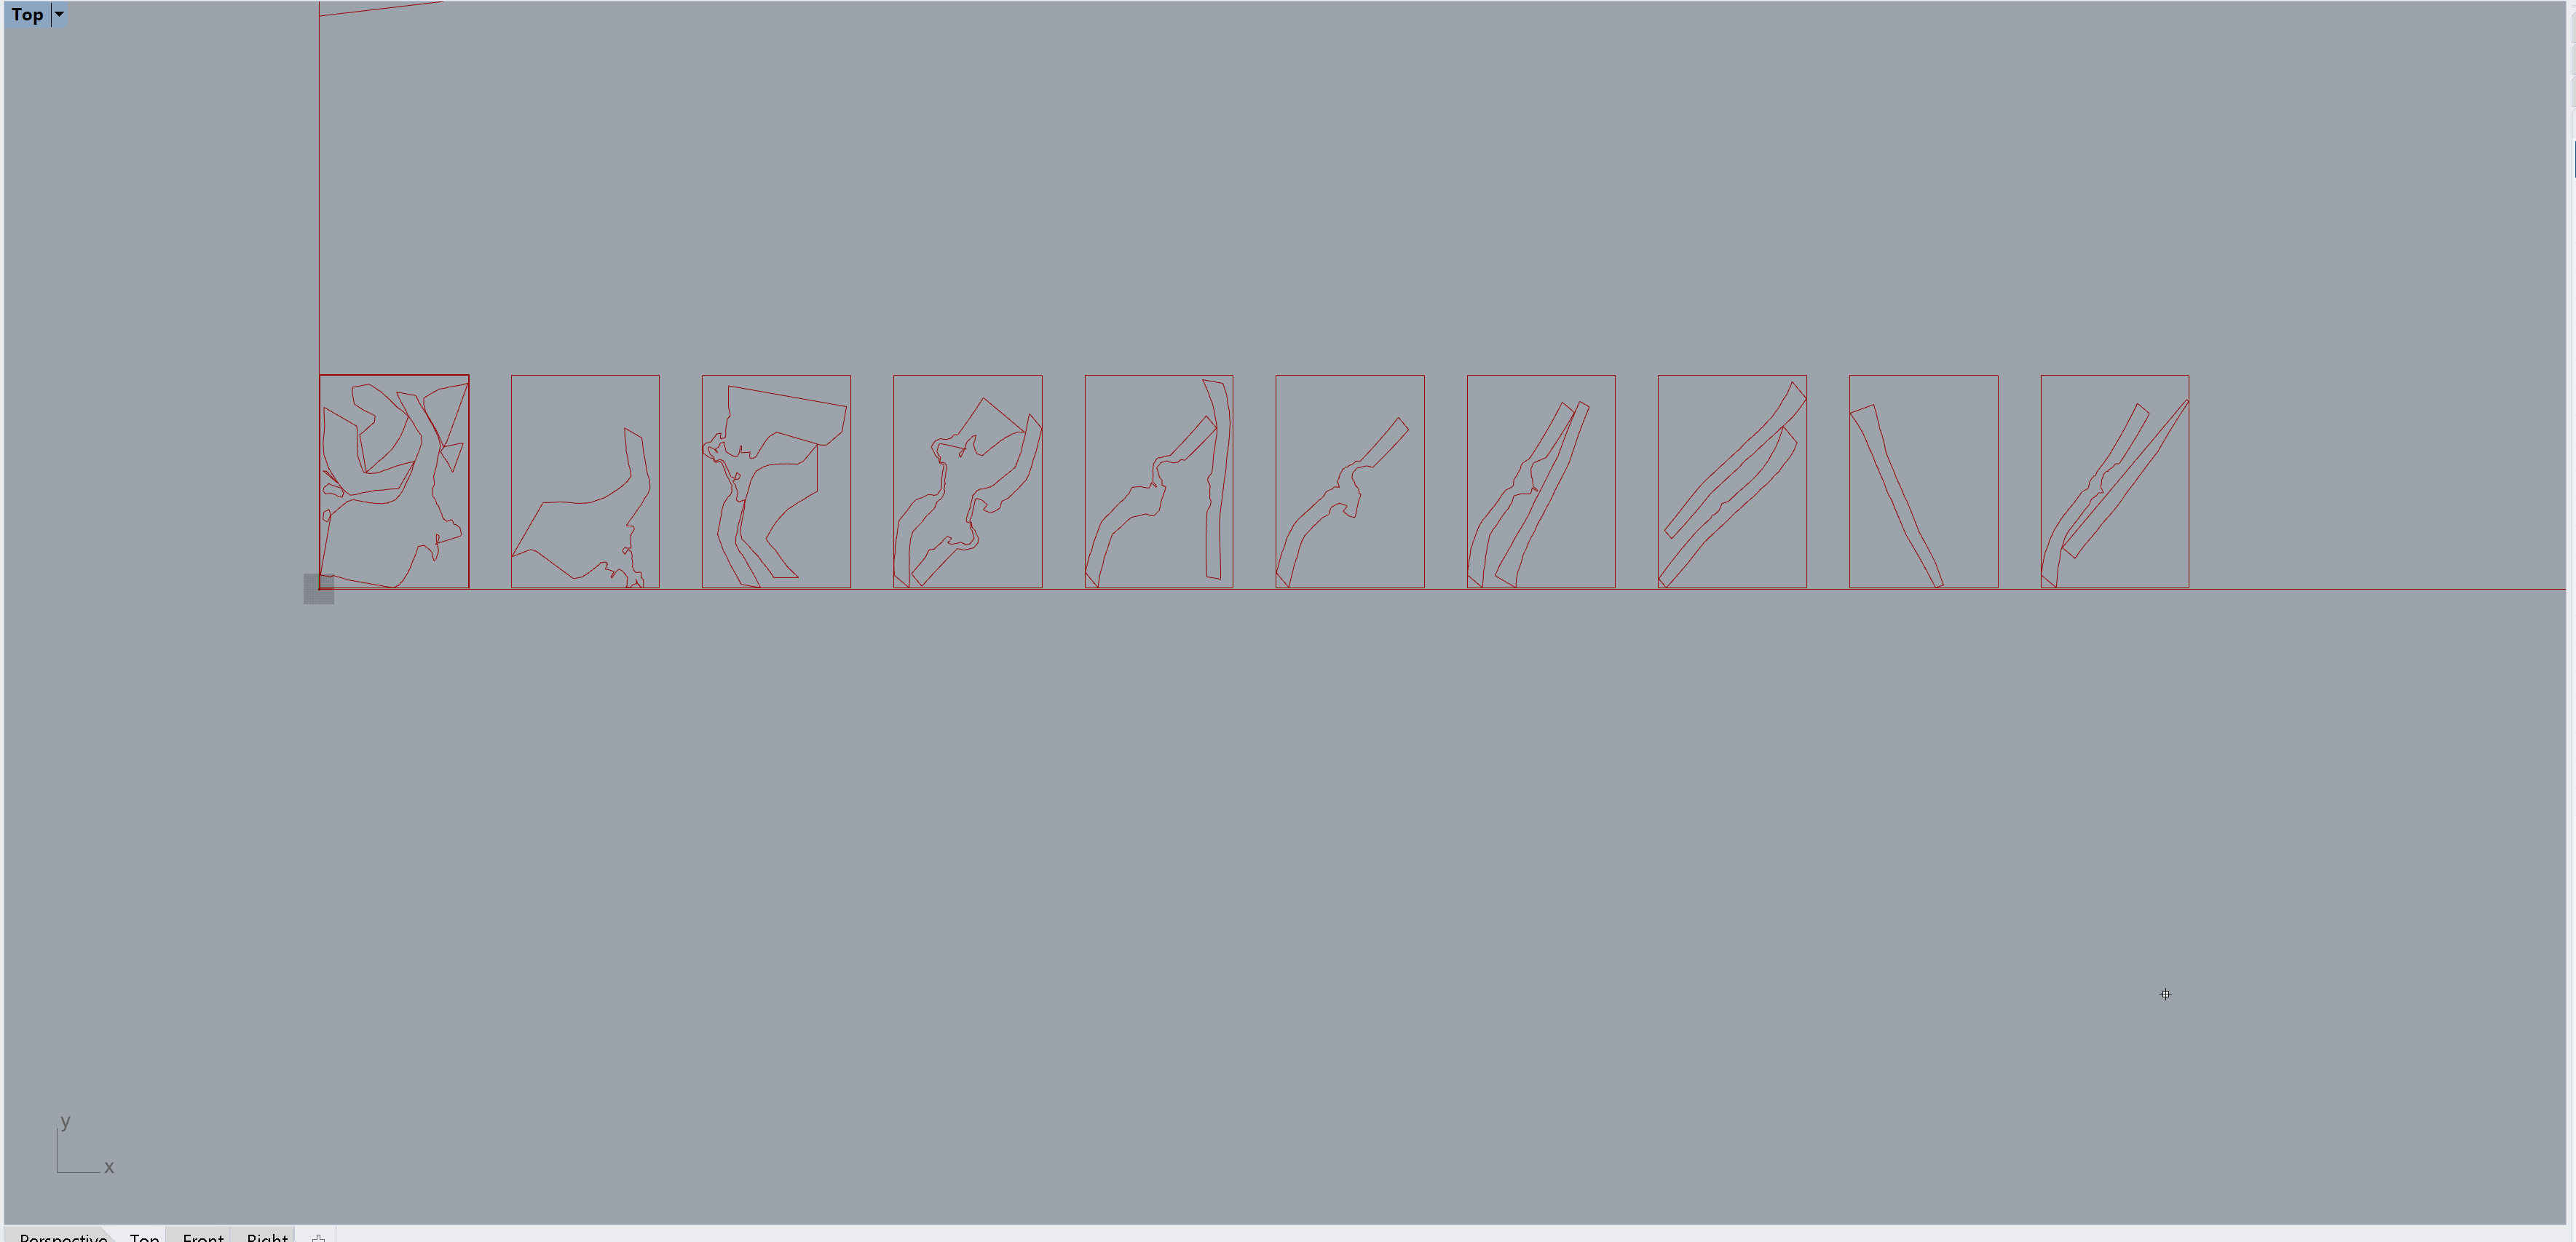
In short, my script takes your terrain as a mesh. After you bake it and put it in, it takes only the top part (the terrain) out of the whole mesh and makes a completely new mesh. The height of the terrain model will be the height of the mesh terrain you input. Then through the “Contour” component the scrip will make polylines for each contour of the terrain. Some of the contours might be too small for a laser to print so they will be eliminated. As well as duplicate contour polylines. Then the polylines are subtracted from twice removed polylines to create a terrain that will be easy to glue together and will save material at the same time. After that there is the scaling into your desired dimension. The last part is done by Open Nest plug-in which will place your contour pieces on sheets. After that you can export and send to laser. Yay!
STEPS
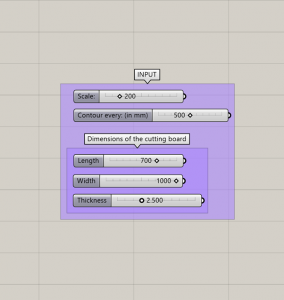
First you have to put input parameters into the script. You need to know the scale you’ll be working with, in what distance you want the contour lines to be and the dimensions of the board you’ll be cutting from – the length and width.
Second you input your mesh into set one mesh, bake it, and put the baked mesh as set one mesh into the second mesh icon.
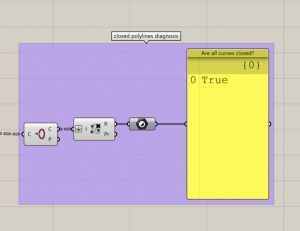
Third you make sure your mesh is top notch. Use the “diagnosis” groups to make sure everything is okay. In EXTRACTING THE TERRAIN PIECES part, you have to make sure that all the polylines are closed and actually make the terrain you desire. Otherwise there is something wrong with the mesh you put in.
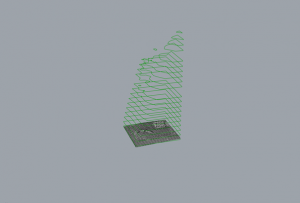
Tip: For this I recommend running the “contour diagnosis” group. It will give you a visual and help you imagine more clearly what you’re really doing. Also the “closed polylines diagnosis” needs to be true.

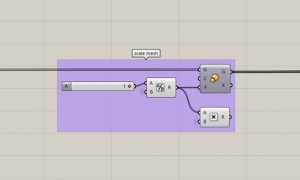
Fourth you are scaling.
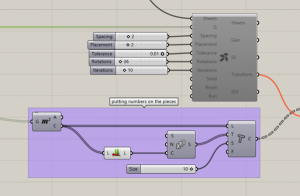
And last but certainly not least. You are using the wonderful OpenNest which does a great deal of the magic happening in this script. It will take the contour lines you have created from the mesh and place them on the sheets.
Just make sure you connect or enable the OpenNest part as the last one. It takes some time for the OpenNest to do it’s magic and it would give to much frustration if it was enabled all the time.
In the script that I’m giving you I disabled the “Pack Objects” component.
Use the settings I used in my script for the “OpenNest” component as I found them to work the best. But feel free to experiment and use the official Open Nest tutorial which is great.
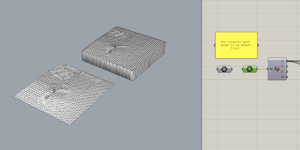
The result should look like this:
You can also put engraving on your pieces so you know which one goes on top of each other, but I do not recommend lasering them as there is almost no control over where the text will appear and it might ruin the visual of your model.
I hope this script works well for you!
Special thanks to Petras Vestartas and Lina Vestarte for making Open Nest
I also used one component of Weaverbird without which the magic of this script wouldn’t be possible.
Big thanks goes to Simon for consulting the whole thing! Thank you.