
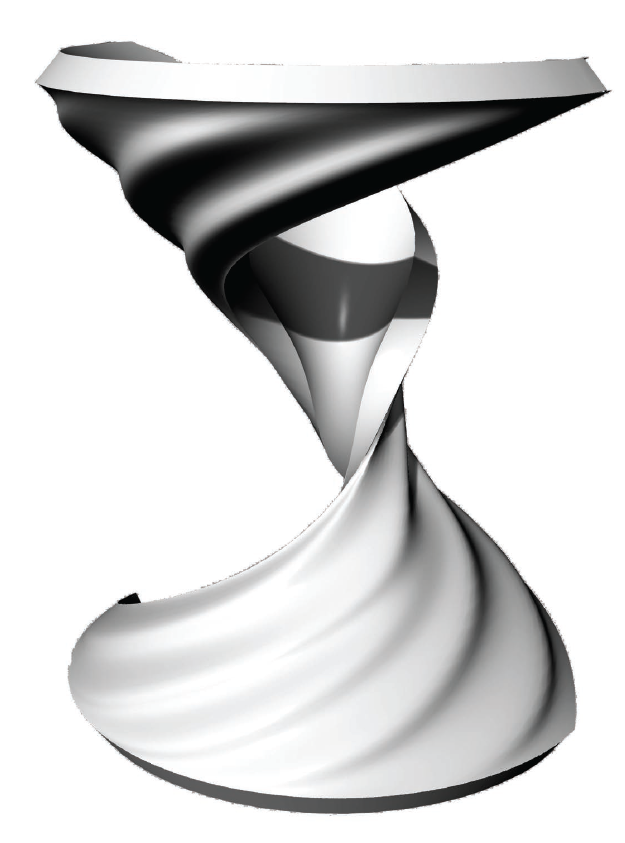
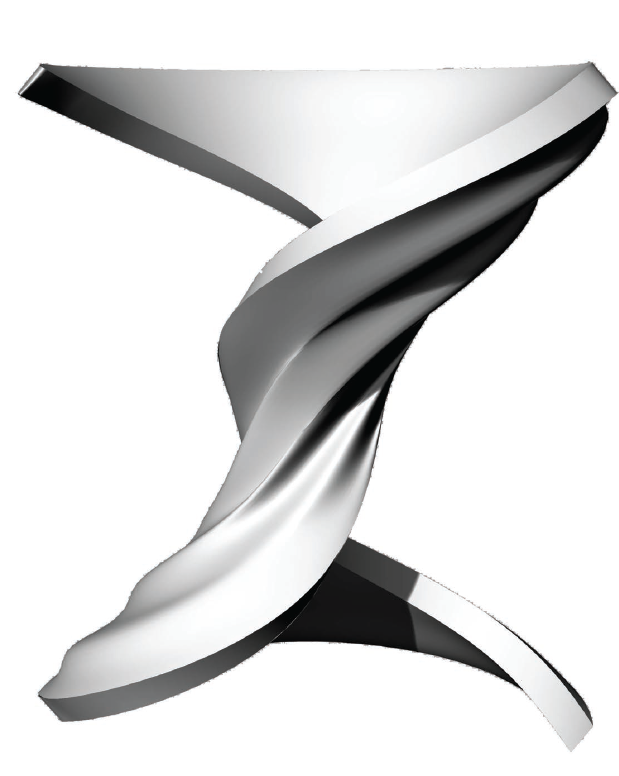
For the Design Studio course, I had to design a column that had been printed in 3D. For my column, I was inspired by a japanese photographer named Shinichi Maruyama that works on the mouvements. His work aims to merge more than 10 000 images of nude dancers. The result is something that is very dynamic, elegant and fluid and I wanted my column to looks like one of Maruyama’s dancer photo.
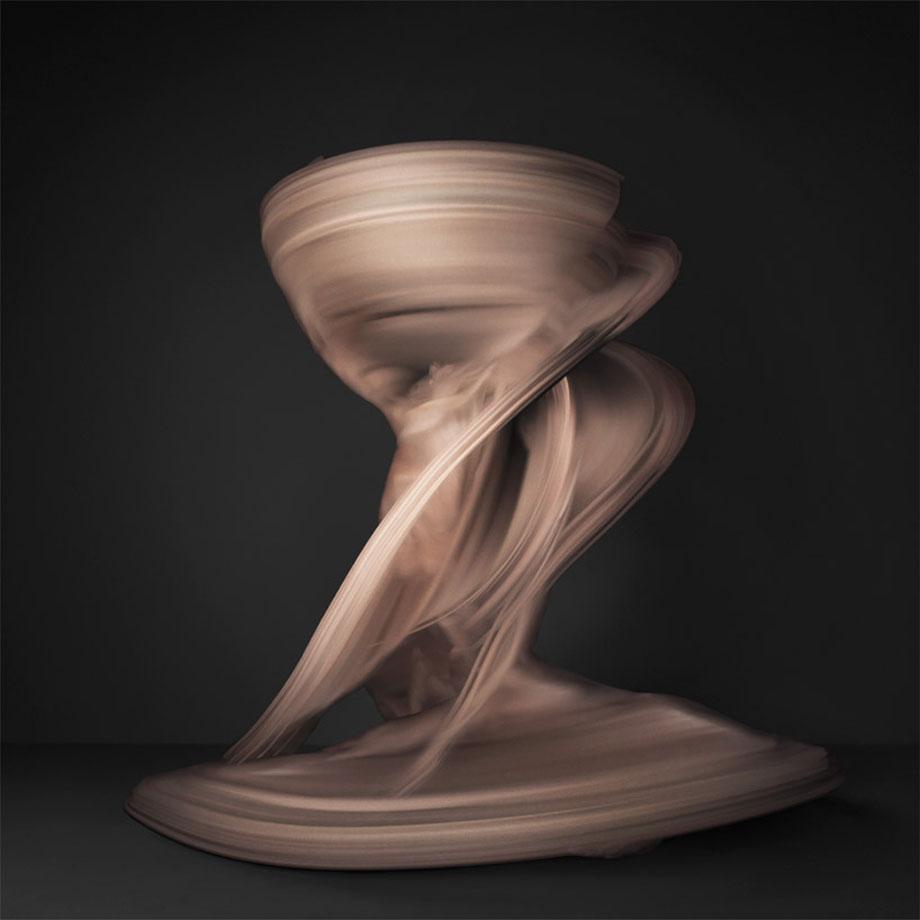
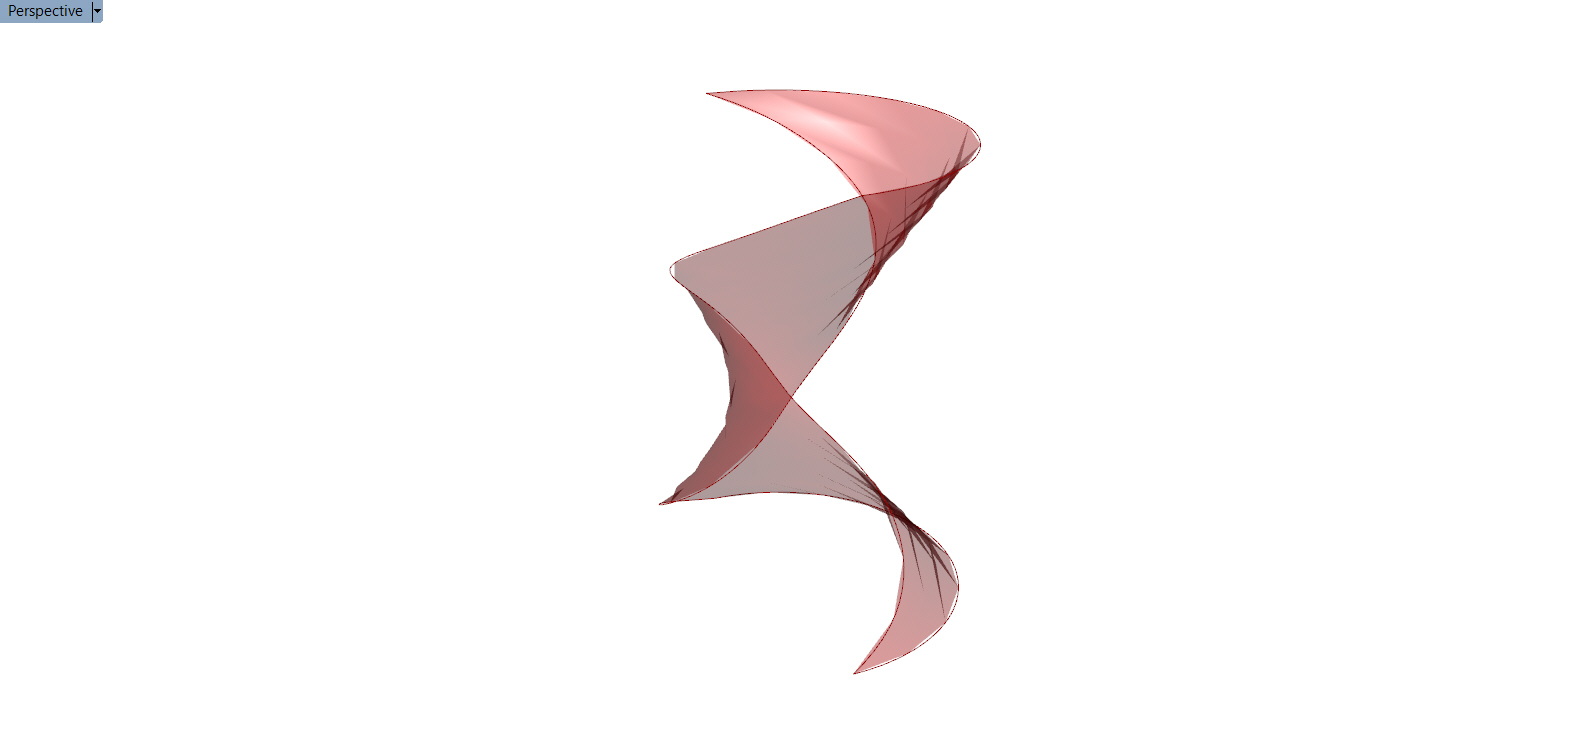
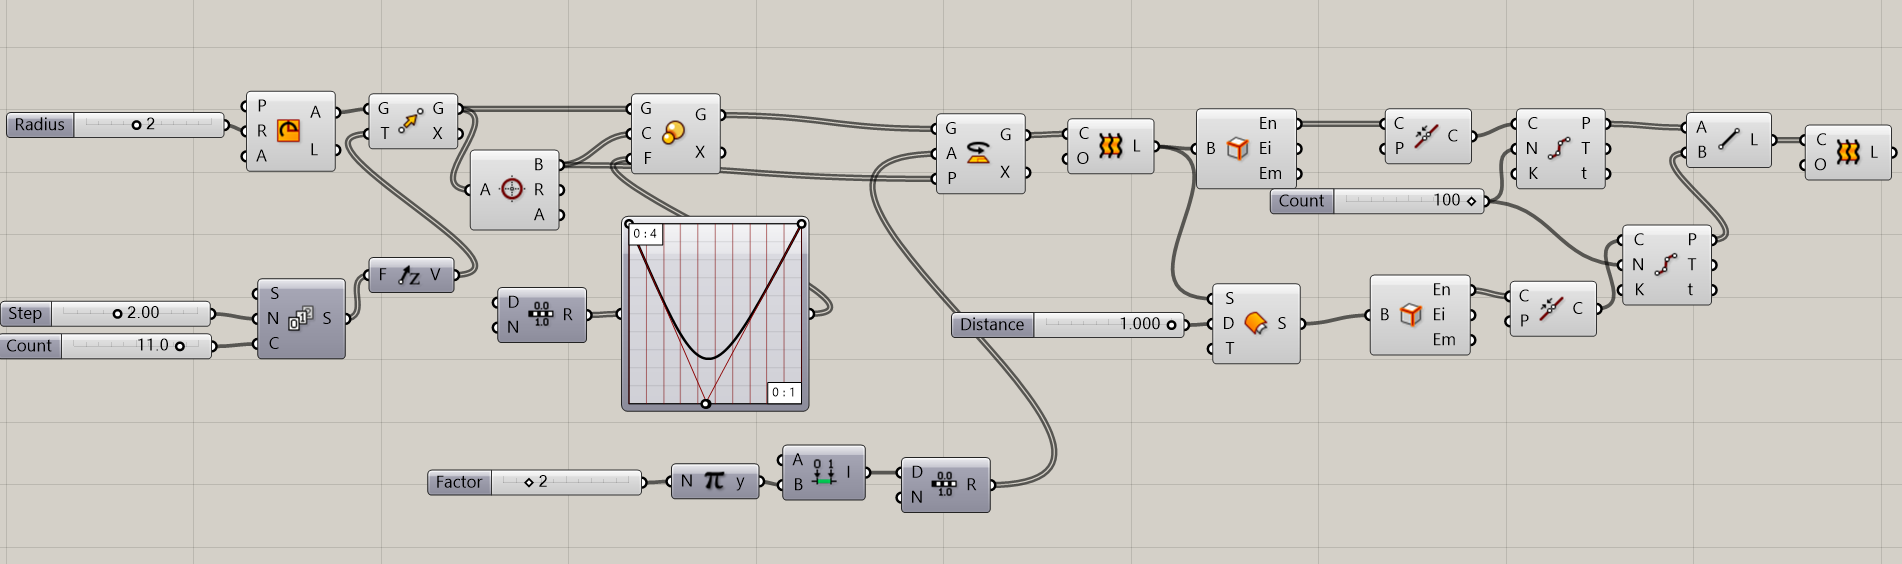
I started the work with Grasshopper by creating a semicircle and I multiplied it. Then, I wanted to have different size of semicircles (the middle had to be thiner than the top and the ground) so I used the deconstruct arc tool linked with the Graph Mapper tool that allowed me to control the shape and the thiness I wanted to give to the arcs. Then I rotated the arcs. After that, what I wanted was to have a surface, so I used the Loft tool. After that, I gave a thickness to that surface. I could do that wih the tool Offset. I decided to give a thickness of 1 cm of my column because I think this is the good thickness to have an elegant column due to the proportions. (the column is 20 centimeters high)
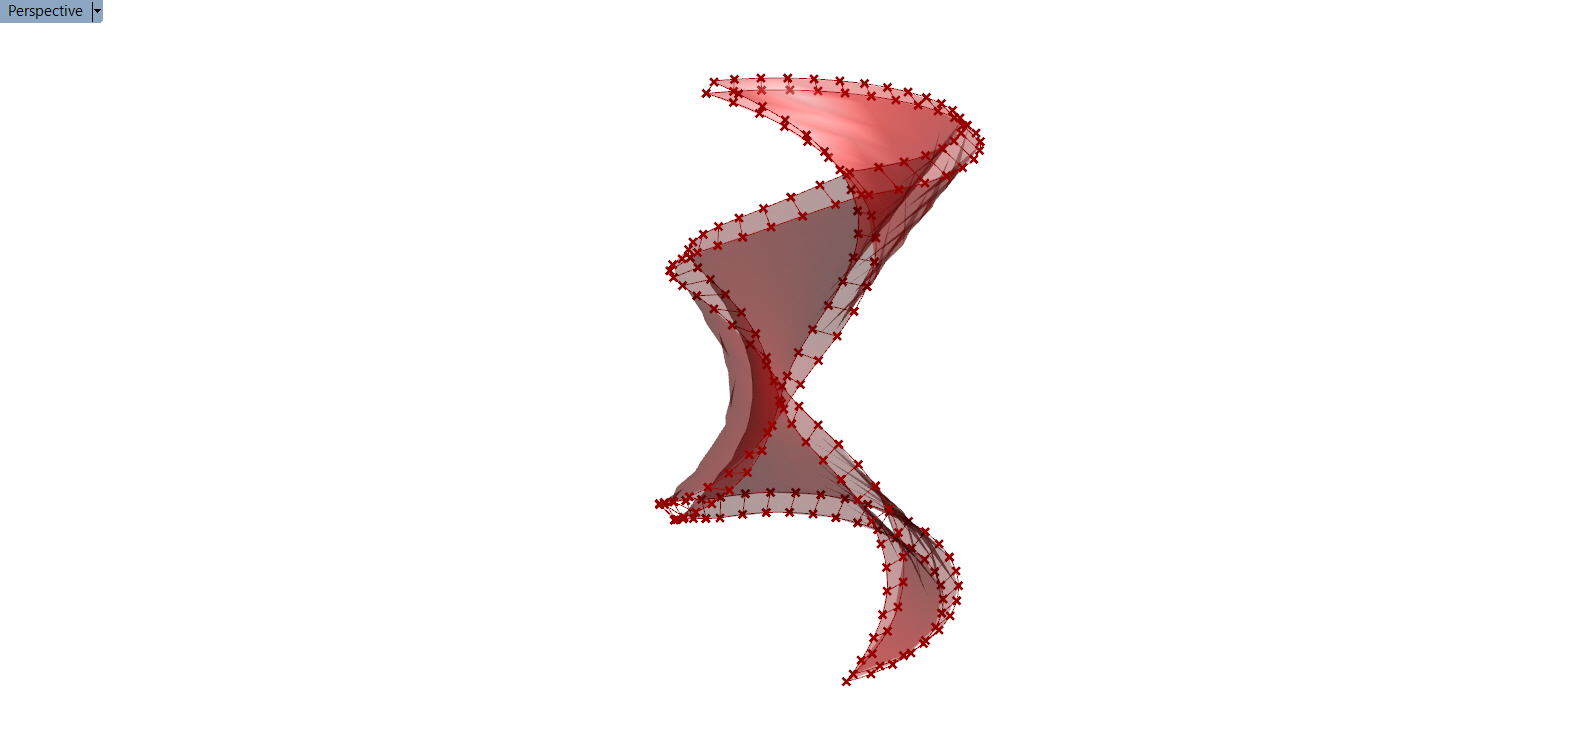
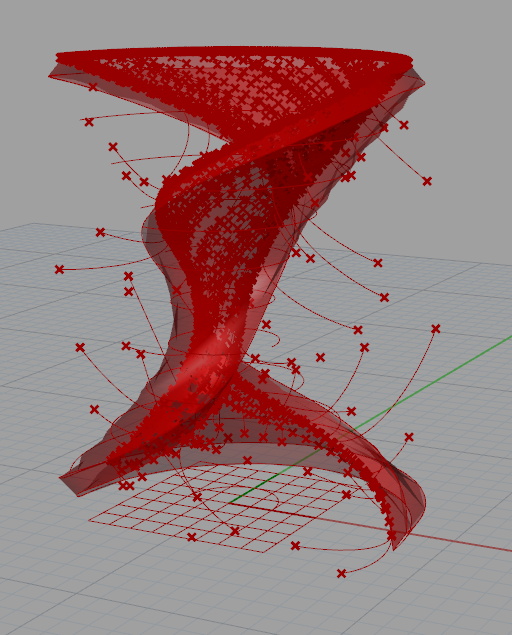
After having the two surfaces, I needed to link them together. So I used the Brep component to the two surfaces and divided the curves of the surfaces. All the new points created in the two surfaces were linked together by lines, the last step was to create surfaces between the lines and so between the two surfaces.

After that, I baked every surfaces to have the object in Rhinoceros. What I wanted now was to have reliefs on the exterior surface to emphasize the idea of mouvement. I activated the points on the surface and started to move it in a random way and created relief on it.
I decided to let the second and interior surface being smooth, to contrast with the irregularity of the exterior surface.

Final Result
Another solution could have been possible to create relief on the surface, by using the additionnal plugin Quelea. This plugin was created by Alex Fischer. It can generates points around the object that you want. Those points are moving and they are creating trajectories that you can use to have the relief on a surface. The first step is to create a system to work on. You must first create a box around the object you want to work on. This box is used to delimited the area where the points can move. And then we connect this box and an environment (here, it is the exterior surface) to create the system. Then the use of Agent Forces will define the behavior that points will have (for example if the forces are separating them, or attracting them, etc.)
Here is the official website of the Quelea plugin : http://quelea.alexjfischer.com/
Andréa Raharijaona