
Why and what I cover in this tutorial?
How to acutally apply voronoi on clothes?
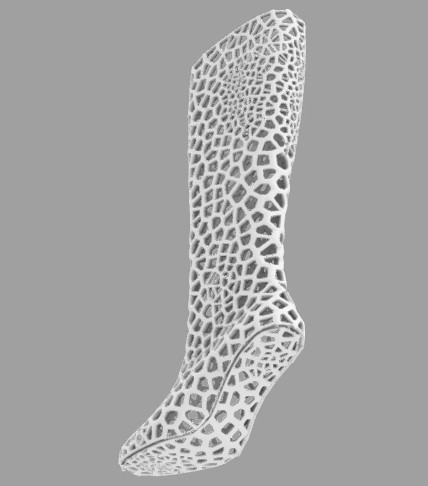
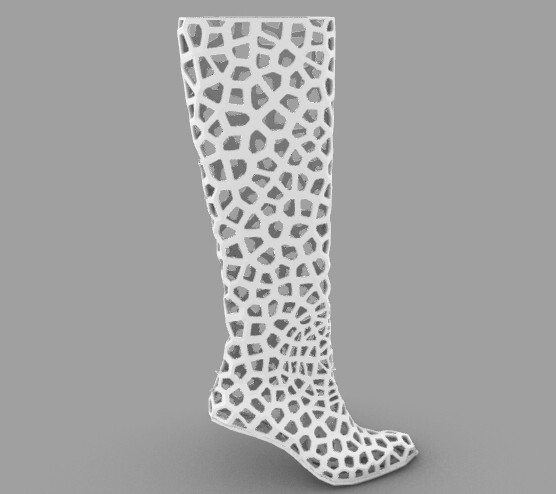
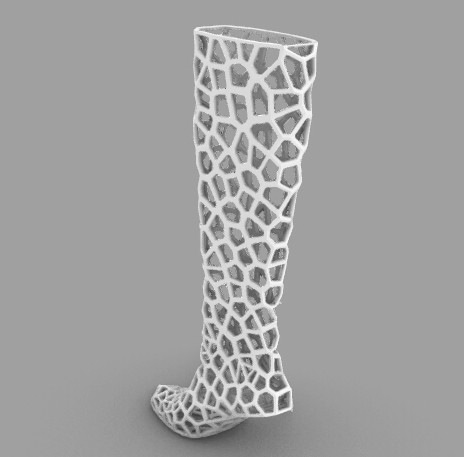
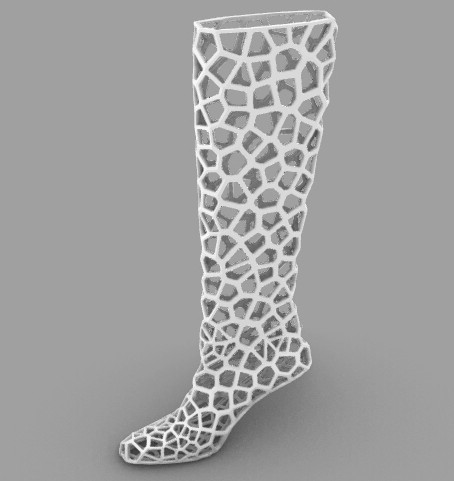
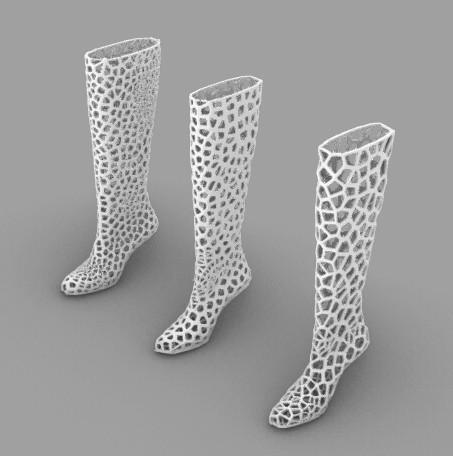
Well, I decided to try. My first intention was to cover some motocros jacket with voronoi reinforced protectors, but than a found this nice model of a single shoe.
It is simple and plain so I will use it instead.


What can you learn?
1. I will show you where to get some nice 3D models for your own artwork trial.
2. How to get voronoi on a random surface…
3. and how to add and adjust attractors to it.
4. I will also show you some useful tricks, which I found very helpefull.
Video-tutorials on related topics via Youtube.
Website with free models only registration required:
https://www.hongkiat.com/blog/60-excellent-free-3d-model-websites/
I downloaded this shoe from here:
https://grabcad.com/
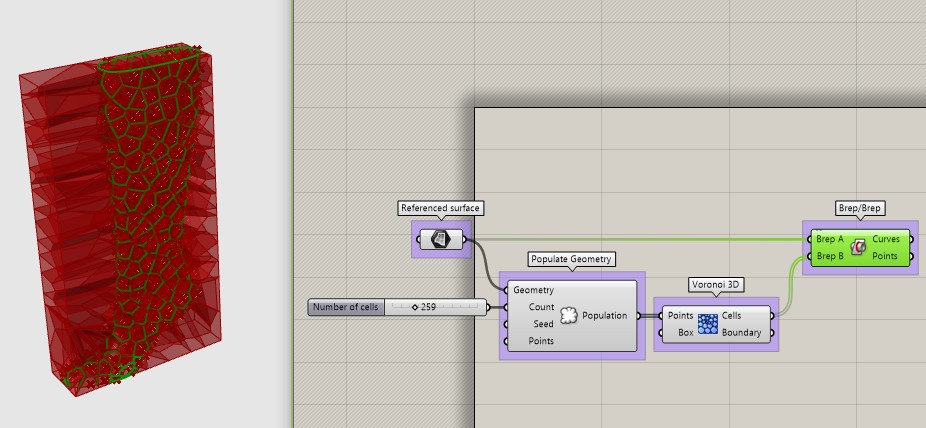
How to get voronoi on random surface:
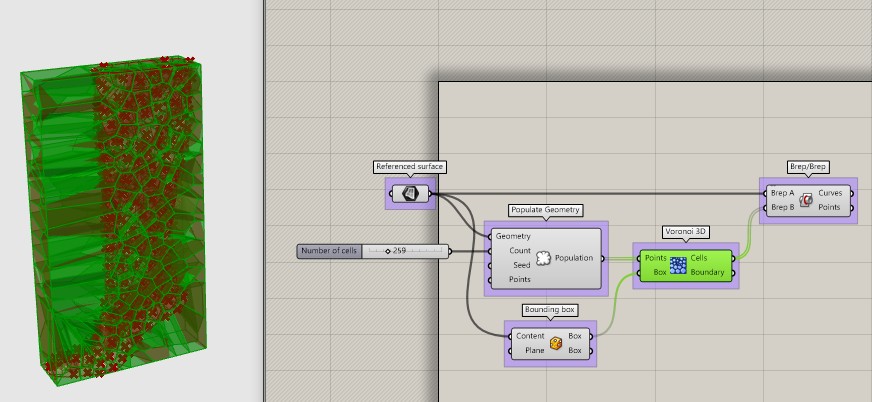
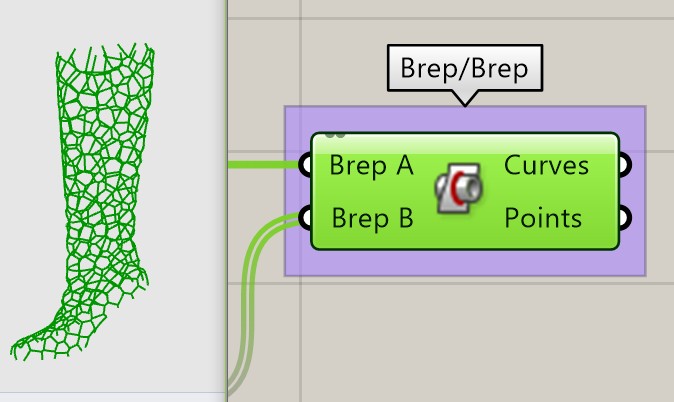
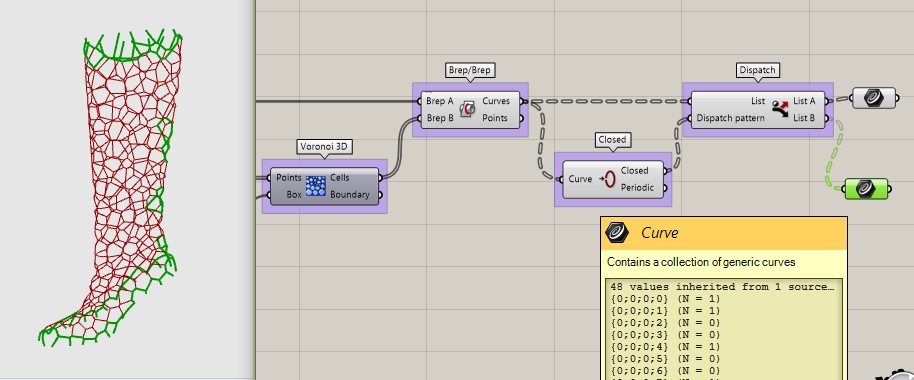
Link your 3D object form Rhino to Grass by using command Set one surface (in Surface container). Easiest way to get voronoi pattern on random surface is to intersect surface with 3D voronoi pattern. Apply Bounding Box for embracing whole surface into voronoi.
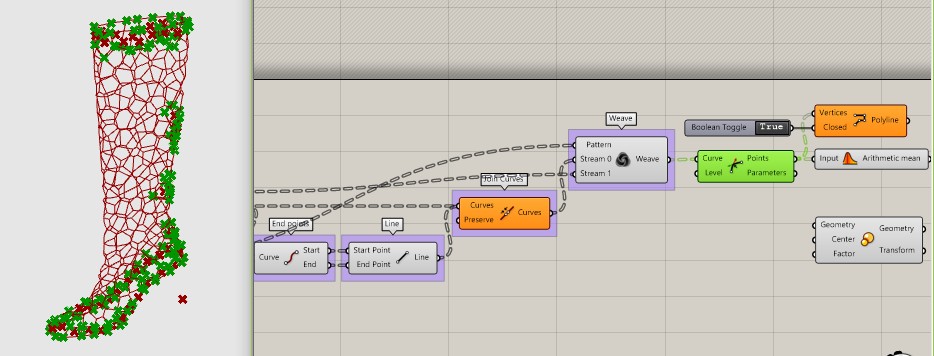
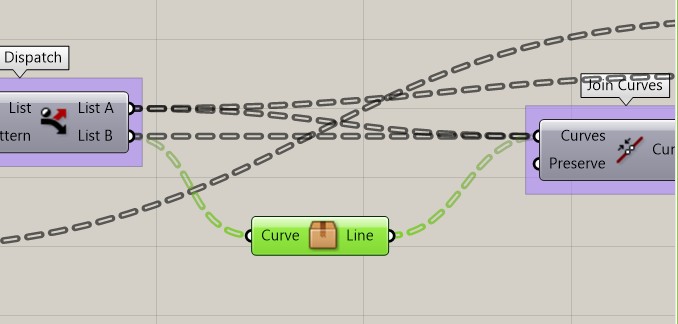
Now as you can see we will need to close those cells on the edge. That can by done by selecting unclosed curves, using Dispatch, and closing them separetly (Join Curves). Than Weave can put it all together. !!!Be carefull with the right oreder on the Weave inputs!!!
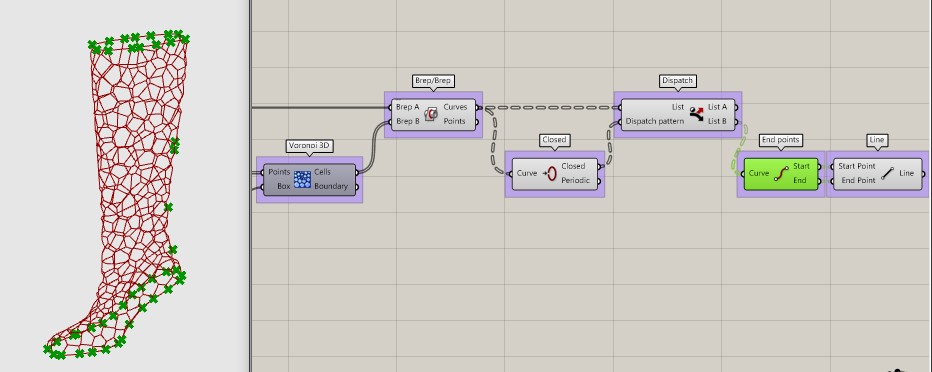
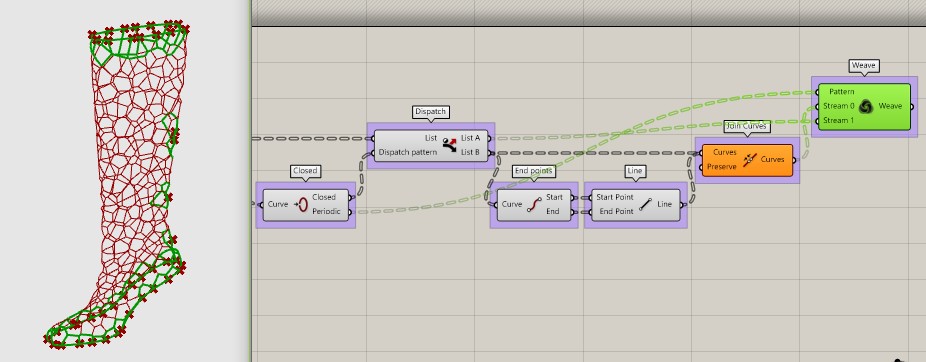
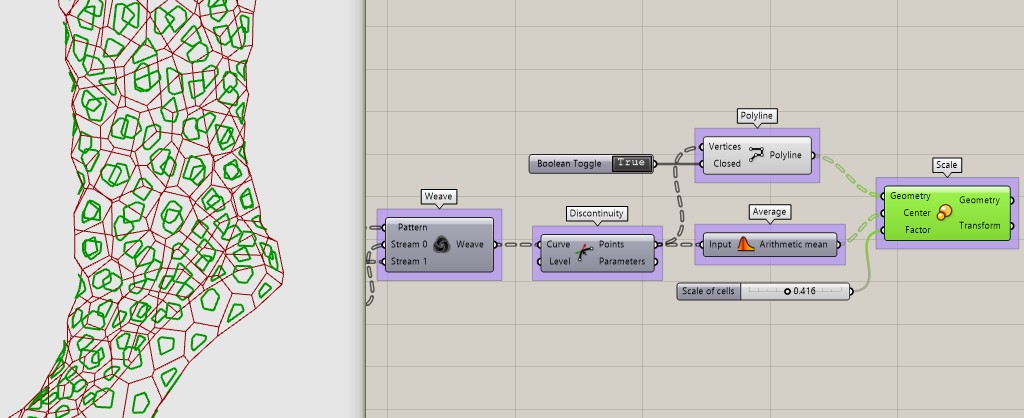
Now you have closed grid. Use Scale to get nice cell out of it. But first you need to get those points in corners (Discontinuity) and create polylines (use toggle to ensure that polylines are closed), also prepare a centre for each cell scaling by Averige.
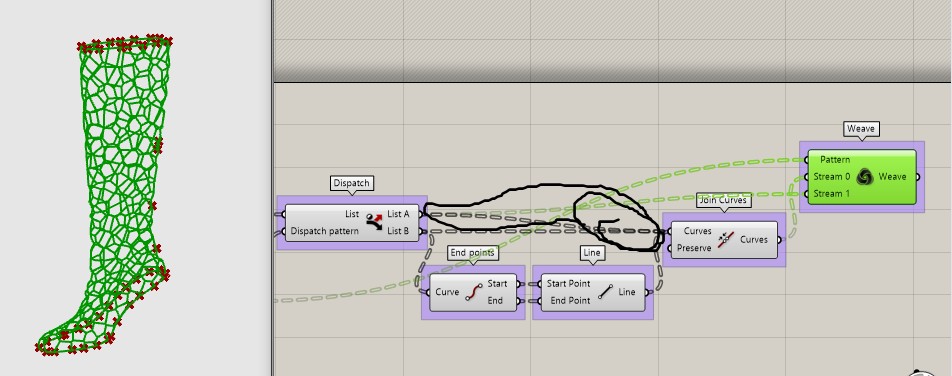
Sorry, I miss that… do not forget to plug the rest of curves from Dispatch to Join Curves!
Scale is done.
How to make a mash out of it:
First put curves into Loft.
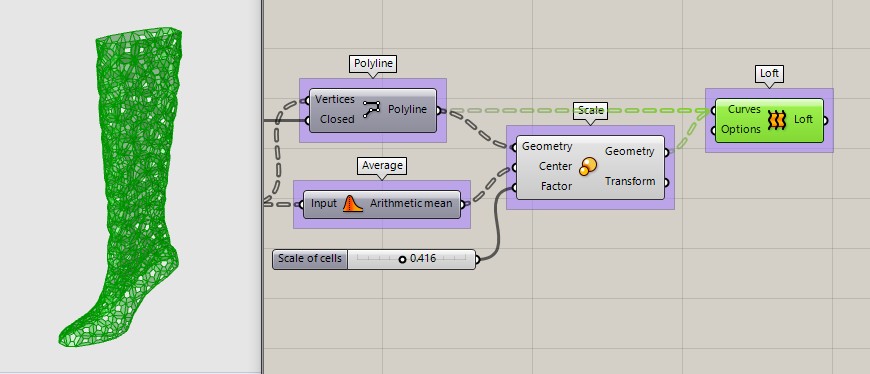
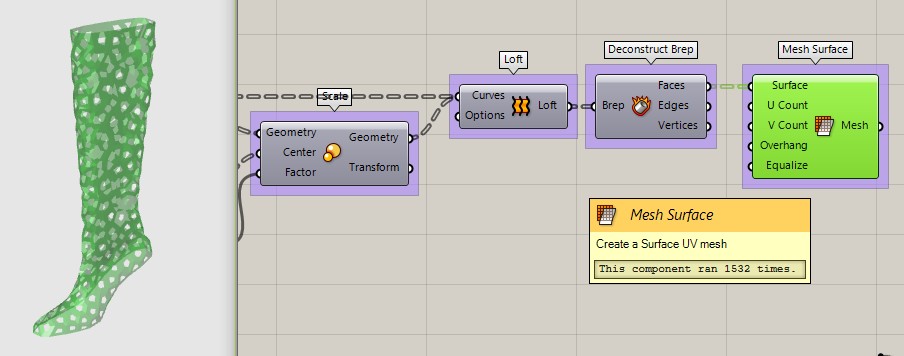
You can get Facex, Edges and Vertices from Loft using Decontruct Brep, than you can put faces into Mash surface. Here you have your mash surface.
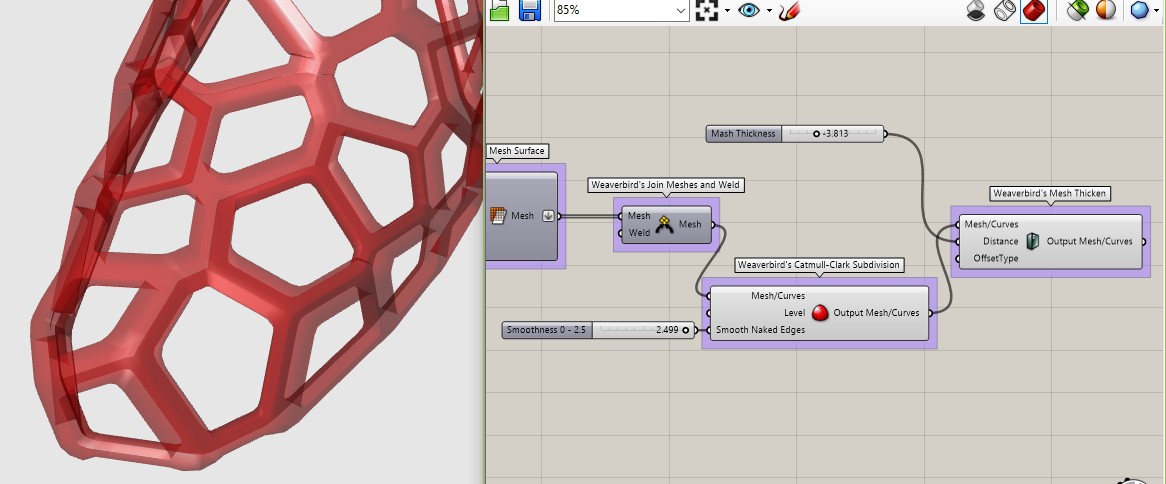
If you want mash to be 3 dimensional you can use Weaverbird plugin and play with it a little bit.
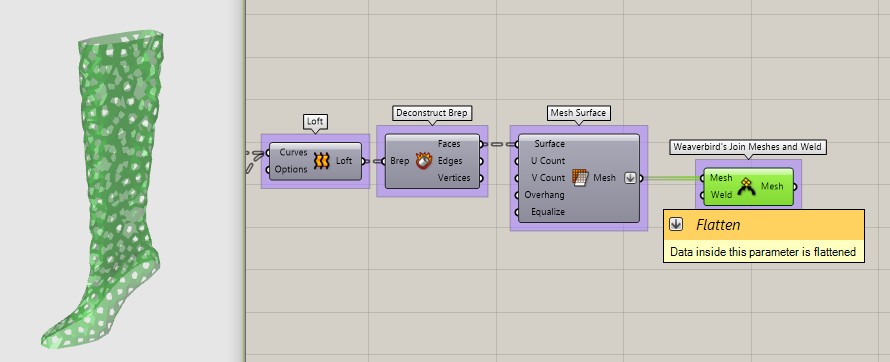
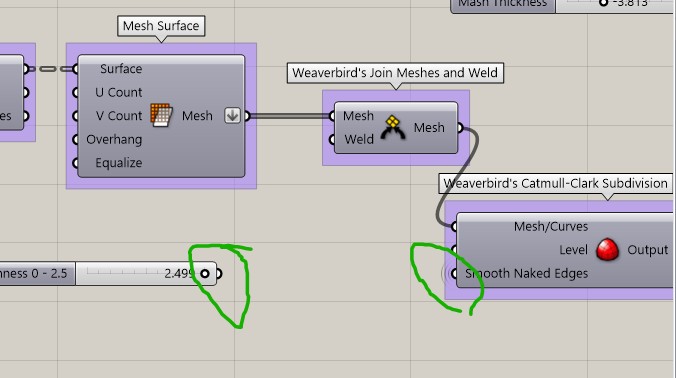
To get nice one side extruded mash flatten the Mash Surface output. Component (Weaverbird’s Join Meshes and Weld) will make nice continous mash.
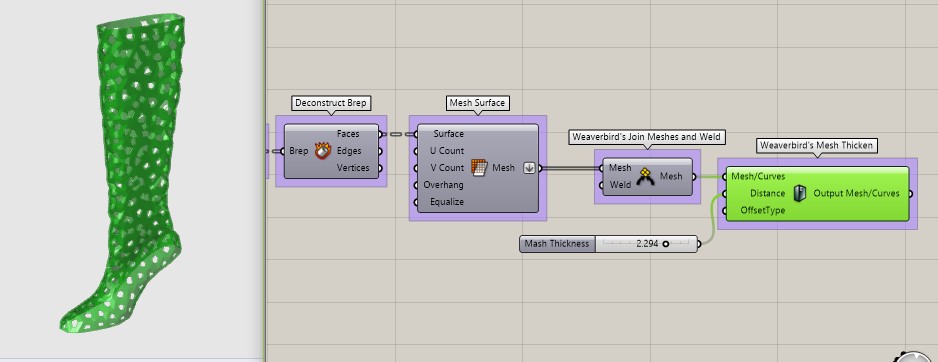
Weaverbird’s Mesh Thicken will create a volume for you. It is smart to have thickness slider running from negative numbers, because than you can choose a direction of extrusion.
To adjust a smoothness of cell edges you can ad a (Weaverbird’s Catmull-Clark Subdivision).
Without:
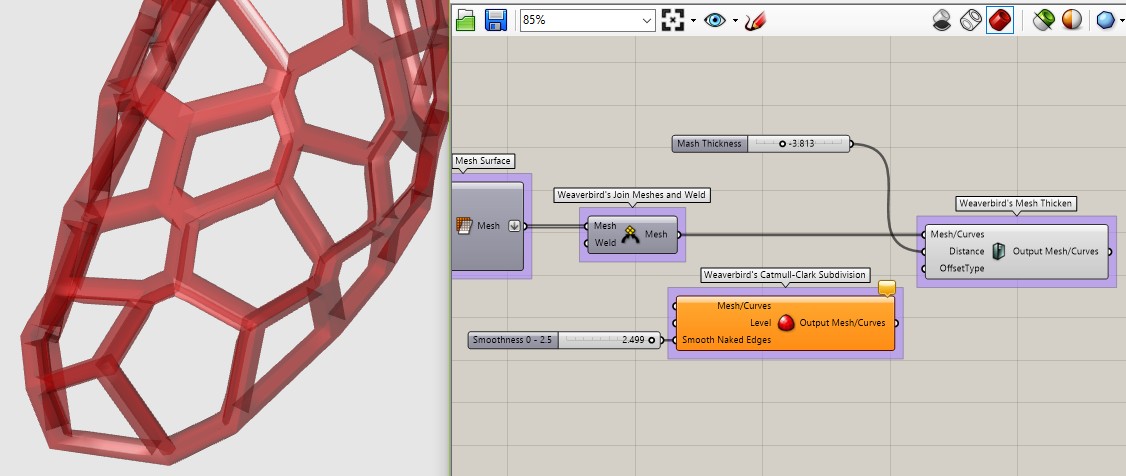
With:
How to create an attractor for a random sufrace voronoi:
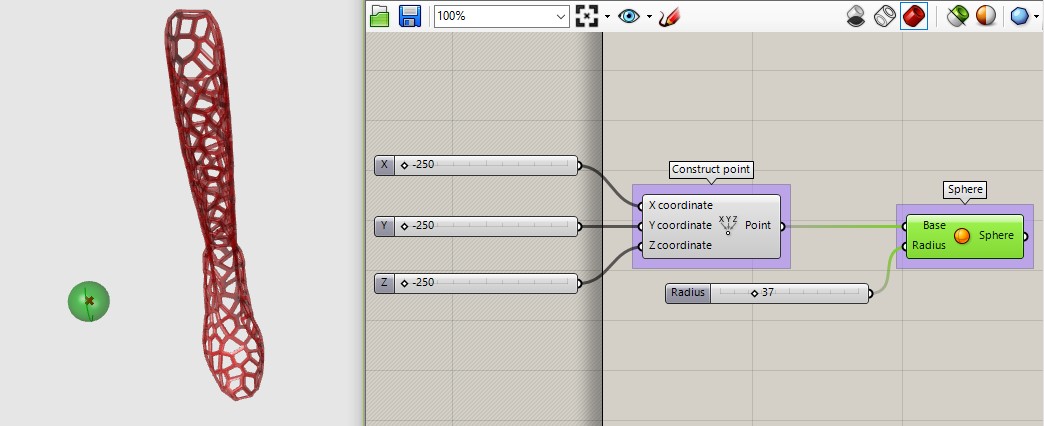
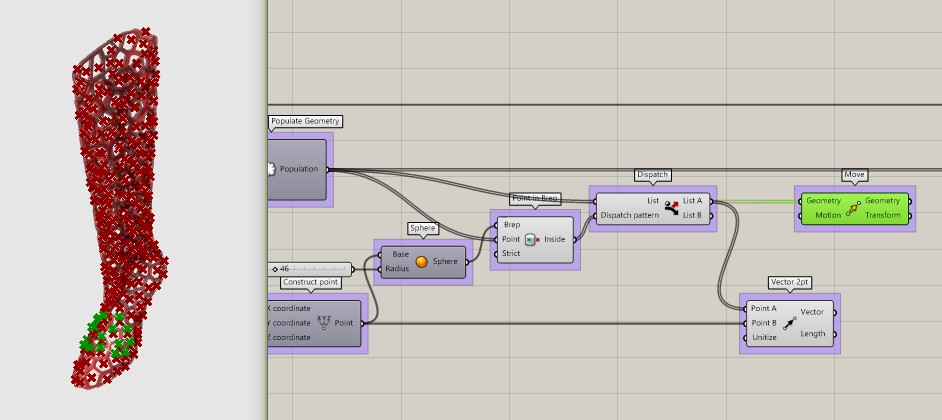
I decided to use a sphere to select points.
Create a sphere. Than adjust it to get in touch with the surface.
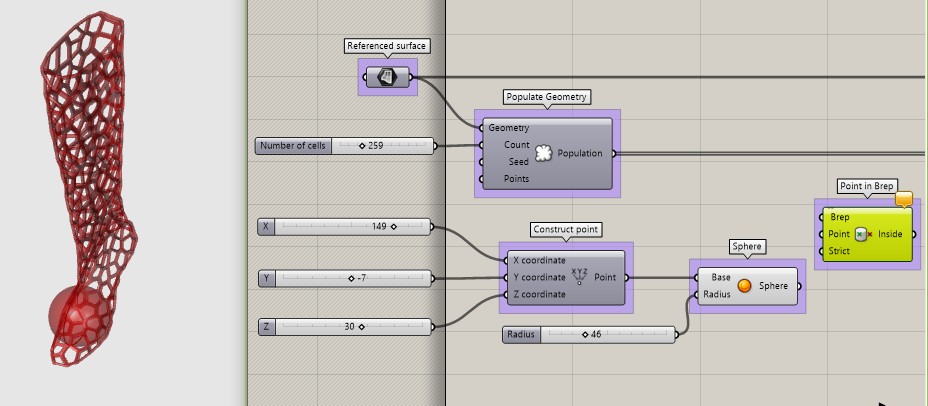
Point in Brep will help to create a dispatch pattern from Populate geometry group of points.
The shorter panel shows points inside of the sphere. Those are the points we want to move.
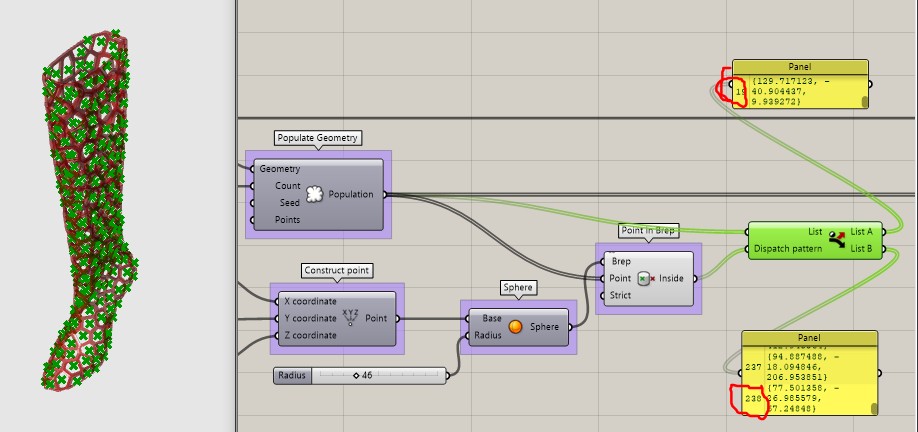
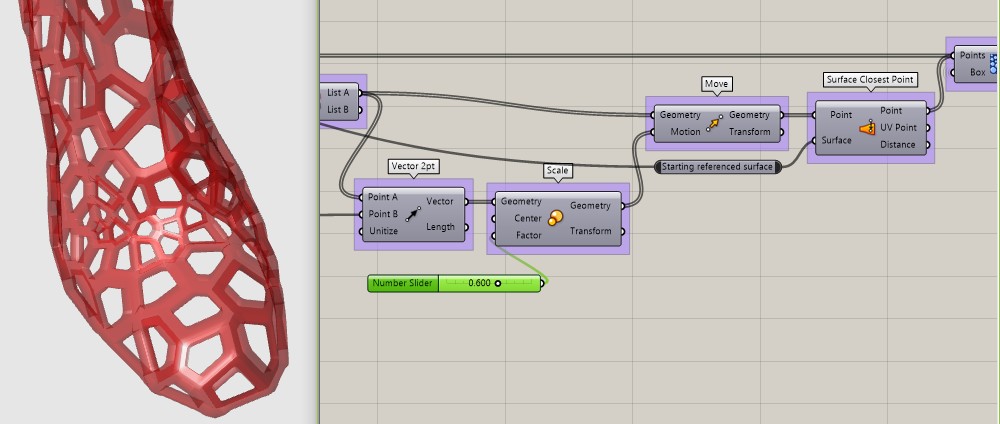
To the (Move) we can use (2pt Vector) scaled to the desired dimensions.
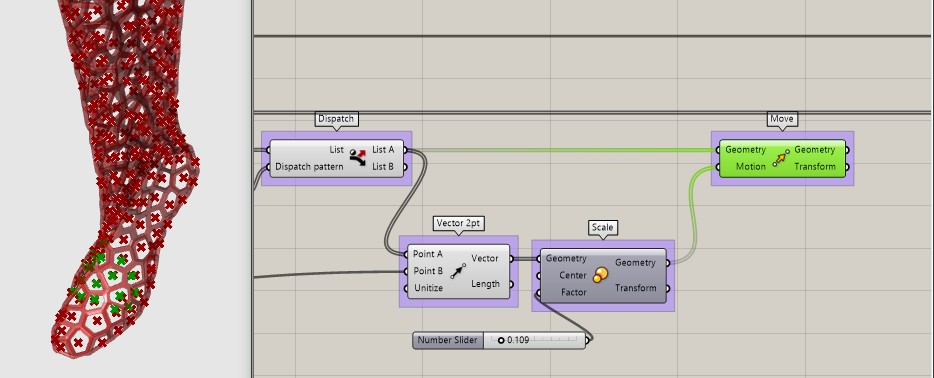
Use (Surface closest point) to get those points back to the surface.
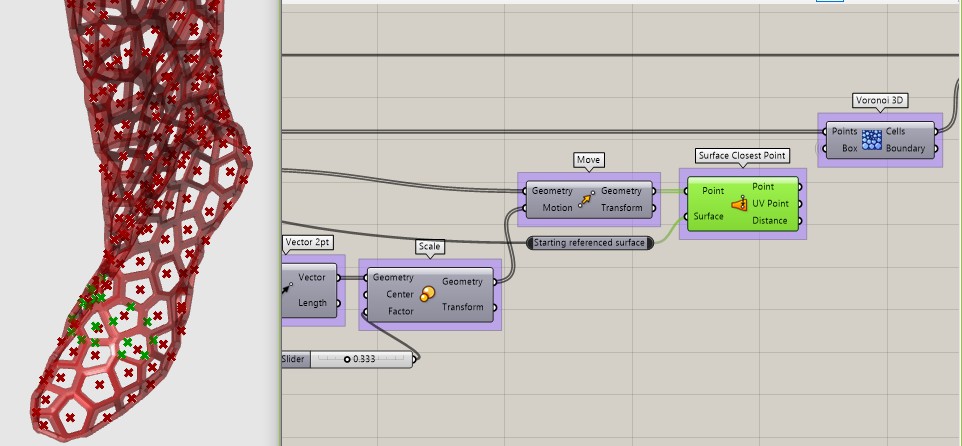
Now you can plug the new points to the Voronoi 3D and your attractor is working.
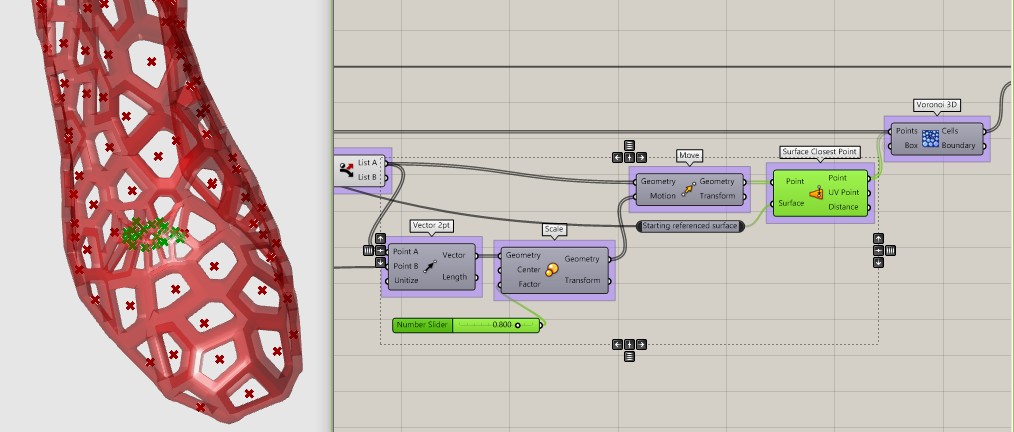
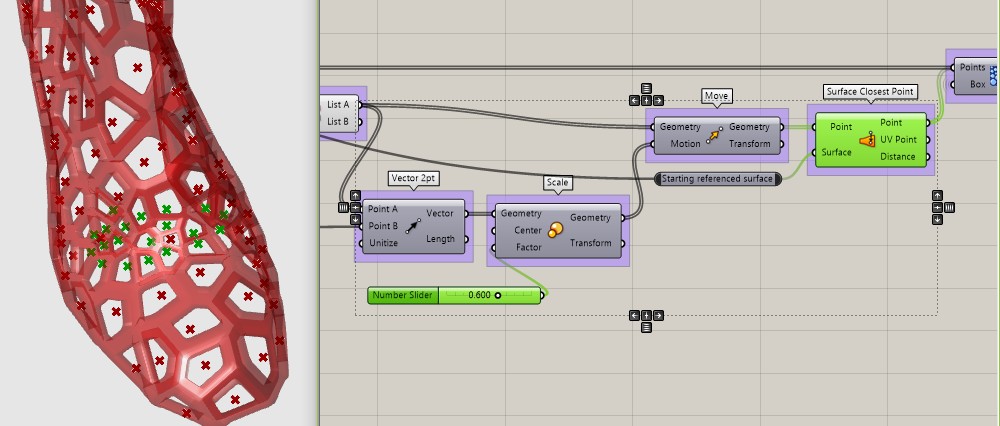
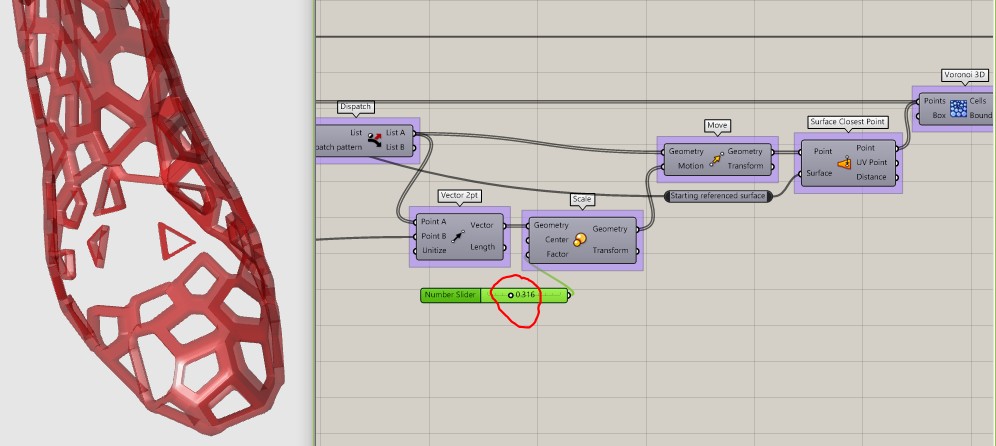
Just be careful with adjusting sliders for attractors, your points can easily drift of the surface and you will have a trouble ….
You can copy attractor as a whole, change location of the Sphere centre point and make your own design. Repeat this procedure on the shoe insole too. Then bake and your done.
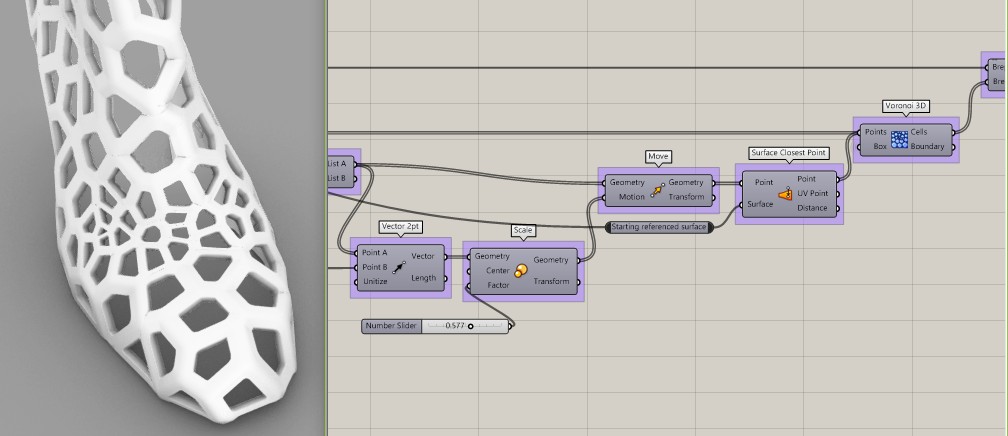
Congratulations you can now apply voronoi for any surface.
Tips and tricks:
Especially if you have not a powerful PC.
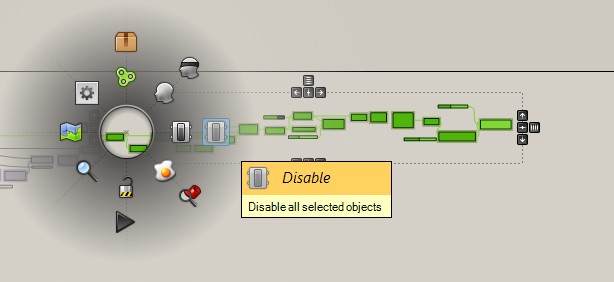
While adjusting attractors use only points as visible and working = DISABLE whole ending part of the script to get results faster, after you are done ENABLE them on.
Use clusters to join components together to have simpler script.

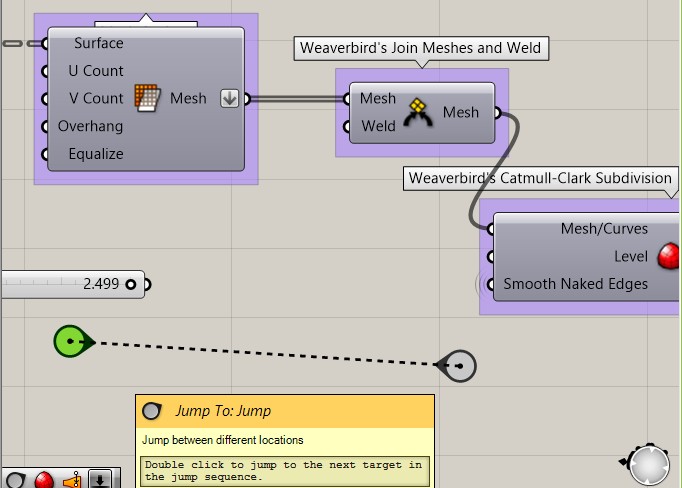
Use Jump: you can travel to the second arrow just by double clicking:
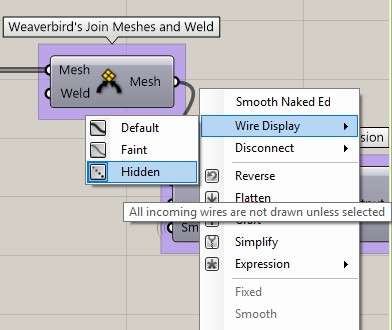
Use Hidden Wire option, the wire disappear unless you touch the pluged input. Combined with Jump it allows you to have a nice script with all the driving data in the front of the script.
Video- tutorials:
Data:
Shoe:
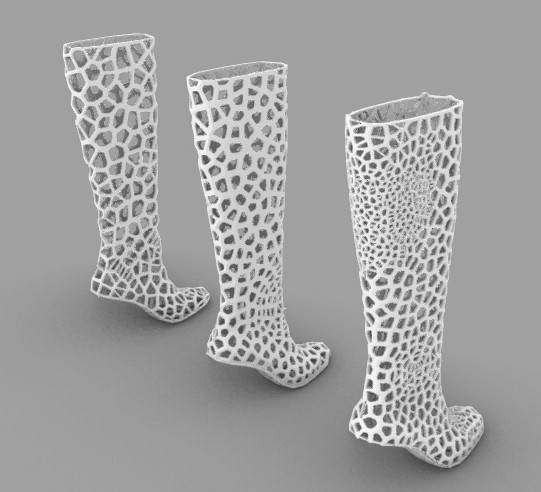
Demonstration:
Advanced model: