
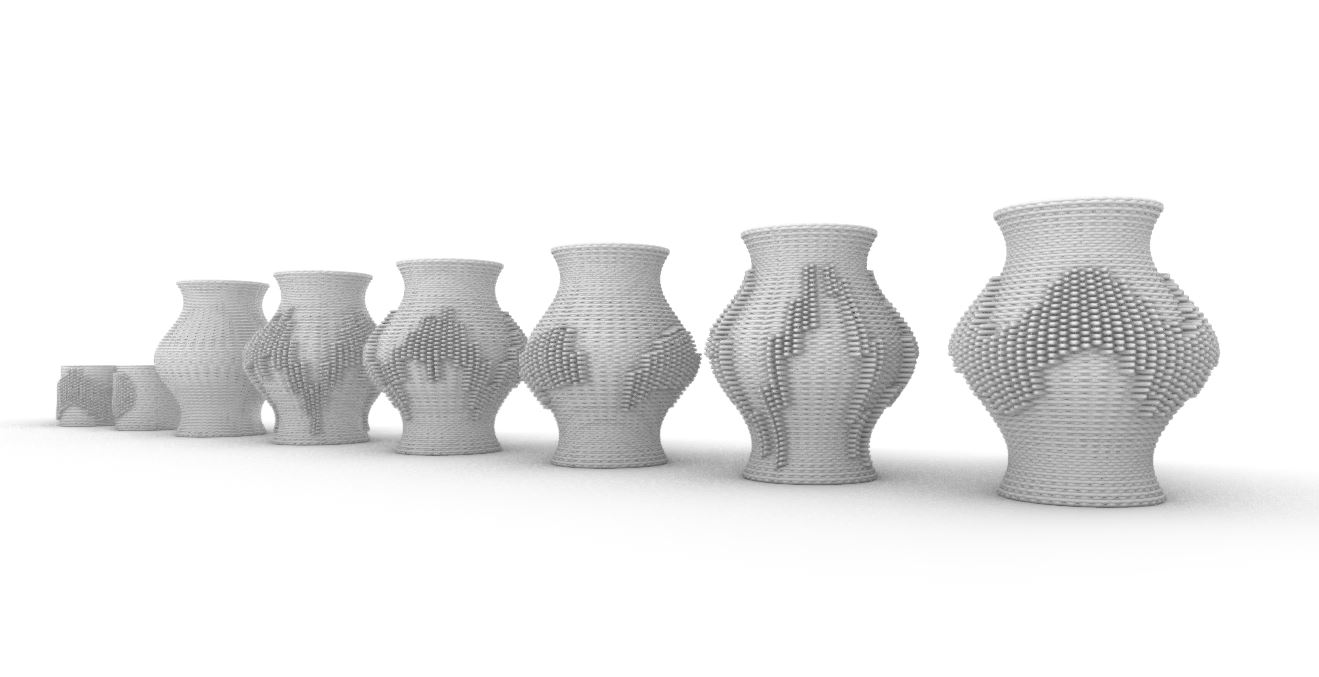
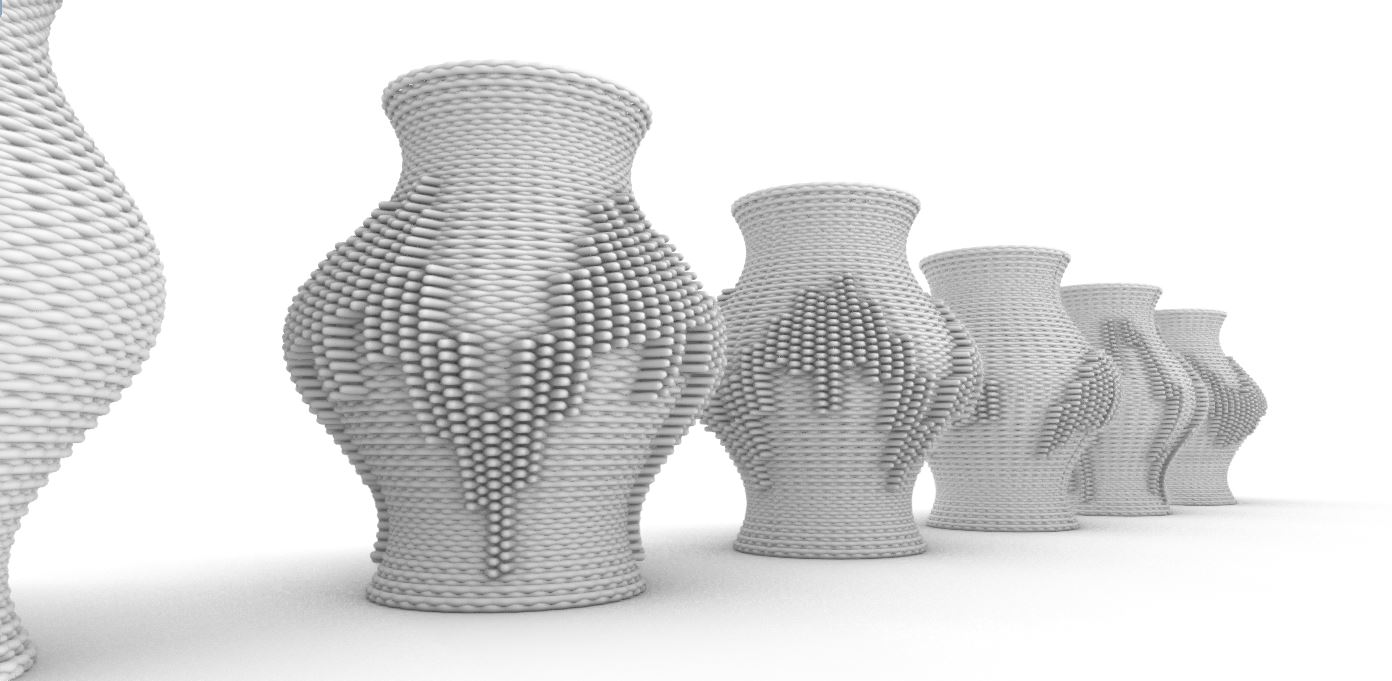
The goal was to create an unusual and interesting pattern for 3D printing. The Grasshopper script creates a wavy pattern. By connecting a variety of curves and changing their distance from the print object, it is also possible to create unique, more convex parts. The pattern can be used for various crockery and decor elements.
Inspiration


Required plugins for the script:
1. Mesh pipe (to make the computer run faster) https://discourse.mcneel.com/t/mesh-pipe-plug-in/75430
2. Visose Robots (for 3D print simulation) https://github.com/visose/Robots
Full script

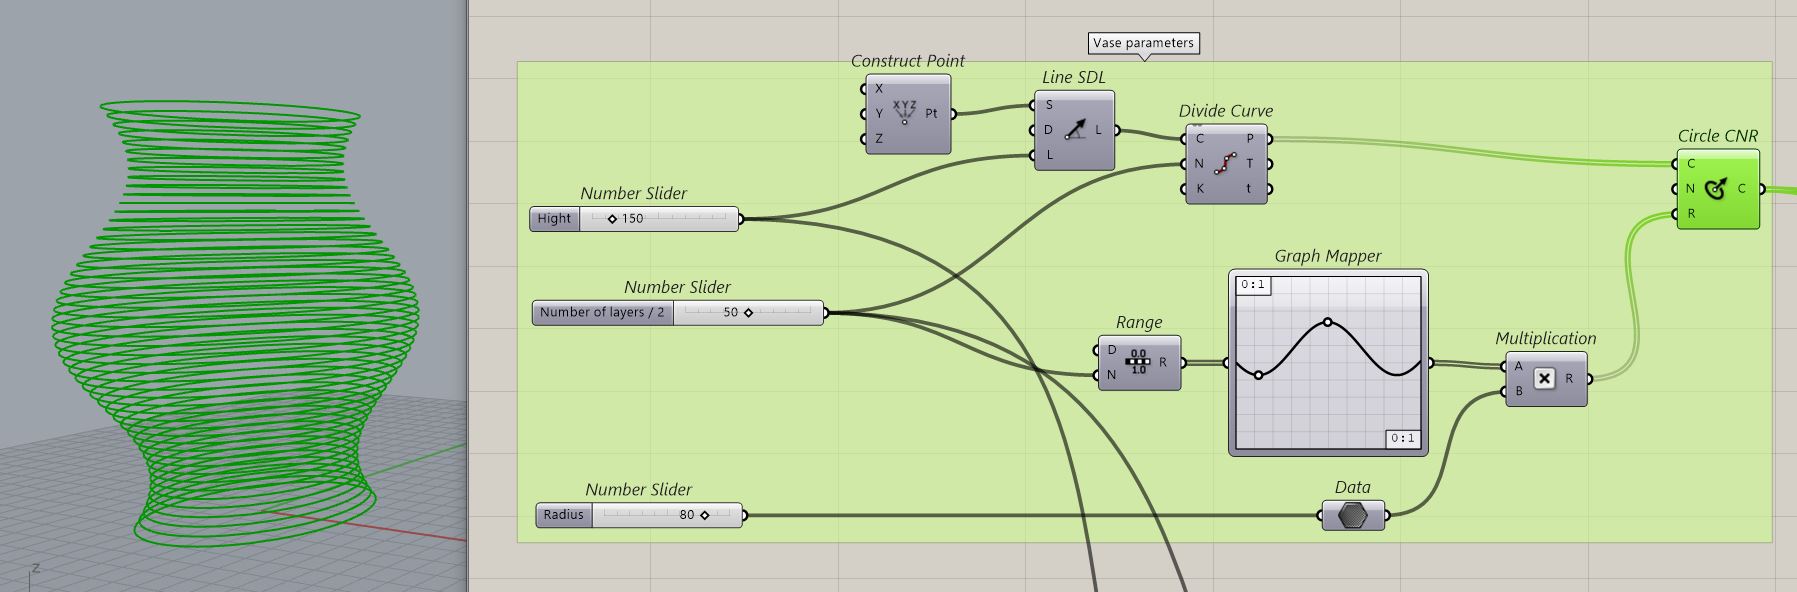
1 step | Creating a vase shape
For creating a vase, you need to Construct Point, and then create a line from a point on the Z axis. Next, you need to create points on the line using Divide Curve and make a circle in each of them. To give the vase a variety of shapes, you should use Grapf Mapper and experiment.
If you need to apply a pattern to another already existing shape, you have to submit the form in the format of curves and connect it to the script instead of this block.
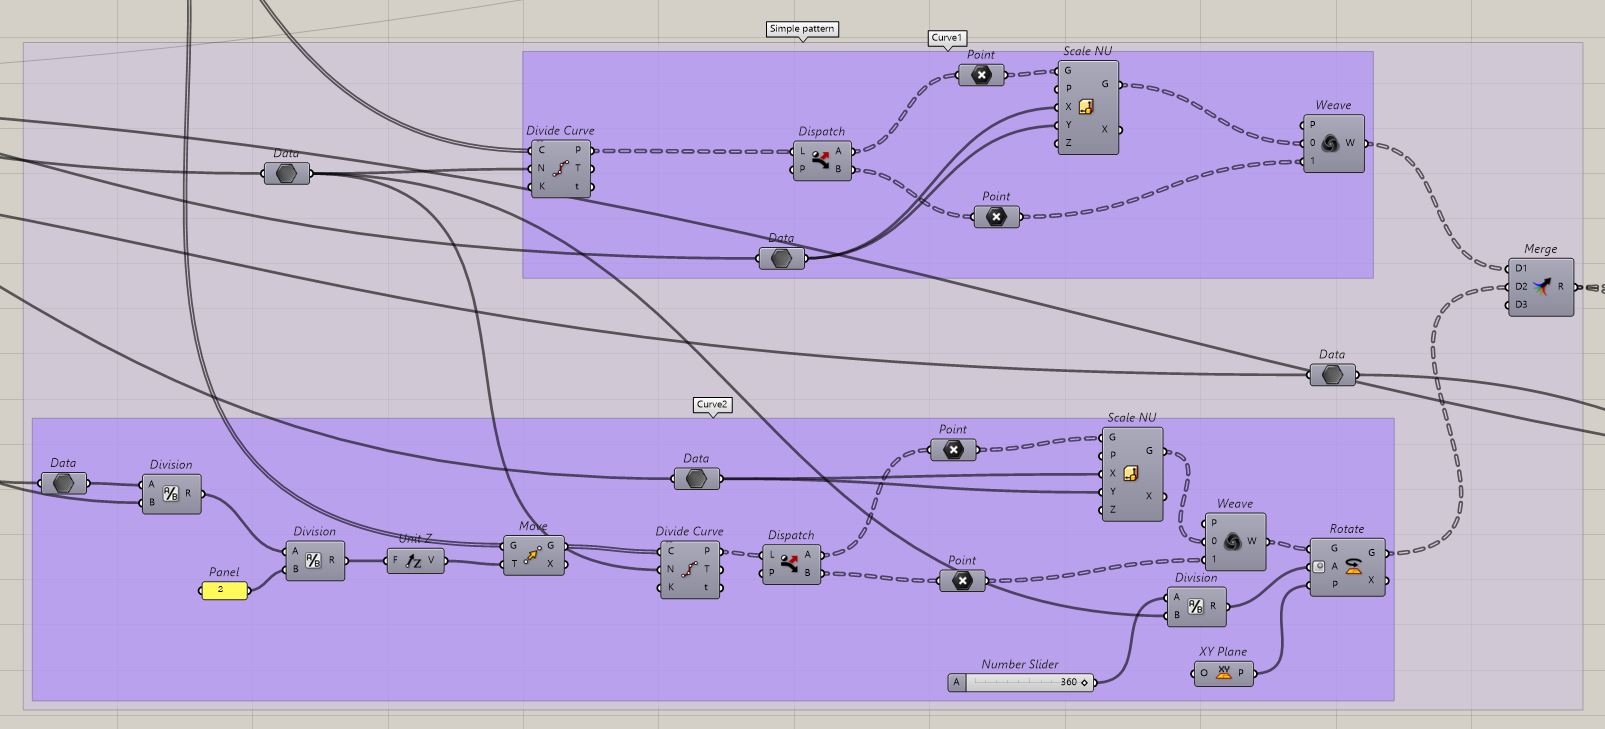
2 step | Creating a simple pattern
A simple pattern has a wave-like structure that can be divided into “even” and “odd” levels. To create an “even level”, it is necessary to use Divide Curve for all circles and use Dispatch to separate the points into two lists. Then you need to apply Scale to one of the lists to make these points more convex. To create an “odd level”, the same logic is used, but it is also necessary to apply Move to shift all “odd levels” by half a step between the “even levels”. Also, you need to apply Rotate, using the formula 360 / the number of points on each circle, so the convex part of one level will be above the concave part of the adjacent level.
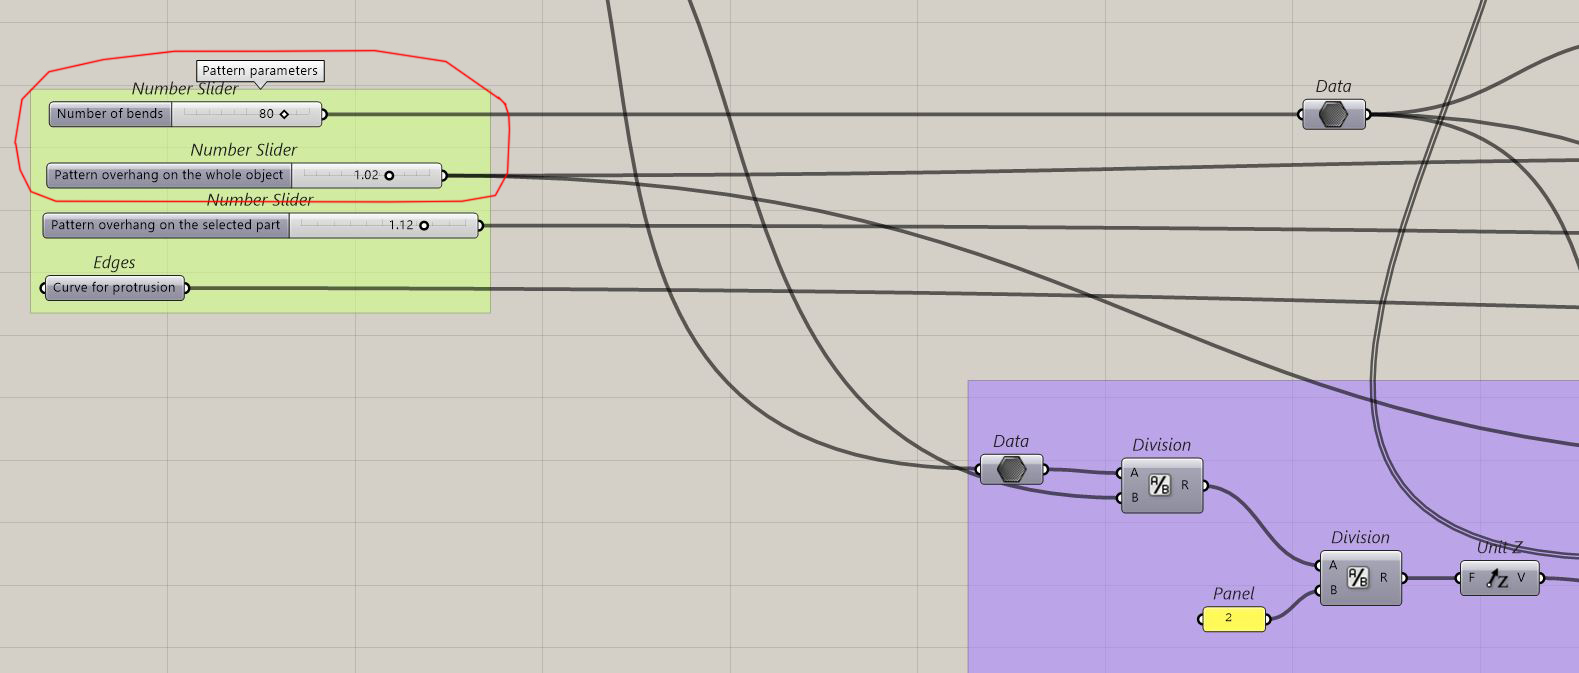
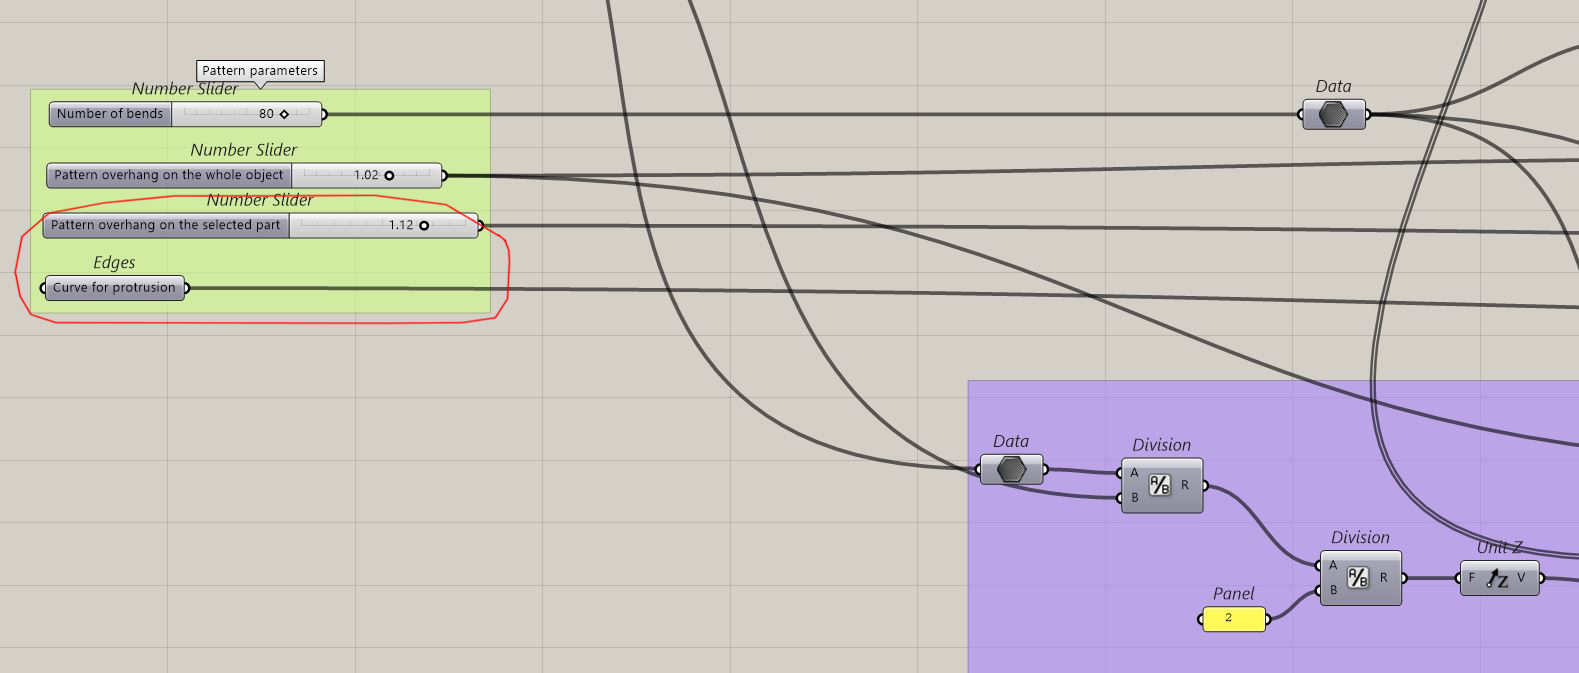
The number of bends (points on the curve) and the protrusion distance of the pattern (the scale of the external points) are parametric.
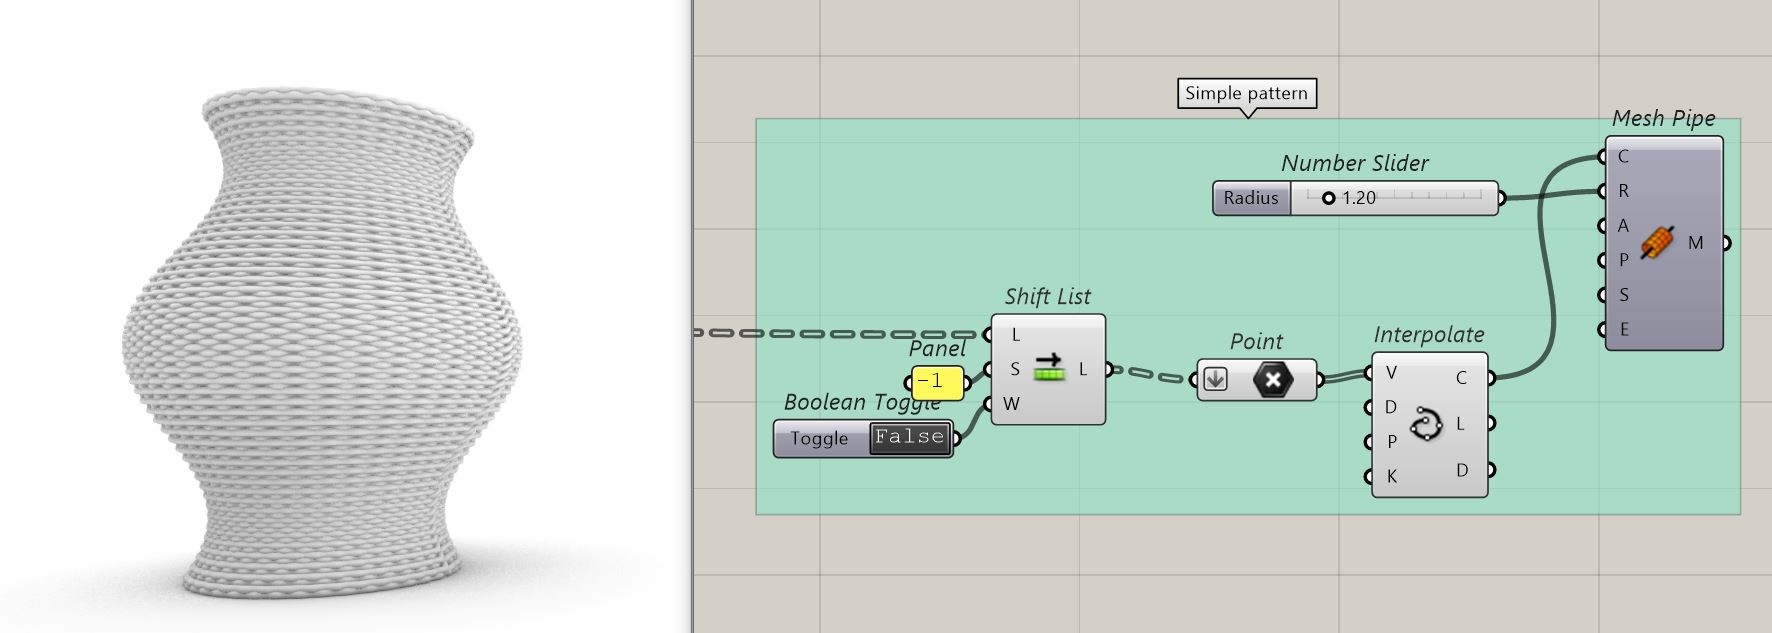
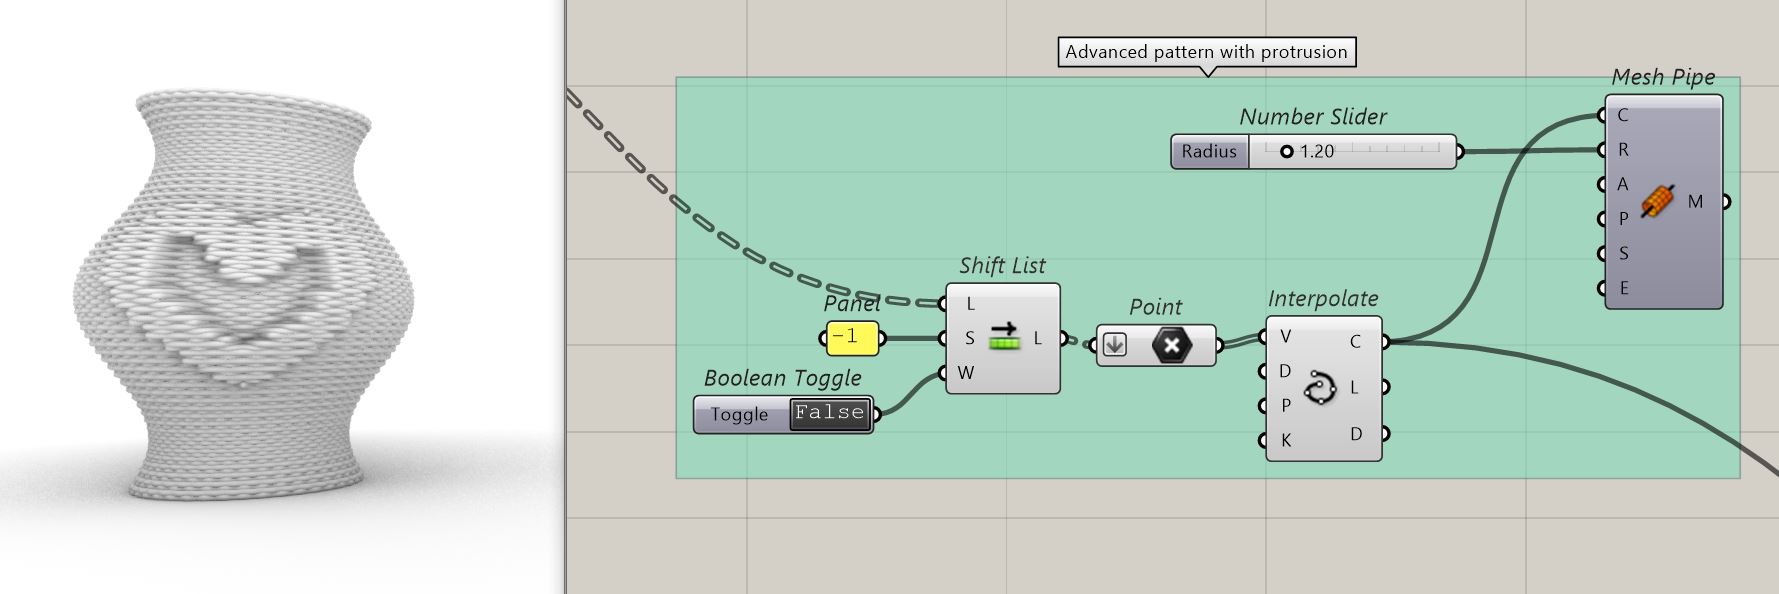
To create a curve by points, it is necessary to use Interpolate. To make the line continuous, you need to remove the last point by Shift List and then flatten all points.
This simple pattern can be used for 3D printing. To do this, lines from Interpolate must be connected to the Visose Robots script. Mesh Pipe helps you to see the real view of the object, bake it and use it in Rhinoceros and other programs.
3 step | Creating an advanced pattern with protrusion
An advanced patter makes some parts more convex. The placement and number of convex parts is affected by the curve that is placed next to the object. The logic is that if the distance from a point on the object to the curve is more than a certain predetermined number, then the point will protrude more, if the distance is less, then it will protrude less and same like in a simple pattern.
First you need to create a Loft of the object, then create a curve projection on the object using Map to Surface.
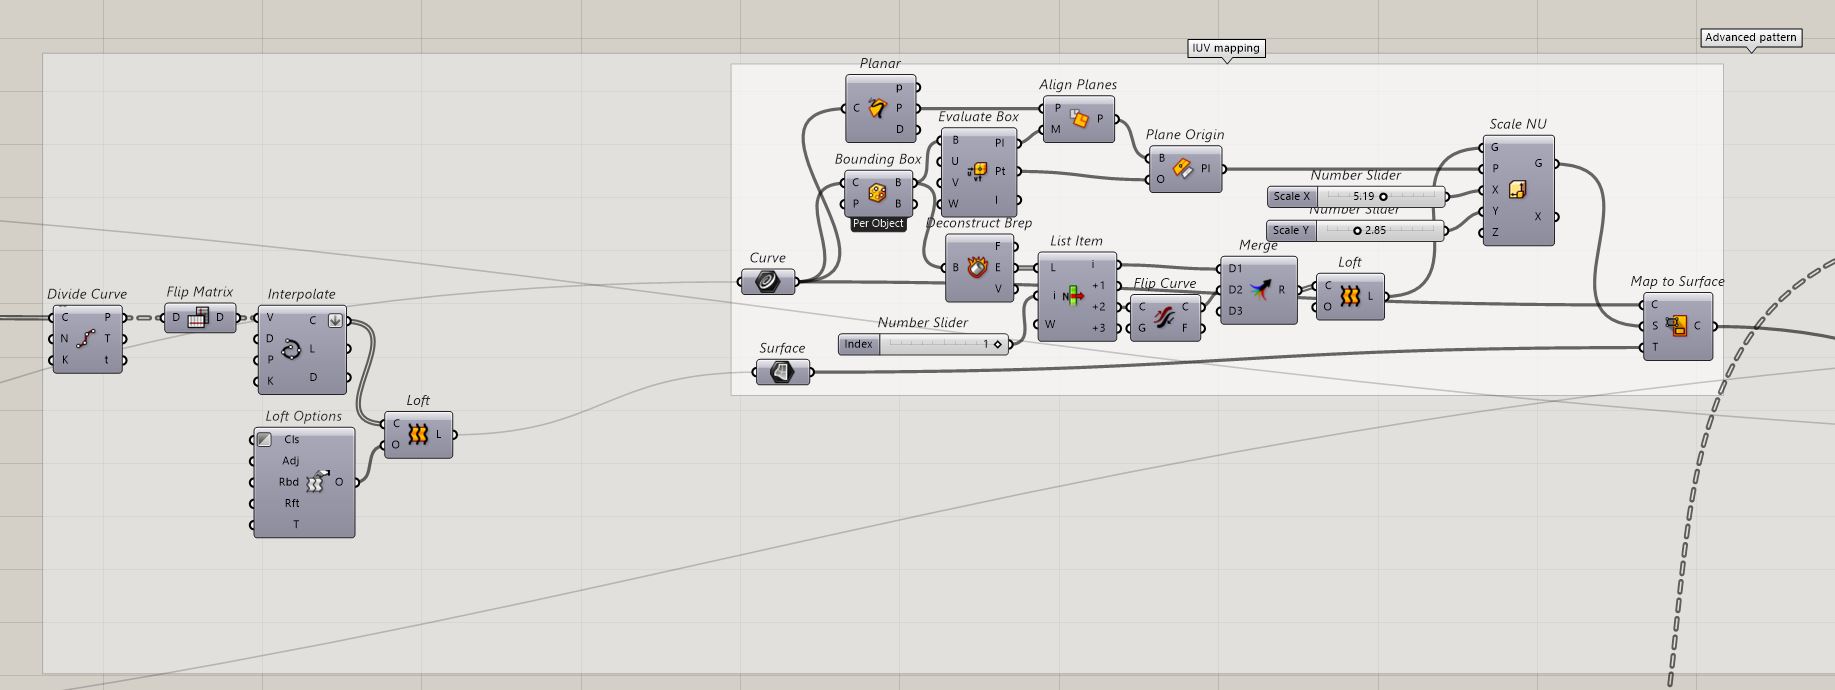
Next, you need to use Curve Closest Point, placing points from a simple pattern to the P parameter, and mapped curve to C. To filter out points that are close to the curve, you need to use Smaller Than, then sort out points for True and False using Dispatch. True points should be scaled and then you have to Weave all points.
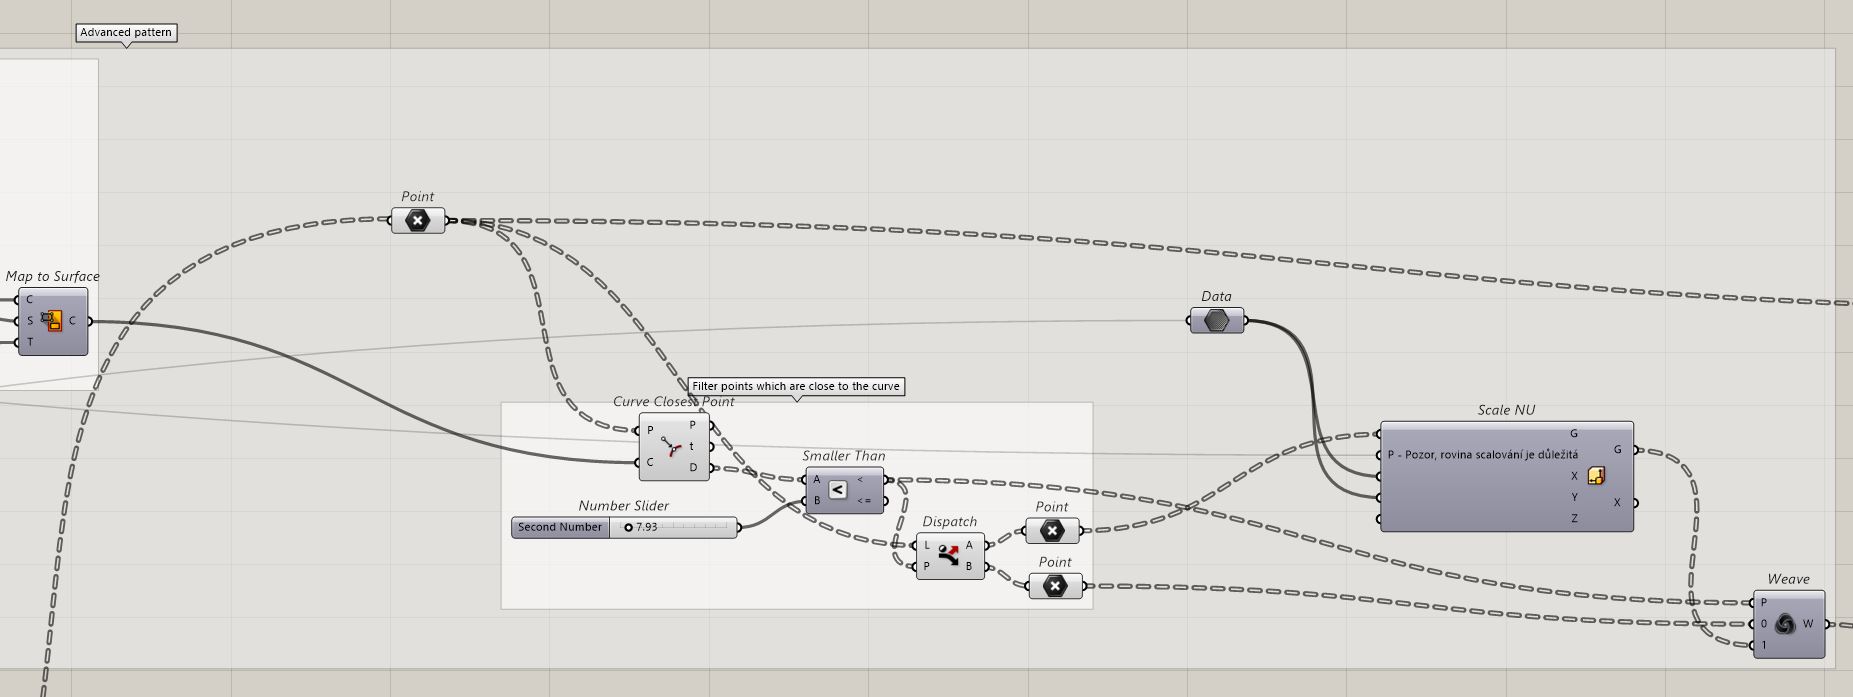
The protrusion distance of the chosen parts (by the scale of the True points) is parametric. You can also create any curve for protrusion and connect it to the script and change the distance from the curve to the object.
In the end Interpolate should be applied to the points and then the curves can be connected to Visose Robots. To view and export geometry can be used Mesh Pipe as above.
4 step | Creating an alternative pattern with protrusion
The alternative pattern gives the opportunity to create an interesting convex pattern across the surface of the vase, which can be adjusted with a connected curve.
For alternative pattern you need to divide the points into external and internal using Dispatch. Further actions should be carried out with external points. You have to use the Closest Point command to find the closest points on the object to the curve and then use Line and find out the distances. The next step is to filter the points using the Smaller Than command. Apply Scale to points with a value of True, that will help to provide the protrusions. False points should stay unchanged. Then Weave all the points with specifying the pattern parameter from Smaller Than. At the end, Weave all the external points with the internal ones and with leaving the standard parameter of the pattern (TF).
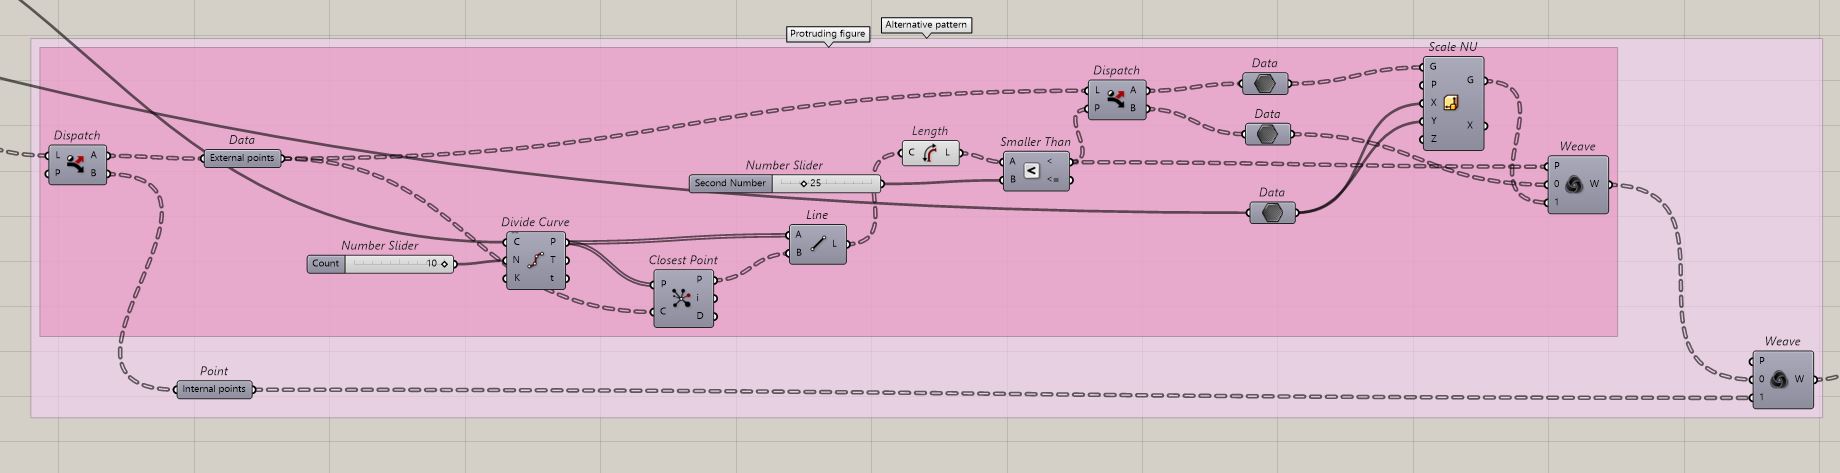
You should use the same sliders like for advanced pattern. You can create any curve and connect it to the script and change the distance from the curve to the object, that will affect the pattern of the convex parts.
In the end you can use Mesh Pipe or Visose Robots after using Interpolate.
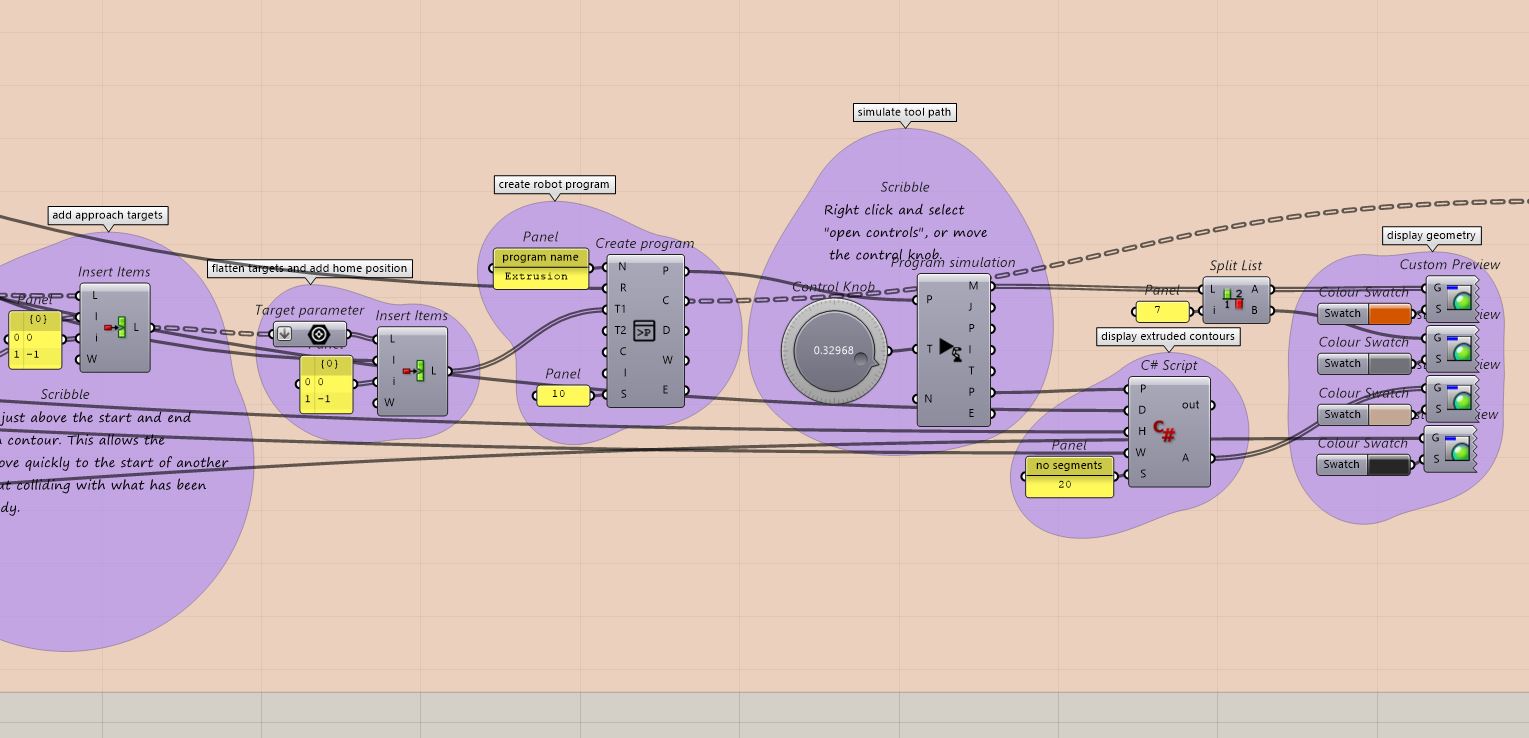
5 step | Visose Robots for 3D printing
To create a 3D print simulation, you can use an example script for extrusion from Visose Robots.
https://github.com/visose/Robots/blob/master/Documentation/Examples/extrusion%20example.gh
In Simplify Curve you need to connect the curves. Also it`s possible to change other parameters in script, like extrusion attributes.
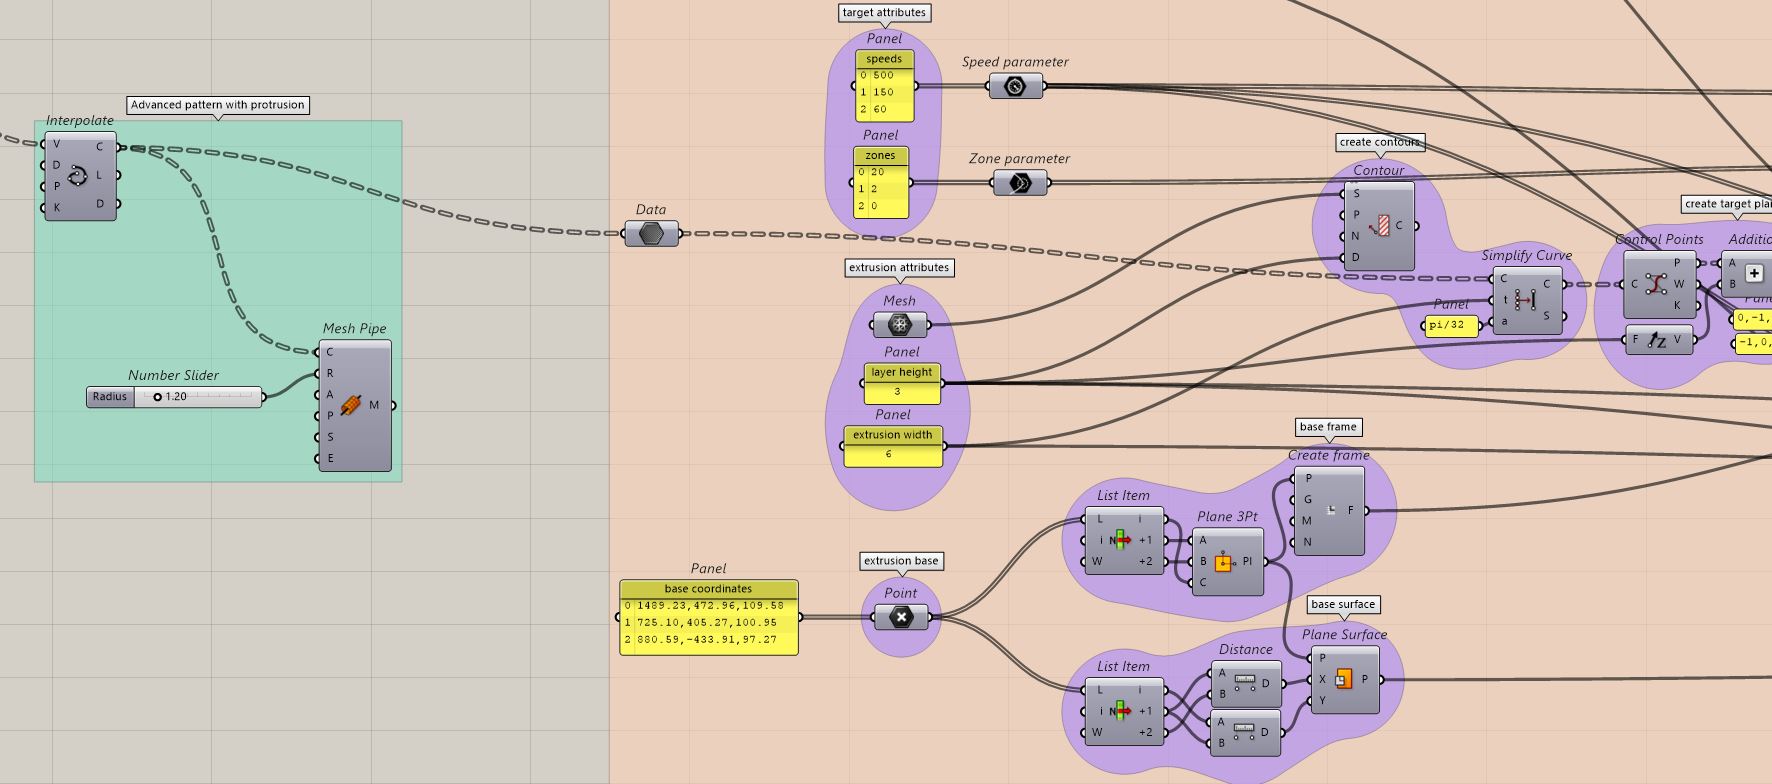
You can see geometry in Custom Preview and also watch the program simulation.
Using the script (alternative pattern)