
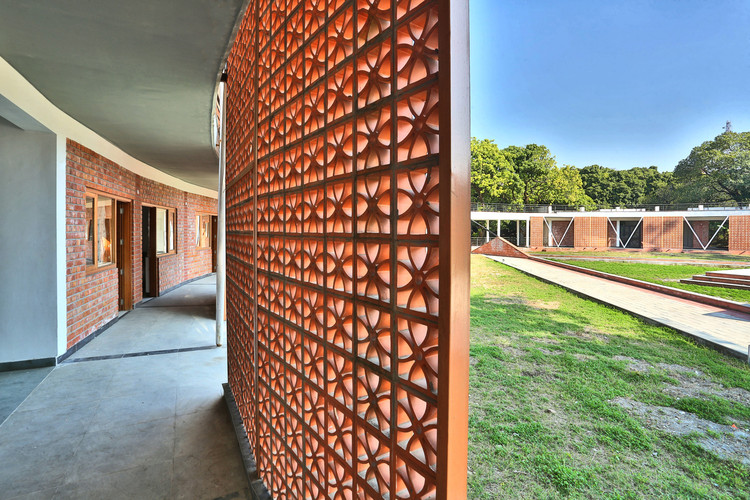
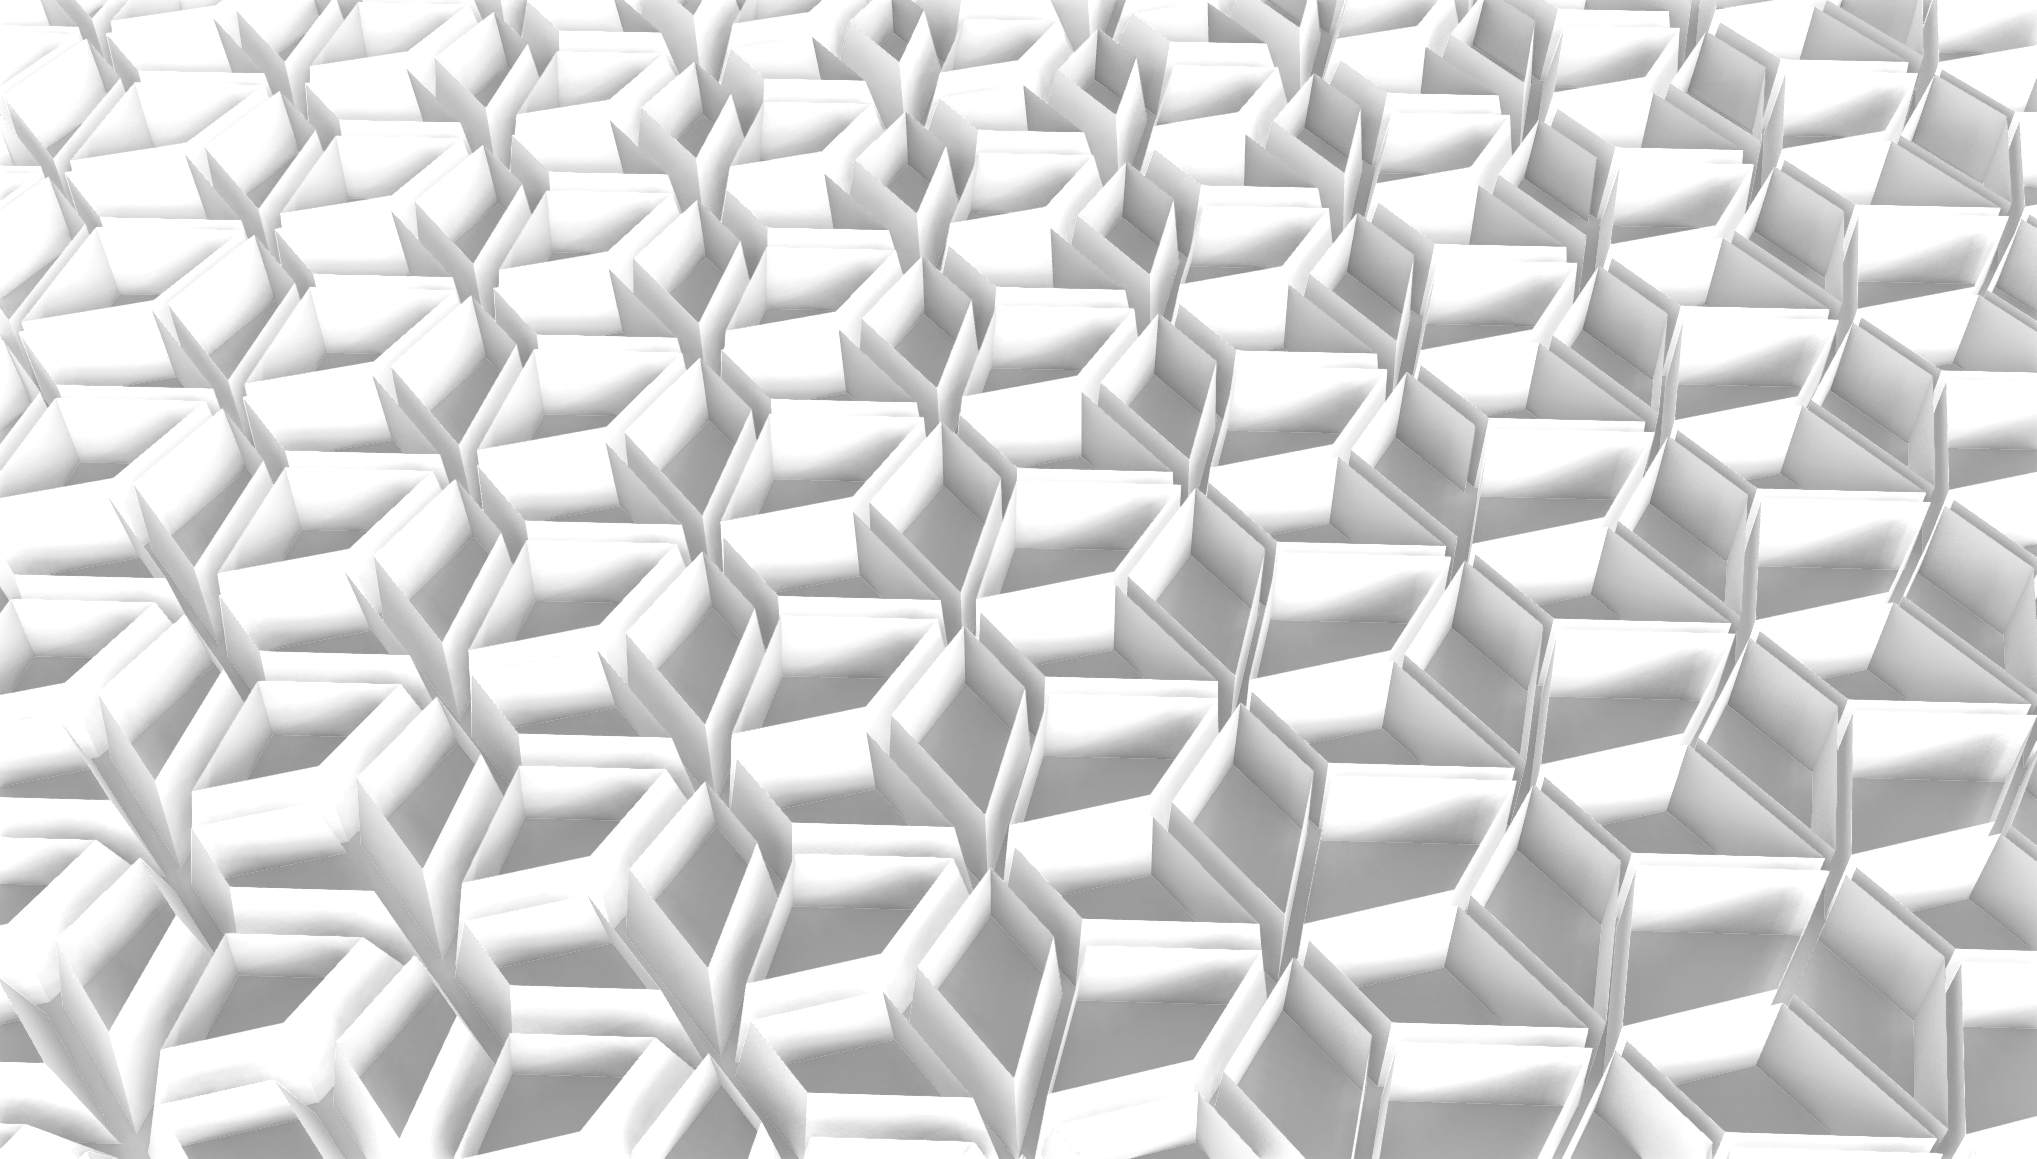
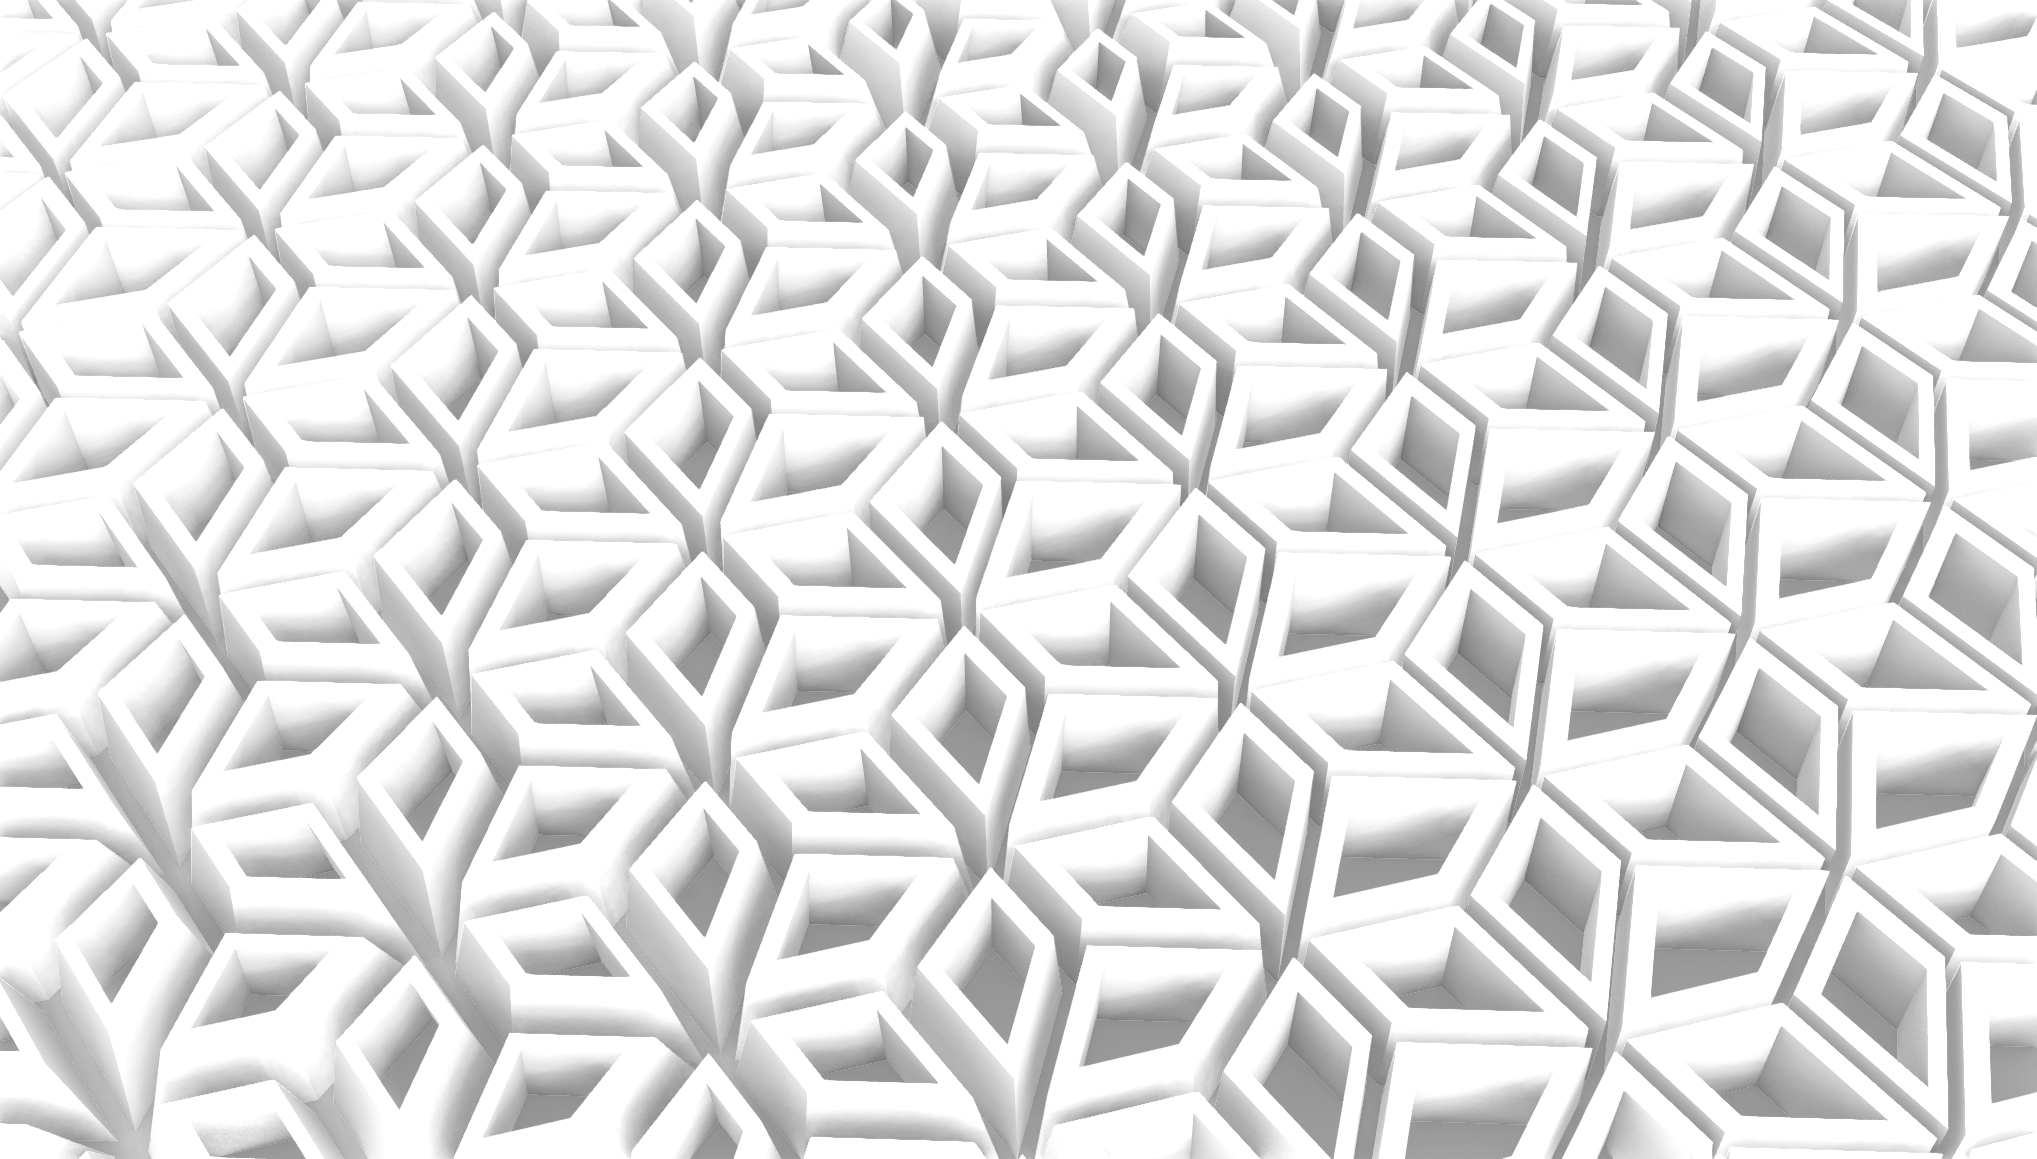
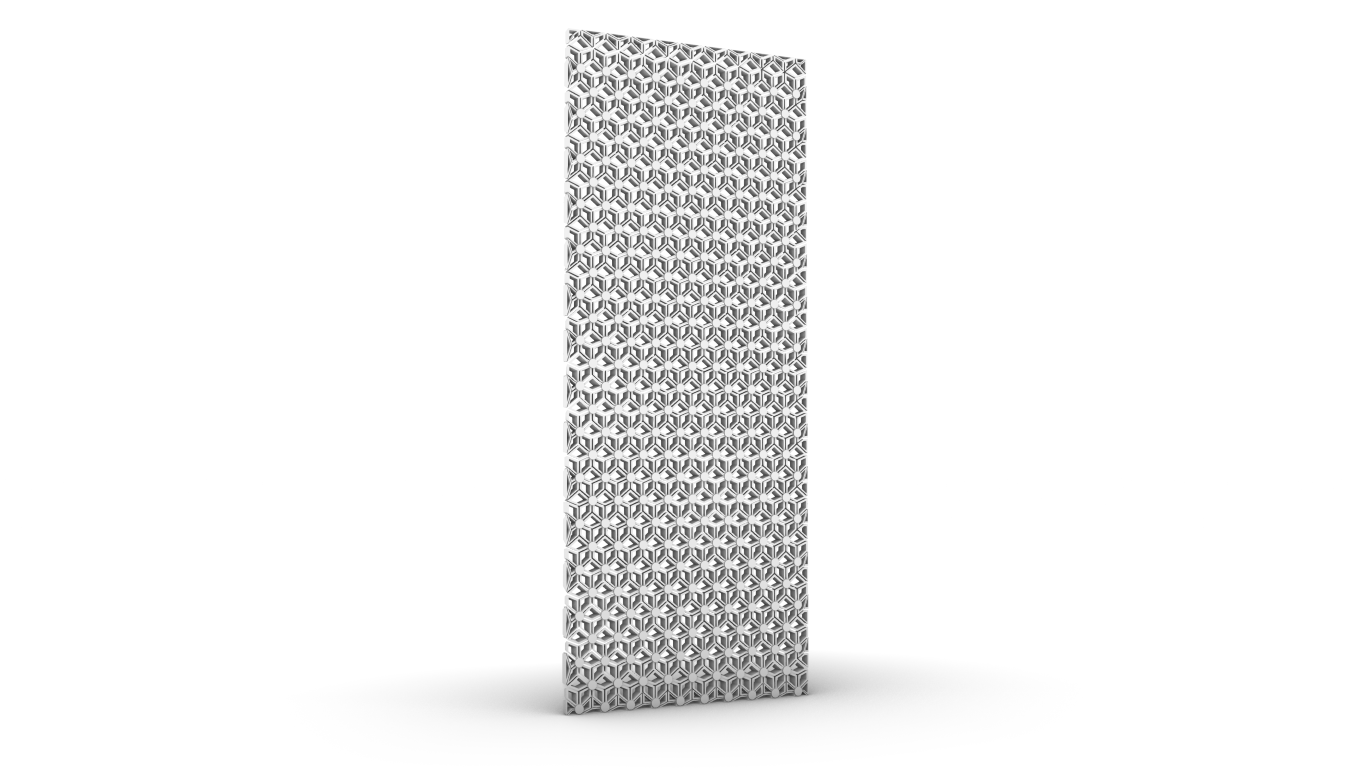
This project takes inspiration from traditional perforated brick screens, often seen in local architecture across warm climates. These elements combine light filtering, ventilation and ornament into one modular system. The goal was to translate that architectural logic into a 3D-printed version. It should be customizable and easy to assemble without tools. By using parametric design, the project explores how such patterns can be adapted to user input, and how recycled plastic can give new life to architectural surfaces. The concept builds on the shift from fixed production methods to on-demand, digital manufacturing.
Script
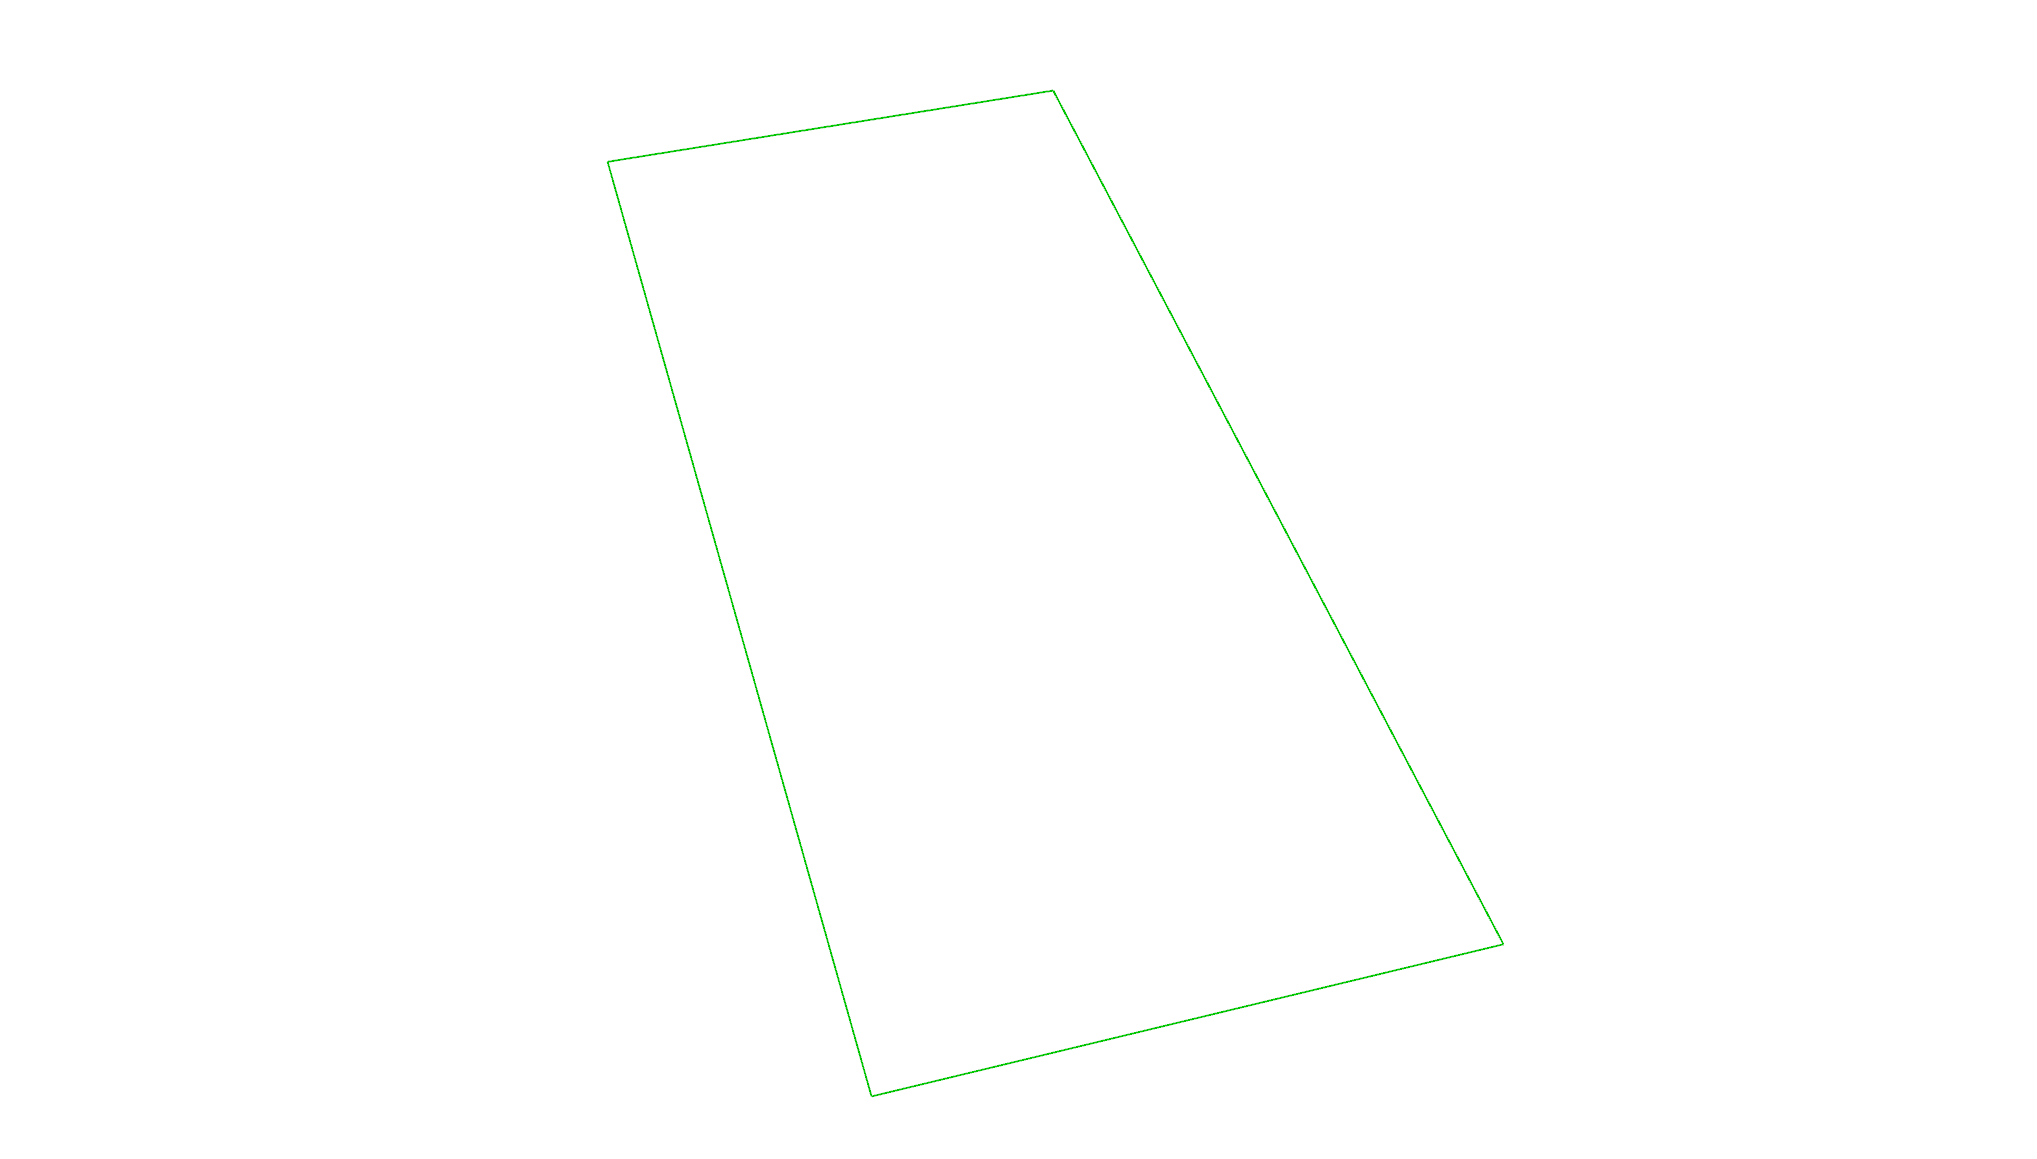
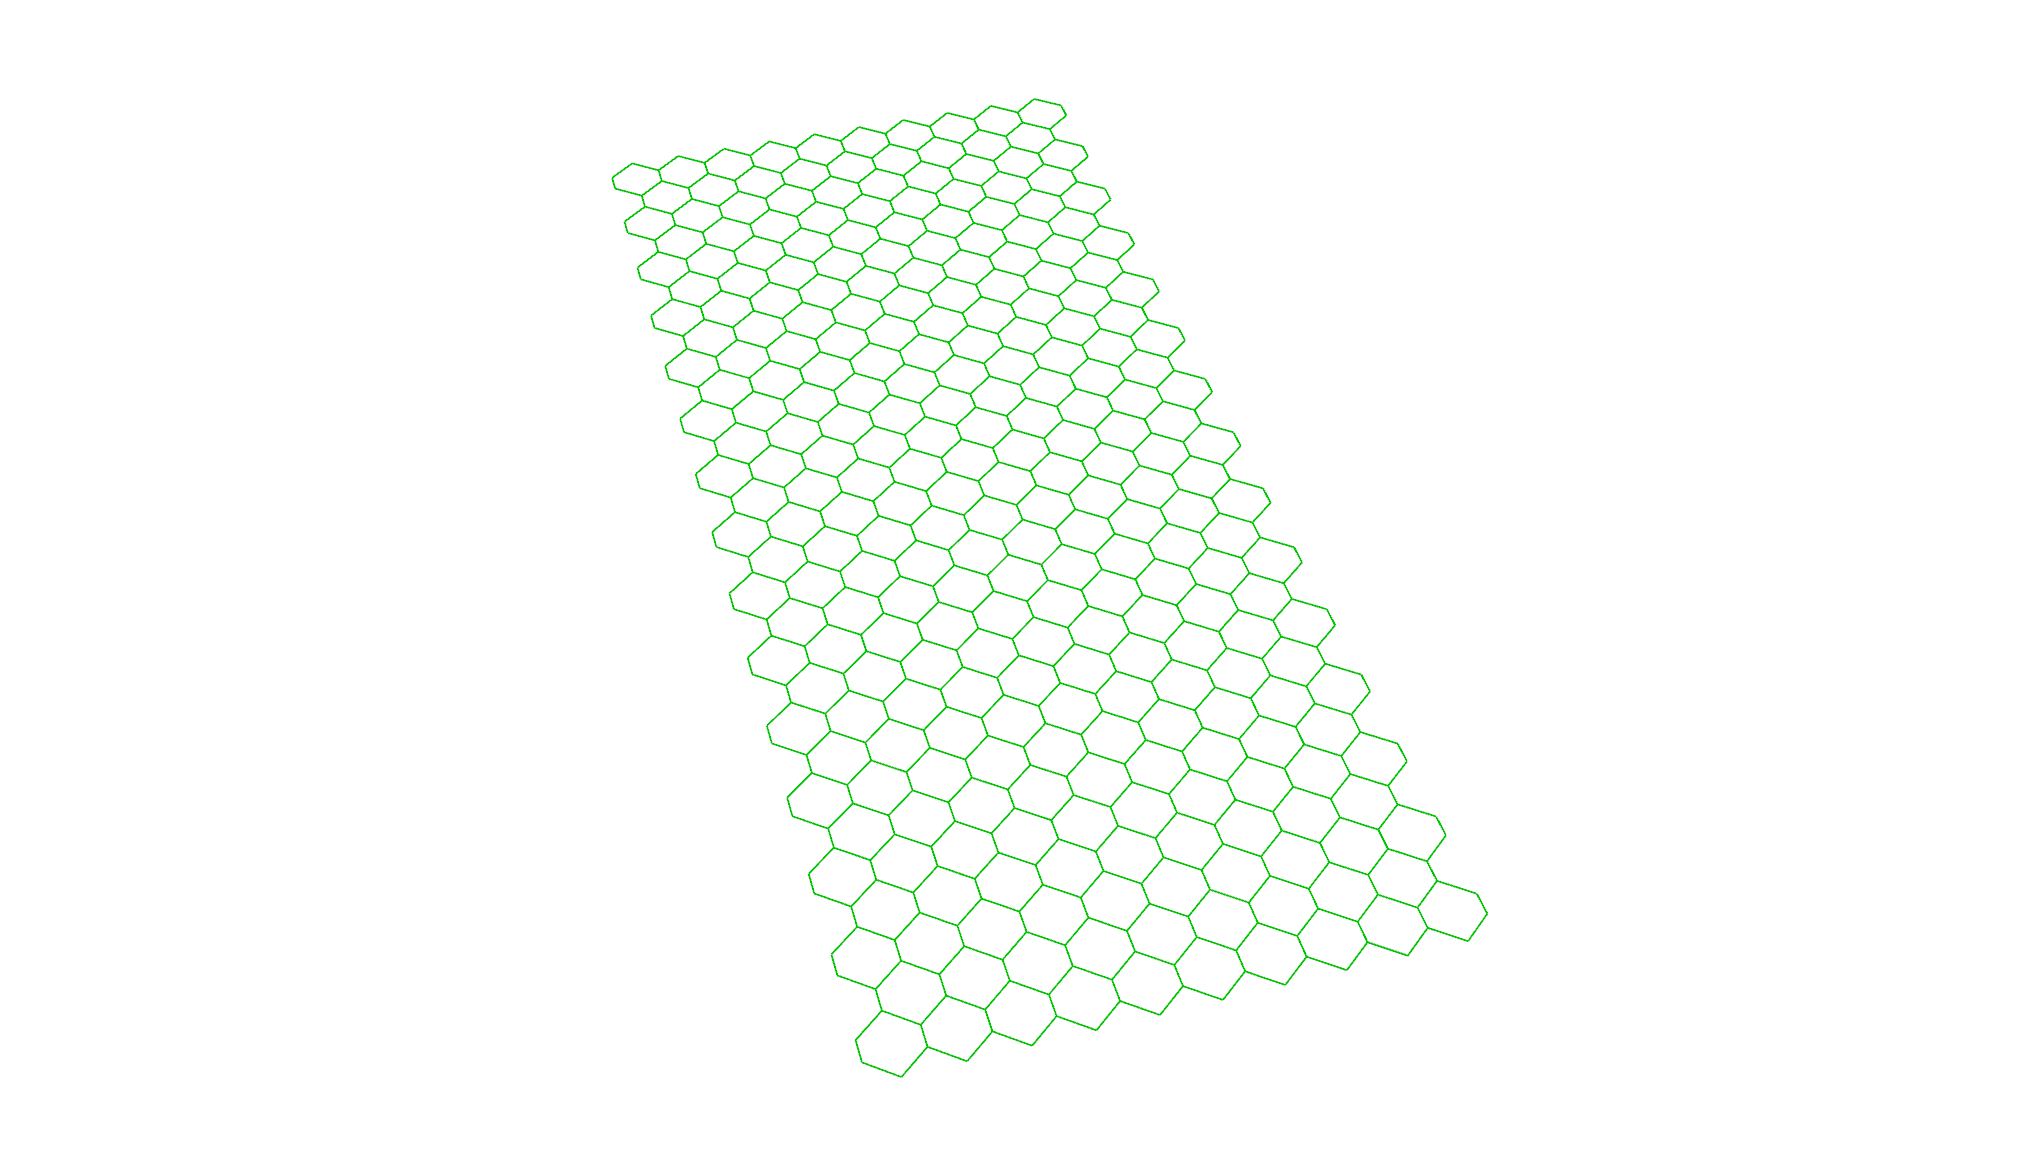
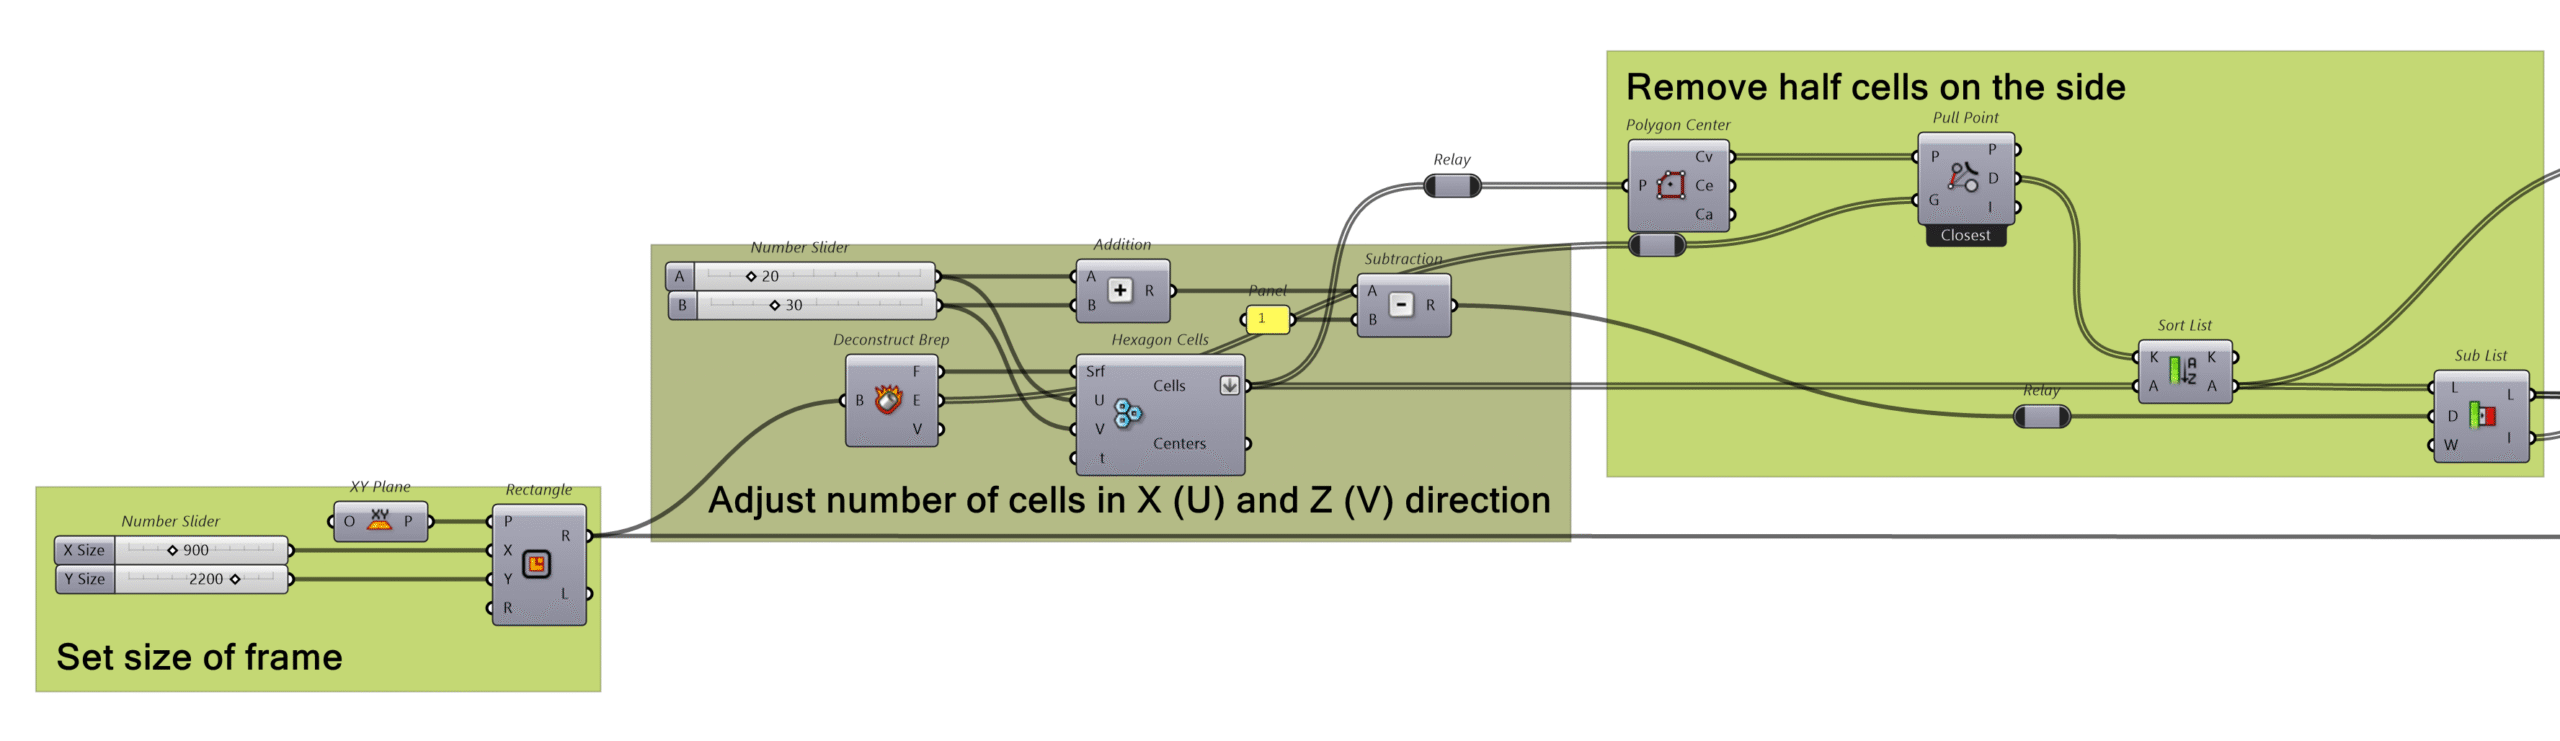
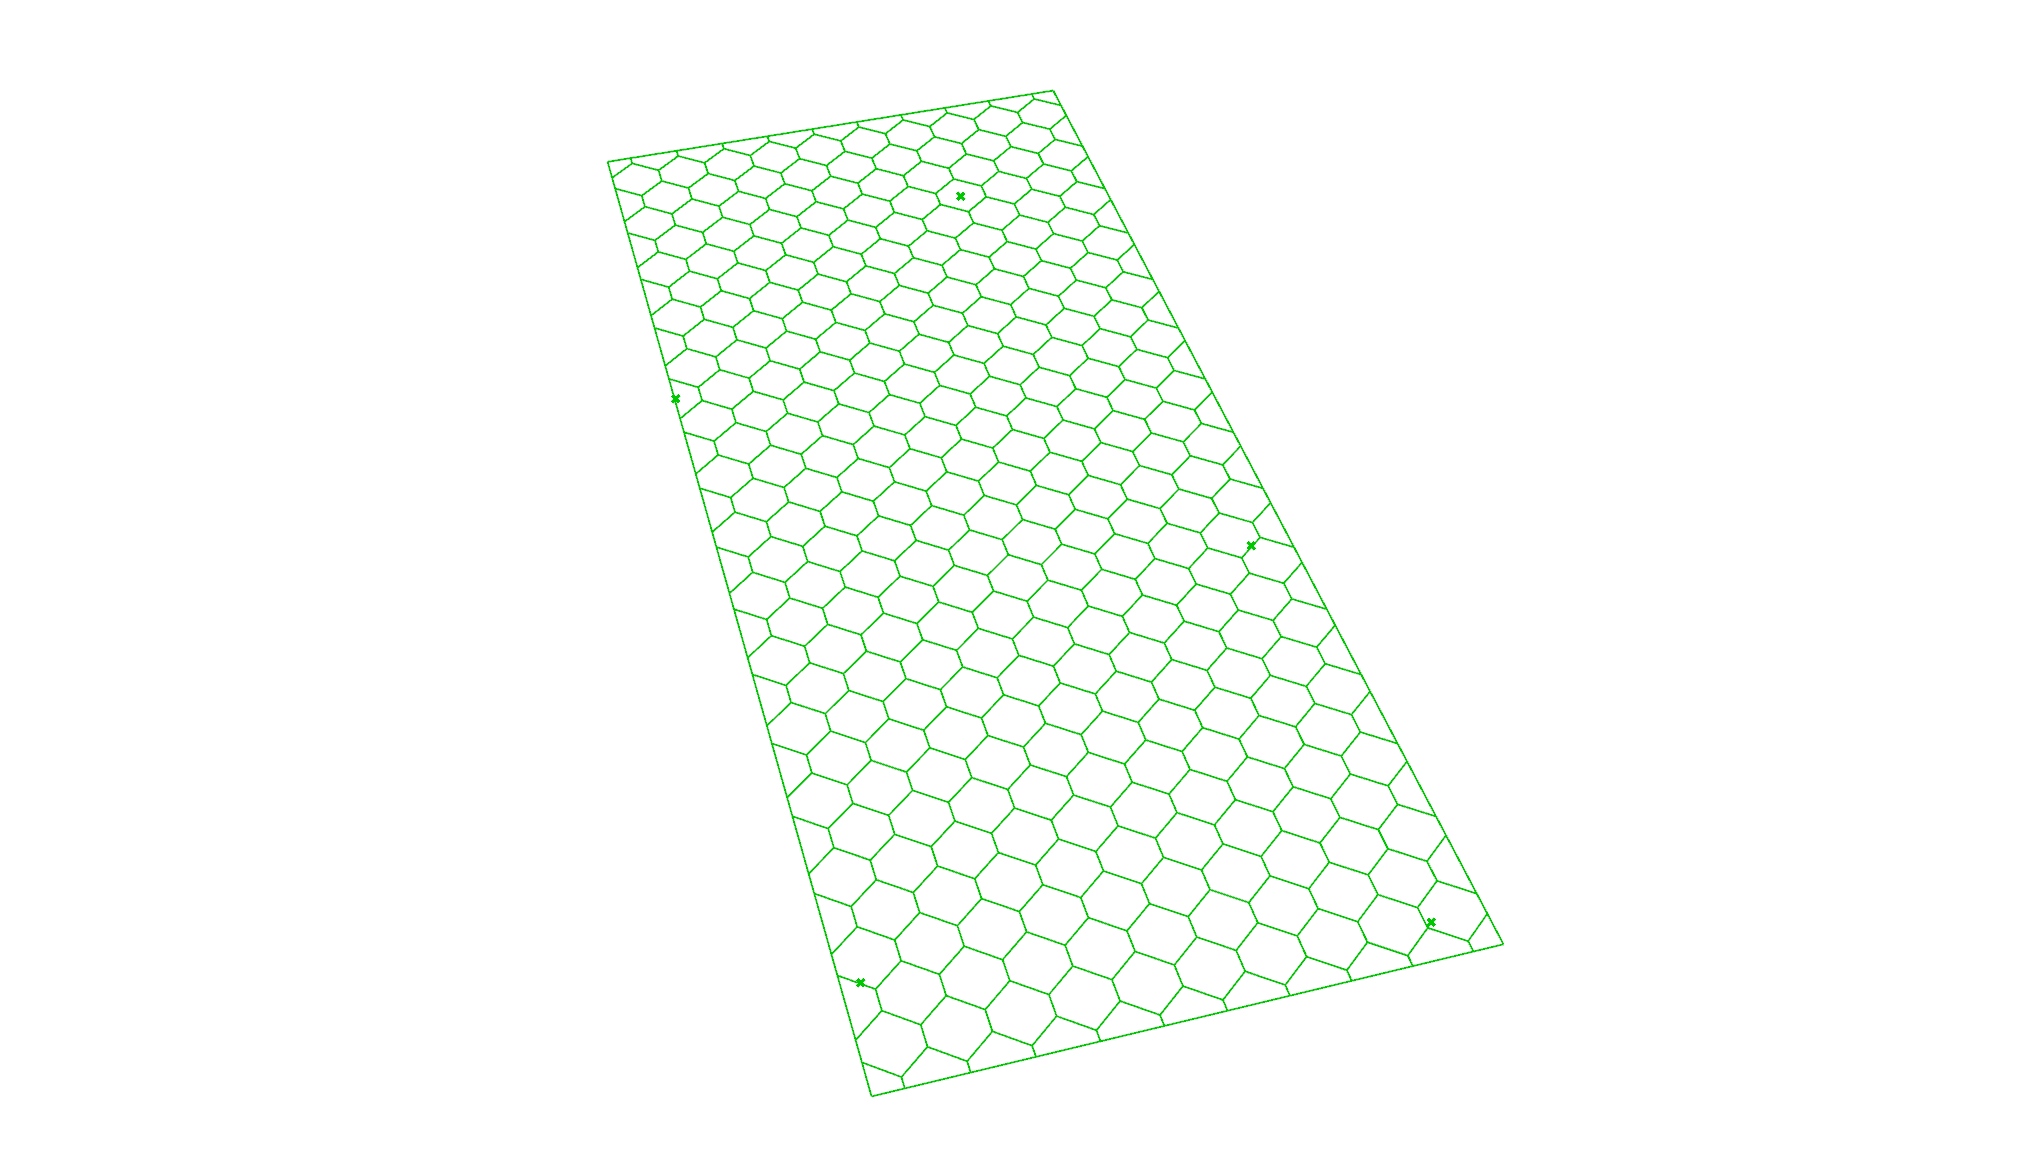
The user starts to enter the width and height of the screen. Then it chooses how many hexagons have to get in width and height. Based on this, the size of each hexagon is automatically calculated.
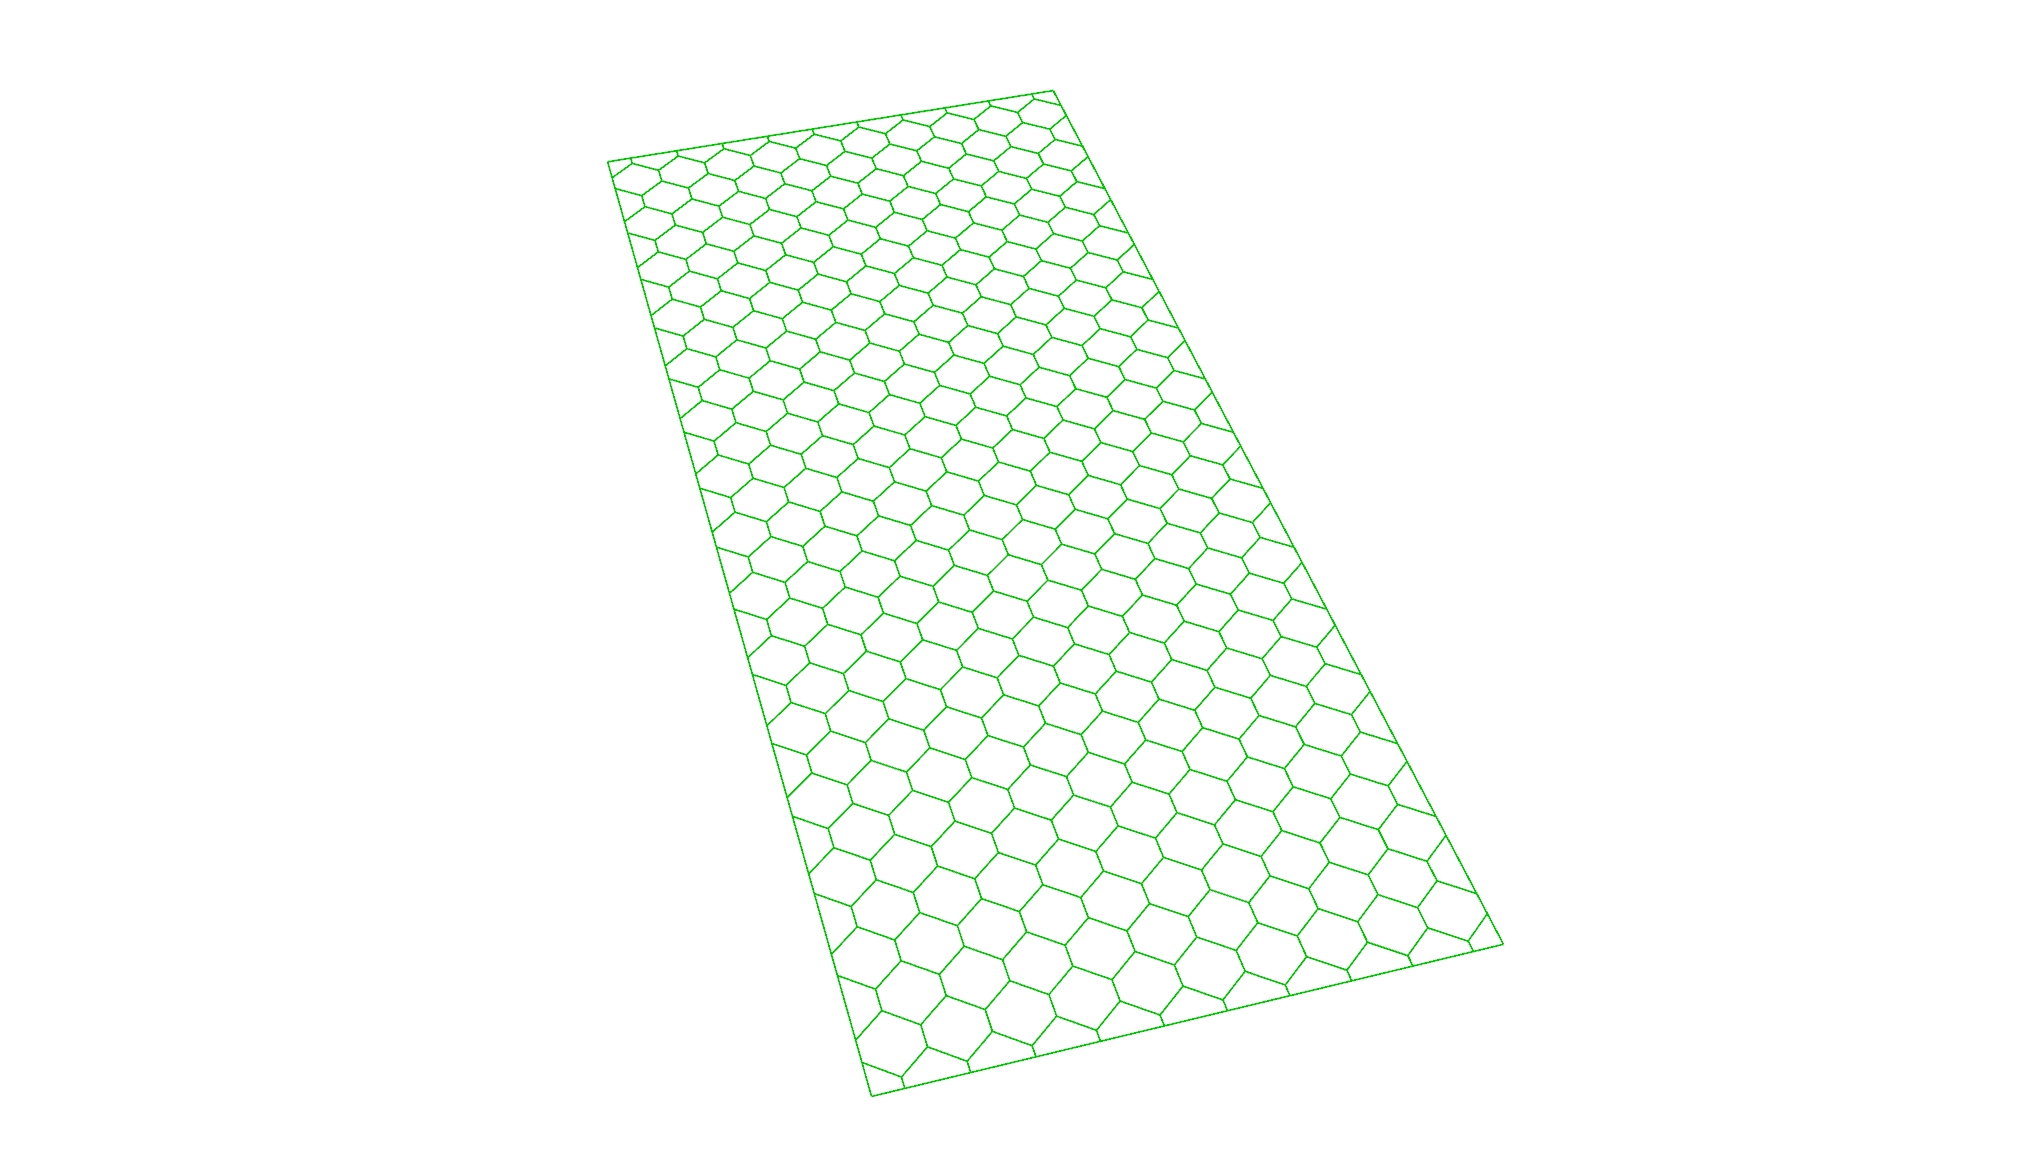
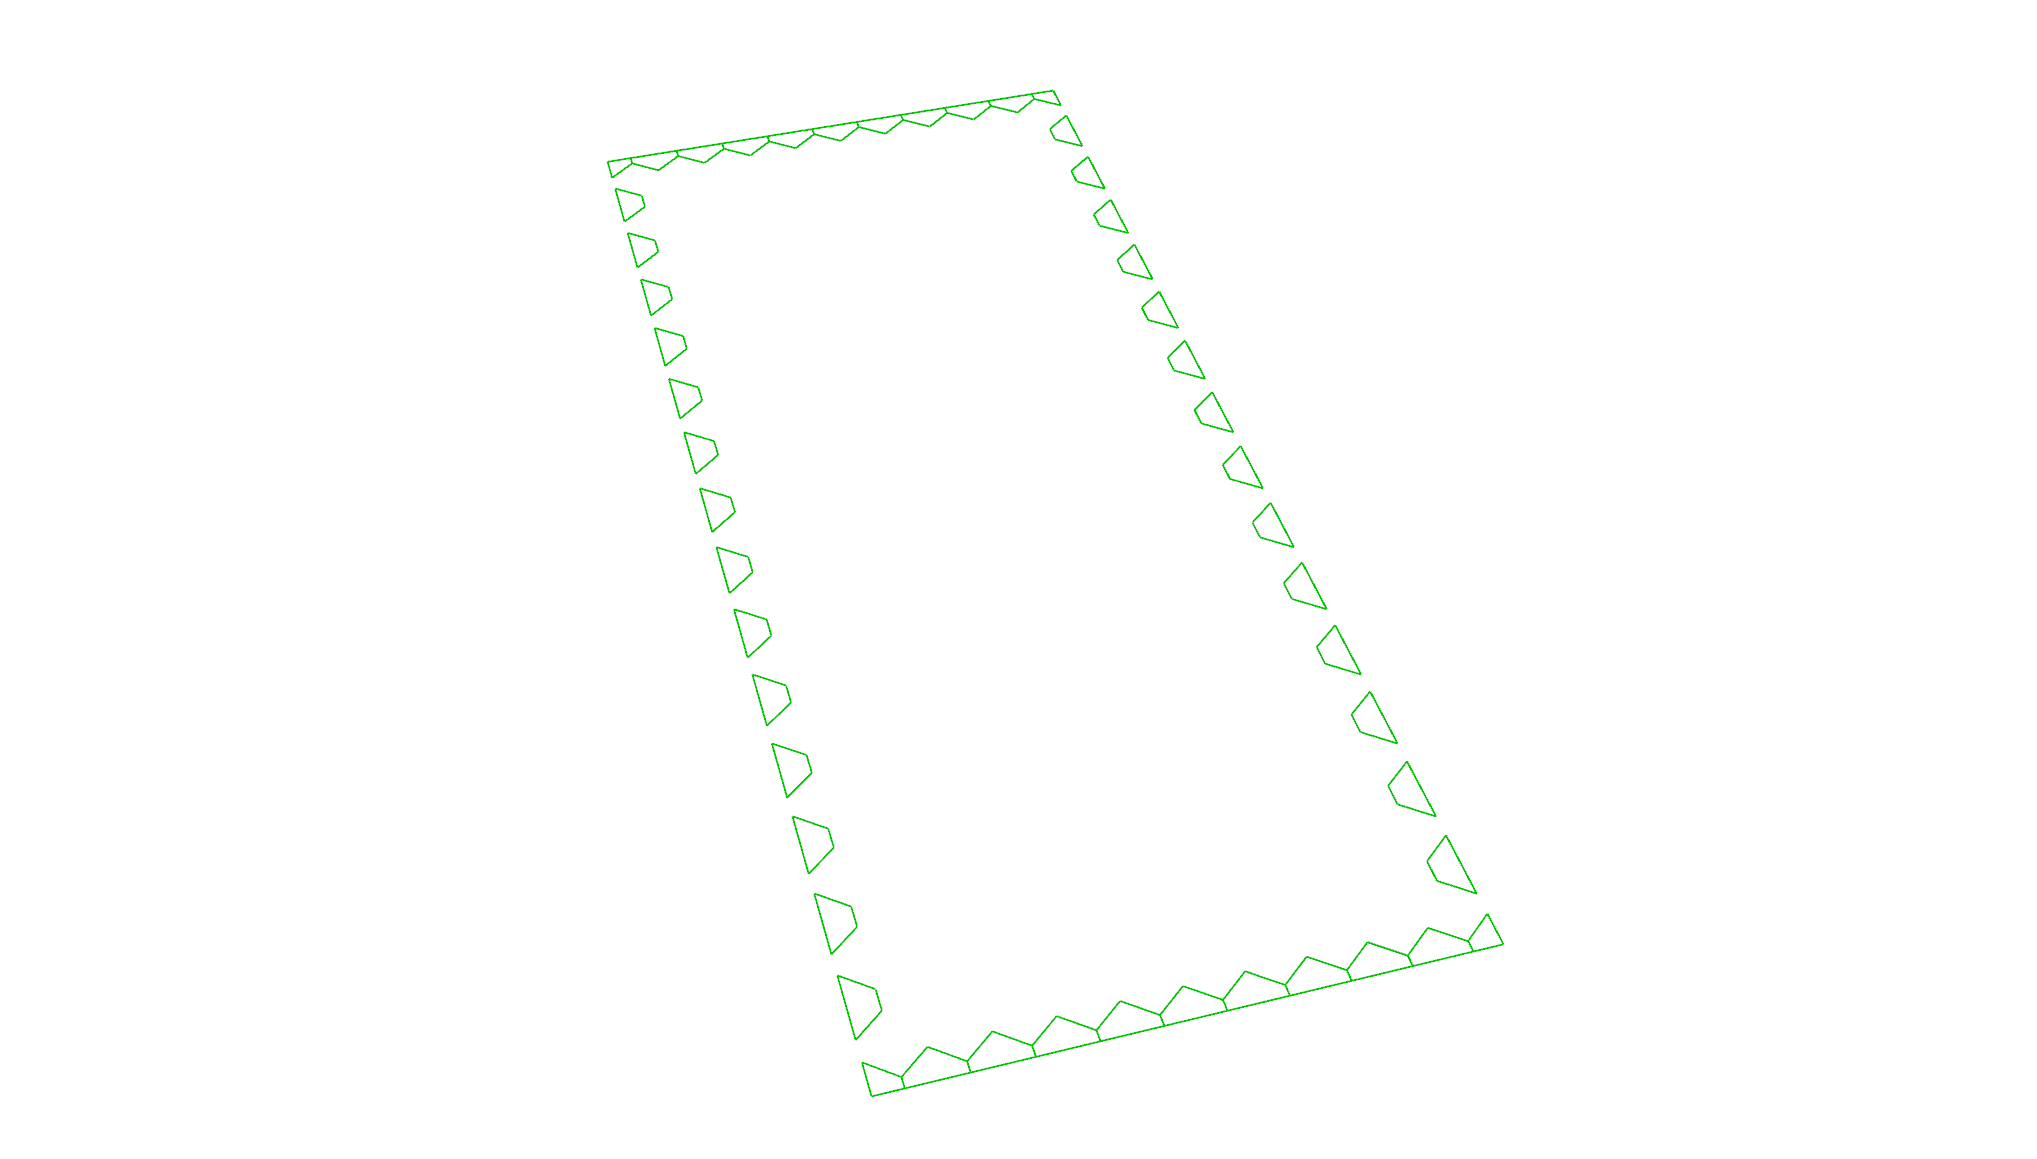
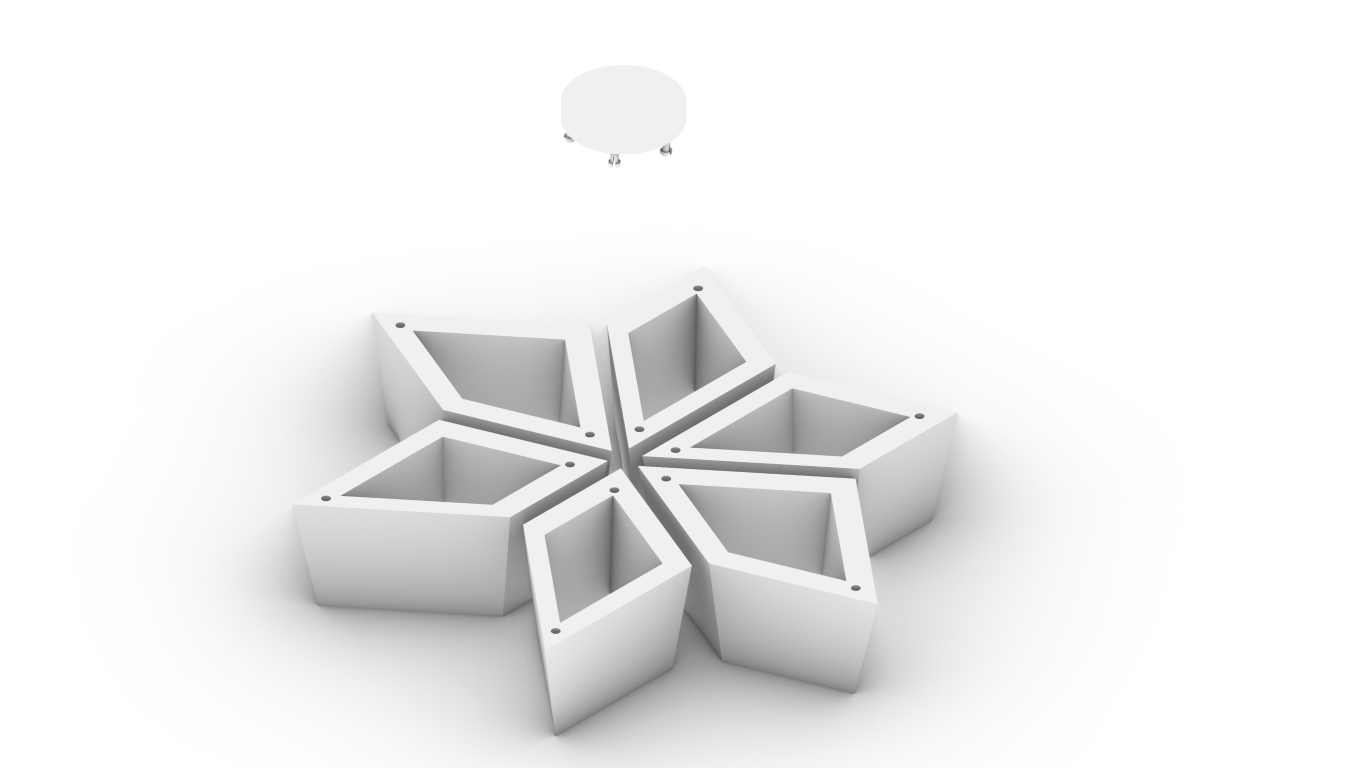
Not all hexagons are complete, half -shapes arise on the edges. The Pull Point component is used to distinguish here. By comparing the distance of the center of each hexagon with a central reference on the edge of the screen, the half hexagons can be recognized and set separately in a list. This way, both forms can be further processed separately.
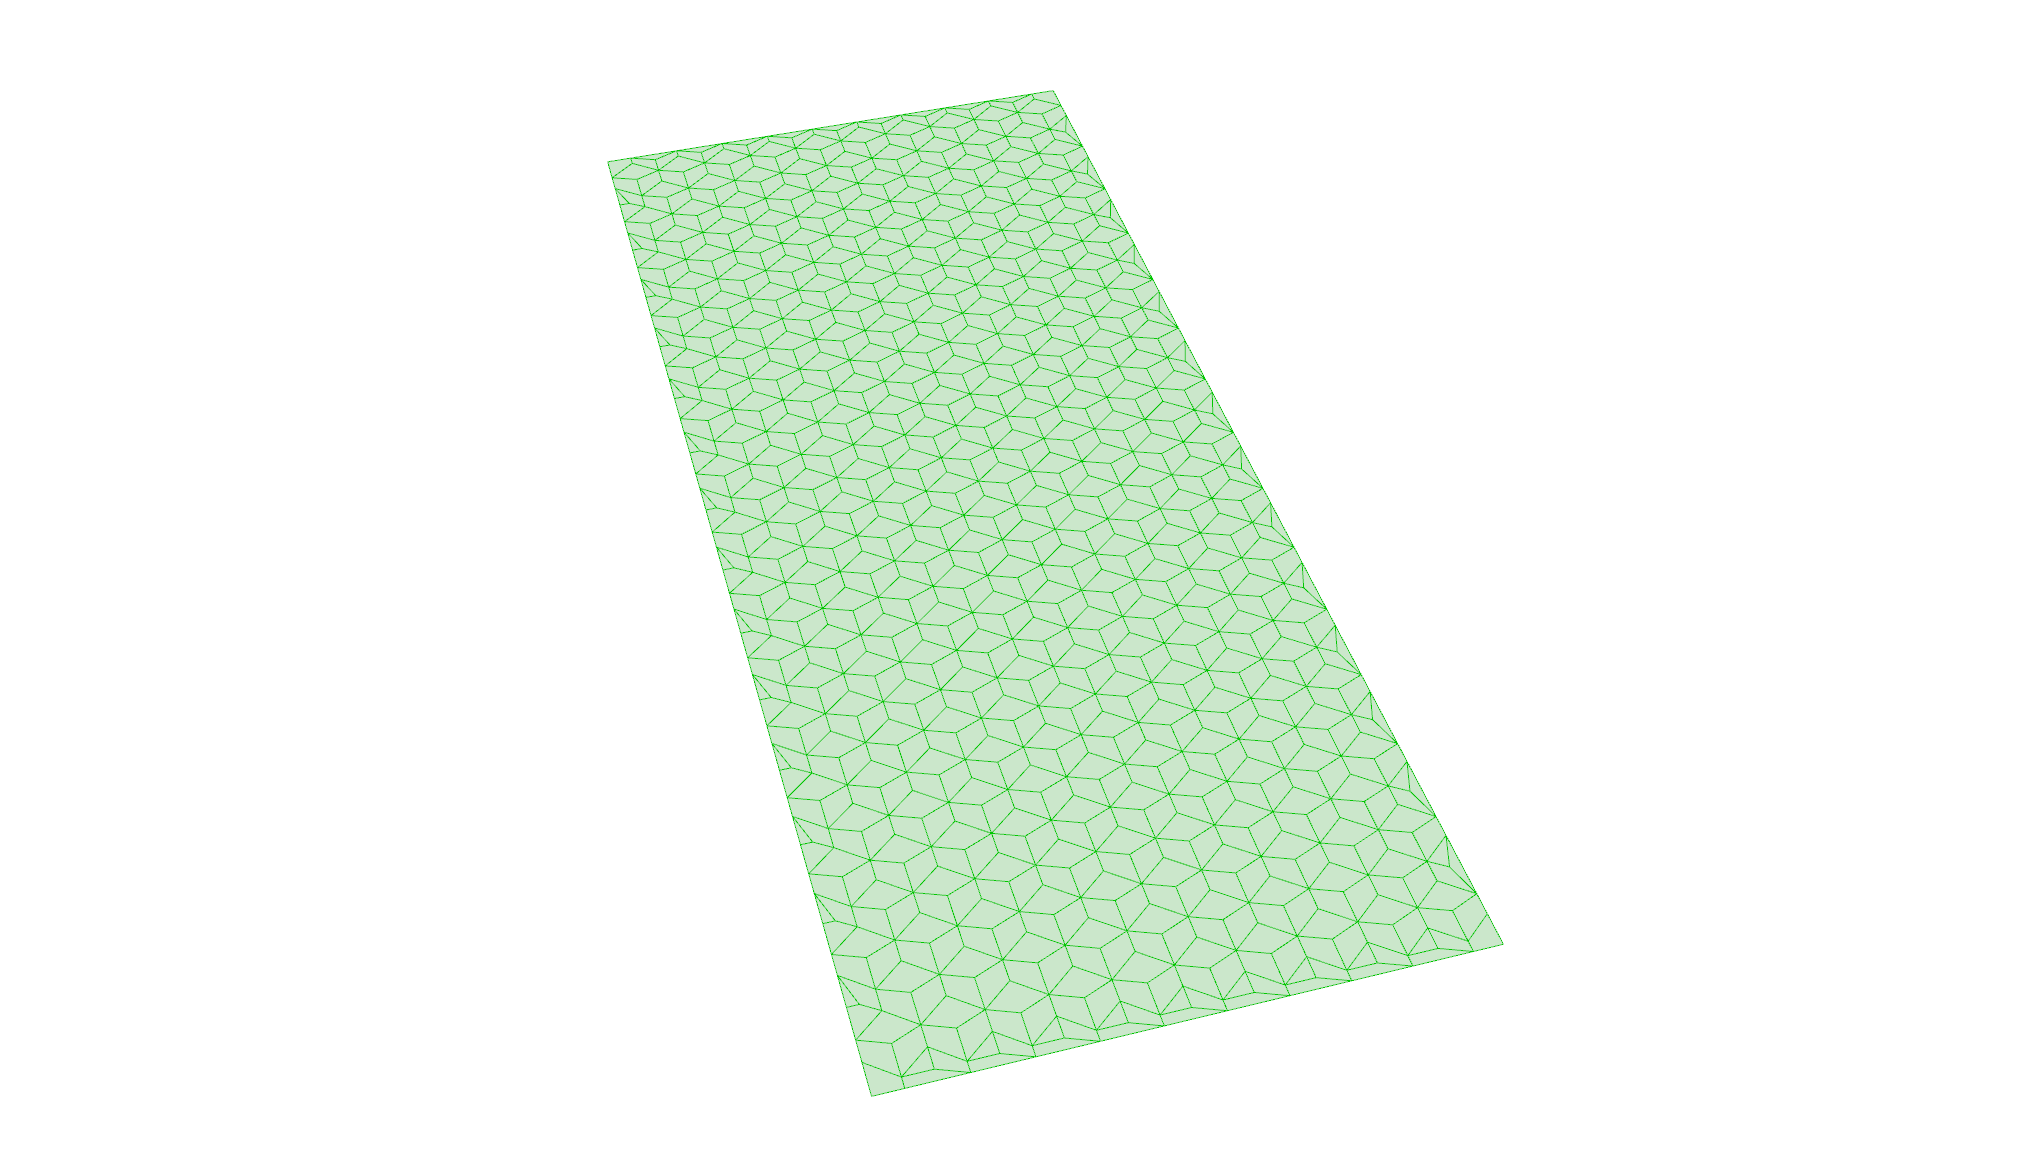
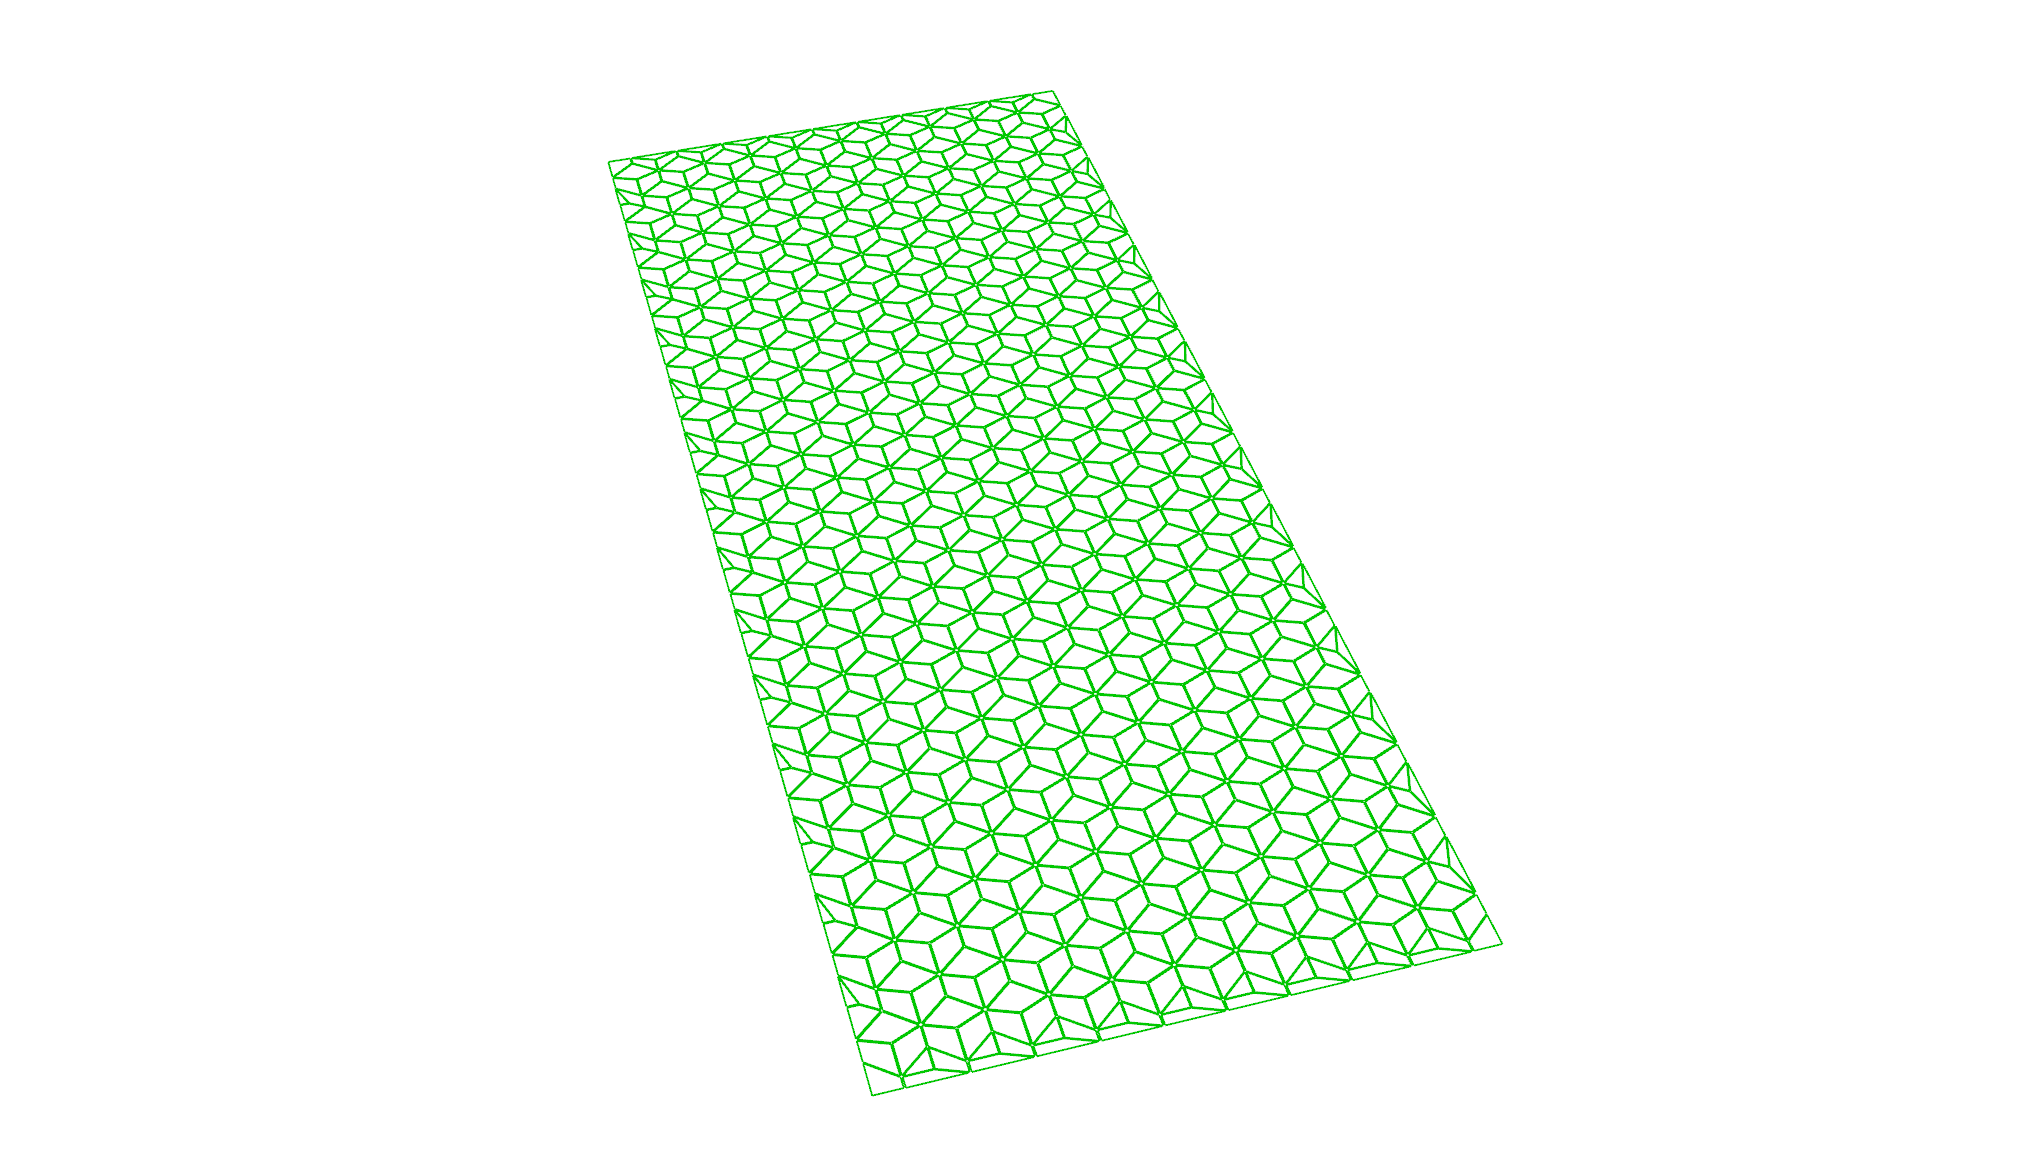
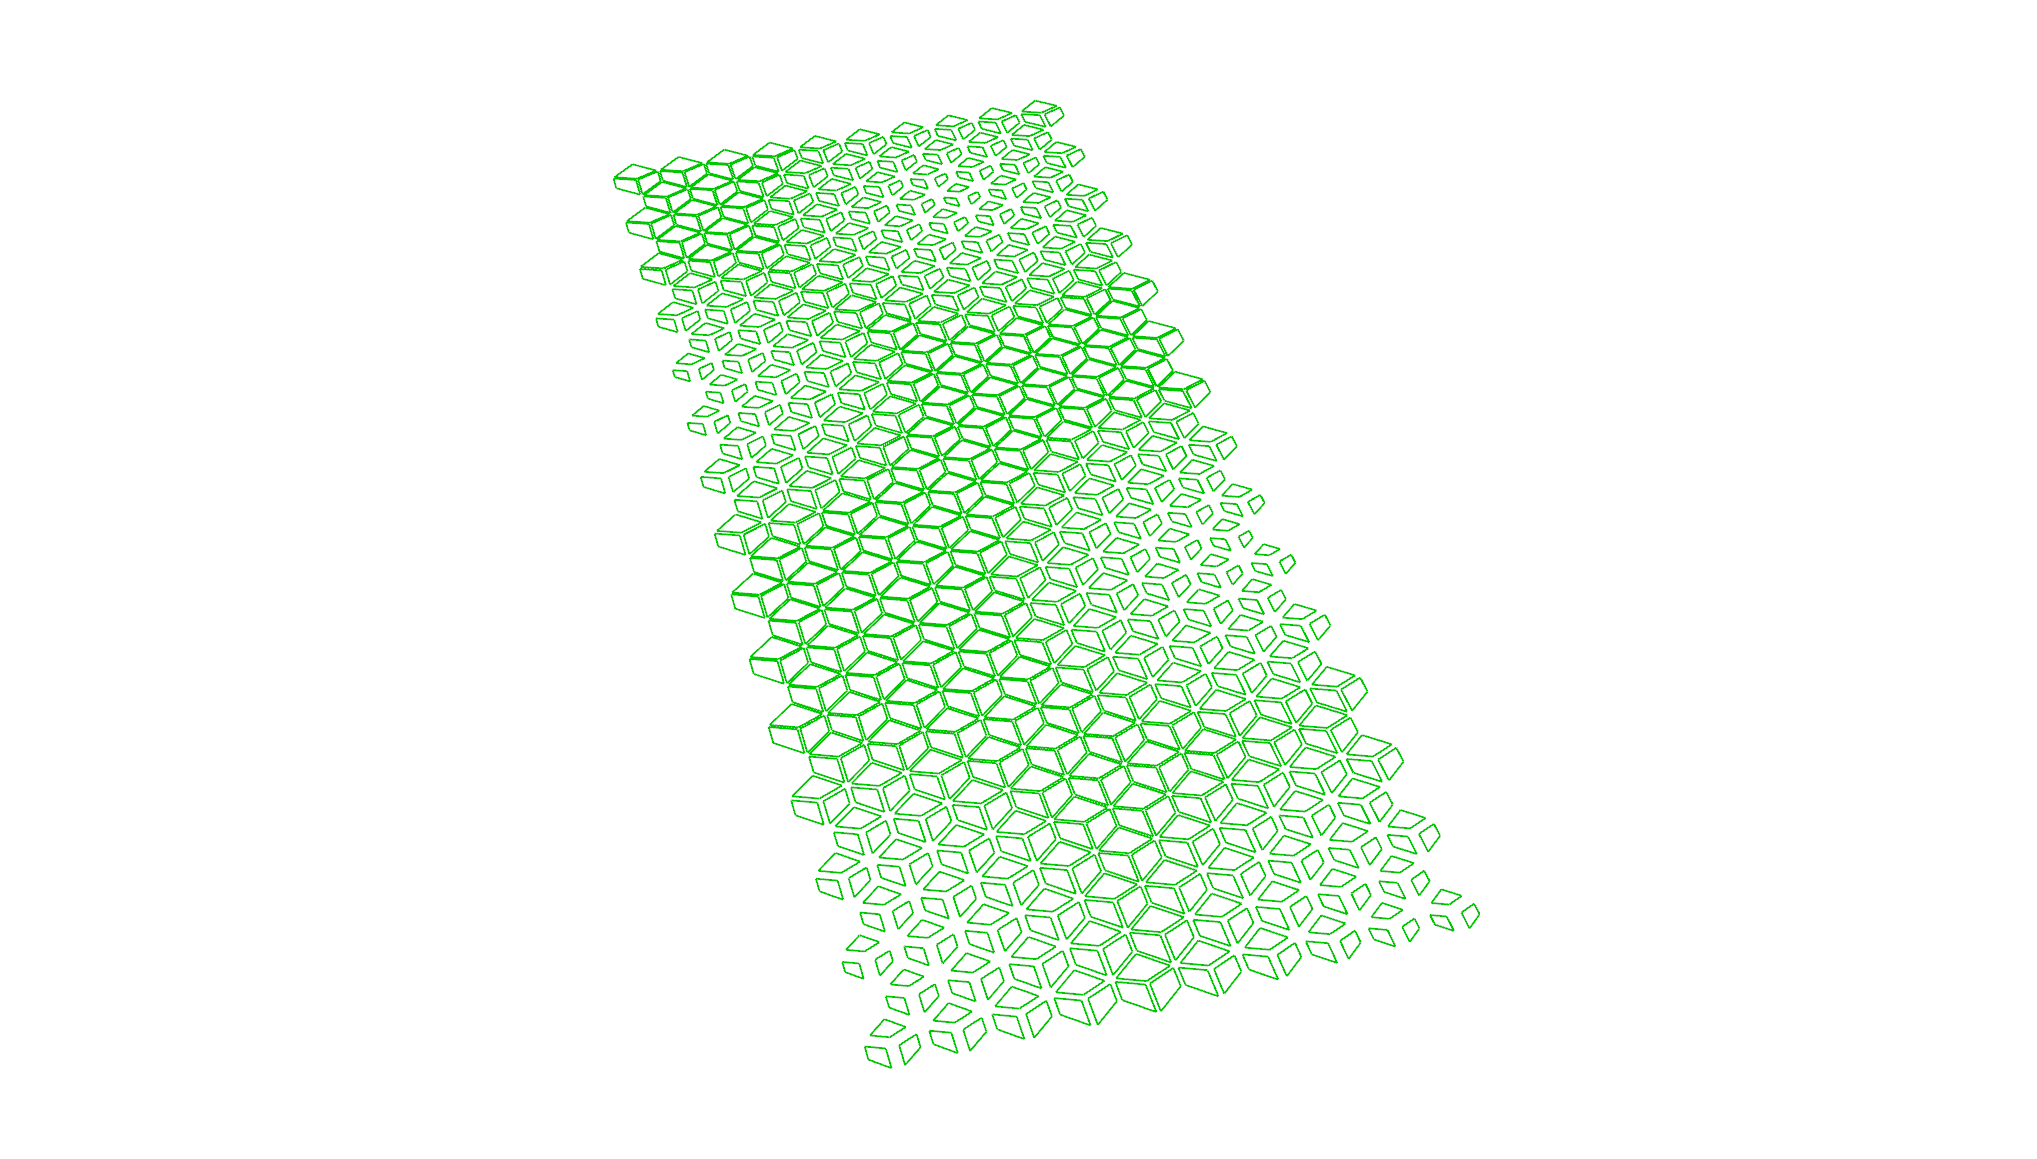
Each hexagon is divided into three areas. These triangles form the basis for the final panels. To get a better effect on 3D printing and to make the connection easier later, these surfaces will offset a little bit to the inside. This creates space between the panels and they get a clear edge.
At the same time, a number of attractor points are randomly generated over the surface. These points will later determine how open or closed each panel should be, depending on the distance to such an attractor.
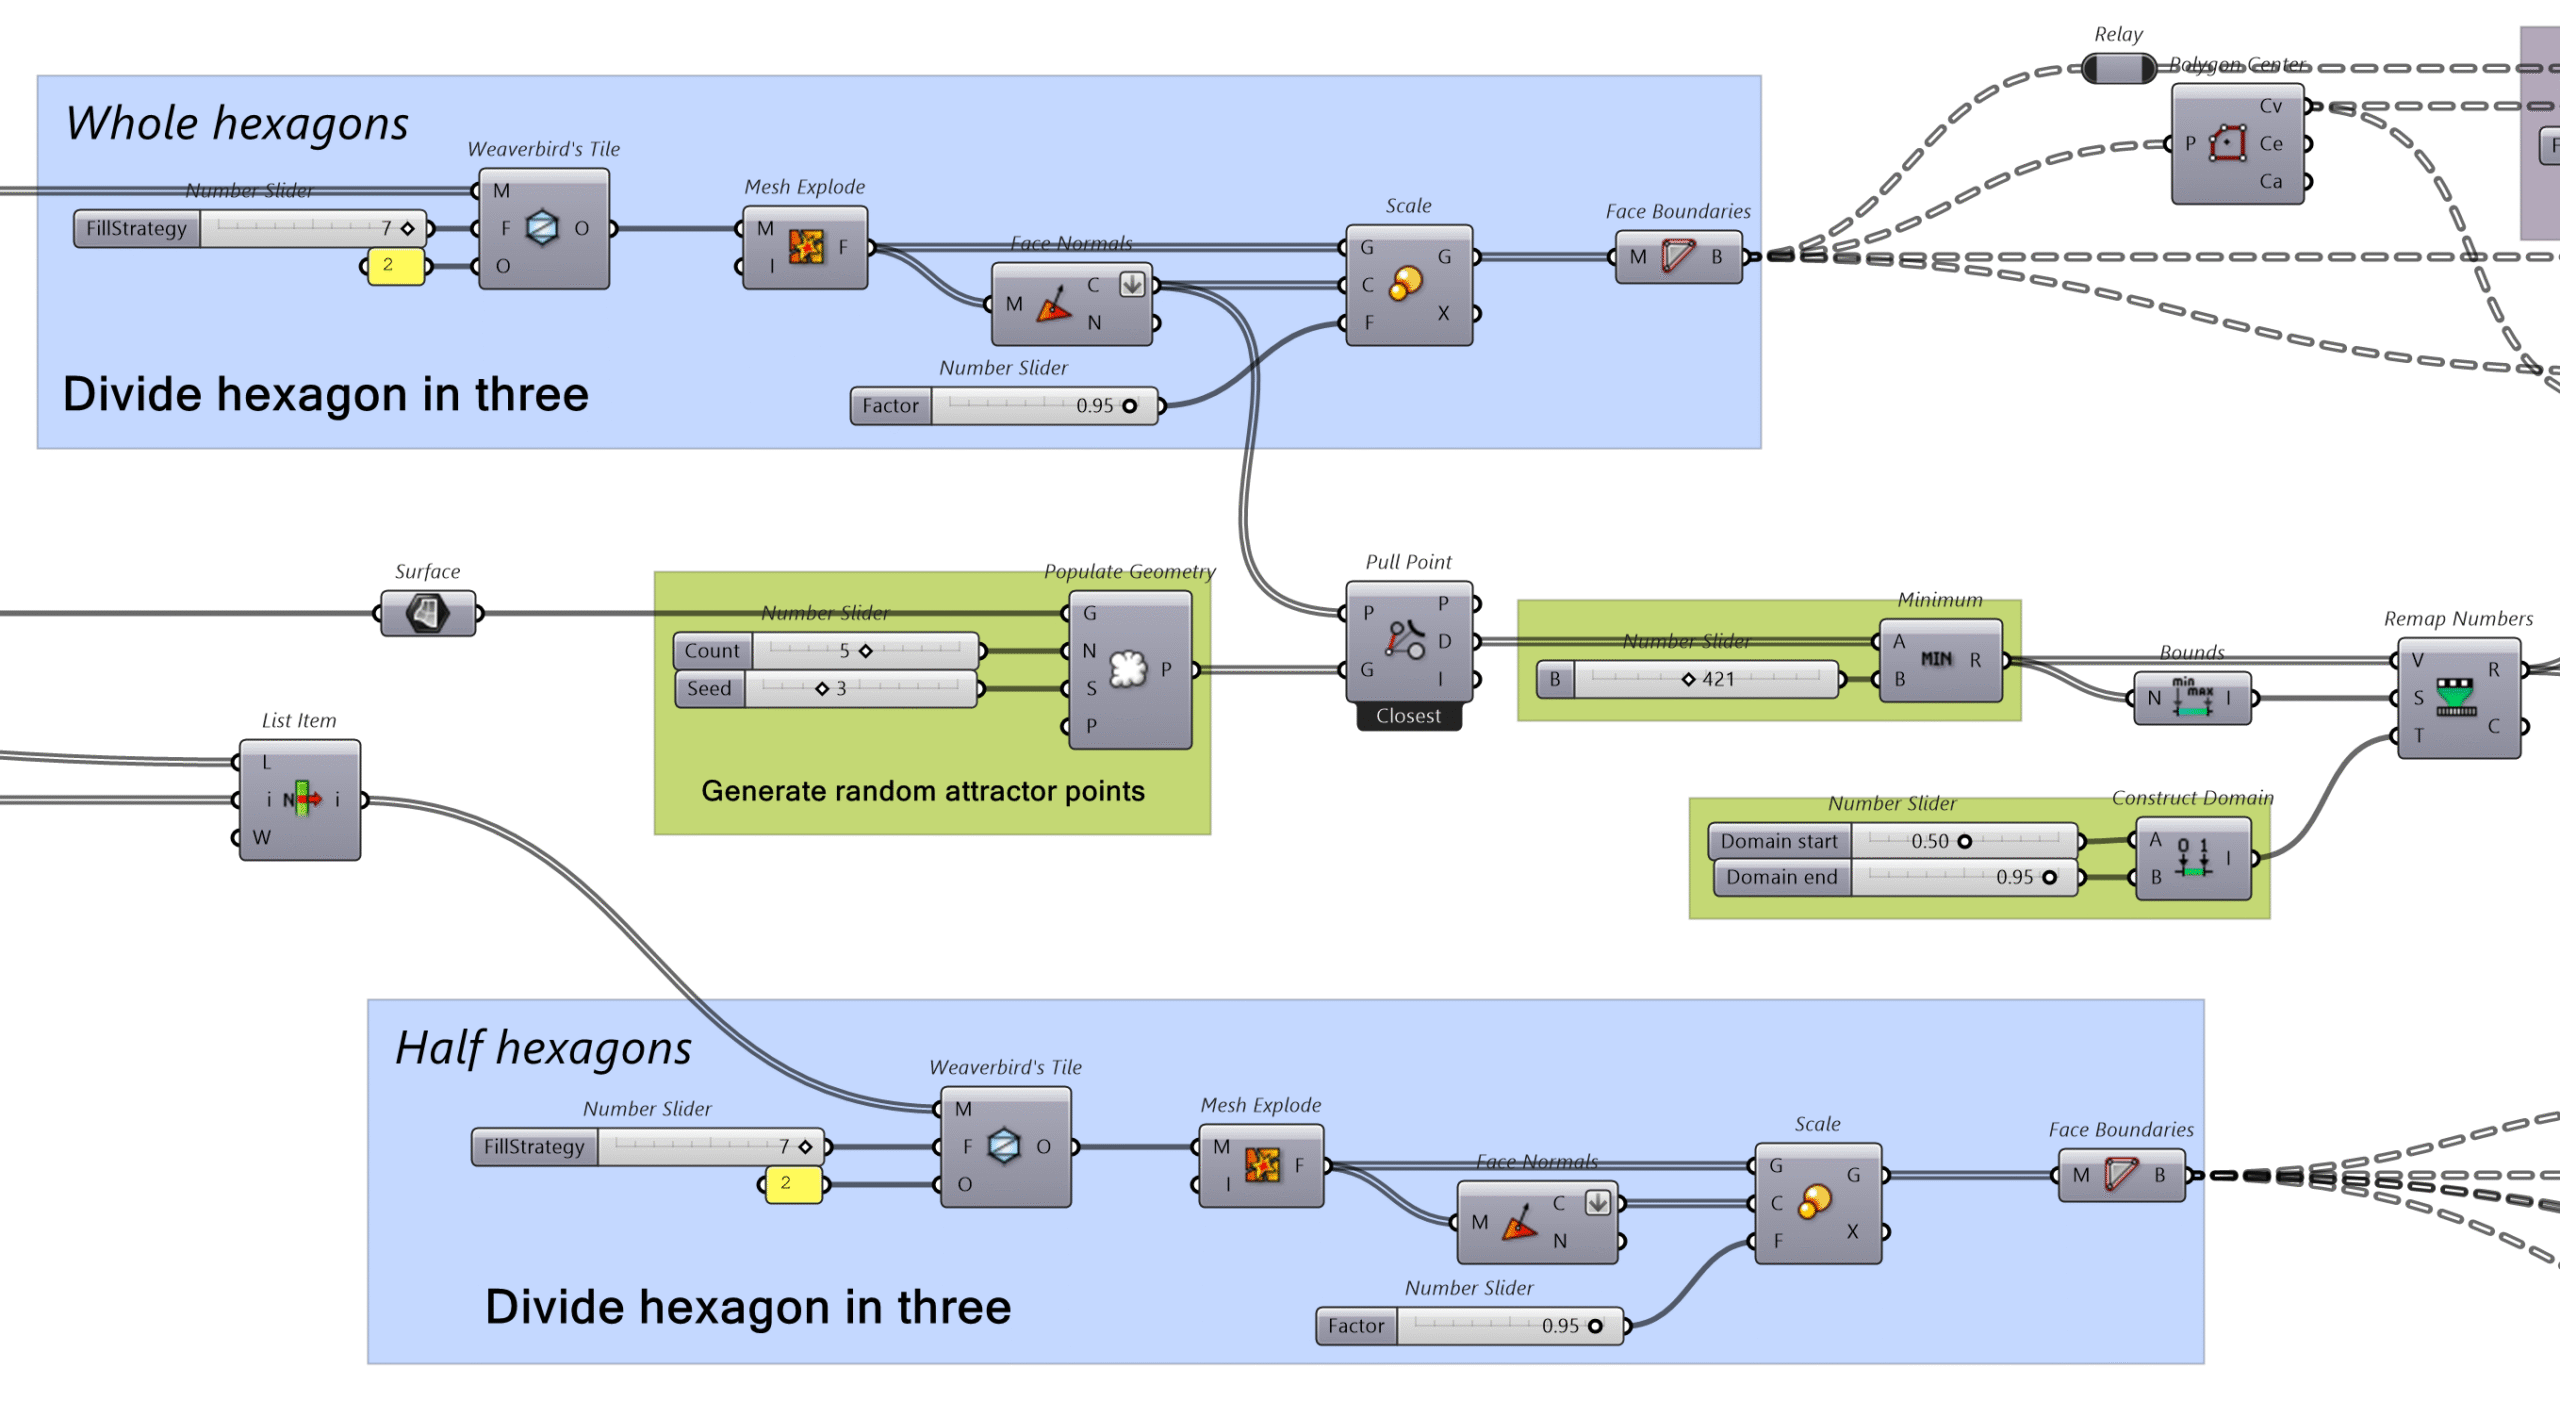
The distance between each panel and the attractor points determines how closed the panel becomes. The closer the center of the panel is to an attractor, the smaller the open space becomes.
This is done by scaling the outline of the panel. Closer = larger scale factor = less open. This scaled outline is then moved up a bit in the Z direction. Then a loft is created between the original outline and the raised version. This creates a 3D shape with a ‘roof’ that responds to the attractors.
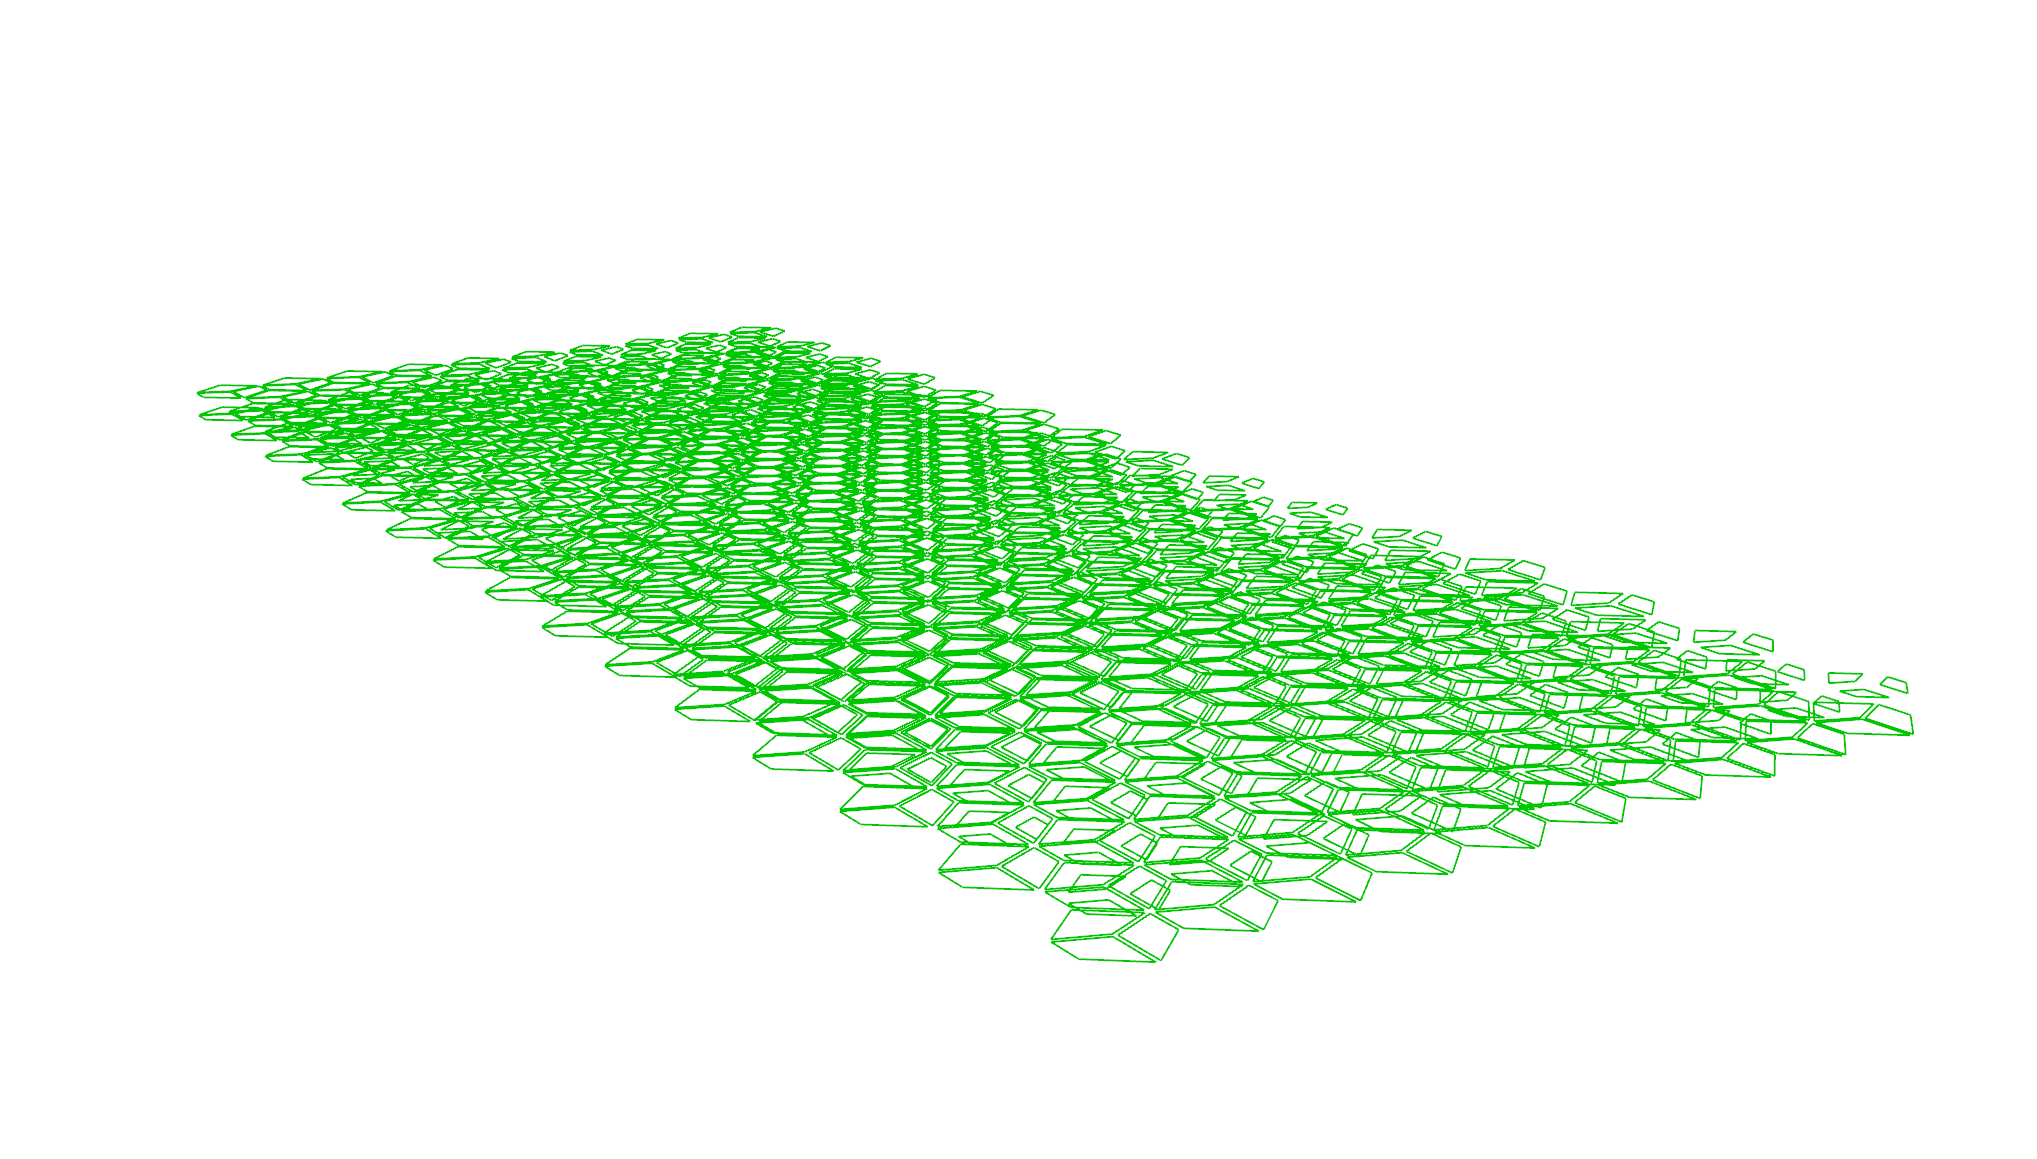
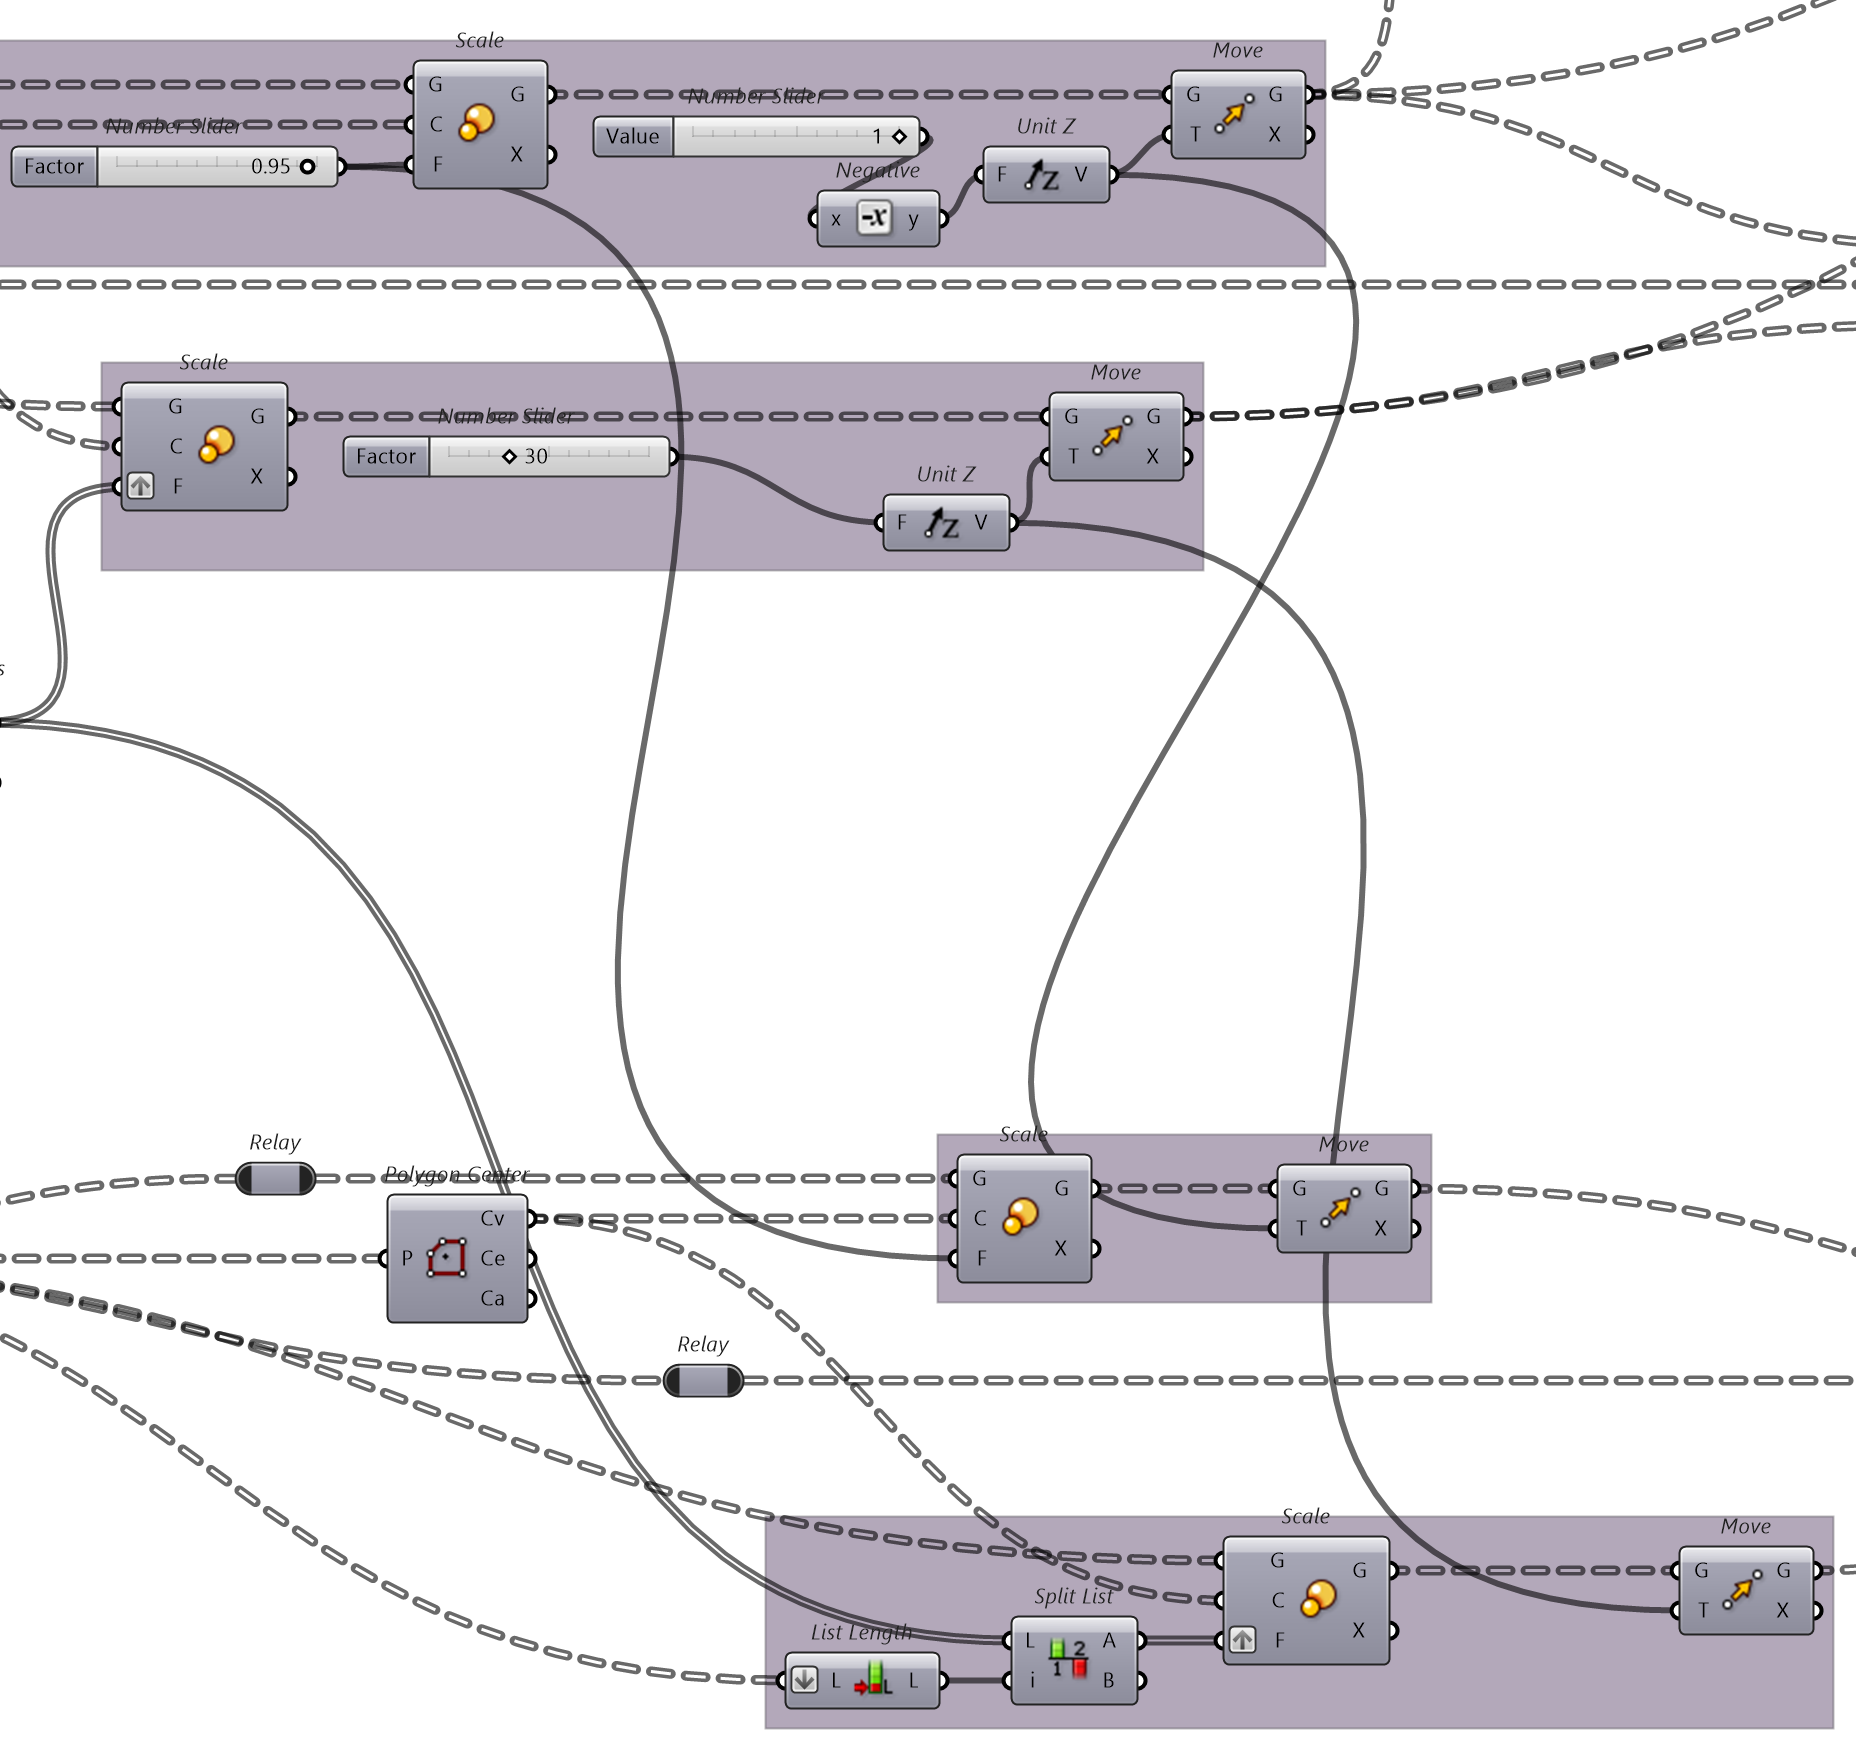
To make the loft a real 3D panel, the loft surface is offset inwards. This gives the panel thickness and creates a closed 3D volume. This volume is needed to be able to export and print the panel properly later.
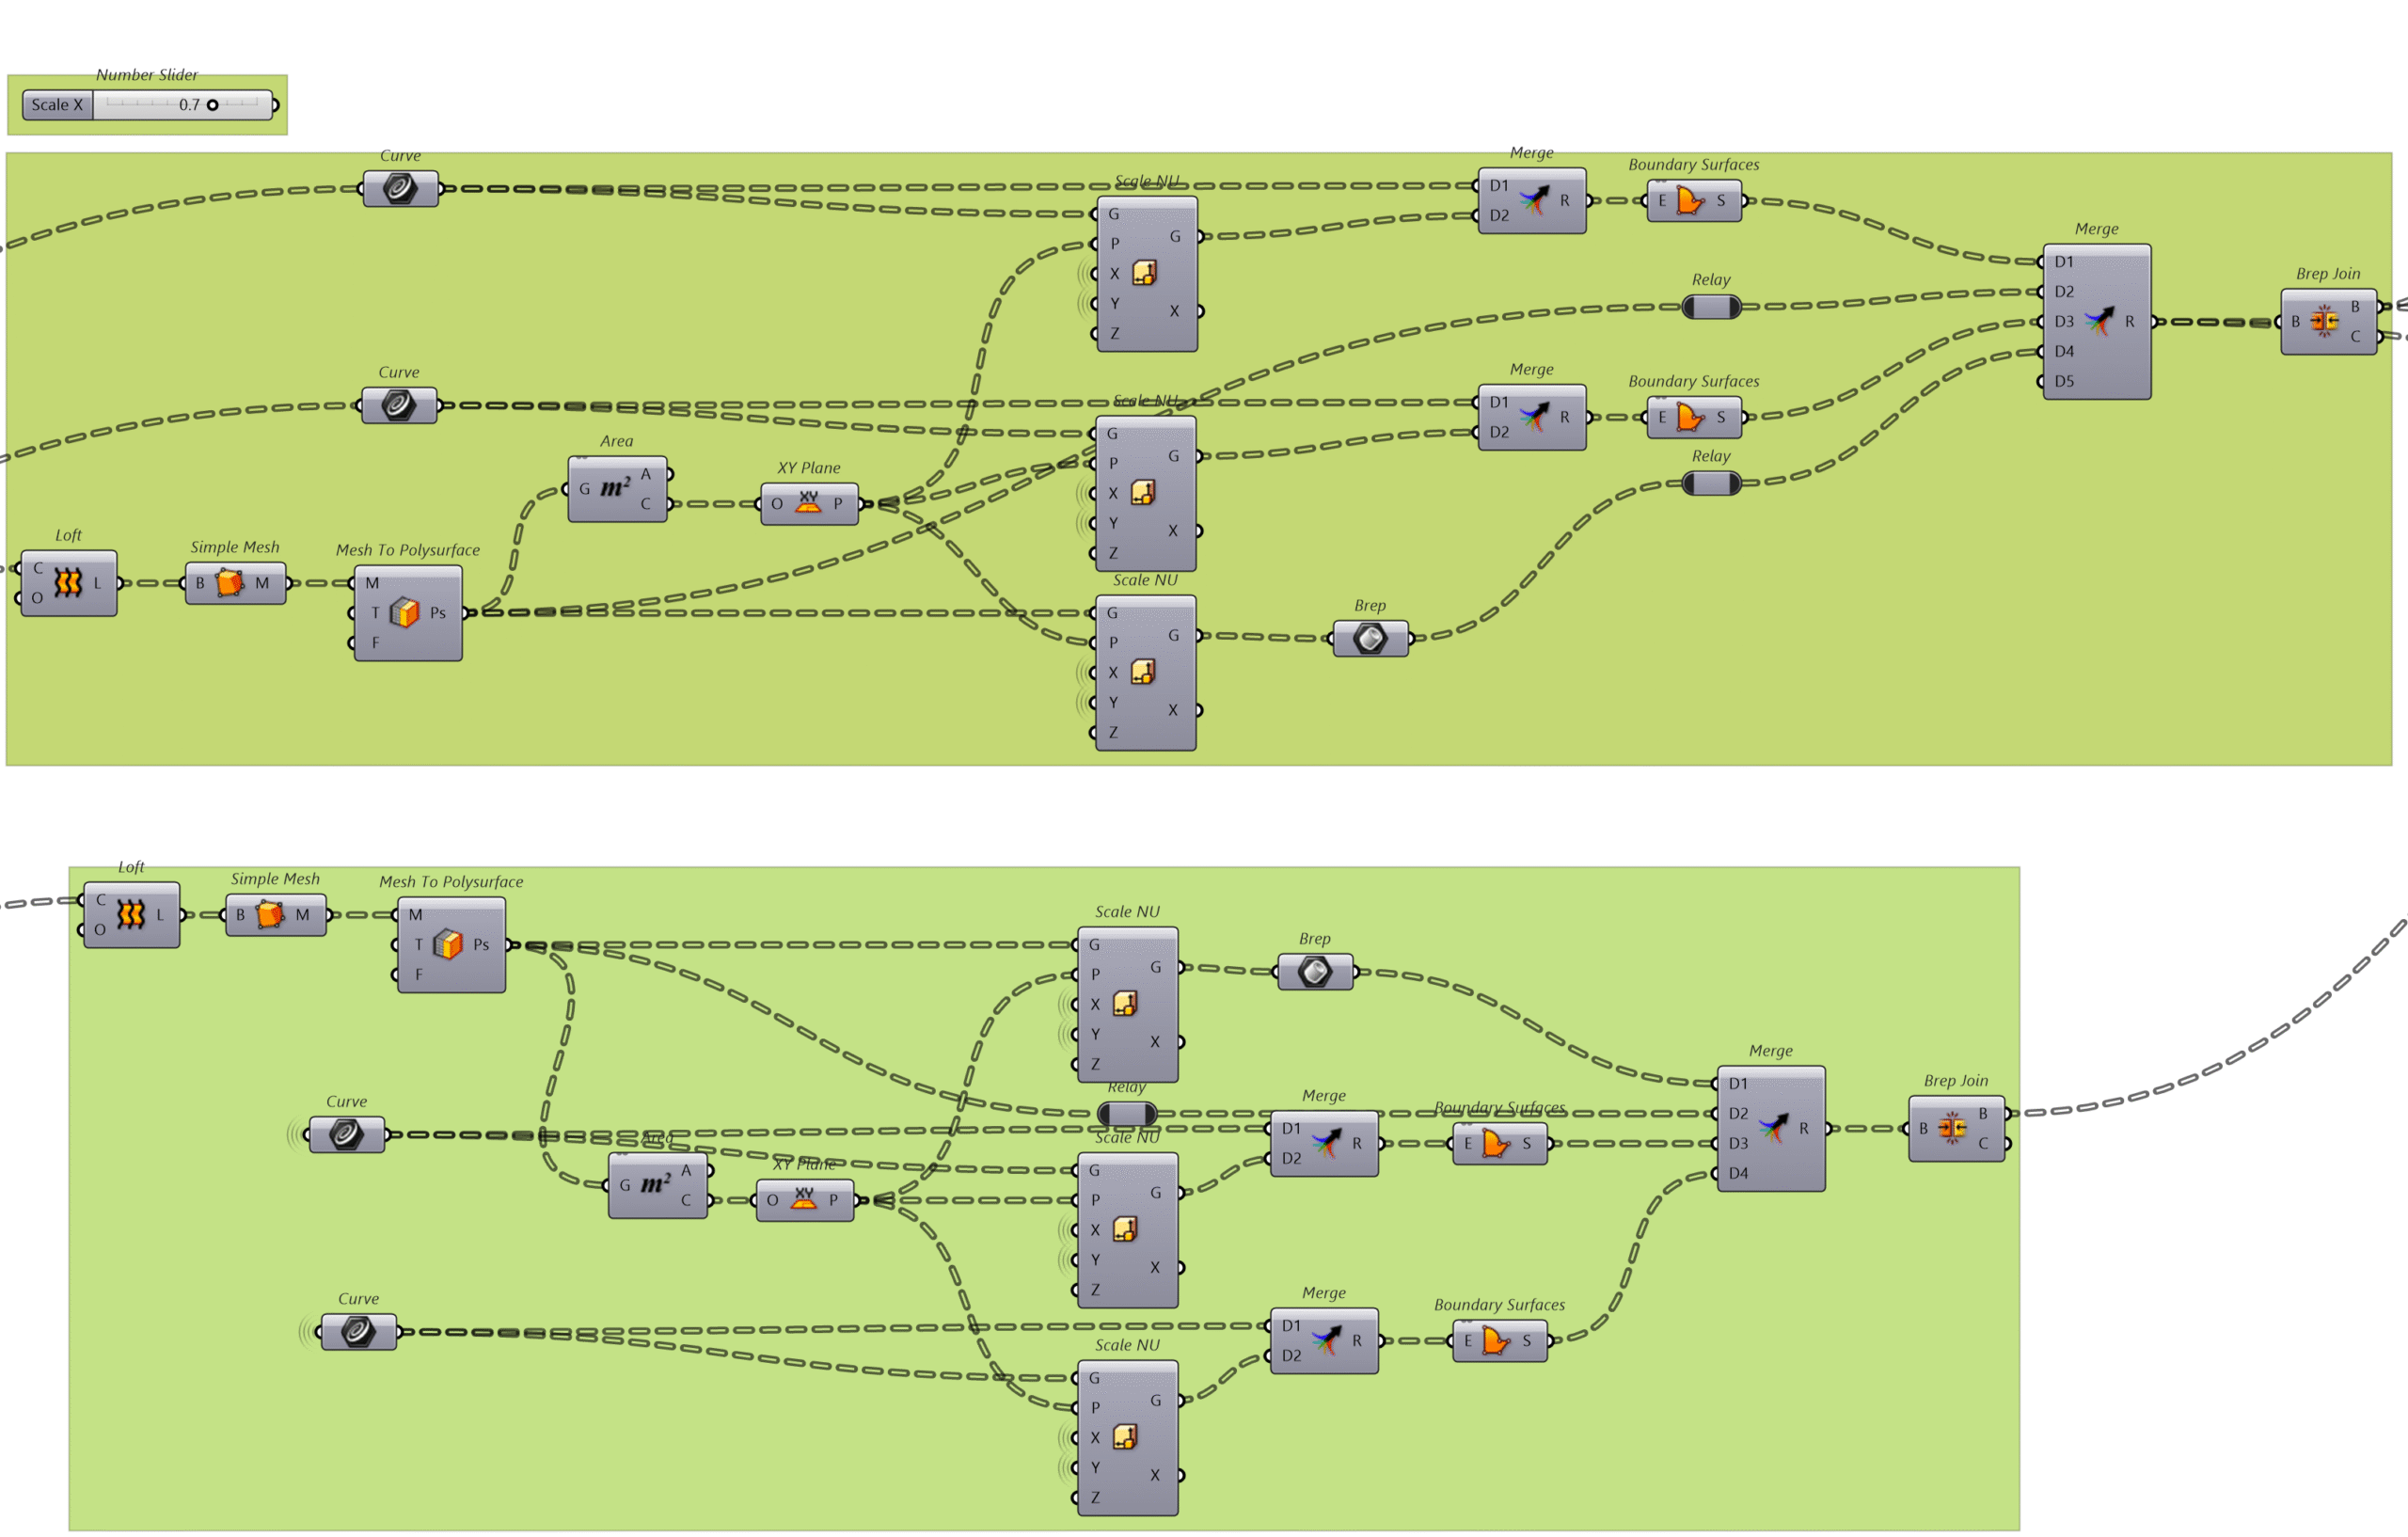
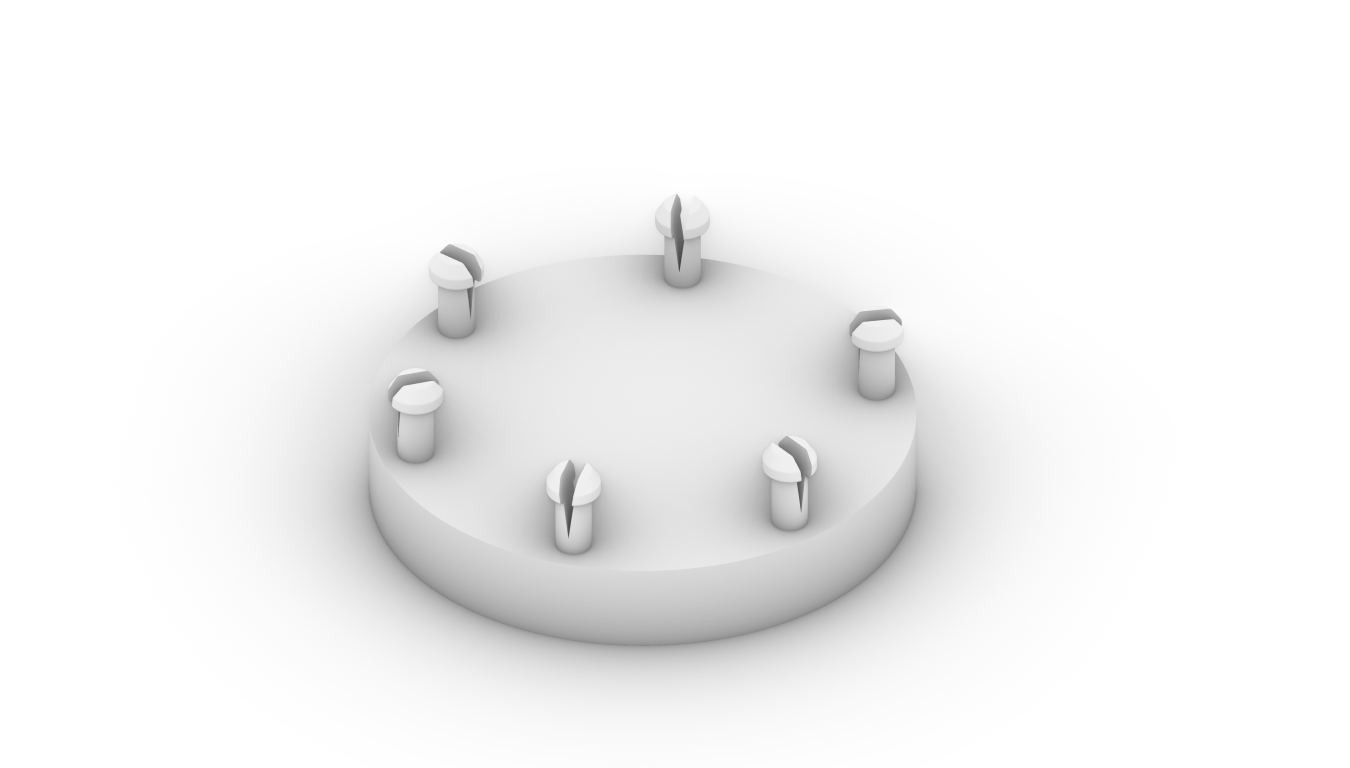
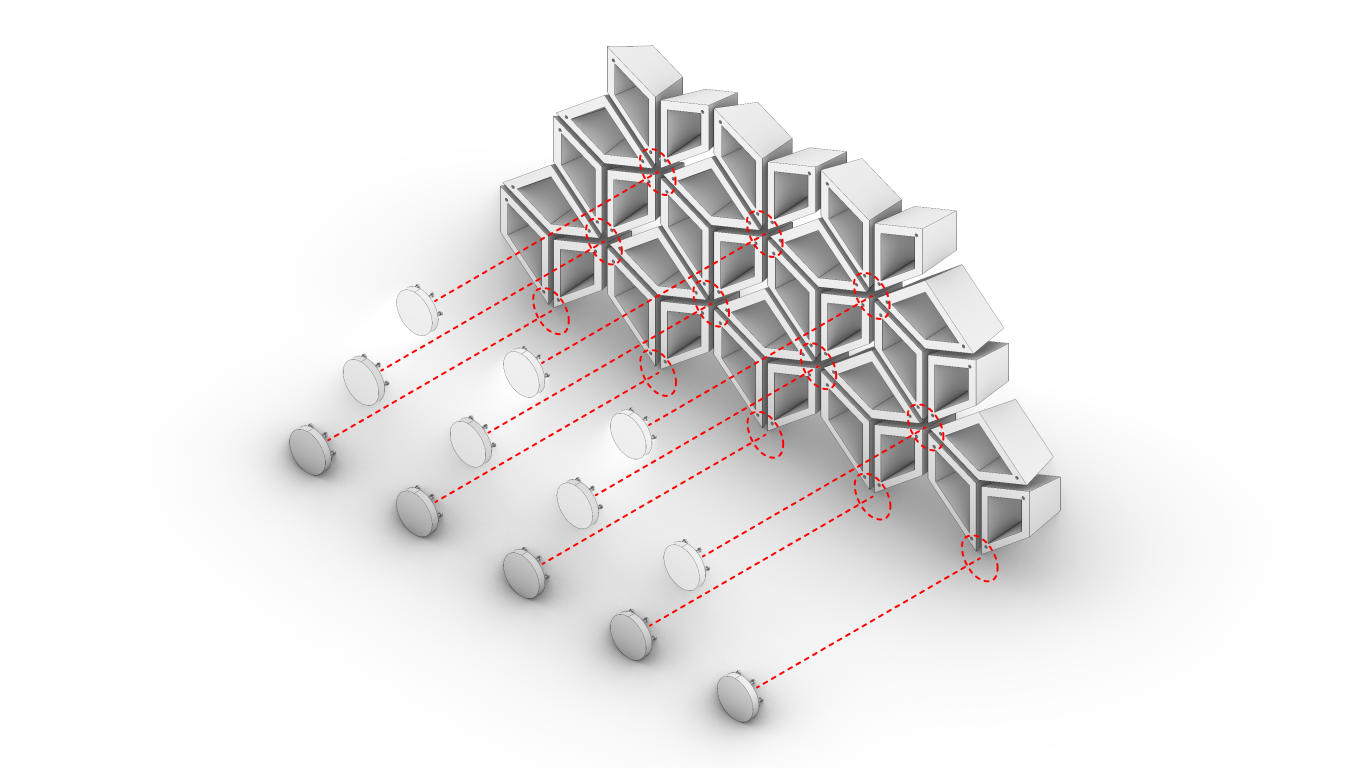
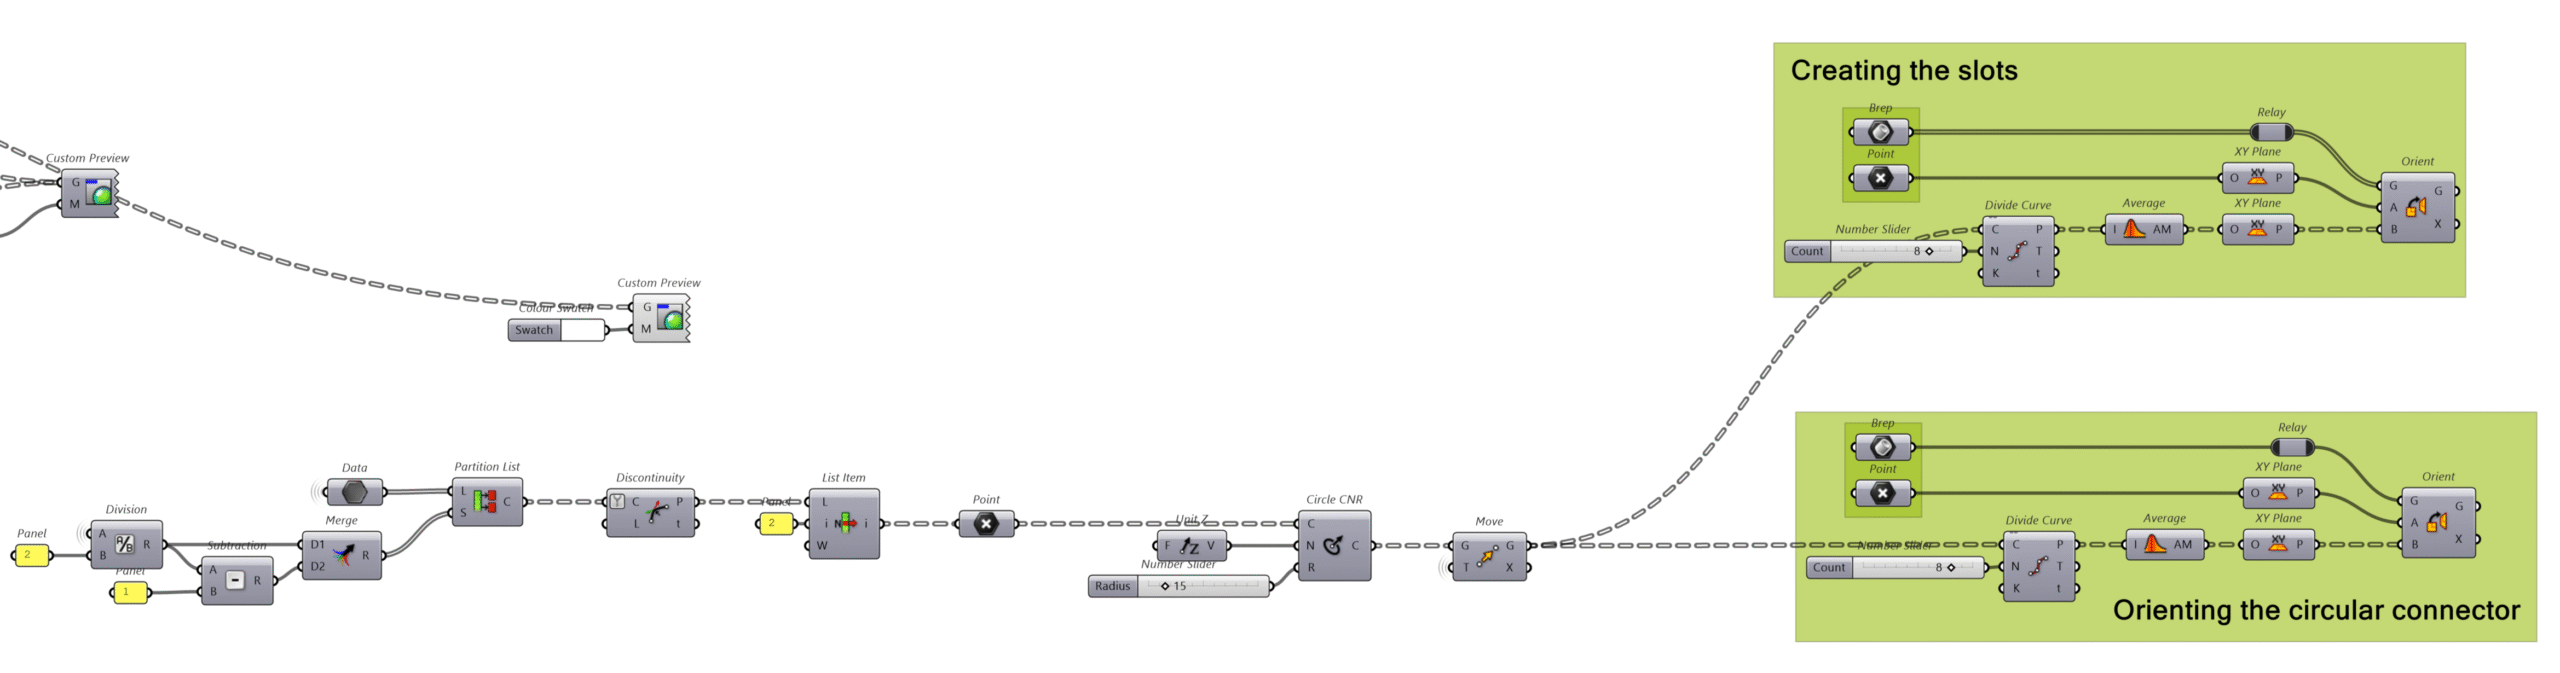
Now that all 3D panels are ready, they still need to be connected to each other. A special circular click piece has been designed for this. I modeled this connection piece myself, instead of generating it in Grasshopper every time. This keeps the calculation time low and the script runs faster.
The click piece fits exactly into the recess on the back of the panels and ensures that multiple panels click together firmly, without the need for glue or extra tools.
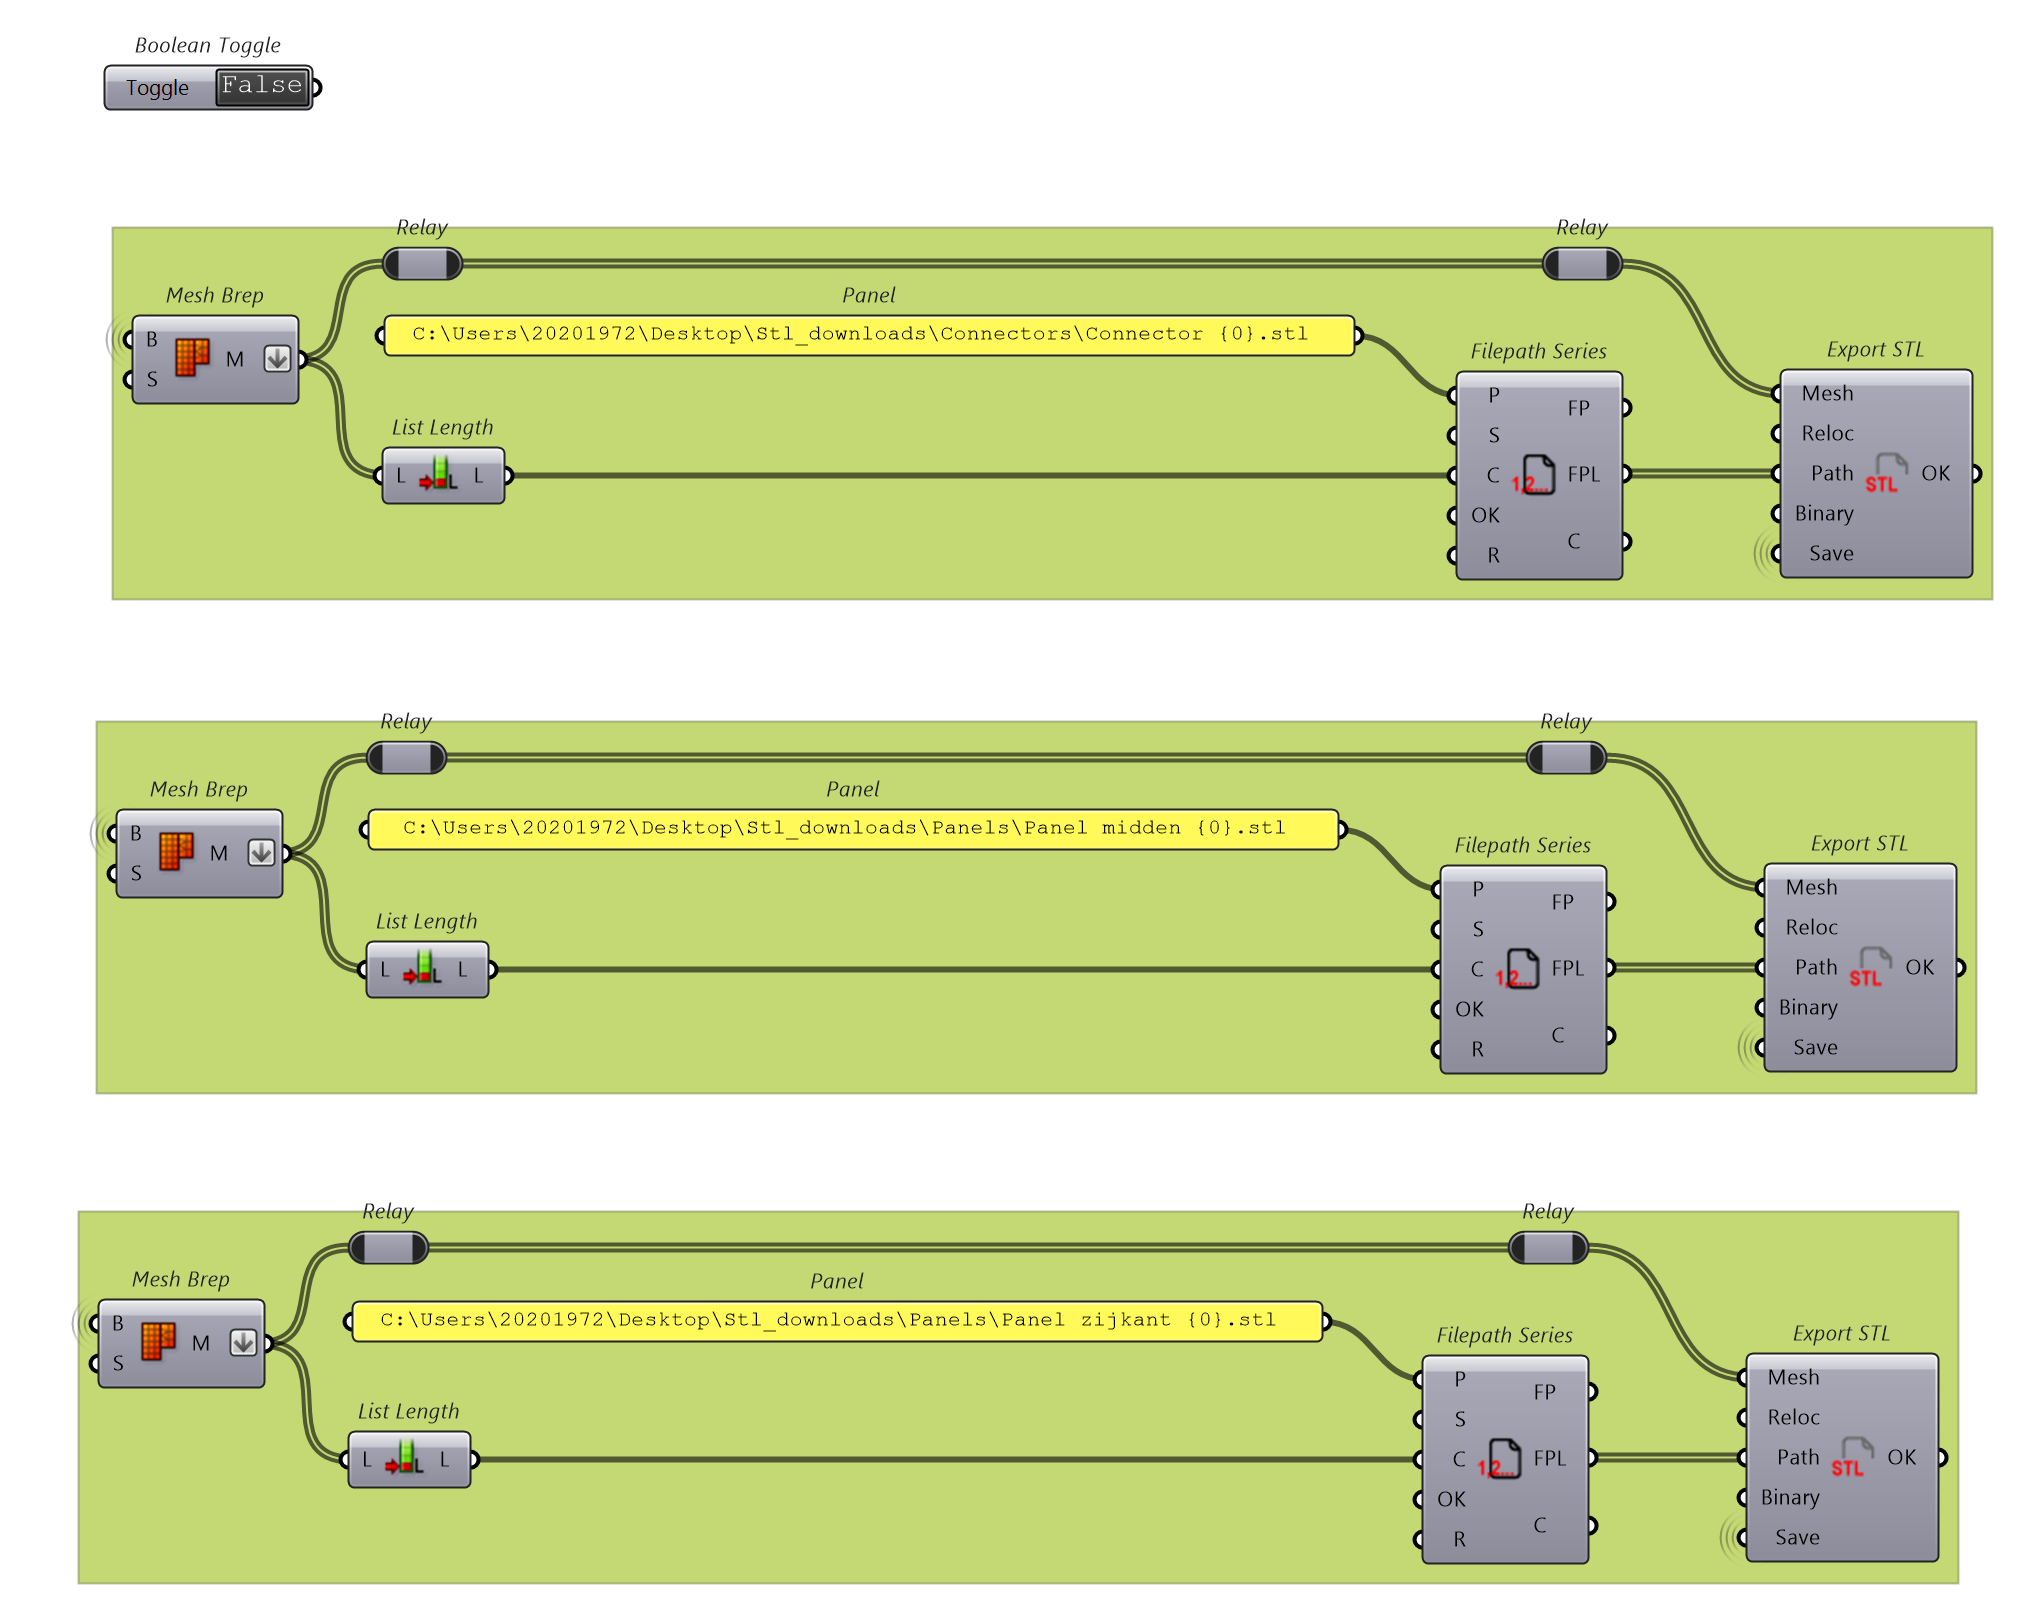
The final step is to simply set the Boolean Toggle to ‘True’, and all panels will be automatically exported as STL files. These files will be saved to the specified folder on the computer, ready to be 3D printed immediately. This way, the entire process from input to print-ready output is fully automated.


The original idea was to make the Grasshopper script accessible via ShapeDiver, so that users without technical knowledge could use the system via a web interface. This would make the design process accessible and widely accessible.
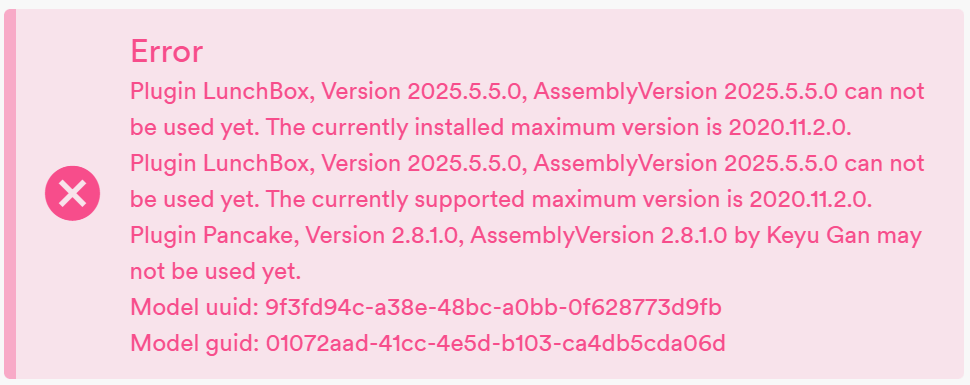
However, during implementation it turned out that certain plugins are not compatible with ShapeDiver. The Lunchbox plugin is supported, but only the 2020 version. Unfortunately, this older version does not work in combination with Rhino 8, which means I cannot use the older version of Lunchbox. The Pancake plugin, which was used to automatically export STL files, is not supported at all.
Due to these limitations, the script can currently only be used locally. As a next step, it can be investigated how the design can be rewritten with ShapeDiver-compatible components, so that it can still be made available online.
Downloads
(for correct use of script, install Pancake by illusionwing and Lunchbox by Nathan Miller plugin)