Tyko Bergseth, Sweden
When designing a space, acoustics play a crucial role in shaping both the atmosphere and how the space is perceived. Acoustics can be influenced by the shape of the interior as well as the materials and furniture used within it. One commonly used solution for improving acoustics, especially in music studios or soundproof rooms, is acoustic tiles.
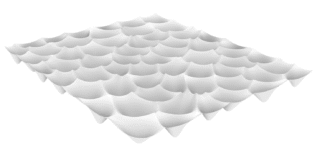
The aim of my project is to design an acoustic tile, inserted in a box and simulate how it interacts with sound, to test its ability. The tile can be used to cover a whole wall, or be used as smaller tiles connected together. My generated tiles are in scale 1:10.
Credits to Pachyderm Acoustical Simulation (by Arthur).
Inspiration:
https://acousticpanels.co.uk/how-to-install-acoustic-panels-8-easy-step
For script:
https://www.food4rhino.com/en/app/hybrid-room-acoustic-simulator
Chat GPT for inspiration while designing the script.
Iterations of created acoustic tiles:


Script tutorial:
Start by downloading Pachyderm from the PackageManager in rhino 8.
- Aucustic panel

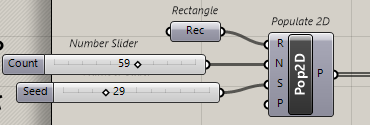
To create a parametric acoustic tile in Grasshopper, begin by defining a rectangular base area. In my case, i have chosen the size to 6×7 decimeters in scale 1:10. The rectangle will work as the boundary, where i then use the populate 2d and Voronoi components to generate a fixed number of randomly placed cells.
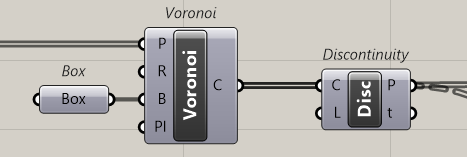
To ensure that the Voronoi cells stay within the rectangular boundary, a Box input of the Voronoi component is connected to the rectangle.
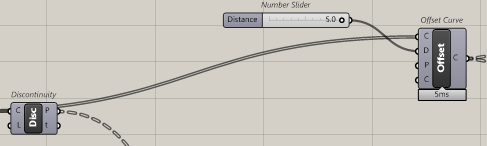
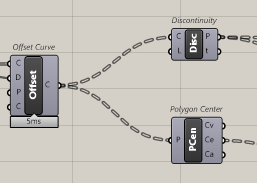
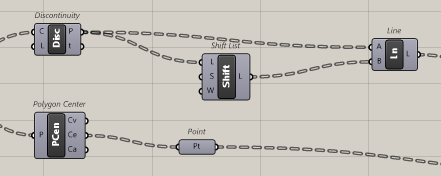
To create a margin within each cell, the Voronoi cell curves are offset inward using the Offset Curve component. Before offsetting, the Discontinuity component is used to find the corner points of each polygon, which helps define how the curves are offset. Further, the offset distance is controlled by a number slider, allowing you to adjust how thick or thin the cell borders appear.
To make the tile three-dimensional, the center point of each Voronoi cell is found using the Polygon Center component.
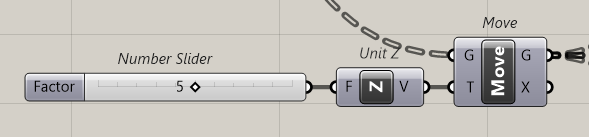
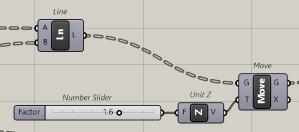
These center points are then moved upward along the Z-axis using the Move component in combination with a Unit Z vector, connected from the Discontinuity. A Factor slider controls the verticality, which influences the surface depth.
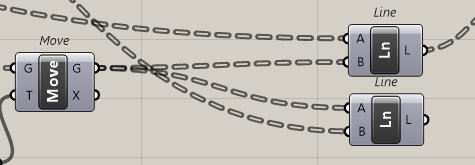
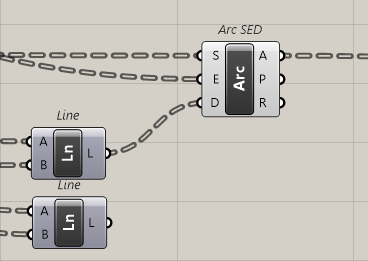
In order to shape the surface more dynamically, points along the offset curves are reordered using the Shift List component. This is for connecting points in a consistent loop to form closed polylines or curves.

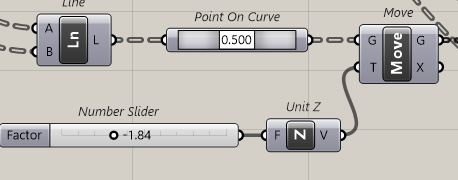
By using the Line and Arc SED components, connections are drawn between these points, forming arcs to introduce curvatures. Some of these lines or points are further moved in the Z direction to create more complexity.
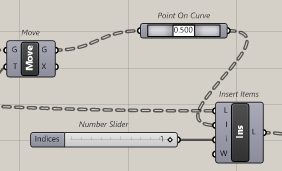
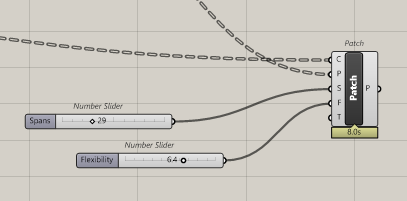
Finally, to create the aucustic tile, all the relevant curves and points are collected and input into a Patch component. The patch generates a surface that fits through the provided geometry. Two sliders control its properties: one for the number of Spans (resolution), and another for Flexibility (how close the surface follows the input curves).
Bake the tile when you are satisfied with the design.
2. Sound simulation

The next step is to simulate sound behavior using the Pachyderm plugin. The previously made acoustic tile is inserted in a closed box in my example, just to generate a closed space for simulation purposes, and is not representing a real room. The aim is to evaluate how sound rays behave in this space, how they reflect and how the acoustic tile affects this behavior.
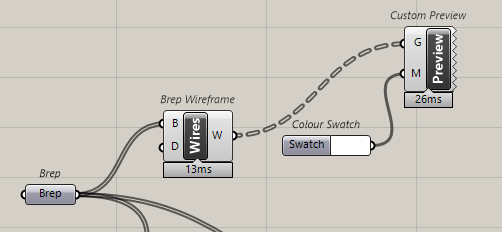
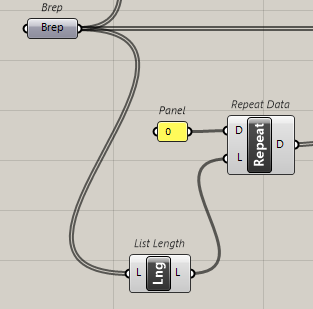
The simulation begins by inputting the geometric data. A Brep component receives both the acoustic tile and the enclosing box. To preview and visually inspect the geometry during the setup, a Brep Wireframe is connected to a Custom Preview component, with a white color swatch as the display color.
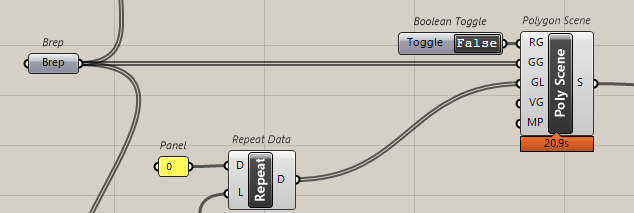
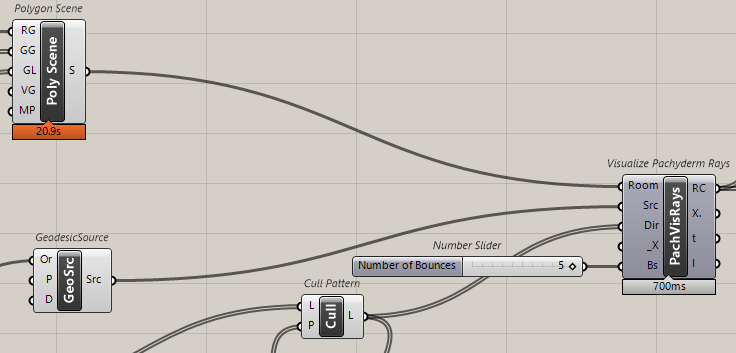
To prepare the scene for simulation, I am using a Polygon Scene component from the Pachyderm toolkit. This component builds an acoustic model by processing the breps and assigning relevant material properties such as reflectivity or absorption. A Boolean Toggle is used to control whether the scene setup should be executed, making it possible to modify without rerunning the entire simulation each time.
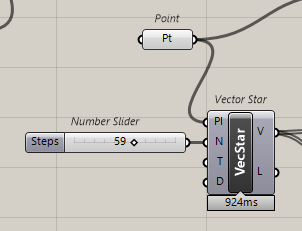
Next, a sound source is defined. A Point component sets the location of the source within the room. From this point, a series of directional vectors is generated using the Vector Star component, which distributes sound rays in all possible directions. The number of rays, is adjustable with a number slider, offering control over the simulation resolution.
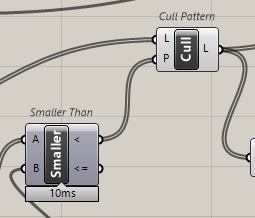
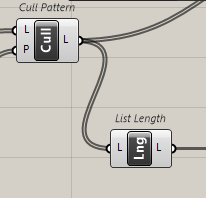
To ensure only relevant rays are considered, a filtering step is added. The vectors are deconstructed, and those with a positive Z-direction are removed using a Smaller Than component combined with Cull Pattern.
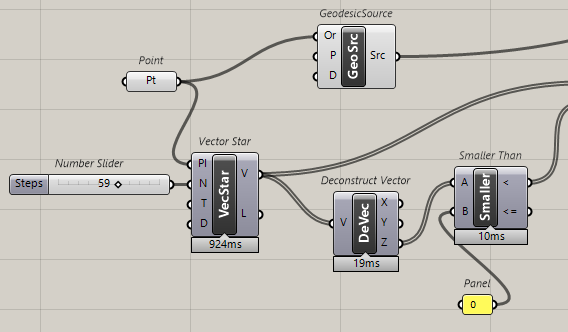
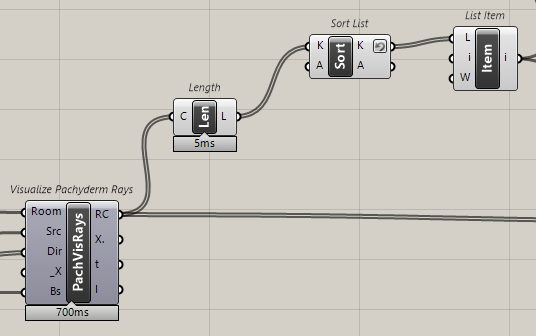
These cleaned-up vectors, along with the source point, are then fed into the Geodesic Source component, which acts as the initial sound source for the simulation. This is passed into the PachyRays component, which calculates the simulation. Parameters such as the number of allowed bounces are controlled with a slider.
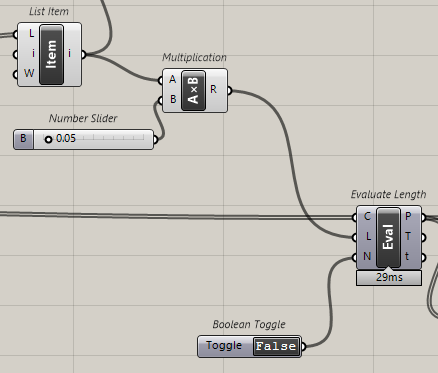
The result of the raytracing is a list of paths showing how sound travels through the room and interacts with its surfaces. The Length of each ray is calculated, sorted, and evaluated. The shortest ray is isolated using List Item, and a multiplier is applied to determine a threshold for evaluating and trimming the dataset.

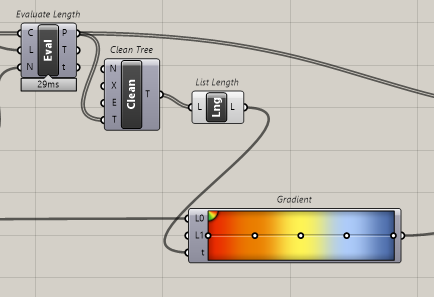
To visualize the simulation, the output tree structure is cleaned, and the total number of reflections is counted. Then, a gradient component is used to assign colors to the rays based on their length or intensity, providing a heatmap-like view of the sound field. A Cloud Display component visualizes the result in 3D space, with the size of the display points adjustable via a slider.


Together, the acoustic tile and the sound simulation visualizes how sound interact in the space. The different types of acoustic tiles can easily be tested by just switching them out, and reset the Brep component with the new tile.


The sound simulation visualised:
