
Goal of this script
What I wanted to do was an acoustic treatment for my concert hall with wooden slats.
With the shape that my room was, i felt that it needed a more organic and flowy wooden structure to make the space seem more cozy.

TUTORIAL
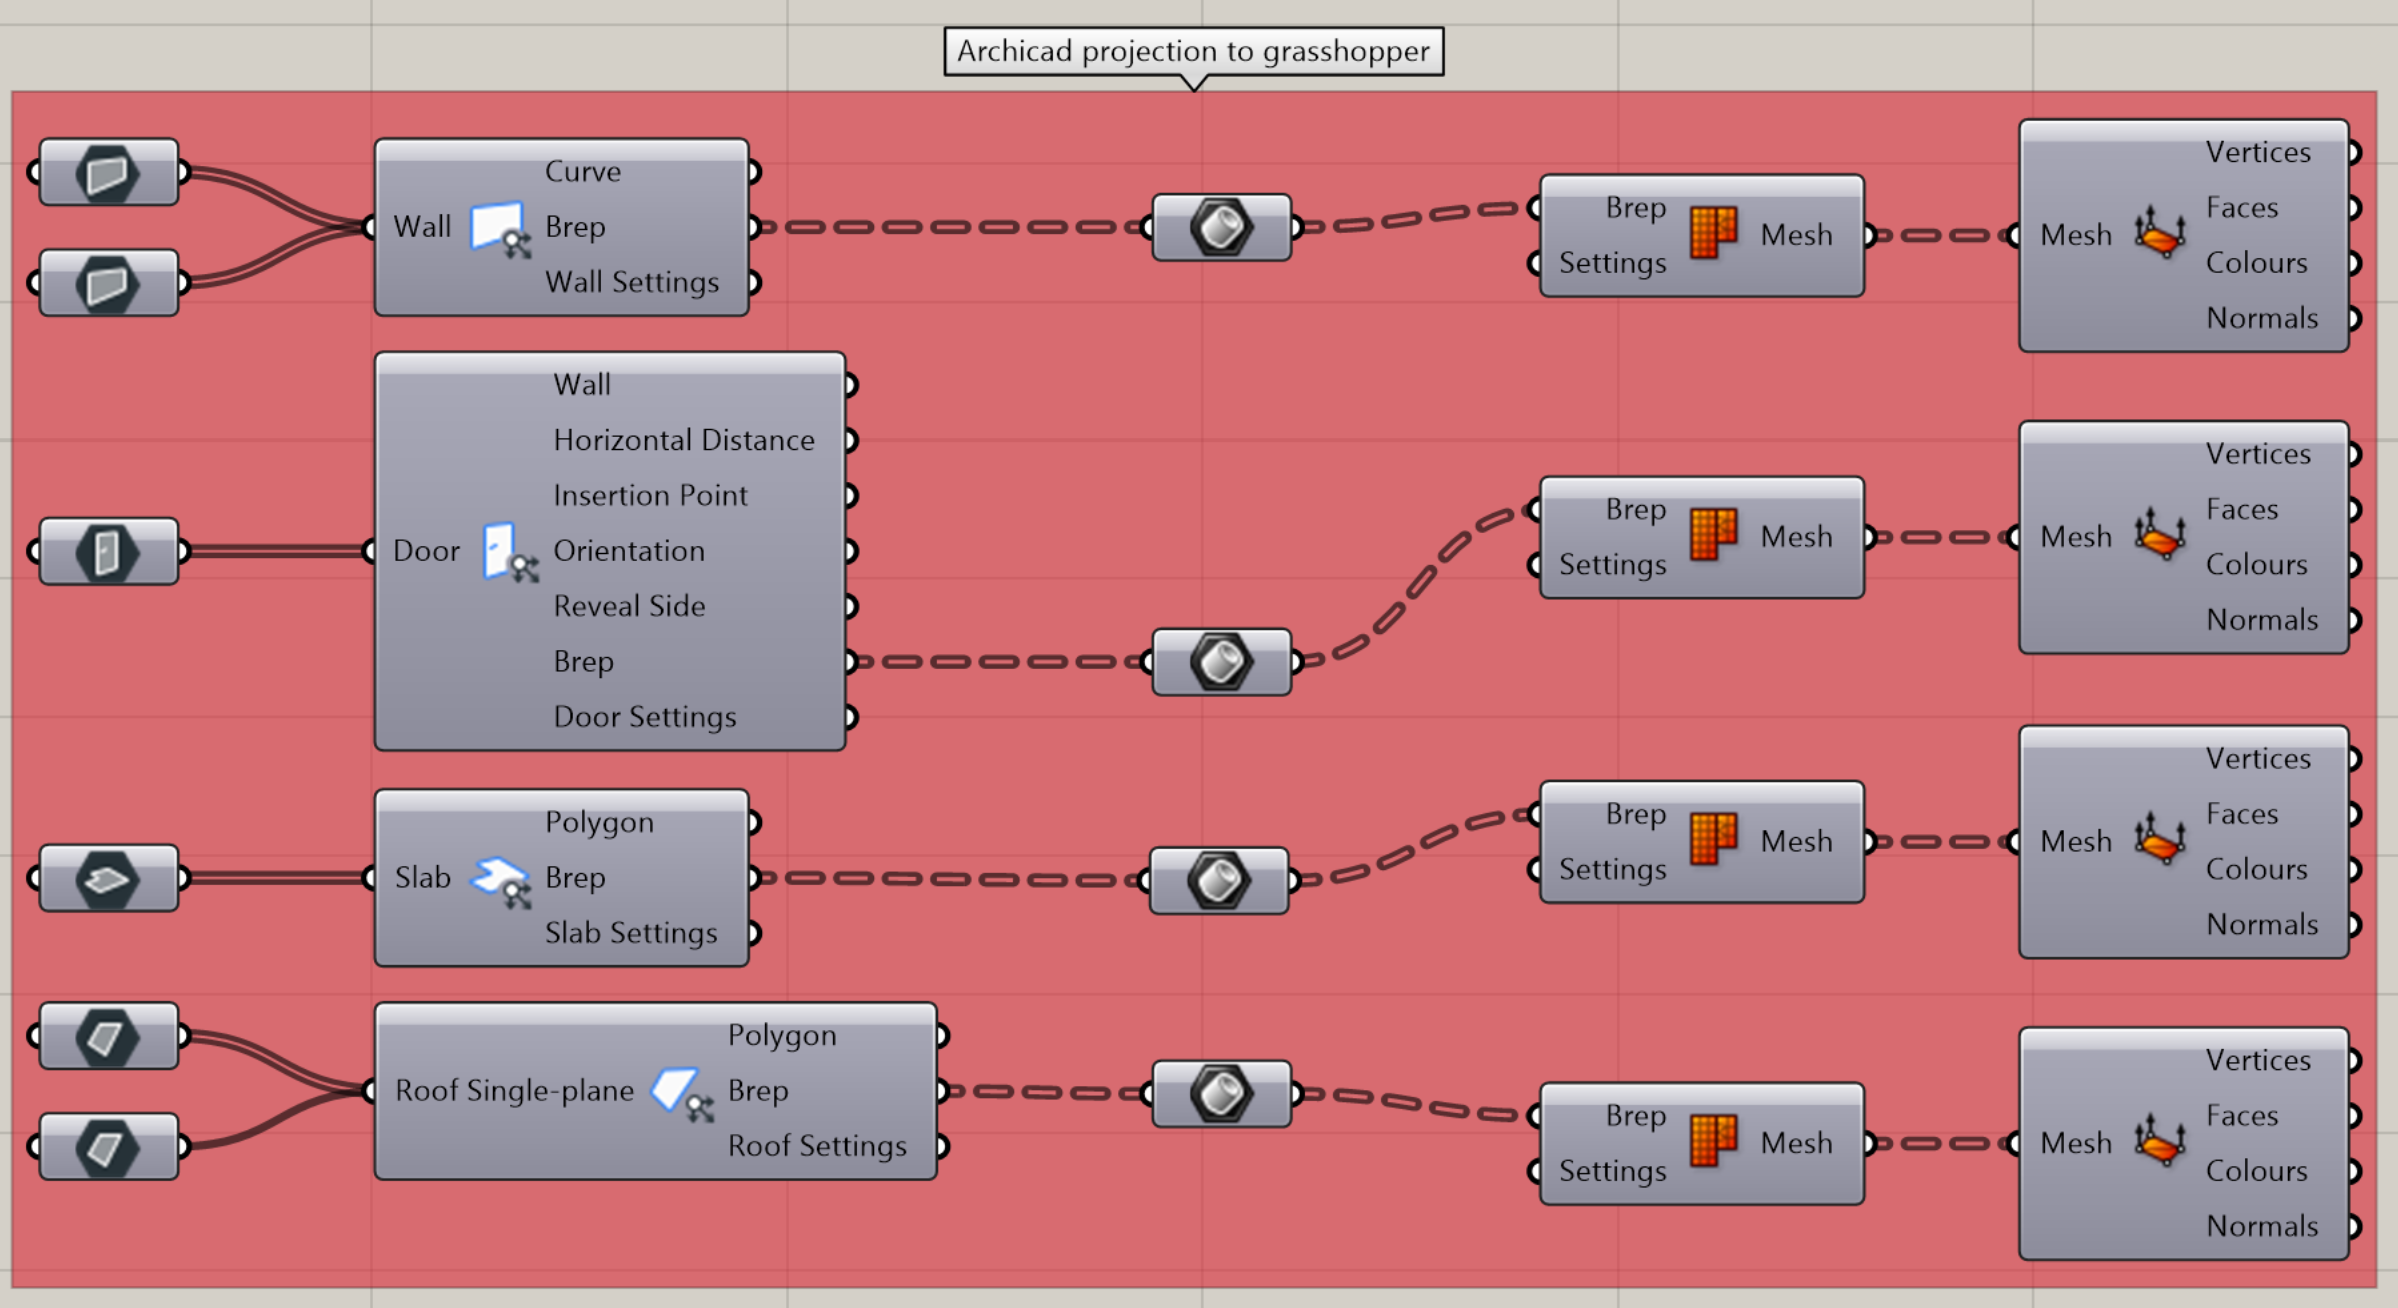
1. Extraction from Archicad
Since I’m working with Archicad, i downloaded the Archicad livesync.
I wanted to project my Archicad room into Grasshopper and Rhino, so i used the Archicad Deconstruct Wall, Deconstruct Door, Deconstruct Slab and Deconstruct Roof. I placed and selected multiple of these objects and connected them inside Grasshopper. After that, I extracted the Brep if these nodes and turned them into a mesh, that I’ve then deconstructed into points, where I chose which points I wanted.

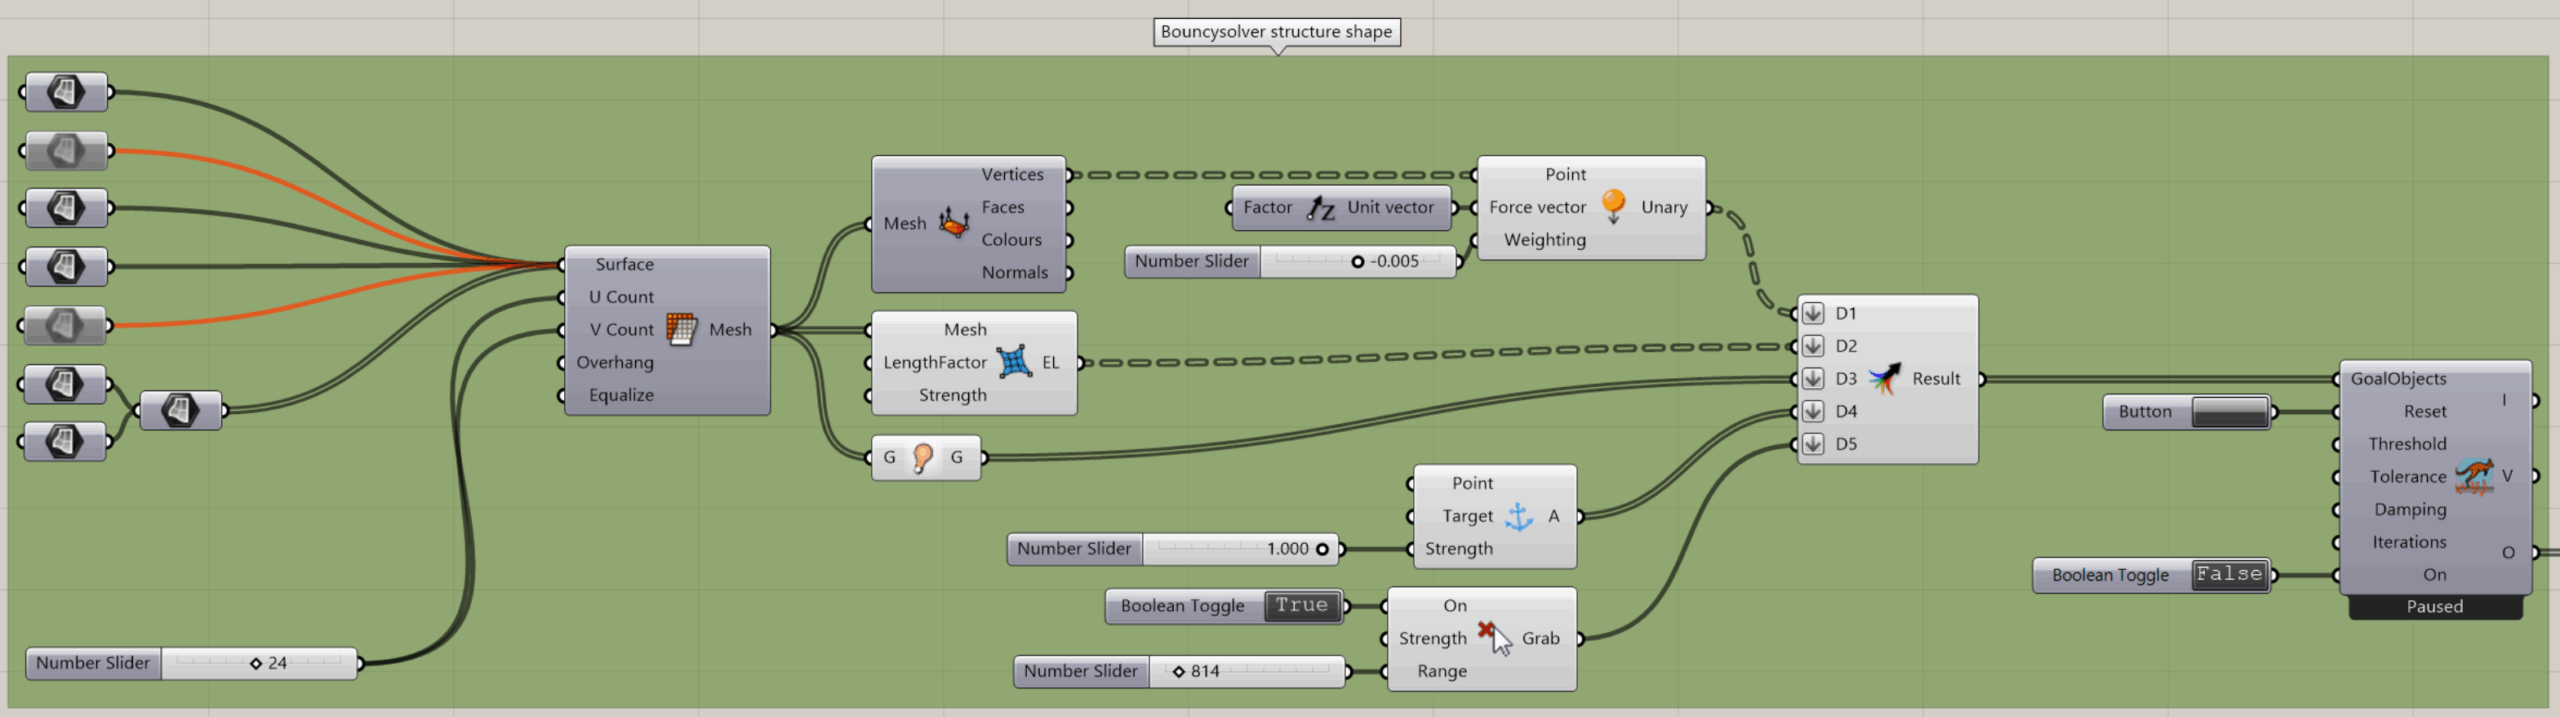
2. Bouncysolver
After selecting all the wanted points, I created surfaces that I plugged into Mesh Surface.
This Mesh Surface is then used as the main structure shape, which is used with the Bouncysolver from Kangaroo.
I deconstructed points from the Mesh Surface and applied a Load onto them with a Unit Z vector to select the correct gravitational direction and a Number Slider for the strength of the vector applied.
The next part of the Bouncysolver (Kangaroo) is EdgeLengths which take the shape of the Mesh Surface.
A small part, which is helpful, is the Show node to make the surface of the Bouncysolver (Kangaroo) visible.
Next, what the Bouncysolver needs is the Anchor node to connect the mesh to certain points so that it doesn’t float away. This node also has a Number Slider to select the wanted Strength of the anchor points.
Lastly, what I find quite useful is the Grab node which makes it possible for me to grab the simulated mesh and pull it towards my wanted direction and additionally shape it.
All of these nodes are then plugged into Merge, flattened and sent into the Bouncysolver’s GoalObjects (Kangaroo) where I also plugged a Button into Reset and a Boolean Toggle into On. This controls the simulation and you can pause it whenever you feel like the desired shape is complete.

3. Contours from resulting mesh
I feed the resulting geometry from the Bouncysolver into a Mesh, then clean the mesh with Clean Tree to sort out false data. The cleaned data tree is then sent to Mesh Join to clean the structure further and remove any defects.
I connected this Mesh into a Contour, which slices the Mesh into curves. I needed to construct a plane that will slice the Mesh and for this, i chose to use the Plane 3Pt as to not only make a generic surface, but to twist it to a specific direction. The last node needed for the Contour to work is the Deconstruct Plane.
The resulting curves are trimmed where the floor starts with Plane Trim Curve, where i wanted it to be at XY Plane. I also flattened the Trimmed output.


4. Getting rid of short curves
After i cut the Mesh into Curves, the next step to tidy things up is to get rid of shorter, unwanted curves.
This was done with the Smaller Than, which sorts out information from the Curve into smaller and bigger data then the input from the Number Slider. This is then fed into Dispatch and into another Curve.
After sorting the Curves out, the last step before using the Parametric Pipe Mesh is to smooth any wobbly Curves using the Fit Curve Smooth with Number Sliders.


5. Parametric mesh pipe
Last step I made was to make the slats from the resulting Curves.
Firstly, I wanted to move the construction with the Unit Z to have it at a specifis height with the Move.
This is plugged into Parameter Pipe Mesh from the Pufferfish plug-in to the Curve input.
Into the Parameters U input, I plugged a Range with a Number Slider to make the Pipes smoother.
With the Parameter Pipe Mesh, I also chose the desired radius with a Number Slider and end type of the mesh with a value from a Number Slider as well.


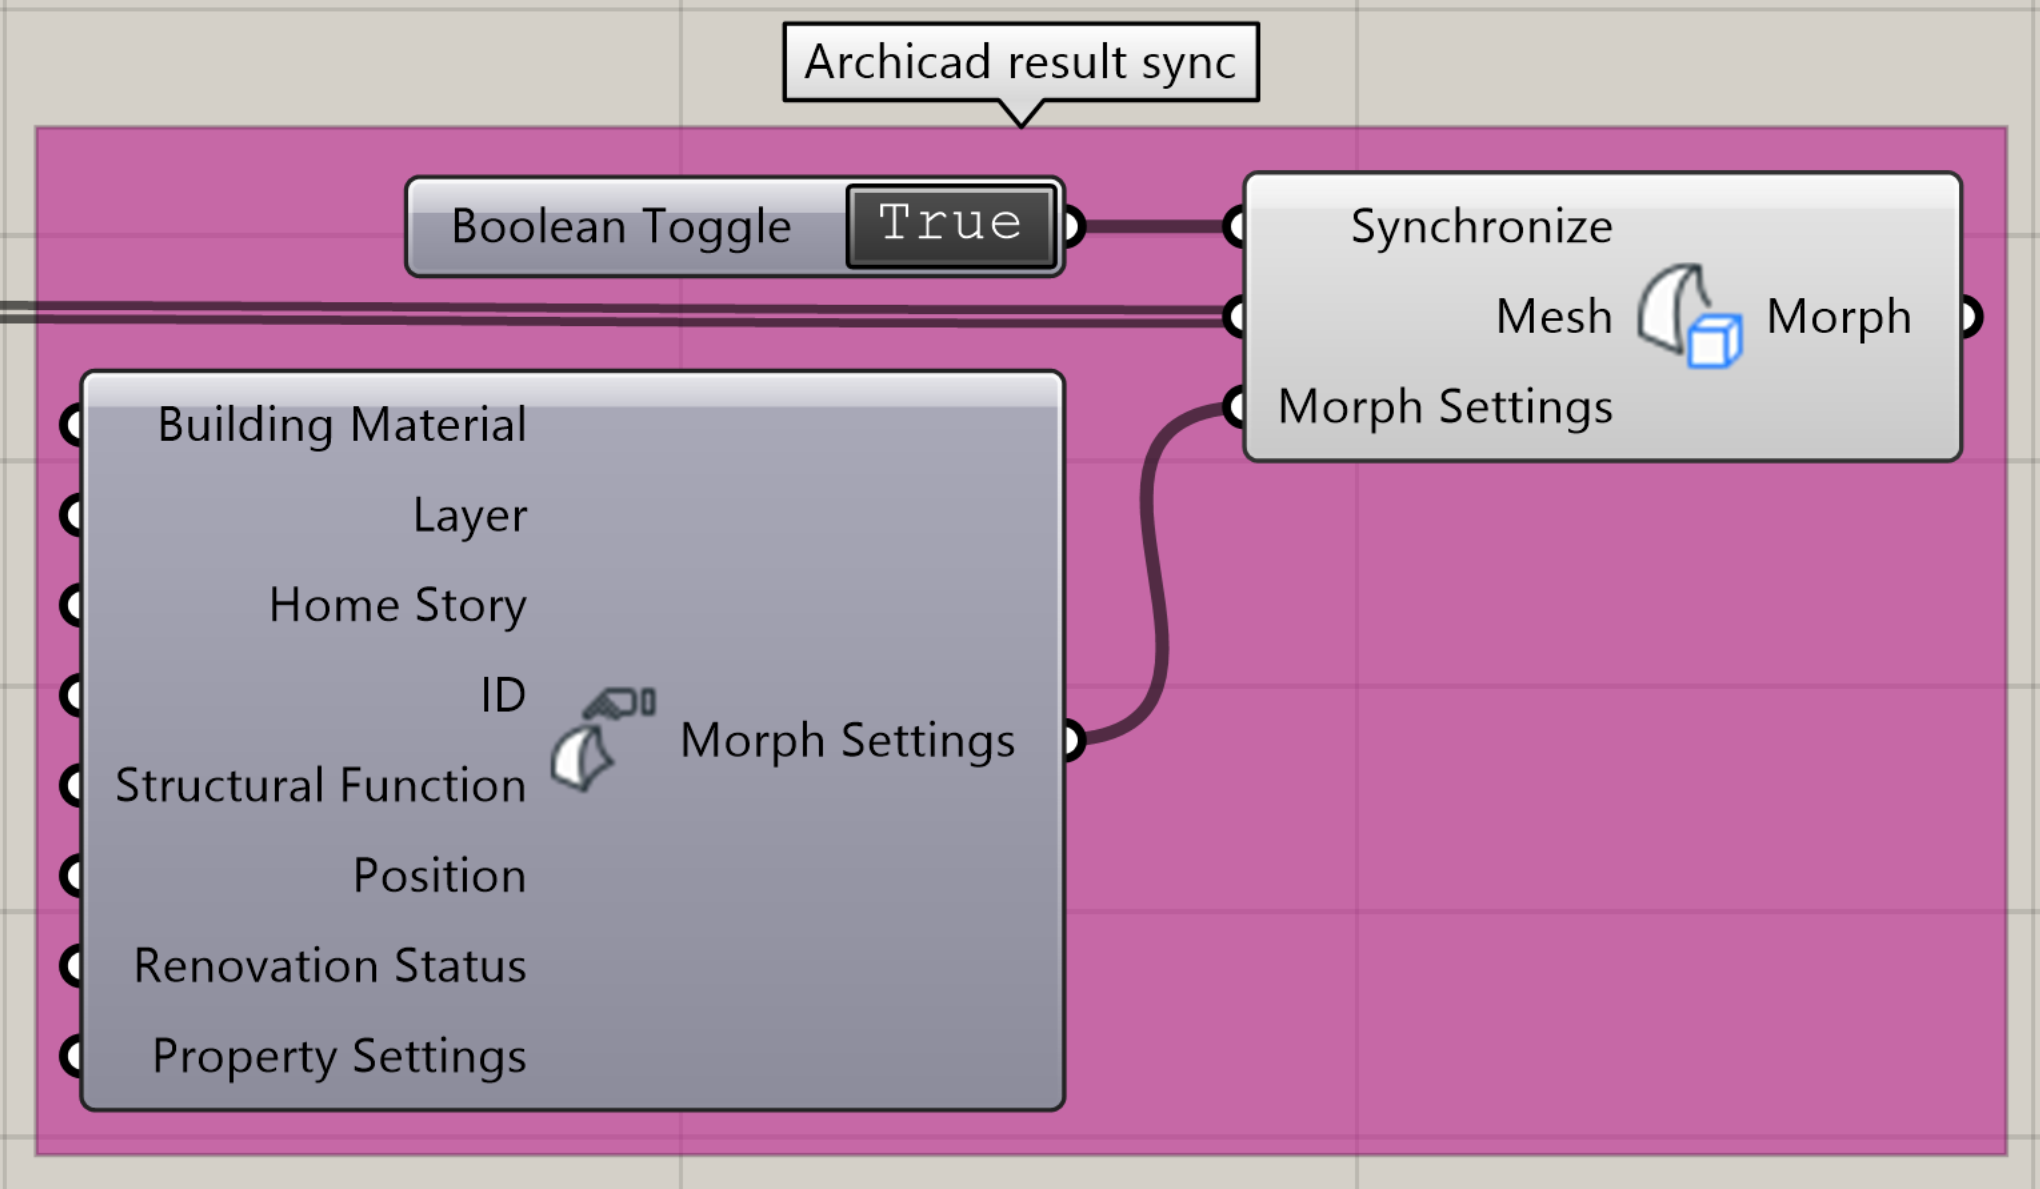
6. Archicad result sync
To project the resulting slats into Archicad, I plugged the resulting geometry from Paratemer Pipe Mesh into Archicad Morph Solid, which also mas a Boolean Toggle plugged into the Synchronize input to make the connection between Grasshopper and Archicad live and Archicad Morph Settings plugged into the Morph Settings input to select the desired morph settings in Archicad.
7. Final Result
I have then livesynced the Archicad file and rendered the resulting structure in Twinmotion.
