Václav Železník: Attractor pathing through an enclosed space
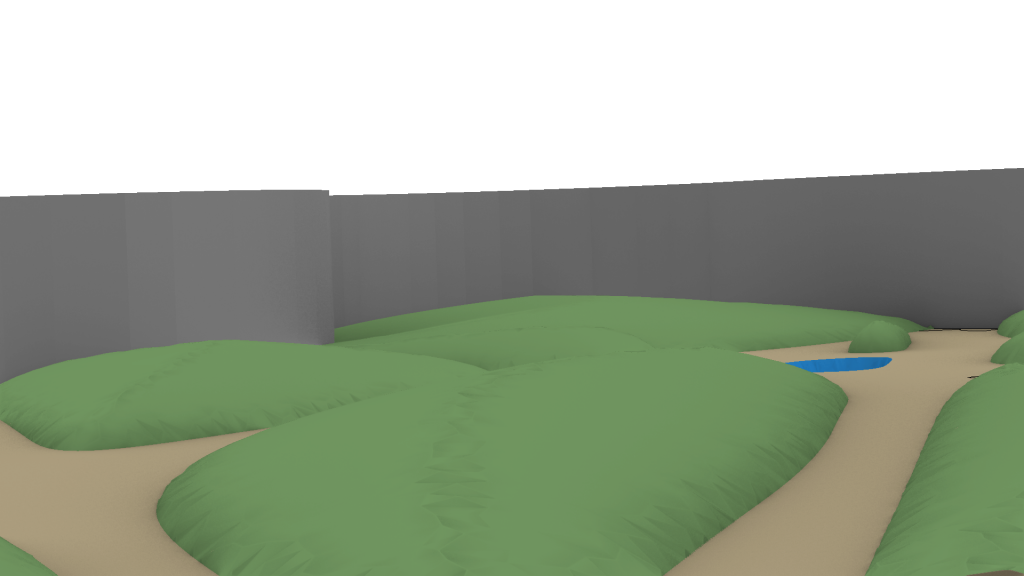
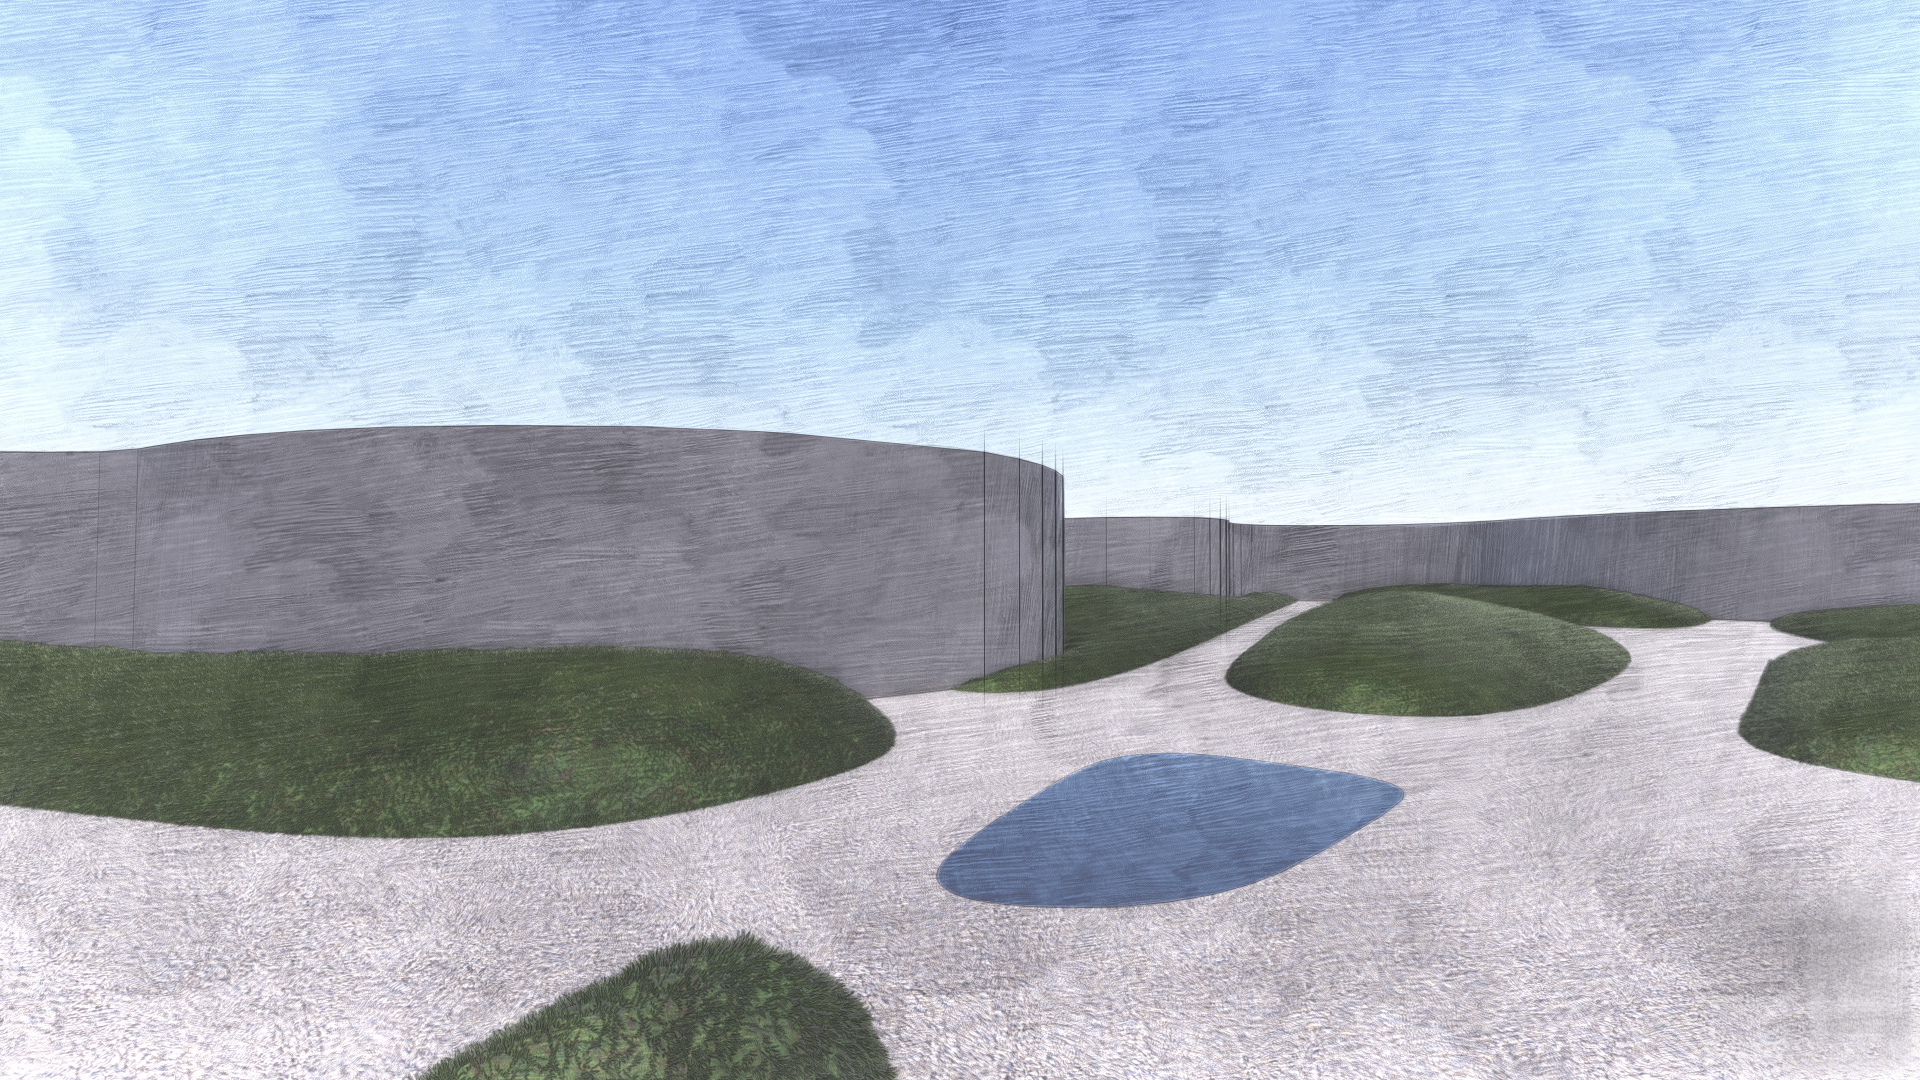
In this task, I am making some beautiful paths through the courtyard of a monastery by my friend, she designed this semester.
(0. Don’t forget Bifocals)
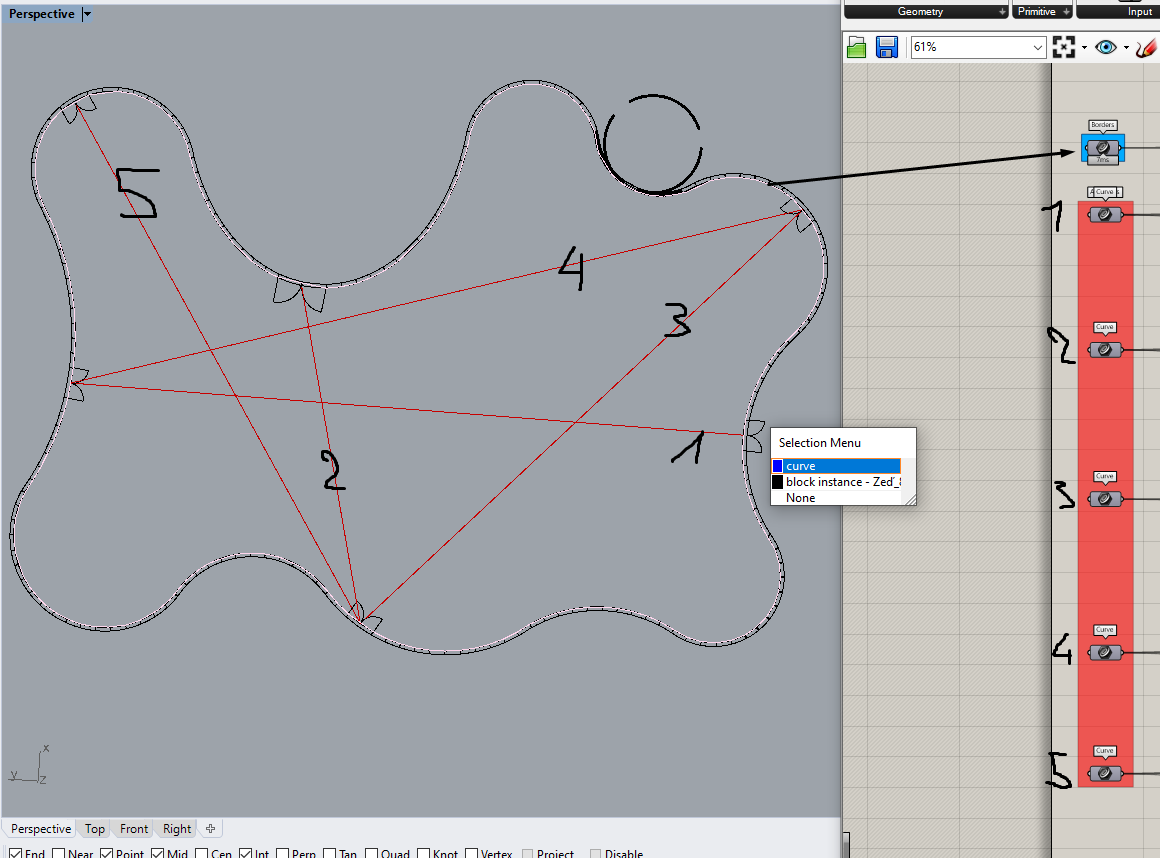
- Determining the paths
Set the particular curves to GH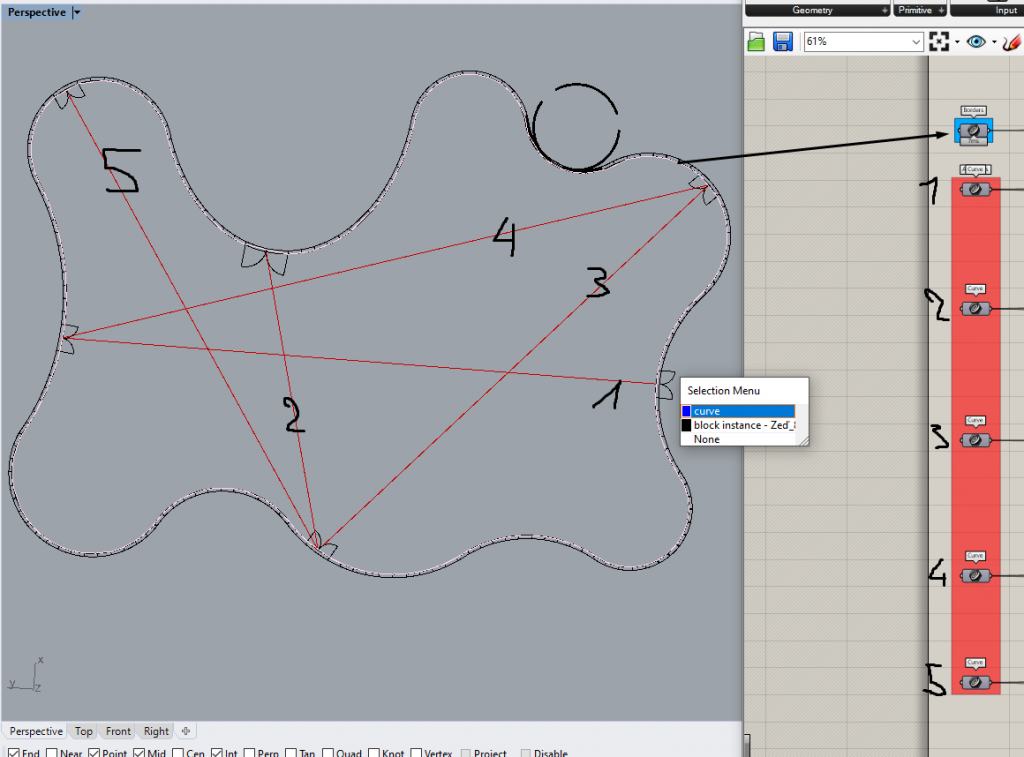
- Offset the ‘path’ curves to both sides
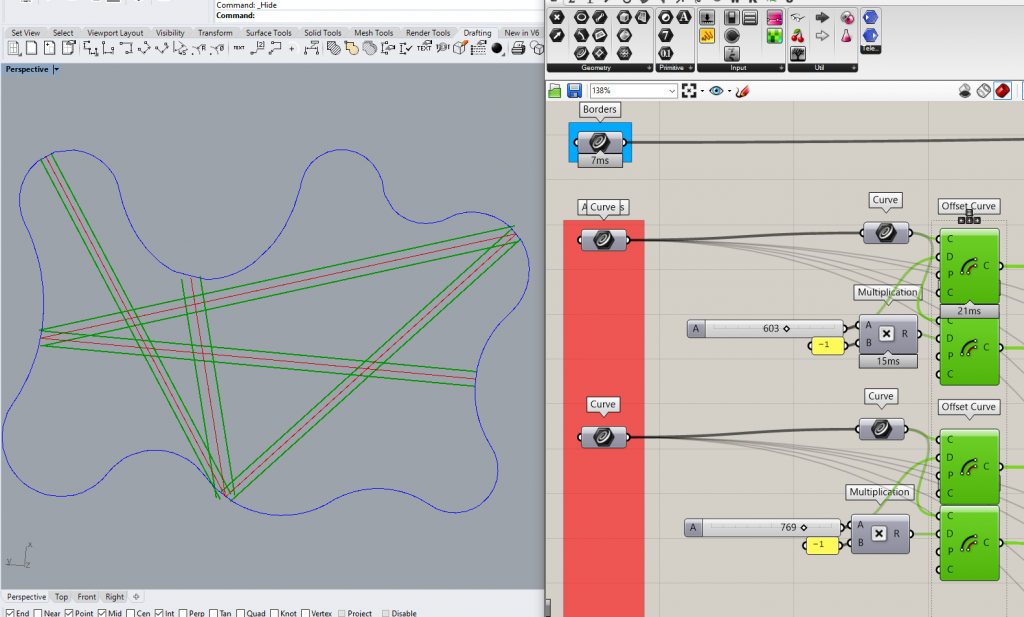
- Now, I use the component Blend Curve to shape 2 intersecting paths quite easily.
You might need to flip some of the path curves using Flip Curve.
Make sure all of the new curves intersect with the border curve, use Extend Crv if not!
Flatten the outputs.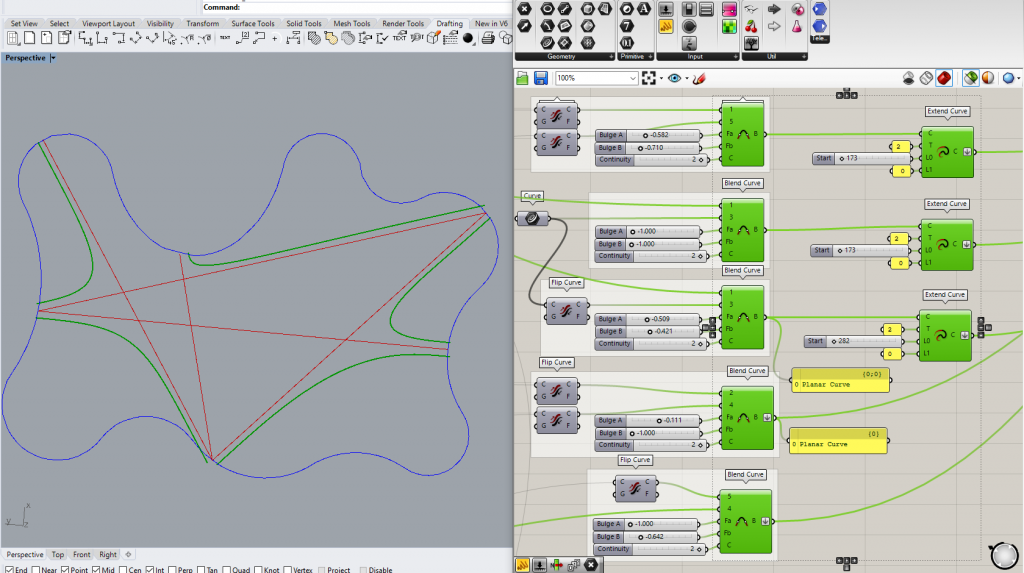
- Here I move onto the middle isles:
First, obtain Intersect points of the offset curves (make sure to chose the correct ones) and make a Polyline from them.
Use Multiple Curves on the original path curves to get attractor points of the isle.
REMAP the Distance values and prepare a 2pt Vector.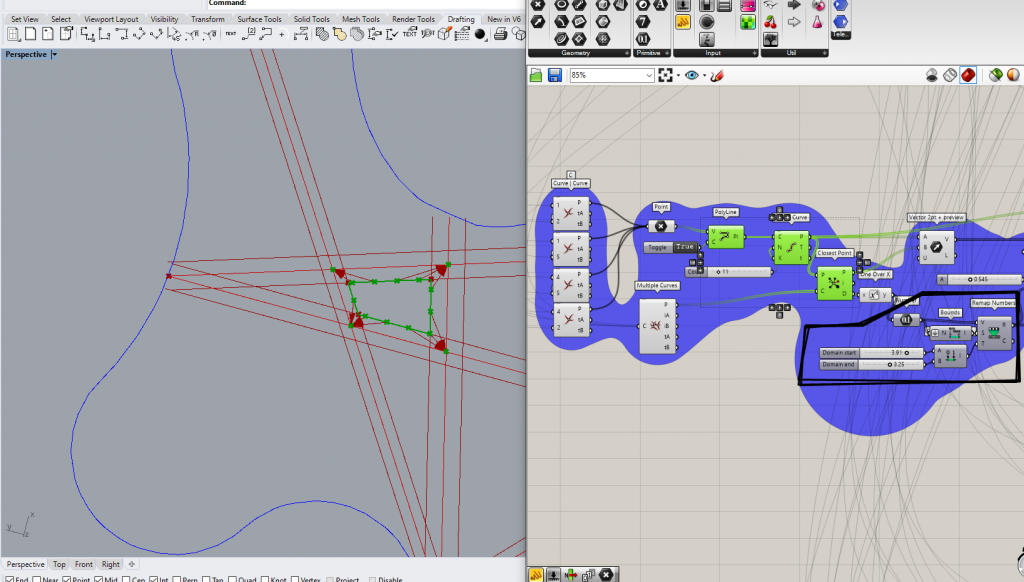
- Moving to the second part of this blue monster:
Work with the Move component using the vector just made and move the Divide Curve points.
Use the moved points to create a new curve (Nurbs Curve in my case).
Try some number operations until absolute satisfaction by the new curve.
FLATTEN!
Repeat #4 & #5 for all the isles.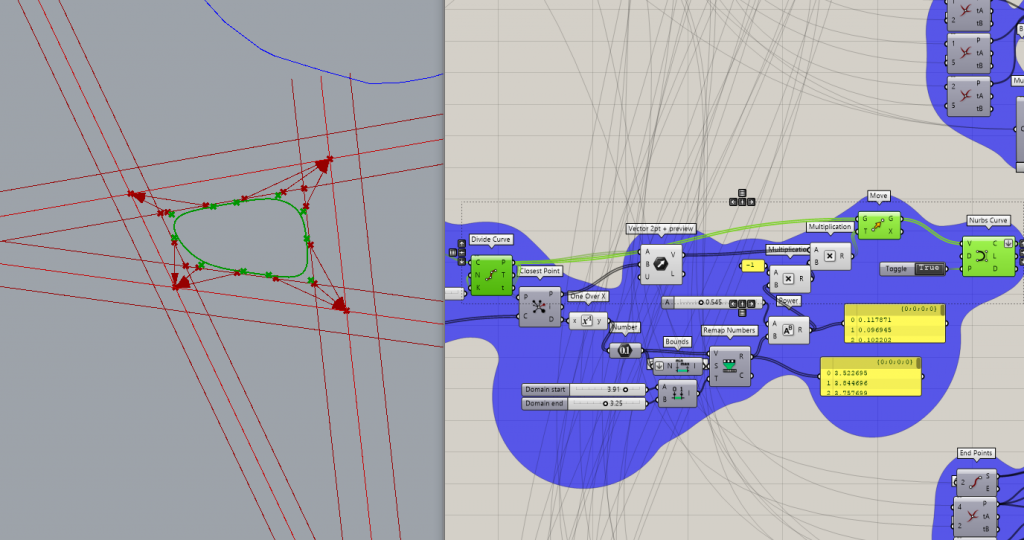
- There is one special case: 3 curves intersecting but not making an enclosed boundary.
The method stays similar, just the Polyline command is replaced by Joining the Lines.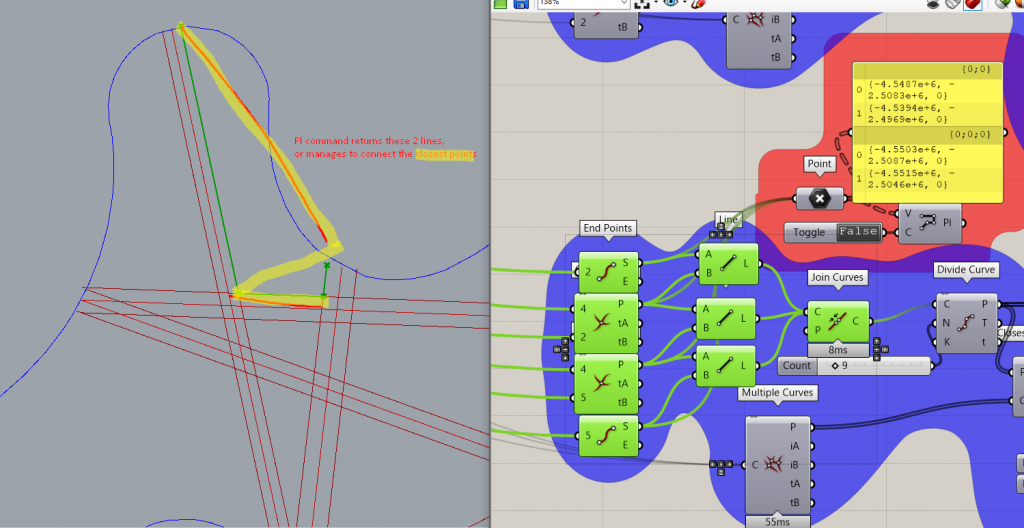
- Check for EXTEND again!
- I need all the curves to be closed, thats coming up now, joining the outer curves with the border.
For that I must Shatter the border curve and
Trim the overlaps of the outer curves.
Pay attention to flattens and chosing the correct Dispatch output.
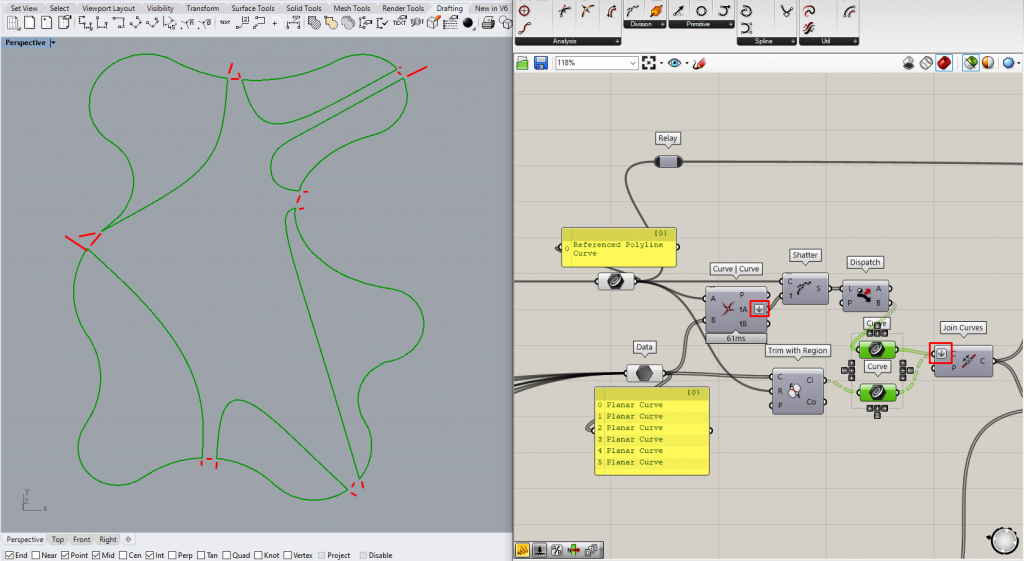
- Group them together, keep an eye on the data tree structure.
Make some Boundary Surfaces!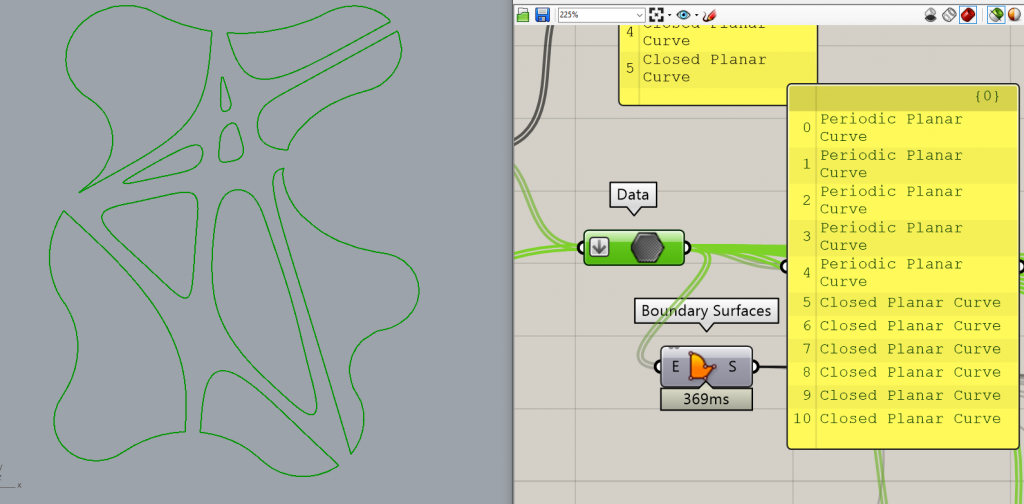
- ANOTHER MONSTER
So I pick a curve and an appropriate surface, populate the surface with good amount of points.
Then I find a Closest Point on the curve for every point generated.
Their Distance is Remapped multiplied and serves as Z Vector for the Move command.
Furthermore, for a nice mesh, I divide the curve and use Delaunay Mesh.
(CrvClosestPt points in DMesh were making invalid mesh in some cases)

- REPEAT!
Try adding *(-1) to make a small pond anywhere or just to dig deep! - Customize your Custom Preview