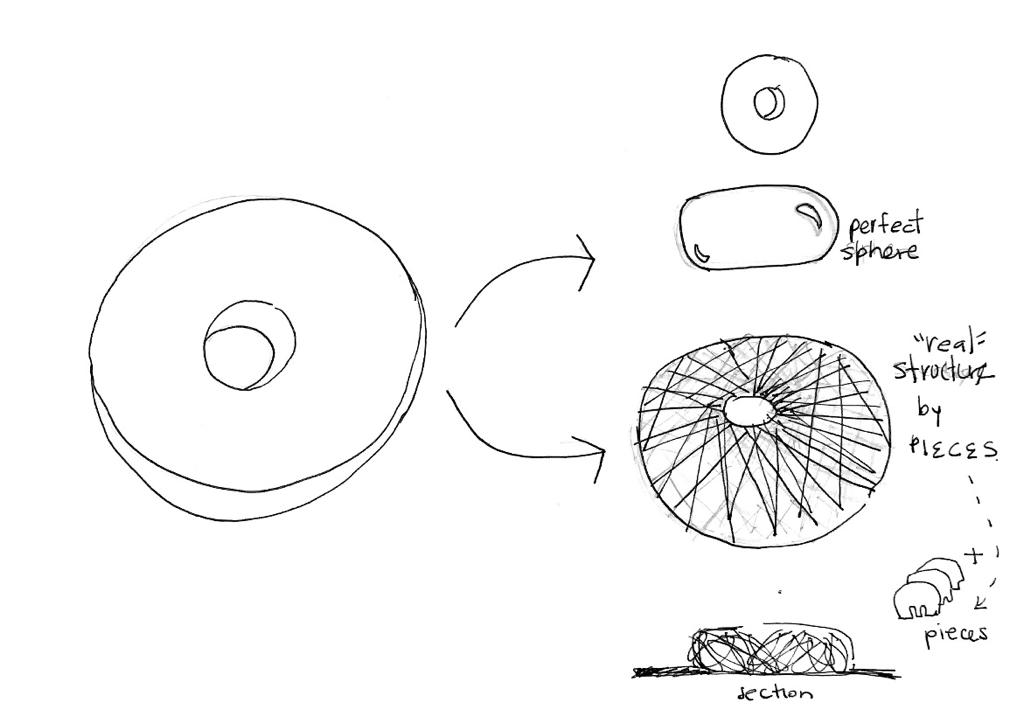
CONCEPT:
The concept arises from my passion for non-orthogonal bodies, spheres, donuts, and bubbles and how to get this structure to be built in reality. To build these surfaces you usually have to perform an exercise of fractioning them and giving them geometry. Children’s toys usually reach the intention of building something. And the intention here is that this “donut” can be put together and be a decorative space, a toy, or a puzzle.
I was inspired by the work of Robert J. Lang and his work for the NASA. Here he developed a concept for large unfolding structures, trying to answer the question: How do you pack a significant amount of spacecraft into a tight place? And my structure tries to imitate this principle.
MAIN GOAL: Create a non-orthogonal structure, with simple geometry, in this case, a donut and all the pieces that are required to be built in reality.

Starshade Project – Robert J. Lang
SKETCH:
FIRST IDEA:
The first idea was a surface for pavilion or a bigger structure. This was able to recreate a patter with triangulation, but it needed more structure to actually be able of build the surface in real life. Here the solution was more similiar to a geodesic structure, that’s why this wasn’t the final project, but I’m also very happy with this product.
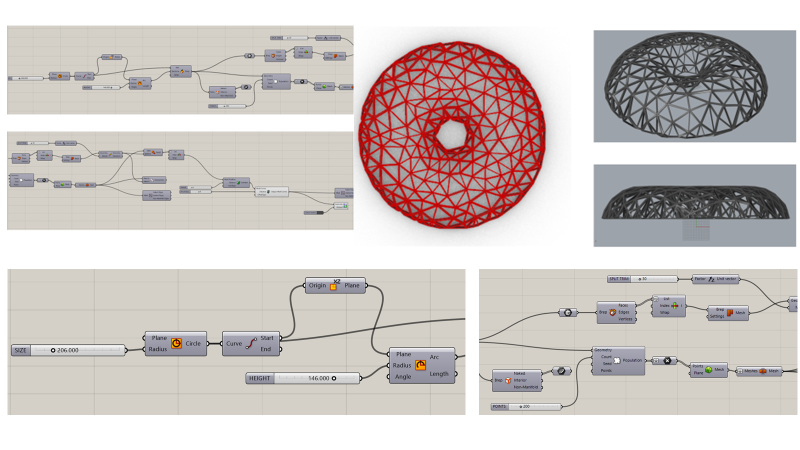
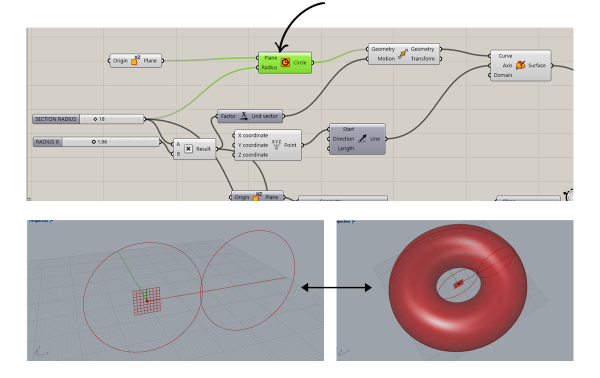
STEP 1: Make a circle and give it a radius.
Select the slider “circle” and “xz plane” also add and slider for the radio. Add a surface with “revolution” and create a line for build the domain (number) so we will be able to see the donut.
STEP 2: Intersect the donut.
Slide curve “circle” and join with the radius, so can be the same as other base, with that we will create the center of the plane. Slide “perpendicular plane” to add the number of planes, also rotate them in the x axis, “deconstruct plane” to rotate the planes using “rotate plane” add a number of slider. With that, we will see the curves of our structure of donut. Around 15-20 degrees is good rotation.

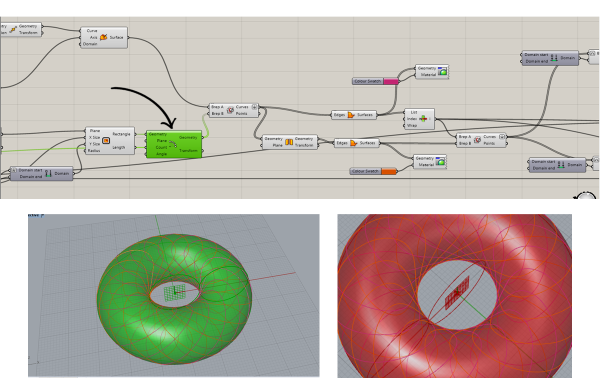
STEP 3: Give a surface and intersect the curves.
Increase the amount of pieces and made a surface to bake. Intersect them and add plane of “rectangles” for keep the proportion, like that we can increase or decrease the radius or the pieces of our structure. Slide “geometry” and “polar array” together and join in the middle by the rectangle.
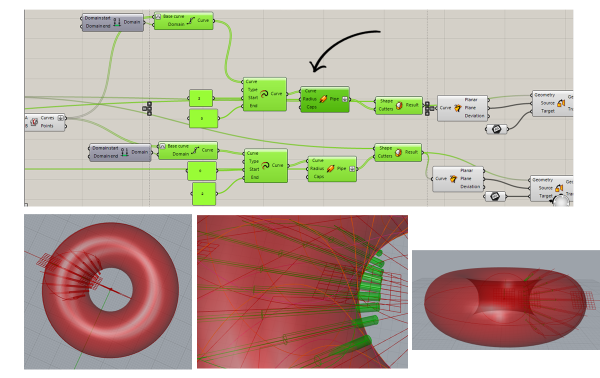
STEP 4: Create the edges “elements” of the donut.
This part is very important, since it will give the sense of individual pieces to each element and later, make the structure possible to build. Using “brep” in flat mode, together with “mirror” and two “boundary surface” to create a series. Add a number of slider of the pieces that will create your structure of donut. We need to have a sense of pieces, with another “brep” it will join them and a “index” will put the surfaces on a point list. Here we can already see a “costume preview” and a “colour swatch” for each group.
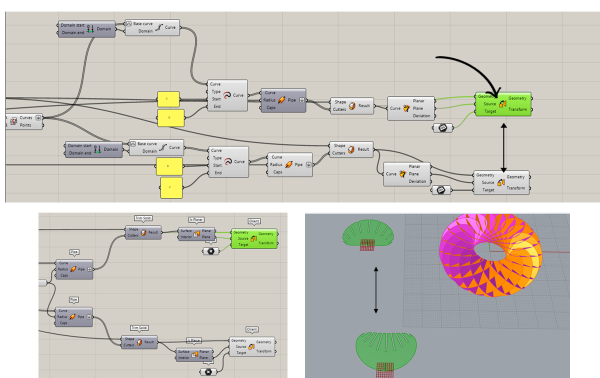
STEP 5: Extend the curves of the pieces.
We need to flatten our curves in the intersection and see the domain slide “construct domain” with “sub curve” to extend the curves of the individual pieces. Slide “extend curve” and a number of slider for the thickness in the shape box and “pipe” in mode “flatten” like the image above (step 4). Slide “trim solid” for the intersection and a “plannar curve”. Next we “orient” these pieces and we add “surface” so we will see them as well as the final structure of the donut.

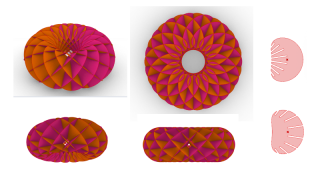
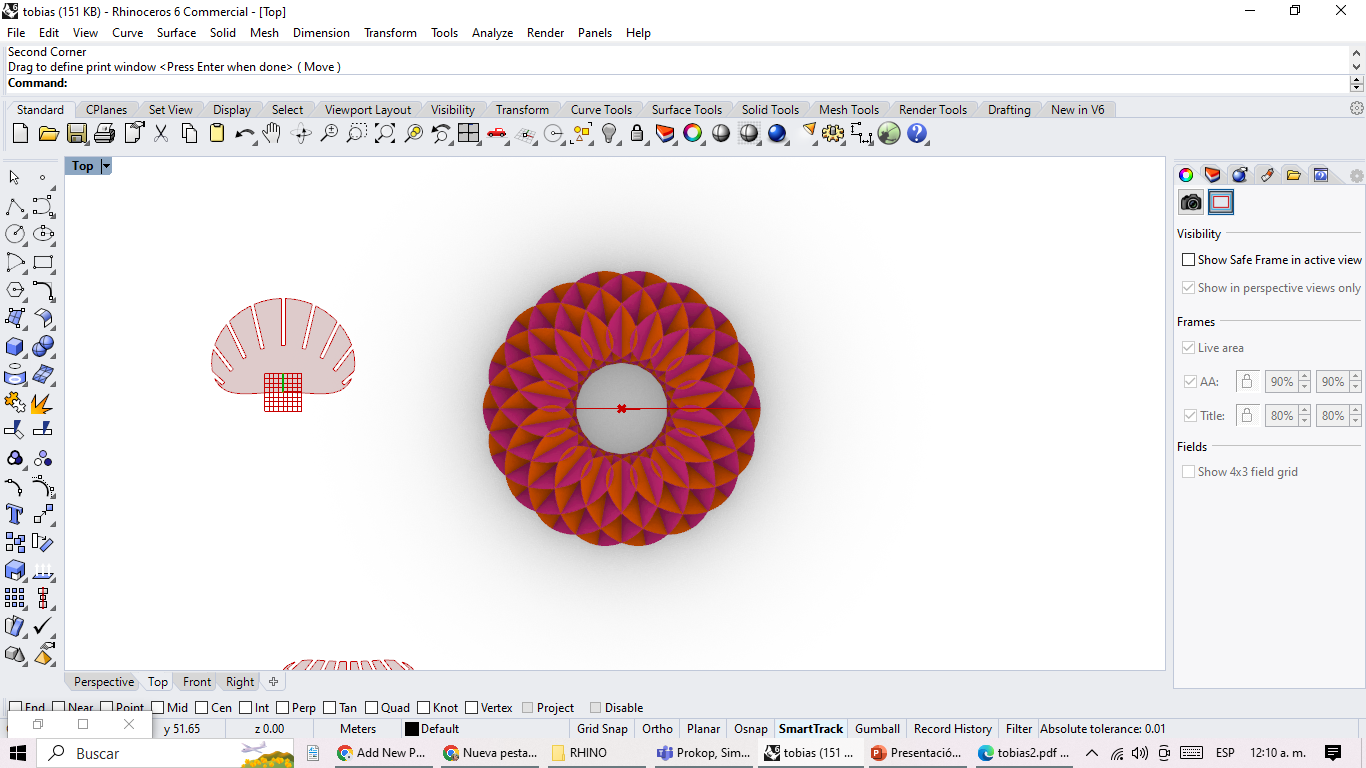
FINAL PRODUCT
ADVANTAGES: The result of this script gives us the possibility to explore the sequence of non-orthogonal elements and how they can be intertwined.

VARIATIONS:
RANGE:
Changing the “multiplication” for “range”, (in just 1 case) we obtain a more flexible visualization on the wireframe, render mode, etc. And we modify the slide of the structure for a round(circle) element, obtaining a variation of the first exercise. When adding “range” in both cases the individual structure will be the same but the visualization will be more flexible still.

http://scripting.molab.eu/wp-content/uploads/2023/02/Build-a-donut-range.gh
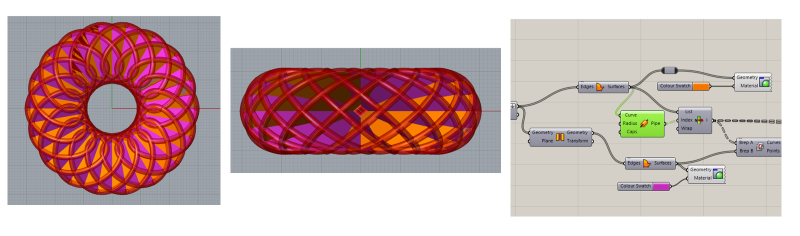
PIPE:
Adding “pipe” to the surface, we are going to obtain the perimeter of the individual pieces, creating a pipe structure that can be an interesting 3d print exercise or for installation of light.
Sara Alexsa Venegas Torres. First-year International Master’s Student. CVUT 500CAD3
REFERENCES:
FIRST: Bryan Albeiro García ( https://archbga.com/ ) is an Architect from Alicante Spain. He shares tutorials on instagram and on his website. With his page on instagram I learned how to apply the slide “geometry” and “extend curve”. I thank him for his inspiration and scripts, because I was able to use this in my final product.
https://archbga.com/work/hedgehog-pavilion
https://www.instagram.com/p/CnkQs1gMO1O/
SECOND: For this product I used diferent tutorials like:
This project was build in Rhino 6.