
park – tool for landscape architects
goal
I wanted to create a script, that would help landscape architects to connect their drawing with computer. Parametric modeling in Rhino Grasshopper allows that. In this script, you can insert your drawings into prepared Image Samplers. This way, you can use your zone plans, define the planting area with brush strokes, use gradient or bump maps to affect various attributes like density of forest or size of plants.
This script combines the speed and flexibility of 3D parametric modeling with the freedom and creativity of hand drawing.
tutorial
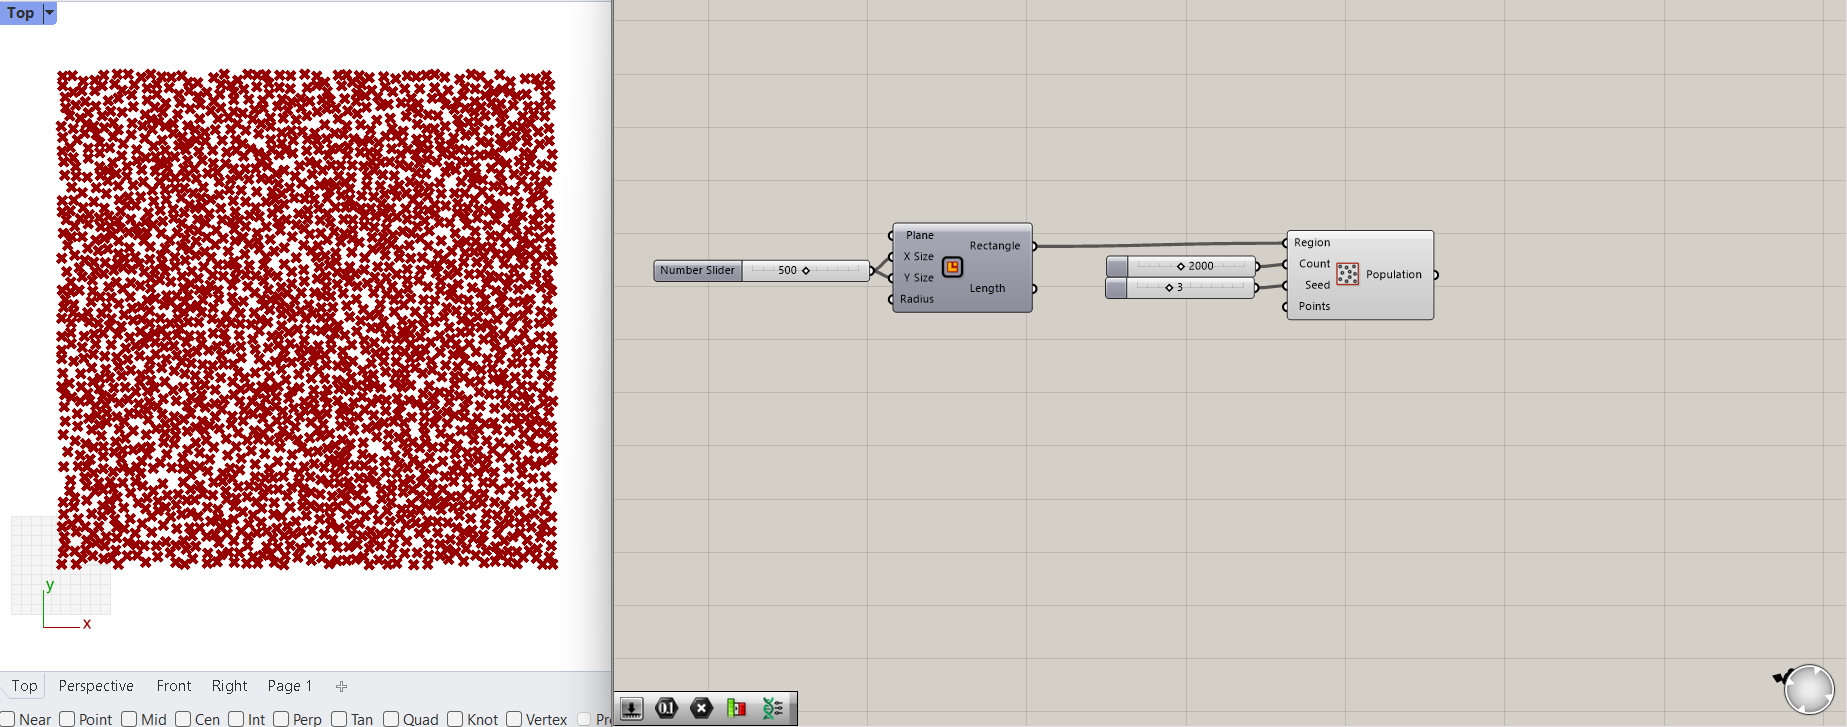
1. define area

2. populate area
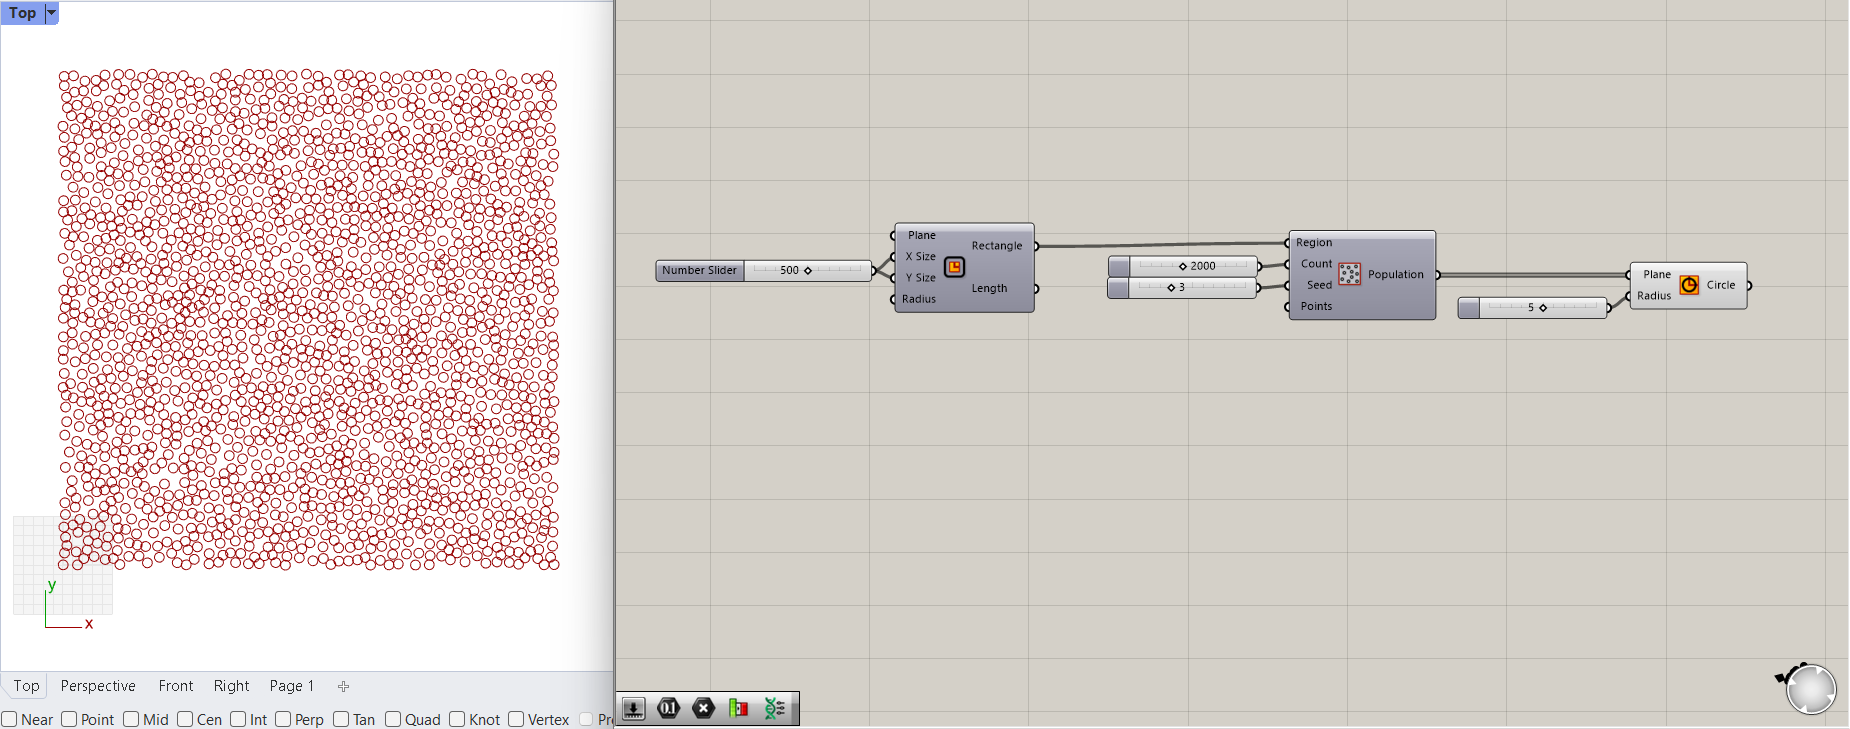
3. substitute trees with circles
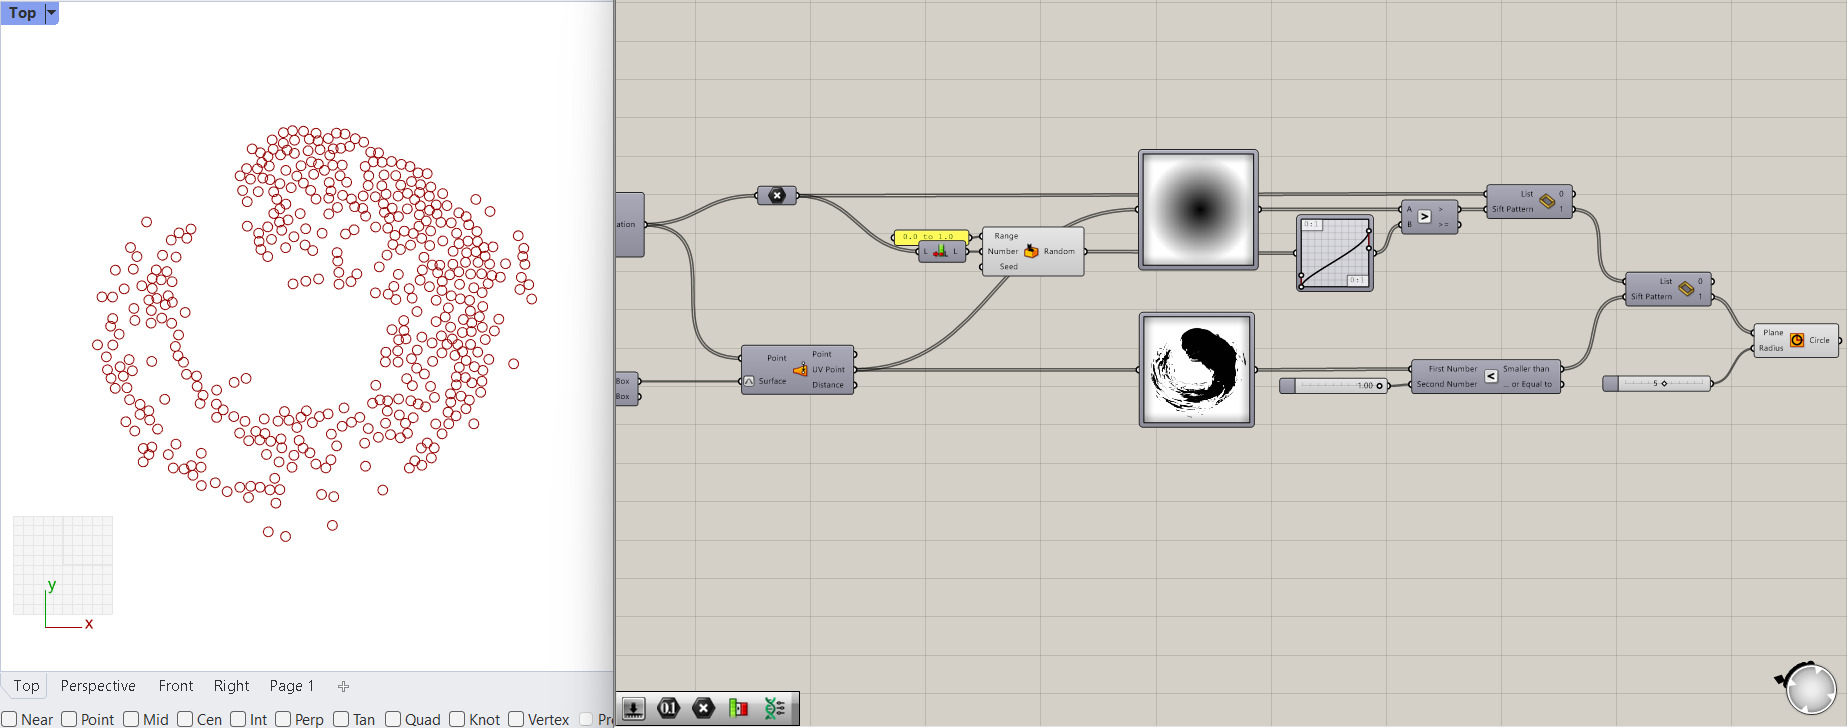
4. redefine planting area

- add Image Sampler element
- upload black&white image
- set channel to Color brightness
- associate the Image Sampler with population region using Union Box and Surface Closest Point
- add the correction using Larger Than
- add Sift Pattern to use the image as a mask (do not use Dispatch, it is similar, but it mix-up the item list, which therefore will not correspond with the image anymore)
5. adjust the density of trees
- similar to previous step
- for correction use Graph Mapper (Bezier)
- use Random to manipulate the density more naturally
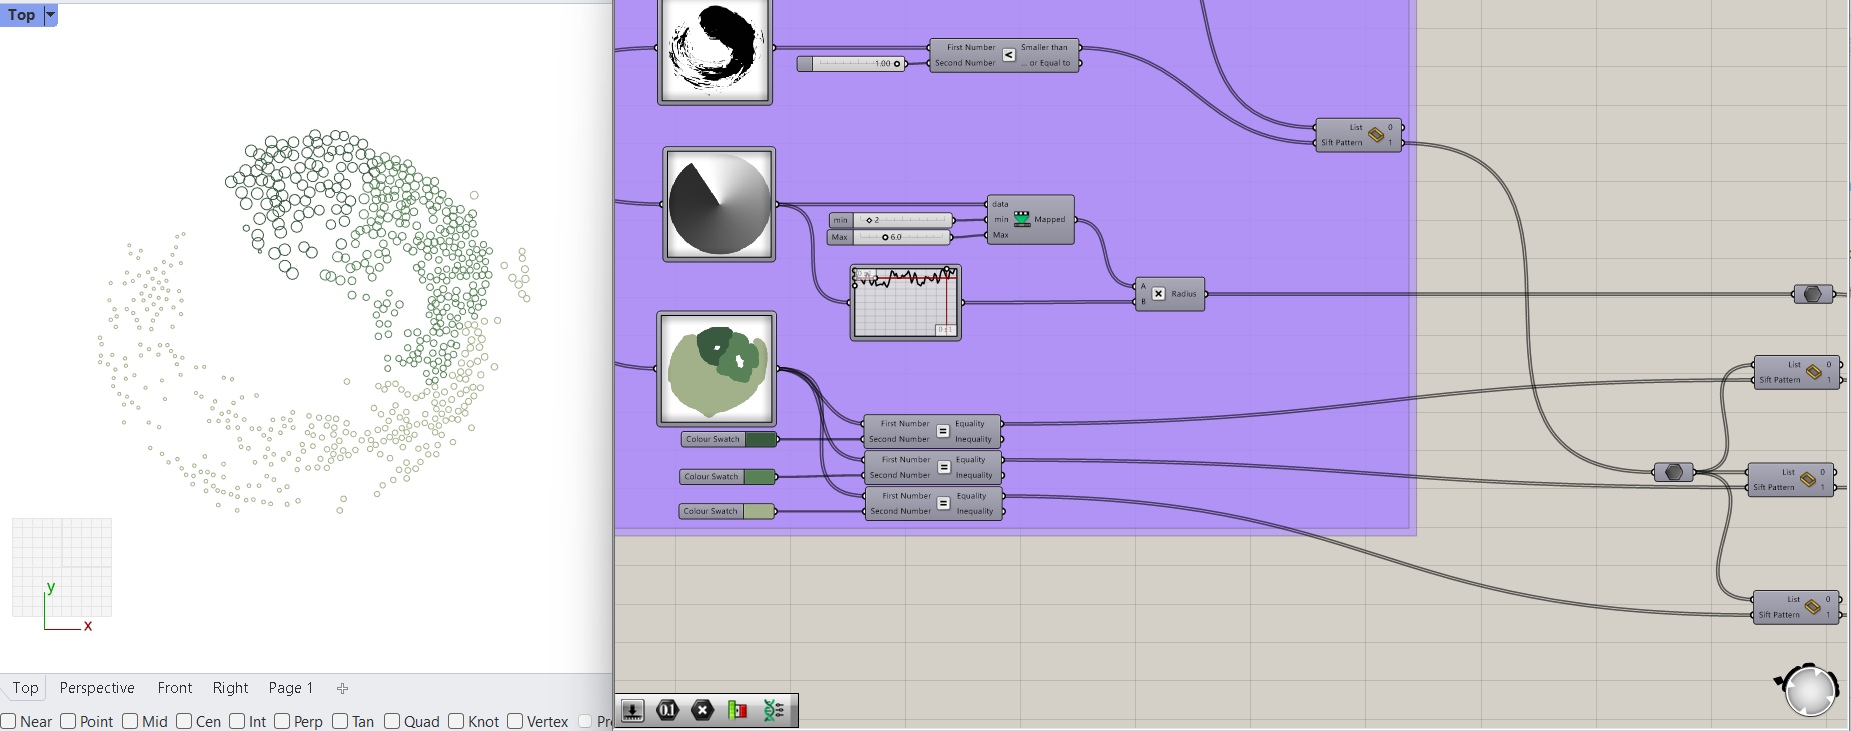
6. adjust the size of trees
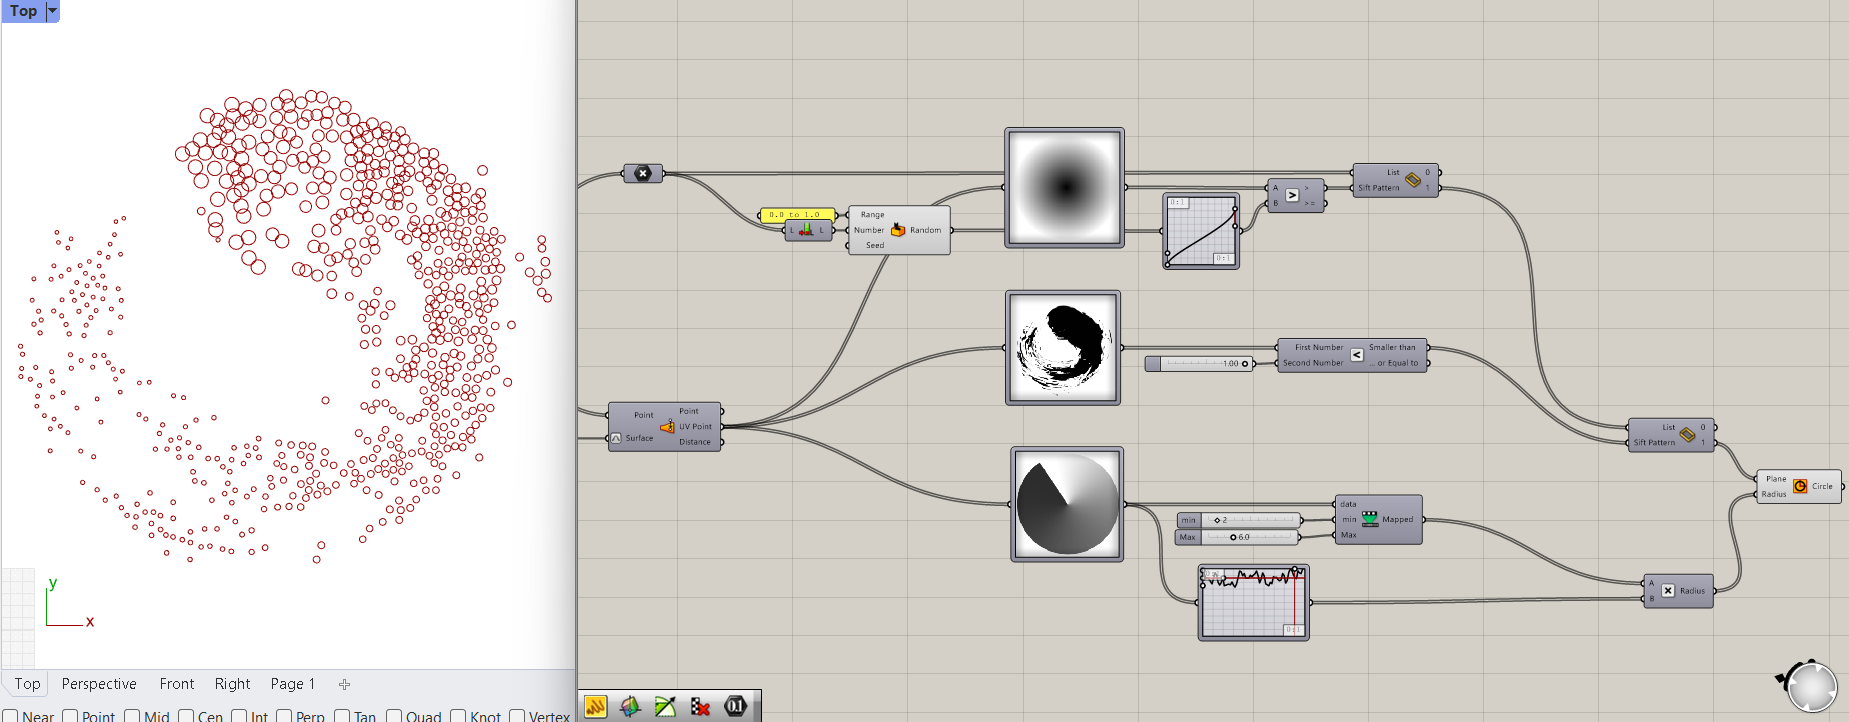
- similar to previous step
- you can add Graph Mapper (Perlin) to simulate natural variation in size
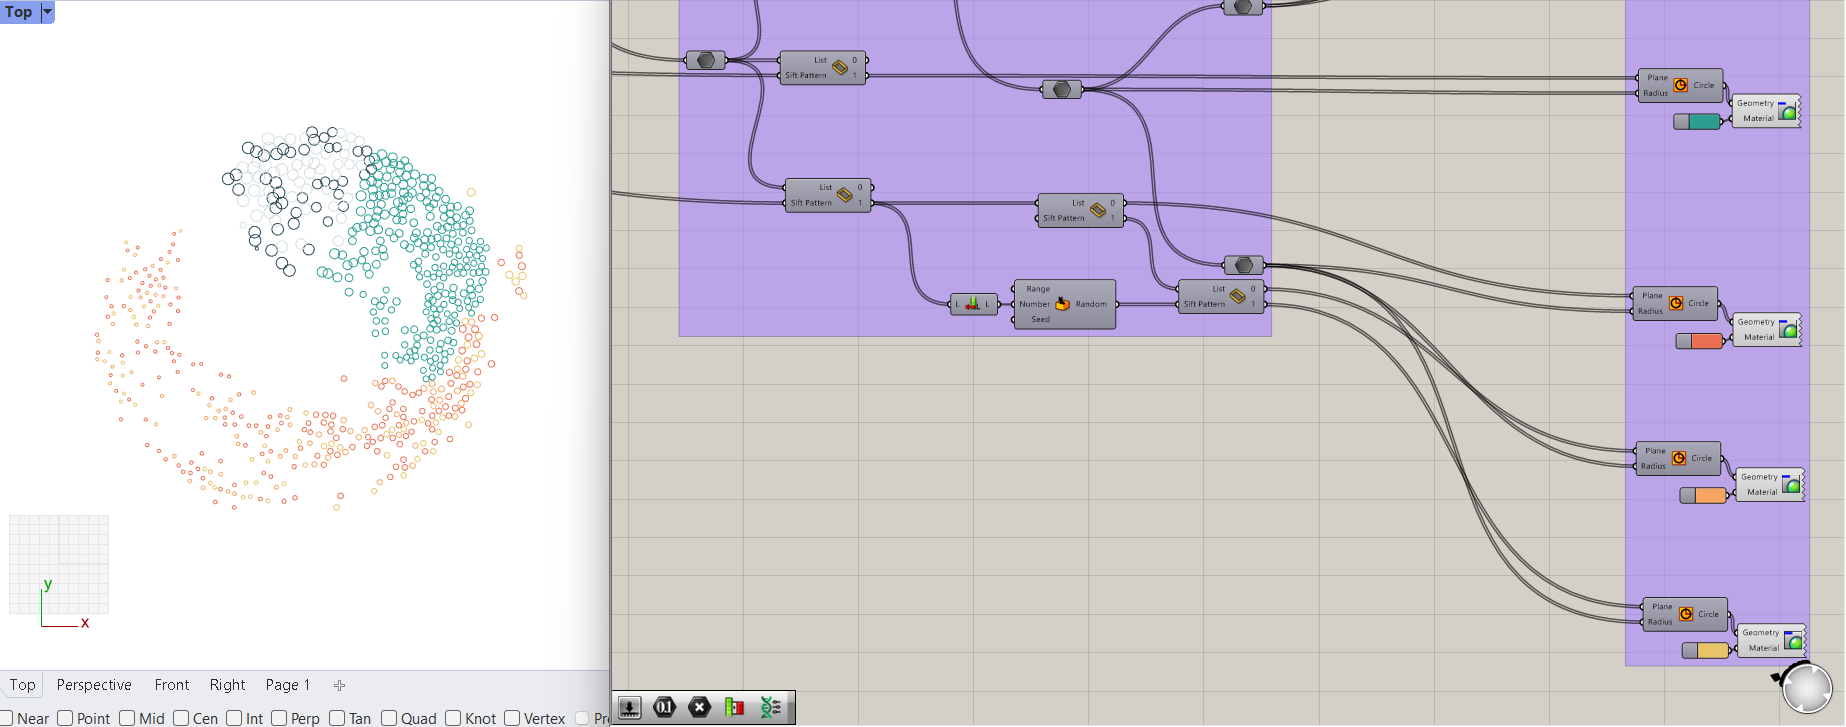
7. add planting zones

- in landscape architecture, the common approach is to use different zones for plants
- add zones using your “zone plan” image in Image Sampler and Color Swatch (eyedrop desired zone color)
- populate the zones differently using Count and Seed
- note: here it is good to use Dispatch to shorten the lists before associating them with Image Samplers
8. distribute trees into zones
- add “zone plan” Image Sampler once again to plant the trees (Circles) on those different zone populations
- note: you cannot do it directly from the zones in previous step, because the Lists are different, all the Image Samplers should be associated with one list, which is the Union
9. diversify the zones
- use Sift Pattern again, if you want to have more diversity within the zones (e.g. in zone 3, I wanted 3 different species)
- preview the trees with different colors using Custom Preview
10. plant LandsDesign trees
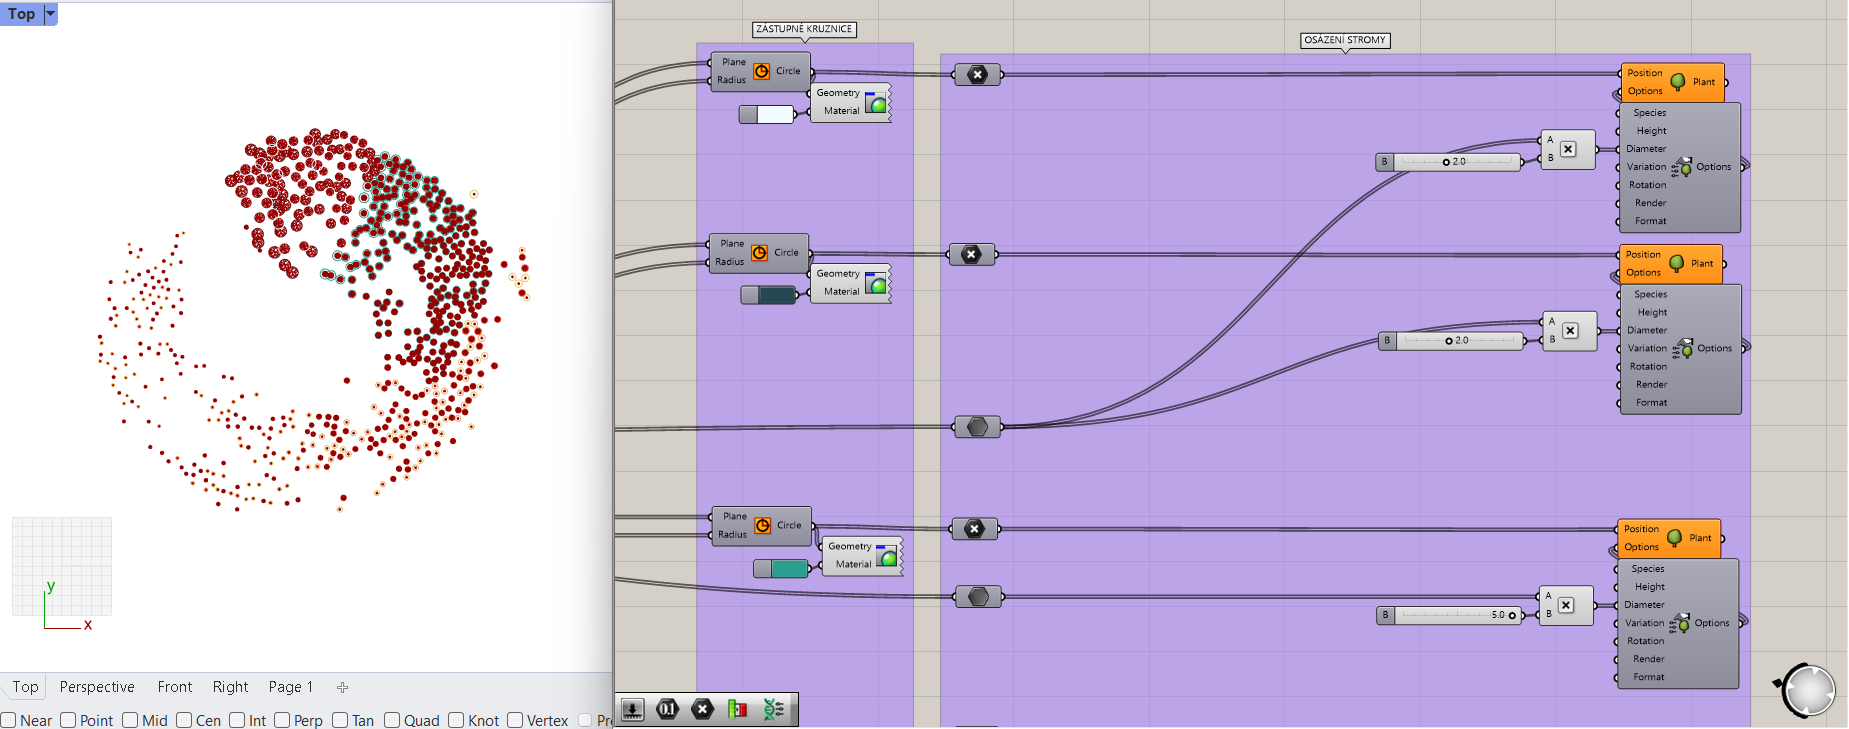
- add Plant elements (search or use Lands tab)
- use the circles centerpoints for Plant Position
- add Plant Options elements
- note: here you can add your own models of trees instead of LandsDesign elements
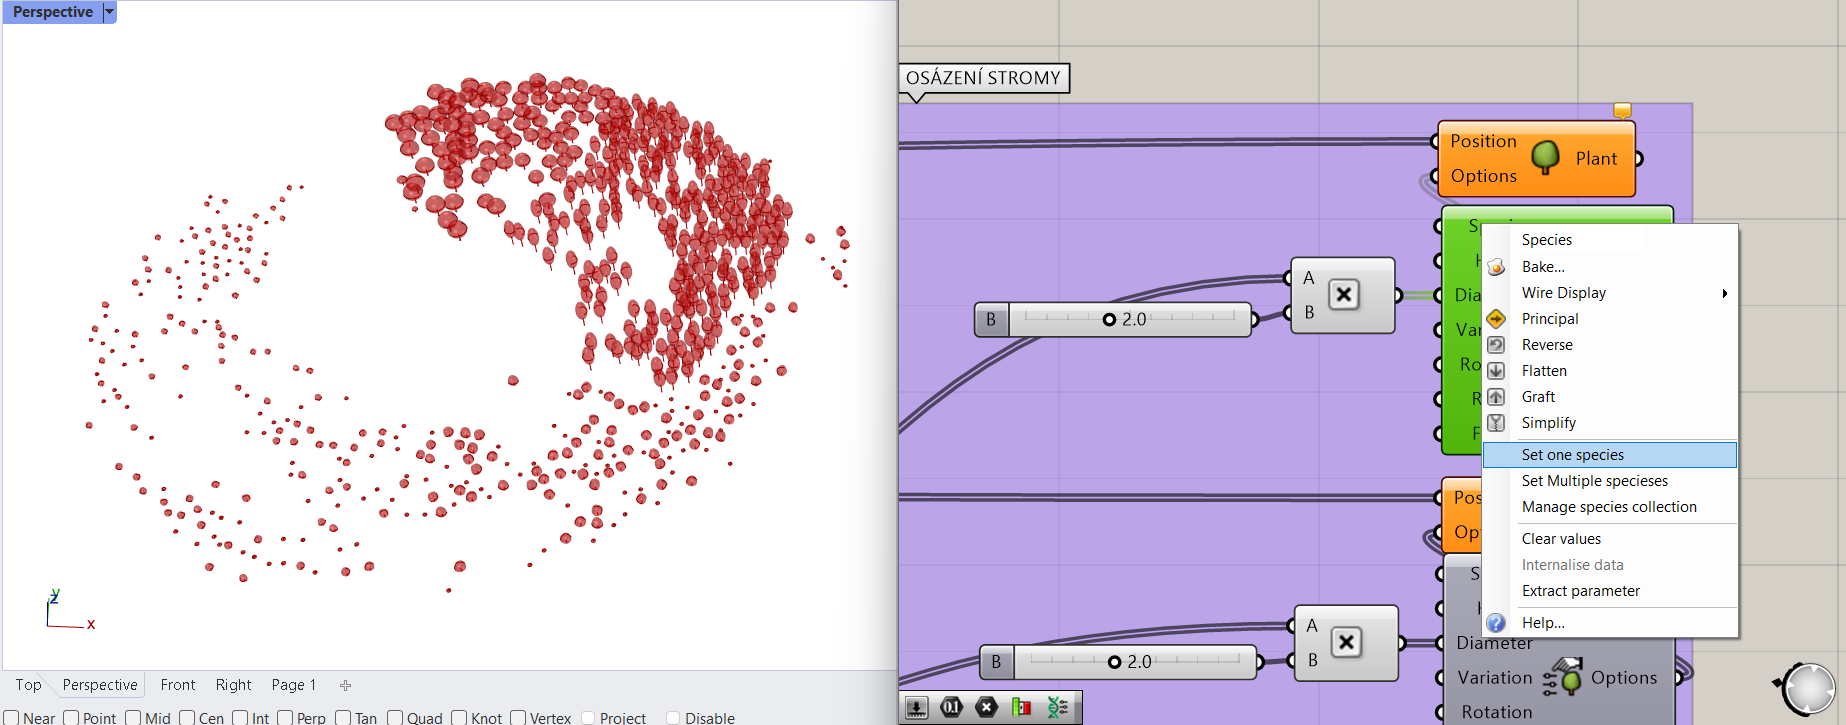
- in the Plant Options right-click on Species and select Set one species
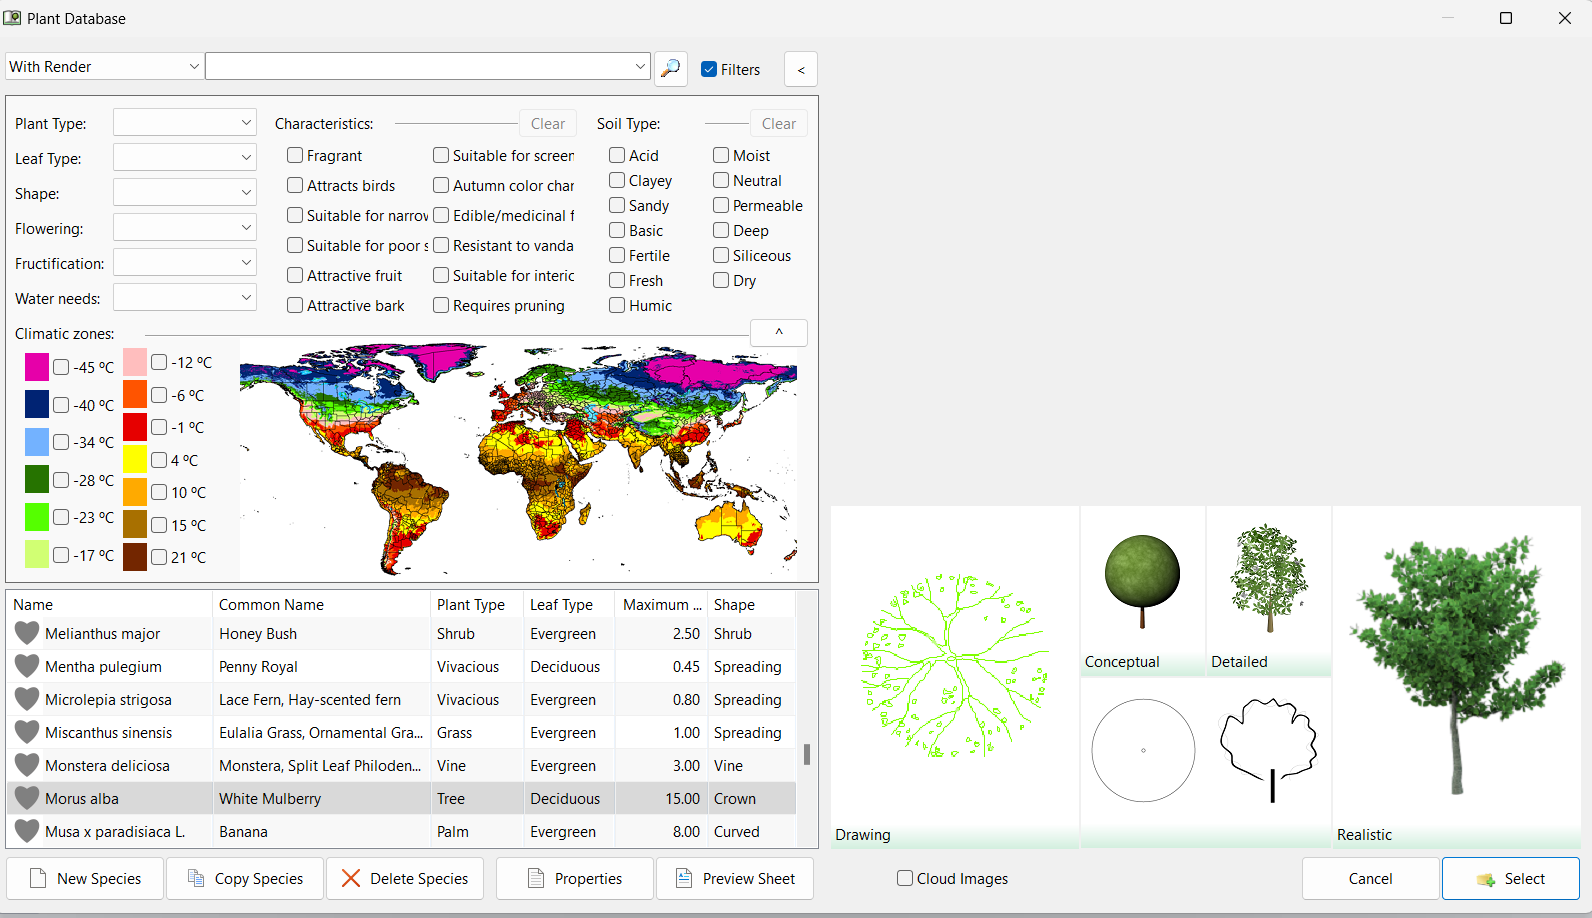
- Browse… desired Species and add them into Species Collection
11. bake it
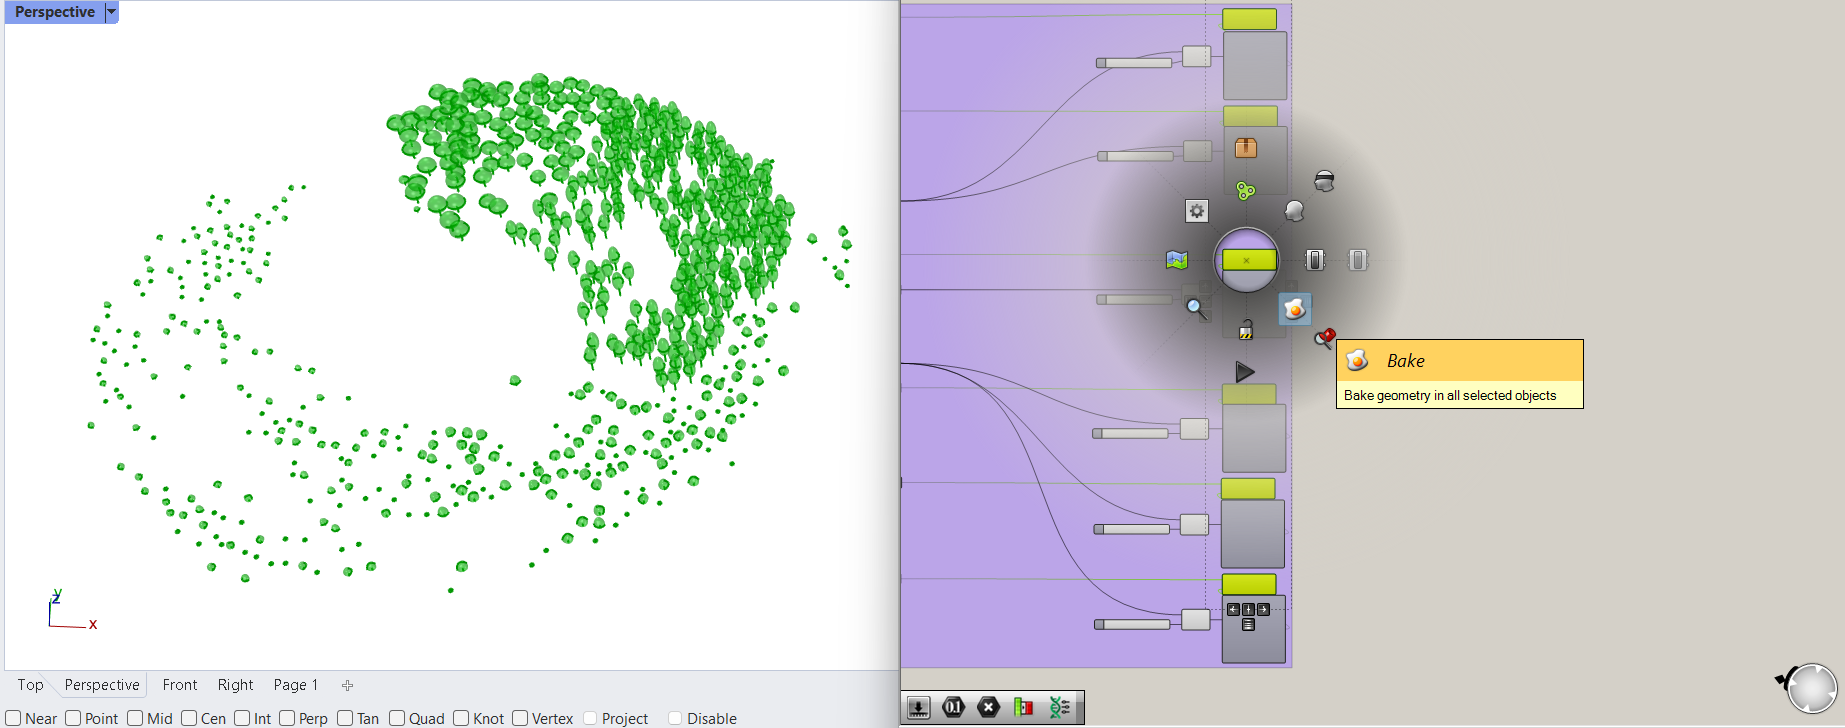
- select all Plants, press mouse wheel and select Bake
12. choose display style
- Rhino – LandsDesgin tab – Edit Panel
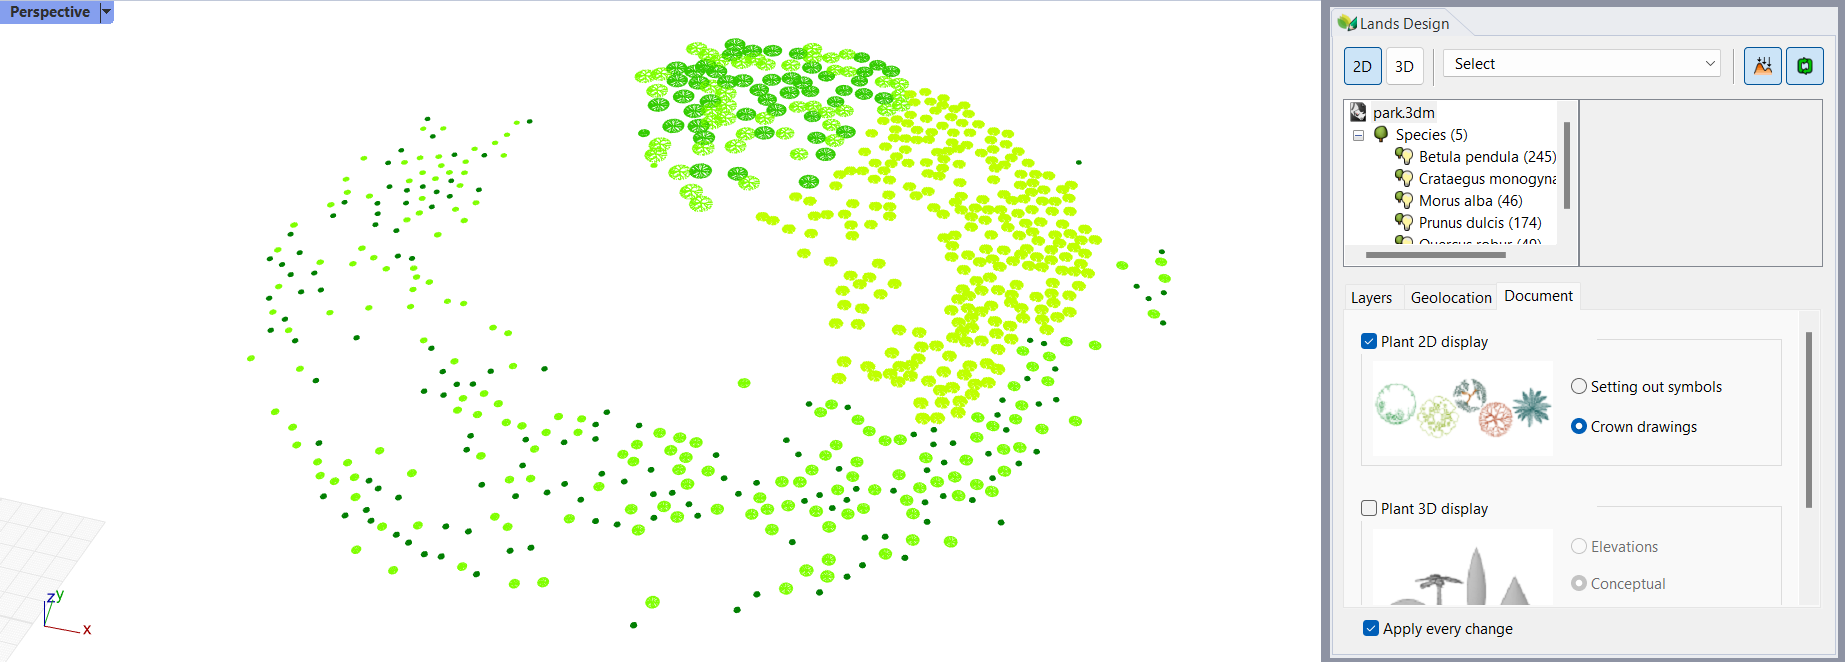
- you can choose to display plants in 2D
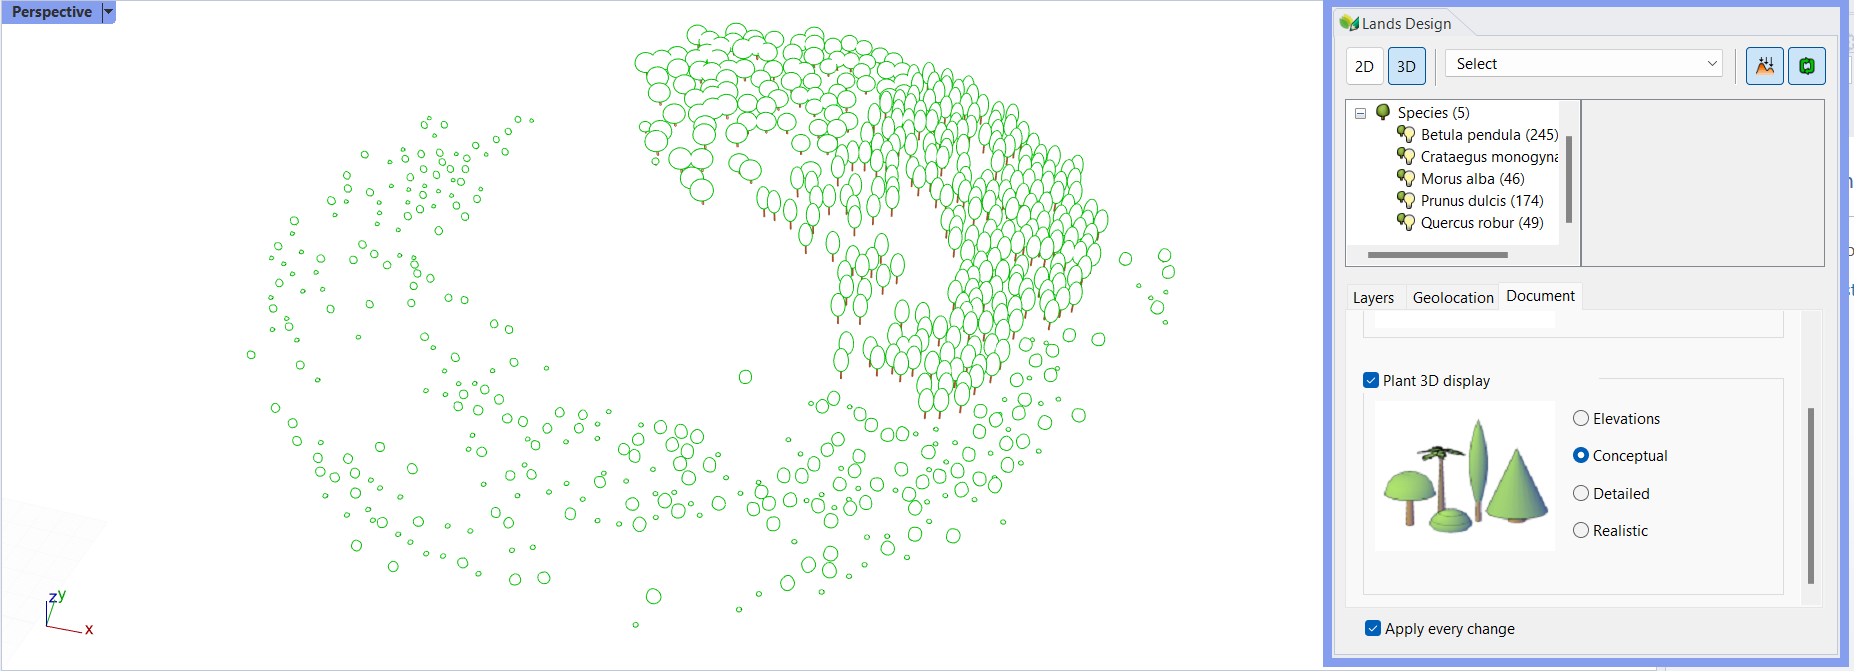
- you can choose different display styles with different levels of detail for 3D models (work with Conceptual, render with Realistic, etc.)
13. done
used plugins
other possibilities and suggestions
- use your tablet or scans of hand drawn plans and maps
- easily adjust your images with Photoshop (start with drafts and then replace them with more precise)
- play around with different masks affecting different attributes
- play around with corrections using Graph Mapper and graph types
- add overlapping zones for tree layer, shrub layer and herb layer
- play around with LandsDesign components and features (create documentation lists, calculate CO2, make visualizations, …), see their tutorials
- you can use your own 3D models of trees instead of LandsDesign