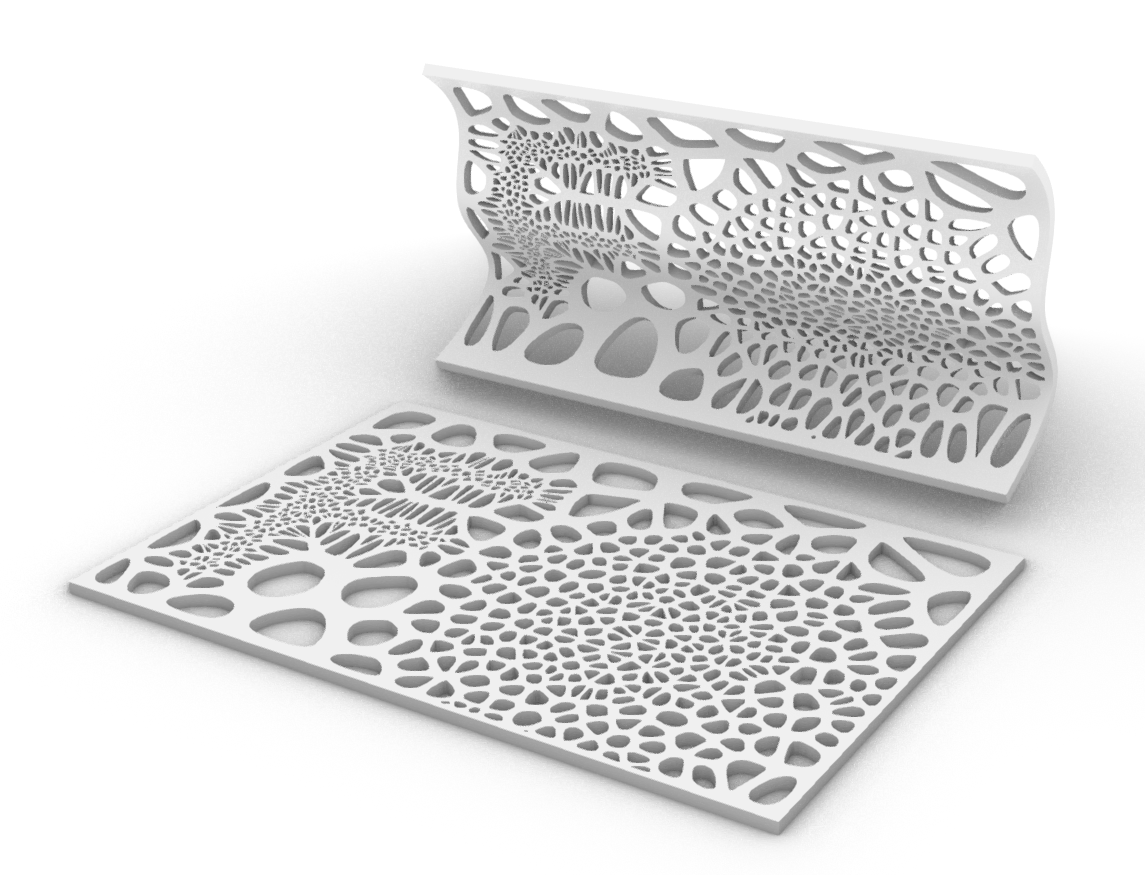
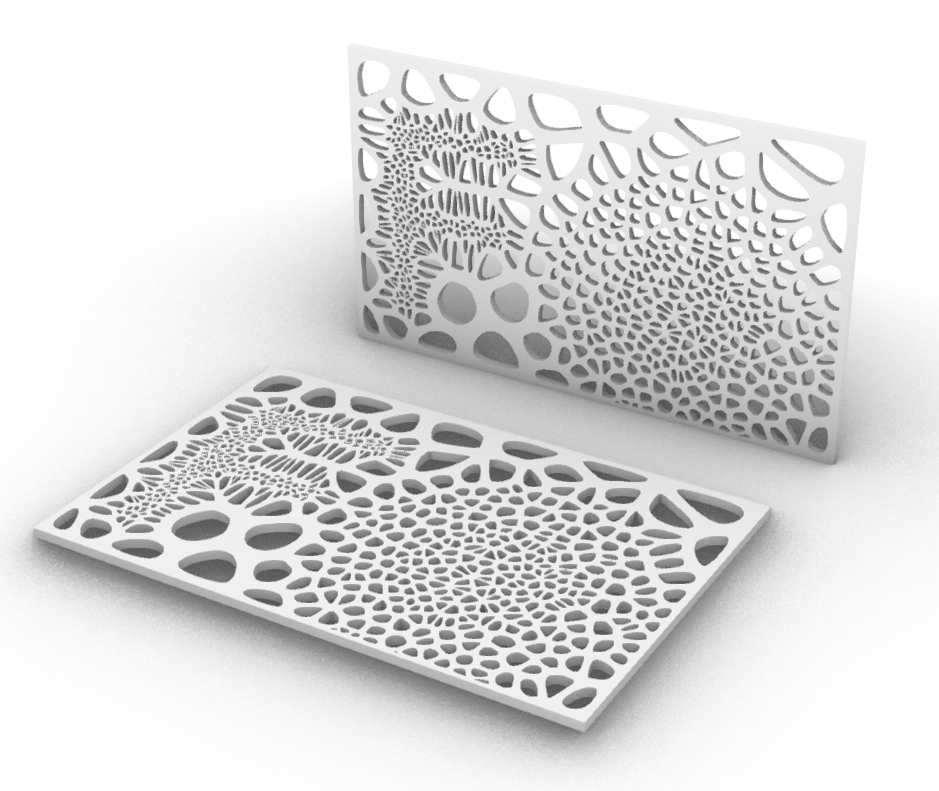
I wanted to make custom pattern surface that could be applied on any surface whether it is flat or curved one . This should help you get your custom like pattern onto loggias,balconies or facades.
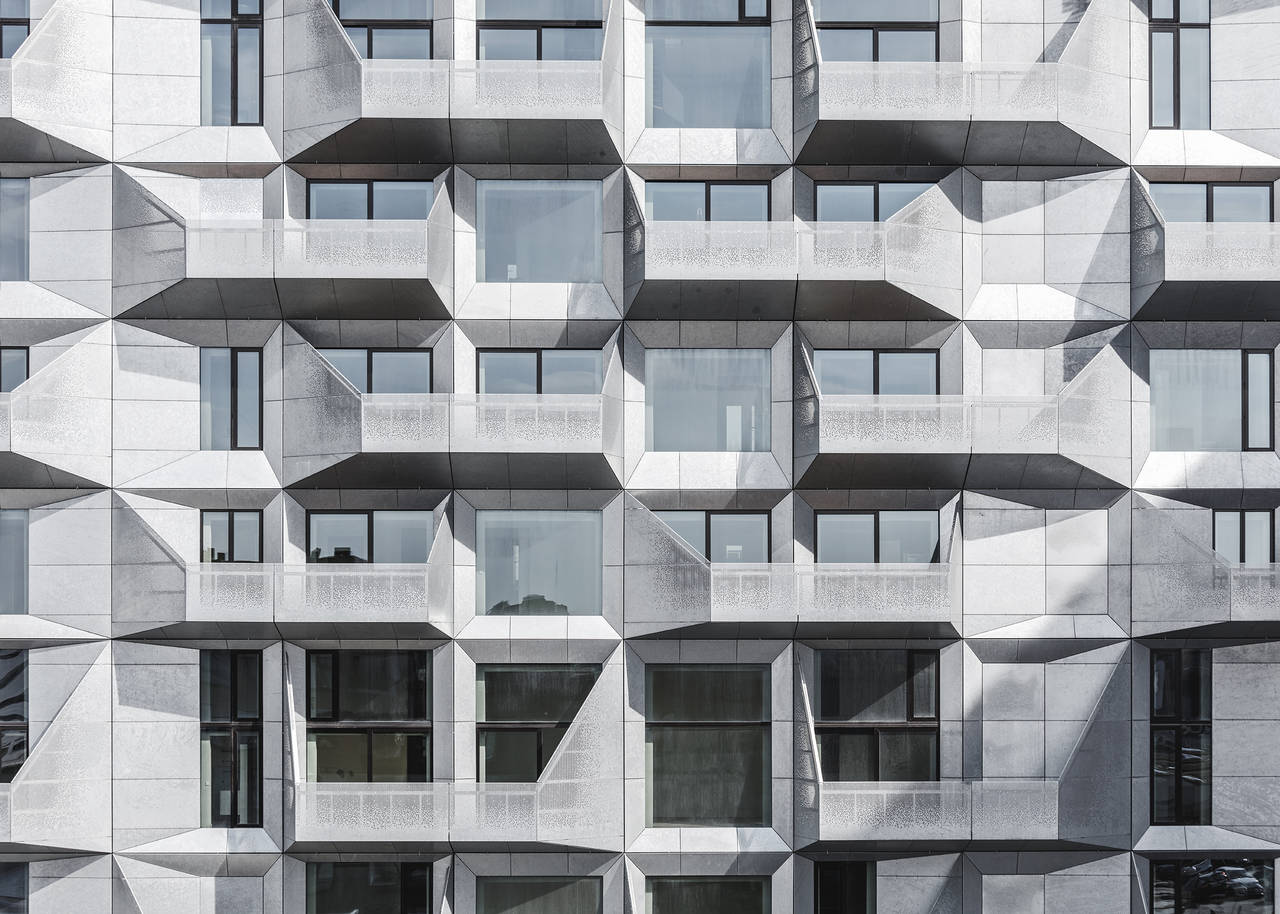
Inspiration and real-life example
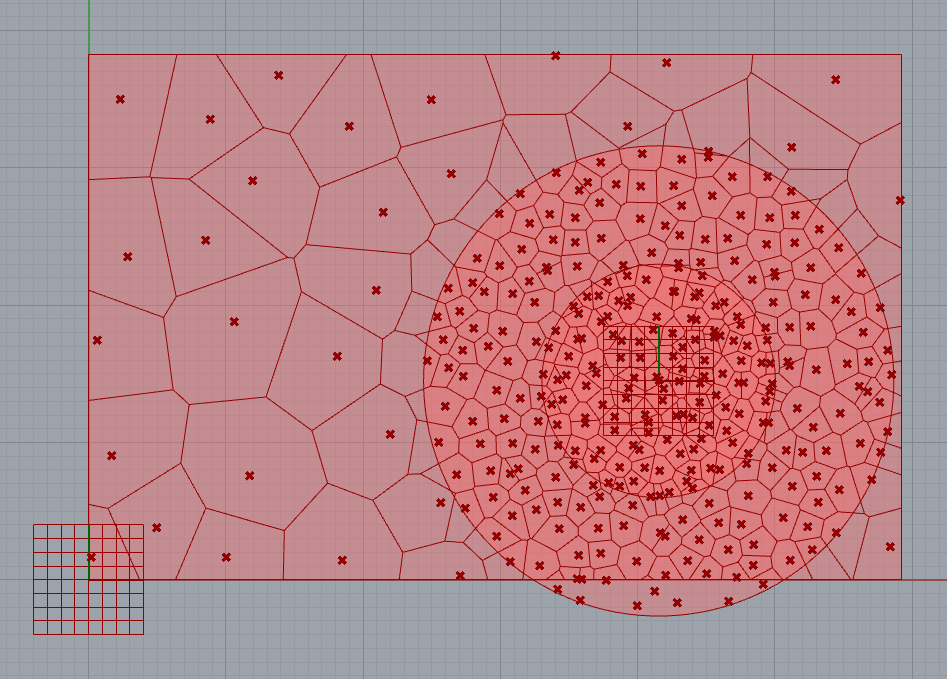
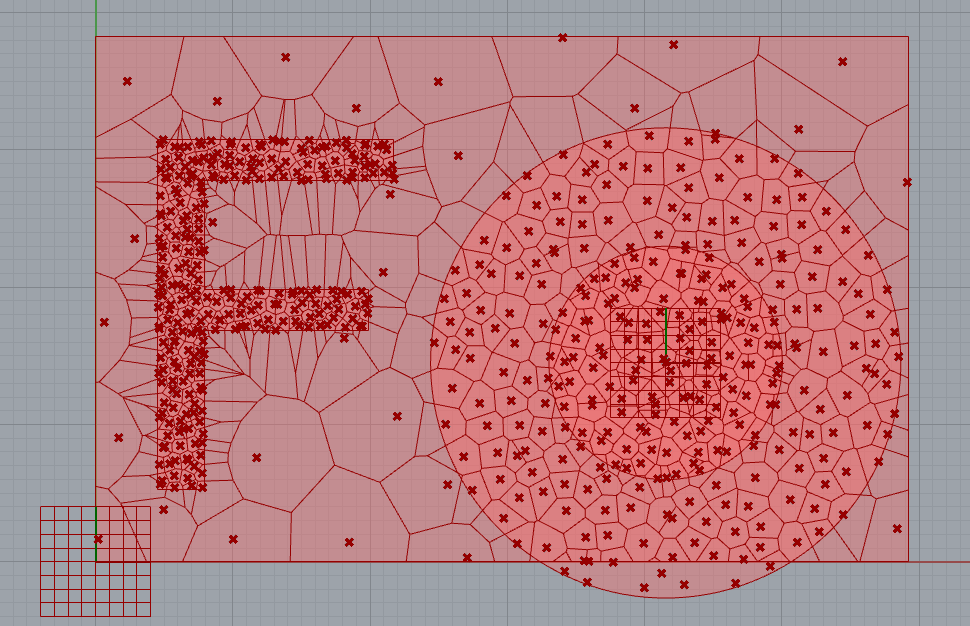
The Silo in Copenhagen and its balconies
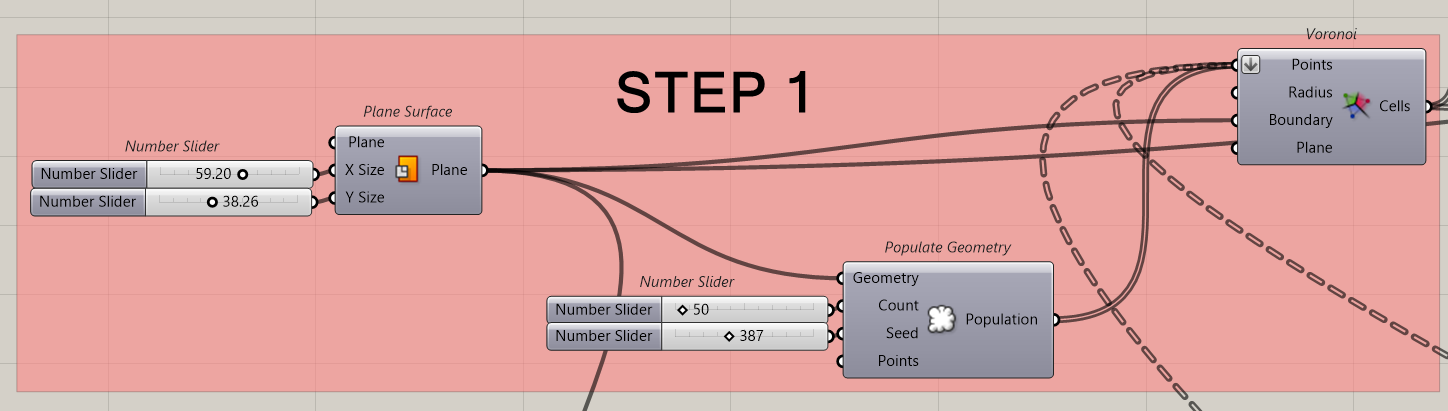
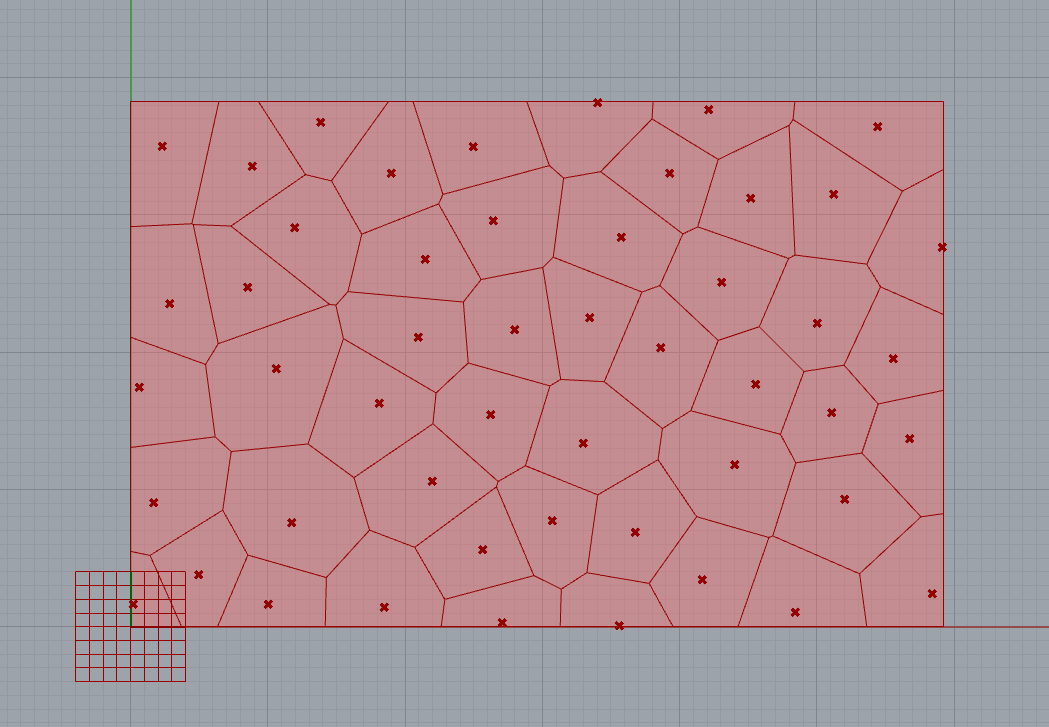
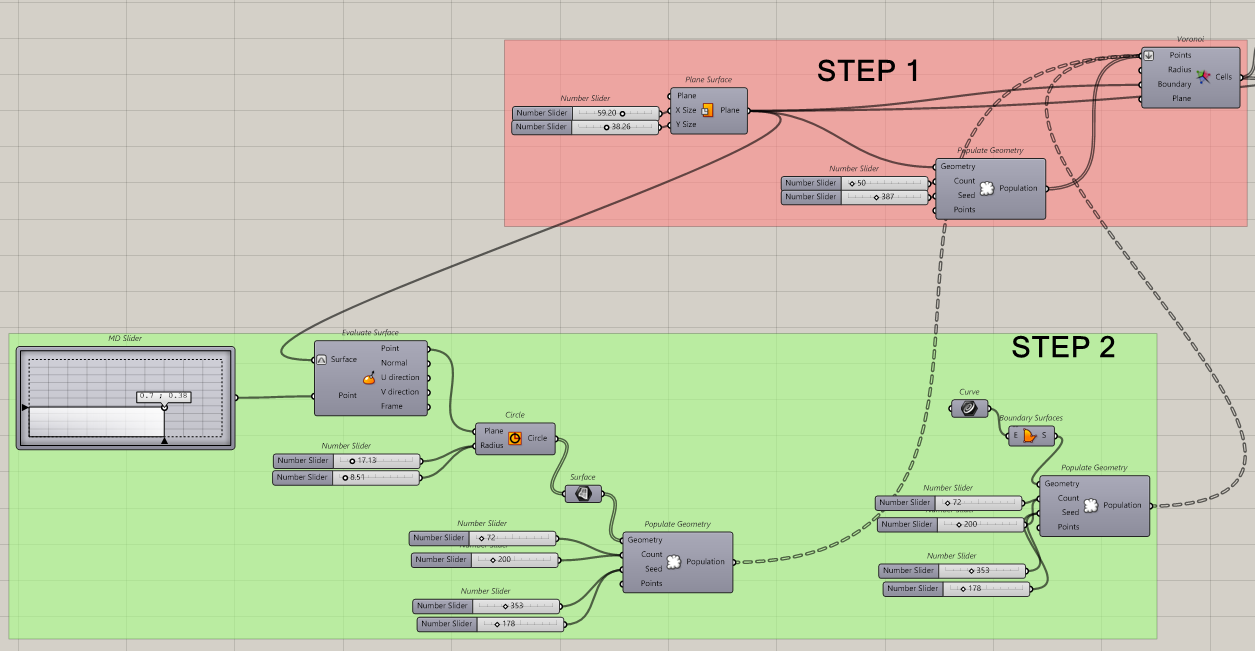
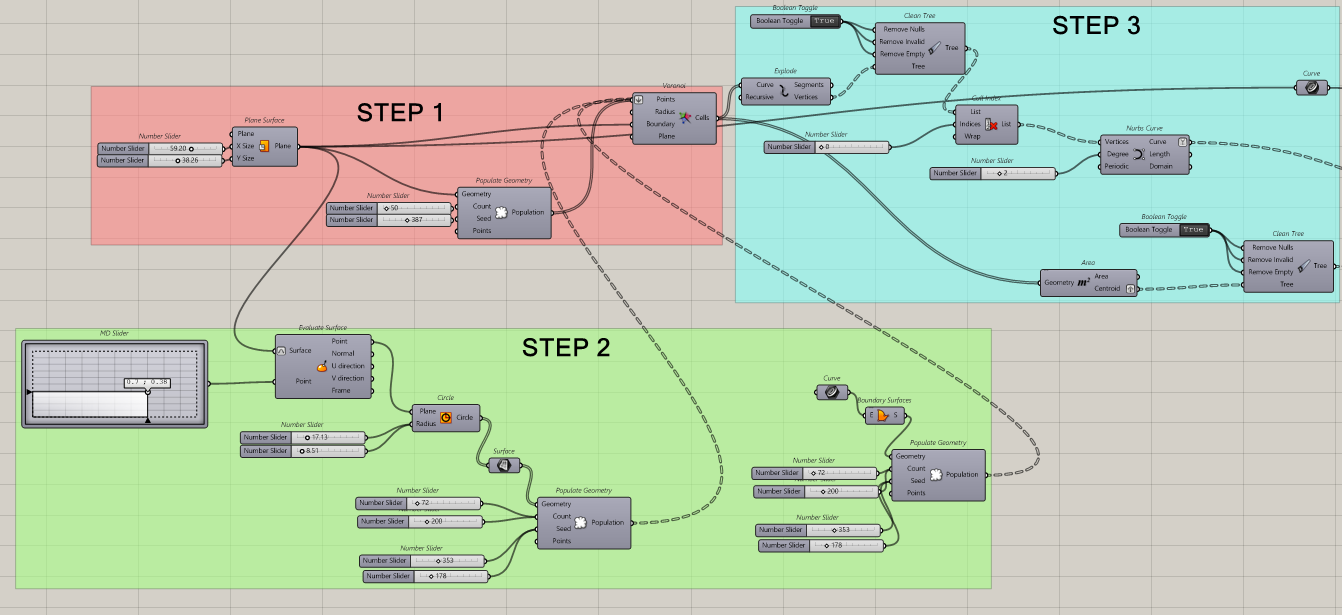
STEP 1: Creating the base Surface for Voronoi Cells
- In Grasshopper, use the Surface Primitive tool to create a plain surface.
- Use the plain surface to generate the base surface for the Voronoi cell
- Define parameters for the size of the base surface (X and Y size).
- Navigate to the Mesh section in Grasshopper.
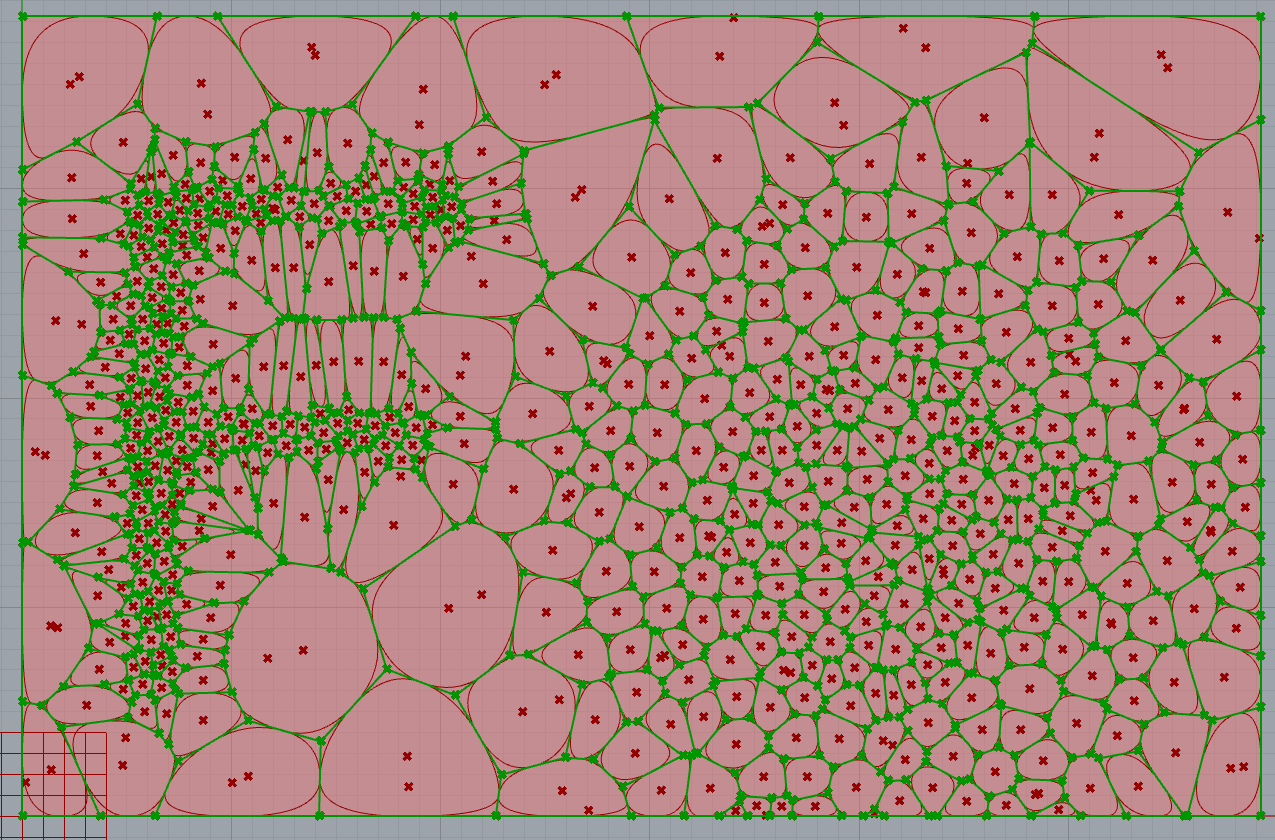
- Use the Triangulation component or type “Voronoi” to generate Voronoi cells.
- Utilize the Populate Geometry tool to define the points for the Voronoi cells.
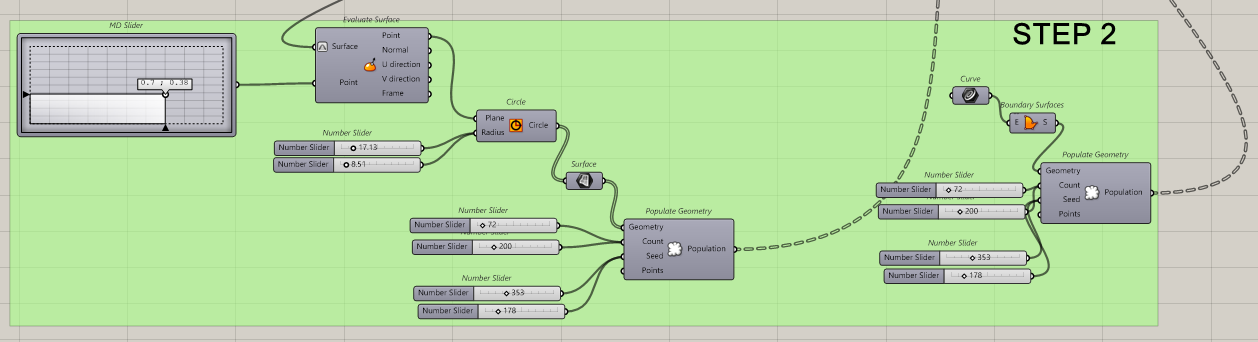
STEP 2: Creating Attractors
- Use the Evaluate Surface tool to define a boundary surface.
- Utilize the MD Slider to manipulate the location of point attractors on the surface.
- Draw circles or any closed curves to define additional boundaries for attracting more points.
- Populate the defined circles or curves with points using the Populate Geometry tool.
- the count and radius of the points to control the distribution of Voronoi cells.
- Utilize seeds to add randomness to the distribution of points.
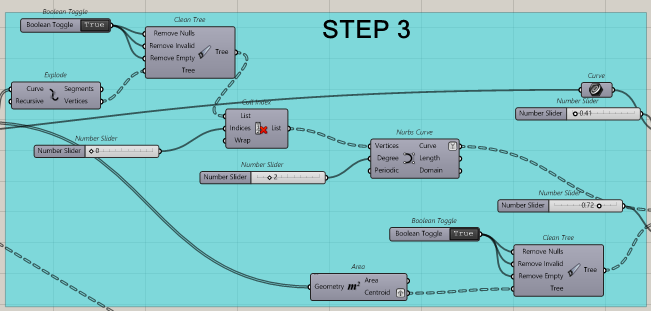
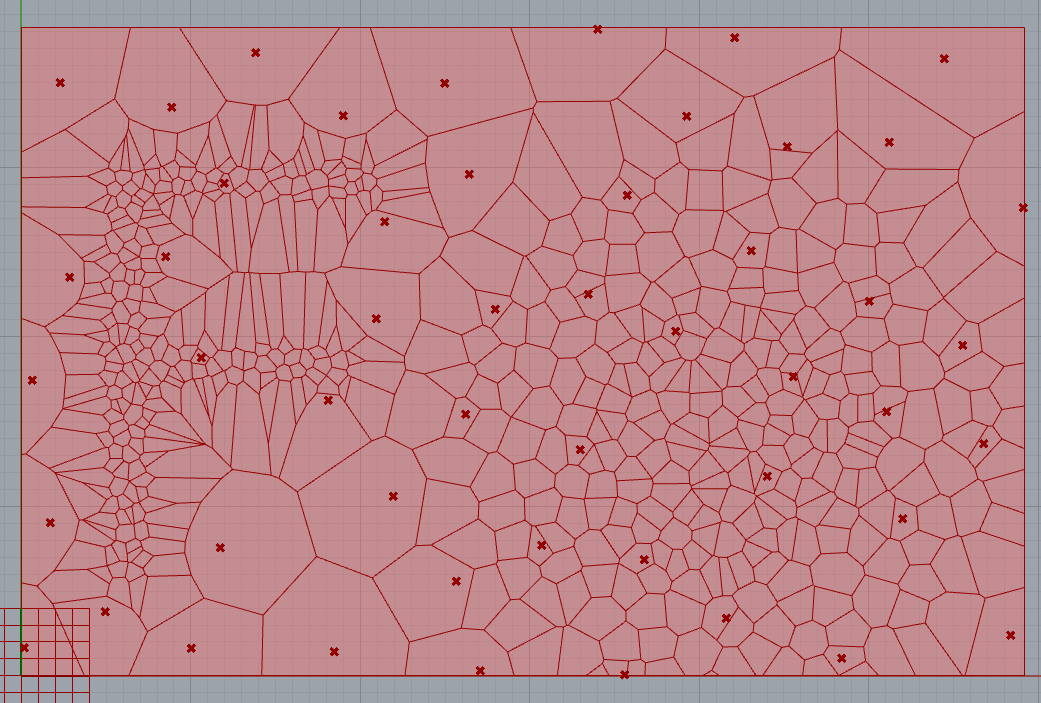
STEP 3: Converting Points to Curves and Cleaning issues
- Use the Explode component to convert Voronoi cells into vertices.
- Create NURBS curves from the vertices to represent the boundaries of the Voronoi cells.
- Handle potential issues with small curves by adjusting parameters and cleaning data.
- Identify and address empty data groups using the ‘Clean Tree’ function.
- Remove null, invalid, and empty data using a toggle switch.
- Resolve issues with polygon ends by adjusting settings in the ‘Sets’ menu, specifically the ‘Call Index’ tool and setting periodic input to true.
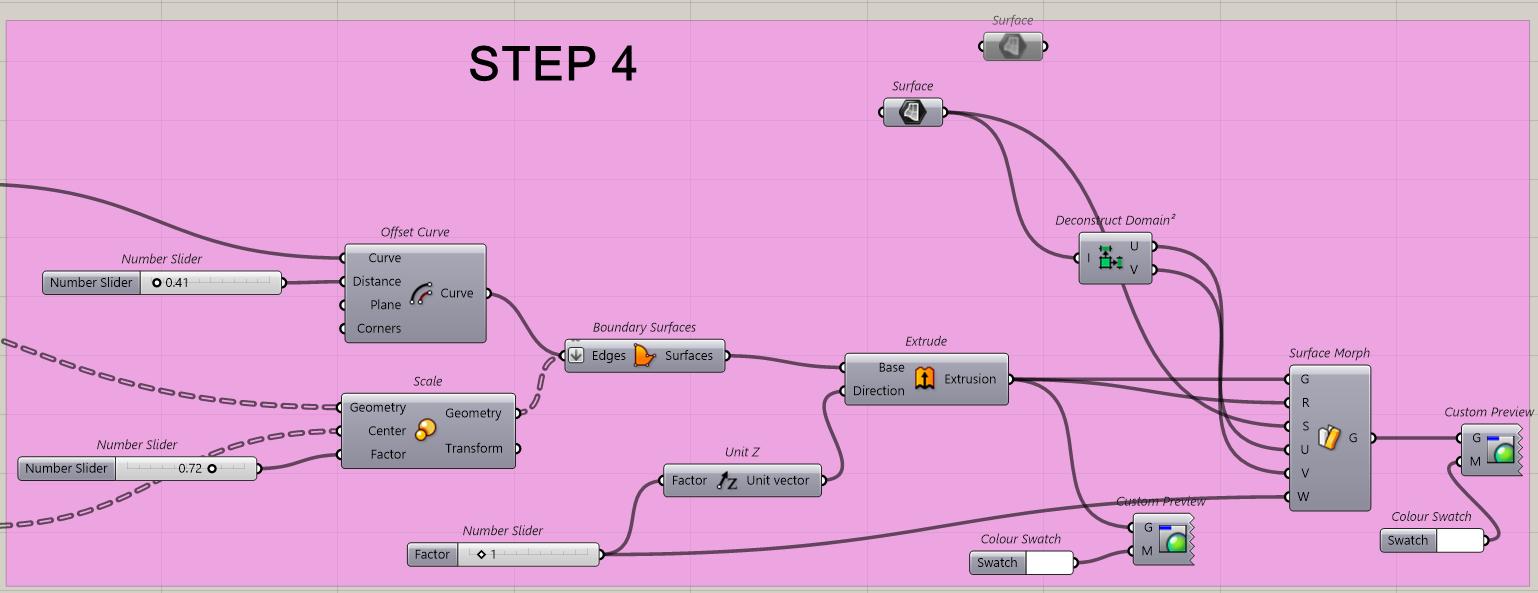
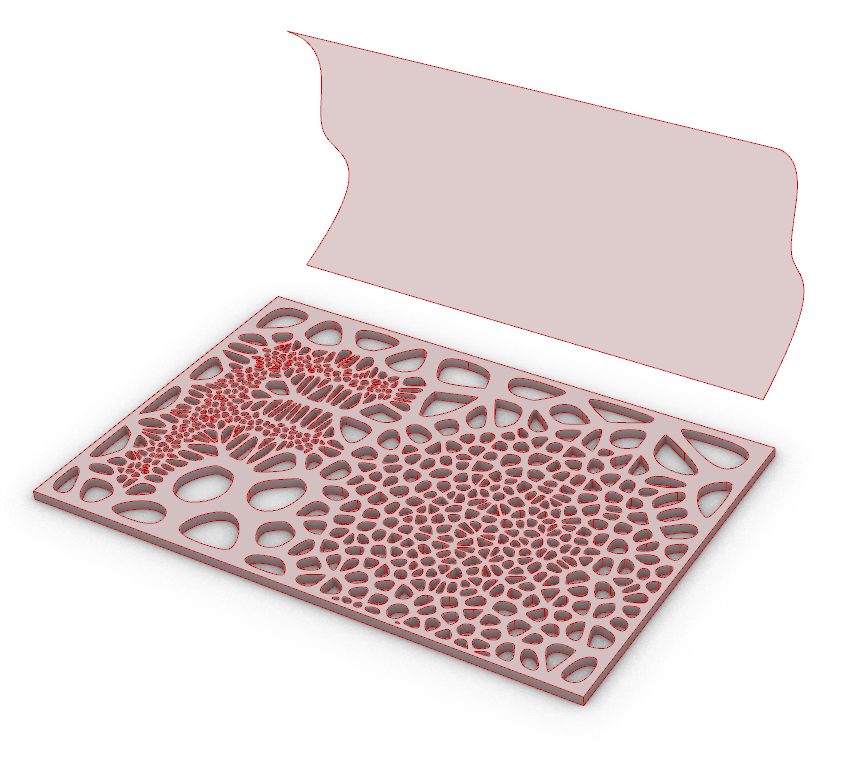
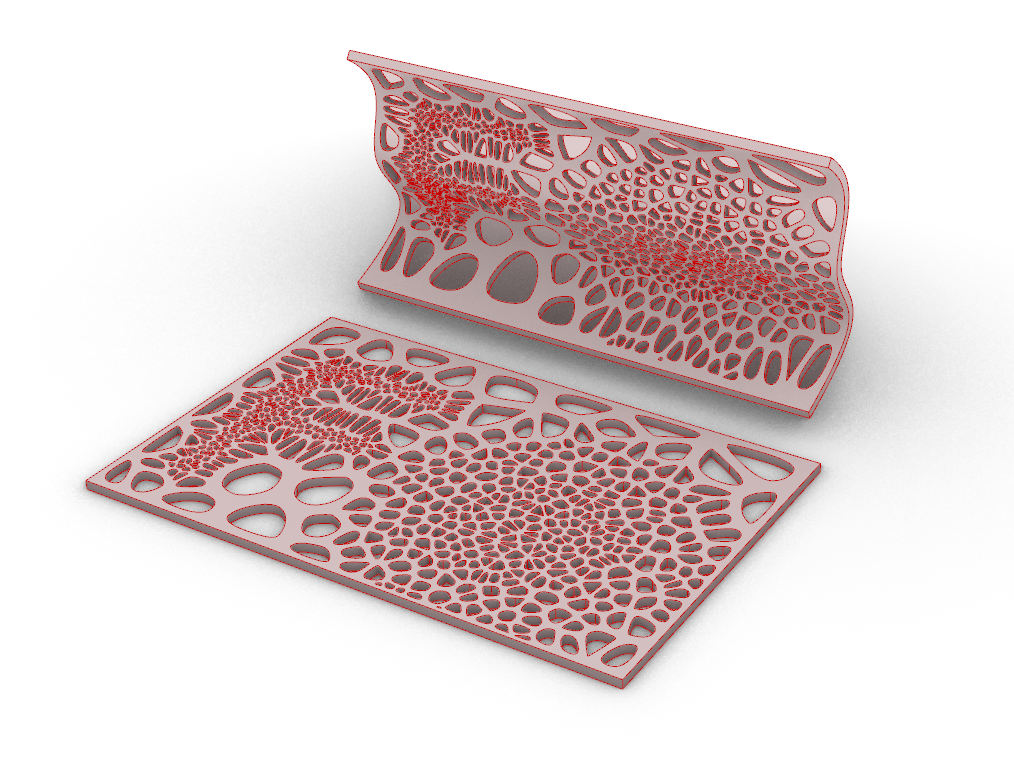
STEP 4: Creating offset and converting Curves into Surfaces and Applying source surfaces ( patterns ) onto the Target Surface
- Scale curves using percentages and adjust parameters as needed.
- Create offset curves using the ‘Offset Curve’ tool.
- Combine sets of curves using ‘Boundary Surface’ and flatten data to create a unified surface.
- Applying custom Voronoi pattern (source surface) onto the target trough Surface morph
- Add your custom Voronoi pattern (source surface) as Geometry and reference parameters Deconstruct domain from your target surface using ‘Deconstruct domain’ function for your U and V paramets and use target surface as S parameter and add a slider or connect existing one from extrusion for your W parameter