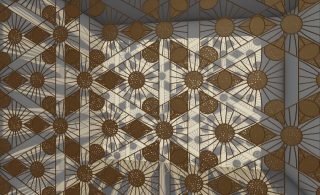
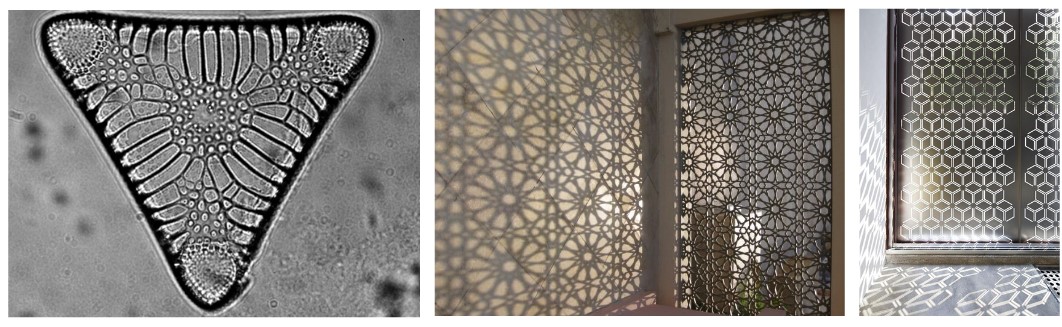
This tutorial topic was inspired by a diatom called TRICERATIUM MORLANDII. The lattice-like structure provides support and protection to the cell, maintaining its shape and integrity. The intricate patterns and designs of the frustule can also contribute to the buoyancy of diatoms, helping them stay suspended in water and facilitating their movement. These structures also enable them to filter particles based on size, selectively absorb nutrients, concentrate pollutants, manipulate light, and act as biogenic silica filters. I used its filtering properties of this diatom and make a light-filtering facade. By playing with overlapping I made different patterns, that could be used as a light filtering screen for a terrace or decorative partition wall for indoors.
Inspiration
Step-by-step tutorial
1. step
Construct inner and outer polygon.
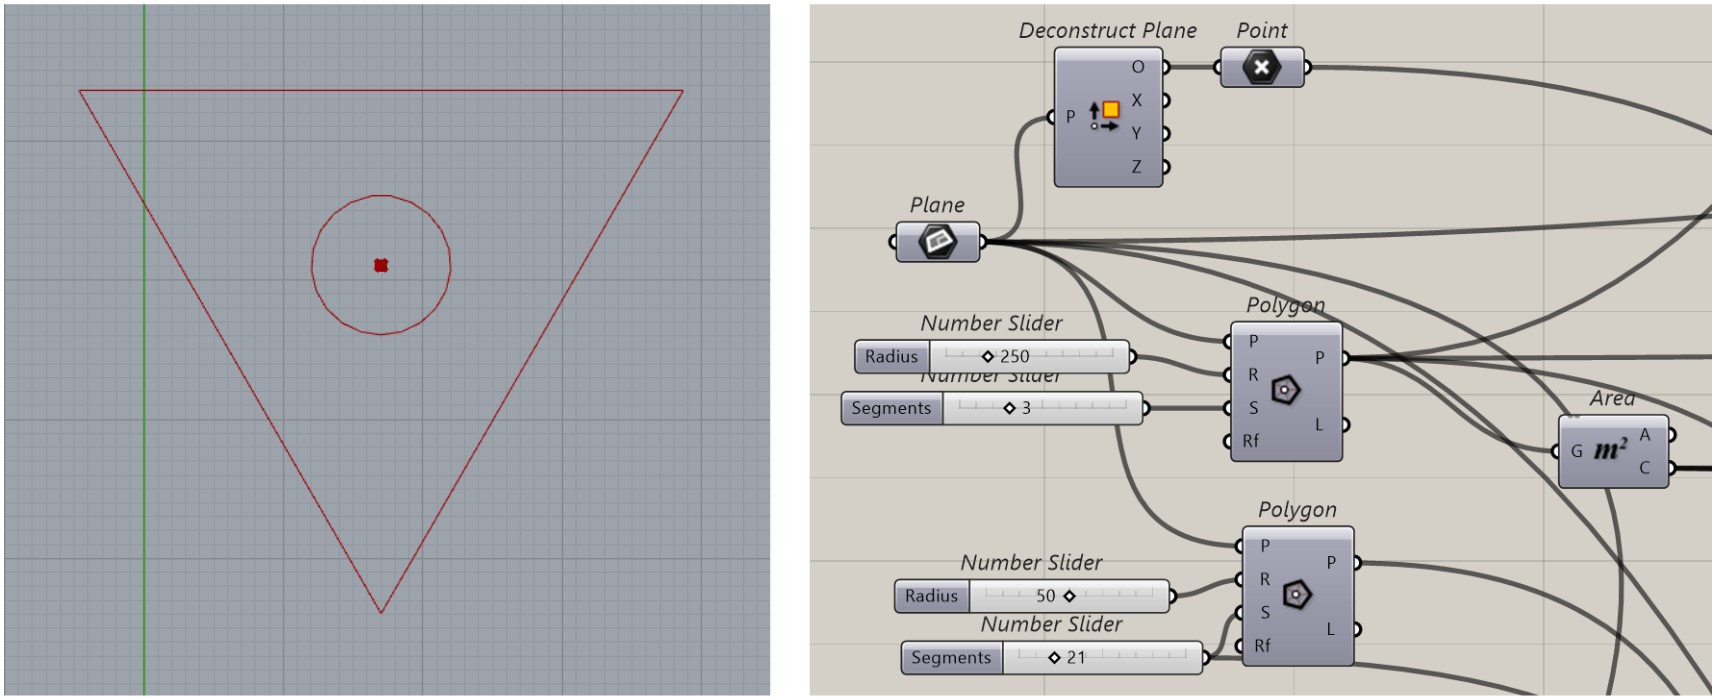
2. step
Construct arcs in the corners – at first one, and then by using “Polar array” copy and rotate it twice.
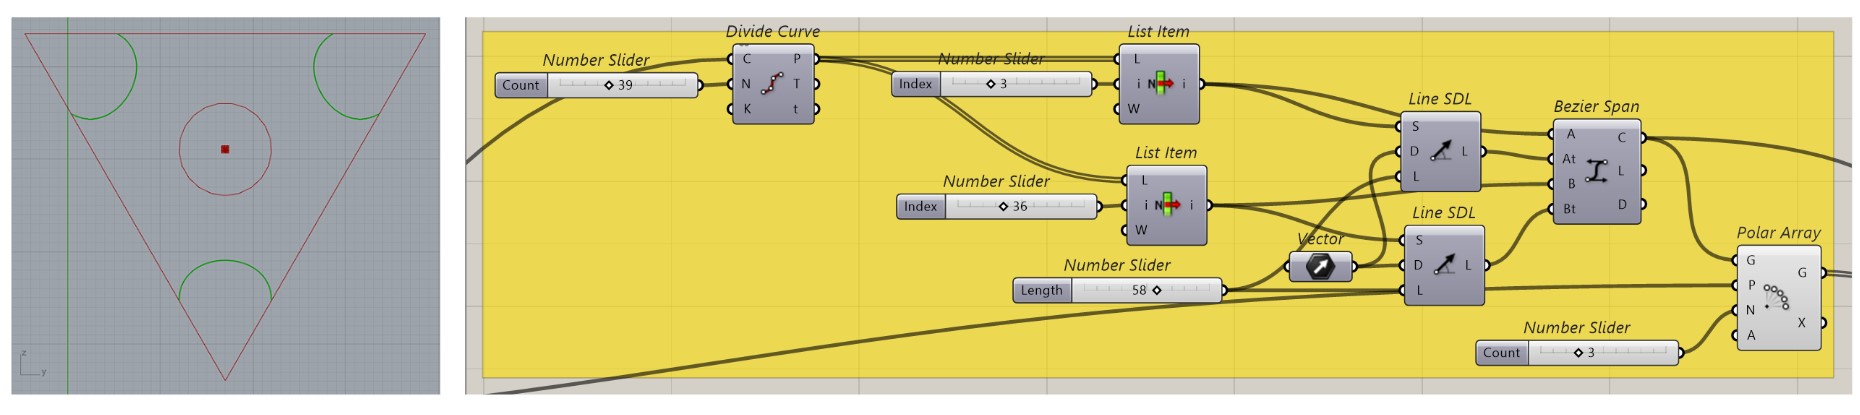
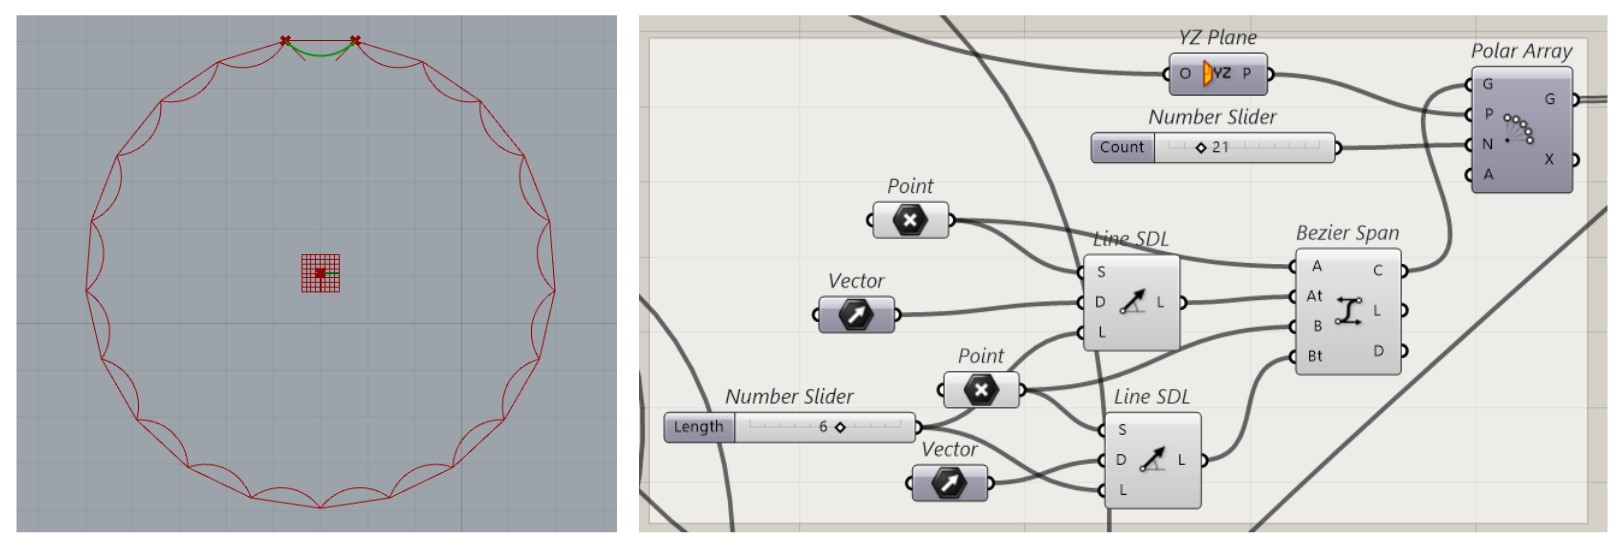
3. step
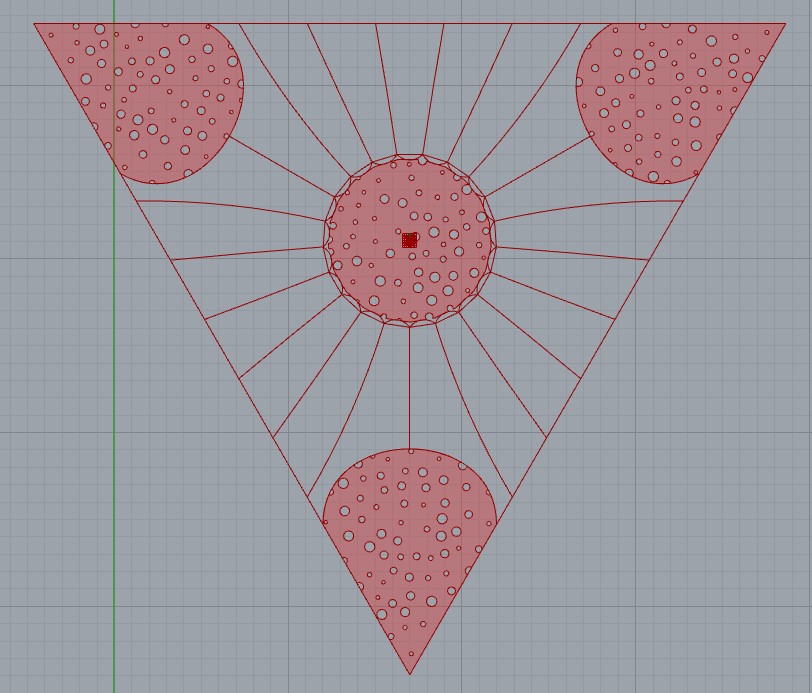
Create arcs in the inner polygon.
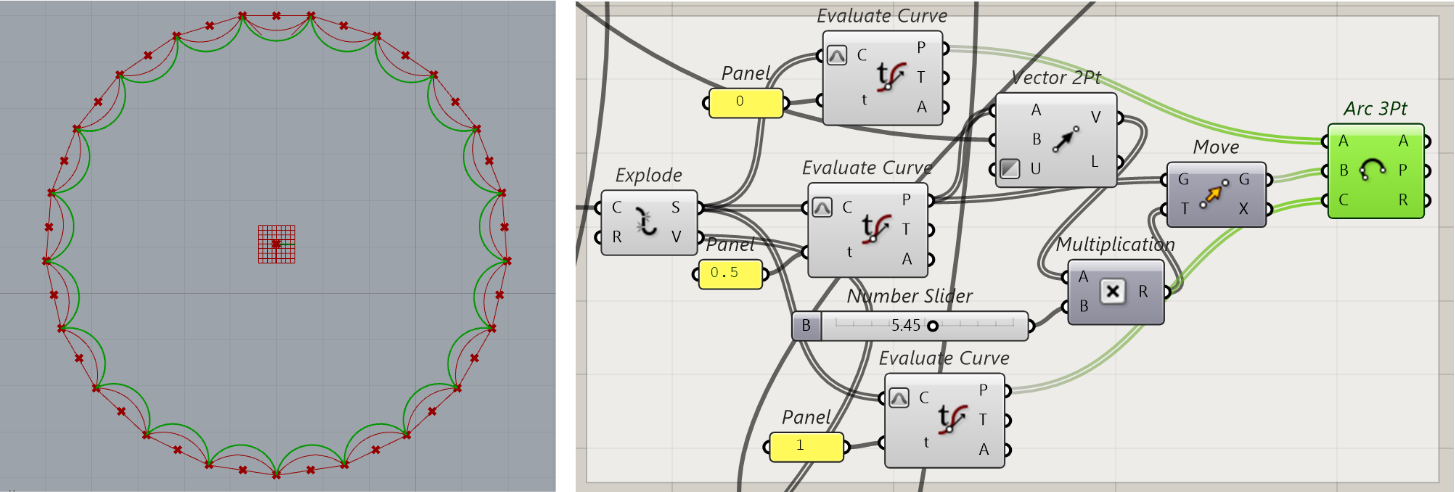
1. approach
Bake the existing polygon, use two points, that are next to each other, and by using 45-degree vectors, construct a bezier span. After that create a “Polar Array” of this geometry.
2. approach
Construct 3-point arcs by using points from the component “Evaluate Curve”. Just don’t forget to reparametrize the input data. In this way, it is even possible to change the curvature of the arcs.
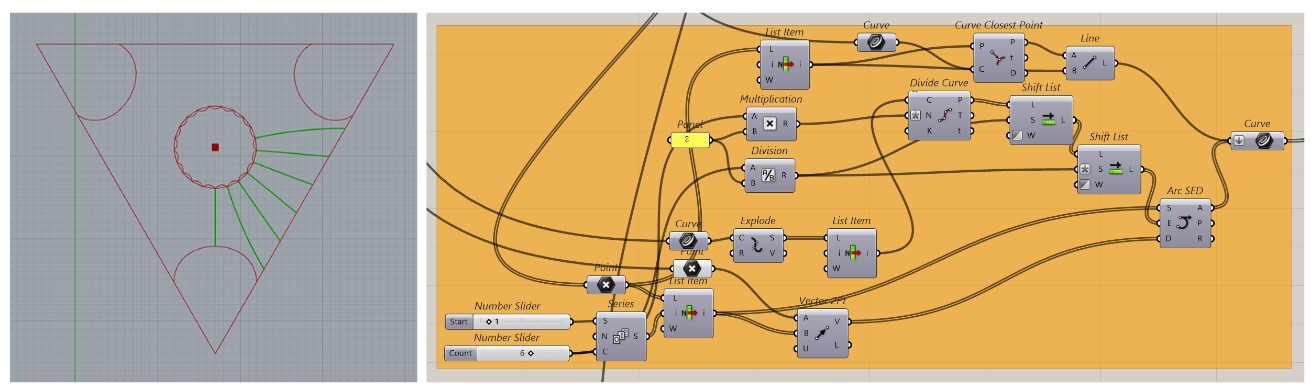
4. step
Construct curves, that connect points of the inner polygon with points of the outer polygon. Draw a separate line from the inner polygon to the midpoint of an arc in the corner.
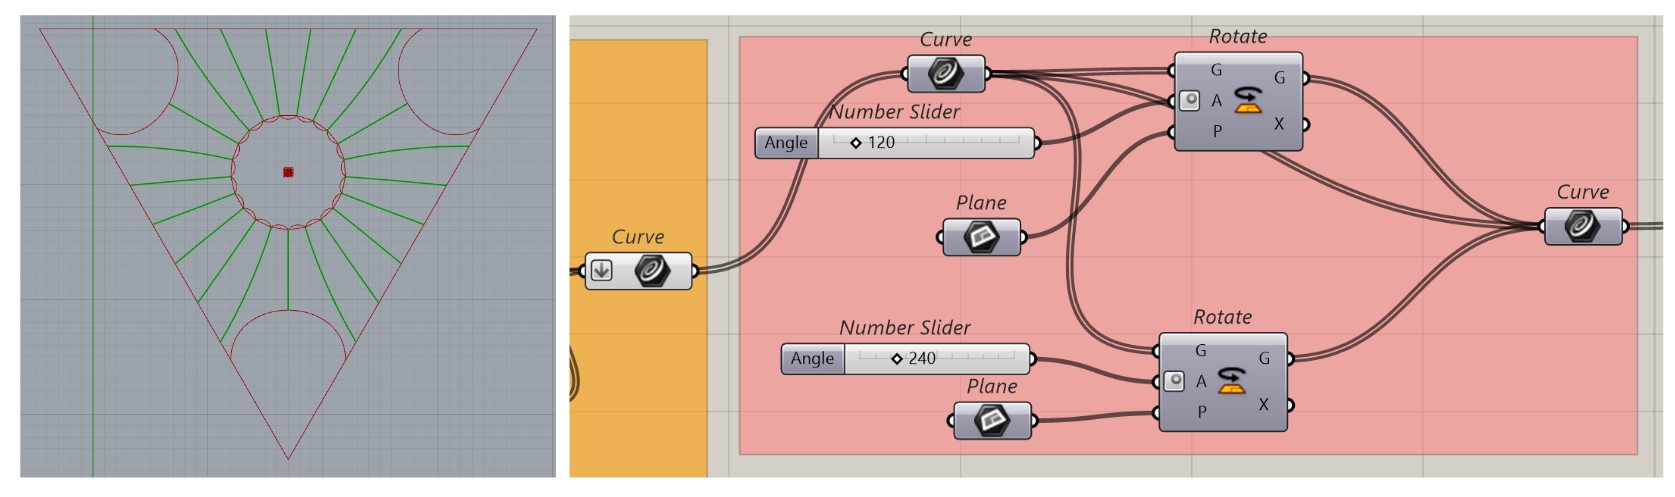
5. step
Rotate it twice, also possible to do it with “Polar Array” as we did it before.
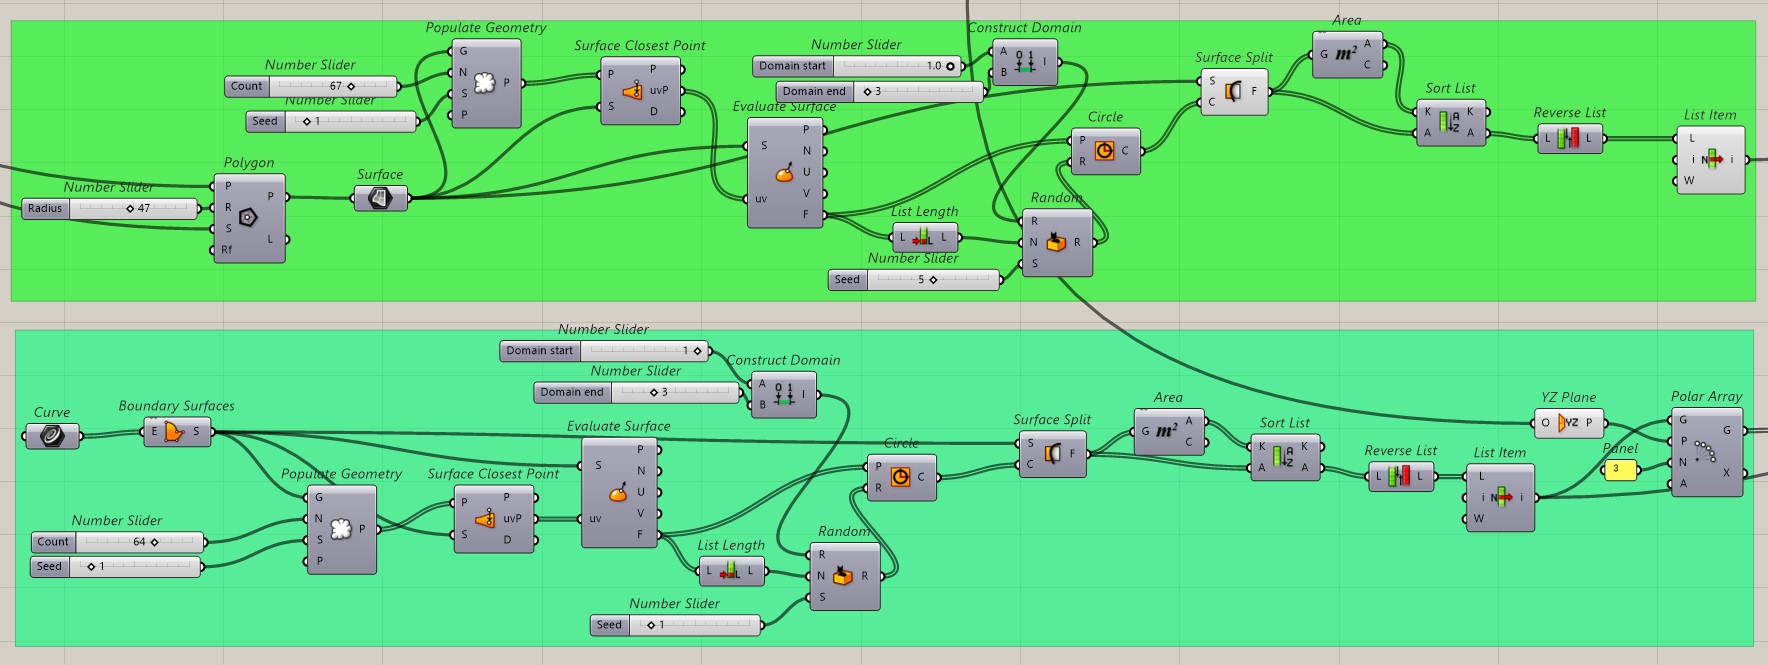
6. step
Construct a surface with holes in the inner polygon. First, populate geometry to get the points, then find the coordinates of the closest points, evaluate them, and draw randomized circles around each of them. After that split surface to get the fragments and “cut out” the holes. Repeat the same with surfaces in the corners.
7. step
Give all the curves volume by using Dendro marching cubes and smoothen them by using Weavebird’s plugin.

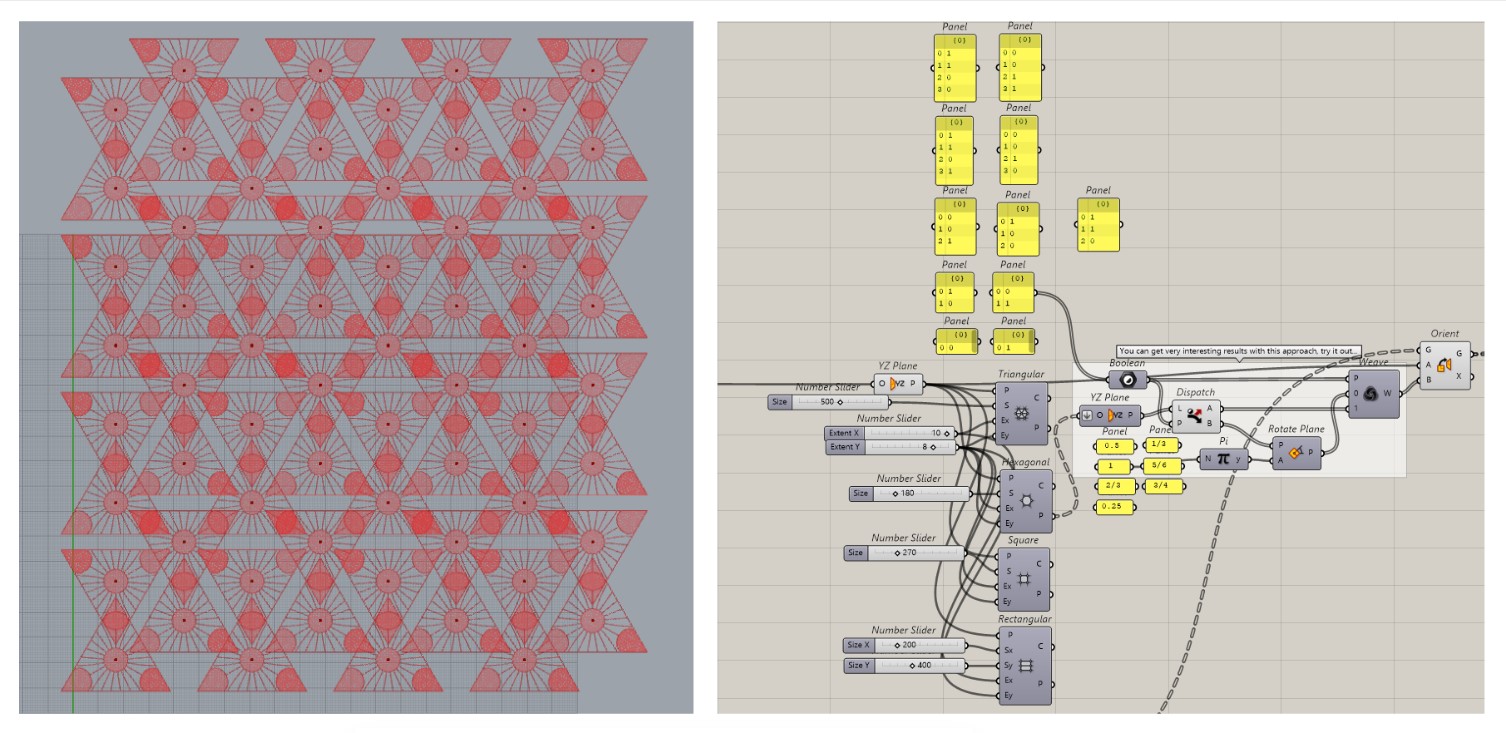
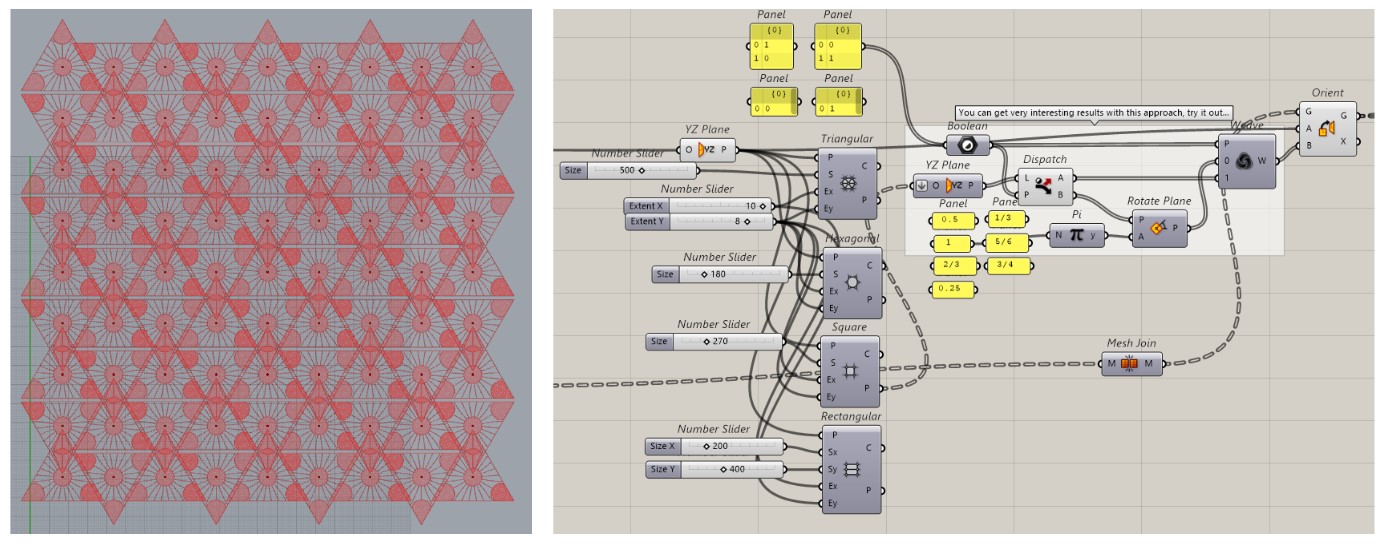
8. step
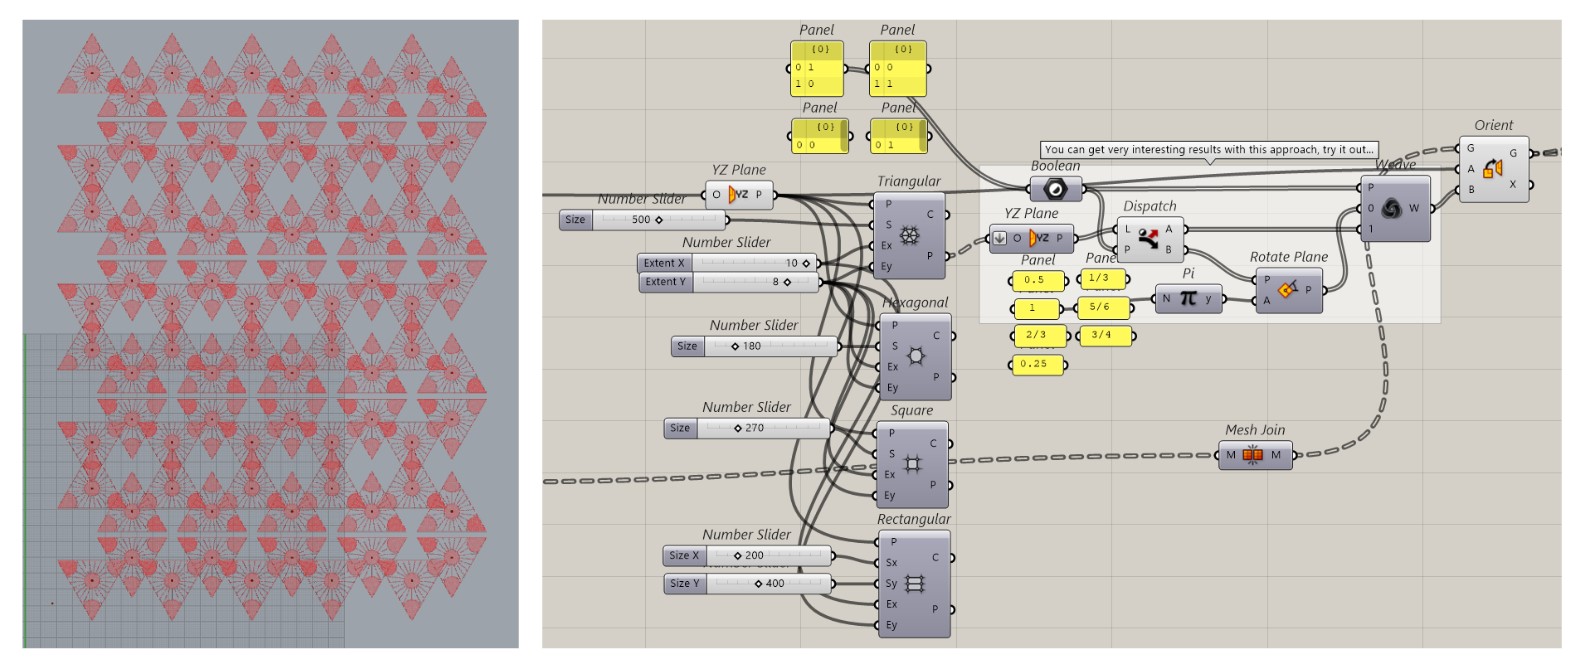
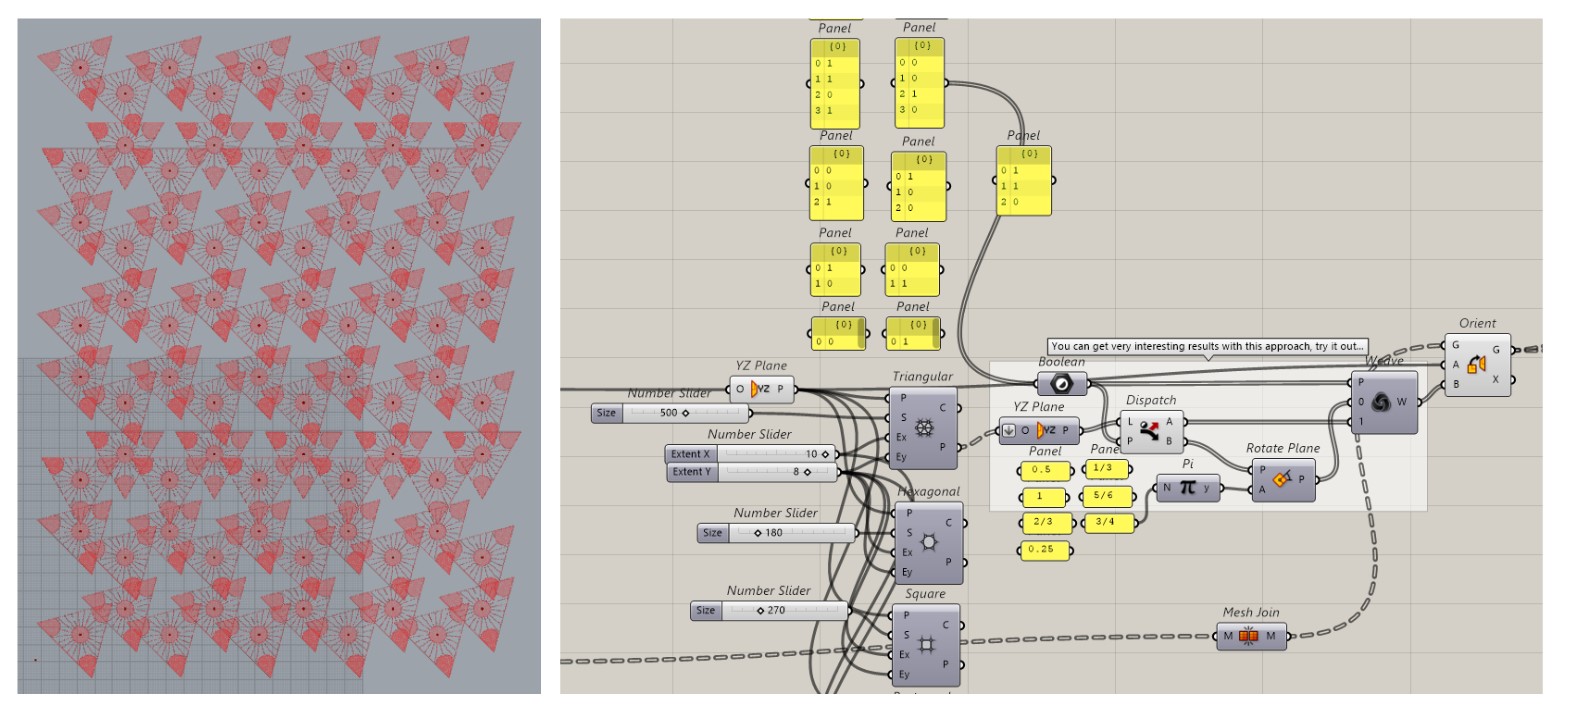
Now is the most interesting part. Merge all previously constructed elements, turn them into meshes, and use them as an input parameter for the grid. Any time you need to perform a large geometrical operation, it is better to use meshes, because it is the most efficient data type and will make the script a lot faster. You can use different kinds of grids to experiment. Then put output points to the plane and use it as a “list” input parameter for dispatch. Try to play with different patterns and rotation angles, after that weave all 3 streams and use “Orient”.
Additional – 9. step
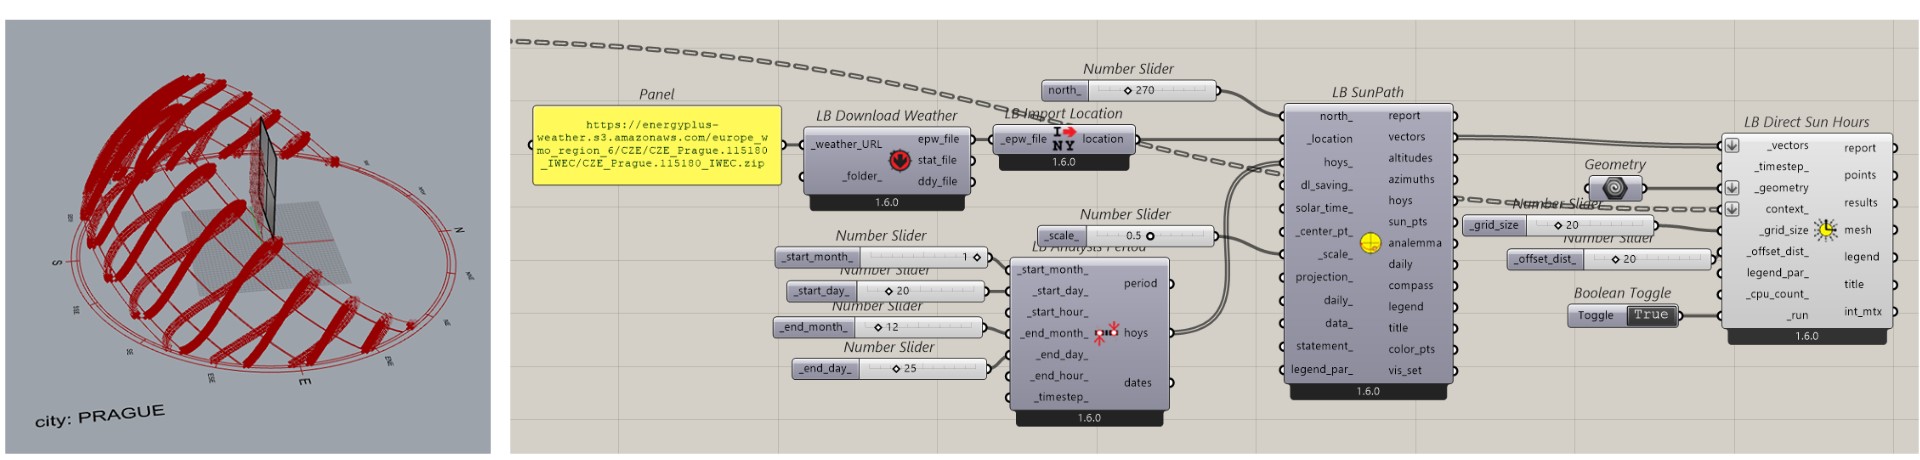
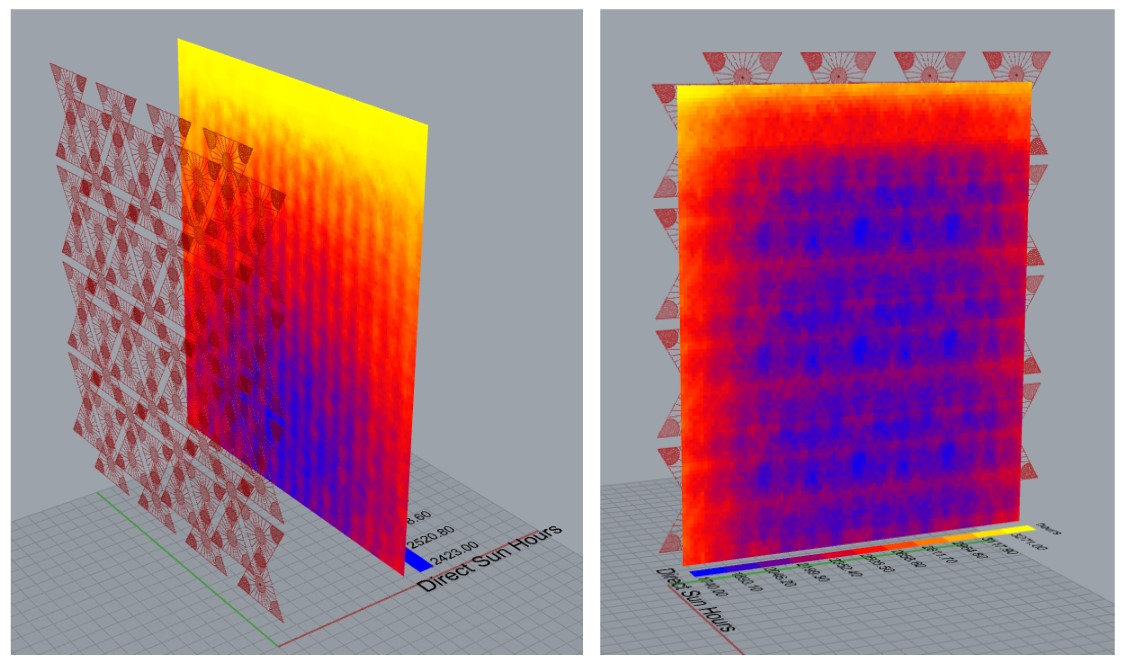
Make sun analysis by using the Lagybug plugin. First, make a SunPath, then, use the output geometry as a context input for “LB direct sun hours”, and draw some surface in rhino and use it as a geometry, on those surfaces the analysis will be calculated.
Overview of the file
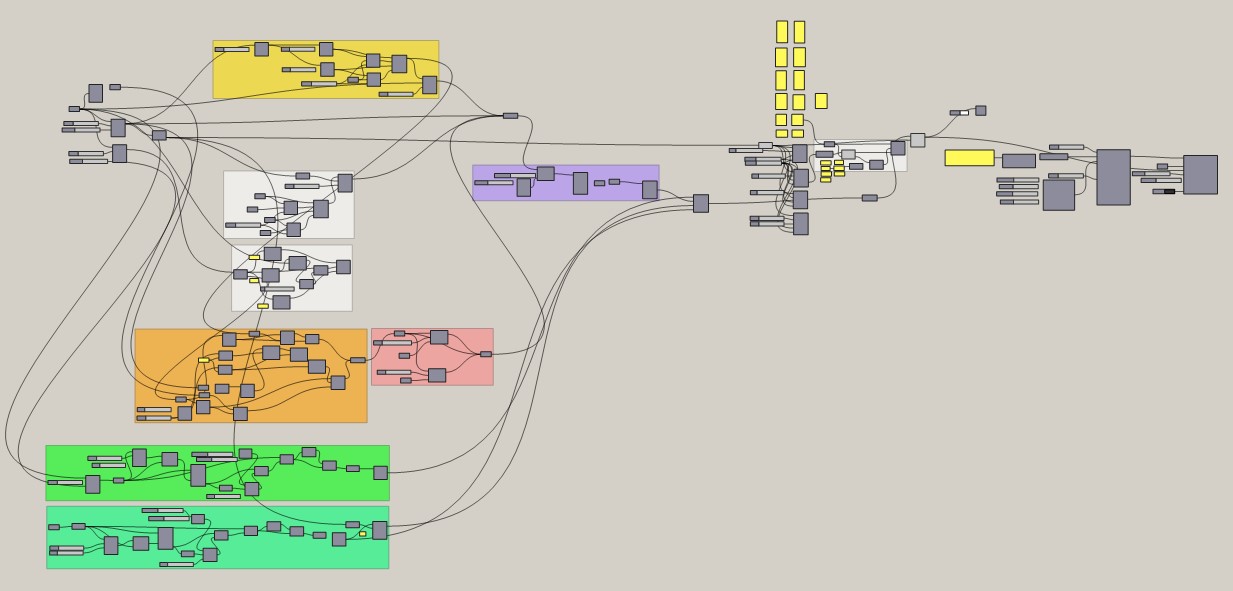
Result
Exporting and rendering in Lumion.
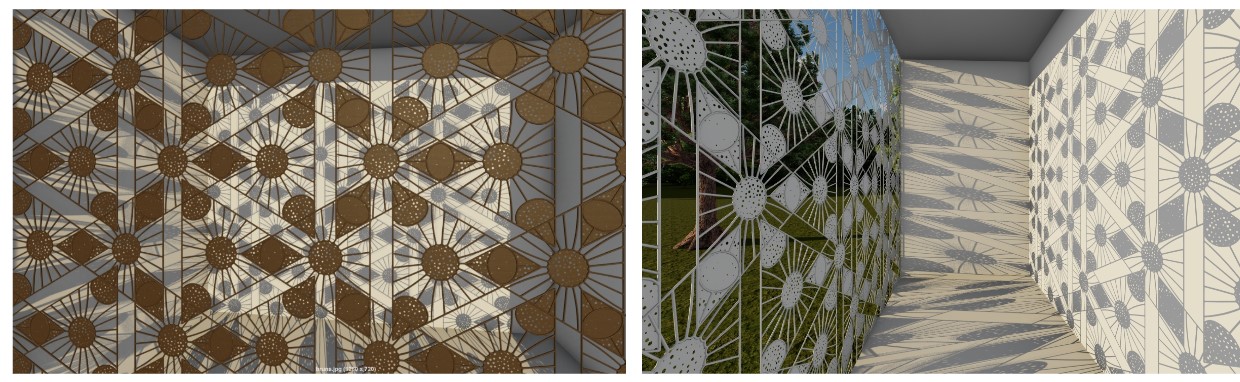
This exact structure could be used as a terrace wall for a private house.
The best patterns for shading, that we should use for the southern part, are the ones with the most overlapping, we can achieve that by decreasing size of grid cells.
Those structures can be fixed in the walls or there should be some mounting structure, where could be added hinges, that the shading could be adjustable.
Files
Plugins
https://www.food4rhino.com/en/app/ladybug-tools