
My semester project on Rhino Grasshopper is linked with our studio main topic: renovation of heritage. How to reconstruct or renovate with the use of a scripting software? I took the example of carpentry, which is something that often comes to be reconstructed, at least partly. For example, according to some new addition required by a renovation project, some elements can be changed (sizing, wood type, etc.). Knowing the vernacular techniques, the grasshopper features gives us the possiblity to model the carpentry and change every parameter according to what’s needed.
For my studio project, the building to renovate is this old barn (section below). Main problems is: as some roof insulation is needed, how to resize elements if this is needed, or in case of extension ?
 As shown below, The process on modeling is the opposite as the construction steps. The main tool needed is to understand the geometry of the carpentry and the relation between each element: which faces, beams, are on the same plane, or symetrical, etc.

Step 0: plan
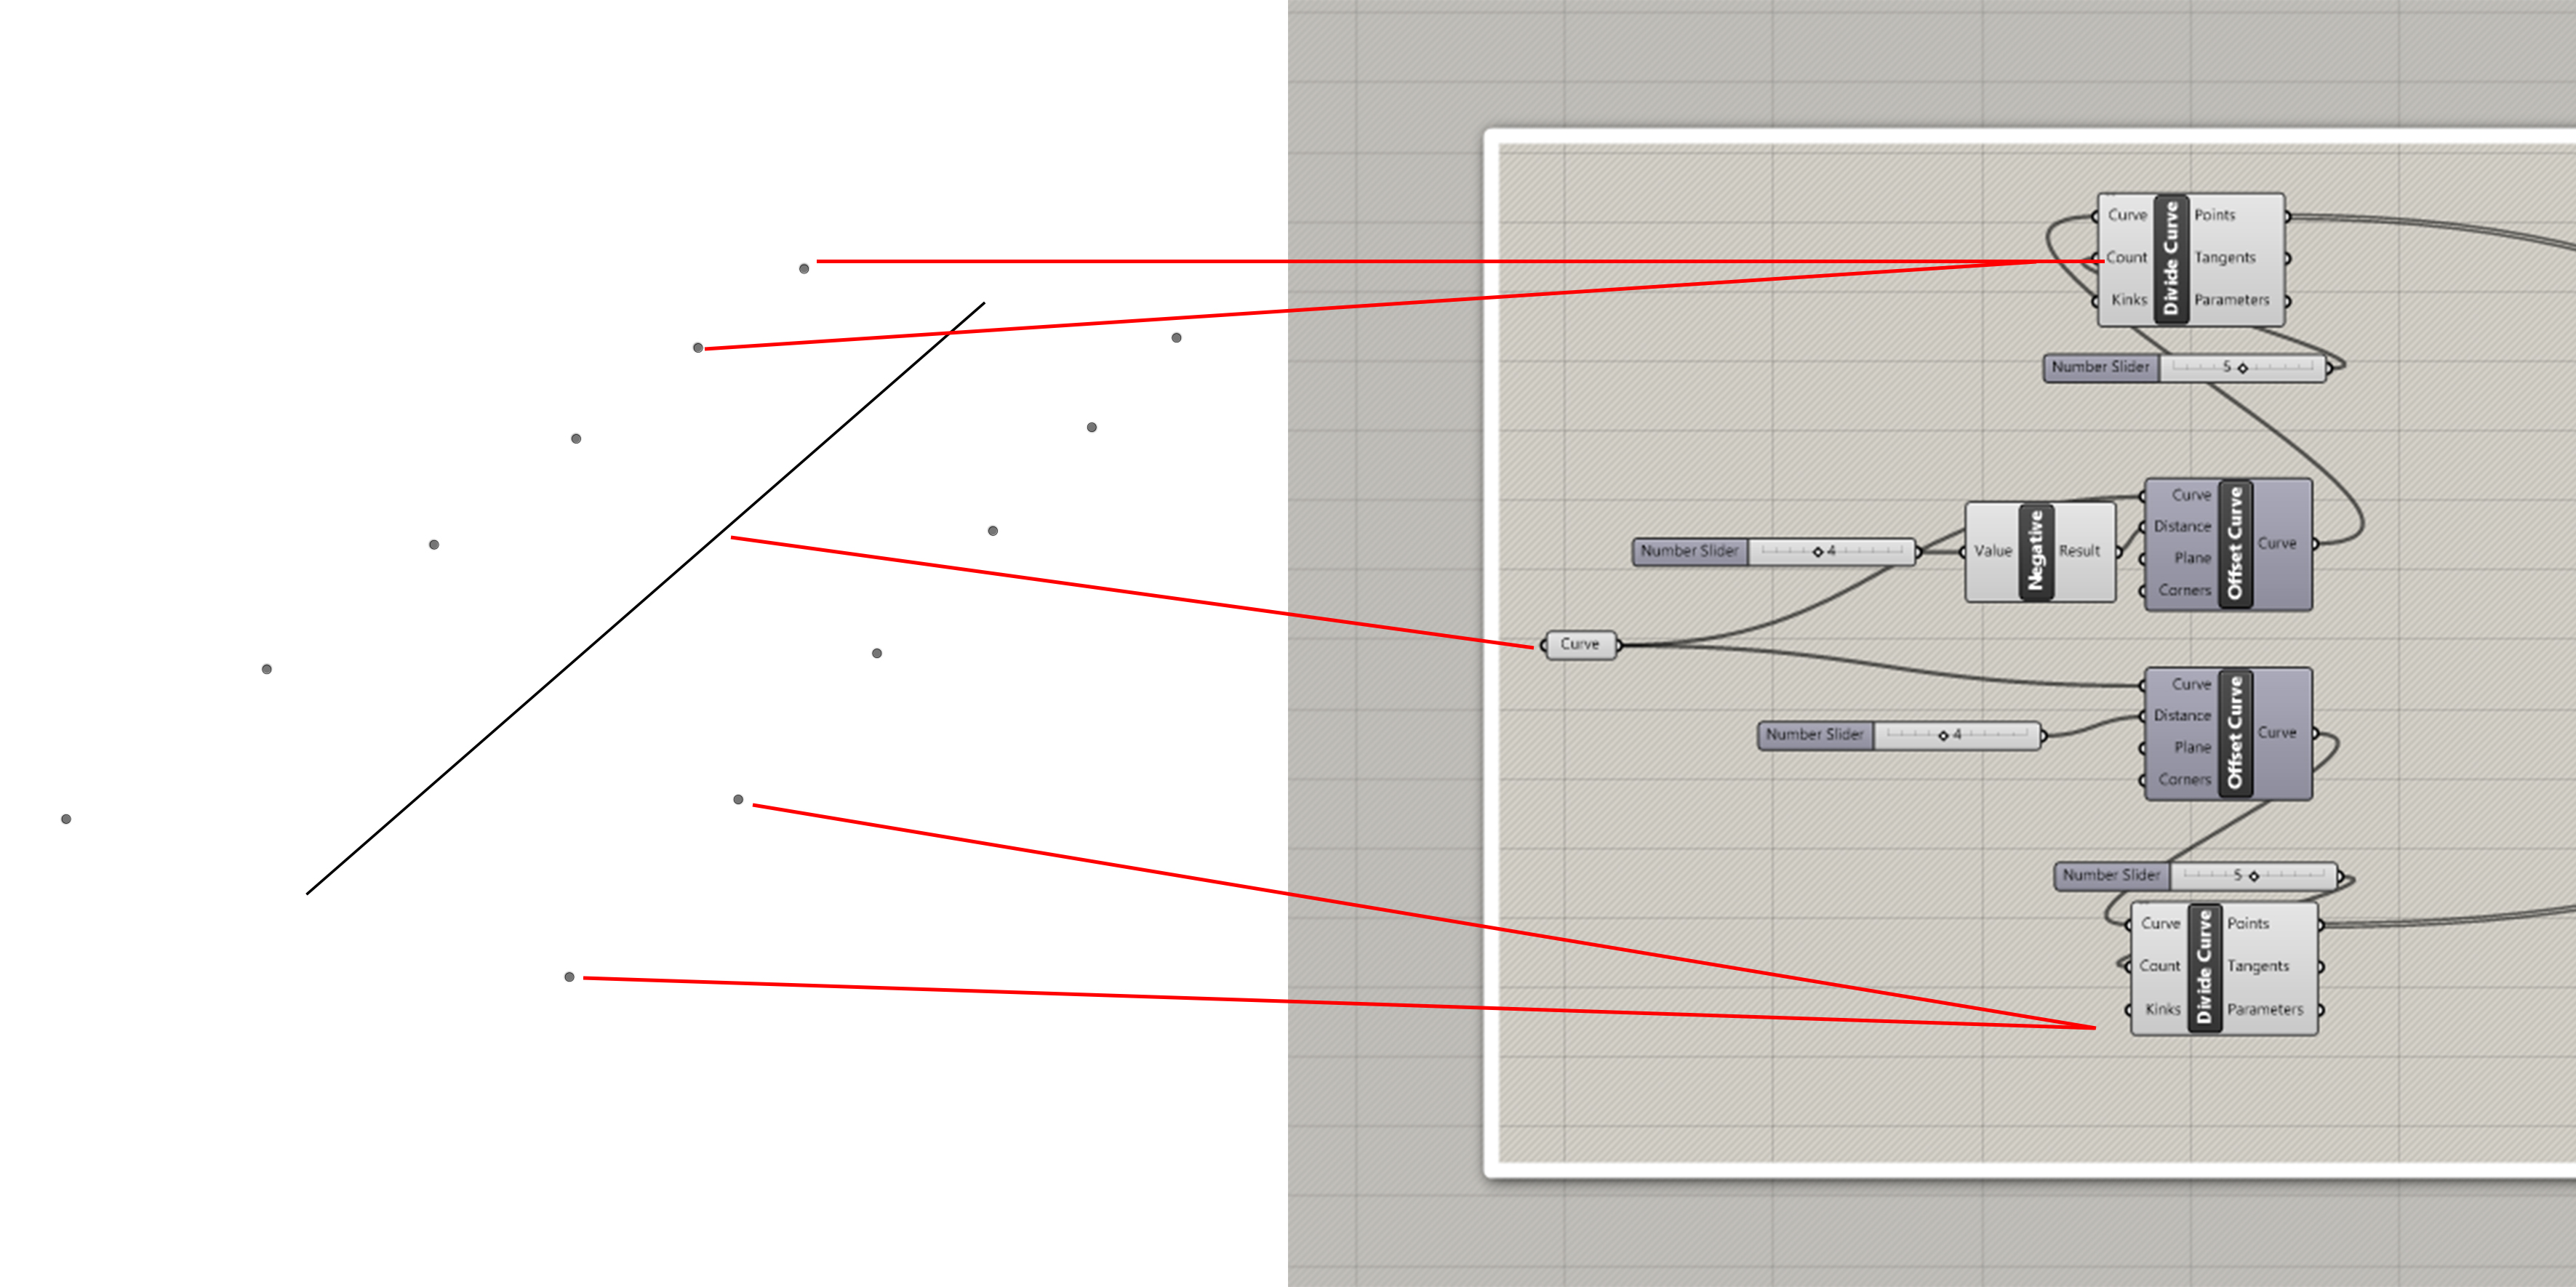
The work begins with defining the anchor points of the carpentry. Starting from a line, we’ll be able to control the x and y coordinates of anchor points of each frame.
 Then I created X and Y vectors, to define a plane specific to the plan.
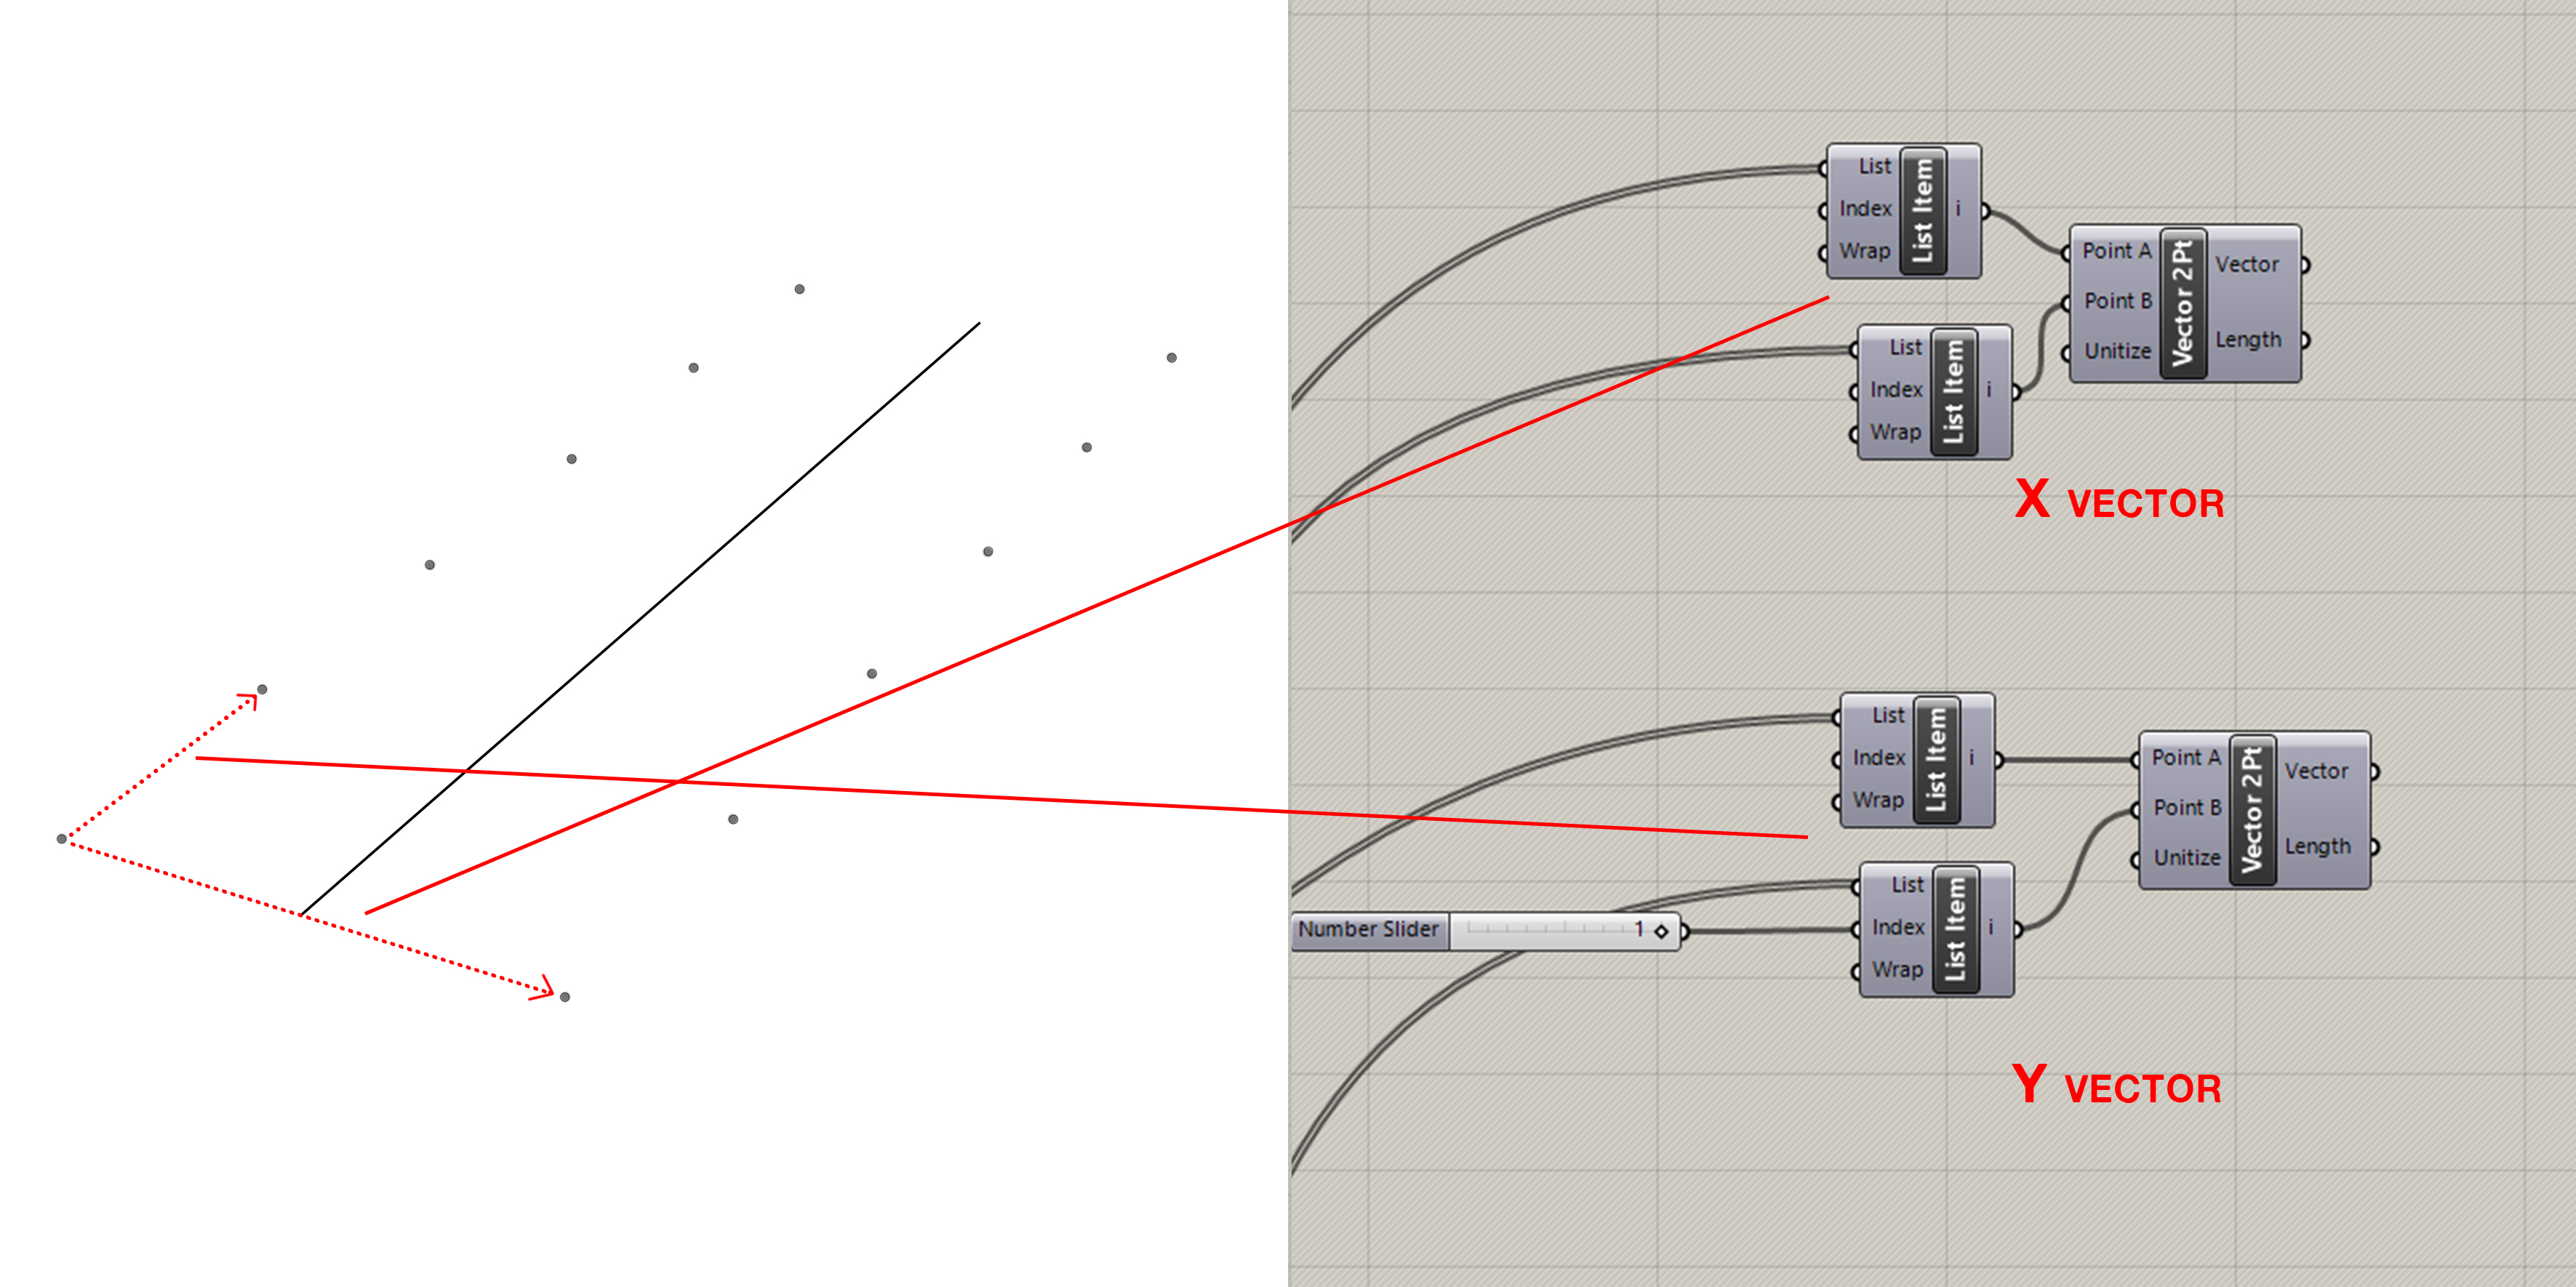
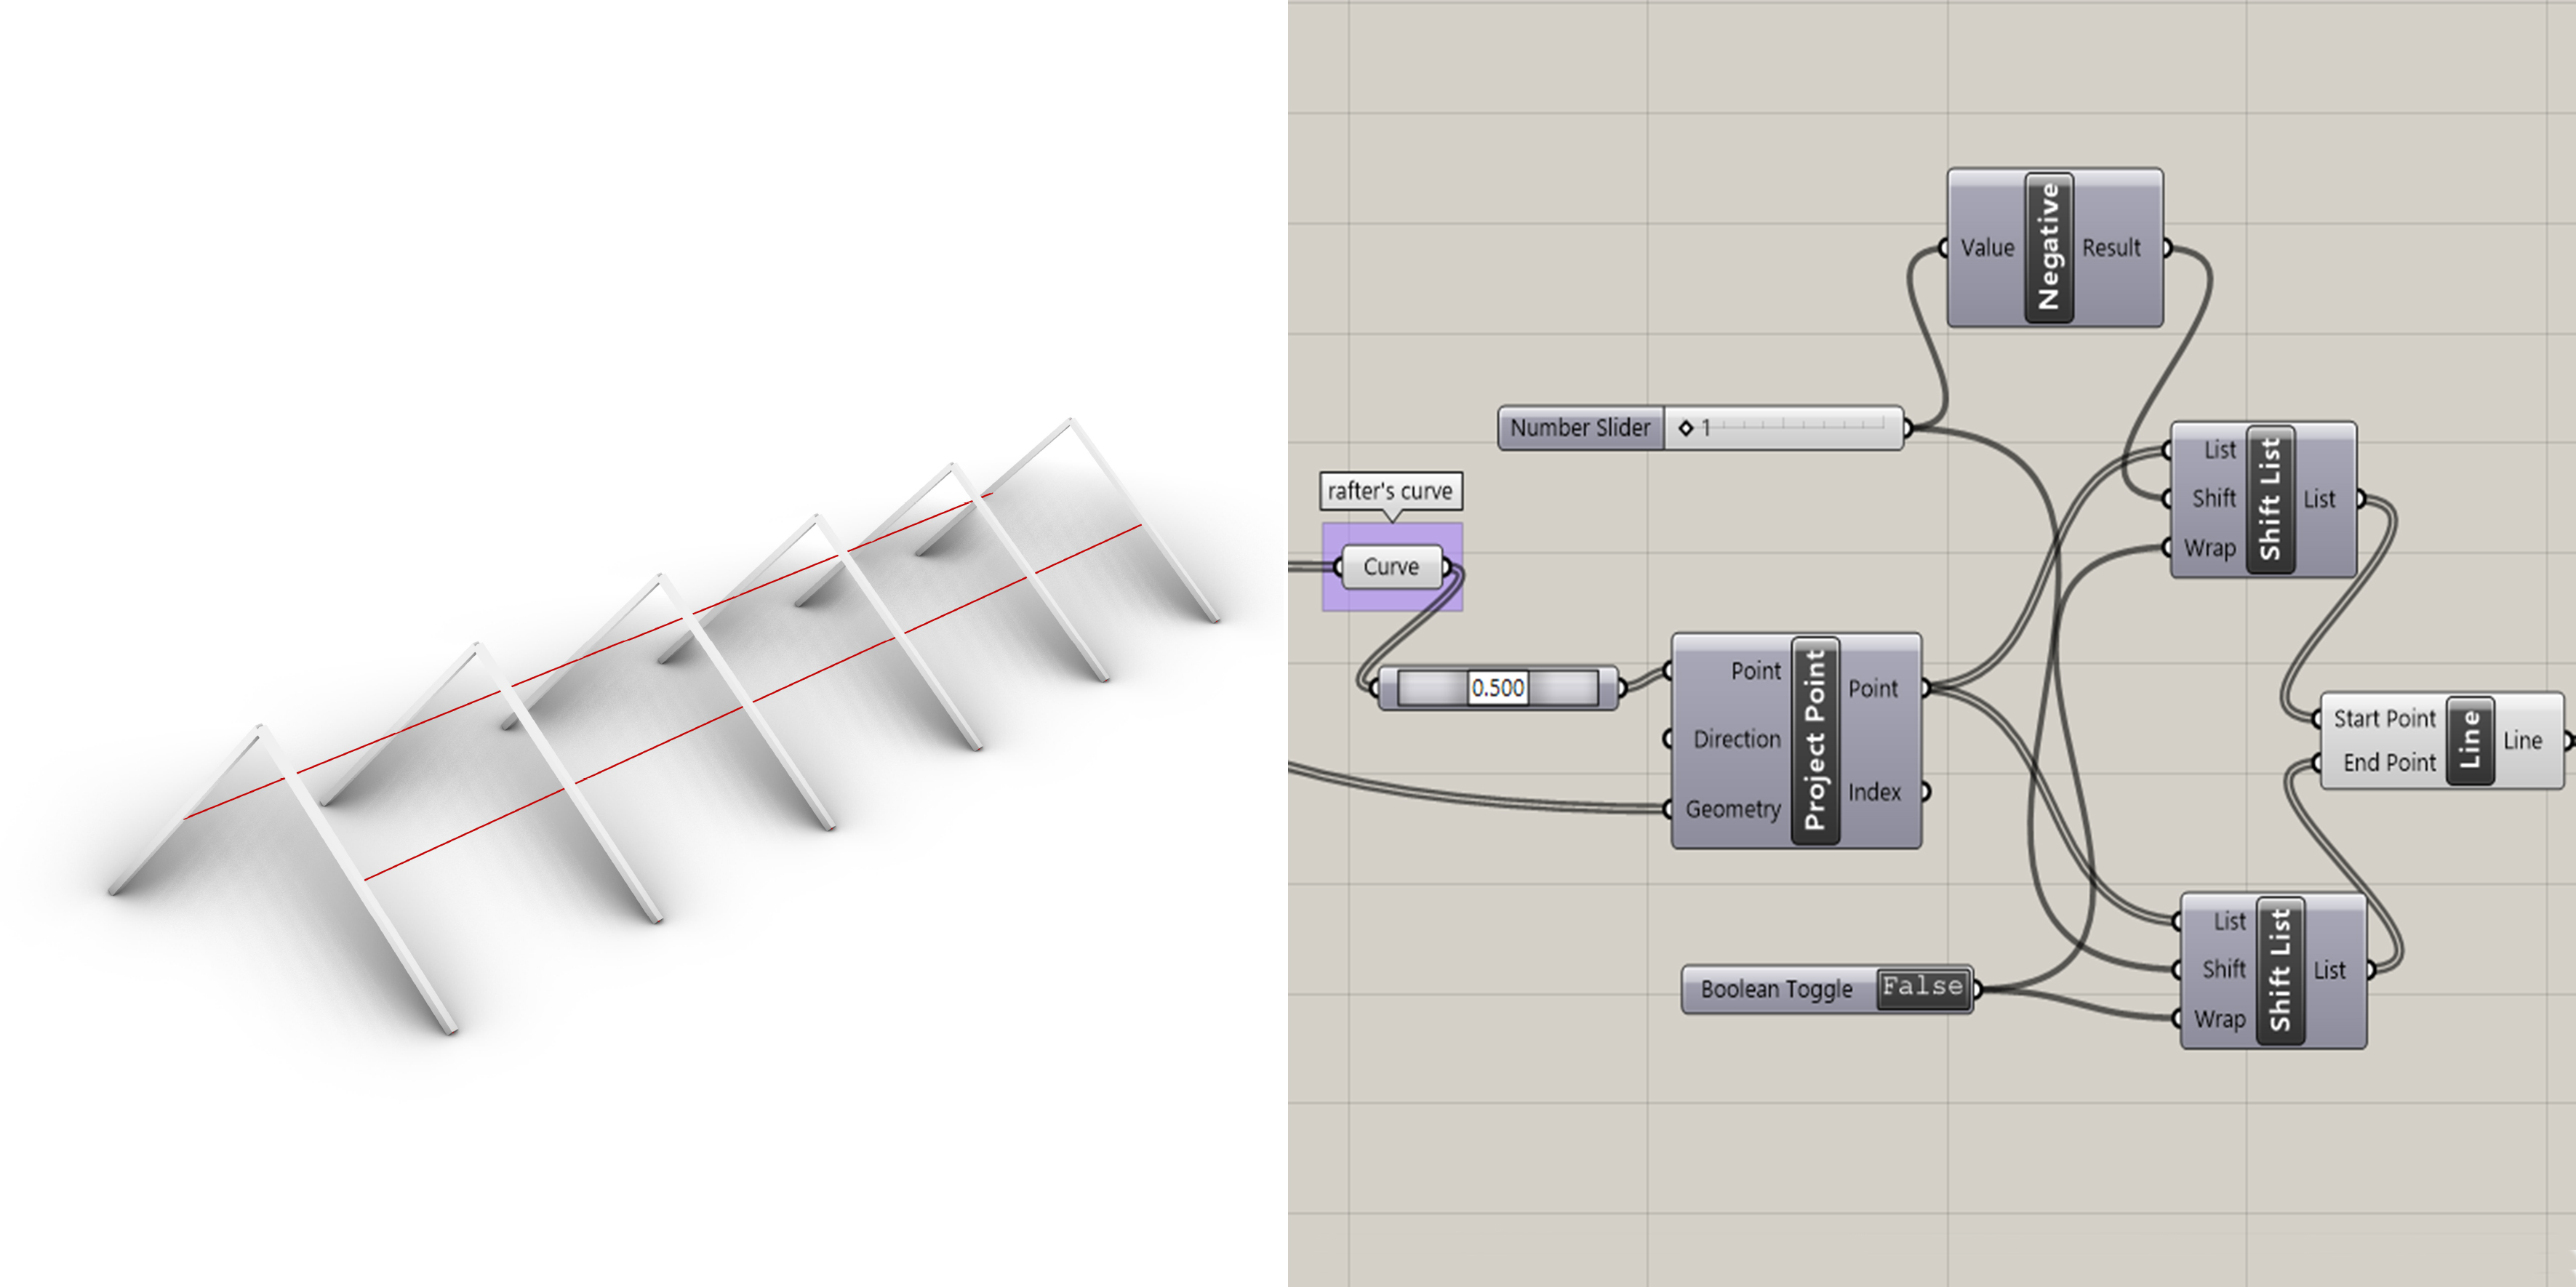
Step 1: rafters
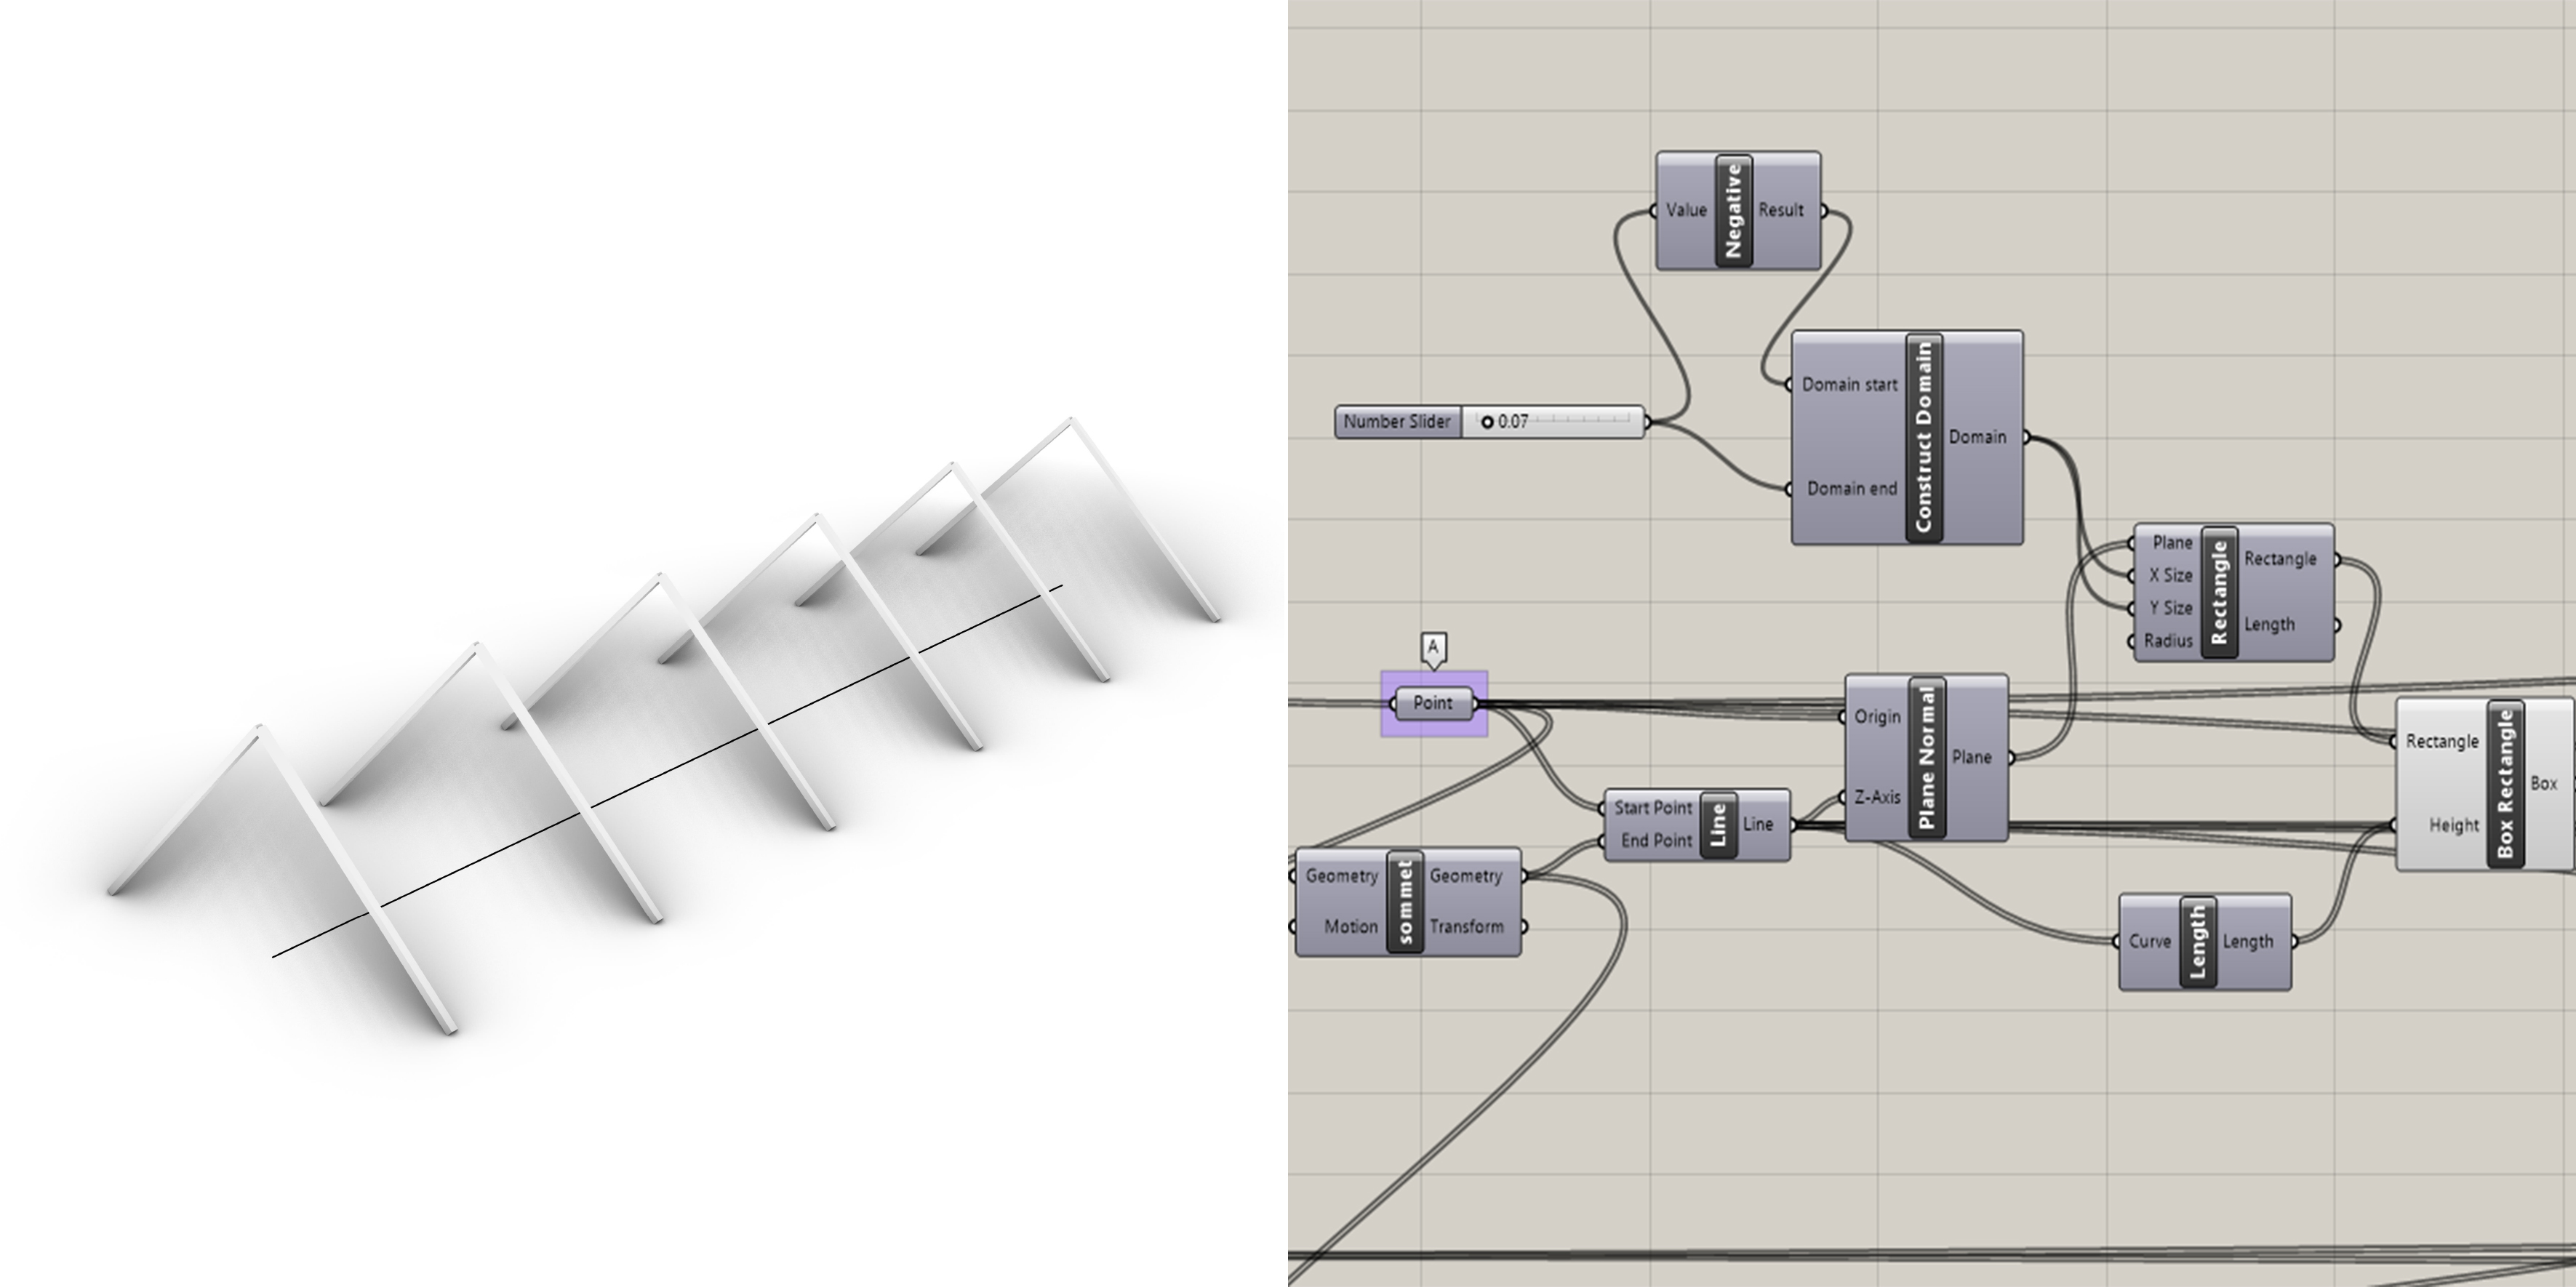
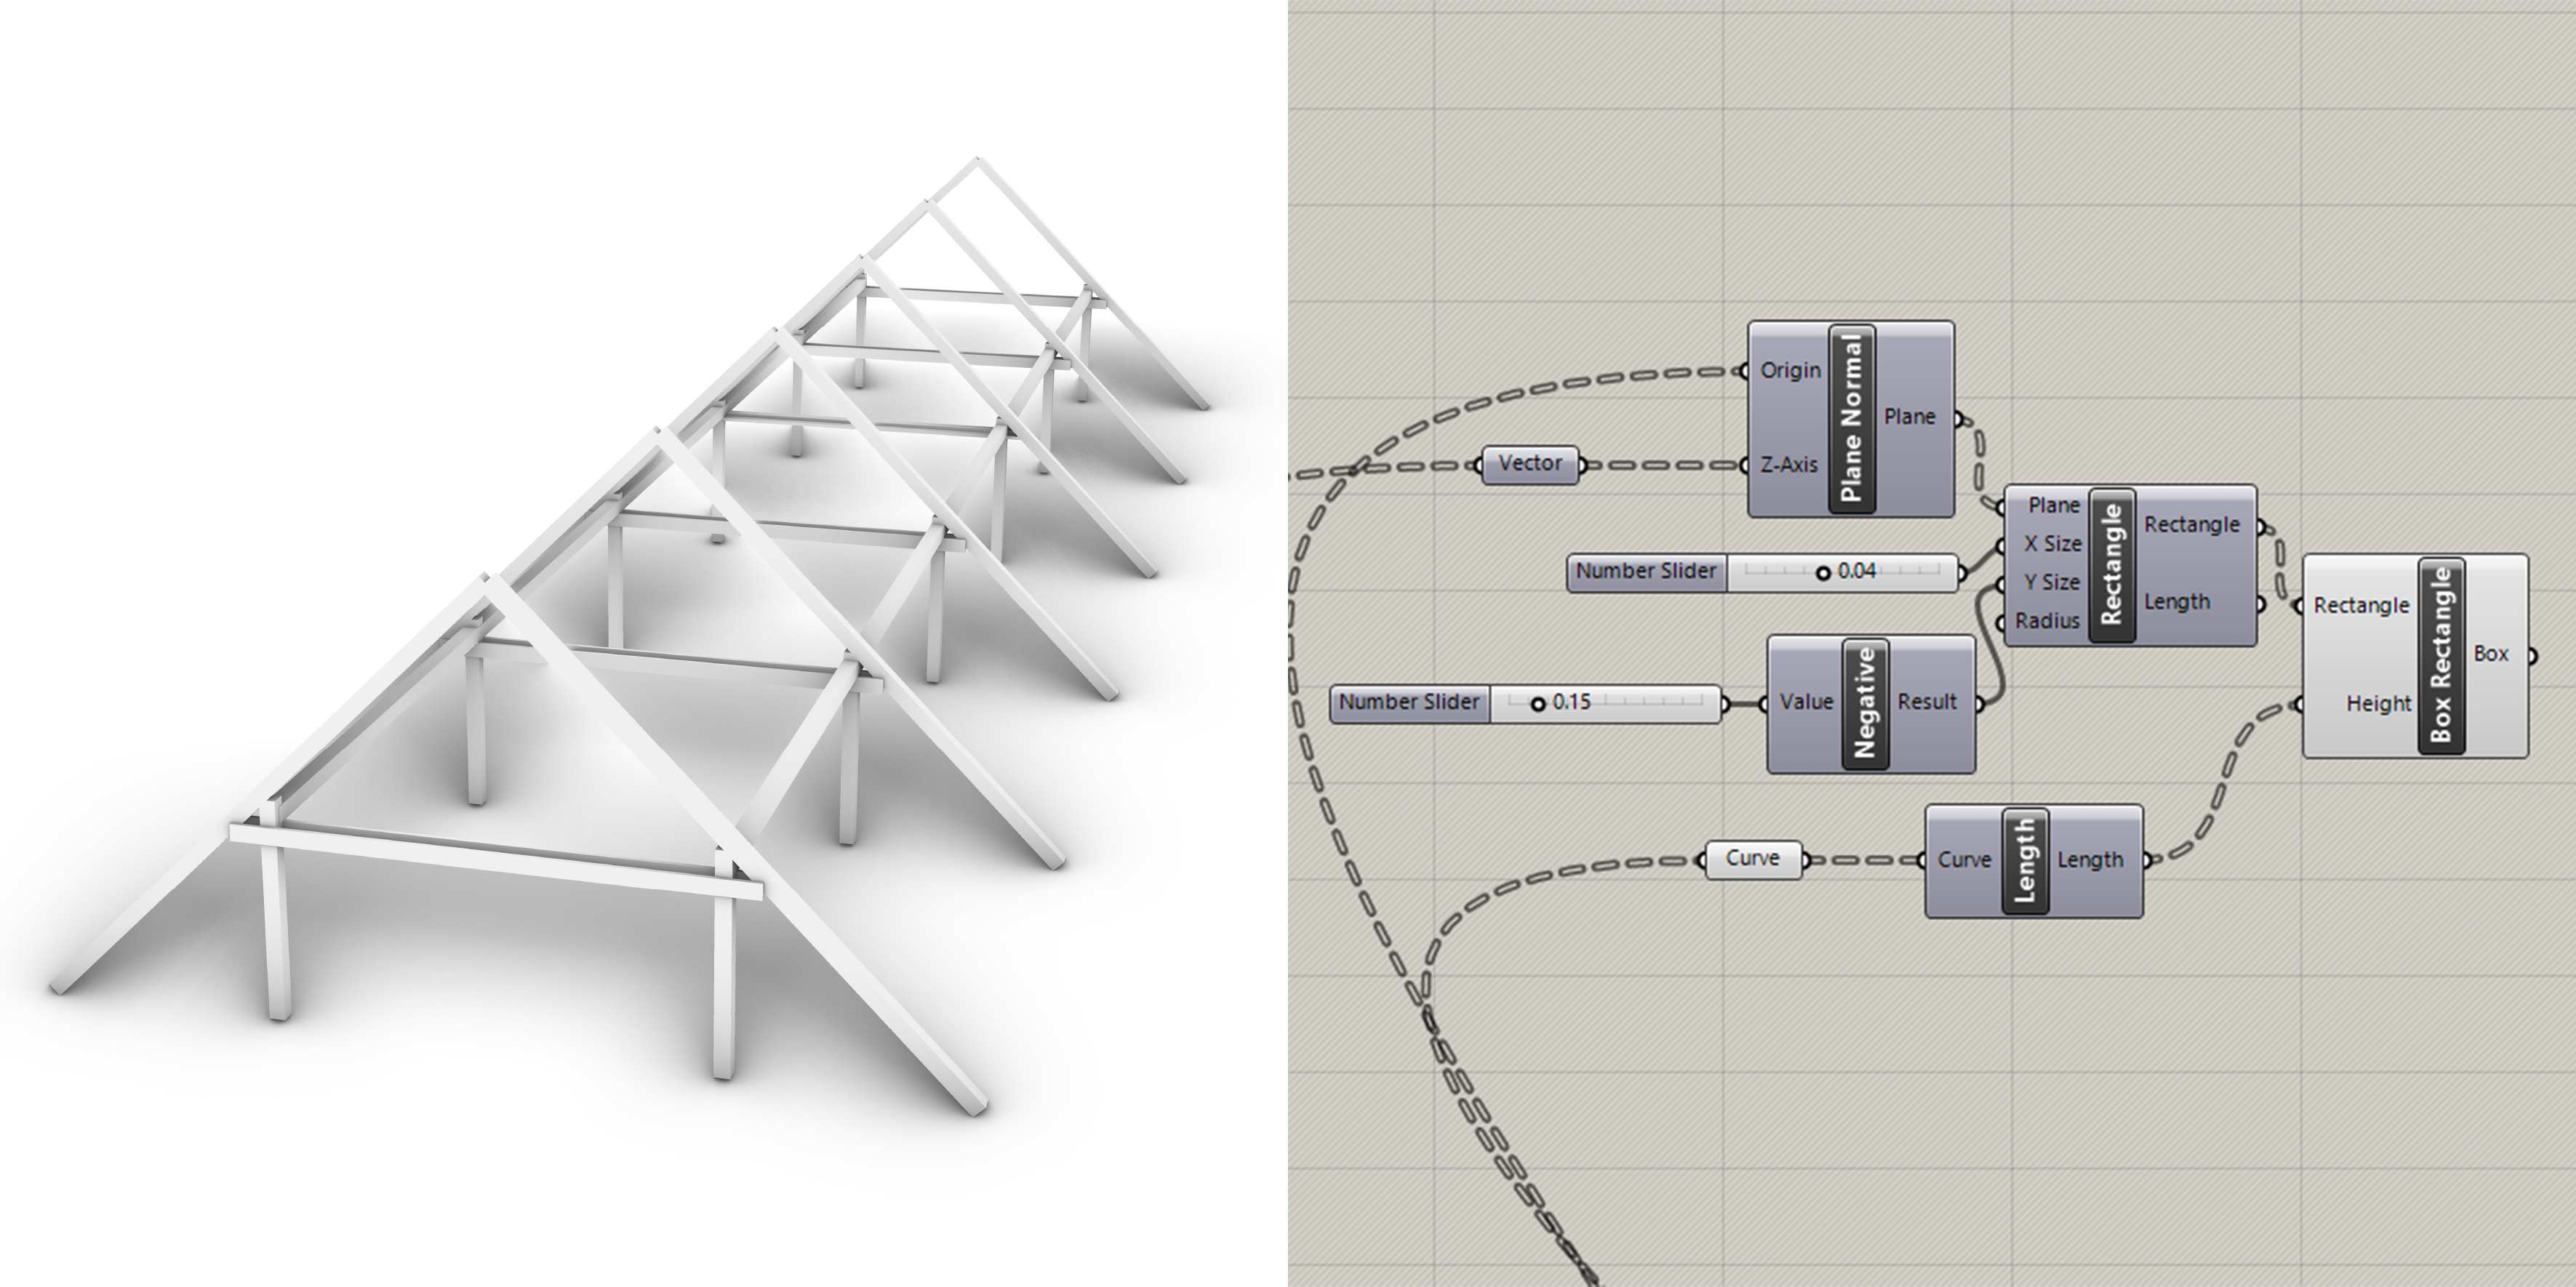
The modelling process for the following steps will be the same from now: first, drawing the lines of the concerning elements using geometric tools, and then creating a box from this line.
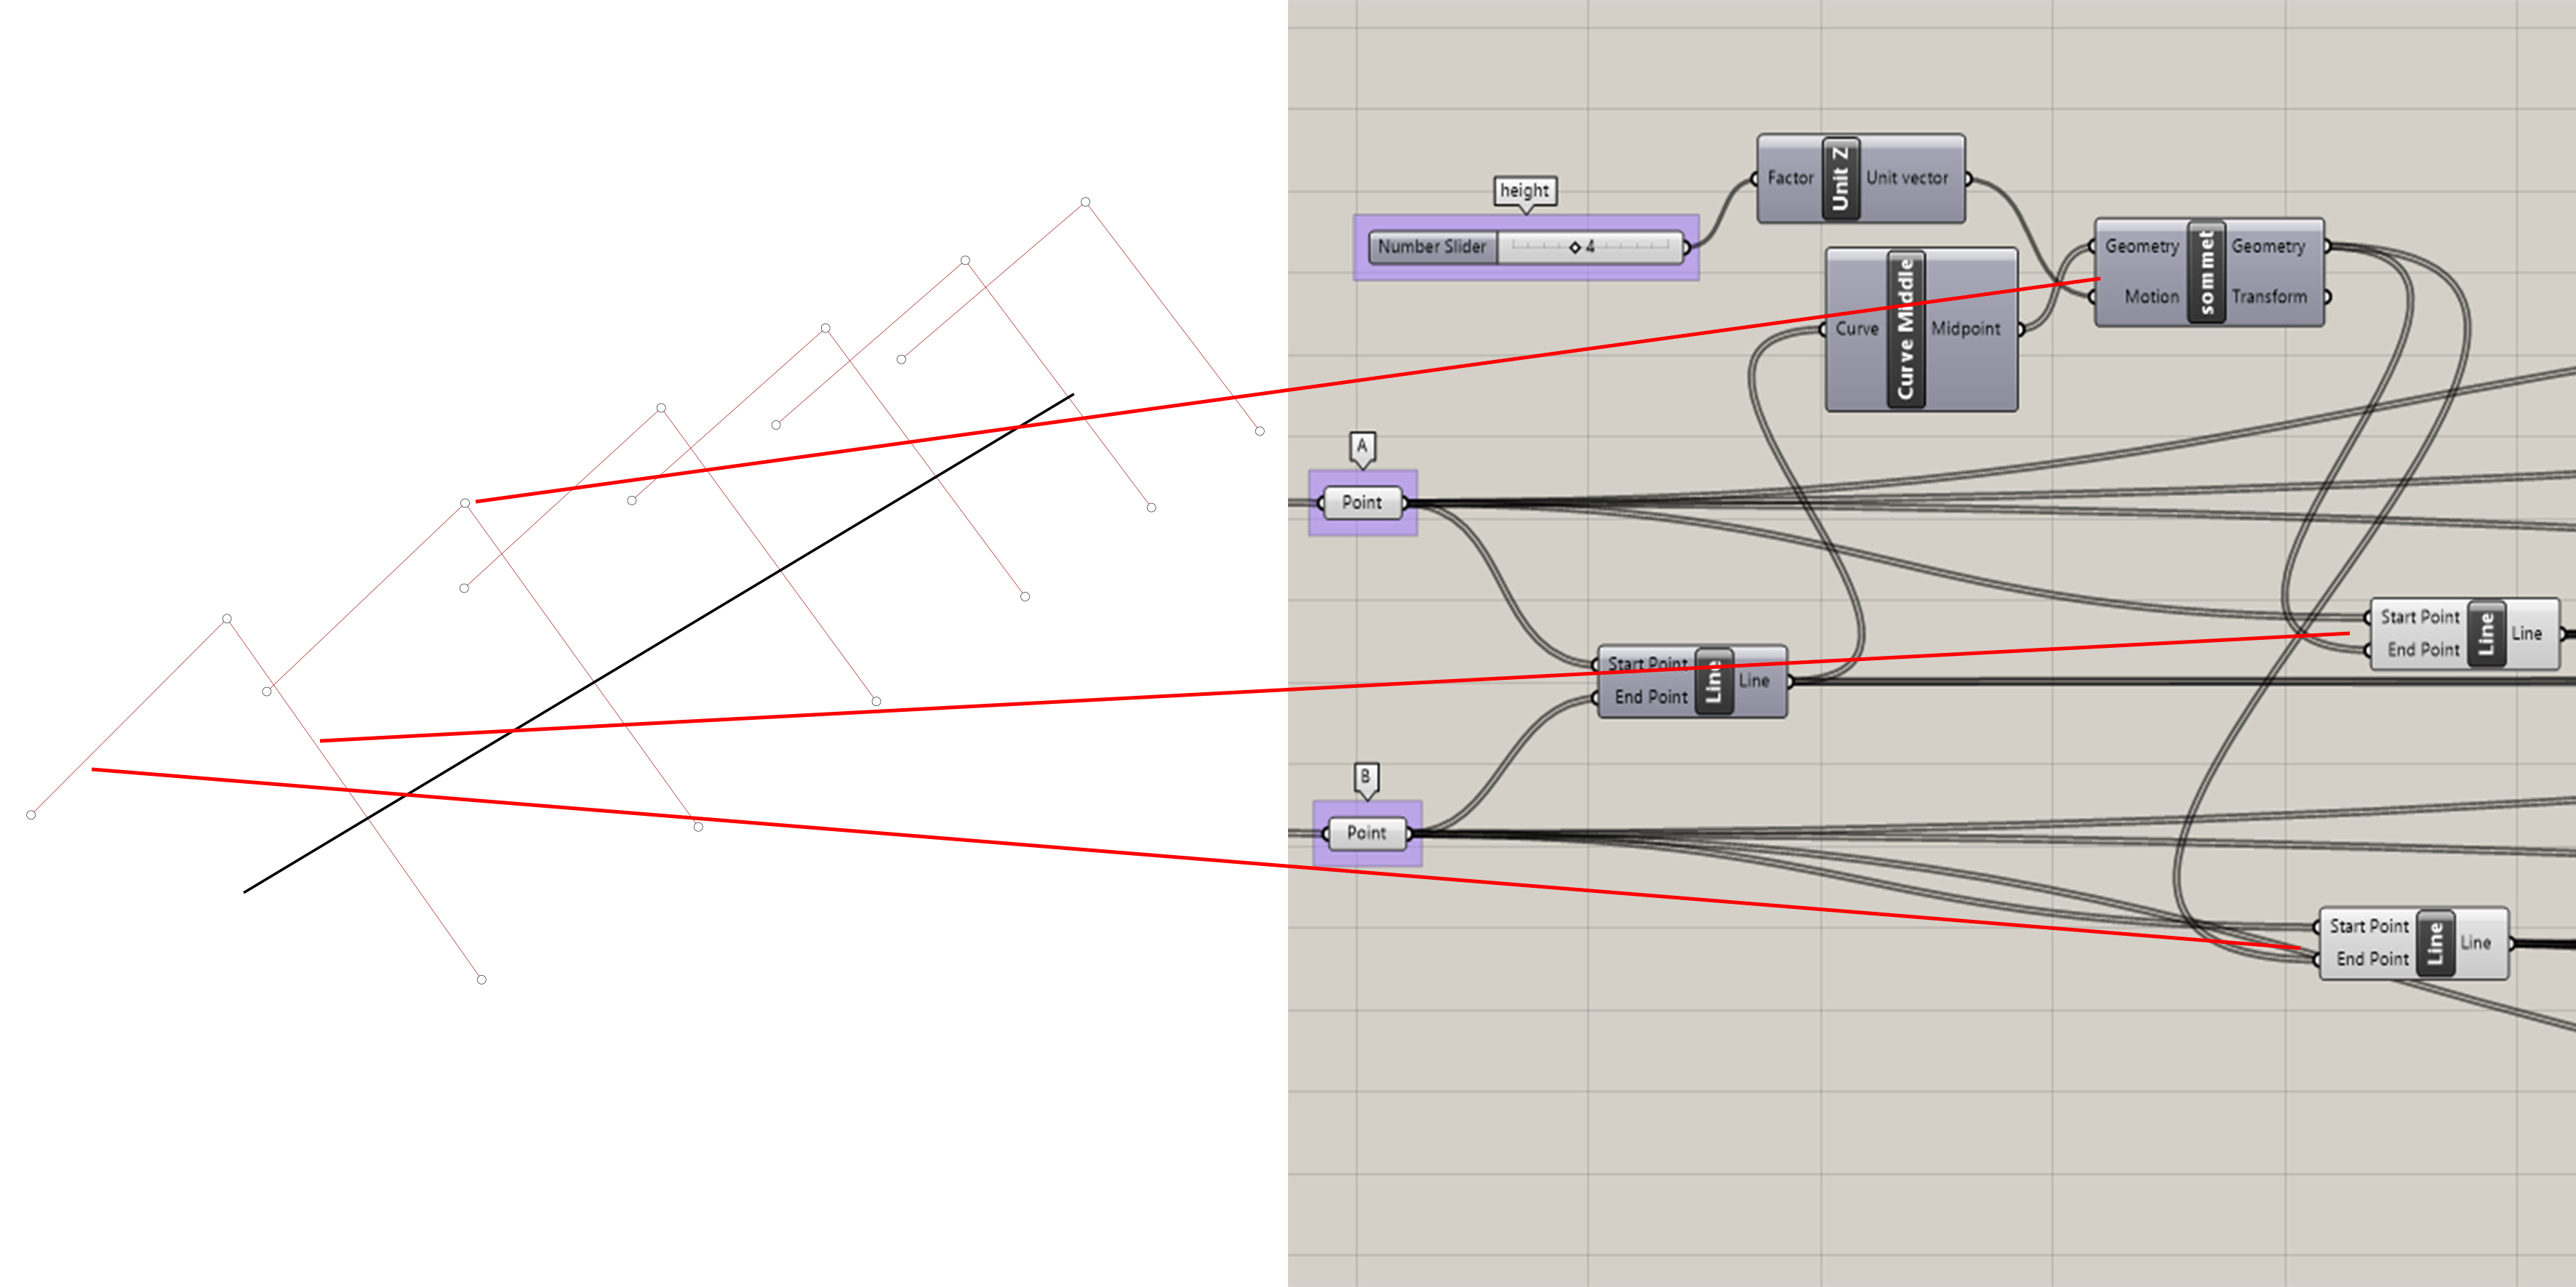 The created lines will define the normal of the plan used to create the box, and its height.
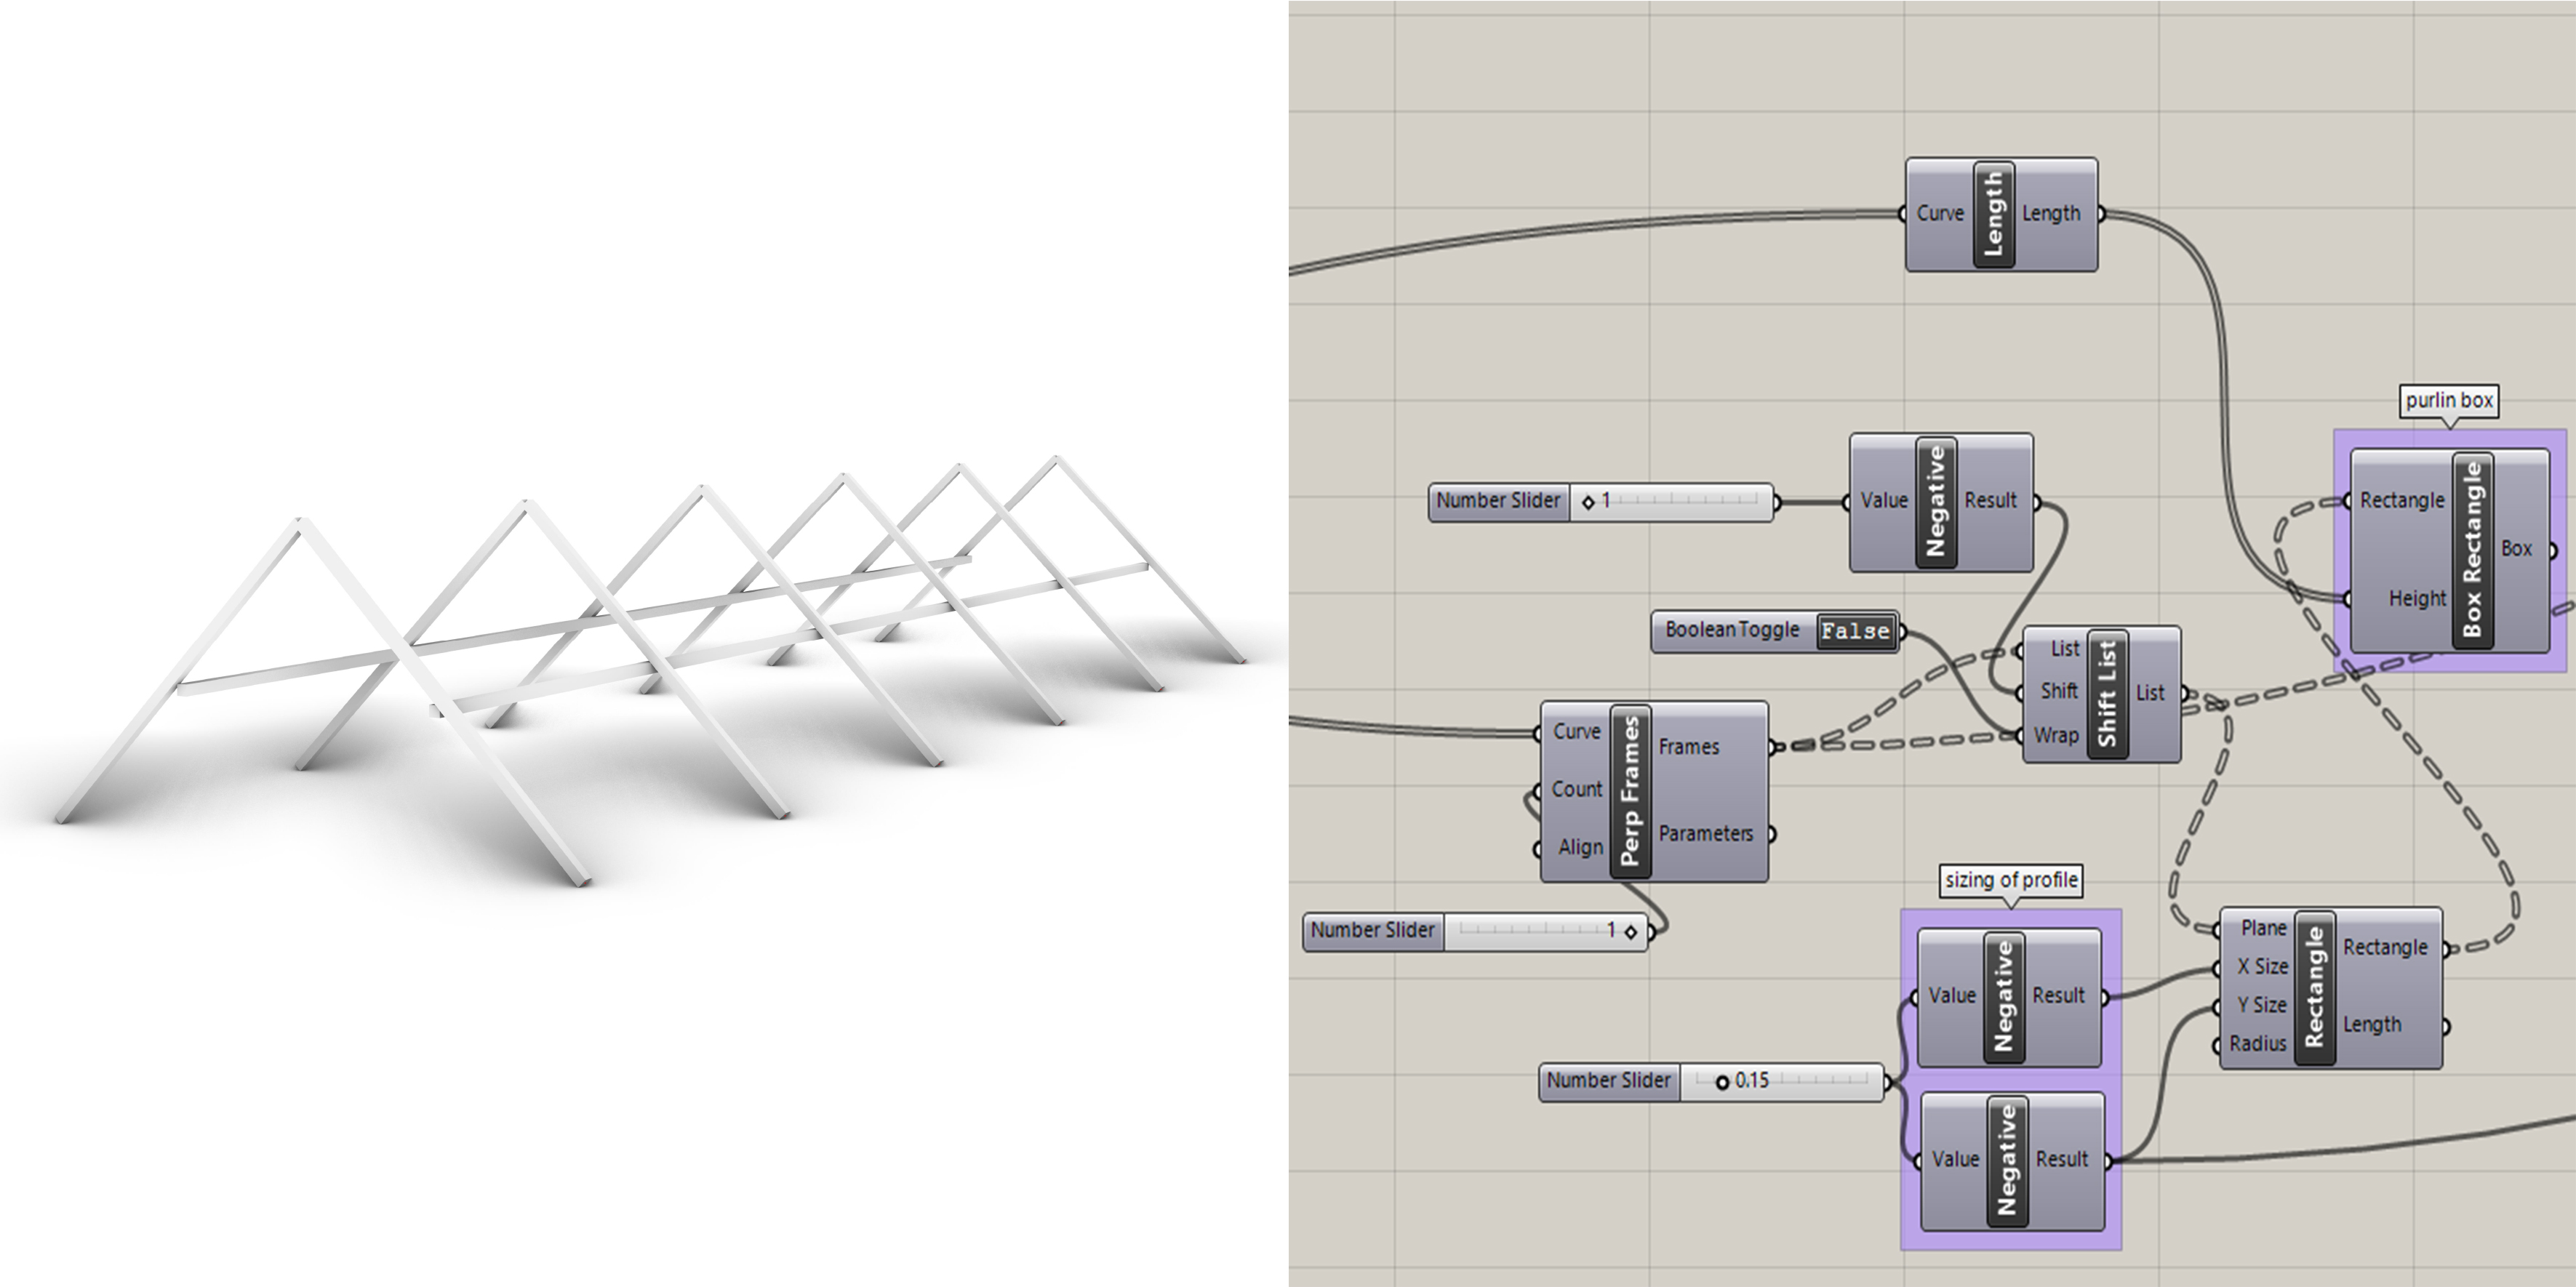
Step 2: purlins
to model the lines, I set a point along the rafters lenght, then linked each frame to the next one.
 The box is modelled by creating a plane for the profile, and the distance of the previous line for its height:
 This process is done for each side of the carpentry.
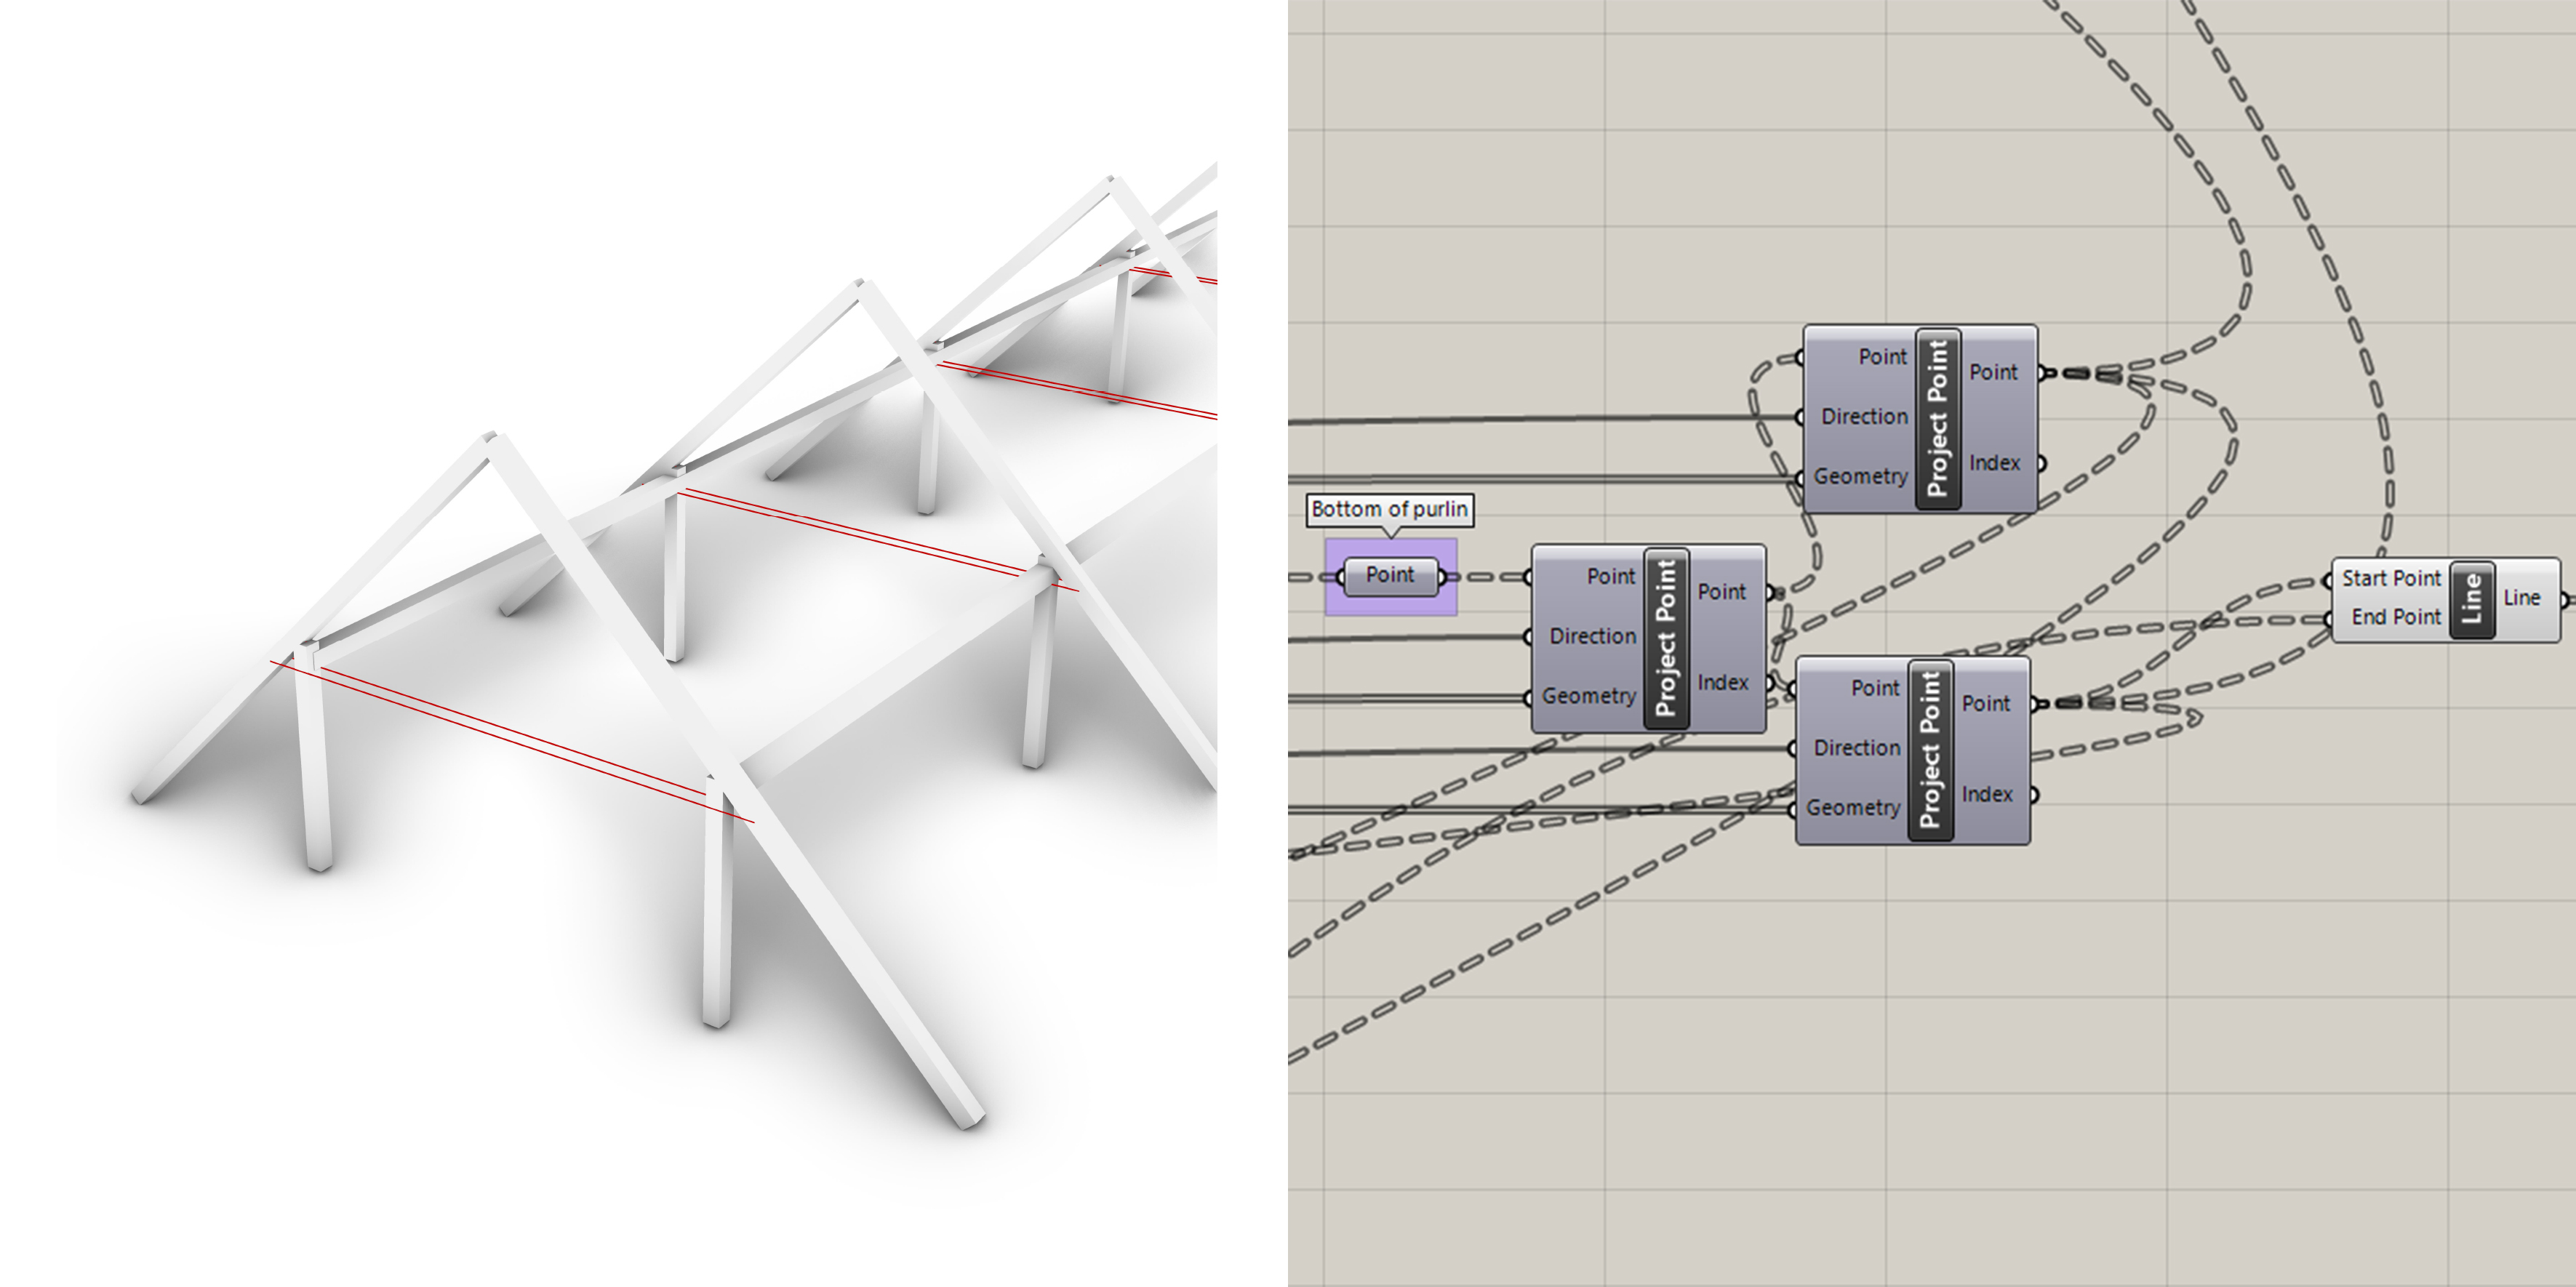
Step 3: posts
To model the lines of the post, it was needed to project some points in order to set the posts right under the purlins.
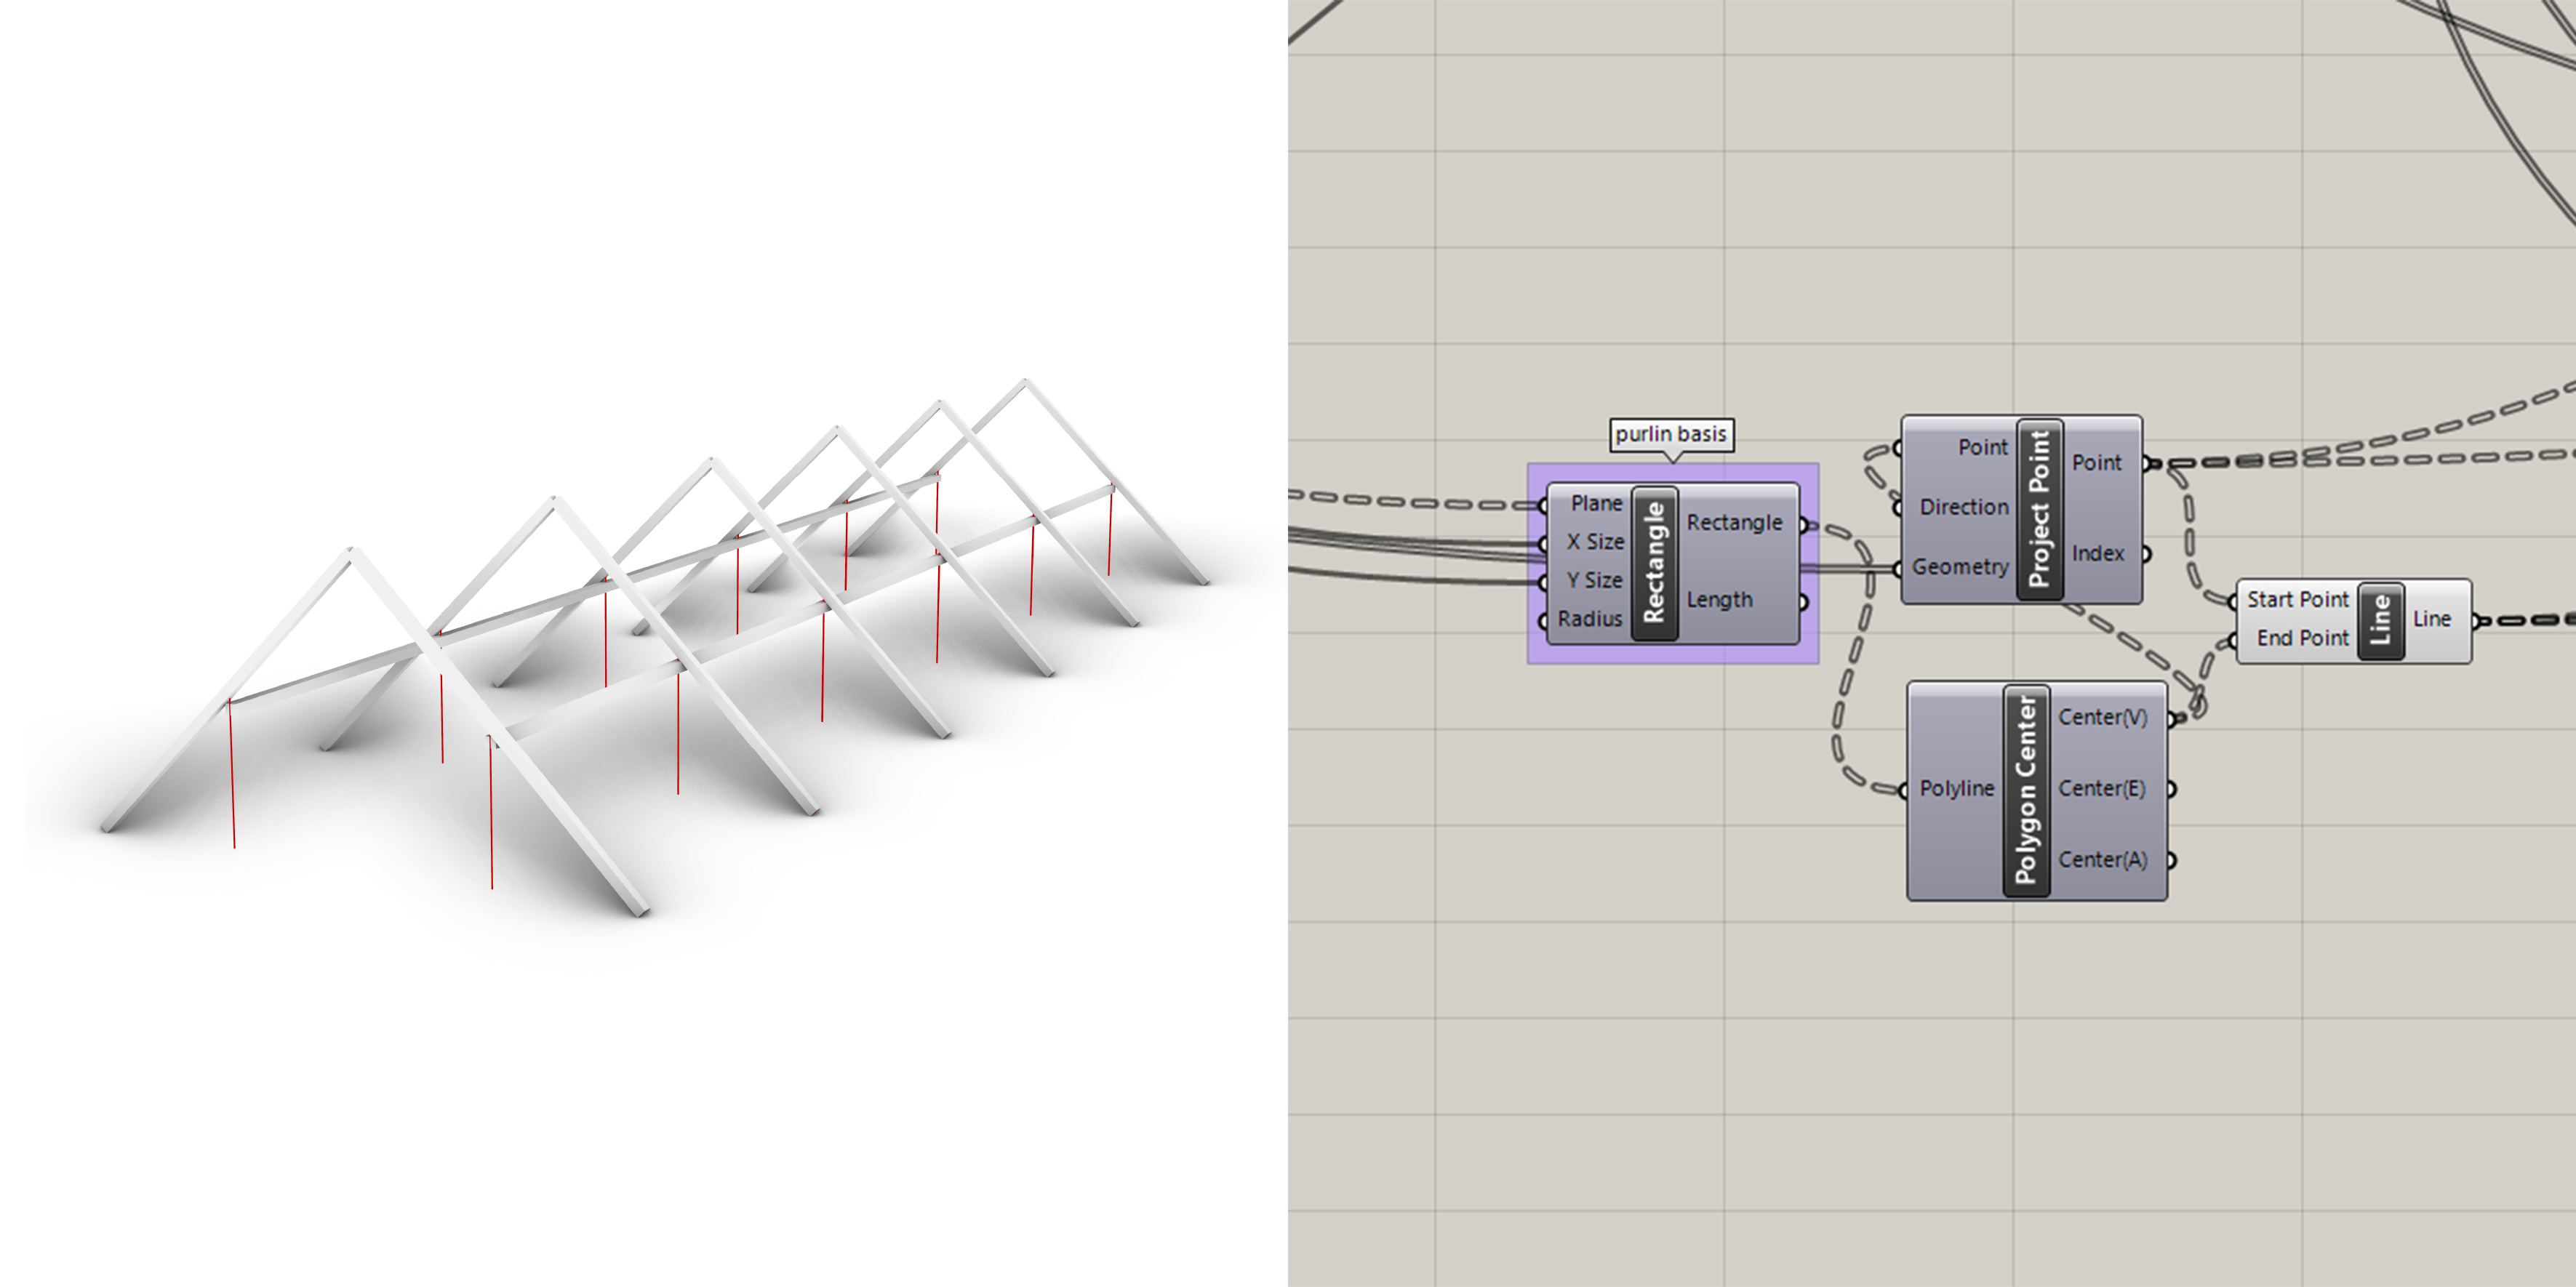 Modelling the boxes:
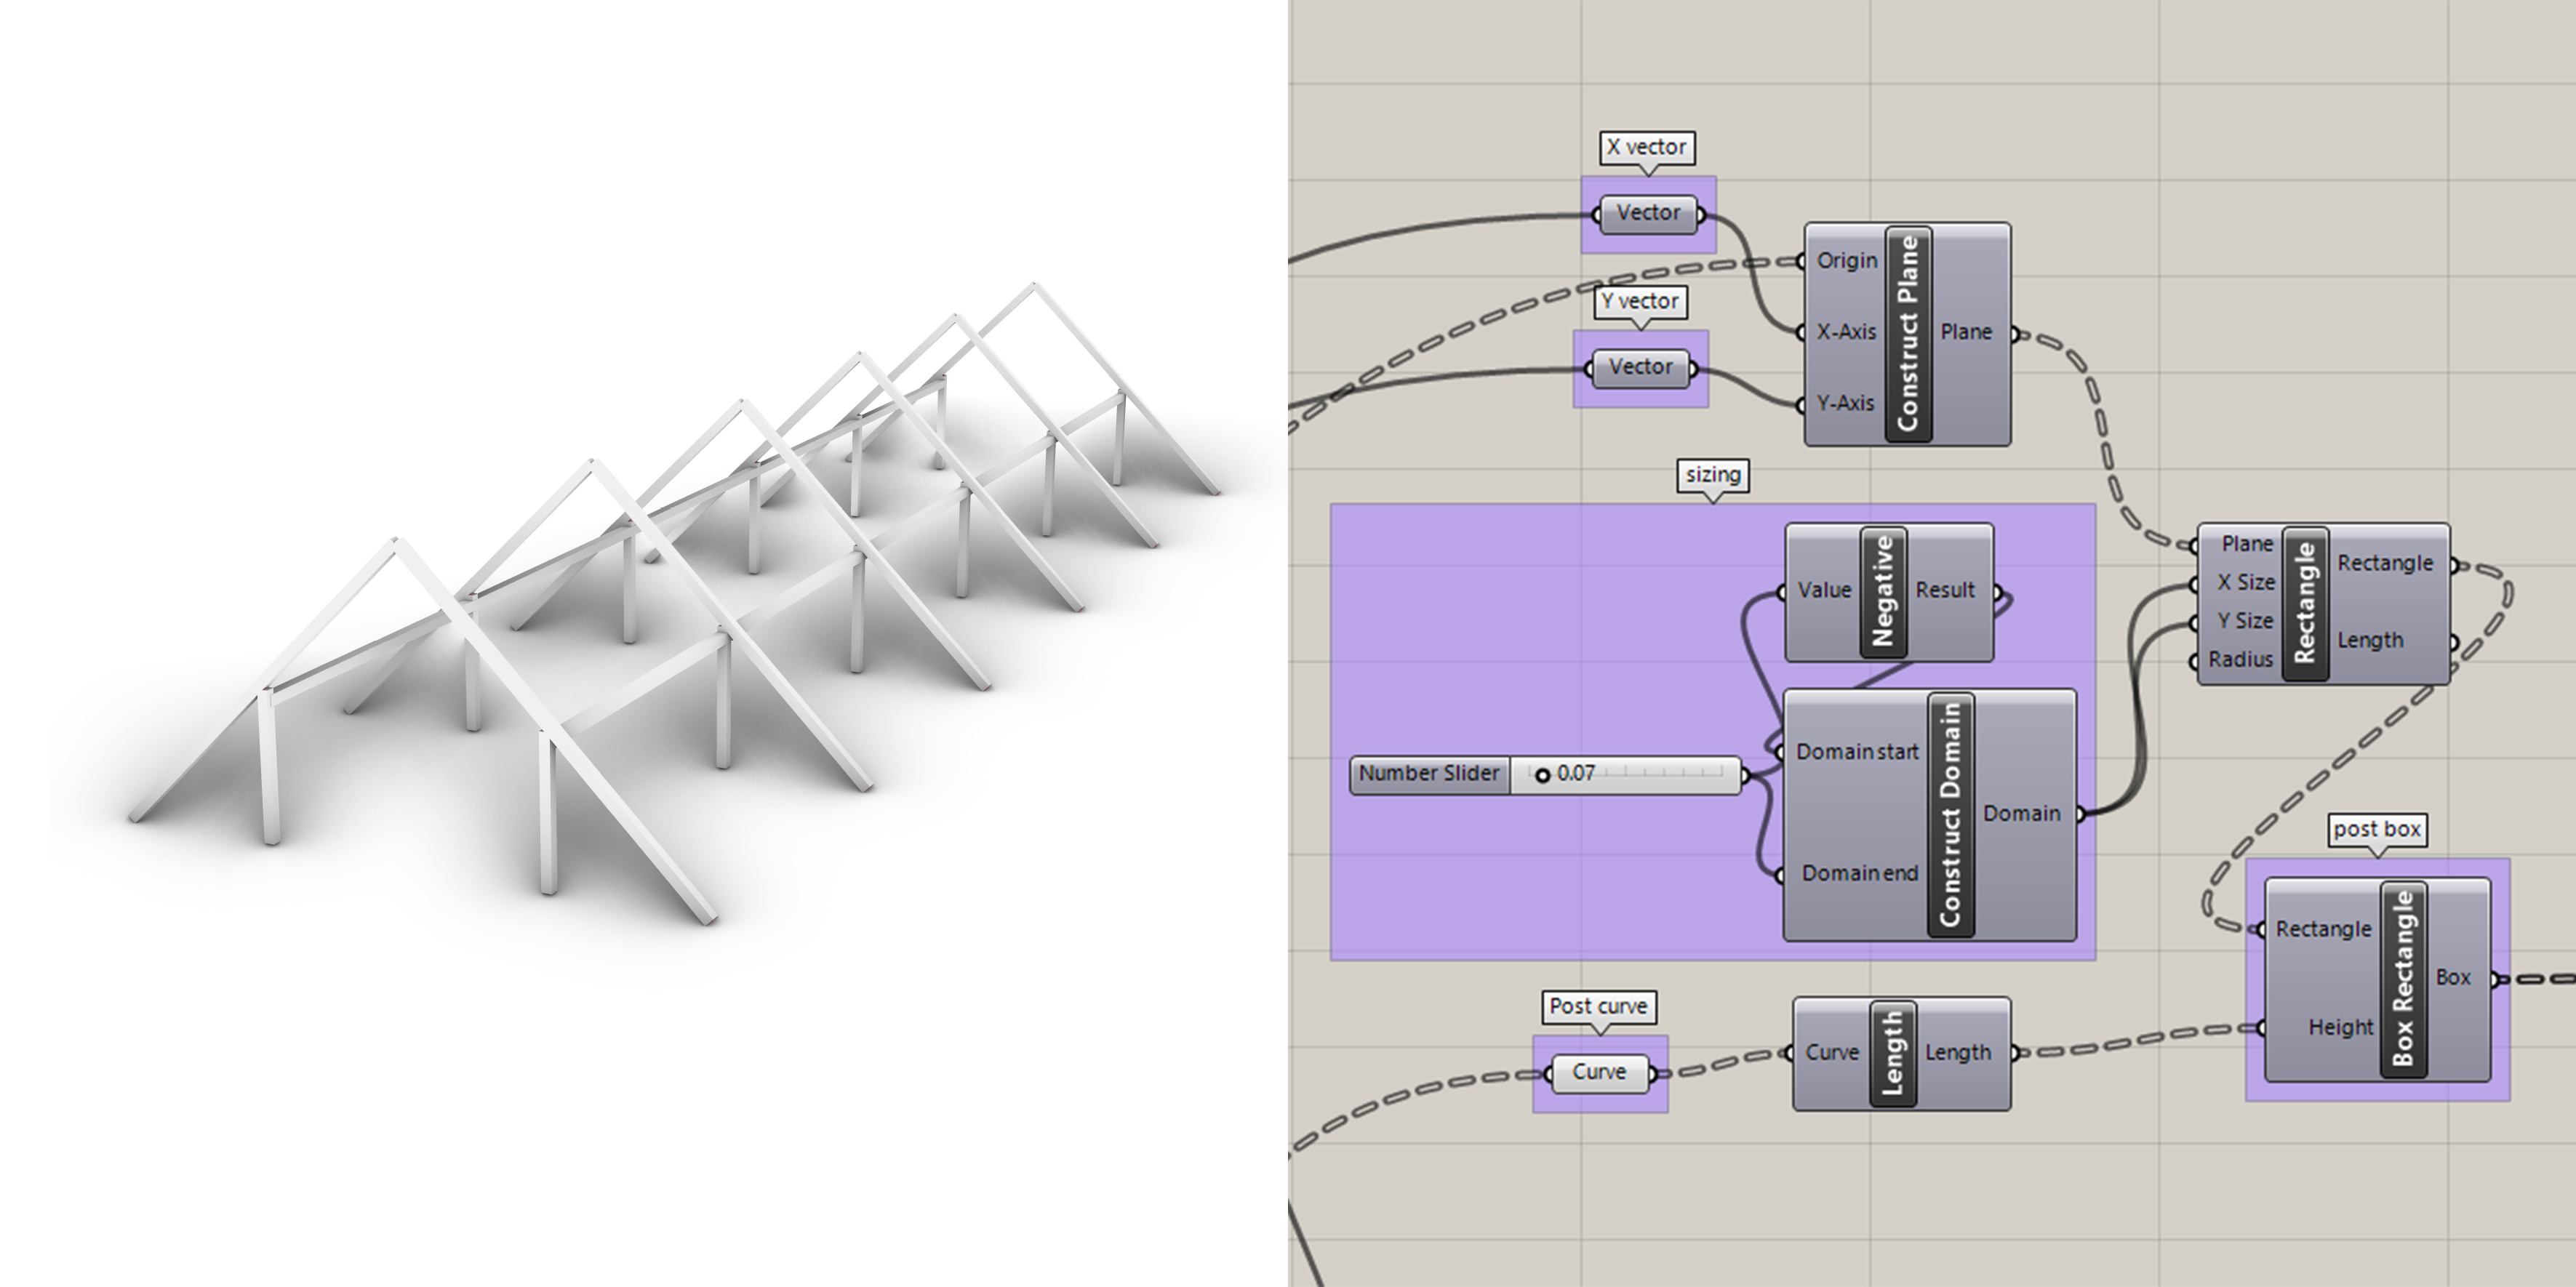 This process is done for each side of the carpentry.
Step 4: Collars
Same process: project points along X and Y vectors, and create a line in between.
 The process is needed to be done for each side. Same for the boxes:
 Repeat the 4th step for the bottom collars:

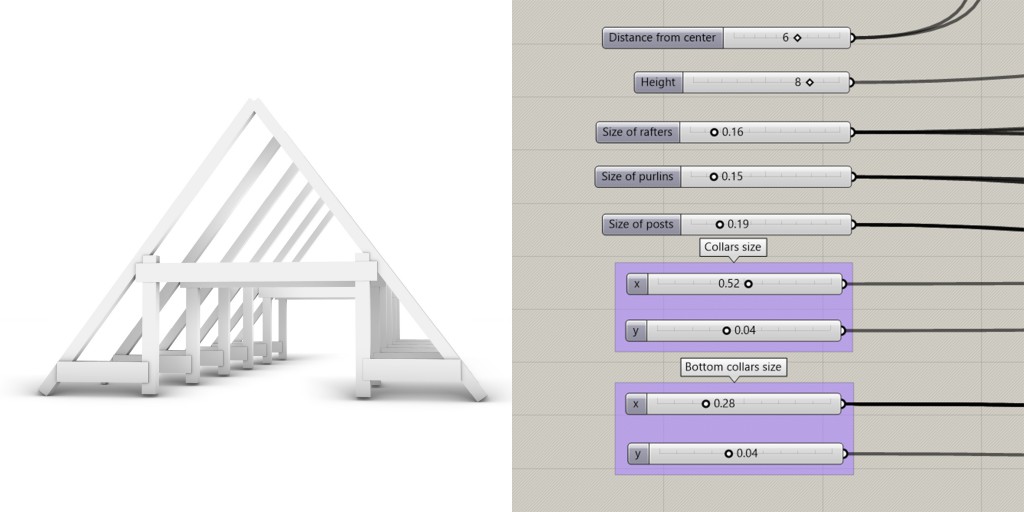
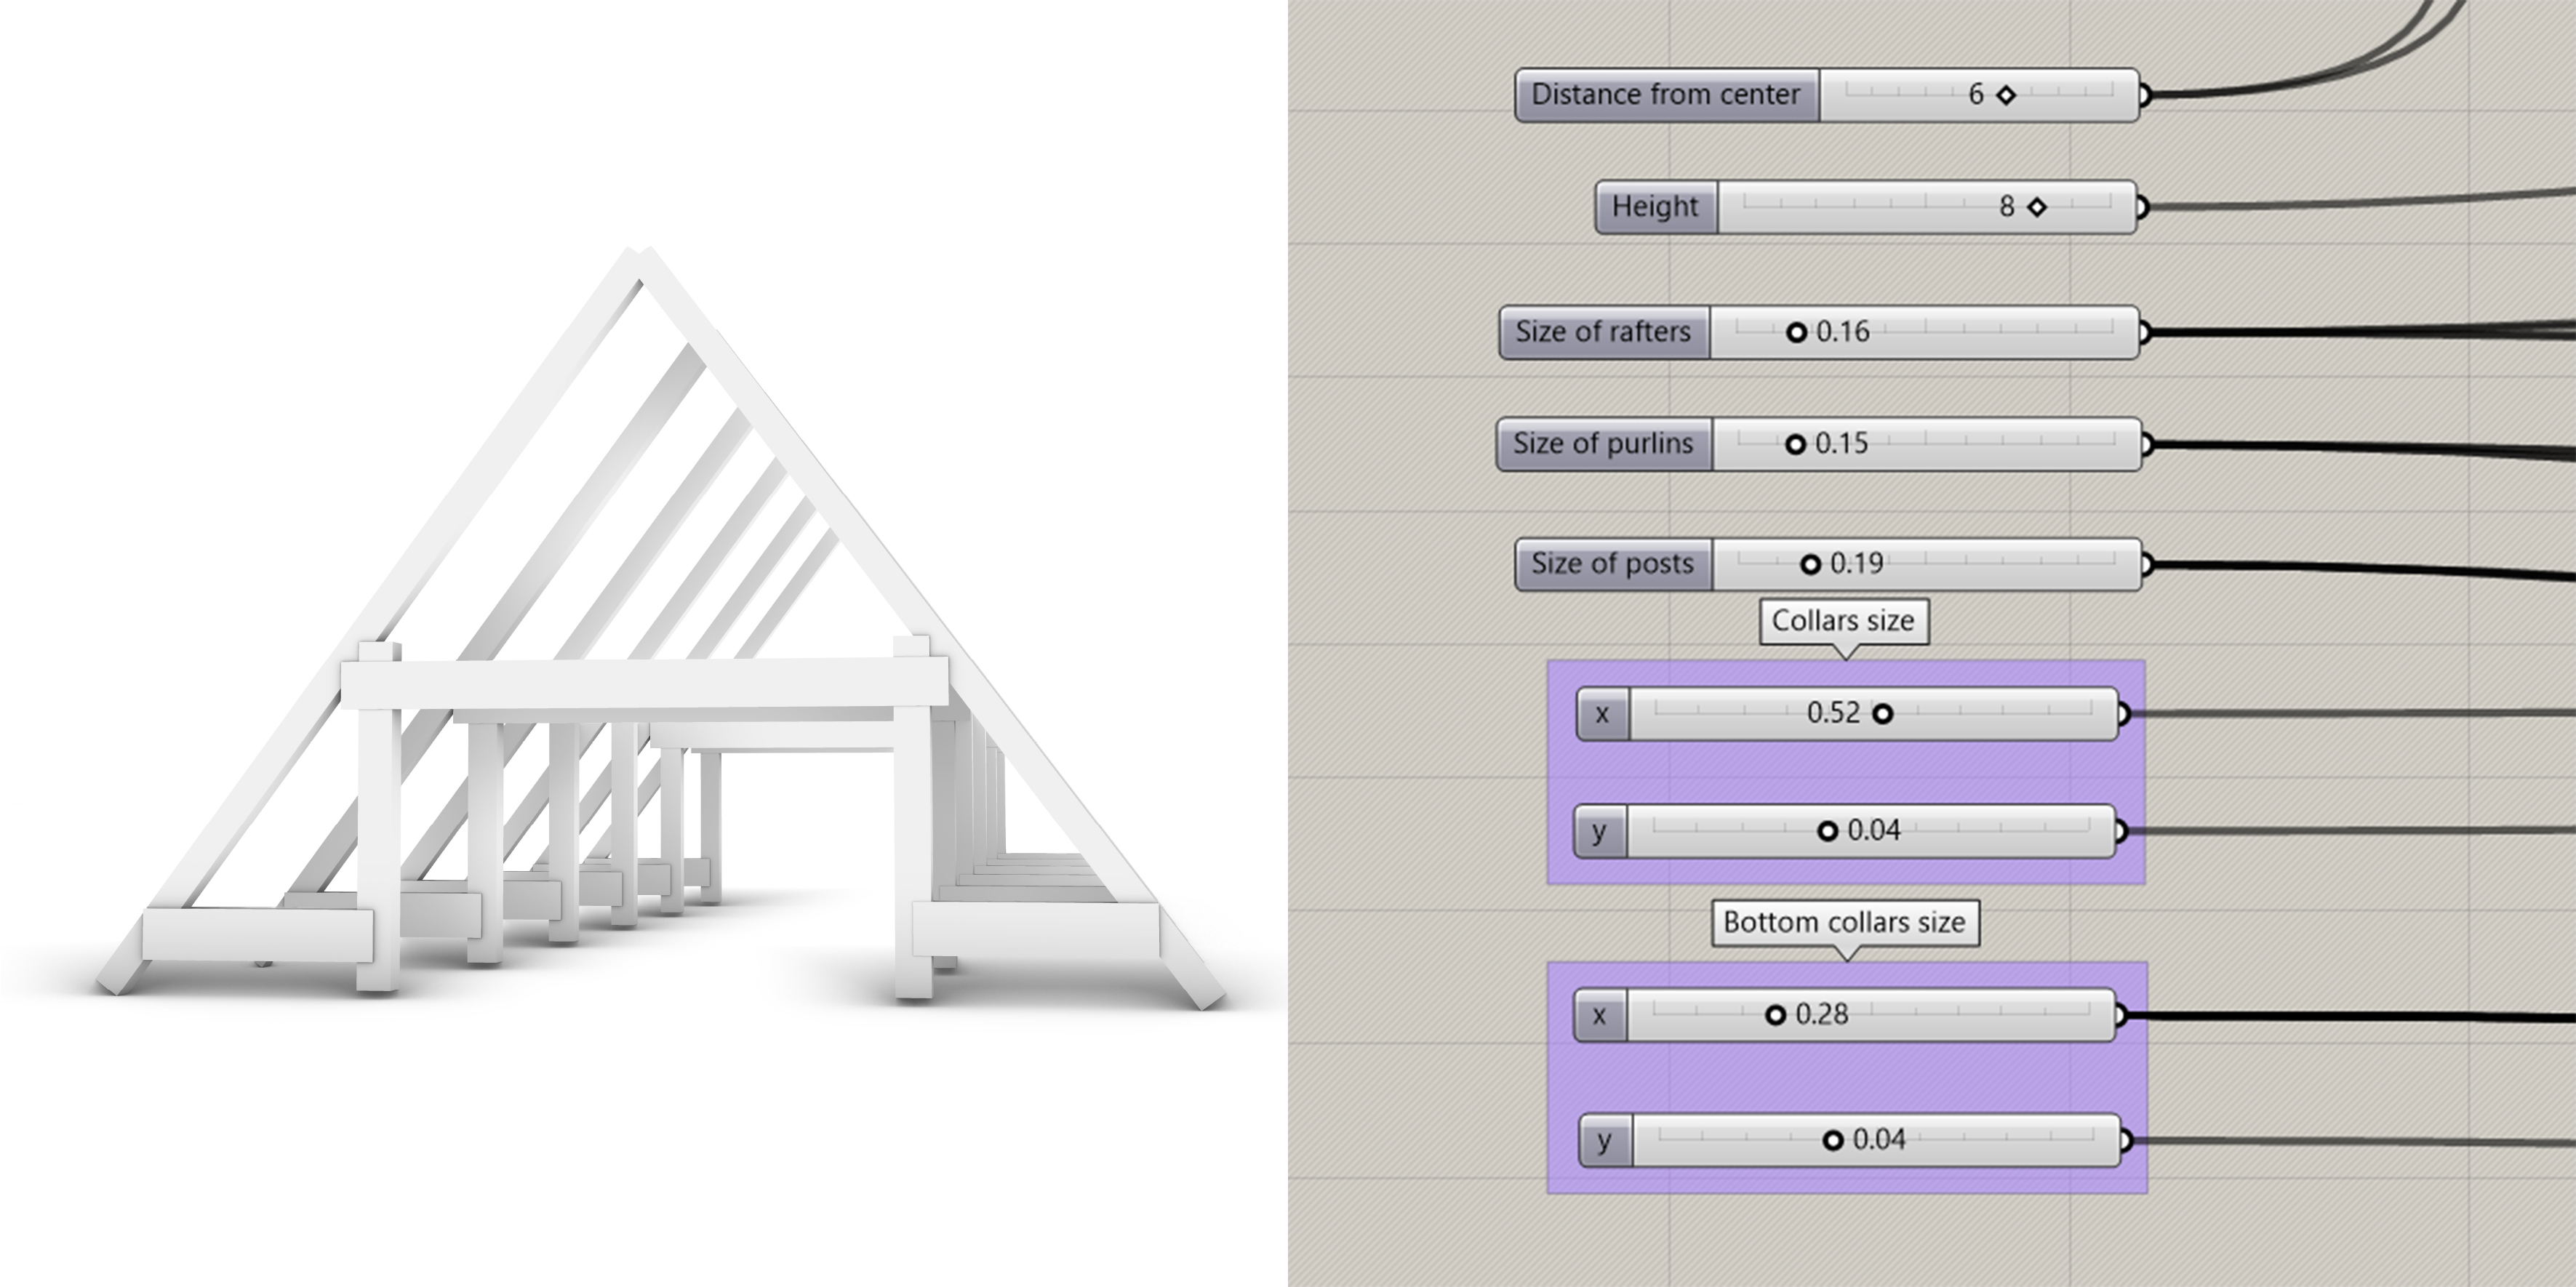
Final product:

With other params:
 Conclusion:
This project was quite helpful to explore the possibilities that links scripting with vernacular architecture. It is okay to model two sloped- roofs, but not more complicated. It could be improved by adding secondary carpentry elements such as roof windows, or showing the joinery methods (bolean operation maybe ?)